When the craving for something sweet hits hard and you’ve got maybe 30 minutes to make it happen, canned peaches are your secret weapon. These golden fruits arrive pre-peeled, pre-sliced, and already packed with natural sweetness—meaning you skip all the tedious prep work that usually derails last-minute dessert plans. Whether you’re feeding unexpected guests, need a contribution to a potluck, or just want something warm and comforting without the production, these ten canned peach desserts deliver real satisfaction in minimal time. Each recipe uses ingredients you likely already have stashed in your pantry, and none of them demand fancy equipment or advanced baking skills. Let’s dig into the fastest routes from empty bowl to dessert table.
Table of Contents
- 1. Peach Crisp with Buttery Oat Topping
- Why It’s the Fastest Win
- The Essential Components
- 2. Dump Cake with Yellow Cake Mix
- What Makes It Almost Effortless
- The Bare Essentials You Need
- 3. Peach Cobbler with Simple Batter Topping
- Why This Method Never Fails
- Recipe Breakdown for Quick Success
- 4. Fried Peach Hand Pies with Canned Biscuits
- The Ingenious Shortcut That Actually Works
- Everything You Need for Success
- 5. Peach Cobbler Cookies That Double as Ice Cream Sandwiches
- What Makes These Different from Regular Cookies
- The Ingredient List for a Full Batch
- 6. Easy Peach Bread That Works Year-Round
- Why This Method Beats Traditional Baking
- Complete Ingredient Breakdown
- 7. Peach Upside-Down Cake for Impressive Presentation
- The Genius of Caramelized Fruit Topping
- The Full Recipe for Elegant Results
- 8. No-Bake Yogurt Peach Pie for Zero-Effort Elegance
- Why No-Bake Equals Maximum Smart
- The Building Blocks for This Showstopper
- 9. Peach Crumble Bars for Portable Dessert Servings
- Why Bars Are the Smarter Choice for Feeding Groups
- The Full Recipe for a 9×13-Inch Pan
- 10. Peach Cobbler Muffins with Crumble Topping
- The Muffin Advantage for Quick Desserts
- The Complete Ingredient List
- The Bottom Line
1. Peach Crisp with Buttery Oat Topping
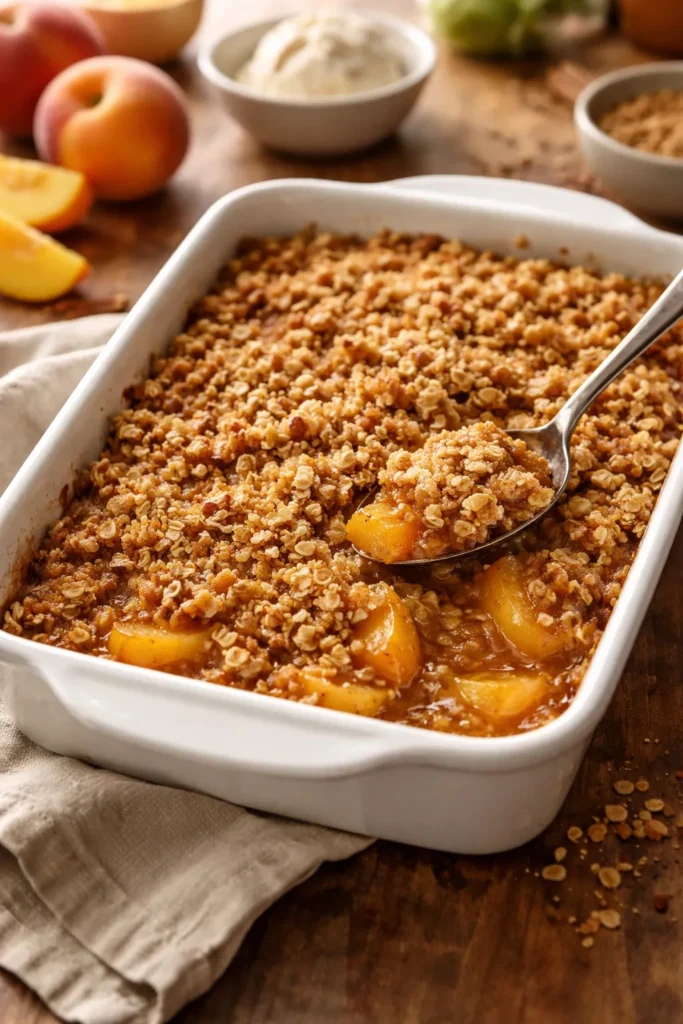
This is the ultimate pantry rescue dessert, and it’s ready to eat in just 40 minutes total. The beauty of a peach crisp lies in its simplicity—you’re essentially layering drained canned peaches with a crumbly topping made from oats, flour, brown sugar, cinnamon, and butter, then letting the oven do the heavy lifting while you put your feet up.
Why It’s the Fastest Win
A peach crisp requires zero filling prep because the fruit arrives ready to use. Unlike a pie that demands pastry skills or a cobbler that needs biscuit dough, the crisp topping comes together in one bowl with just a fork—literally mashing butter into dry ingredients until everything resembles coarse breadcrumbs. There’s no rolling, no crimping, no specialized technique to master. You can have this dessert assembled and in the oven in under 10 minutes.
The Essential Components
- 28 to 29 ounces canned peaches, drained (save that juice for smoothies or beverages)
- ¾ cup old-fashioned rolled oats (quick oats work but give a softer texture)
- ¾ cup all-purpose flour mixed with ¾ cup packed brown sugar
- 1½ teaspoons ground cinnamon stirred into the dry topping
- ½ cup softened butter, worked into the mixture until crumbly
- Pinch of salt to enhance all the flavors
- Optional: ¼ cup chopped pecans or walnuts for extra crunch and richness
Pro tip: Make the crumb topping the night before and refrigerate it in a sealed container. Simply spread it over your peaches right before baking, saving yourself precious minutes when you need them most.
2. Dump Cake with Yellow Cake Mix
This four-ingredient marvel proves that shortcuts don’t mean sacrificing flavor. A peach dump cake requires you to do exactly what the name suggests: dump ingredients into a pan in layers, then let the oven work its magic while you relax. The magic happens when butter, cake mix, and canned peaches interact during baking, creating a surprisingly sophisticated dessert with a crispy top and fruity, moist center.
What Makes It Almost Effortless
There’s no mixing bowls to dirty, no creaming butter and sugar, no waiting for batter to come together. You literally open three cans or packages, measure nothing, and layer them directly into your baking dish. The butter melts during baking and helps the cake mix toast into a golden crust while the peaches release their juices and create a sauce underneath. It’s chemistry without the chemistry class.
The Bare Essentials You Need
- 1 (15 ounce) can sliced peaches in juice, drained and spread evenly in a 9×13-inch pan
- 1 (15.25 ounce) box yellow cake mix, sprinkled dry directly over the peaches
- ½ cup unsalted butter, sliced into pats and scattered across the top
- Optional: 1 teaspoon cinnamon and ⅛ teaspoon nutmeg for warm spice notes that deepen peach flavor
- Bake at 350°F for 30 to 35 minutes until the top is golden and slightly crispy at the edges
Worth knowing: This dessert gets even better the next day as the flavors meld and the texture becomes more cohesive. Make it ahead and reheat gently in the oven before serving with vanilla ice cream.
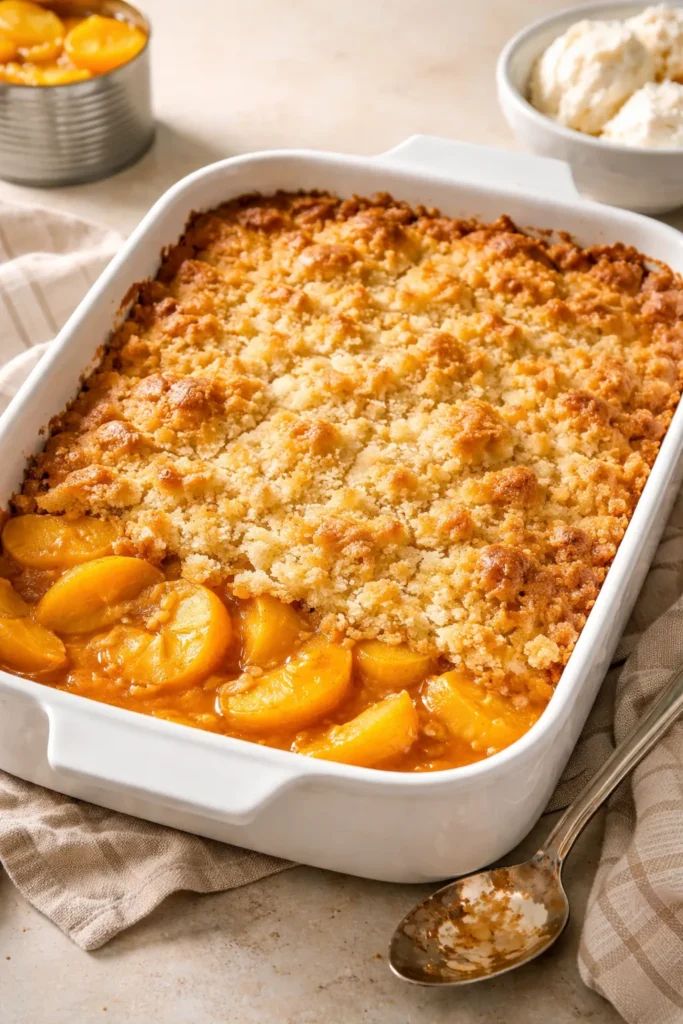
3. Peach Cobbler with Simple Batter Topping
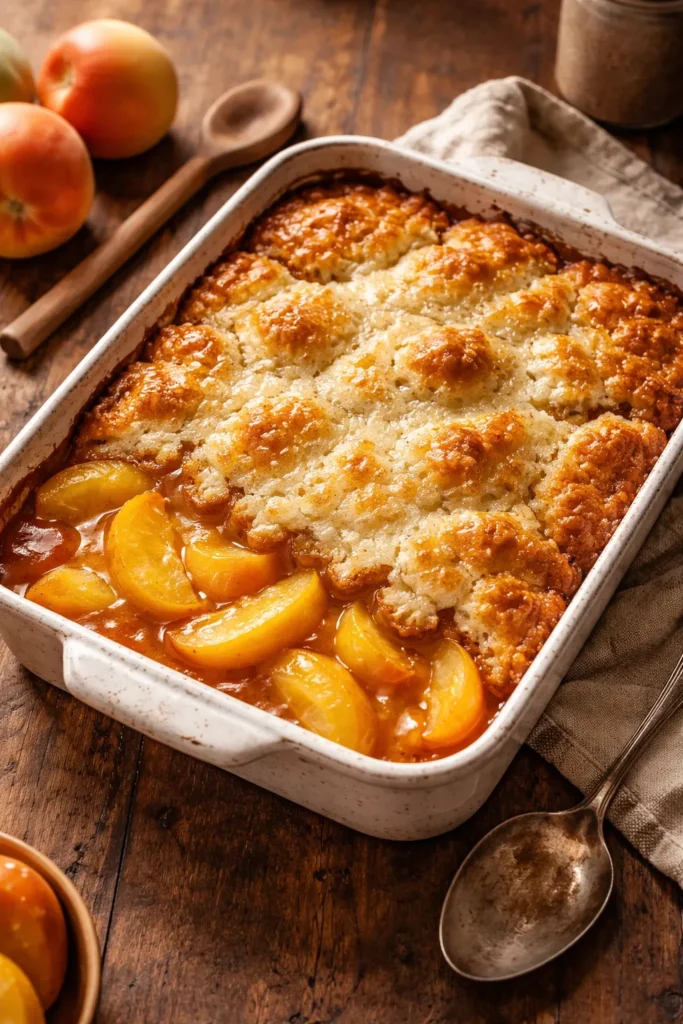
A traditional peach cobbler delivers that comforting, homey dessert vibe that makes people think you’ve been baking all afternoon—except you pulled it together in five minutes. The key difference between a cobbler and a crisp is the topping: a cobbler gets a soft, cake-like batter that bakes on top of the fruit, while a crisp wears an oat-based crumb. This version is deceptively simple because the batter pours over the fruit and rises up around it during baking, creating rustic, cobbled edges that look impressive and taste incredible.
Why This Method Never Fails
The batter doesn’t require any special technique—you’re just whisking together flour, sugar, milk, baking powder, and a pinch of salt until mostly combined. Lumps are totally fine and actually preferred because they help the batter stay textured rather than becoming dense. The real technique here is letting the butter melt in the pan first, pouring the batter over it, and then spooning the undrained canned peaches (juice and all) on top without stirring. That juice creates sauce, the batter rises through it, and you get this beautiful, rustic finish.
Recipe Breakdown for Quick Success
- ½ cup unsalted butter, melted in a 9×9-inch baking dish in the oven as it preheats to 350°F
- 1 cup all-purpose flour combined with 1 cup granulated sugar, 2 teaspoons baking powder, 1 cup whole milk, and pinch of salt
- 1 (15 ounce) can sliced peaches, with juice included—spoon over the batter without mixing
- 1 teaspoon ground cinnamon sprinkled over everything before baking
- Bake for 40 to 45 minutes until the top is deep golden and the center barely jiggles when nudged
Real talk: This cobbler is nearly impossible to mess up because you’re not trying to achieve perfect technique. The messier, more rustic-looking it is, the better it actually tastes. People find that imperfection charming and real.
4. Fried Peach Hand Pies with Canned Biscuits

Fried hand pies sound fancy, but they’re one of the quickest warm desserts you can make, especially when you use canned biscuit dough and canned peach pie filling. You’ll have golden, caramelized pastry pockets oozing with sweet peach filling in under 20 minutes. These are perfect for potlucks, unexpected guests, or when you want something that feels indulgent without any real effort.
The Ingenious Shortcut That Actually Works
Canned peach pie filling arrives pre-sweetened, pre-spiced, and perfectly thick, so you skip the entire filling-making process. All you do is flatten canned biscuit dough, add a spoonful of filling, fold, seal the edges with a fork, and fry until puffy and golden. The biscuit dough puffs from the steam inside and browns from the oil outside, creating crispy-outside, tender-inside pastry that’s absolutely crave-worthy. You don’t need a recipe more complex than this.
Everything You Need for Success
- 1 (12 ounce) can refrigerated biscuits, allowed to come to room temperature for easier flattening
- 1 (21 ounce) can peach pie filling, drained slightly if very juicy
- Oil for frying (vegetable, canola, or coconut oil all work)
- 2 tablespoons granulated sugar mixed with 1 teaspoon ground cinnamon for dusting while warm
- Optional: powdered sugar glaze made from 1 cup powdered sugar, 2 tablespoons milk, and ½ teaspoon vanilla extract
Pro tip: Keep the biscuit dough covered with plastic wrap while you work so it doesn’t dry out. Flatten each one between two pieces of parchment paper for zero-stick handling.
5. Peach Cobbler Cookies That Double as Ice Cream Sandwiches
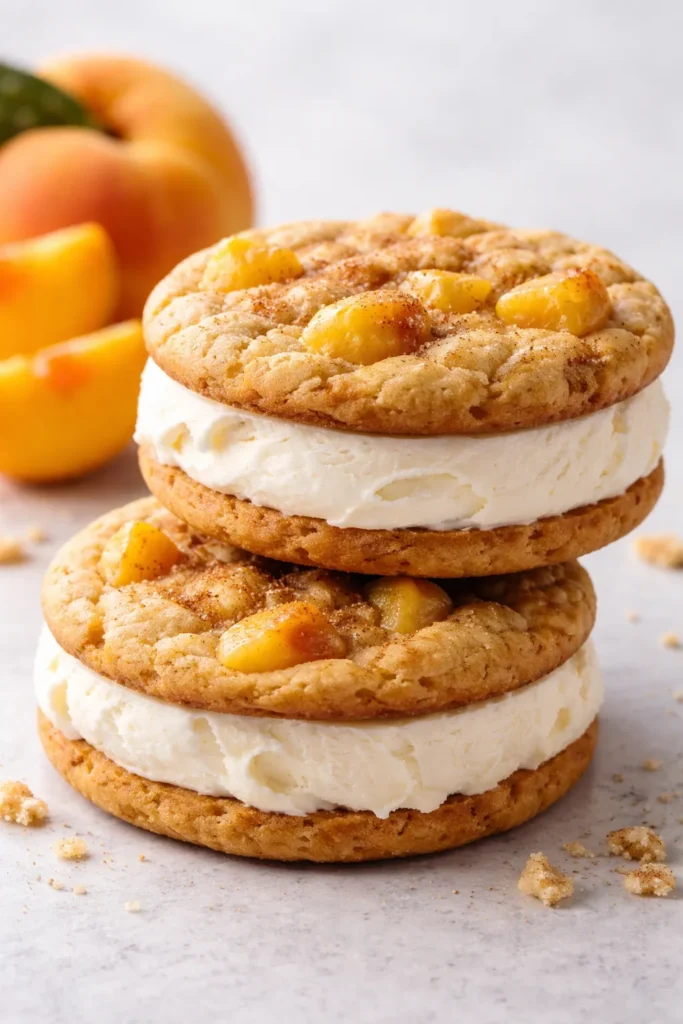
These aren’t your average cookies—they’re soft, cake-like rounds studded with canned peaches and warm spices, baked just until the edges set but the centers stay tender. Each cookie delivers the flavors of a traditional cobbler in a handheld form that’s perfect for eating warm with your fingers or sandwiching with vanilla ice cream for an indulgent treat.
What Makes These Different from Regular Cookies
These cookies use sour cream in the batter, which keeps them incredibly moist and tender even after they cool. The canned peaches get chopped into small pieces and folded into the dough, distributing fruity sweetness throughout rather than concentrating it in filling. Warm spices—cinnamon especially—echo the flavors of a classic cobbler, tricking people into thinking you’ve spent way more time on these than you actually have.
The Ingredient List for a Full Batch
- 1½ cups all-purpose flour, 1½ teaspoons baking powder, ½ teaspoon baking soda, ½ teaspoon salt combined in one bowl
- ½ cup softened unsalted butter creamed with ½ cup granulated sugar until pale and fluffy (3 to 4 minutes with a mixer)
- 2 large eggs added one at a time, beating after each addition
- 1 teaspoon pure vanilla extract and ½ cup sour cream folded in gently
- 1 cup canned peaches, drained, patted dry, and chopped into small pieces
- ½ cup powdered sugar mixed with 2 to 3 tablespoons of the peach juice from the can for a glaze drizzled over cooled cookies
Worth knowing: These cookies actually improve overnight as they sit in an airtight container—the flavors deepen and the texture becomes more tender and cohesive. Make them the day before you need them.
6. Easy Peach Bread That Works Year-Round
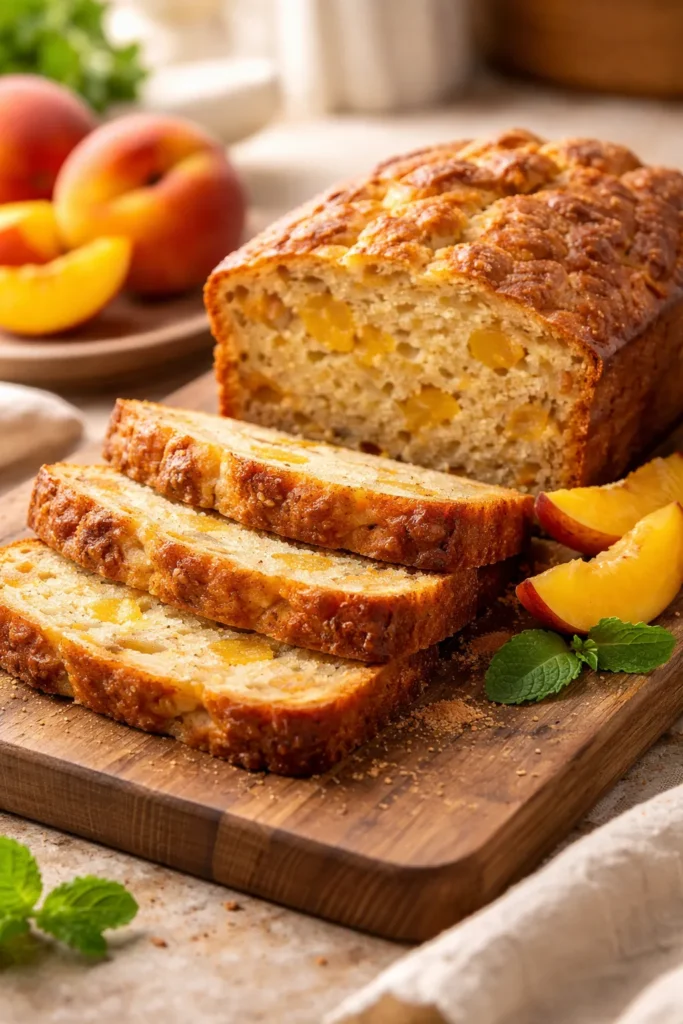
Quick breads are the reliable workhorse of rushed baking, and peach bread might be the most forgiving version because canned fruit provides consistent moisture and sweetness. This bread is tender, not too dense, and flavored with just enough cinnamon and vanilla to complement the peaches without overwhelming them. You can slice it warm and eat it plain, or toast it and serve with butter for a simple breakfast-dessert hybrid that works anytime.
Why This Method Beats Traditional Baking
Quick bread batter comes together in one bowl without requiring any special technique like creaming or whipping. You combine dry ingredients in one bowl, wet ingredients (including beaten eggs and melted butter) in another, and fold them together gently until just combined. The canned peaches provide moisture, so you don’t worry about the bread drying out. It bakes in under an hour and emerges golden, even, and perfectly moist every time.
Complete Ingredient Breakdown
- 1½ cups all-purpose flour, 1½ teaspoons baking powder, ½ teaspoon baking soda, ½ teaspoon salt sifted together
- ½ cup softened unsalted butter mixed with ½ cup granulated sugar
- 2 large eggs, lightly beaten, and 1 teaspoon vanilla extract
- ½ cup sour cream or plain Greek yogurt for tanginess and moisture
- 1 cup canned peaches, drained, patted completely dry, and chopped into small chunks
- ¼ teaspoon ground cinnamon and pinch of nutmeg for warmth
- Pour into a greased loaf pan and bake at 350°F for 50 to 55 minutes
Pro tip: Toss the chopped peaches in a tablespoon of flour before folding them in—this prevents them from sinking to the bottom of the loaf and helps distribute them evenly throughout.
7. Peach Upside-Down Cake for Impressive Presentation
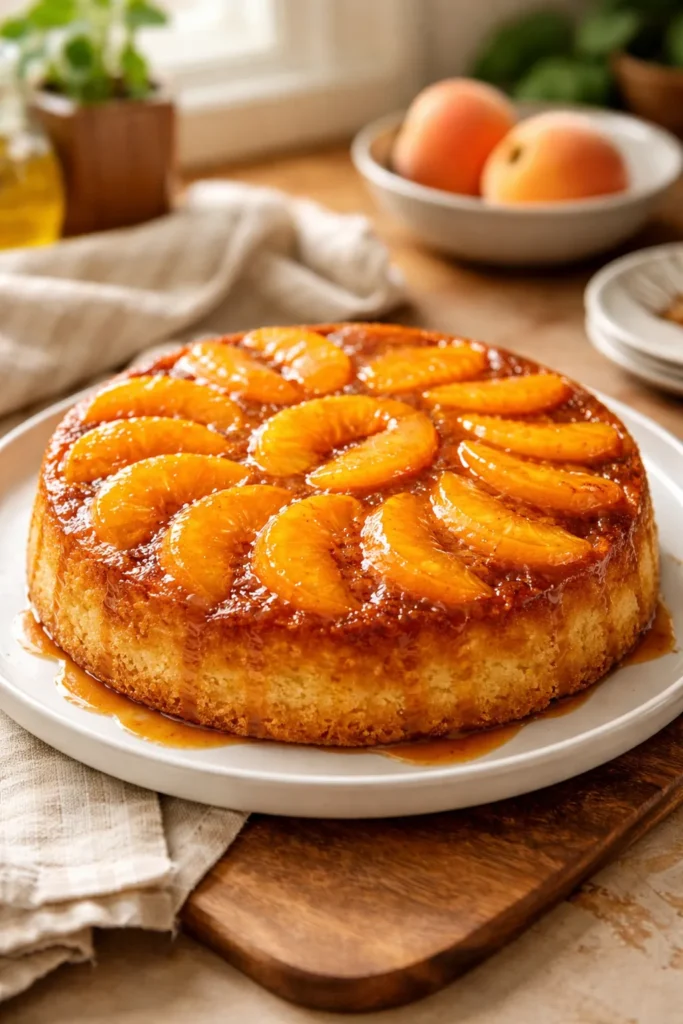
An upside-down cake looks like you’ve invested serious effort, but the technique is deceptively simple and takes only 50 minutes from start to elegant plating. You melt butter and brown sugar in the bottom of a cake pan, arrange canned peach halves or slices in a pretty pattern, pour basic cake batter over everything, bake, and flip onto a serving plate. The fruit caramelizes and sticks to the cake, creating this gorgeous golden top with concentrated peach flavor.
The Genius of Caramelized Fruit Topping
Melting butter with brown sugar creates a thick, dark caramel that bonds the fruit to the cake during baking. That caramel also concentrates the peach flavor in a way that feels almost luxurious and professional. The gentle heat and moisture from the fruit beneath the batter keep the entire cake moist and tender, even if you slightly overbake it. You can prepare the caramel and fruit arrangement in the pan while your oven preheats, making this one of the fastest impressive-looking desserts possible.
The Full Recipe for Elegant Results
- 6 tablespoons unsalted butter melted in a 9-inch round cake pan with ⅓ cup packed brown sugar, stirred until combined
- Canned peach halves or slices (about 8 to 10 pieces), arranged in a single layer over the caramel
- 1 cup all-purpose flour, 1 teaspoon baking powder, ⅛ teaspoon salt combined
- ¼ cup softened unsalted butter creamed with ½ cup granulated sugar
- 1 large egg, ⅓ cup milk, ½ teaspoon vanilla extract added to butter mixture
- Fold dry ingredients into wet ingredients, spread batter carefully over the fruit layer
- Bake at 350°F for 30 to 35 minutes until a toothpick comes out clean
Worth knowing: Let the cake cool in the pan for about 5 minutes before running a thin knife around the edges and flipping onto a serving plate. The caramel will be thick and may not release immediately, so patience here prevents disaster.
8. No-Bake Yogurt Peach Pie for Zero-Effort Elegance
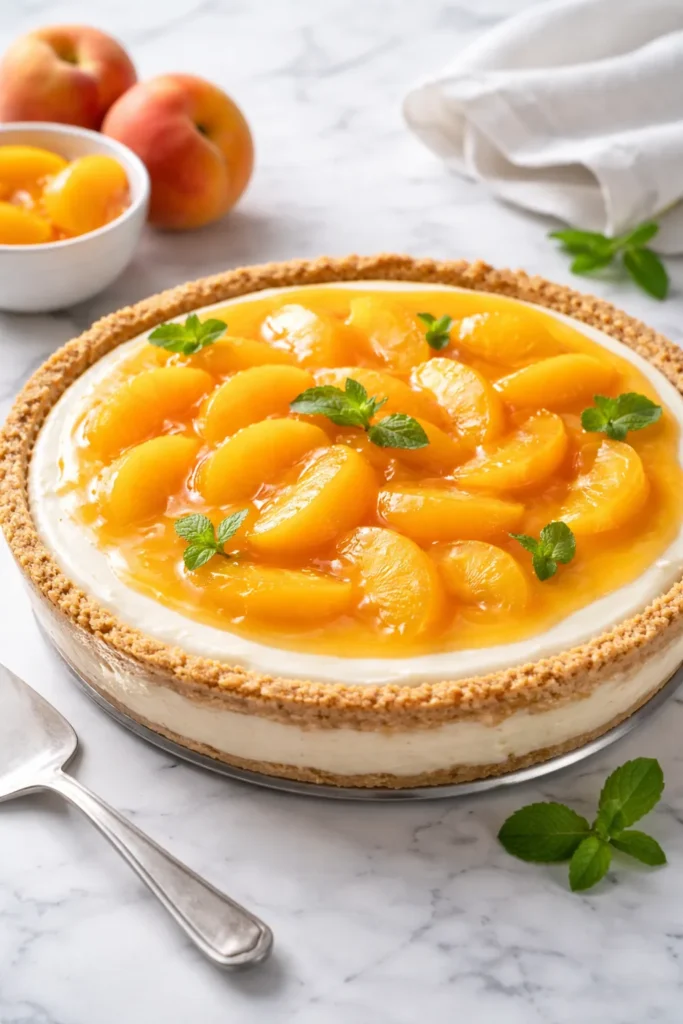
This requires absolutely no baking, which means it takes 10 minutes of actual work plus chilling time. The pie comes together with a simple vanilla cookie crust, a yogurt-based filling lightened with whipped cream, and a layer of canned peaches topped with peach-flavored gelatin that sets into a glossy glaze. It’s refreshing, not too heavy, and genuinely impressive for the minimal effort involved.
Why No-Bake Equals Maximum Smart
You’re leveraging purchased items (vanilla wafer cookies, whipped cream, gelatin) to build a structure that looks and tastes homemade. The filling is simply canned peach juice, unflavored gelatin, vanilla yogurt, and whipped cream folded together—no cooking, no eggs, no careful temperature management. Everything sets in the refrigerator while you do literally anything else, and you can make it a full day ahead without any texture issues.
The Building Blocks for This Showstopper
- 15 to 20 vanilla wafer cookies crushed finely and mixed with 3 tablespoons melted butter, pressed into a 9-inch pie pan
- 1 (16 ounce) container plain or vanilla Greek yogurt folded together with 1 cup heavy cream, whipped to stiff peaks
- 1 (3 ounce) package peach-flavored gelatin mixed with ¾ cup hot peach juice from the canned peaches, cooled slightly then folded into the yogurt mixture
- 1 (15 ounce) can peaches, drained and arranged over the yogurt layer
- ½ cup peach juice reserved mixed with 1 teaspoon gelatin to create a glaze brushed over the peaches
- Refrigerate for at least 4 hours until everything is set firm
Pro tip: You can assemble this pie in the morning and serve it at dinner without any last-minute scrambling. It actually improves as it sits because the flavors meld.
9. Peach Crumble Bars for Portable Dessert Servings

Crumble bars are essentially a peach crisp baked in a rectangular pan and cut into squares, making them infinitely more portable and elegant than spooning crisp into a bowl. These bars have a thin crumble base layer, a thick peach filling, and a generous crumb topping that gets golden and slightly caramelized in the oven. They’re perfect for potlucks, lunch boxes, or eating with your fingers while standing in the kitchen at midnight.
Why Bars Are the Smarter Choice for Feeding Groups
Baking crisp in a large pan gives you the same wonderful flavors but makes serving awkward—you’re trying to portion something that’s meant to be poured into bowls. Baking it as bars lets you cut clean squares, stack them on platters, and serve them with one hand while holding a napkin or drink in the other. The bars are sturdy enough to travel without falling apart, making them the perfect contribution to gatherings.
The Full Recipe for a 9×13-Inch Pan
- ¾ cup all-purpose flour mixed with ½ cup old-fashioned oats, ⅓ cup packed brown sugar, ¼ teaspoon salt, and ⅓ cup softened butter until crumbly
- Press half this mixture into a parchment-lined 9×13-inch pan
- Bake at 350°F for 8 to 10 minutes until barely set
- Mix 2 (15 ounce) cans drained peaches with 3 tablespoons sugar, 1 tablespoon cornstarch, and 1 teaspoon ground cinnamon, spread over the base layer
- Top with remaining crumb mixture and bake for 20 to 25 minutes until golden
- Cool completely before cutting into 12 to 16 bars
Worth knowing: These bars freeze beautifully for up to three months. Bake them ahead and store them in freezer-friendly containers, then thaw at room temperature before serving.
10. Peach Cobbler Muffins with Crumble Topping
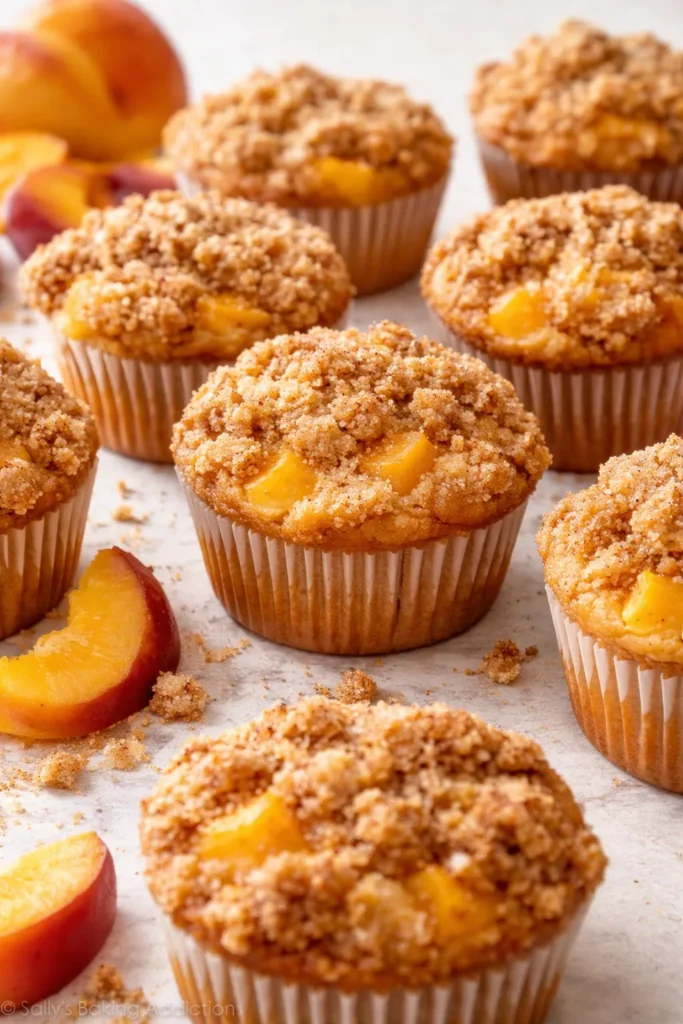
Muffins are handheld comfort in a single bite, and peach cobbler muffins deliver all the warm, spiced flavor of a traditional cobbler in a form you can grab on your way out the door. These muffins have a tender, moist crumb studded with canned peaches, a touch of sour cream for tang and moisture, and a cinnamon-sugar crumble topping that bakes into a slightly crispy shell while the inside stays soft.
The Muffin Advantage for Quick Desserts
Muffins require the same minimal technique as quick breads—combine wet and dry ingredients separately, fold together gently, divide into muffin cups, and bake. Because they’re portioned individually, they bake faster than a loaf (about 20 minutes versus 55), they’re easier to serve, and leftovers stay fresher longer in an airtight container. You can make a full dozen in under 45 minutes and have grab-and-go desserts for days.
The Complete Ingredient List
- 1½ cups all-purpose flour, 1½ teaspoons baking powder, ½ teaspoon baking soda, ½ teaspoon salt, ½ teaspoon ground cinnamon sifted together
- ½ cup softened unsalted butter creamed with ½ cup granulated sugar
- 2 large eggs, beaten, 1 teaspoon vanilla extract, and ½ cup sour cream folded in gently
- ¾ cup canned peaches, drained, patted dry, and chopped small
- Crumble Topping: ⅓ cup old-fashioned oats, ¼ cup all-purpose flour, 3 tablespoons packed brown sugar, ¼ teaspoon cinnamon, 2 tablespoons softened butter mixed together
- Line a muffin tin with papers, divide batter equally, top each with crumble mixture
- Bake at 375°F for 18 to 22 minutes until a toothpick comes out clean
Pro tip: Don’t overfill your muffin cups or the batter will overflow and create a mess. Fill each cup about two-thirds full and let the crumble topping extend slightly above the rim—that’s the whole point.
The Bottom Line
Canned peaches transform rushed baking from stressful to downright enjoyable. You’ve got the fruit ready to go, the flavor already locked in, and the ability to create elegant, impressive desserts in under an hour without any of the anxiety that comes with working against the clock. These ten options range from the simplest dump cake (four ingredients, five minutes of work) to slightly more involved recipes like cobbler cookies and upside-down cake, but all of them deliver the same message: you don’t need fresh fruit, perfect weather, or hours of free time to make something genuinely delicious.
The real secret isn’t complicated technique or specialty ingredients—it’s having canned peaches in your pantry and knowing exactly which dessert to reach for based on how much time you actually have and what kind of serving situation you’re facing. Keep a couple of cans on hand, and you’ll never be caught without an impressive dessert option again.