There’s a specific kind of craving that only Chinese takeout can satisfy — that perfect combination of sticky-sweet sauces, smoky wok-seared proteins, and deeply savory flavors that somehow taste better eaten straight from a paper carton. If you’ve ever stood at the counter waiting for your delivery order and thought I wonder if I could make this myself, the answer is yes. And you’d probably do it better.
What most people don’t realize is that Chinese-American takeout food isn’t some culinary mystery locked behind restaurant walls. The dishes we love — General Tso’s chicken, beef and broccoli, crispy egg rolls — were designed to be crowd-pleasers. They rely on a handful of pantry staples, high heat, and a few smart techniques that are completely learnable at home. The Woks of Life, a family whose Chinese takeout restaurant background gives them genuine authority on the subject, has proven time and again that homemade versions aren’t just possible — they’re often tastier than what you’d get delivered.
Making these dishes yourself puts you in control of every ingredient. Less sodium, cleaner oils, more vegetables, and zero mystery sauces. You also skip the 40-minute wait, the delivery fee, and the lukewarm noodles. With a solid wok or a large heavy skillet and a stocked pantry, a restaurant-quality Chinese dinner can be on the table faster than most delivery orders arrive at the door.
Below are 12 of the most beloved Chinese takeout dishes, with detailed guidance on how to make each one at home — including exactly what goes into the sauce, where people commonly go wrong, and how to get that elusive restaurant-style depth of flavor in your own kitchen.
Table of Contents
- The Essential Pantry You Need Before You Start
- 1. General Tso’s Chicken
- Getting the Sauce Right
- Why Frying Temperature Matters More Than You Think
- 2. Beef and Broccoli
- Building the Stir-Fry Sauce
- Handling the Broccoli Properly
- 3. Kung Pao Chicken
- The Right Cut and Prep
- Layering the Heat
- 4. Takeout-Style Fried Rice
- The Egg Technique
- Wok Hei: That Smoky Restaurant Flavor
- 5. Lo Mein Noodles
- Building Texture With Vegetables
- The Common Lo Mein Mistake
- 6. Orange Chicken
- The Sauce Formula
- Keeping the Chicken Crispy
- 7. Sesame Chicken
- Why Toasted Seeds Make the Difference
- Adjusting the Sweetness
- 8. Sweet and Sour Pork
- Building a Genuine Sweet and Sour Sauce
- 9. Classic Crispy Egg Rolls
- The Most Important Filling Rule
- Proper Wrapping and Sealing
- 10. Crab Rangoons
- Folding Technique Options
- Frying Temperature and Oil Depth
- 11. Hot and Sour Soup
- Building the Broth
- 12. Chicken Chow Mein
- The Chicken Marinade
- The Vegetable Combination
- How to Get That Restaurant Wok Flavor at Home
- Storage, Reheating, and Make-Ahead Tips
- Final Thoughts
The Essential Pantry You Need Before You Start
Before getting into individual recipes, it’s worth talking about what separates a mediocre homemade stir-fry from one that actually tastes like your favorite takeout spot. The answer is almost always the pantry. These ingredients aren’t exotic — many are available at standard grocery stores, and all of them are easy to find at any Asian market or online.
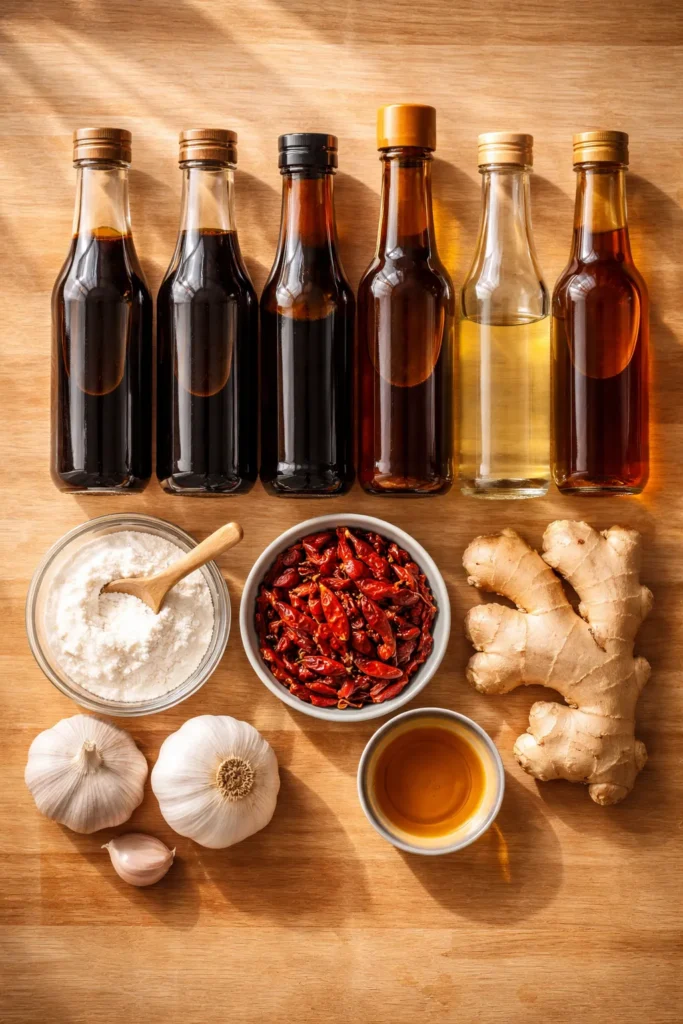
Stock these non-negotiables:
- Light soy sauce — the everyday workhorse for seasoning and color
- Dark soy sauce — used in smaller amounts for deep color and slight sweetness
- Oyster sauce — thick, savory, faintly sweet; essential for stir-fry sauces
- Hoisin sauce — rich and slightly sweet, used in marinades and glazes
- Sesame oil (toasted) — never cook with this one; drizzle it on at the very end
- Rice vinegar — mild acidity that brightens sauces without overpowering them
- Shaoxing rice wine — adds a distinctive depth that you simply can’t replicate with a substitute
- Cornstarch — creates the glossy, clingy sauce texture that defines Chinese-American cooking
- Dried red chilies — árbol or Tien Tsin chilies work perfectly for most recipes
- Fresh garlic and fresh ginger — always fresh; the powdered versions don’t come close
A high-smoke-point neutral oil — peanut oil is traditional, avocado or vegetable oil work too — rounds out the list. With these in your kitchen, you’re equipped to make almost every dish below without a last-minute grocery run.
1. General Tso’s Chicken
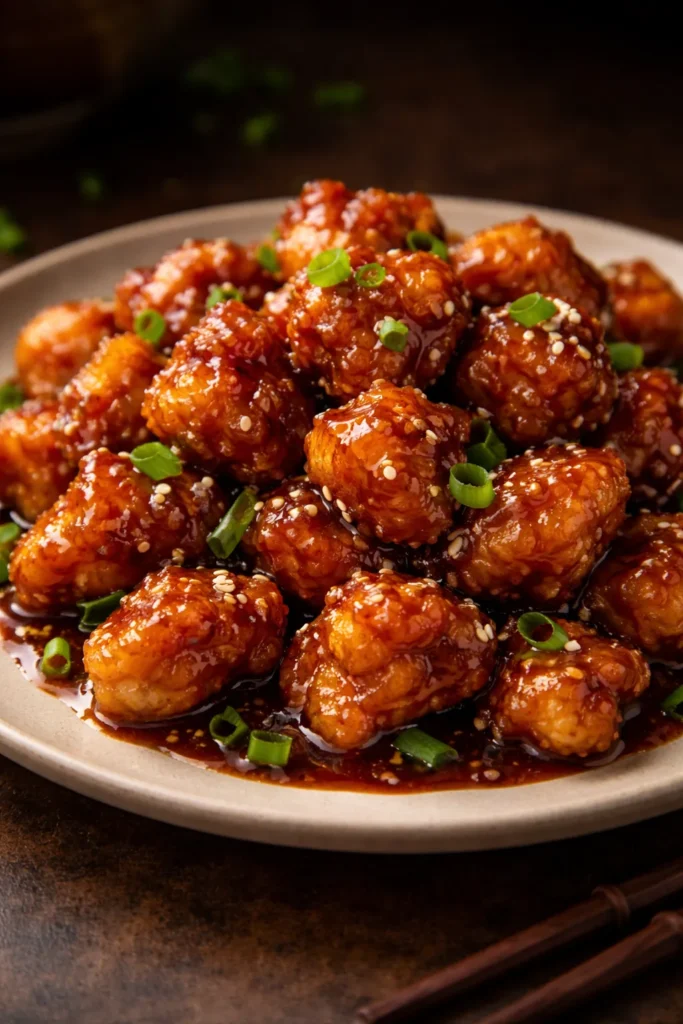
General Tso’s chicken is arguably the crown jewel of Chinese-American takeout. Crispy battered chicken pieces tossed in a glossy sauce that’s simultaneously sweet, savory, tangy, and lightly spicy — it’s the dish that made many people fall in love with Chinese food in the first place. What most people don’t know is that the dish has murky origins: food historians widely credit it to chef Peng Chang-kuei, who created a version of it in Taiwan before bringing his cooking to New York, where the recipe evolved into the sweet, chili-spiked dish we recognize today.
The secret to making it genuinely well at home is twofold. First, the coating needs to be light and crispy, not thick and bready. A batter made with a combination of cornstarch and a small amount of flour (roughly 3:1 ratio) produces a shatter-crisp shell that holds up when tossed in the sauce. Second, the sauce needs proper acidity. Most restaurant versions skew too sweet — balancing that sugar with a good pour of rice vinegar (about 2 tablespoons per batch) transforms the sauce from cloying to complex.
Getting the Sauce Right
The base sauce combines 3 tablespoons soy sauce, 2 tablespoons rice vinegar, 1 tablespoon hoisin, 1 tablespoon sugar, ½ cup chicken broth, and 1 teaspoon cornstarch stirred together before cooking. This gets poured into the wok after you’ve sautéed 4-6 dried red chilies and 3 minced garlic cloves in a teaspoon of oil. Cook it until the sauce thickens enough to coat a spoon — about 90 seconds — then add your fried chicken and toss.
Why Frying Temperature Matters More Than You Think
Fry the chicken in oil held at 350°F (175°C). Below this temperature, the coating absorbs oil and turns greasy. Above it, the exterior darkens before the chicken cooks through. A thermometer isn’t optional here — it’s the difference between crispy takeout-style chicken and sad, soggy results.
Pro tip: Fry the chicken in two batches. Overcrowding the oil drops the temperature dramatically, which kills the crispiness before it even has a chance to form.
2. Beef and Broccoli
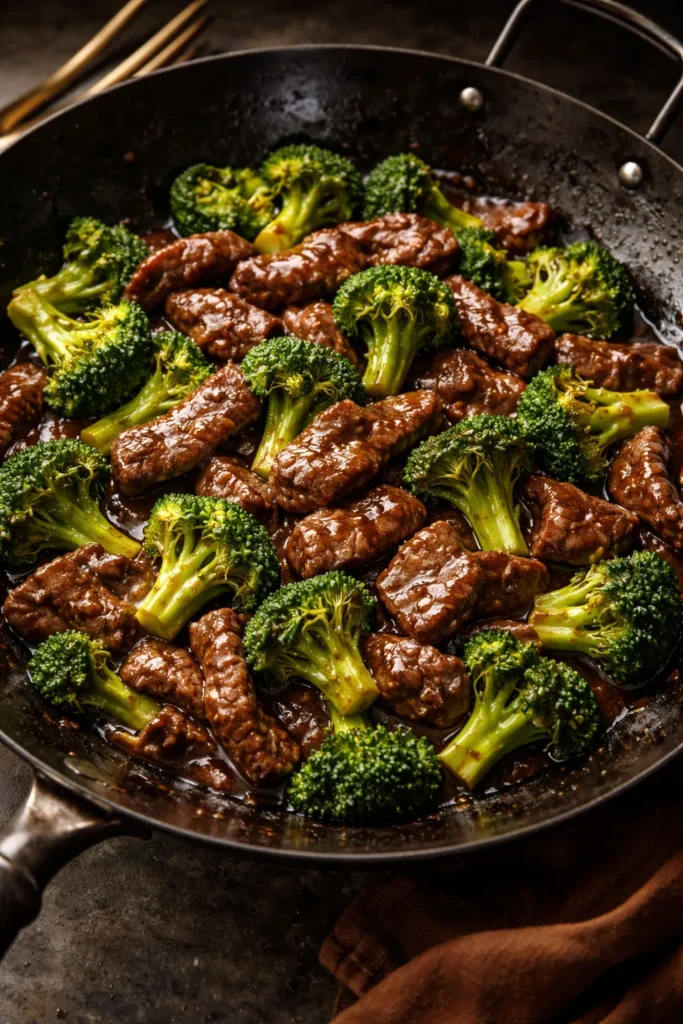
Beef and broccoli is one of the most deceptively simple dishes in the takeout canon, and one of the most frequently made wrong at home. The telltale mistake? Tough beef and mushy, waterlogged broccoli. Both problems are easy to fix once you know what causes them.
The velveting technique is what makes takeout beef so tender it practically melts. Slice flank steak or sirloin thinly against the grain (about ⅛ inch thick), then toss the slices with 1 teaspoon baking soda, 1 tablespoon cornstarch, 1 tablespoon soy sauce, and 1 tablespoon water. Let it sit for 20-30 minutes, then rinse the baking soda off thoroughly before cooking. The alkaline treatment relaxes the muscle fibers in a way that no other method replicates.
Building the Stir-Fry Sauce
For the sauce: whisk together 3 tablespoons oyster sauce, 2 tablespoons soy sauce, 1 tablespoon dark soy sauce, 1 teaspoon sesame oil, 1 tablespoon cornstarch, and ¾ cup beef broth. Set this aside before you turn on the heat — the stir-fry moves fast once the wok is hot.
Handling the Broccoli Properly
Blanch the broccoli florets in boiling salted water for 60 seconds, then transfer them immediately to ice water. This sets the bright green color and par-cooks them just enough that they need only 30 seconds in the hot wok to finish. Skip this step and you’ll either undercook the broccoli (raw and bitter) or overcook it trying to soften it in the stir-fry.
Sear the beef over maximum heat for 60-90 seconds per side in small batches. Remove it, add your aromatics (garlic, ginger), pour in the sauce, add the broccoli, then return the beef for a final toss. Total cooking time from first piece of beef in the wok to plated dish: under 8 minutes.
3. Kung Pao Chicken
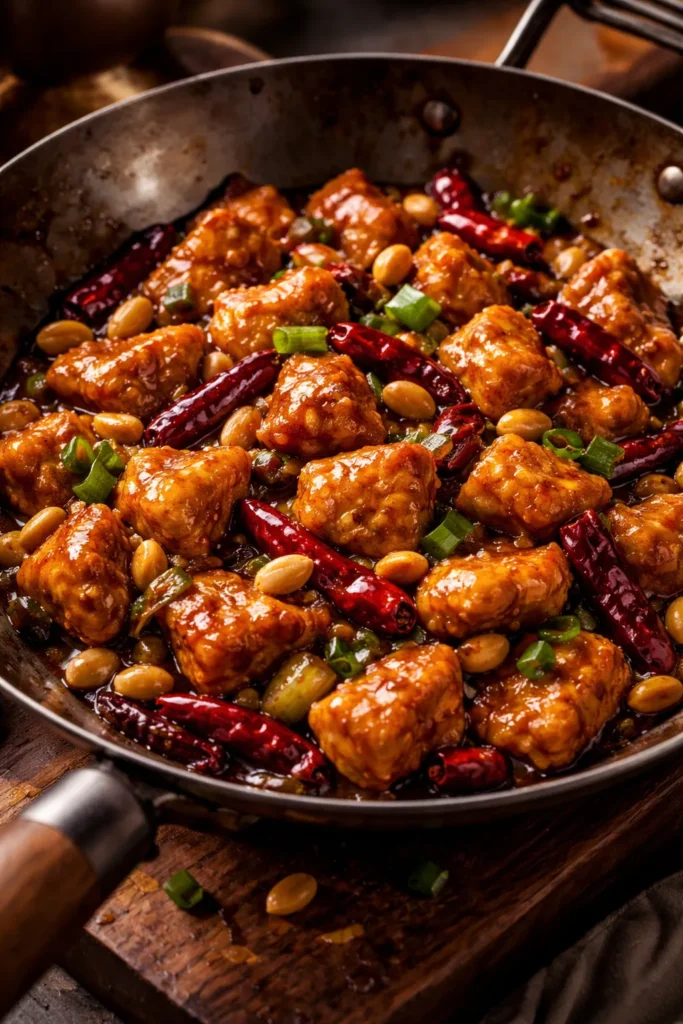
Authentic Sichuan kung pao chicken and the Chinese-American takeout version share a name but tell very different stories. The Sichuan original uses Sichuan peppercorns for their distinctive mouth-numbing quality — what Chinese cooks call mala. The takeout version most people know is milder, slightly thicker in sauce, and built around roasted peanuts and dried chilies for heat and crunch.
The takeout-style sauce is built from soy sauce, chicken broth, rice vinegar, a small amount of sugar, sesame oil, and cornstarch — with the proportions adjusted to produce a thick, gloppy coating rather than a light glaze. That texture is intentional: it makes every piece of chicken cling to the sauce rather than letting it pool at the bottom of the carton.
The Right Cut and Prep
Use boneless chicken thighs instead of breasts. Thighs stay juicy under high heat where breasts tend to seize up and dry out. Cut them into ¾-inch cubes, then marinate them for 15 minutes in soy sauce, cornstarch, and a splash of Shaoxing wine. This brief marinade gives the surface of each piece a slightly starchy coating that helps the final sauce stick.
Layering the Heat
Add 6-8 dried árbol chilies to the wok first, letting them bloom in hot oil for 20-30 seconds until they darken and become fragrant. Don’t let them burn — this step adds warm, rounded heat rather than sharp spice. Add the chicken, then sliced celery, red bell pepper, and finally the peanuts, which go in during the last 60 seconds to preserve their crunch.
Worth knowing: Dry-roasting the peanuts in a dry pan for 3-4 minutes before adding them to the dish dramatically improves their flavor. Raw peanuts taste flat; roasted ones add a nutty depth that pulls the whole dish together.
4. Takeout-Style Fried Rice
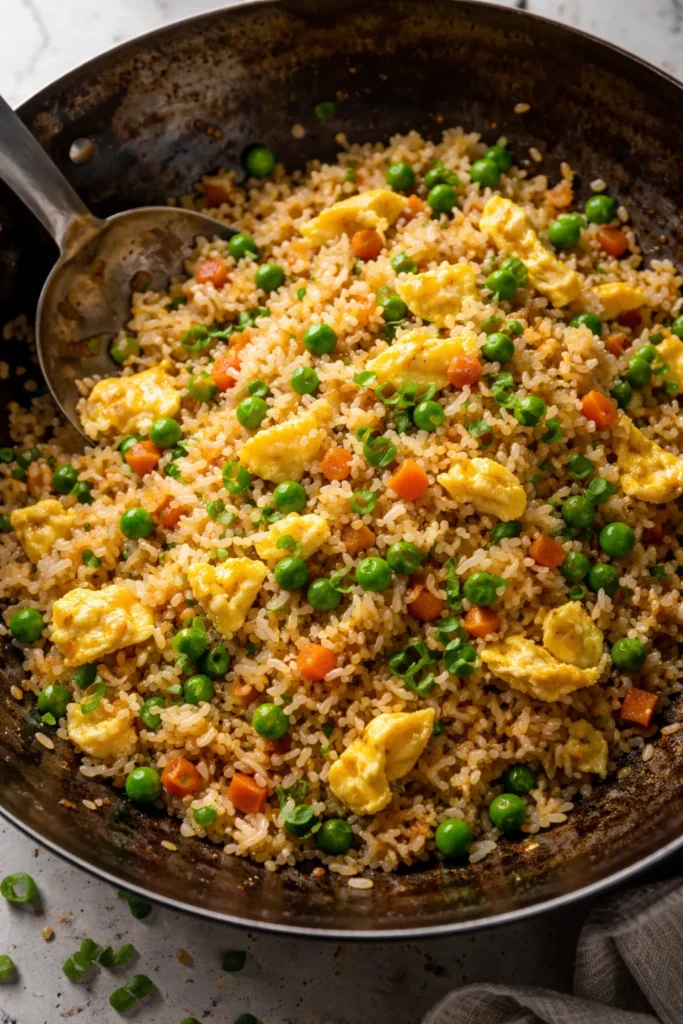
Fried rice is one of those dishes that looks simple but hides several technical requirements that most home cooks unknowingly skip. The result — clumpy, oil-soaked, bland rice — gives homemade fried rice a bad reputation it doesn’t deserve when made properly.
The most cited rule is using day-old rice, and it’s true — but the reason matters more than the rule itself. Freshly cooked rice contains too much moisture, causing it to steam in the wok rather than fry. The grains stick together and you end up with mush. Day-old rice that’s been refrigerated overnight has dried out sufficiently to fry properly, developing individual, slightly chewy grains with a lightly crispy exterior.
If you don’t have day-old rice, spread freshly cooked rice on a baking sheet and refrigerate it uncovered for at least an hour. It’s not identical to overnight-cold rice, but it gets you 80% of the way there.
The Egg Technique
Scramble the eggs separately first, removing them from the wok before they’re fully set. They’ll finish cooking when you toss them back in at the end. Adding eggs too early — or scrambling them directly in with the rice — results in dry, overcooked egg pieces that texture like rubber.
Wok Hei: That Smoky Restaurant Flavor
That subtle smokiness you taste in restaurant fried rice — called wok hei, or “breath of the wok” — comes from using heat far higher than most home stoves produce. You can approximate it by: using the largest burner on your stove at maximum heat, using a carbon steel wok that retains heat well, and cooking in smaller batches so the temperature stays high throughout. Drizzle soy sauce around the edge of the wok rather than directly onto the rice — the brief contact with the hot metal caramelizes the soy before it hits the rice, adding depth.
5. Lo Mein Noodles
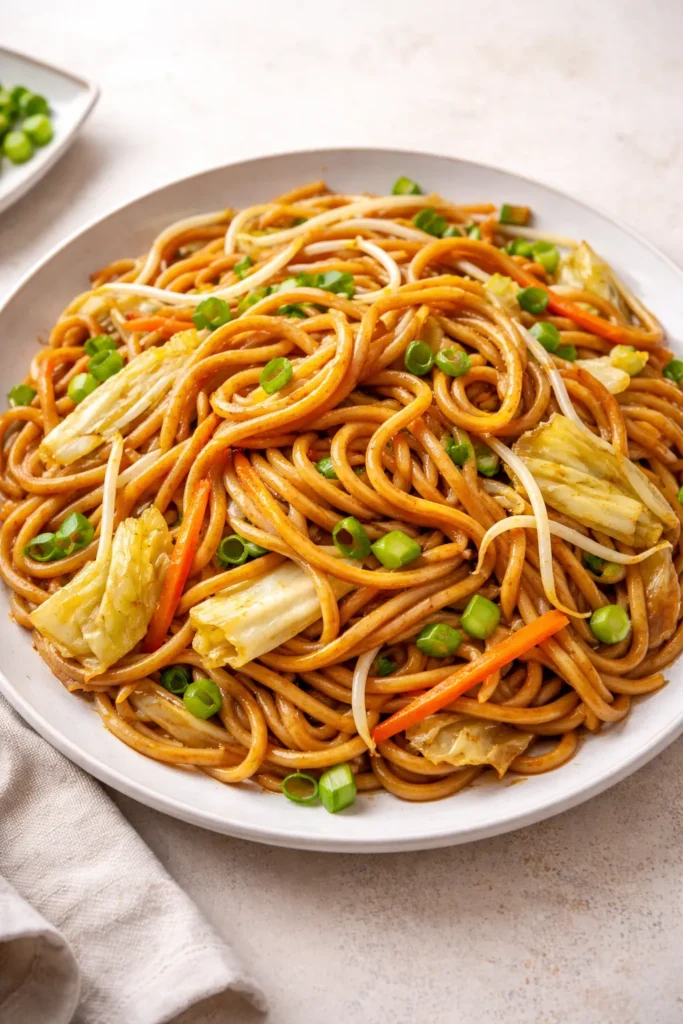
Lo mein — literally “tossed noodles” — is the chewier, saucier cousin of chow mein, and it’s one of the most satisfying takeout dishes to recreate at home. The noodles themselves are thick, springy fresh wheat noodles that pick up sauce in a way that thinner noodles simply don’t. Finding genuine lo mein noodles at an Asian market is worth the trip; in their absence, fresh spaghetti or fresh linguine are the closest grocery store substitutes.
The sauce ratio that produces authentic takeout lo mein: 3 tablespoons oyster sauce, 2 tablespoons soy sauce, 1 tablespoon dark soy sauce, 1 teaspoon sugar, 1 teaspoon sesame oil, and 2 tablespoons water. Mix this before you cook and keep it next to the stove — lo mein comes together in under 5 minutes once the wok is hot.
Building Texture With Vegetables
The vegetable mix in lo mein isn’t arbitrary. You want a combination of textures: something soft (napa cabbage or bok choy), something with crunch (julienned carrots, bean sprouts), and something aromatic (sliced scallions). The cabbage wilts into the noodles beautifully; the carrots provide bite; the scallions add freshness.
The Common Lo Mein Mistake
Overcooking the noodles before they go into the wok. They should be cooked to just barely al dente — still with a slight chew — because they’ll continue cooking for another minute in the hot wok. Fully cooked noodles turn to mush during stir-frying. Cook them 1-2 minutes less than the package suggests, then immediately toss with a teaspoon of oil to prevent clumping.
Pro tip: Add a splash of the noodle cooking water (about 2 tablespoons) to the wok after adding the sauce. The starchy water helps the sauce cling to every strand of noodle.
6. Orange Chicken
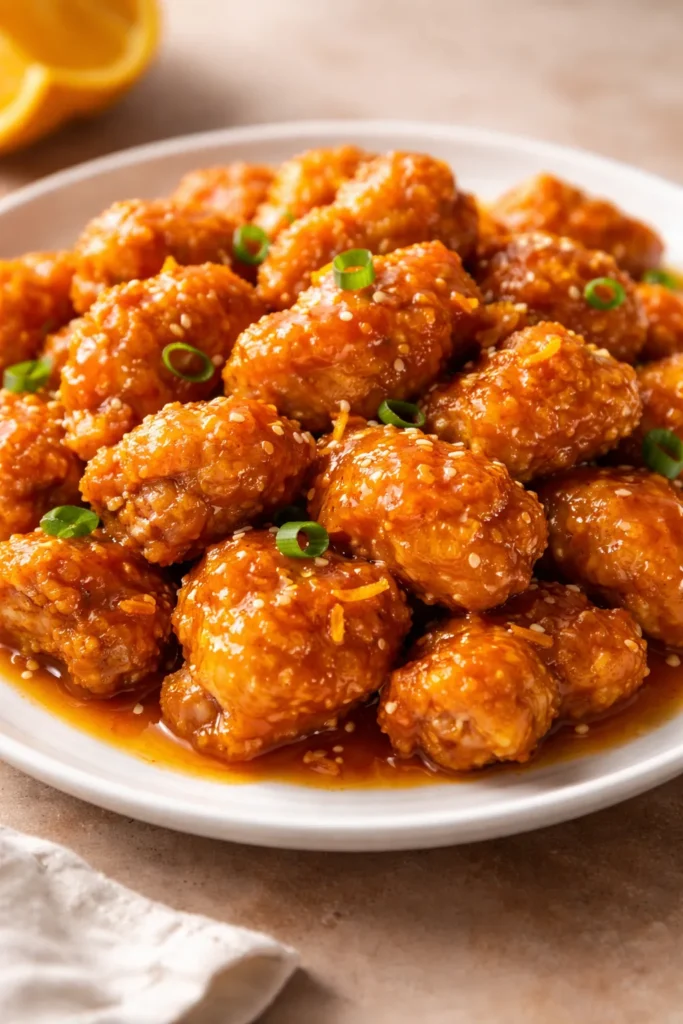
Orange chicken sits at an interesting intersection: it’s one of the most recognized Chinese-American dishes, yet its flavor profile — bright citrus, sweet glaze, crispy chicken — makes it genuinely crowd-pleasing rather than just familiar. The Panda Express version made it famous, but homemade versions with real orange zest and fresh juice taste noticeably more complex.
The key insight from Serious Eats’ development of this recipe: use orange three ways — fresh juice, grated zest, and dried orange peel. The fresh juice provides brightness, the zest adds aromatic oils, and the dried peel (available at Asian grocery stores or in the spice aisle) contributes a bitter depth that stops the sauce from tasting flat or one-dimensional. If you can’t find dried peel, increase the zest and add a small pinch of powdered citrus peel.
The Sauce Formula
Combine ½ cup fresh orange juice, 2 tablespoons soy sauce, 1 tablespoon rice vinegar, 3 tablespoons sugar (adjust to taste), 2 teaspoons grated fresh orange zest, 1 teaspoon sesame oil, and 1 tablespoon cornstarch. This produces a sauce that’s bright, moderately sweet, and just sticky enough to coat the chicken without turning it soggy.
Keeping the Chicken Crispy
The batter needs to fry to a proper crust before the sauce goes on. A mixture of ½ cup cornstarch and ¼ cup all-purpose flour, seasoned with salt and white pepper, gives a light, shatteringly crisp coating. Dredge the chicken pieces, shake off the excess, and fry at 350°F until deeply golden. Toss in the sauce immediately before serving — letting it sit causes the coating to absorb moisture and soften.
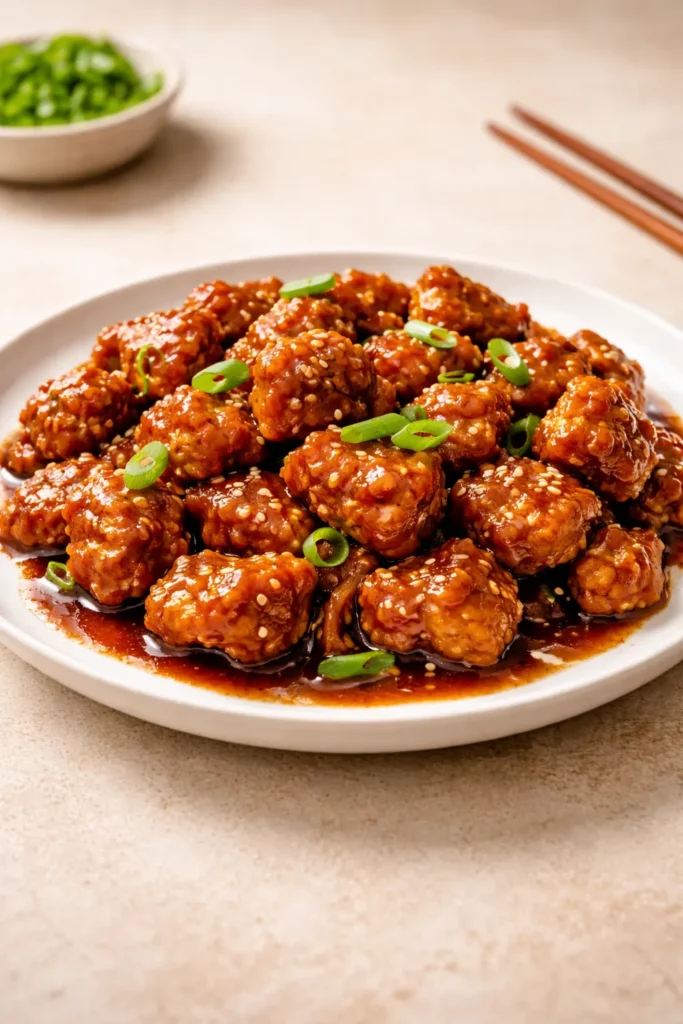
7. Sesame Chicken
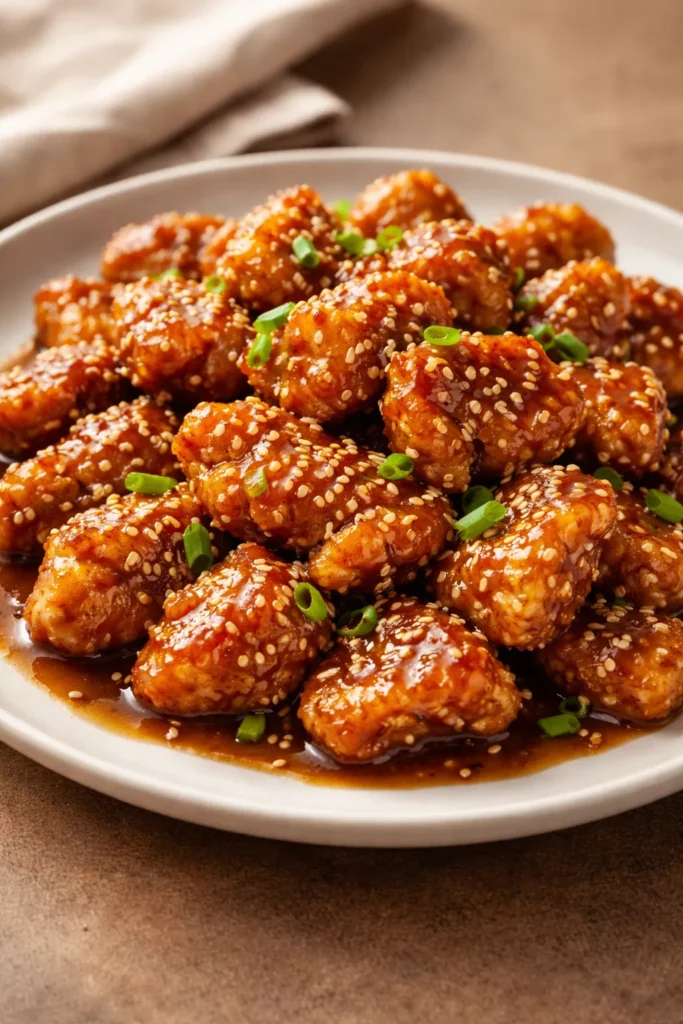
Sesame chicken and General Tso’s chicken use nearly identical cooking methods — crispy battered fried chicken — but the sauce takes the dish in an entirely different direction. Where General Tso’s is assertively savory with chili heat and vinegar, sesame chicken is sweeter, milder, and wrapped in a glossy glaze that’s heavy on toasted sesame.
The sauce adjustment from General Tso’s is simple: increase the sugar, add extra sesame oil, omit the dried chilies, and finish with a generous shower of toasted sesame seeds. But there’s one step that separates mediocre sesame chicken from the real thing: toasting the seeds first.
Why Toasted Seeds Make the Difference
Raw sesame seeds taste mild, slightly grassy, and one-dimensional. Toast them in a dry pan over medium heat for 3-4 minutes, shaking constantly, until they turn golden and begin to pop. The heat activates the oils and produces a nutty, warm flavor that raw seeds simply don’t have. Add half to the sauce during cooking and scatter the rest over the finished dish for layers of sesame flavor throughout.
Adjusting the Sweetness
Sesame chicken is meant to be sweeter than most other takeout dishes — that’s part of its identity. But “sweeter” doesn’t mean one-note. Balance the sugar with soy sauce for saltiness, and add ½ teaspoon of rice vinegar to the sauce to provide just enough acidity to keep the sweetness from feeling heavy. Taste the sauce before adding the chicken; if it tastes too sweet on its own, it’ll be even more so once it coats the protein.
8. Sweet and Sour Pork
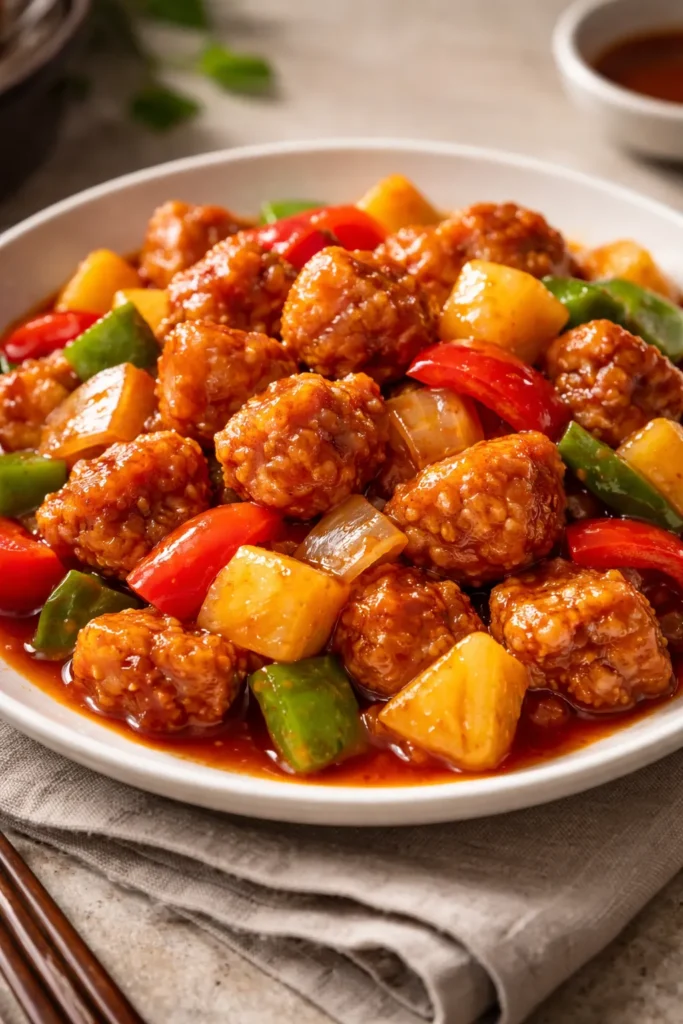
Sweet and sour pork is one of the oldest dishes in the Chinese-American takeout tradition, and it remains one of the most beloved because the flavor combination — bright, tangy, sweet, with crispy pork and the pop of pineapple — is genuinely, universally satisfying. The homemade version wins on texture every single time: the pork comes out of your kitchen with a crispier coating and juicier interior than anything that’s been sitting in a steam table.
Use pork tenderloin or pork loin, cut into 1-inch cubes. These cuts stay tender and don’t dry out during frying. The batter is similar to General Tso’s — mostly cornstarch with a little flour — but you can add a beaten egg to the mixture for a slightly thicker, crunchier result.
Building a Genuine Sweet and Sour Sauce
The shortcut version uses ketchup, which works but produces a one-dimensional sauce. A fuller-flavored version combines 3 tablespoons ketchup, 3 tablespoons rice vinegar, 3 tablespoons sugar, 2 tablespoons soy sauce, and 2 tablespoons pineapple juice. This produces something brighter and more layered than the ketchup-only approach.
Add cubed fresh pineapple (or canned chunks, drained), diced red and green bell peppers, and sliced onion to the wok with the sauce. The pineapple releases natural sugars as it cooks, adding another dimension to the sauce without any extra sugar needed.
Critical timing note: Add the fried pork to the sauce immediately before serving. Sweet and sour pork that sits in sauce for more than 3-4 minutes loses its crispy coating entirely. If you’re serving a crowd, keep the sauce and pork separate and combine them at the table.
9. Classic Crispy Egg Rolls

Egg rolls are the appetizer that signals a full Chinese takeout experience. The satisfying crunch of a properly fried wrapper, the savory filling of pork and cabbage, the dunk into sweet-and-sour sauce or hot Chinese mustard — it’s a complete sensory experience in one handheld package. Making them at home seems intimidating, but it’s largely a matter of technique and a few basic rules.
Pre-made egg roll wrappers (found in the refrigerated section of most grocery stores or at any Asian market) make this completely accessible. The filling comes together in about 10 minutes of cooking: ground pork or finely minced pork shoulder, shredded napa cabbage, julienned carrots, bean sprouts, minced garlic, and fresh ginger, seasoned with soy sauce, sesame oil, and white pepper.
The Most Important Filling Rule
The filling must be completely dry before wrapping. Moisture is the enemy of a crispy egg roll. After cooking the filling, spread it on a baking sheet and let it cool for at least 15 minutes. Then, critically, squeeze handfuls of the filling over the sink to press out any remaining liquid. Excess moisture turns wrappers soggy during frying and can cause them to burst open in the oil.
Proper Wrapping and Sealing
Place about 3 tablespoons of filling in the lower third of the wrapper, fold the bottom edge over the filling tightly, fold in the sides, then roll firmly toward the top. Seal the edge with a dab of cornstarch slurry (1 tablespoon cornstarch mixed with 1 tablespoon cold water). Fry at 350°F, turning once, until deeply golden — about 3-4 minutes. These freeze beautifully before frying and reheat in an oven or air fryer perfectly.
10. Crab Rangoons

Crab rangoons occupy a special place in the Chinese-American takeout pantheon — they’re not remotely traditional Chinese food, but their combination of crispy wonton wrapper, creamy filling, and sweet-savory dipping sauce has earned them genuine devotion. They are, as one food writer memorably put it, a wildly successful excuse to eat deep-fried cream cheese. And they work.
The classic filling: 8 ounces of cream cheese (softened to room temperature), 4-6 ounces of crab meat (imitation surimi or real crab — both work, though real crab gives a more assertive flavor), 2 sliced scallions, 1 minced garlic clove, 1 teaspoon Worcestershire sauce, and a pinch of white pepper. Mix until combined, but don’t overmix — you want the crab in pieces, not completely mashed into the cream cheese.
Folding Technique Options
The traditional takeout shape — four corners pinched up and pressed together into a star — looks impressive and creates extra crispy edges. For beginners, a simple triangle fold (fold the wrapper in half diagonally over the filling, press out air, seal the edges with water) is just as delicious and significantly easier. The important thing is making sure there are no gaps in the seal; air pockets cause the rangoons to burst open in the oil.
Frying Temperature and Oil Depth
Heat about 2 inches of oil to 350°F. Fry 4-5 rangoons at a time — crowding the oil cools it down and produces greasy, pale wrappers rather than golden, blistered ones. They cook fast: 2-3 minutes total, flipping once. Serve immediately with homemade sweet-and-sour sauce or plum sauce for dipping.
Pro tip: Crab rangoons can be assembled and frozen on a parchment-lined baking sheet, then transferred to a freezer bag. Fry directly from frozen — no thawing needed — for about 4 minutes at 325°F.
11. Hot and Sour Soup
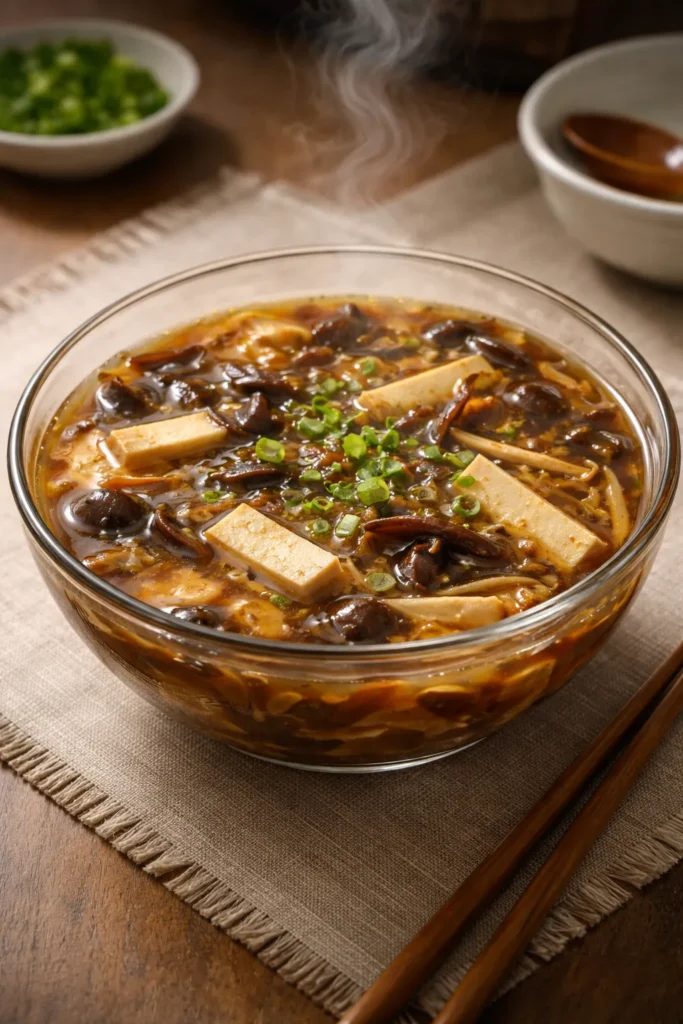
Hot and sour soup is the overlooked hero of the Chinese takeout menu — warming, deeply savory, and surprisingly complex for something that takes under 30 minutes to make at home. The heat comes from white pepper (not chili), and the sour comes from rice vinegar. That distinction matters for flavor: white pepper provides a warm, diffuse heat that blends into the broth, while chili would create a sharper, more aggressive heat that would overwhelm the balance.
The ingredient list includes a few items worth tracking down: dried wood ear mushrooms (also called black fungus), which add an earthy flavor and distinctive silky-chewy texture; dried lily buds (also called golden needles), which contribute an earthy sweetness; and firm tofu, cut into thin strips. These are all standard items at any Asian market, and they’re what separates a genuine hot and sour soup from a watery approximation.
Building the Broth
Start with 4 cups of good chicken broth (or pork broth if you have it). Add the rehydrated mushrooms and lily buds, sliced tofu, and a handful of bamboo shoot strips. Season aggressively with soy sauce and white pepper — the soup needs more seasoning than you might expect because the egg and cornstarch slurry that go in later will dilute the flavor.
The cornstarch slurry (3 tablespoons cornstarch mixed with 3 tablespoons cold water) goes in near the end to thicken the broth to its characteristic silky consistency. Then the eggs: beat 2 eggs lightly and drizzle them into the gently simmering soup while stirring the pot in a slow circle — this creates those characteristic ribbons of cooked egg. Finish with 3-4 tablespoons of rice vinegar (taste and adjust) and a drizzle of sesame oil.
12. Chicken Chow Mein
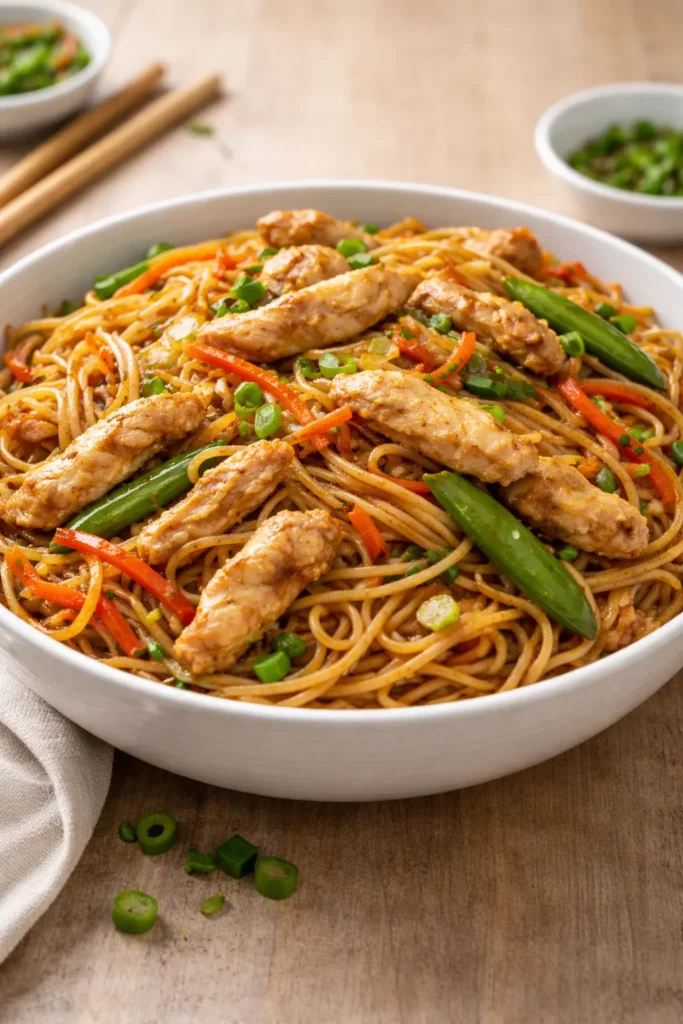
Chow mein — meaning “fried noodles” — is distinct from lo mein in a key way: the noodles are cooked until they develop a lightly crispy exterior, either from direct contact with the wok or from being fried separately before being tossed with the other ingredients. That slightly crispy texture, combined with soft vegetables and savory sauce, is what makes chow mein worth making over lo mein when you want textural contrast in your bowl.
For takeout-style chicken chow mein, use thin fresh chow mein noodles (available at Asian markets and some grocery stores). In their absence, dried angel hair pasta or dried thin wheat noodles are workable substitutes. Cook them until just al dente, toss immediately with a teaspoon of oil, then fry them in batches in a very hot wok until lightly golden on each side — about 2 minutes per side.
The Chicken Marinade
Slice 1 pound of chicken thighs into thin strips and marinate them for 15 minutes in 1 tablespoon soy sauce, 1 teaspoon Shaoxing wine, 1 teaspoon cornstarch, and ½ teaspoon sesame oil. This brief marinade seasons the chicken and creates a slight coating that helps it brown rather than steam in the wok.
The Vegetable Combination
Bean sprouts, julienned carrots, sliced napa cabbage, and scallions are the standard. Add them in order of cooking time: harder vegetables (carrots) first, softer ones (cabbage, bean sprouts) last. Everything should be crisp-tender — not soft, not raw.
The sauce: 2 tablespoons oyster sauce, 2 tablespoons soy sauce, ½ teaspoon dark soy sauce, ½ teaspoon sugar, and ¼ cup chicken broth. Pour it over the noodles in the final minute of cooking, tossing everything vigorously so the sauce coats every strand.
How to Get That Restaurant Wok Flavor at Home
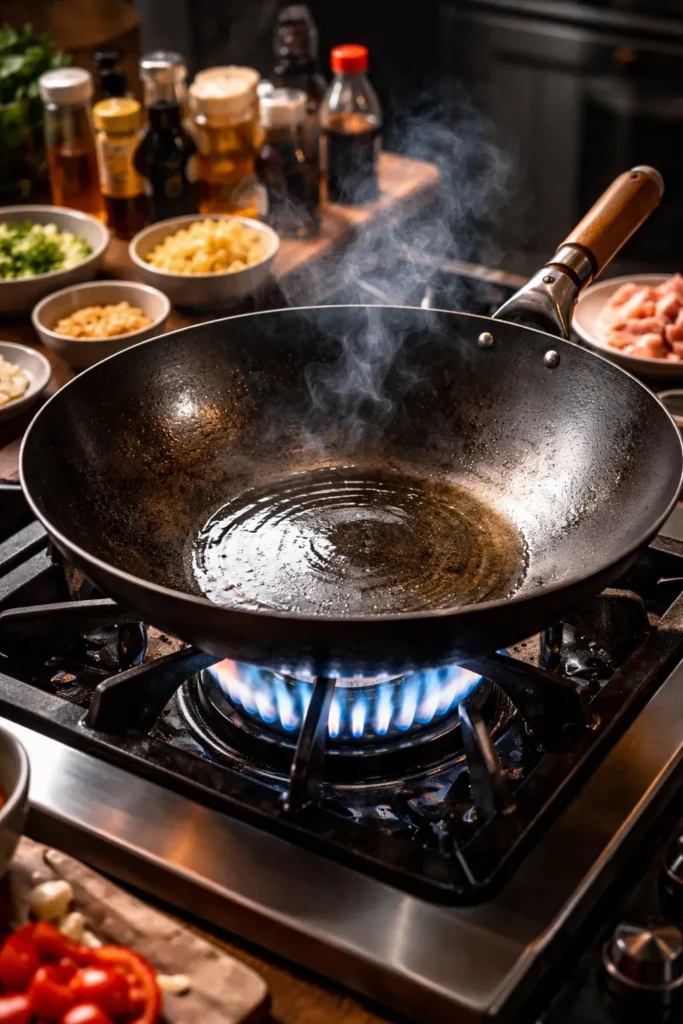
The wok hei question — how to replicate that slightly smoky, charred, unmistakable depth that restaurant stir-fries have — is one of the most common frustrations home cooks face with Chinese food. Restaurant woks sit over commercial burners that output 100,000 BTUs or more. Your home stove outputs 10,000-15,000 BTUs on its best burner. You’re not going to fully bridge that gap, but you can get close.
Use your largest, heaviest pan on your highest-output burner. A carbon steel wok is ideal because it heats quickly and retains heat well. A cast iron skillet is a solid second choice. A thin stainless pan loses temperature too quickly when you add cold ingredients.
Preheat the pan much longer than feels comfortable. Most home cooks add oil after 30-60 seconds of preheating. Let the wok heat on high for 2-3 full minutes before adding oil. It should be hot enough that a drop of water evaporates instantly on contact — not spatters, but vaporizes.
Cook in smaller batches. This is the single most impactful adjustment a home cook can make. A restaurant wok at 100,000 BTUs can handle a full batch of ingredients without losing temperature. Your home burner can’t. Cooking half the amount at a time means the pan temperature stays high, ingredients sear rather than steam, and you get that slightly caramelized exterior on proteins and vegetables that gives Chinese stir-fry its signature depth.
Storage, Reheating, and Make-Ahead Tips
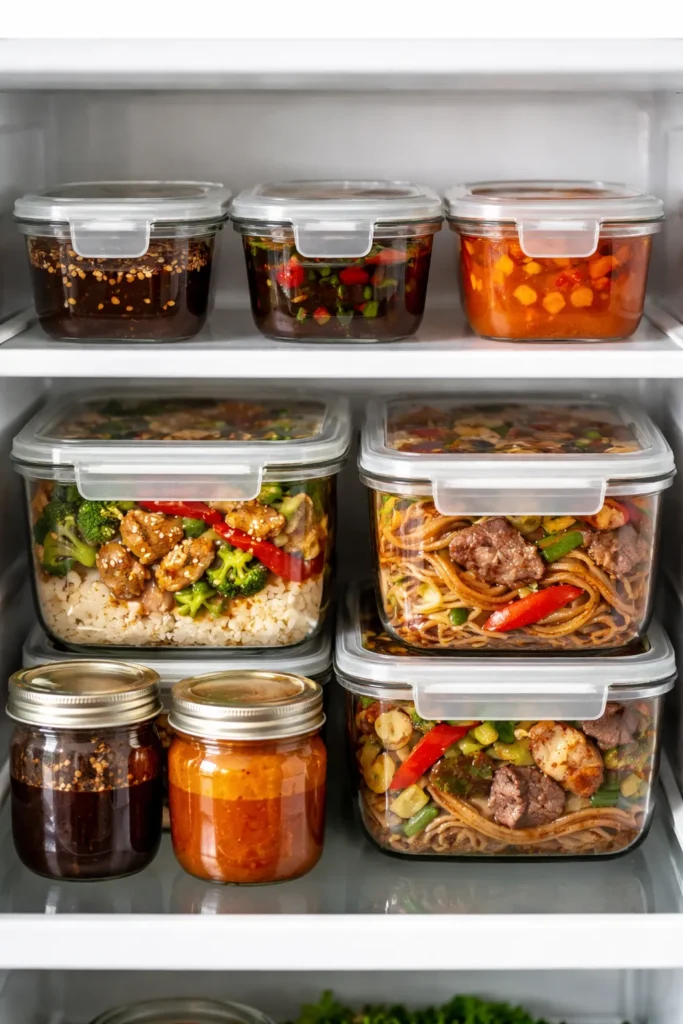
One of the genuine advantages of making Chinese takeout at home is how well most of these dishes store — often better than the restaurant versions, which have already started degrading in transit by the time they reach you.
Refrigerator storage: Most stir-fry dishes — beef and broccoli, kung pao chicken, orange chicken, lo mein — keep well in an airtight container for up to 4 days. Soups like hot and sour keep for 3-4 days.
Freezer-friendly items: Egg rolls (unfried), crab rangoons (unfried), and general Tso’s chicken (sauce and fried chicken stored separately) all freeze well. Fried rice and chow mein noodles can be frozen and reheated but lose some of their texture.
Reheating: For sauced dishes and stir-fries, the stovetop over medium heat with a splash of water or broth is far superior to the microwave. It revives the sauce’s glossy texture and keeps proteins from becoming rubbery. Microwave reheating works in a pinch — do it in 30-second intervals and cover loosely to trap steam.
Make-ahead strategies: Prep all your sauces in advance and store them in small jars in the fridge — they’ll keep for a week. Velvet and marinate proteins the night before. Cook rice or noodles ahead and refrigerate them. With prep done, a full Chinese takeout-style dinner can come together in 20 minutes on a weeknight.
Final Thoughts
The dishes in this collection represent something meaningful beyond convenience: they’re proof that the flavors we associate with our favorite takeout experiences are genuinely achievable in a home kitchen. Not just acceptable approximations — dishes that often surpass what you’d get delivered, because you control the quality of every ingredient.
Start with whichever dish you crave most. General Tso’s chicken is a satisfying first challenge that teaches frying technique and sauce-building in one recipe. Fried rice is the perfect use for leftover rice and builds confidence fast. From there, the techniques compound — once you understand how to velvet protein and build a cornstarch-thickened sauce, a dozen more dishes open up to you.
The pantry investment is the biggest barrier, and it’s a one-time thing. Once you have oyster sauce, Shaoxing wine, dark soy sauce, and sesame oil on the shelf, the cost per meal drops dramatically compared to ordering in. A pound of flank steak and a head of broccoli will feed four people for a fraction of what beef and broccoli costs per order. That’s a strong argument on its own — but the flavor is the real reward.