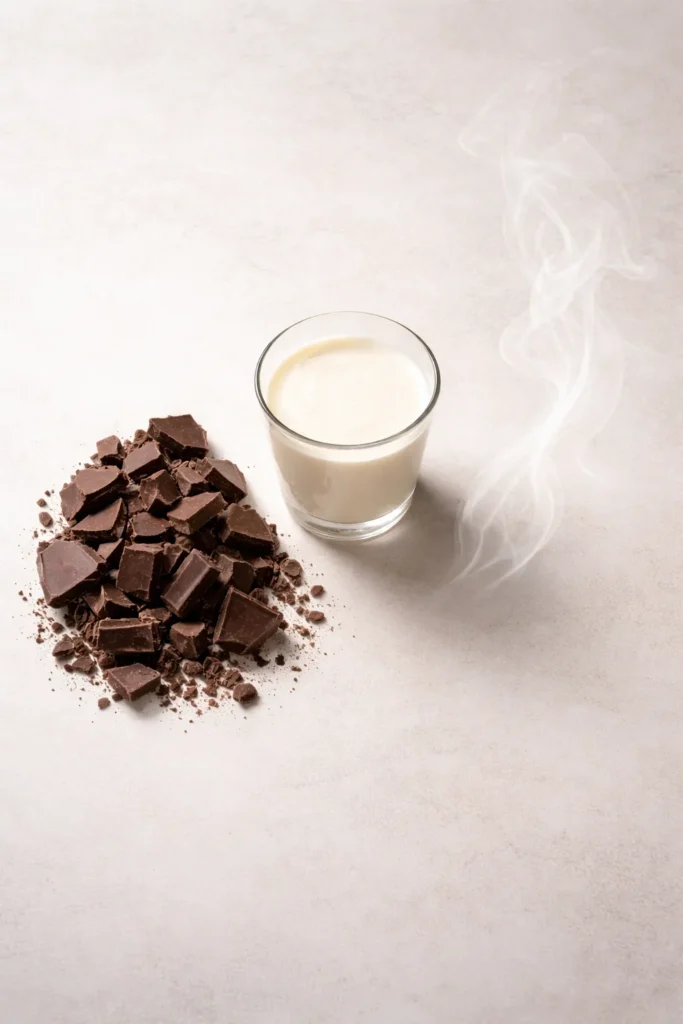
If you’ve ever looked at a dessert topped with a glossy, luxurious chocolate coating and assumed it required fancy techniques and obscure ingredients, I’m about to blow your mind. The truth is, the most elegant chocolate topping in the baker’s arsenal requires only three things: chocolate, cream, and heat. That’s it. No butter, no extracts, no mysterious thickening agents—just pure chocolate magic that comes together faster than you can frost a cake from scratch.
This isn’t some stripped-down compromise version. This is the real thing. Professional pastry chefs have been making ganache this way for decades, and it works because the chemistry is already perfect. When you stop trying to improve on simplicity, you end up with something that tastes and looks significantly better than the complicated alternatives. The ganache sits glossy and smooth on your cake, sets to just the right firmness after cooling, and delivers an intense chocolate experience that feels genuinely indulgent—all from three ingredients you probably already have in your kitchen.
The real breakthrough for anyone eating keto or low-carb is realizing you don’t need to surrender this kind of dessert elegance. You just swap your chocolate to sugar-free varieties, and suddenly you have a topping that works beautifully within your dietary goals while tasting better than most standard recipes. Making this ganache once or twice will cement it as your go-to dessert finish. It’s reliable, forgiving, and honestly faster than mixing up a traditional frosting.
Table of Contents
- What Is Chocolate Ganache and Why It’s So Simple
- Why Three Ingredients Is All You Really Need
- Choosing the Right Chocolate for Your Ganache
- Understanding Heavy Cream and Its Role in Ganache
- The Magic of the Heating Method
- Serving and Timing Information
- Complete Ingredient List
- Step-by-Step Instructions
- Common Mistakes That Ruin Ganache (and How to Fix Them)
- Tips for Getting That Perfect Glossy Finish
- Storage and Make-Ahead Guidance
- Variations and Flavor Adaptations
- Using Your Ganache on Different Desserts
- Troubleshooting Your Ganache Texture
- Final Thoughts
What Is Chocolate Ganache and Why It’s So Simple
Ganache sits in this interesting space between a sauce and a frosting. Depending on how thick you make it, it can drip elegantly over a cake, spread like frosting, or set firm enough to slice. The name comes from French pastry tradition, but the concept is pure simplicity: emulsify melted chocolate with cream, and the fat in both ingredients blends into something silkier than either alone.
The reason this works so well is chemistry. Chocolate contains cocoa butter (fat), and heavy cream is mostly fat suspended in water. When you melt chocolate and add hot cream at the right temperature, the two fats merge into a stable emulsion. The heat loosens the chocolate enough to flow smoothly, and the water content in the cream carries the chocolate particles. As everything cools, the cocoa butter sets slightly, and you get a texture that’s dense but not grainy, glossy but not runny.
For keto baking, this matters even more than in traditional recipes. Sugar-free chocolate needs that cream to achieve the right texture—it won’t have the same smooth melting point as regular chocolate. The cream does the heavy lifting, making the difference between ganache that sets like fudge and ganache that stays grainy or separated. It’s not optional; it’s essential for how these specific chocolates behave.
The simplicity isn’t accidental laziness. It’s actually the most sophisticated approach. When you’re working with only three ingredients, every single one has to earn its place. There’s nowhere to hide flaws, and there’s no masking agents to smooth over poor chocolate quality. This is why professional bakers often make ganache this way—it’s a purity test for ingredient quality, and when everything is good, the result is undeniably beautiful.
Why Three Ingredients Is All You Really Need
You’ll encounter ganache recipes with butter, salt, vanilla extract, espresso powder, and various other additions. Some of these add genuine value; others are solutions looking for problems. Let’s be honest about what each extra ingredient actually does, so you can decide if you want them.
Butter gets added sometimes because it creates a slightly shinier finish and a slightly firmer set. Here’s the thing: if you’re using quality keto chocolate and the right cream-to-chocolate ratio, you don’t need it. The chocolate and cream already provide all the fat you need for that glossy appearance. Butter is genuinely helpful when you’re making ganache with certain difficult chocolate brands that won’t set smoothly—but with good chocolate, it’s optional at best.
Salt enhances chocolate’s flavor by sharpening the perceived sweetness and deepening the cocoa notes. A tiny pinch genuinely improves the final taste. But again, this is an enhancement, not a necessity. If your chocolate is already high-quality with good cocoa flavor, your ganache will taste excellent without it. If you do add salt, use a delicate hand—just a pinch on top of your measure.
Vanilla extract or other flavorings introduce flavors that compete with chocolate rather than complement it. In a three-ingredient ganache, chocolate is the whole point, and adding vanilla muddies that intention. Save the extracts for when you’re deliberately making flavored variations—not for the base recipe.
The reason to keep your base recipe minimal is actually tactical. When you nail the three-ingredient version, you understand the technique deeply. You know exactly how thick your cream-to-chocolate ratio creates, you understand cooling times, you recognize the window for pouring versus spreading. Once you master that foundation, adding variations becomes creative rather than compensatory. You know what you’re changing and why.
There’s also a practical kitchen advantage: fewer ingredients means fewer opportunities for things to go wrong. No emulsification problems from competing fats. No weeping or separation from too much liquid. No grittiness from powdered sweeteners that didn’t fully dissolve. It’s just chocolate, cream, and straightforward chemistry.
Choosing the Right Chocolate for Your Ganache
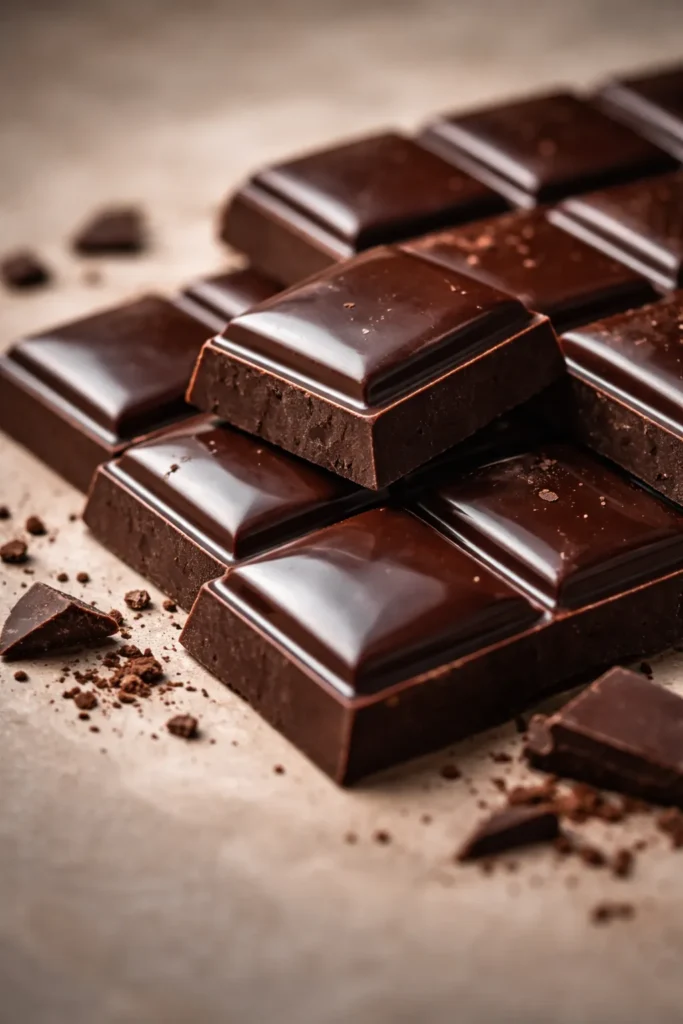
This choice matters more than anything else in your recipe. The chocolate’s texture, sweetness, cocoa butter content, and emulsifier profile will determine whether your ganache turns out silky or grainy, glossy or dull, perfectly spreadable or too soft or too stiff.
For keto chocolate, you have several brands available, and they genuinely behave differently. Lily’s brand chocolate chips (particularly their semi-sweet and dark options) melt smoothly and set with a lovely sheen. ChocZero creates chips that are extremely low-carb but can be trickier to work with—they tend to require slightly more cream and produce a different texture than Lily’s. Bake Believe chips fall somewhere in the middle. Your choice isn’t about which brand is objectively “best”—it’s about which one is most readily available to you and which ratio works best with the specific brand you choose.
The cocoa percentage matters here. Higher percentage chocolate (like 85% or 90% cacao) creates a more intensely chocolatey ganache that’s slightly stiffer when set. Lower percentage chocolate (like 55% or 60% cacao) makes a softer, more creamy ganache. For cakes, the semi-sweet range (around 55-62% cacao for keto brands) gives you the best balance—it sets firm enough to hold a smooth topping but soft enough to cut and eat cleanly.
Consistency of the chocolate base matters too. Some people prefer starting with chocolate chips (easier to measure and faster to melt). Others insist on chopped chocolate bars for a slightly different final texture. For keto, sugar-free chocolate chips are genuinely easier to work with than trying to chop a bar. The chips are already in small pieces, they melt consistently, and they cost about the same per ounce.
One critical point: check the ingredient list, not just the carb count. Some sugar-free chocolates are sweetened with erythritol or xylitol, which can create grittiness as they cool and recrystallize. Others use allulose or monk fruit, which dissolve more cleanly. For ganache specifically, you’ll have better luck with chocolates that use allulose or monk fruit as their primary sweetener. This seems like a small detail, but it makes the difference between a glossy, smooth ganache and one that develops a slightly grainy texture after a day or two.
The cocoa butter content matters even more than marketing claims. Real cocoa butter is what creates that smooth melting sensation. Some cheap sugar-free chocolates replace cocoa butter with other fats that don’t behave the same way when heated and cooled. Higher-quality chocolate brands—even their sugar-free lines—maintain proper cocoa butter content, and your ganache will reflect that investment immediately.
Understanding Heavy Cream and Its Role in Ganache
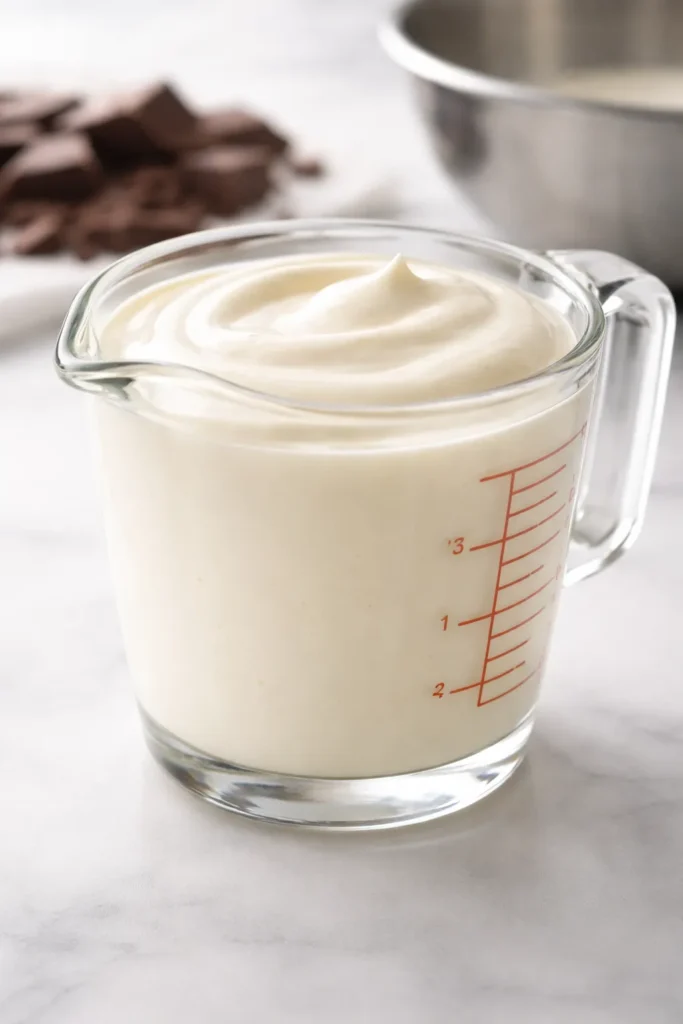
Heavy cream (also called heavy whipping cream) is not interchangeable with other creams. The percentage of fat in the cream directly affects how your ganache sets and tastes.
Heavy cream contains 36-40% butterfat. This is crucial. Half-and-half (which is only 10-12% fat) will not work—the ganache becomes too thin and won’t set properly. Light cream (20% fat) still isn’t enough. Whipped cream is often stabilized with added ingredients that will interfere with emulsification. Regular milk won’t work at all. You need the high fat content of heavy cream, and you need it to be unsweetened and free of stabilizers. When you see recipes that claim you can substitute almond milk or coconut milk, they’re usually recommending you add butter or oil to compensate—which means you’re back to multiple ingredients.
For keto and dairy-free variations, canned full-fat coconut cream (the thick stuff that separates at the top of a can) does work beautifully. The fat content is similar, and it creates a ganache with a slightly different flavor profile—earthier, less sharp—but equally smooth and glossy. If you go this route, use the cream from a can of full-fat coconut milk (chill the can first, scoop off the hardened cream, discard the watery liquid), or buy coconut cream in a carton. Just verify the fat percentage is 10% or higher.
The temperature of your cream matters significantly. When you heat the cream before adding it to chocolate, you’re not just warming the mixture—you’re opening up the fat globules and making them easier to blend with the chocolate. If your cream is cold when it touches the chocolate, it may cause the chocolate to seize and separate. The cream needs to be steamy and hot (but not boiling) when it contacts the chocolate. You’ll see small bubbles forming around the edges, maybe some steam, but the cream should never actually boil and foam over.
The ratio of cream to chocolate determines your final texture. A 1:2 ratio (one part cream to two parts chocolate) creates a thicker ganache that sets quite firm—perfect for a frosting that you’ll pipe or spread. A 1:1 ratio (equal parts) gives you a ganache that’s thicker than a sauce but thinner than frosting—perfect for pouring over cakes and letting it set smoothly. A 2:3 ratio (two parts cream to three parts chocolate) creates something in between. You’ll adjust based on your chocolate brand and your intended use.
The Magic of the Heating Method
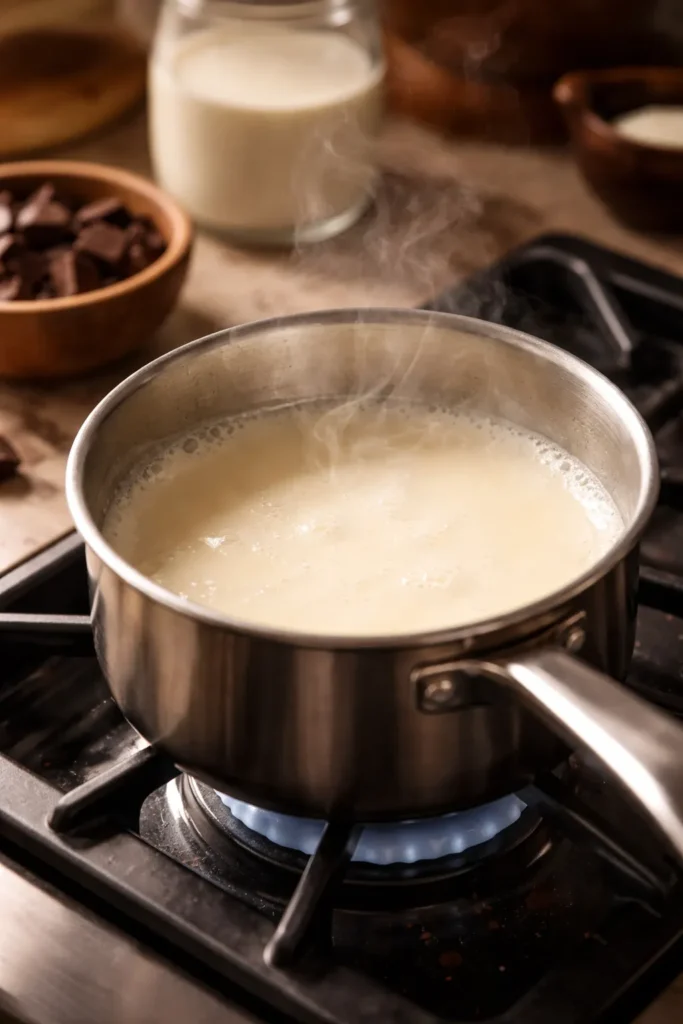
How you heat your cream determines whether you get smooth ganache or separated, grainy mess. The traditional method—heating cream in a small saucepan on the stove—gives you the most control because you can watch it happen in real time.
Pour the cream into a small saucepan and place it over medium-low heat. You’re not trying to boil the cream; you’re just heating it until it’s very hot and steaming, with small bubbles forming around the edges. This usually takes 3-4 minutes. The moment you see steam and bubbles starting, remove the pan from heat immediately. You want the cream hot enough to melt chocolate through residual heat, not so hot that it boils aggressively.
Some people prefer the microwave method, especially if they’re making a small batch. Pour the cream into a microwave-safe bowl, heat on high for 30-45 seconds (for ½ cup of cream), then stop and check it. The cream should be steamy and hot to the touch, maybe with a few bubbles starting to form. If it needs more time, heat in additional 10-second bursts. Be careful here because cream can boil over in the microwave suddenly—it’s easier to heat incrementally than to start over if you’ve overheated it.
There’s also the double boiler method, which is more involved but extremely reliable. Place a heatproof bowl on top of a pot of simmering water (the bowl shouldn’t touch the water). Pour your cream into the bowl and heat gently until steaming. This takes longer but prevents any risk of scorching.
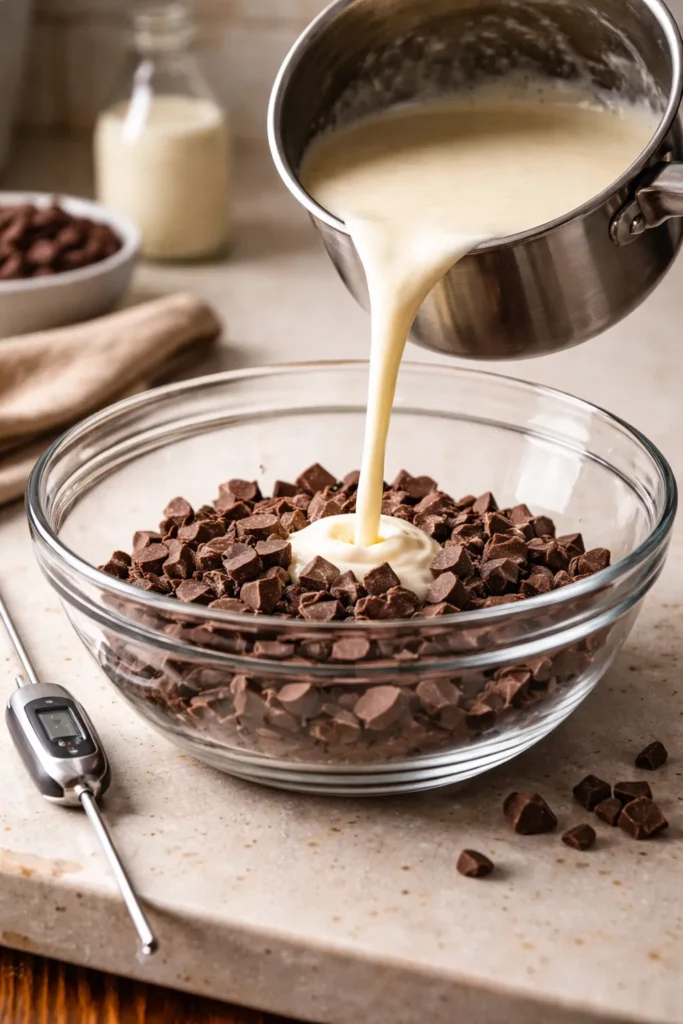
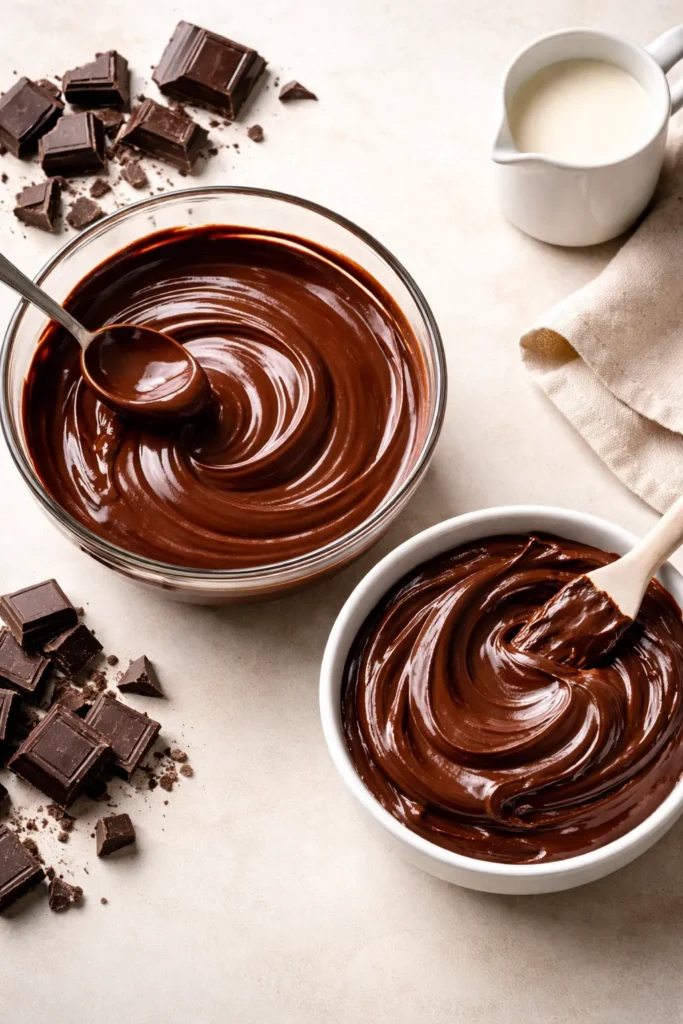
The critical moment is when you combine hot cream and chocolate. Pour the hot cream directly over your chopped chocolate (which should be sitting in a heatproof bowl). Don’t stir immediately. Let it sit for one to two minutes. This resting period lets the heat gently melt the chocolate before you add any agitation. If you stir too early, you risk creating small lumps of unmelted chocolate that won’t integrate smoothly.
After the rest, stir slowly and gently, moving from the center outward. Don’t whisk vigorously, which whips air into the mixture. Use a spatula or wooden spoon and stir with steady, deliberate motions until all the chocolate is melted and the mixture is glossy and smooth. If you’ve done everything right, this should take only 30 seconds to one minute of stirring.
Serving and Timing Information
Yield: Makes approximately 1¼ cups of ganache (about 10 servings of 2 tablespoons each) | Enough to top one 8-9 inch round cake or 12 cupcakes
Prep Time: 5 minutes (chopping chocolate)
Cook Time: 5 minutes (heating cream and combining)
Total Time: 10 minutes active + 20-30 minutes cooling (depending on thickness desired)
Difficulty: Beginner — This recipe requires no special equipment and the steps are truly straightforward. Even if you’ve never made ganache before, the technique is foolproof when you follow the basic rules about temperature and resting time.
Complete Ingredient List

For the Ganache:
- 8 ounces sugar-free or unsweetened chocolate chips (approximately 1⅓ cups, roughly 227 grams)
- ½ cup heavy whipping cream (118 ml)
- Pinch of fine sea salt (optional but genuinely recommended—it deepens chocolate flavor)
Notes on chocolate: Use quality sugar-free chips like Lily’s brand, or chopped sugar-free chocolate bars. Alternatively, use 8 ounces of unsweetened baking chocolate (such as Ghirardelli 100% cacao), which requires no added sweetener beyond what’s already in your keto chocolate chips. If using unsweetened baking chocolate, add ¼ cup allulose or monk fruit blend sweetener to achieve the desired sweetness.
Alternative for dairy-free: Substitute heavy whipping cream with the same volume of full-fat canned coconut cream (the solid cream from a chilled can of full-fat coconut milk, not the water portion).
Step-by-Step Instructions
Prepare Your Equipment:
-
Place your chocolate chips into a medium-sized heatproof bowl that can sit stably on a counter—you’ll be pouring hot cream into this, so avoid anything with a narrow base that might tip. A stainless steel or glass bowl works best; avoid plastic, which can retain heat and affect chocolate temperature.
-
If using chocolate chips that are large or uneven in size, chop them slightly finer with a knife. You want pieces roughly the size of a raisin. This increases surface area and helps the chocolate melt faster and more evenly from the residual heat of the cream.
-
Set everything else aside: your cream in its container, a reliable thermometer (optional but helpful), a sturdy spoon or heatproof spatula, and a measuring cup.
Heat the Cream:
-
Pour the ½ cup of heavy whipping cream into a small saucepan and place it over medium-low heat. Do not walk away—you need to watch this carefully.
-
Heat the cream for approximately 3-5 minutes. You’re looking for the moment when you see visible steam rising and small bubbles starting to form around the edges. The cream should be hot to the touch if you dip a clean spoon into it (around 160-180°F / 70-80°C if you’re using a thermometer). Stop heating the moment you see these bubbles begin; do not let the cream come to a rolling boil.
-
Immediately remove the saucepan from heat. The cream will continue to get slightly hotter from carryover cooking, which is fine and actually desirable.
Combine Cream and Chocolate:
-
Pour the hot cream directly over your prepared chocolate chips. Pour slowly and steadily, making sure all the chocolate gets covered by cream. The chocolate will look dull and unmolten—this is correct.
-
Do not stir yet. Cover the bowl loosely with a kitchen towel or a plate and let everything sit undisturbed for exactly 2 minutes. This is non-negotiable time. The heat from the cream is gently melting the chocolate from the outside in, and this resting period ensures even melting without the chocolate overheating or separating.
-
After 2 minutes, remove the cover and examine the chocolate. Most of it should look wet and slightly glossy on the surface, even if it’s not completely melted. This is the perfect point to start stirring.
Create the Ganache:
-
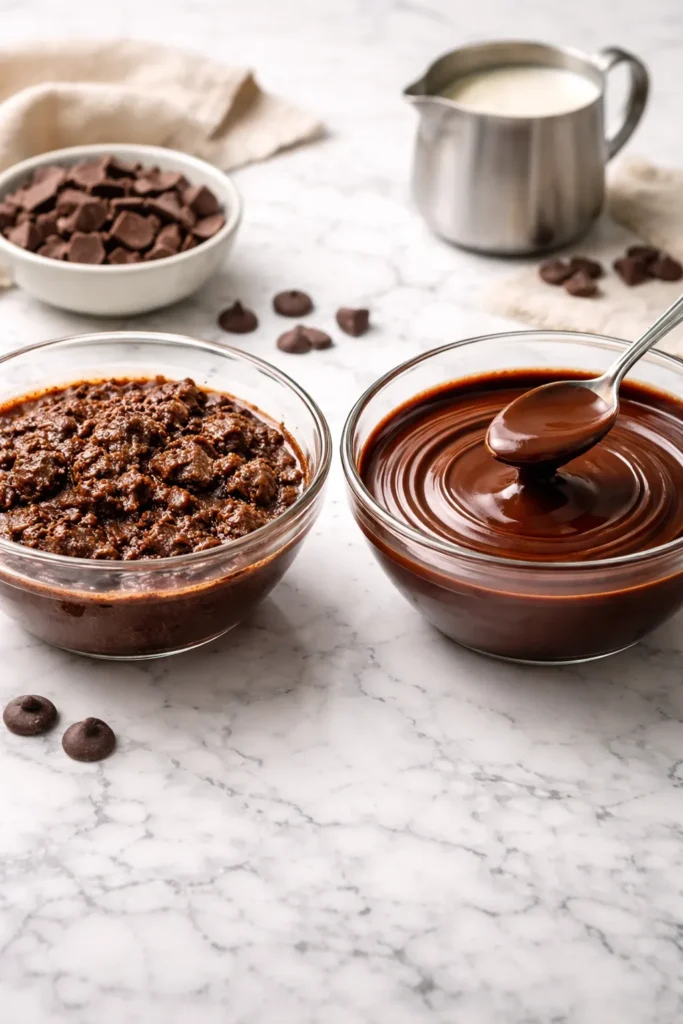
Using a spatula or wooden spoon, begin stirring slowly and deliberately from the center of the bowl, moving outward in a circular motion. Don’t whisk or beat vigorously—the goal is smooth integration, not aeration. Stir with steady, confident motions.
-
Continue stirring for 30-60 seconds until all visible chocolate chunks have disappeared and the mixture is uniformly glossy and smooth. The ganache should look like thick hot fudge—darker than the melted chocolate alone, glossy, and completely homogeneous.
-
If any small unmelted chocolate pieces remain (usually due to cold spots in your heatproof bowl), place the bowl in the microwave on 50% power for 10 seconds, remove it, and stir again. Repeat once if needed, but usually, this isn’t necessary.
-
If you’re adding the optional pinch of salt, stir it in now while the ganache is still warm.
Cool to Your Desired Consistency:
-
At this point, your ganache is ready to use. You can pour it warm over a cake (where it will set to a glossy finish as it cools), or let it cool to room temperature first for a thicker consistency that you can spread with a spatula or pipe through a pastry bag.
-
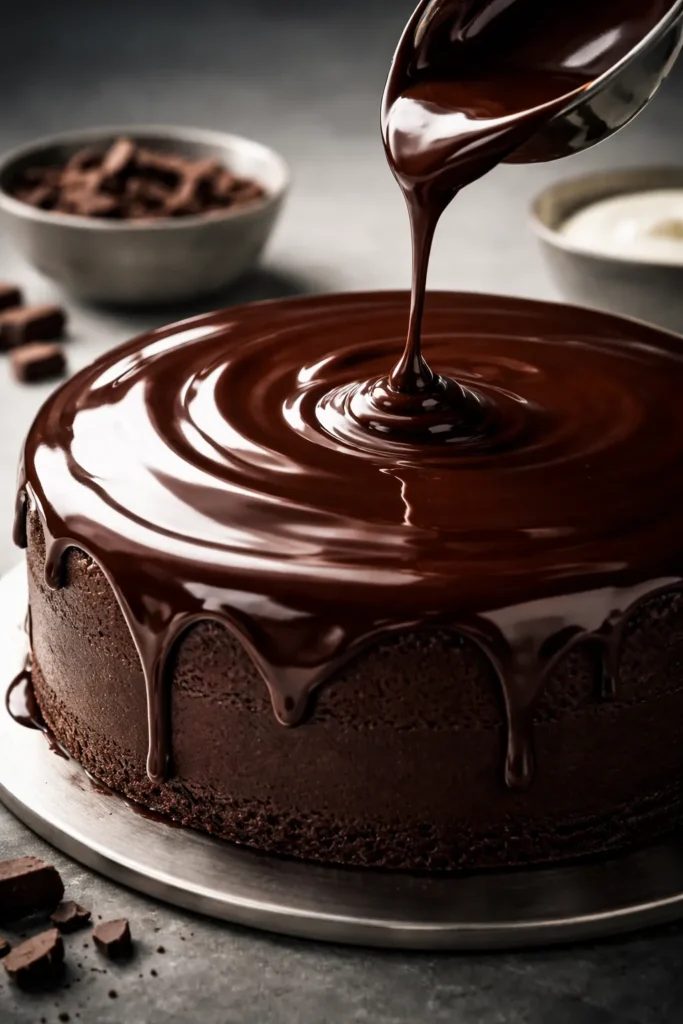
If you’re pouring ganache over a cake: Use it immediately while it’s warm (ideally between 100-110°F / 38-43°C) and at its thinnest, most pourable consistency.
-
If you’re spreading or piping: Let the ganache cool at room temperature for 20-30 minutes, stirring occasionally, until it reaches a consistency similar to thick pudding—thick enough to hold a shape but still soft enough to work with a spatula or piping bag.
-
If making ahead: Allow ganache to cool to room temperature, then transfer to an airtight container and refrigerate for up to 5 days. Reheat gently before use (see storage section below).
Common Mistakes That Ruin Ganache (and How to Fix Them)
Mistake: Water getting into your ganache. Even a tiny amount of water can cause chocolate to seize, becoming thick, grainy, and lumpy. Water breaks down the cocoa butter, causing the fat particles to clump. This is why you need to make sure your bowl is completely dry before adding chocolate, your spoon is dry before stirring, and you never get condensation dripping from a cover into your ganache.
How to fix it: If your ganache looks grainy or separated, you can often rescue it by adding more cream, one tablespoon at a time, and whisking gently. Sometimes the seized chocolate will smooth out as more fat is introduced. If it’s completely hopeless, strain it through a fine-mesh strainer to remove the lumps, and use it as a thin glaze instead of frosting. You’ve learned something valuable about your technique for next time.
Mistake: Boiling the cream instead of gently heating it. When cream boils aggressively, the water content increases relative to the fat, and you end up with a too-thin ganache that won’t set properly. Boiling also can overheat the chocolate, causing the cocoa butter to separate and the ganache to become grainy.
How to fix it: Let the ganache cool for 10 minutes and see if it thickens as it reaches room temperature. If it’s still too thin, add more finely chopped chocolate (start with an ounce) and gentle heat from the microwave at 50% power in 10-second bursts until it melts and incorporates. Each ounce of chocolate you add will thicken the ganache noticeably.
Mistake: Stirring too early or too vigorously. If you stir immediately after pouring cream into chocolate, you create small lumps of unmelted chocolate that never fully integrate. Vigorous whisking whips air bubbles into ganache, creating a dull, mousy texture instead of the glossy finish you want.
How to fix it: If you’ve stirred too much and aerated the ganache, let it settle for 10 minutes and the air bubbles will mostly disperse. If lumps have formed, stop stirring immediately and let the ganache rest for another minute before trying again with slower, more deliberate motions.
Mistake: Using the wrong cream. Half-and-half, light cream, or milk won’t work because the fat content is too low. The chocolate won’t fully emulsify, and you’ll end up with a thin, separated mixture.
How to fix it: If you’ve already started and realized your mistake, you can add butter (1 tablespoon per cup of ganache) to increase the fat content and help salvage it. Melt the butter gently and whisk it in slowly. This changes your three-ingredient recipe into four, but it will work.
Mistake: Letting ganache get too hot or too cold before using. If ganache is too hot (above 120°F / 49°C), it’s runny and won’t set properly on a cake. If it’s too cold (below 80°F / 27°C), it becomes thick and difficult to pour or spread smoothly.
How to fix it: Reheat in 10-second microwave bursts at 50% power, stirring between each, until you reach the right temperature (around 100°F / 38°C for pouring, or room temperature for spreading). Or gently warm a spoon in hot water and use it to transfer warm ganache over cool ganache, gradually bringing the temperature back up.
Tips for Getting That Perfect Glossy Finish
The shine on ganache comes from undisturbed cocoa butter that’s set in its most orderly crystalline structure. You create this by cooling ganache without agitation and not introducing air bubbles while it sets.
Never whisk or beat ganache once it’s been combined. That stirring step to combine cream and chocolate is the only vigorous stirring your ganache gets. After that, if you need to stir anything back in, use the slowest, gentlest motions possible.
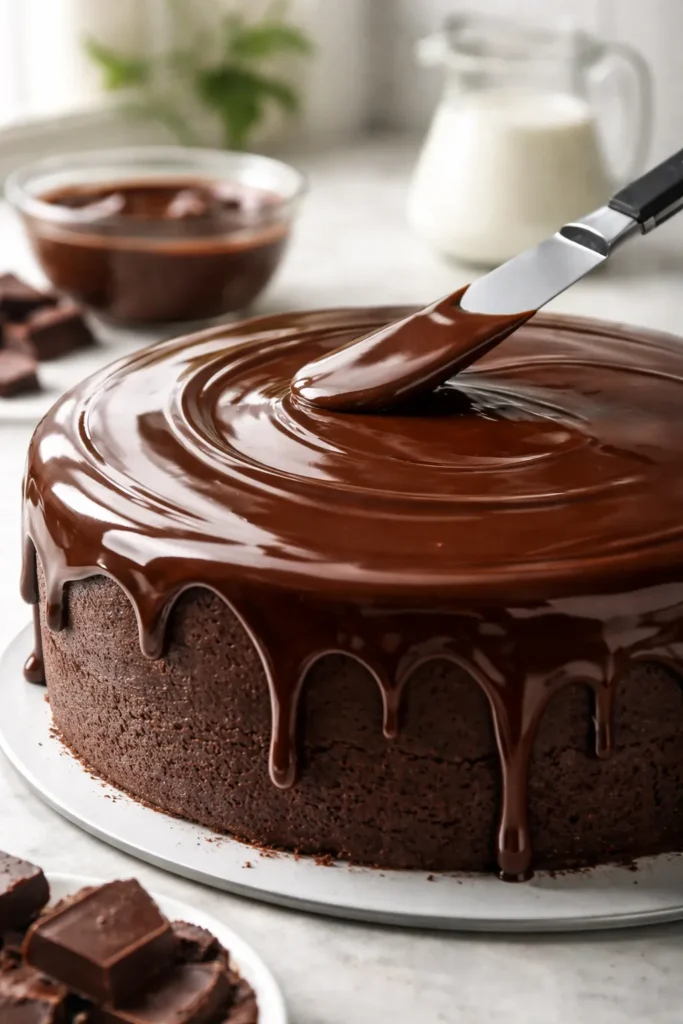
Let ganache cool undisturbed. If you’re pouring it over a cake, pour it and walk away. Don’t smooth it or fuss with it while it’s setting. The glossy finish develops as the cocoa butter sets naturally.
Use a quality spatula if you need to spread it. An offset spatula or an angled bench scraper, lightly warmed under hot water and dried, lets you spread ganache with minimal friction. Dip the warm spatula in hot water between strokes, dry it on a kitchen towel, and make long, smooth passes. This keeps the surface undisturbed as much as possible.
Pour at the right temperature. If ganache is too hot when you pour, it stays glossy longer but may run off edges. If it’s too cool, it becomes hard to pour and may leave tool marks as it sets. The sweet spot is usually around 100-110°F—warm enough to pour smoothly, cool enough to start setting as soon as it hits the cake.
Humidity and temperature affect gloss. On humid days, ganache takes slightly longer to develop its full shine, and it may never be quite as dramatic as on dry days. On very cold days, ganache sets faster and sometimes develops a slightly matte finish. This is just chemistry—there’s nothing wrong with it, just accept that conditions affect outcomes.
Storage and Make-Ahead Guidance
Ganache stores remarkably well because of its high fat content and the absence of eggs or dairy-specific spoilage risks. This makes it perfect for advance preparation.
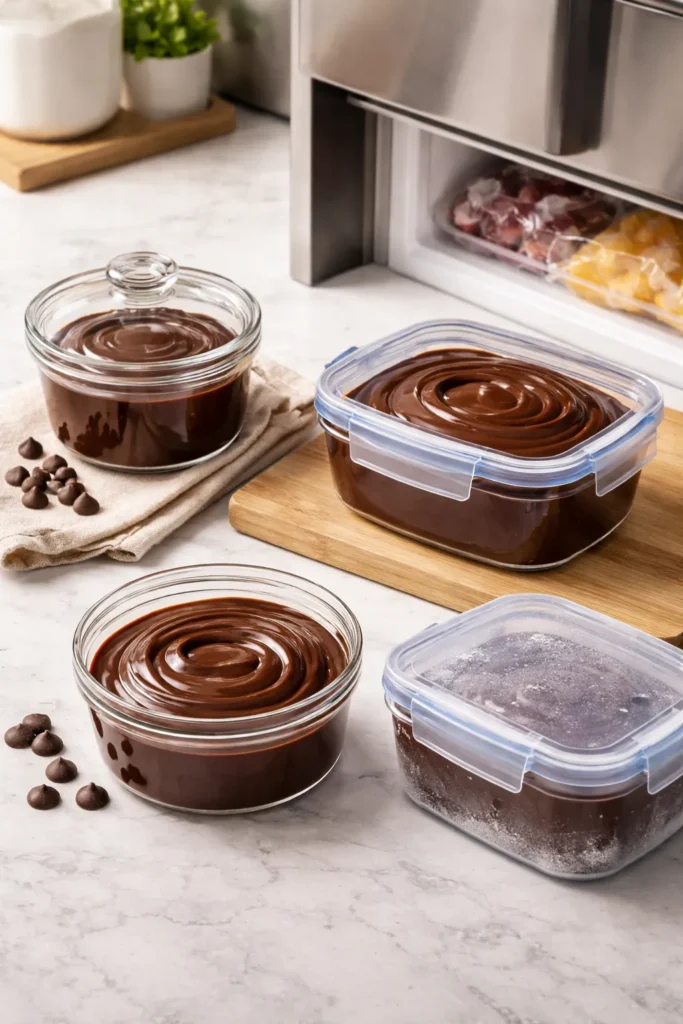
Room temperature storage: Covered ganache can sit on your counter for up to 3 days in a cool kitchen (below 70°F / 21°C). If your kitchen is very warm, refrigerate it instead. It stays smooth and spreadable at room temperature, making it easier to work with than cold ganache.
Refrigerator storage: Ganache keeps covered in the fridge for up to 10 days. The cocoa butter will set harder when cold, creating a firmer texture. This is actually useful if you want to scoop ganache into truffles or use it as a firm frosting.
Freezer storage: Transfer ganache to a freezer-safe airtight container and freeze for up to 2 months. The texture remains stable through freezing because the fat doesn’t separate. Thaw in the refrigerator overnight before using.
Reheating ganache: The beautiful thing about this recipe is that ganache is completely reversible. If it’s cooled and you need it warm and pourable again, simply reheat it gently. For ½ cup of ganache, microwave on 50% power for 15-20 seconds, stirring between intervals, until it reaches the right temperature. Alternatively, place the bowl over a pot of gently simmering water and stir until it reaches the desired consistency.
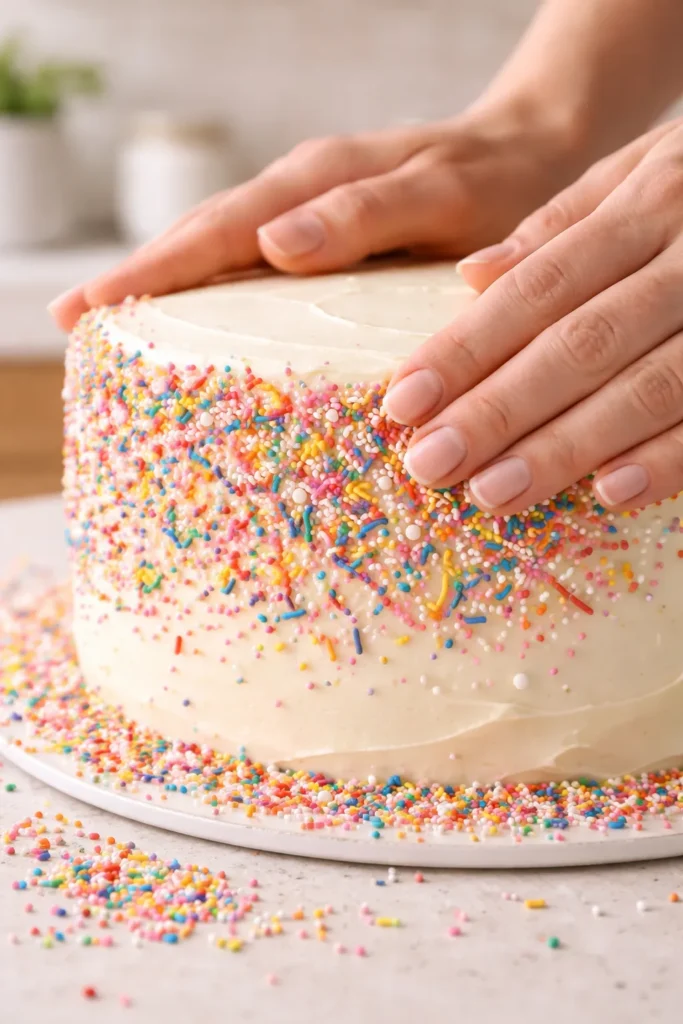
Make-ahead for cakes: You can make ganache up to 3 days before frosting your cake. Store it at room temperature (covered) or in the fridge. Reheat gently to the right pouring temperature, frost your cake, and let the ganache set. For better visual appeal, frost the cake the same day you’ll serve it—ganache develops its maximum gloss within the first 24 hours of setting.
Layering cakes in advance: If you’re making a layer cake with ganache as both a filling and a topping, you can apply the filling ganache when it’s cooler and thicker (almost frosting consistency), layer your cakes, refrigerate overnight, then apply warm ganache as the final glaze the next day. This actually looks better because each layer sets properly before the next one is added.
Variations and Flavor Adaptations
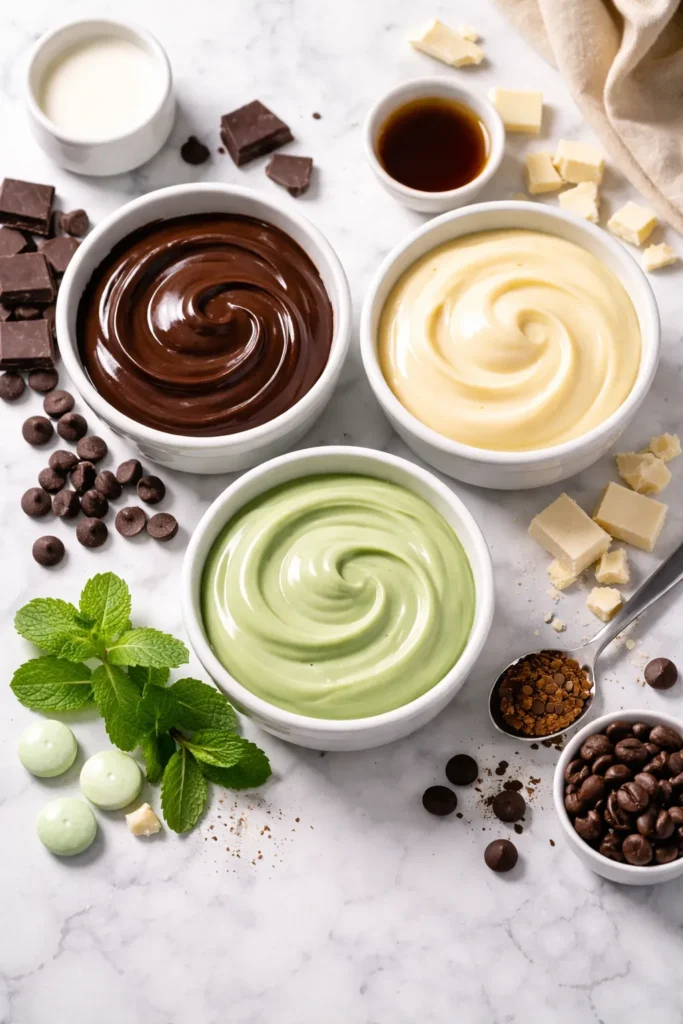
Once you’ve mastered the basic three-ingredient version, these variations take minutes longer but expand your creative options dramatically.
Mint Chocolate Ganache: Add ⅛ to ¼ teaspoon pure peppermint extract after the chocolate and cream are combined and the ganache is still warm. Start with ⅛ teaspoon, stir well, taste on a spoon, and add more if you want stronger mint flavor. This is beautiful over chocolate cake or brownies.
Espresso Chocolate Ganache: Stir in ½ to 1 teaspoon instant espresso powder dissolved in ½ teaspoon warm water before combining with cream, or whisk the espresso powder directly into the cream while it’s heating. The espresso amplifies the chocolate flavor rather than making it taste like coffee. Perfect with vanilla cake or alongside dark chocolate cake.
Sea Salt Caramel Ganache: Make regular ganache, then drizzle in 2 tablespoons of keto-friendly caramel sauce (like lakanto) while the ganache is still warm, stirring gently. Top with a pinch of fleur de sel. This requires a fourth ingredient (the caramel), but it’s worth it for special occasions.
White Chocolate Ganache: Use white chocolate chips or bars instead of dark chocolate—though these behave slightly differently and need careful temperature control since white chocolate scorches more easily than dark. Use the same cream amount and technique, but heat cream slightly less aggressively and watch the white chocolate carefully. It may need an extra ⅓ to ½ cup of cream to reach the same consistency as dark chocolate ganache.
Raspberry or Strawberry Ganache: Fold in 2-3 tablespoons of seedless berry puree after the ganache has cooled to room temperature and before it’s completely set. This colors and flavors the ganache lightly—beautiful with vanilla cake.
Bourbon or Rum Ganache: Add ½ to 1 teaspoon of bourbon or dark rum after combining, stirring well. Alcohol enhances chocolate flavor and adds a sophisticated complexity. Use sparingly since you want the alcohol to flavor the ganache, not make it taste boozy.
Coconut Ganache: Make the ganache, then stir in ¼ teaspoon pure coconut extract (or omit and just the coconut cream in place of heavy cream does the flavoring). Delicious over chocolate cake or spice cake.
Using Your Ganache on Different Desserts
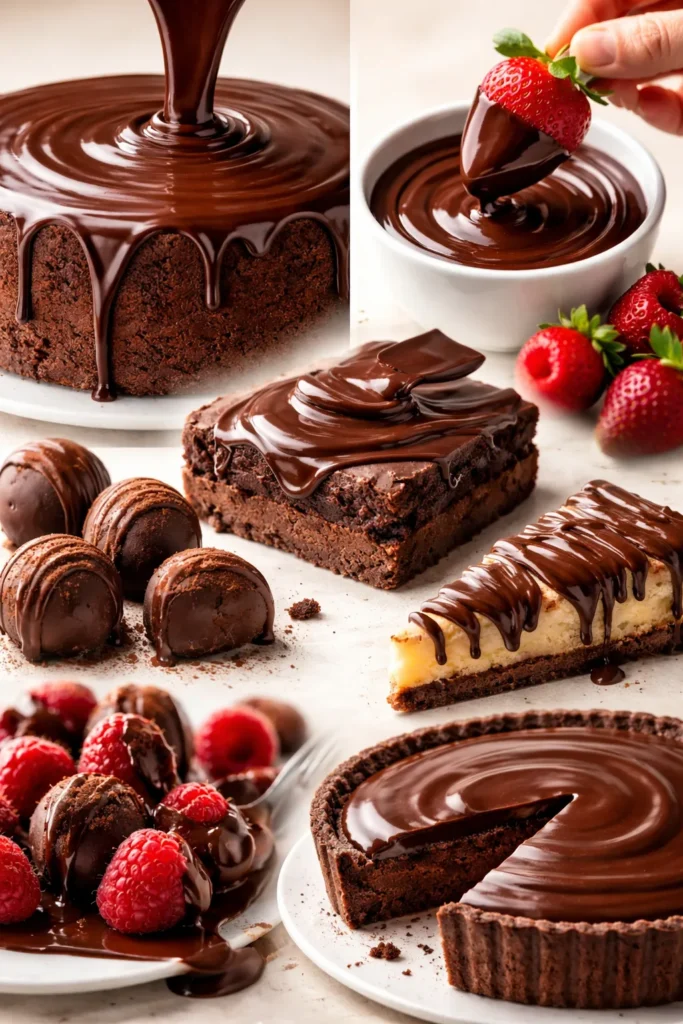
The versatility of ganache is one of its greatest strengths. The same basic recipe works across dozens of applications.
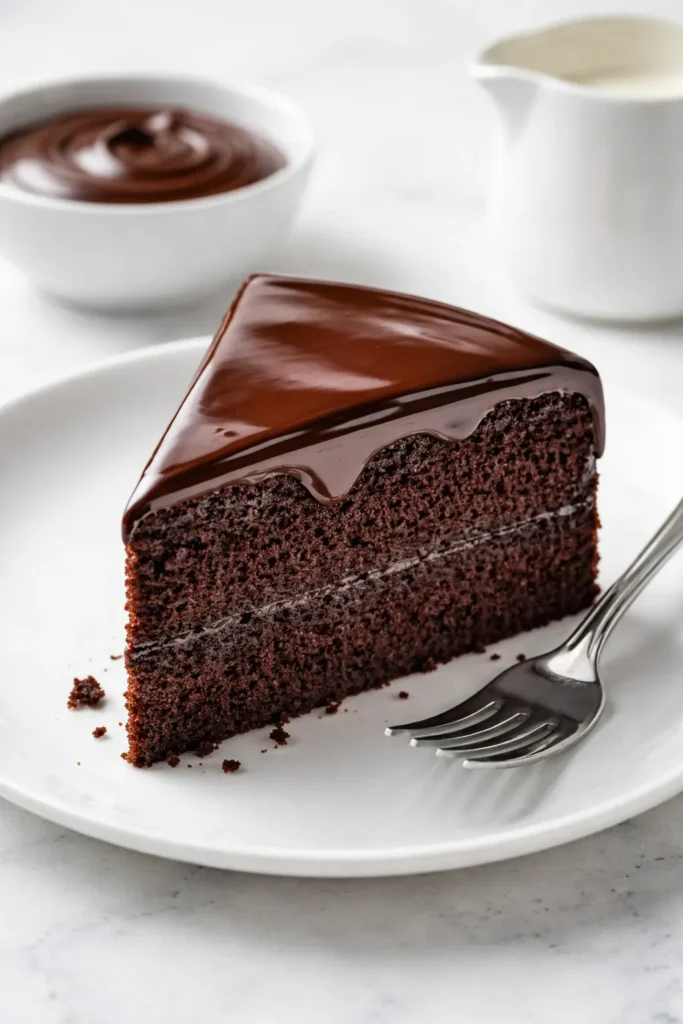
Pouring over cakes: Warm ganache at around 100-110°F pours smoothly and creates a glossy finish that sets evenly. Let it cool for 5 minutes after pouring to prevent running off edges.
Frosting layer cakes: Cool ganache to room temperature so it’s thick like pudding. Use an offset spatula to spread it between cake layers, then apply more as a thin coating on top and sides. You can pipe decorative details if the ganache is chilled until frosting-consistency.
Dipping strawberries or berries: Ganache at room temperature is perfect for dipping. Hold each berry by the stem or with a fork, dip briefly, and set on parchment to set.
Drizzling in patterns: Thin warm ganache slightly (add 1 tablespoon heavy cream per ½ cup ganache) and use a spoon to drizzle artistic patterns over cakes or onto plates for plating.
Making truffles: Cool ganache until firm (refrigerate for 30-60 minutes), scoop into small balls with a melon baller, chill again, then dip in more ganache or melted chocolate, or roll in cocoa powder.
Filling cream pies or cheesecakes: A thick ganache (chilled until firm) can be dolloped or spread over cheesecake or mousse for an elegant finish.
Serving as a sauce: Warm ganache has the consistency of hot fudge sauce—perfect poured over ice cream, layered into parfaits, or served alongside berries and whipped cream.
Brownie or cookie topping: Pour warm ganache over hot brownies right from the oven, or spread cooler ganache on cooled cookies.
Troubleshooting Your Ganache Texture
Different chocolate brands and even different batches of the same brand can behave slightly differently, so understanding how to adjust your ganache is valuable.
Ganache is too thin and runny: This means your chocolate-to-cream ratio needs adjustment. Either add more chocolate (chop it finely, add to the ganache, and gently reheat) or you used too much cream. Next time, measure carefully—weight is more reliable than volume for this reason. If you’ll be using this ganache soon, simply refrigerate it for 15-30 minutes and it will thicken as the cocoa butter sets.
Ganache is too thick and stiff: You either have too much chocolate relative to cream, or your ganache is too cold. If it’s cold, gently reheat in the microwave on 50% power for 10-second intervals. If you made it and it’s just naturally thick, add more cream one tablespoon at a time, warming gently and stirring until you reach the right consistency. Alternatively, accept the thickness—it might be perfect for piping or filling.
Ganache separated and looks curdled: This usually means water got in, or the temperature was too extreme. If it just happened, try adding more cream (one tablespoon at a time, warming gently as you stir) or a small amount of additional melted chocolate to reemulsify. If it’s hopeless, strain it and use as a thin glaze.
Ganache crystallized and looks grainy: This happens with some sugar-free chocolate brands (especially those using erythritol) as the sweetener recrystallizes during cooling. This is cosmetic—the ganache still tastes good. Next time, use a chocolate brand with monk fruit or allulose, or add 1 teaspoon of softened butter to help smooth it. Alternatively, reheat the ganache gently and it will look smooth again, at least temporarily.
Ganache isn’t glossy, looks matte: This is usually environmental—humidity or cold temperatures prevent perfect gloss development. It’s not a problem, just accept that some conditions are less ideal. Or the chocolate quality wasn’t high enough; upgrade to a better brand and the difference will be visible.
Final Thoughts
There’s something deeply satisfying about mastering a technique this fundamental and simple. Once you understand how chocolate, cream, and temperature create ganache, you’ve unlocked a skill that works across hundreds of desserts. You’re not following someone else’s complicated directions anymore—you understand the principle, so you can adapt it for any situation.
The three-ingredient version isn’t a limitation; it’s clarity. Everything that’s beautiful about ganache comes through because there’s nothing competing for attention. The chocolate matters because it’s the only chocolate. The cream matters because it’s the only fat. The temperature matters because there’s no other variable to hide behind.
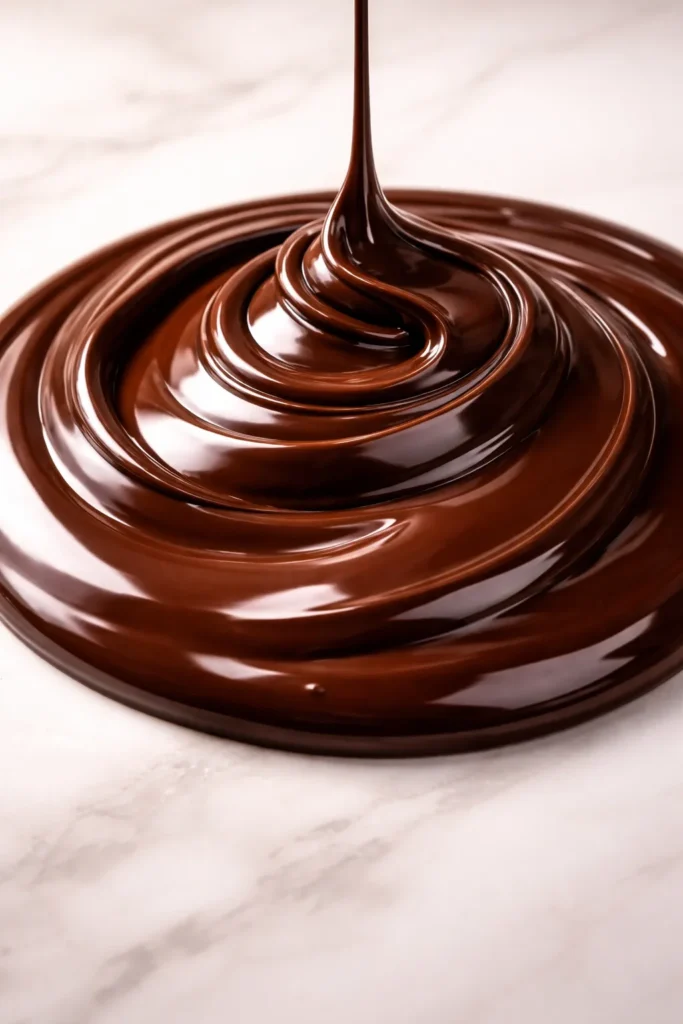
Keep a mental image of what perfect ganache looks like: glossy, smooth, almost black with chocolate, flowing like silk when warm and setting cleanly when cool. That image is your guide. Once you’ve made it once or twice, you won’t need to look up temperatures or timing—you’ll recognize the moment when steam and bubbles say “time to pour,” when two minutes of resting is finished, when the ganache has transformed from two ingredients into something transcendent.
Your next cake deserves this. It’s faster than you think, more impressive than you’d expect from three ingredients, and once you get comfortable with it, you’ll find yourself making it weekly. That’s not hype—that’s just what happens when you solve the problem of how to top desserts elegantly, reliably, and with almost no effort.