Baking muffin bread in a loaf pan opens up a world of possibilities that go beyond traditional muffin tins. While muffins baked in individual cups are undeniably charming, there’s something wonderfully practical and satisfying about pulling a complete loaf from the oven, slicing it, and serving thick pieces that feel more substantial and shareable. The beauty of muffin bread is that it takes the exact same beloved batter—soft, tender, loaded with mix-ins—and transforms it into a format that’s easier to portion, store, and gift. But here’s where it gets interesting: the pan itself, the oven temperature, the baking technique, and even the rising method can all be tweaked to achieve different results. Some methods give you a tender crumb with a delicate, cakey texture. Others create a more substantial bread with a pronounced, craggy top. A few leverage extended cold fermentation to deepen flavor and improve texture in ways that quick baking simply cannot.
If you’ve been curious about converting your favorite muffin recipes to loaves, or you want to explore different baking approaches to get exactly the result you’re after, this guide walks you through seven distinct methods. Some are foolproof and beginner-friendly. Others involve slightly longer timelines but reward you with superior flavor and texture. All of them work beautifully, and by the end, you’ll know exactly which approach fits your schedule, your ingredient pantry, and your desired final product.
Table of Contents
- 1. Classic Quick Bread Method at Lower Temperature
- 2. Higher Heat Method for Pronounced Tops and Crispy Edges
- 3. Steam-Trap Method Using Covered Pans
- 4. Pan-of-Water Method for Enhanced Rise and Moisture
- 5. Cold Fermentation Overnight Method for Deeper Flavor
- 6. No-Fail Box Muffin Mix Method for Quick Convenience
- 7. Single-Bowl One-Step Method for Minimal Cleanup
- Tips for Success Across All Methods
- Variations and Flavor Combinations
- Storage, Freezing, and Make-Ahead Tips
- Final Thoughts
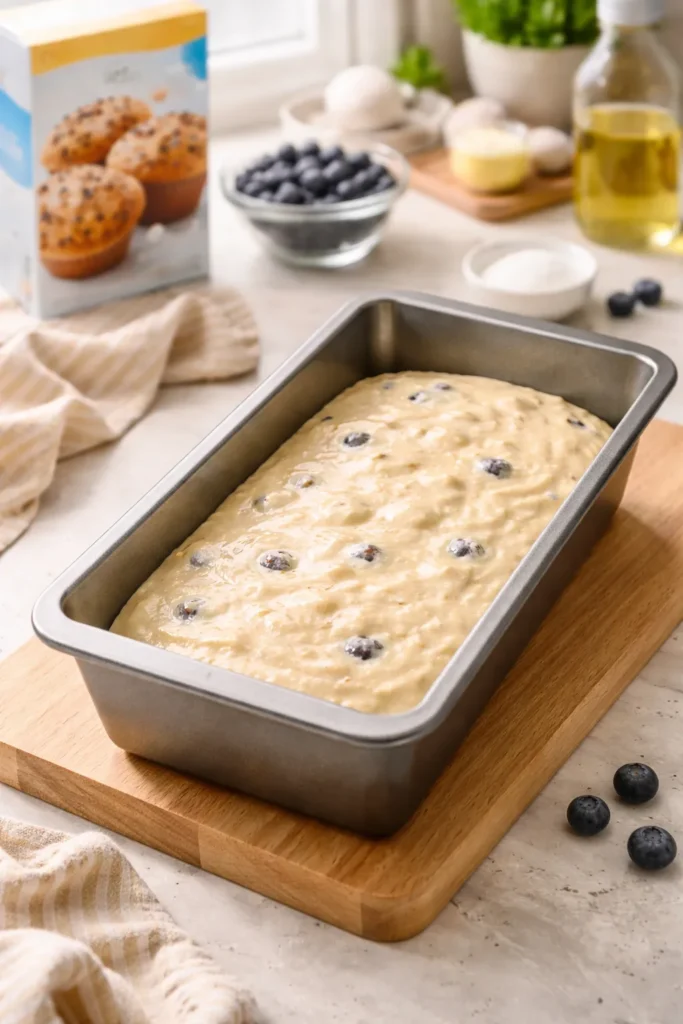
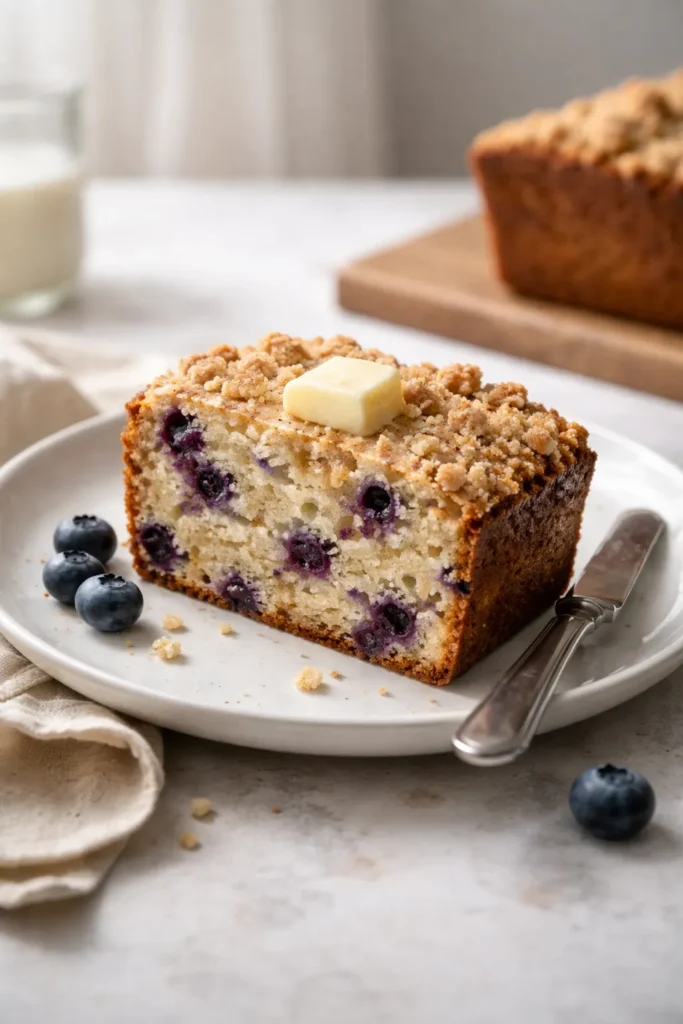
1. Classic Quick Bread Method at Lower Temperature
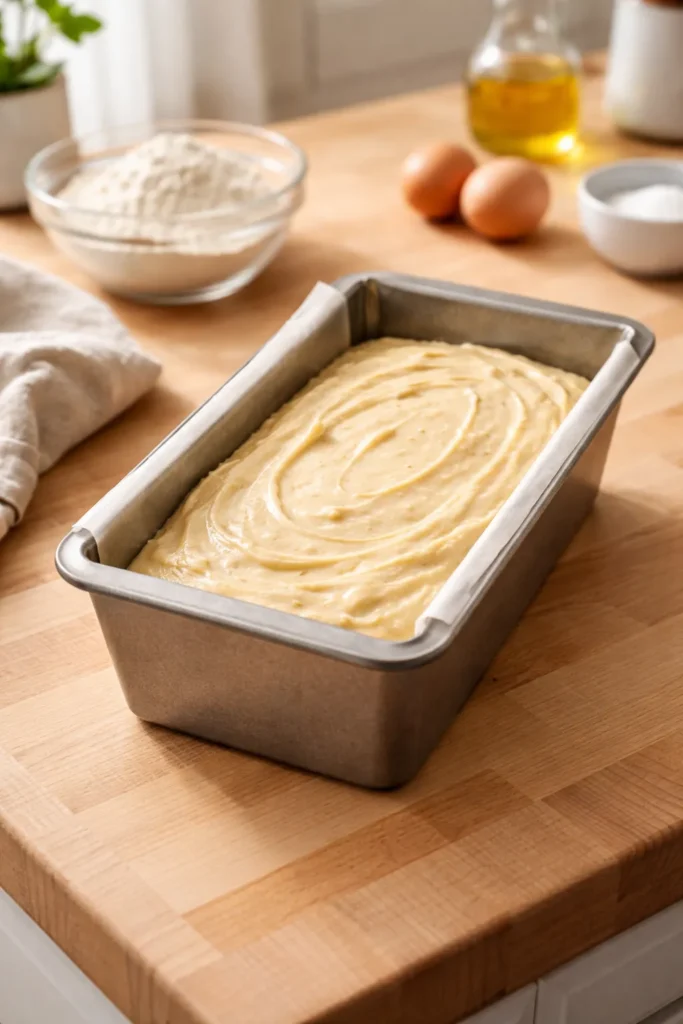
The classic quick bread method is the most straightforward and reliable approach for most home bakers. This technique uses a moderate oven temperature (350°F) paired with a standard baking time of 50–65 minutes, which gives the interior time to bake through completely while developing a gentle, even browning on the outside. It’s the method you’ll find in most published quick bread recipes, and it works remarkably well for converting any 12-muffin recipe into a single loaf.
The reason this temperature works so well relates to how quick breads bake differently from muffins. When batter is spread across individual muffin cups, each one has more surface area exposed to the hot oven air, so they bake and brown relatively quickly—typically in 18–25 minutes at 375–400°F. But a loaf pan concentrates the batter into a thicker mass that requires gentler, slower heat to ensure the center finishes cooking before the exterior burns. Lowering the temperature to 350°F slows the browning process, giving the crumb plenty of time to set through without overbaking the crust.
Yield: Serves 8 to 10 | Makes 1 loaf
Prep Time: 15 minutes
Cook Time: 55 minutes
Total Time: 70 minutes
Difficulty: Beginner — no special equipment or techniques required; this straightforward method produces reliable results every time.
For a Classic Blueberry Muffin Bread:
- 2 cups (250g) all-purpose flour, spooned and leveled
- 1 teaspoon baking soda
- 1 teaspoon baking powder
- ½ teaspoon fine sea salt
- ½ cup (8 tablespoons; 113g) unsalted butter, softened to room temperature
- ⅔ cup (135g) granulated sugar
- ¼ cup (50g) packed light brown sugar
- 2 large eggs, at room temperature
- ½ cup (120g) sour cream or Greek yogurt, at room temperature
- 1½ teaspoons pure vanilla extract
- ⅓ cup (80ml) whole milk, at room temperature
- 1½ cups (210g) fresh blueberries, lightly tossed in 1 tablespoon flour to prevent sinking
Bake the Bread:
-
Preheat the oven to 350°F (175°C) and position the rack in the center. Grease a 9×5-inch loaf pan thoroughly with softened butter or nonstick spray, making sure to coat the corners and sides where the bread is most prone to sticking.
-
In a medium bowl, whisk together the flour, baking soda, baking powder, and salt. Set aside.
-
Using a stand mixer fitted with the paddle attachment (or a handheld mixer), beat the softened butter and both sugars together on medium-high speed for 2–3 minutes, until the mixture is pale, noticeably fluffy, and has increased in volume. This creaming step aerates the batter and contributes to a tender crumb.
-
Add the eggs one at a time, beating well after each addition and scraping down the sides of the bowl to ensure even incorporation. The batter may look slightly curdled after adding the eggs—this is completely normal.
-
On low speed, add the sour cream and vanilla extract, mixing just until combined. Do not overmix at this stage.
-
With the mixer running on low speed, add the dry ingredients in three additions, alternating with the milk in two additions (flour — milk — flour — milk — flour). Begin and end with the dry ingredients. Mix only until each addition just disappears; do not overmix, as this develops gluten and results in a dense, tough crumb.
-
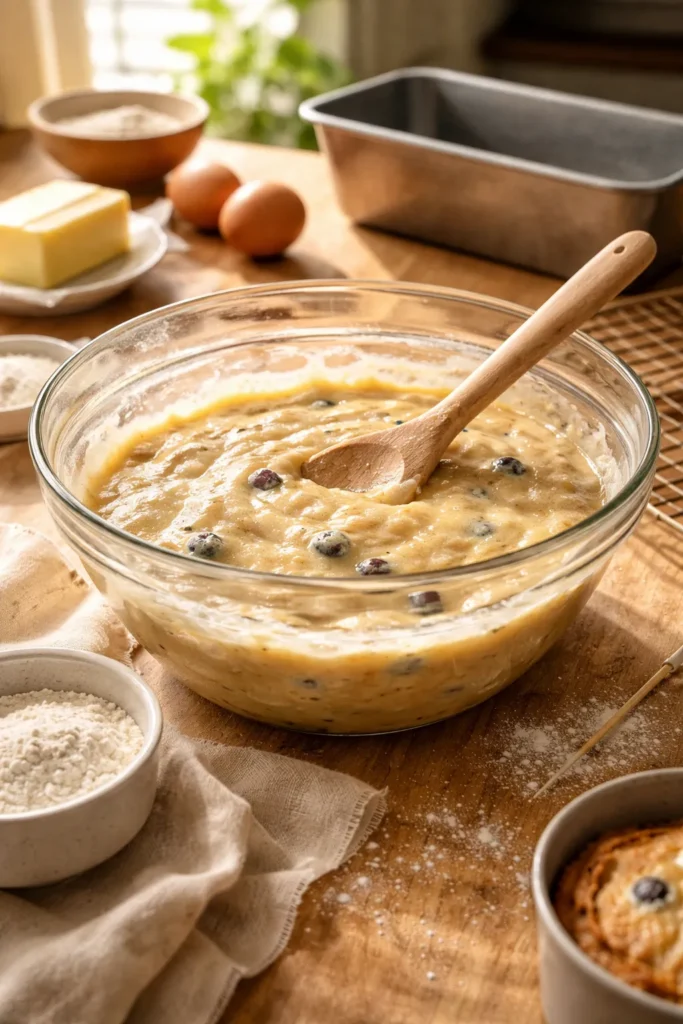
Using a rubber spatula, gently fold in the flour-coated blueberries until evenly distributed throughout the batter.
-
Pour the batter into the prepared loaf pan and smooth the top with an offset spatula, creating an even surface.
-
Bake for 50–65 minutes, rotating the pan halfway through baking, until a toothpick inserted into the very center comes out clean or with just a few moist crumbs clinging to it. The top should be golden brown, and the edges should just begin to pull away from the sides of the pan.
-
Remove the bread from the oven and let it cool in the pan on a wire rack for 15 minutes. Do not remove it from the pan while still warm; the bread is fragile and will crumble. After 15 minutes, run a thin knife around the edges to loosen it, then invert the loaf onto a cooling rack. Cool completely before slicing—at least another 30 minutes.
This method produces a tender, cake-like crumb with gentle browning and a classic muffin-bread texture. The longer, slower bake time allows flavors to develop beautifully, and there’s virtually no risk of an over-baked exterior or an underdone center.
2. Higher Heat Method for Pronounced Tops and Crispy Edges

If you’re after a more dramatic, bakery-style muffin bread with pronounced doming and a distinctly crispy crust, the higher heat method is your answer. This approach starts the bread at a higher temperature (375–400°F) for the first 20–30 minutes to encourage rapid rise and browning, then reduces the heat to allow the interior to finish baking through without burning. The result is a bread with a gorgeous, burnished top, crunchy edges, and a tender crumb—much closer to the muffins you’d buy from an artisan bakery than a soft, cake-like quick bread.
The science here is straightforward: higher oven temperatures cause the batter to set faster on the outside while the inside is still rising. This creates that characteristic doming and craggy texture at the top, much like you get with muffins baked at 375–400°F. By dropping the temperature partway through, you prevent the exterior from over-browning while allowing the thermal energy to penetrate to the center.
This method works best with batters that include a good amount of chemical leavening (baking soda and baking powder both present) and a slightly thicker, less liquid batter. If your muffin recipe is too wet, it may dome excessively and crack. Thicker batters (with a slightly higher ratio of flour to liquid) handle the heat better and reward you with that stunning muffin-top appearance.
Yield: Serves 8 to 10 | Makes 1 loaf
Prep Time: 15 minutes
Cook Time: 45 minutes
Total Time: 60 minutes
Difficulty: Intermediate — the timing is slightly more involved because you’ll adjust the temperature partway through, but the technique itself is straightforward.
Higher Heat Cinnamon Muffin Bread:
- 2 cups (250g) all-purpose flour
- 1 tablespoon baking powder
- ½ teaspoon baking soda
- ½ teaspoon fine sea salt
- ½ cup (100g) granulated sugar
- ¼ cup (50g) packed light brown sugar
- 6 tablespoons (85g) unsalted butter, melted and cooled slightly
- 1 large egg, at room temperature
- ¾ cup (180ml) whole milk, at room temperature
- 1 teaspoon pure vanilla extract
For the Cinnamon-Sugar Topping:
- 3 tablespoons granulated sugar
- 1 teaspoon ground cinnamon
- 1 tablespoon melted butter
Bake with Temperature Control:
-
Preheat the oven to 400°F (200°C) and position the rack in the center. Grease a 9×5-inch loaf pan with softened butter or nonstick spray.
-
In a large bowl, whisk together the flour, baking powder, baking soda, and salt.
-
In a separate bowl, whisk together both sugars, melted butter, egg, milk, and vanilla extract until well combined.
-
Pour the wet ingredients into the dry ingredients and stir with a rubber spatula just until the dry ingredients are moistened. The batter should be thick and slightly lumpy—this is intentional and correct.
-
Pour the batter into the prepared pan and smooth the top gently.
-
In a small bowl, combine the sugar and cinnamon for the topping. Brush the top of the batter lightly with melted butter, then sprinkle the cinnamon-sugar mixture evenly across the surface. Press gently so it adheres.
-
Bake at 400°F for 20 minutes without opening the oven door. You want the bread to rise rapidly during this initial phase.
-
After 20 minutes, reduce the oven temperature to 350°F (175°C), rotate the pan for even baking, and continue baking for 20–25 minutes more, until a toothpick inserted in the center comes out clean and the top is deep golden brown.
-
Remove from the oven and let cool in the pan for 10 minutes, then turn out onto a cooling rack. Cool for at least 30 minutes before slicing.
The higher heat method produces noticeably different results: a bread with a professional-looking, slightly domed top, crunchy edges, and a tender interior. It’s ideal if you love the texture and appearance of bakery muffins and want to replicate that in loaf form. The cinnamon-sugar topping becomes crispy and caramelized, making every bite feel indulgent.
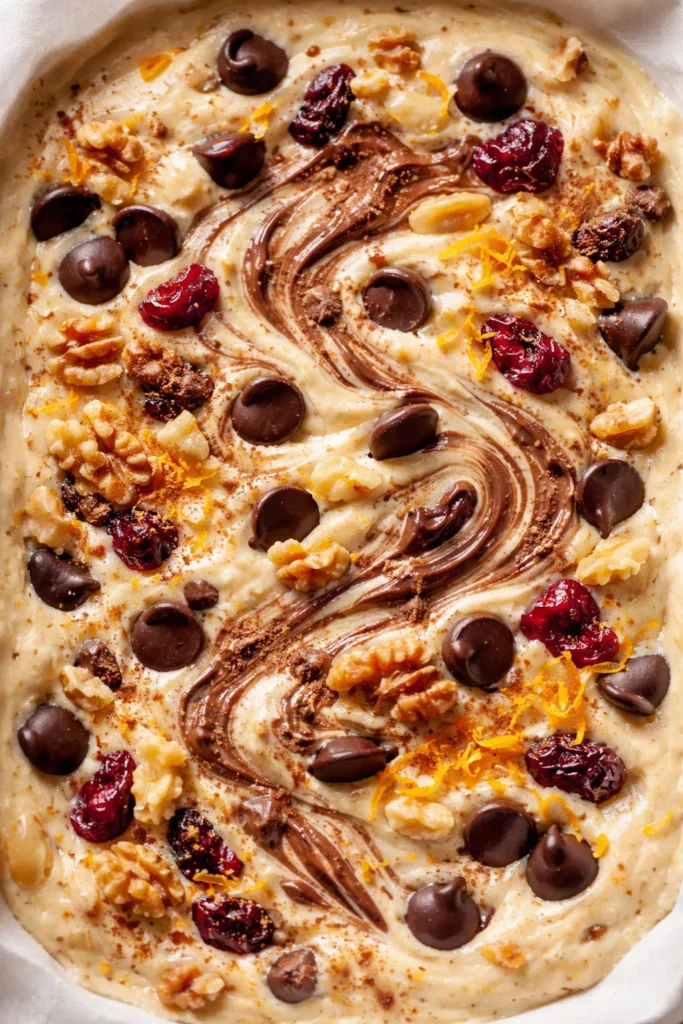
3. Steam-Trap Method Using Covered Pans
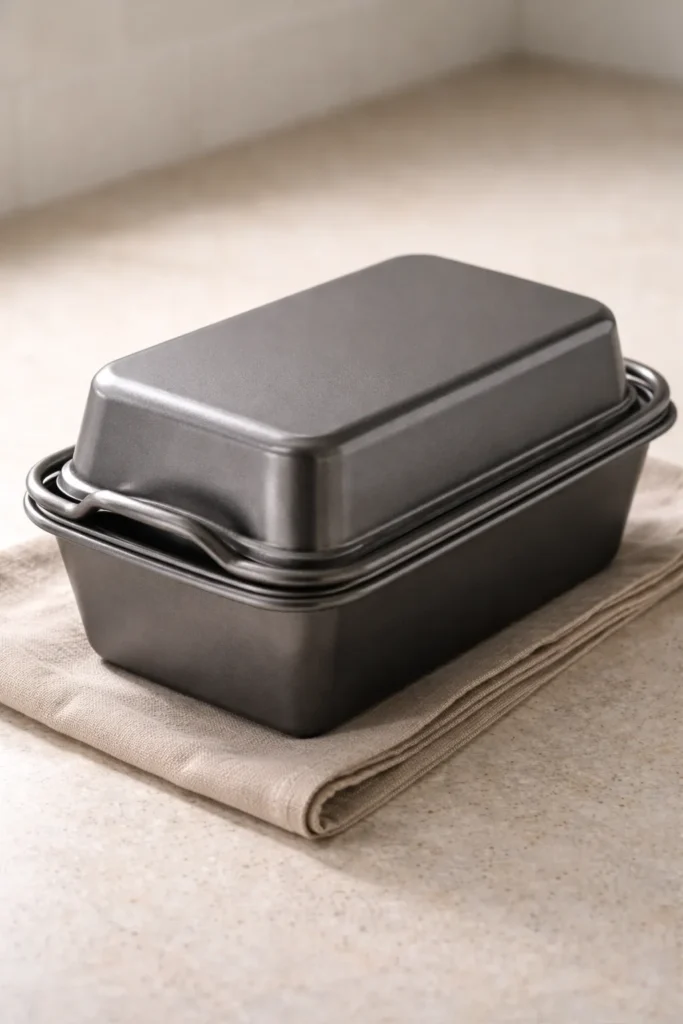
The steam-trap method mimics the effect of a Dutch oven by covering the loaf pan with another pan or aluminum foil during the initial phase of baking. This approach traps steam released by the baking batter, creating a humid oven environment that delays crust formation and encourages maximum rise. The result is a bread with a more tender, softer crust and a more open, airy crumb—almost closer to a tender pound cake than a traditional muffin texture. This method is particularly effective if you want a tall, impressive loaf with maximum volume.
The principle behind this technique is that steam in the oven keeps the surface of the batter soft and flexible, allowing it to expand upward rather than setting too quickly. By removing the covering halfway through (around 25–30 minutes), you allow the crust to form and brown during the second half of baking, achieving a balance between height and browning.
This method works beautifully for delicate batters and recipes with lots of add-ins. The gentler initial environment prevents splitting or uneven browning, and the result feels almost luxurious—each bite is supremely tender and moist. It’s a professional technique that deserves to be more common in home baking.
Yield: Serves 8 to 10 | Makes 1 loaf
Prep Time: 15 minutes
Cook Time: 50 minutes
Total Time: 65 minutes
Difficulty: Beginner — the technique is simple, though you do need to remember to remove the cover halfway through.
Chocolate Chip Muffin Bread with Steam Trapping:
- 2 cups (250g) all-purpose flour
- 1 teaspoon baking soda
- 1 teaspoon baking powder
- ½ teaspoon fine sea salt
- ½ cup (113g) unsalted butter, softened
- ⅔ cup (135g) granulated sugar
- ¼ cup (50g) packed light brown sugar
- 2 large eggs, at room temperature
- ½ cup (120g) sour cream, at room temperature
- 1½ teaspoons pure vanilla extract
- ⅓ cup (80ml) whole milk, at room temperature
- 1½ cups (255g) semi-sweet chocolate chips, divided (1 cup in batter, ½ cup on top)
Bake with Steam Cover:
-
Preheat the oven to 350°F (175°C). Grease a 9×5-inch loaf pan and prepare a sheet of aluminum foil by tearing off a piece slightly larger than the pan opening.
-
Whisk together flour, baking soda, baking powder, and salt in a bowl.
-
Using a mixer, cream the butter and both sugars for 2–3 minutes until pale and fluffy.
-
Add the eggs one at a time, mixing well after each addition. Scrape down the bowl.
-
On low speed, add sour cream and vanilla, then alternate the dry ingredients with the milk, starting and ending with dry ingredients. Mix only until combined.
-
Fold in 1 cup of the chocolate chips gently.
-
Pour the batter into the prepared pan. Sprinkle the remaining ½ cup of chocolate chips on top of the batter.
-
Cover the loaf pan tightly with the foil, pressing the edges down gently to seal in steam without compressing the batter.
-
Bake covered for 30 minutes. The bread will have risen noticeably, and you should smell chocolate and vanilla in the oven.
-
Carefully remove the foil cover and return the pan to the oven. Bake uncovered for 18–22 minutes more, until a toothpick inserted in the center comes out clean and the top is golden brown.
-
Cool in the pan for 15 minutes, then turn out onto a rack. Cool completely before slicing.
The steam-trap method delivers a spectacularly tall, tender loaf with a surprisingly delicate crumb for a quick bread. If you want to impress someone with homemade muffin bread, this is the technique to use.
4. Pan-of-Water Method for Enhanced Rise and Moisture
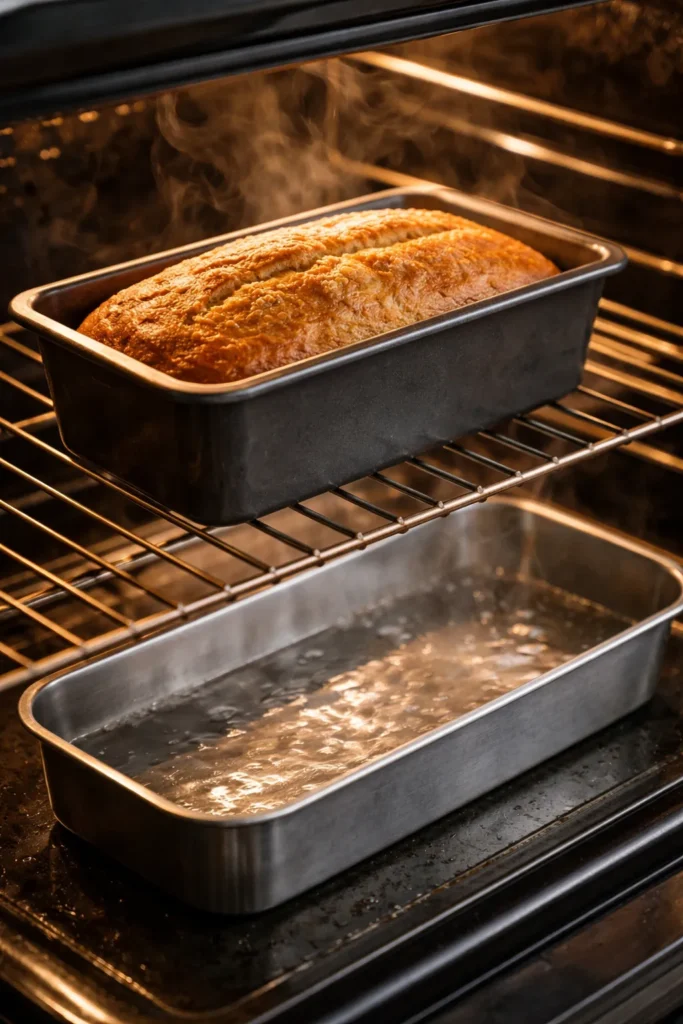
The pan-of-water method places a shallow pan of hot water on the oven rack below the loaf pan during baking. This added humidity in the oven encourages rise, promotes even browning, and can enhance moisture in the finished bread. This approach is especially effective for enriched batters (those with lots of butter, eggs, and dairy) and works particularly well for producing a bread with a tender crumb and a nicely browned, even crust without any burnt edges.
Home ovens naturally vent steam, so they’re relatively dry environments compared to commercial baking ovens with built-in steam injection. By adding a water pan, you’re essentially creating a pseudo-humid baking environment that mimics professional bakery conditions. This is not a trick borrowed from bread baking alone—pastry chefs and cake bakers use this method regularly to achieve superior browning and moisture retention.
The key to success here is ensuring the water pan is positioned securely and doesn’t interfere with air circulation. The water should reach a gentle simmer during baking but never boil aggressively, which could create excessive steam and affect browning. This method pairs beautifully with moderately high temperatures (375°F) and works exceptionally well for muffin breads with delicate batters or those incorporating fruit.
Yield: Serves 8 to 10 | Makes 1 loaf
Prep Time: 15 minutes
Cook Time: 50 minutes
Total Time: 65 minutes
Difficulty: Intermediate — you need to heat water separately and be mindful of placement, but the actual baking technique is standard.
Peach Muffin Bread with Water-Bath Baking:
- 2 cups (250g) all-purpose flour
- 1 teaspoon baking powder
- ½ teaspoon baking soda
- ½ teaspoon fine sea salt
- ½ cup (113g) unsalted butter, softened
- ¾ cup (150g) granulated sugar
- 2 large eggs, at room temperature
- ½ cup (120g) plain yogurt or sour cream, at room temperature
- ½ teaspoon almond extract (optional but recommended)
- 1 teaspoon pure vanilla extract
- ¼ cup (60ml) whole milk, at room temperature
- 1½ cups (300g) fresh peaches, peeled, pitted, and cut into small dice (or frozen peaches, thawed and drained)
Bake with Water Pan:
-
About 10 minutes before baking, fill a shallow roasting pan or cake pan with hot water and place it on the lower oven rack. Preheat the oven to 375°F (190°C) with the water pan in place.
-
Grease a 9×5-inch loaf pan with softened butter or nonstick spray.
-
Whisk together the flour, baking powder, baking soda, and salt in a bowl.
-
Cream the butter and sugar on medium-high speed for 2–3 minutes until light and fluffy.
-
Add the eggs one at a time, beating well after each addition. Scrape down the bowl after the second egg.
-
On low speed, add the yogurt, almond extract (if using), and vanilla extract, mixing until combined.
-
Alternate the dry ingredients with the milk, beginning and ending with dry ingredients. Mix until just combined.
-
Fold in the diced peaches gently, distributing them evenly. If using fresh peaches, they may release some juice into the batter—this is normal and actually beneficial for moisture.
-
Pour the batter into the prepared loaf pan.
-
Place the loaf pan on the center oven rack, directly above the water pan. Make sure the loaf pan is stable and positioned securely.
-
Bake for 45–55 minutes, rotating halfway through. The bread should be golden brown on top, and a toothpick inserted in the center should come out clean with just a few moist crumbs.
-
Carefully remove the loaf pan from the oven (the water pan will still be hot). Cool in the pan for 15 minutes, then invert onto a cooling rack. Cool completely.
The water-bath method produces a bread with a tender, evenly browned crust and a remarkably moist interior crumb. The steam helps the fruit stay juicy rather than drying out, so this method is excellent for any muffin bread that features fresh or juicy add-ins.
5. Cold Fermentation Overnight Method for Deeper Flavor
The cold fermentation method takes a completely different approach: instead of baking the muffin bread the day you mix it, you prepare the batter, pour it into the loaf pan, cover it, and refrigerate it overnight (or up to 24 hours). The next day, you bring the pan to room temperature and bake. This extended resting period allows subtle flavor development through enzymatic activity, better hydration of the flour, and a more flavorful, complex taste—something you simply cannot achieve with quick baking alone.
This approach is inspired by overnight oat recipes, cold-rise pastry doughs, and the slow fermentation methods used in bread baking. While muffin breads don’t contain yeast and won’t develop the sour tang of a true sourdough, the slow rest period still enhances flavor development in meaningful ways. The flour absorbs more liquid, hydrating more fully, which can result in a more tender crumb. Any vanilla, spices, or flavorings have more time to distribute throughout the batter evenly.
This method requires more planning but minimal actual hands-on effort. It’s perfect for busy bakers who want to prepare their muffin bread the night before and bake it while coffee brews. It’s also ideal for gift-giving, as you can bake it early in the morning and have it completely cooled by midday.
Yield: Serves 8 to 10 | Makes 1 loaf
Prep Time: 15 minutes, plus overnight refrigeration
Cook Time: 50 minutes
Total Time: Overnight resting time plus 65 minutes the next day
Difficulty: Beginner — the baking itself is simple; the main requirement is planning ahead.
Maple Walnut Muffin Bread with Overnight Rest:
- 2 cups (250g) all-purpose flour
- 1 teaspoon baking powder
- ½ teaspoon baking soda
- ½ teaspoon fine sea salt
- ¼ teaspoon ground nutmeg
- ⅛ teaspoon ground ginger (optional)
- ½ cup (113g) unsalted butter, softened
- ½ cup (100g) granulated sugar
- ¼ cup (60ml) pure maple syrup (not pancake syrup)
- 2 large eggs, at room temperature
- ½ cup (120g) sour cream or plain yogurt, at room temperature
- 1 teaspoon pure vanilla extract
- ⅓ cup (80ml) whole milk, at room temperature
- ¾ cup (90g) walnuts, coarsely chopped and lightly toasted
Prepare and Rest:
-
The night before baking, grease a 9×5-inch loaf pan and line the bottom with parchment paper for easier removal.
-
Whisk together the flour, baking powder, baking soda, salt, nutmeg, and ginger (if using) in a bowl.
-
In a separate bowl, cream the softened butter with the sugar and maple syrup. Beat on medium-high speed for 2–3 minutes until light and fluffy.
-
Add the eggs one at a time, beating well after each addition.
-
On low speed, add the sour cream and vanilla extract, mixing until just combined.
-
Alternate the dry ingredients with the milk, starting and ending with dry ingredients. Mix only until the flour is no longer visible.
-
Fold in the chopped walnuts gently.
-
Pour the batter into the prepared loaf pan and smooth the top. Cover the pan loosely with plastic wrap or a clean kitchen towel.
-
Refrigerate overnight (or up to 24 hours). The batter will hydrate further and develop flavor complexity during this rest period.
Bake the Next Day:
-
In the morning, remove the loaf pan from the refrigerator and let it sit on the counter, covered, for 30–45 minutes to bring to room temperature. This step is important—baking cold batter directly from the fridge can result in uneven baking.
-
Preheat the oven to 350°F (175°C).
-
Uncover the pan and bake for 50–60 minutes, until a toothpick inserted in the center comes out clean and the top is golden brown.
-
Cool in the pan for 15 minutes, then turn out onto a cooling rack. Cool completely before slicing.
The cold fermentation method produces a noticeably more flavorful bread with a tender, uniform crumb. The maple flavor becomes richer, the walnut taste more pronounced. This method is perfect for developing complex flavor in spiced muffin breads or those with warm spices like cinnamon, ginger, or cardamom.
6. No-Fail Box Muffin Mix Method for Quick Convenience
If you prefer the simplicity and consistency of boxed muffin mixes, converting them to a loaf is entirely possible—and the results are actually quite good. The no-fail box mix method is as straightforward as they come: you use a standard box of muffin mix, follow the manufacturer’s instructions for wet ingredients, make one small adjustment to the leavening, and bake at a lower temperature than muffins would require. This method is perfect for weeknight baking when you want a finished product without measuring multiple ingredients or dealing with flour dust.
The key adjustment when converting muffin mix to loaves is adding extra baking powder (usually 2 teaspoons extra) and reducing the oven temperature by 25°F from what the box directs for muffins. Since most muffin mixes recommend baking at 400°F for 18–22 minutes, you’ll adjust to 375°F and bake for about 45–55 minutes, depending on your specific mix and oven. This slower, gentler heat allows the interior to bake through before the exterior over-browns.
Box mixes are formulated to be slightly more cake-like than traditional quick breads, so the result will be a tender, tender loaf with a pleasant, light crumb—not quite the same rustic character as a from-scratch quick bread, but perfectly pleasant and undeniably convenient. Many people enjoy the predictability and speed of box mix muffin bread, especially for casual family breakfasts or unexpected guests.
Yield: Serves 8 to 10 | Makes 1 loaf
Prep Time: 10 minutes
Cook Time: 50 minutes
Total Time: 60 minutes
Difficulty: Beginner — this is one of the easiest methods available.
Box Mix Muffin Bread:
- 1 box (between 15 oz and 18 oz) muffin mix of your choice (blueberry, chocolate chip, lemon, raspberry, or any flavor)
- 2 teaspoons baking powder (this is in addition to what’s in the mix)
- 2 large eggs
- ⅓ cup neutral oil (canola, vegetable, or light olive oil)
- 1 cup water or milk (check the box instructions; some mixes specify one or the other)
- Optional: ½ cup fresh fruit (if baking with a plain or vanilla mix)
Bake the Loaf:
-
Preheat the oven to 375°F (190°C). Grease a 9×5-inch loaf pan with softened butter or nonstick spray.
-
In a large bowl, combine the muffin mix with the 2 teaspoons of extra baking powder. Whisk well to distribute the additional leavening evenly. This extra baking powder helps compensate for the longer, slower bake time and ensures the loaf rises adequately.
-
In a separate bowl, whisk together the eggs, oil, and water (or milk) until well combined.
-
Pour the wet ingredients into the dry ingredients and stir with a spatula just until the dry ingredients are moistened. The batter should be slightly lumpy—do not overmix. If using fresh fruit, fold it in gently now.
-
Pour the batter into the prepared loaf pan, filling it about two-thirds to three-quarters full. Some box mixes may yield slightly more or less batter, so adjust accordingly—do not fill the pan more than three-quarters full, or the batter will overflow as it rises.
-
Bake for 45–55 minutes, rotating the pan halfway through. A toothpick inserted in the center should come out clean or with just a few moist crumbs. The top should be golden brown, and the edges should feel set when you gently press them.
-
Remove from the oven and cool in the pan for 10 minutes, then turn out onto a cooling rack. Cool completely before slicing.
-
Storage: Cover and store at room temperature for up to 2 days, or refrigerate for up to 1 week. Wrap tightly and freeze for up to 3 months.
The box mix method produces reliable, consistent results every time. While it may not have the artisanal character of a from-scratch quick bread, it’s far superior to many store-bought options and offers tremendous convenience. Many experienced bakers keep a few boxes on hand for emergency baking situations or for introducing young children to baking success.
7. Single-Bowl One-Step Method for Minimal Cleanup
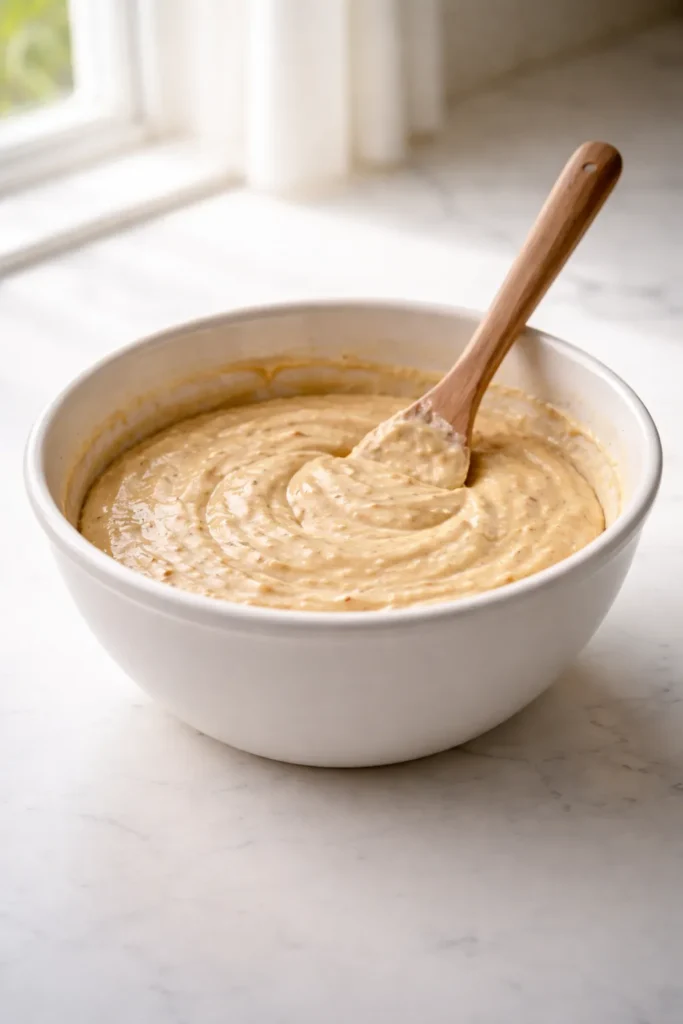
The single-bowl method is the ultimate in convenience and ease, requiring you to mix the entire batter in just one bowl with no separate wet-and-dry mixing. This approach works beautifully for muffin breads because the muffin formula—with its relatively balanced ratio of fat, sugar, and egg to flour—tolerates being mixed more directly than a traditional sponge cake would. You simply combine all ingredients in one bowl, stir until just combined, and bake. Cleanup is reduced to a single bowl and one spoon or spatula, making this method perfect for busy mornings or when you’re baking with children who find the standard two-bowl method overwhelming.
The key to success with the single-bowl method is using room-temperature ingredients (especially the eggs, butter, and dairy), not overmixing, and ensuring all your dry ingredients are whisked together thoroughly before adding any wet components. You’ll still add the dry ingredients before the wet ones, but everything happens in the same bowl. The result is virtually identical to the classic method—a tender, moist muffin bread with no difference in texture or flavor, but significantly less work.
This method eliminates the need for a stand mixer, which makes it ideal for small kitchens or situations where you want to minimize equipment. It’s also genuinely easier for people with mobility challenges or anyone who simply prefers straightforward, no-fuss baking.
Yield: Serves 8 to 10 | Makes 1 loaf
Prep Time: 15 minutes
Cook Time: 55 minutes
Total Time: 70 minutes
Difficulty: Beginner — this is the simplest method in terms of technique and equipment required.
Raspberry White Chocolate Single-Bowl Muffin Bread:
- 2 cups (250g) all-purpose flour
- 1 teaspoon baking soda
- 1 teaspoon baking powder
- ½ teaspoon fine sea salt
- ½ cup (113g) unsalted butter, melted and cooled for 5 minutes
- ⅔ cup (135g) granulated sugar
- ¼ cup (50g) packed light brown sugar
- 2 large eggs, at room temperature
- ½ cup (120g) sour cream or plain yogurt, at room temperature
- 1½ teaspoons pure vanilla extract
- ⅓ cup (80ml) whole milk, at room temperature
- 1¼ cups (160g) fresh raspberries
- ¾ cup (130g) white chocolate chips
Mix and Bake:
-
Preheat the oven to 350°F (175°C). Grease a 9×5-inch loaf pan with softened butter or nonstick spray.
-
In a large bowl, whisk together the flour, baking soda, baking powder, and salt. Make sure these dry ingredients are well distributed—take an extra 30 seconds to whisk thoroughly, as this ensures even leavening throughout the loaf.
-
Add the melted butter, both sugars, eggs, sour cream, vanilla extract, and milk directly to the bowl with the dry ingredients. Stir with a rubber spatula just until the dry ingredients are moistened and no flour pockets remain. The batter should be thick and slightly lumpy. This should take only 30–40 stirs, not more.
-
Gently fold in the raspberries and white chocolate chips with a few final turns of the spatula.
-
Pour the batter into the prepared loaf pan and smooth the top gently.
-
Bake for 50–60 minutes, rotating the pan halfway through, until a toothpick inserted in the center comes out clean. The top should be golden brown, and the edges should be set.
-
Cool in the pan for 15 minutes, then turn out onto a cooling rack. Cool completely before slicing—at least 30 minutes.
The single-bowl method is perfect for weeknight baking, for teaching children to bake, and for anyone who wants excellent results with minimal fuss. The tender crumb and beautiful browning rival any more complicated method, proving that extra steps don’t always equal better results.
Tips for Success Across All Methods
Regardless of which method you choose, a few universal principles apply to every approach. Room temperature ingredients are non-negotiable. Butter, eggs, and dairy products at room temperature mix together smoothly and evenly, creating a uniform batter that bakes uniformly. Cold ingredients slow the mixing process and can lead to lumps and inconsistent texture in the finished bread.
Don’t overmix the batter. This is the single most common mistake in muffin bread baking. Overmixing develops gluten, which results in a dense, tough crumb with a coarse texture. Mix only until the flour disappears—usually 15–30 seconds after combining wet and dry ingredients. A few tiny lumps are not just acceptable; they’re desirable.
Check for doneness with a toothpick, not appearance alone. Every oven is different, and baking times vary based on oven calibration, altitude, pan material, and batter temperature. A toothpick (or thin knife) inserted into the very center of the loaf is the most reliable doneness test. It should come out clean or with just a few moist crumbs clinging to it—never wet batter, but also not completely dry.
Cool in the pan for 10–15 minutes before removing. This brief rest allows the structure to set enough that the bread won’t crumble when you turn it out. Trying to remove a loaf immediately from the oven will result in a broken, crumbly mess.
Rotate the pan halfway through baking. Most home ovens have hot spots. Rotating the pan 180 degrees at the halfway point ensures even browning and prevents one side from over-browning while the other stays pale.
Grease the pan thoroughly, paying special attention to the corners. Muffin bread sticks easily, especially once it cools. Corners are the worst offenders. Use butter or nonstick spray generously, or line the pan with parchment paper for foolproof removal.
Variations and Flavor Combinations
The beauty of muffin bread is how easily it adapts to different flavors and add-ins. Chocolate lovers can swap ¾ cup cocoa powder into the flour, reduce the flour to 1¼ cups, and add 1 cup chocolate chips for a decadent loaf. Spice enthusiasts can add 2 teaspoons of cinnamon, ½ teaspoon nutmeg, ¼ teaspoon allspice, and ⅛ teaspoon cloves to create a warming chai-spiced bread. Citrus fans can replace the vanilla with 1½ teaspoons of almond or orange extract and add the zest of 2 lemons or one orange directly into the batter.
Dried fruit works beautifully in muffin bread—try chopped dried apricots, dried cranberries, dried cherries, or even raisins at 1–1½ cups total. Nuts add pleasant texture and flavor; walnuts, pecans, almonds, and macadamia nuts all work wonderfully at ¾ cup, lightly toasted and chopped. Fresh fruit is wonderful too, though frozen berries should be used straight from the freezer (not thawed) to minimize sinking and color bleeding into the batter.
For dietary swaps, sour cream can be replaced with Greek yogurt, regular yogurt, or applesauce in equal amounts. Milk can be swapped for buttermilk (reduce baking soda if using buttermilk, as the acidity reacts with it). Butter can be replaced with an equal amount of neutral oil for a more tender crumb, or with melted coconut oil for subtle coconut flavor. Eggs can be replaced with applesauce or mashed banana (¼ cup per egg) in most recipes, though the texture will be slightly denser.
Storage, Freezing, and Make-Ahead Tips
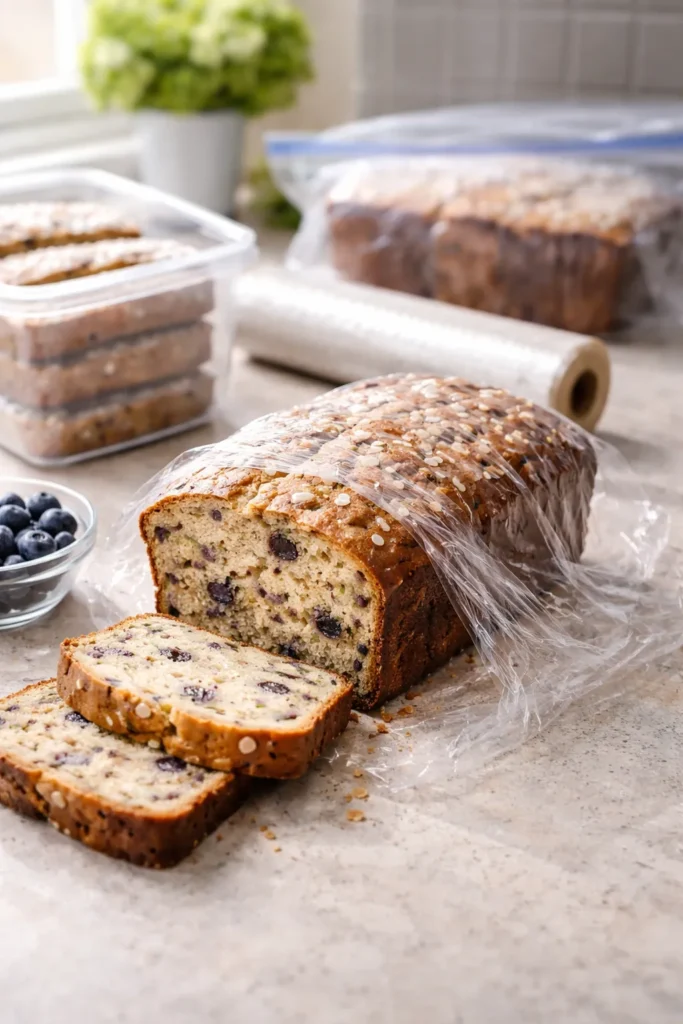
Muffin bread keeps beautifully. Covered and stored at room temperature, it stays fresh for 2–3 days. Wrapped tightly and refrigerated, it lasts up to 1 week—the cold actually improves sliceability and can bring out subtle flavors. To reheat, wrap a slice loosely in a paper towel and microwave for 15–20 seconds, or toast it gently in a toaster oven to restore some textural contrast.
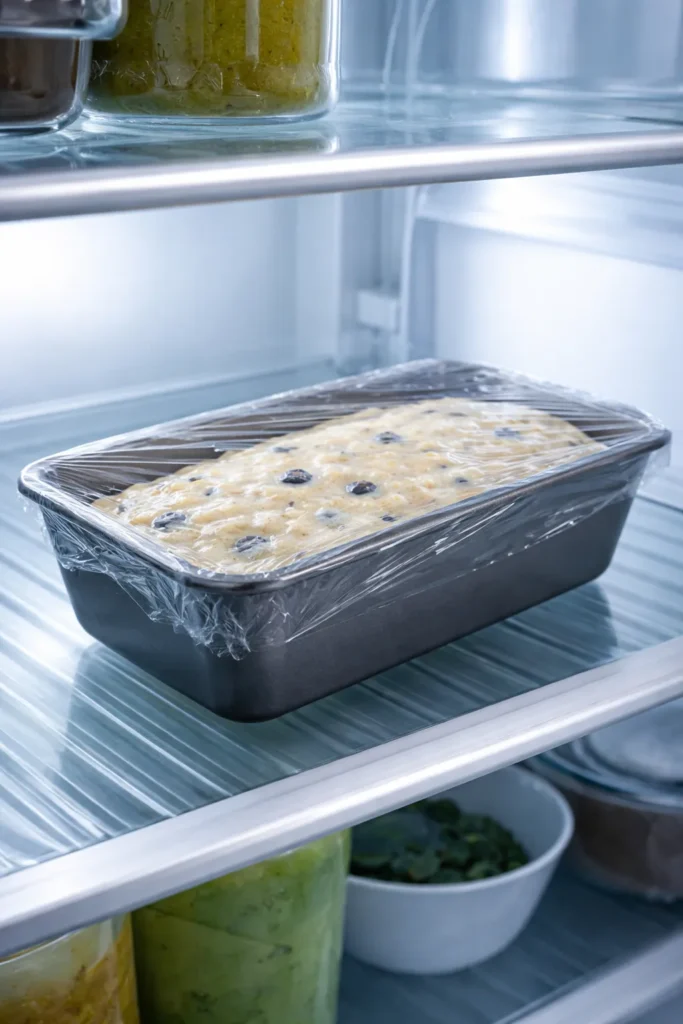
For longer storage, freeze the cooled loaf completely, then wrap it tightly in plastic wrap followed by aluminum foil (the double-wrap prevents freezer burn and flavor absorption). Frozen muffin bread keeps beautifully for 3–4 months. Thaw it overnight on the counter, unwrapped, or reheat individual slices straight from the freezer using the toaster oven method. Many people freeze muffin bread in individual slices, which makes weekday breakfasts incredibly convenient—grab a slice, toast it, and eat.
The cold fermentation method is ideal for make-ahead planning. Prepare the batter the night before, refrigerate, and bake the next morning while the coffee brews. The box mix method is perfect for last-minute baking because you always have the ingredients on hand. The steam-trap and water-pan methods work beautifully if you have slightly longer than usual in the oven and want to prioritize texture.
Final Thoughts
Converting favorite muffin recipes to loaves opens up entirely new possibilities for how you enjoy these beloved treats. Whether you’re drawn to the classic simplicity of the lower-temperature method, the dramatic appearance of the higher-heat approach, or the complex flavor development of overnight fermentation, you now have seven proven strategies to choose from. Each method delivers a slightly different result—some produce tender, cake-like crumbs; others yield more substantial, textured loaves with pronounced tops.
The best method is ultimately the one that fits your schedule, your equipment, and your personal preferences. The classic quick bread method works reliably every single time and requires nothing beyond a standard oven. The single-bowl method offers ultimate convenience. The cold fermentation method rewards patience with superior flavor. The box mix method celebrates speed and consistency. All seven approaches produce delicious muffin bread worth serving with pride to family and friends.
Muffin bread is one of those rewarding bakes that looks far more sophisticated than the effort required to produce it. With these methods in your repertoire, you’re equipped to bake a perfect loaf whenever the mood strikes—whether that’s a spontaneous Tuesday breakfast or a planned weekend gift. The combination of familiar, beloved flavors, tender crumb, and beautiful presentation makes muffin bread a genuine crowd-pleaser, every single time.