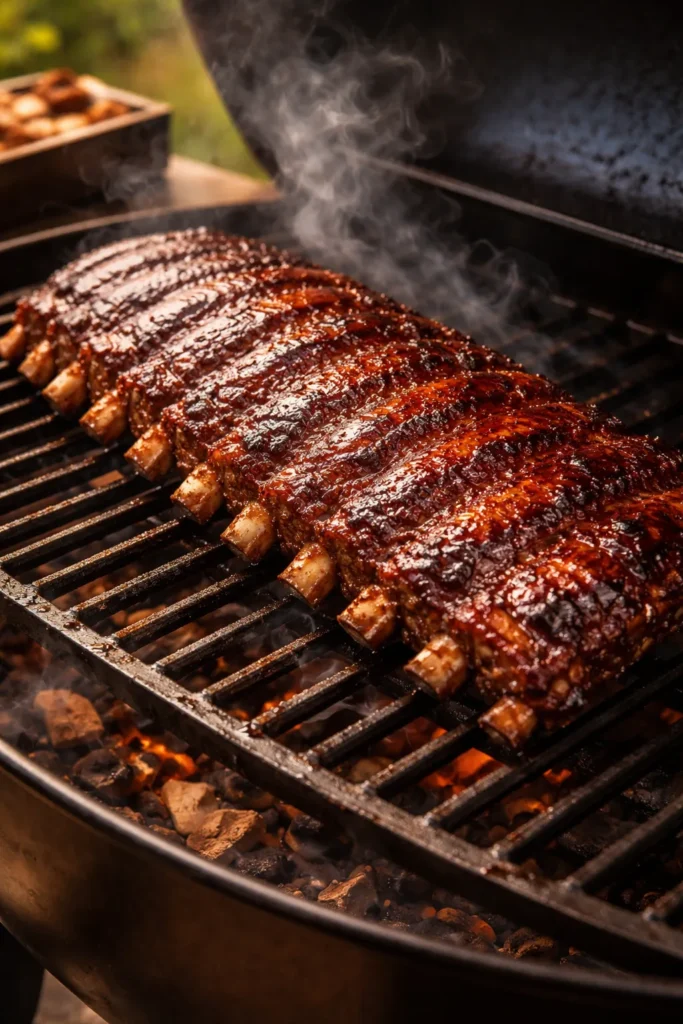
Few things bring people together at a backyard cookout the way a rack of perfectly cooked ribs does. The moment that caramelized bark hits the table — sticky, lacquered, smelling of smoke and spice — conversation stops and napkins start flying. There’s a reason pitmasters guard their rib recipes like family heirlooms.
The good news? You don’t need a competition smoker or decades of experience to pull off ribs that make people go quiet mid-sentence. What you need is the right method for your setup, a solid spice rub, and a little patience. Whether you’re working with a gas grill in a suburban backyard, a wood pellet smoker on a weekend afternoon, or an oven on a rainy day, there’s a recipe here that fits your situation.
These eight cookout-worthy rib recipes cover everything from classic baby backs to fall-apart spare ribs, dry-rubbed Memphis style to sticky sweet Kansas City glazes. Each one has been built around techniques that actually work — no guesswork, no vague instructions, just real results that’ll have your guests asking you to fire up the grill again next weekend.
Table of Contents
- 1. Classic Baby Back Ribs on the Smoker
- The Spice Rub That Does the Heavy Lifting
- Smoking Step by Step
- Quick Facts
- 2. Oven-Baked Baby Back Ribs with Broiled BBQ Crust
- Building the Foil Packet
- The Broiler Finish That Makes the Difference
- Key Details
- 3. Grilled Spare Ribs with Homemade BBQ Sauce
- The Dry Rub
- Homemade BBQ Sauce
- Grilling Method
- Quick Facts
- 4. Pellet Grill St. Louis Style Ribs
- Why St. Louis Cut Works Best Here
- Rub and Smoke
- What to Know
- 5. Oven-to-Grill Ribs for Maximum Flavor
- Stage One: The Oven
- Stage Two: The Grill
- Why This Method Is Ideal for Entertaining
- 6. Spare Ribs with Rum and Soy BBQ Marinade
- The Marinade
- Cooking Process
- Quick Facts
- 7. Kansas City Style Ribs with Sweet Tomato Glaze
- The Sauce
- Layering the Glaze
- What Makes It KC Style
- 8. Memphis-Style Dry-Rubbed Spare Ribs
- The Memphis Rub Formula
- Cooking the Memphis Way
- After They Come Off the Heat
- What Sets This Apart
- Sides, Storage, and Reheating
- Final Thoughts
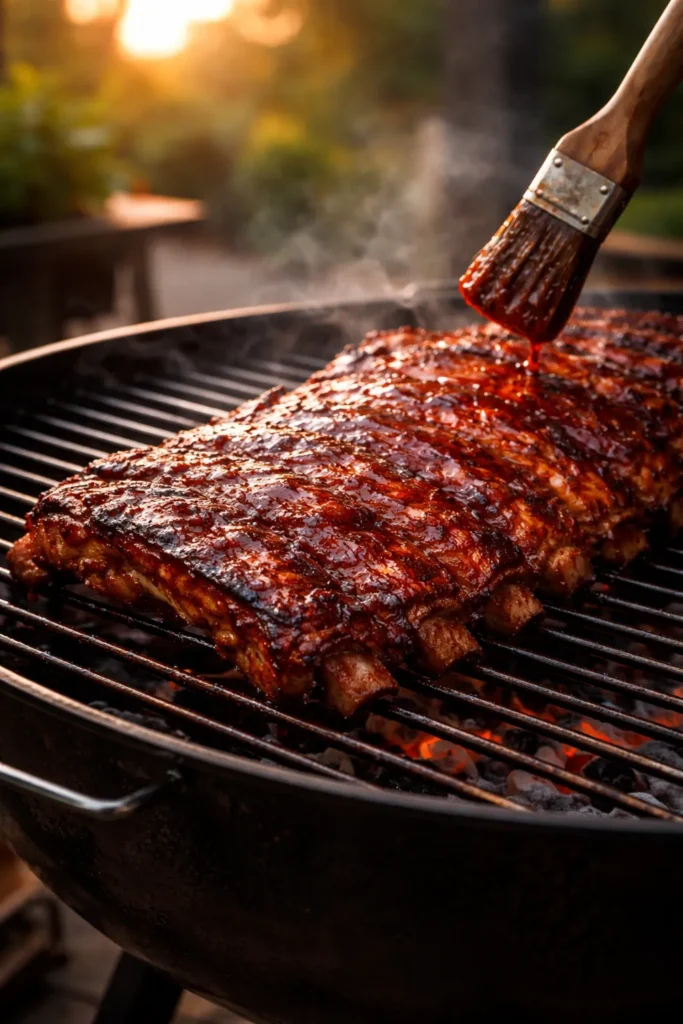
1. Classic Baby Back Ribs on the Smoker
Baby back ribs — sometimes called loin ribs or back ribs — come from high up on the pig’s back, near the spine. They’re shorter, leaner, and more tender than spare ribs, which is exactly why they’ve become the default choice for most backyard cooks. When you smoke them low and slow, the connective tissue breaks down completely, leaving meat that’s juicy all the way through with a deep, wood-kissed flavor you simply can’t fake.
The Spice Rub That Does the Heavy Lifting
The rub is where this recipe starts, and it pulls equal weight as the smoke itself. Combine 3 tablespoons of sugar, 2 teaspoons of kosher salt, 1½ tablespoons of smoked paprika, 1½ teaspoons each of garlic powder and onion powder, 1 teaspoon of ground cumin, 1 teaspoon of dried oregano, ½ teaspoon of ground mustard, and ½ teaspoon of cayenne pepper in a bowl and whisk until blended.
Before anything touches the rub, remove the thin membrane from the underside of each rack. Slip a butter knife under the membrane at one end, lift an edge, then grab it with a paper towel and pull it clean off. That paper towel grip is the trick — the membrane is slippery and without it, you’ll be fighting the thing for five minutes. Once it’s off, coat both sides of the ribs with half the rub and let them sit for 15 minutes. The rub will start to “sweat” into the meat, drawing moisture to the surface and pulling the spices deeper. Then coat with the remaining rub. Use all of it.
Smoking Step by Step
Preheat the smoker to 225°F and place the rubbed racks directly on the grates. Smoke for 2 hours until they’ve developed a dark, rich color. Wrap each rack tightly in heavy-duty aluminum foil and return to the smoker for another 1½ hours — this steaming phase keeps the meat juicy without going mushy.
Carefully unwrap the racks, leaving them on the foil, and brush the tops with about 3 tablespoons of your BBQ sauce. Fold the foil edges up to create a makeshift tray and return to the smoker for 45 minutes to 1 hour more. To check doneness, lift the rack from the center with tongs — if it bends easily and the meat cracks on top, they’re ready.
Quick Facts
- Total cook time: approximately 4 to 4½ hours
- Target smoker temperature: 225°F throughout
- Rest time before slicing: at least 10 minutes
Pro tip: Avoid the popular “3-2-1 method” — two full hours in foil is too long for pork ribs and makes the meat mushy. One to 1½ hours in foil is the sweet spot.
2. Oven-Baked Baby Back Ribs with Broiled BBQ Crust

No smoker, no problem. The oven method produces tender ribs that rival their smoked counterparts, especially when you finish them under the broiler to form that sticky, caramelized crust. The spice rub provides smokiness on its own, and the sealed foil pouch traps steam that slowly breaks down every bit of tough connective tissue. What comes out after two hours is a rack that practically falls apart when you look at it wrong.
Building the Foil Packet
Line a large rimmed baking sheet with heavy-duty aluminum foil — rimmed is non-negotiable here because the ribs release a surprising amount of liquid as they cook, and you don’t want that pooling on the bottom of your oven. After removing the membrane and applying the spice rub (same blend as Recipe 1 works perfectly), place the racks on the prepared sheet and cover the entire pan tightly with another sheet of foil.
Bake at 300°F for about 2 hours. The lower temperature compared to most roasting gives the fat time to render properly rather than seize up and dry out.
The Broiler Finish That Makes the Difference
Once the ribs are tender, remove the foil and brush each rack with about 3 tablespoons of BBQ sauce. Slide the pan under the broiler and watch closely — because of the sugar in both the rub and the sauce, the transition from beautifully caramelized to burnt happens in under a minute. You’re looking for the sauce to bubble, darken, and develop a slight char along the edges. That’s usually 2 to 4 minutes depending on your broiler.
Key Details
- Oven temperature: 300°F for the bake, then broiler on high to finish
- Why it works: The sealed foil creates a steam environment that mimics the moisture of a smoker
- Don’t skip the broil — it’s the step that takes the ribs from “baked pork” to “BBQ ribs”
Alternative finishing method: Skip the broiler and grill the oven-baked racks over medium heat for 10 to 15 minutes, basting with sauce as you go until charred in spots and heated through.
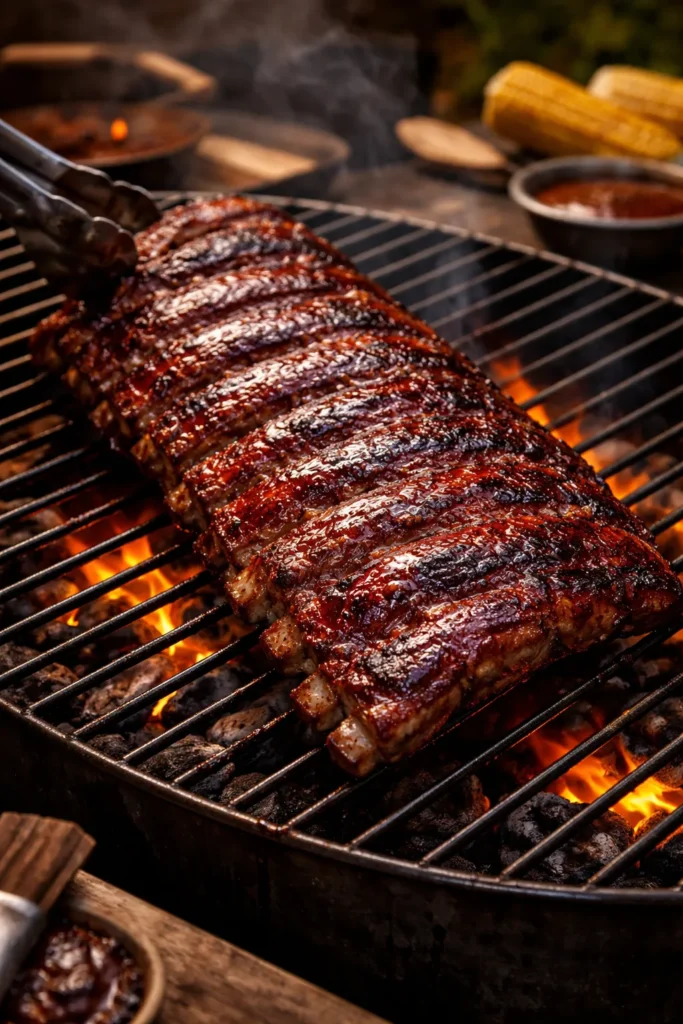
3. Grilled Spare Ribs with Homemade BBQ Sauce
Spare ribs come from the belly of the pig, lower and flatter than baby backs, with more meat between the bones and a higher fat content that makes them exceptional for the grill. They’re also more forgiving than baby backs when it comes to heat fluctuations — that fat cushions the meat and keeps it moist even if your grill temperature drifts a bit. The trade-off is time. Spare ribs need between 2½ and 3 hours of low, indirect heat before they’re ready for sauce.
The Dry Rub
In a small bowl, combine ⅓ cup of firmly packed light brown sugar, ¼ cup of smoked paprika, 2 tablespoons of kosher salt, 1 tablespoon of freshly ground black pepper, 1 tablespoon of garlic powder, 1 teaspoon of onion powder, 1 teaspoon of ground mustard, and ¼ teaspoon of cayenne pepper. Pat the ribs dry, remove the membrane, and rub both sides heavily. You’ll lose some seasoning to the heat during cooking, so being generous here pays off.
Homemade BBQ Sauce
Combine ½ cup of ketchup, ½ cup of apple cider vinegar, ½ cup of firmly packed light brown sugar, 1 tablespoon each of Dijon mustard, smoked paprika, garlic powder, and Worcestershire sauce, 2 teaspoons of black pepper, and 1 teaspoon of kosher salt in a medium saucepan. Cook over medium heat, stirring frequently, until the mixture thickens — about 7 minutes.
Grilling Method
Wrap the rubbed ribs in aluminum foil and place them bone side up on the cool side of a two-zone grill set to around 250°F. Cook for 1½ hours, then rotate the racks 180 degrees and cook for another 1 to 1½ hours. After the 2-hour mark, start checking every 30 minutes — you’re looking for the meat to pull away from the bone tips by about ½ inch. Once they’re there, crank the grill to 450°F, unwrap the ribs, brush generously with sauce, and grill directly for 2 minutes per side until the sauce caramelizes. Rest for 10 minutes before serving.
Quick Facts
- Cut: Spare ribs or St. Louis-style spare ribs (trimmed spare ribs)
- Indirect heat phase: 250°F for 2½ to 3 hours
- Final glaze phase: 450°F for 4 minutes total
4. Pellet Grill St. Louis Style Ribs
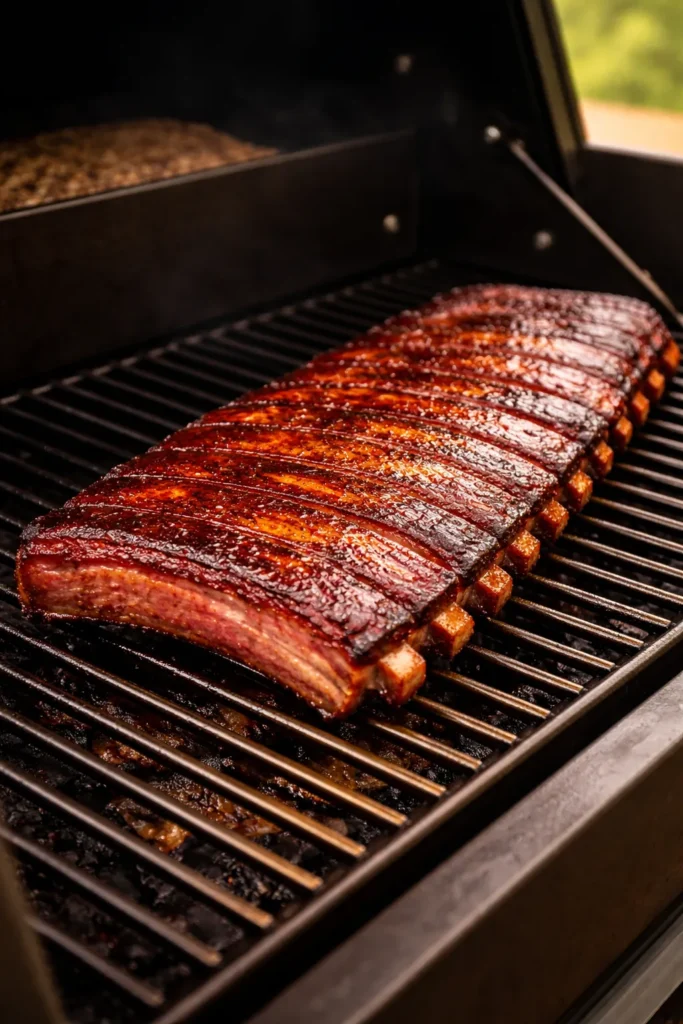
St. Louis-style ribs are spare ribs with the sternum bone, cartilage, and rib tips trimmed away, giving you a neat, rectangular rack that cooks more evenly than untrimmed spare ribs. On a pellet grill, they’re arguably the ideal cut — uniform shape means consistent heat exposure across the whole rack, and the automated pellet feed keeps temperature rock-steady without babysitting.
Why St. Louis Cut Works Best Here
The meat-to-bone ratio on a St. Louis rack sits between baby backs and full spare ribs, and the slightly higher fat content means the meat stays moist through a long smoke without needing as much intervention. Many experienced pitmasters prefer St. Louis-style specifically for pellet smokers because the even shape takes full advantage of the consistent, indirect airflow these cookers produce.
Rub and Smoke
Use a brown sugar-forward rub: 3 tablespoons brown sugar, 1½ tablespoons smoked paprika, 1 tablespoon kosher salt, 1 teaspoon black pepper, 1 teaspoon garlic powder, ½ teaspoon onion powder. Apply after removing the membrane and let the rack sit for 20 minutes before loading it onto the pellet grill.
Set the pellet grill to 250°F and smoke the racks for 3 hours. The lower temperature compared to the baby back smoker method gives the thicker spare rib meat the extra time it needs. After 3 hours, wrap tightly in foil — you can add a splash of apple juice inside the foil pack to keep things humid — and return to the smoker for 1 hour. Unwrap, brush with a vinegar-forward BBQ sauce (the acidity cuts through the richness of the pork fat beautifully), and smoke for a final 30 minutes uncovered until the sauce sets.
What to Know
- Total cook time: approximately 4½ hours
- Pellet wood choice: apple or cherry wood pellets for a sweeter, lighter smoke that doesn’t overpower the pork
- Done when: internal temperature at the thickest part reads between 195°F and 203°F
5. Oven-to-Grill Ribs for Maximum Flavor
This two-stage method solves the biggest problem with pure grill-cooking ribs: getting the inside tender without burning the outside. The oven does the slow, patient work of breaking down the collagen and rendering the fat. Then the grill steps in for that irreplaceable char, smoke kiss, and caramelized sauce that no broiler can fully replicate. The result is ribs that taste genuinely outdoor-cooked but with the controlled, consistent tenderness of oven cooking.
Stage One: The Oven
Apply your spice rub to baby back ribs after removing the membrane. Place them on a foil-lined rimmed baking sheet, cover tightly with foil, and bake at 300°F for 2 hours. At this point, the ribs are fully cooked and tender — they just need the grill’s finishing touch.
You can actually stop here and refrigerate the racks for up to 3 days before grilling, which makes this method excellent for entertaining. Bake them on a Thursday, grill them on Saturday, and spend your party time with guests instead of hovering over a smoker.
Stage Two: The Grill
Preheat your grill to medium (around 350°F to 400°F). Pull the ribs from the refrigerator 30 minutes before grilling so they’re not ice cold going onto the grates. Place them directly on the grill and brush generously with BBQ sauce. Grill for 10 to 15 minutes total, flipping once and basting with additional sauce each time you turn them. You’re watching for the sauce to bubble and develop charred edges — that’s the bark forming, and it’s what makes these ribs taste like they came from a proper BBQ joint.
Why This Method Is Ideal for Entertaining
- Ribs can be baked up to 3 days ahead and refrigerated
- The oven phase is hands-off and foolproof
- Grilling time is short enough to do while guests are arriving
- Works with any grill: gas, charcoal, or even a grill pan if needed
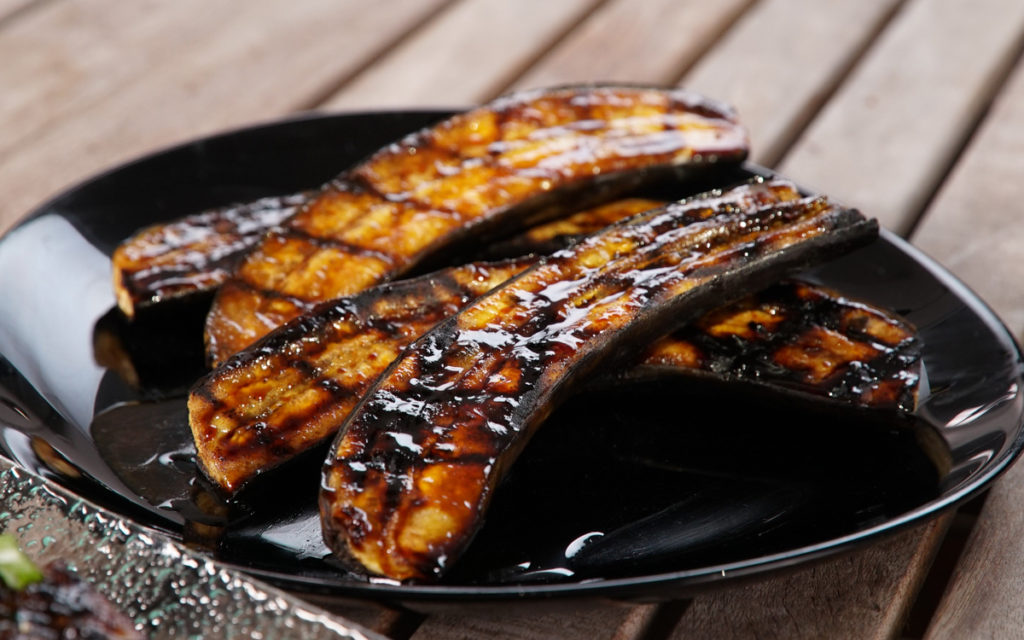
6. Spare Ribs with Rum and Soy BBQ Marinade
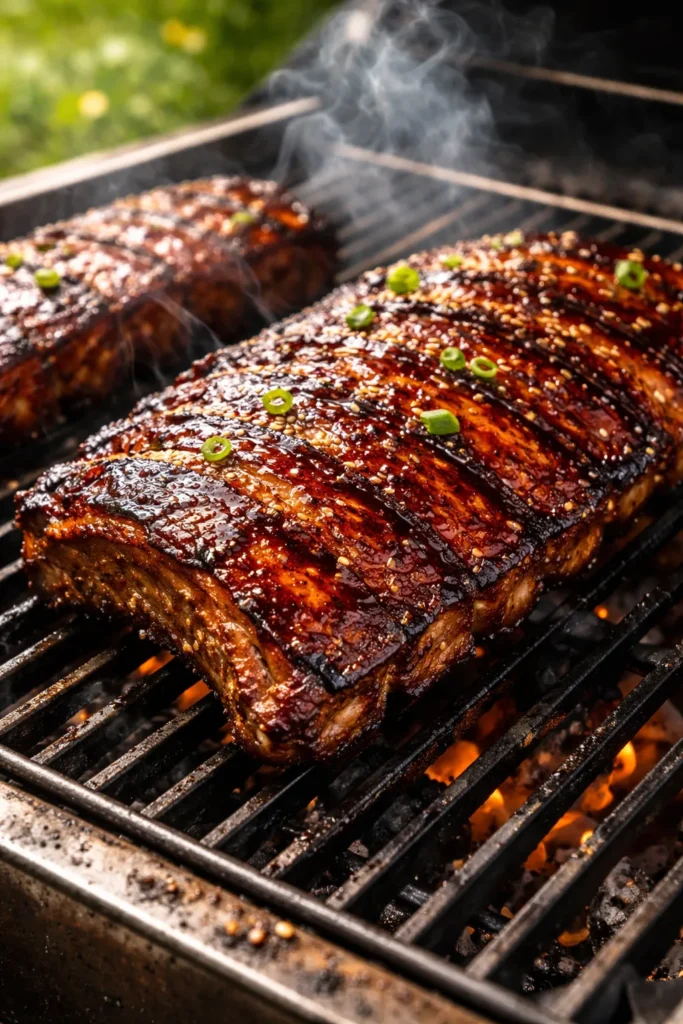
This recipe takes a different starting approach — a wet marinade rather than a dry rub — and the result is ribs with a distinctly deeper, more complex flavor profile. The combination of brown sugar, soy sauce, Worcestershire sauce, and rum creates a marinade that’s equal parts sweet, salty, and savory, with a faint underlying warmth that works beautifully with the richness of spare rib fat.
The Marinade
Combine 1 cup of brown sugar, ½ cup of chili sauce, ¼ cup of ketchup, ¼ cup of soy sauce, ¼ cup of Worcestershire sauce, ¼ cup of dark rum, 2 cloves of crushed garlic, 1 teaspoon of dry mustard, and a pinch of black pepper in a bowl. This makes enough to coat about 4 pounds of spare ribs generously.
Cooking Process
Cut the spare ribs into serving-size sections, wrap them in a double layer of foil, and bake at 350°F for 1½ hours. Unwrap and drain the drippings (don’t throw them away — freeze them and add them to soups or bean dishes later). Transfer the ribs to a roasting pan and coat them with the marinade. Let them sit at room temperature for at least 1 hour, or refrigerate overnight if you want the flavor to go even deeper.
Grill the marinated ribs over medium heat for 30 minutes, basting with additional marinade throughout. The sauce on these ribs doesn’t just coat the surface — because of the pre-bake and marinade soak, it penetrates the meat itself.
Quick Facts
- Cut: Spare ribs, approximately 4 pounds
- Pre-bake temperature: 350°F for 1½ hours
- Grill finish: 30 minutes at medium heat, basting continuously
- Make-ahead tip: Cook the ribs the day before, marinate overnight, and grill fresh the next evening
Pro tip: If you don’t have a grill available for the finish, bake the marinated ribs for an additional 30 minutes at 350°F, basting with sauce halfway through.
7. Kansas City Style Ribs with Sweet Tomato Glaze

Kansas City-style barbecue is defined by its sauce — thick, sweet, tomato-based, with a molasses richness that coats the back of a spoon and your fingers in equal measure. Where Memphis ribs are often served dry with the rub as the star, Kansas City ribs are all about that sticky, lacquered glaze that builds up in layers during cooking. Getting multiple layers of sauce onto the meat — basting, then cooking, then basting again — is what separates KC-style ribs from just “ribs with sauce on them.”
The Sauce
The sauce here needs body and sweetness as its foundation. Start with 1½ cups of ketchup as the base. Add ½ cup of Worcestershire sauce, 2 tablespoons of soy sauce, 5 tablespoons of light brown sugar, 2 tablespoons of yellow mustard, 1 teaspoon each of garlic powder and onion powder, 1 teaspoon of liquid smoke, 1 teaspoon of apple cider vinegar, 3 tablespoons of fresh lemon juice, and 2 tablespoons of pure maple syrup (not pancake syrup — the difference in flavor is significant). Whisk everything together and set aside.
Layering the Glaze
Apply a straightforward dry rub to baby back ribs and cook them using your preferred low-and-slow method — oven at 300°F for 2 hours, or indirect grill heat at 250°F for 2½ to 3 hours. Once the ribs reach tenderness, the glazing process begins.
Brush a generous layer of sauce onto the ribs, then return them to heat — broiler, grill, or uncovered in the oven — for 10 minutes. Brush another layer on top, cook for another 5 minutes. Do this two or three times total. Each layer builds on the last, creating that characteristic thick, glossy Kansas City bark that practically shines under light.
What Makes It KC Style
- Sweet and tomato-forward sauce with molasses or maple undertones
- Multiple basting layers, not just a single coat at the end
- Finished sauce should be thick enough to cling to the meat without dripping off
- Pairs classically with potato salad, mac and cheese, and baked beans
8. Memphis-Style Dry-Rubbed Spare Ribs
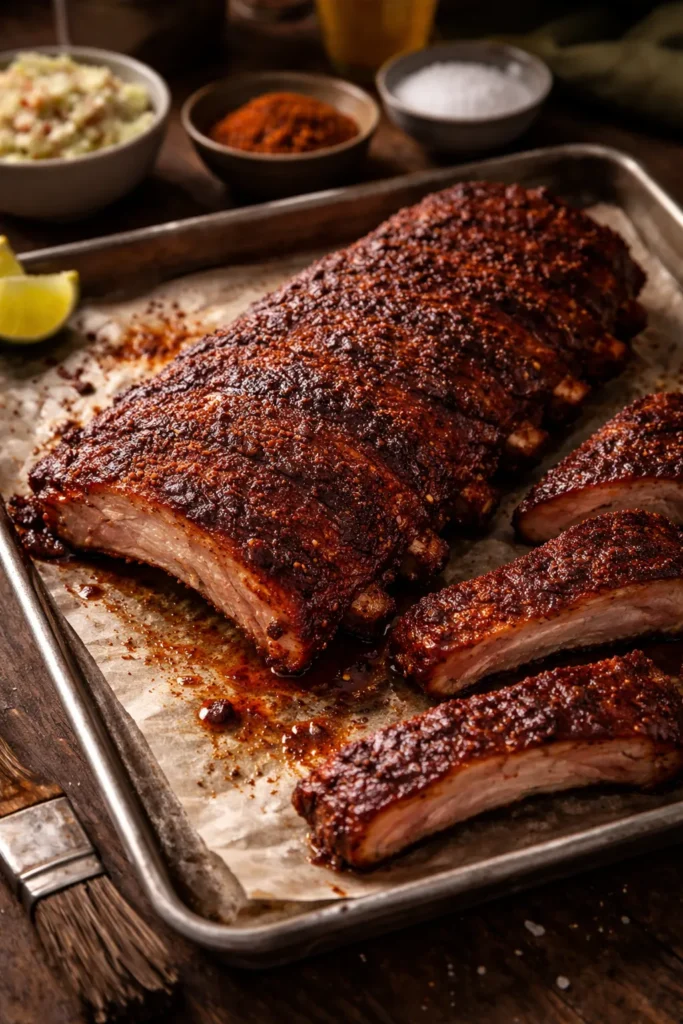
Memphis barbecue carries a fierce, well-earned reputation, and its approach to ribs is as confident as it gets: no sauce required. Memphis-style ribs live and die by the dry rub — a bold, complex spice blend that forms a crust on the exterior during cooking, creating layers of flavor without needing any sauce to prop it up. If you’ve only eaten sauced ribs your entire life, eating a proper Memphis dry rib for the first time is a genuinely revelatory experience.
The Memphis Rub Formula
This rub is built for maximum crust formation and deep flavor penetration. Combine 2½ tablespoons of smoked paprika, 2½ tablespoons of lemon pepper, 1¼ tablespoons of kosher salt, 1 tablespoon of smoked garlic powder, ½ tablespoon of onion powder, ½ tablespoon of ground black pepper, and ½ teaspoon of cayenne pepper. The lemon pepper is not optional here — it adds a brightness that cuts through the fat and keeps the rub from feeling heavy.
For an optional marinade that adds another dimension of flavor before the rub even goes on, whisk together ⅓ cup of soy sauce, ¼ cup of olive oil, ¼ cup of apple cider vinegar, 2 tablespoons of minced garlic, 2 tablespoons of ketchup, and a pinch each of garlic powder, onion powder, and lemon zest. Coat the ribs and let them sit for 30 to 60 minutes before applying the dry rub.
Cooking the Memphis Way
Memphis ribs traditionally go over indirect heat on a charcoal grill or smoker, cooked without foil wrapping so the exterior develops a proper crust rather than steaming soft. Preheat your grill so one side runs at around 300°F. Place the rubbed racks on the cool side, bone-side down, and cook for 30 minutes. Flip and continue cooking until the internal temperature reaches between 190°F and 203°F — 190°F gives you firm, slice-able meat that stays on the bone, while 203°F produces the pull-apart texture most people associate with “fall-off-the-bone” ribs.
After They Come Off the Heat
Rest the racks under a loose foil tent for 30 to 60 minutes. This is longer than most recipes call for, but it makes a difference — the juices redistribute fully throughout the meat, and every bite stays succulent instead of losing all its moisture to the cutting board. Slice between the bones and serve as-is, or with a small side cup of vinegar-based sauce for those who want something to dip.
What Sets This Apart
- No sauce during cooking — the rub creates the bark on its own
- Foil-free cooking preserves a proper dry crust
- The lemon pepper and smoked paprika combination gives the rub both brightness and depth
- Internal temperature is the most reliable doneness indicator — use a meat thermometer every time
Fun fact: Memphis barbecue has two main “factions” — wet and dry — and both are considered authentic. Dry-rubbed ribs represent the more purist tradition, while wet Memphis ribs get a thin vinegar-based sauce applied at the end. Either approach works with this rub.
Sides, Storage, and Reheating
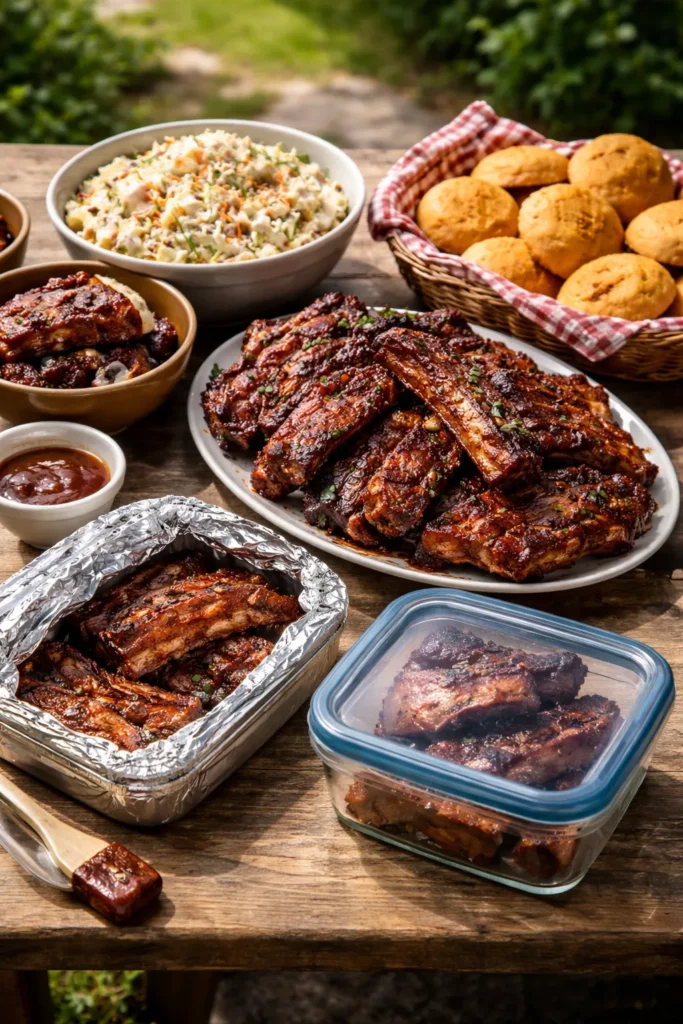
The ribs themselves are the centerpiece, but what surrounds them on the plate matters more than people give credit for. Classic potato salad (creamy or French style), coleslaw (tangy, not overly sweet), and cornbread muffins are the traditional companions because they provide contrast — cool and creamy against hot and smoky, soft and tender against the chew of the bark. Grilled corn, baked beans, and a crisp green salad also work without competing with the ribs for attention.
Leftover ribs store well. Wrap them tightly in foil or place them in an airtight container and refrigerate for up to 4 days. For longer storage, wrap individual portions in plastic wrap, then foil, and freeze for up to 3 months — thaw overnight in the refrigerator before reheating.
Reheating is where many people accidentally ruin otherwise excellent ribs. Don’t microwave them. Instead, place the ribs on a foil-lined baking sheet, brush with a fresh layer of BBQ sauce, cover tightly with foil, and warm in a 250°F oven for 30 to 35 minutes. Remove the foil for the last 10 to 15 minutes so the sauce can set back up and the bark can crisp.
One reheating trick worth knowing: add a tablespoon of apple juice or water inside the foil before sealing. The steam revives moisture without making the meat soggy. Leftover rib meat also shreds beautifully for tacos, baked beans, or quesadillas — the smoky flavor carries through into anything you mix it with.
Final Thoughts
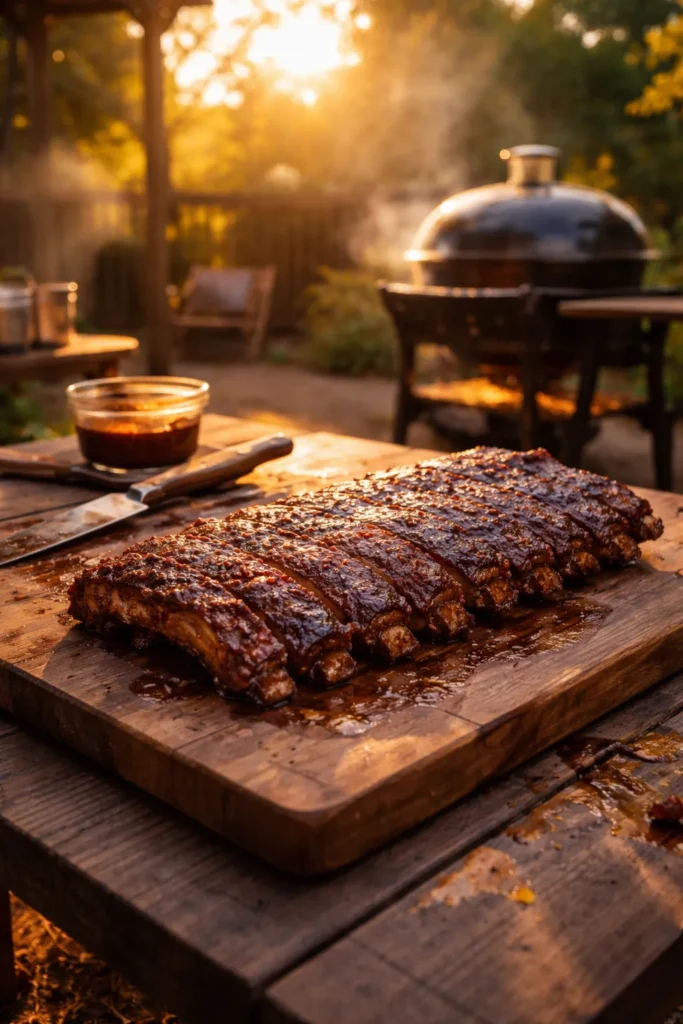
Cooking ribs at a backyard cookout isn’t just about the food — it’s about the whole experience of slow cooking, good smells, cold drinks, and friends who keep wandering over to ask “how much longer?” The methods here range from a 4-plus-hour smoke to a quick two-stage oven-and-grill approach, so there’s a version that fits your timeline and your setup.
Pick one recipe and make it twice before you try another. The second time you cook any of these, you’ll already know the hot spots on your grill, how your broiler behaves, and exactly what “bends easily and cracks on top” looks like on your specific rack. That knowledge is worth more than any single recipe tweak.
The membrane always comes off, the rub always gets used fully, and the ribs always rest before slicing. Get those three things right, and the rest takes care of itself.