Few pieces of kitchen equipment earn genuine loyalty the way a cast iron skillet does. It’s heavy, it runs hot, and it doesn’t apologize for either of those things. People who cook with cast iron regularly will tell you — with complete sincerity — that it changed the way they cook. Not because it’s trendy or because someone on the internet told them to buy one, but because once you’ve seared a steak in a ripping-hot cast iron pan or pulled a golden cornbread from one straight out of the oven, you understand something that no other pan can teach you.
The magic is in the heat retention. Cast iron is slow to warm up, but once it’s hot, it holds that heat with a stubbornness that stainless steel and nonstick simply can’t match. That means a better sear, more even baking, and the ability to go from stovetop to oven without skipping a beat. It also means that the same pan you use to fry bacon at breakfast can bake a skillet cookie for dessert the same evening.
What follows is a collection of eight recipes that genuinely earn their place in your rotation — not because they’re complicated or impressive at dinner parties, but because they work every single time, they taste like something you’d go back for, and they show off what cast iron does better than any other cookware in your kitchen. Each one comes with the technique notes, tips, and honest guidance you need to get it right on the first try — and the fifth.
Table of Contents
- Why Cast Iron Makes These Recipes Better
- The Stovetop-to-Oven Advantage
- Sizing Matters More Than Most People Realize
- 1. Cast Iron Skillet Cornbread
- Why This Recipe Works Every Time
- Ingredients
- Instructions
- Quick Tips
- 2. Pan-Seared Ribeye with Garlic Butter
- The Reverse-Sear Option Worth Knowing
- Ingredients
- Instructions
- Quick Tips
- 3. Chocolate Chip Skillet Cookie
- What Makes It Different From a Regular Cookie
- Ingredients
- Instructions
- Quick Tips
- 4. Chicken Fajitas
- Getting the Sear Right
- Ingredients
- Instructions
- 5. Deep-Dish Skillet Pizza
- No-Knead Dough Is the Move Here
- Ingredients
- Instructions
- 6. German Apple Pancake (Dutch Baby)
- Why This Works Better in Cast Iron
- Ingredients
- Instructions
- 7. One-Pan Chicken Thighs with Garlic, Olives, and Lemon
- Chicken Thighs Over Breasts — Always in Cast Iron
- Ingredients
- Instructions
- 8. Shakshuka (Baked Eggs in Spiced Tomato Sauce)
- The Cast Iron Advantage Here
- Ingredients
- Instructions
- Quick Tips
- Cast Iron Care Between Cooks
- What to Avoid
- When Your Pan Needs Re-Seasoning
- Final Thoughts
Why Cast Iron Makes These Recipes Better

Before getting into the actual cooking, it’s worth understanding why cast iron improves specific dishes in ways other pans don’t. It’s not marketing speak — there’s real, practical chemistry behind it.
When a skillet heats up evenly and stays at a consistent temperature, proteins sear instead of steam. The Maillard reaction — the browning process responsible for flavor crust on steaks, chicken skin, and even cornbread edges — requires sustained, direct heat. Nonstick pans can’t safely reach those temperatures. Stainless steel loses heat too quickly when cold food hits the surface. Cast iron holds its temperature through the drop, which means food browns instead of sticking and going pale.
For baked goods, the thick walls of a cast iron skillet act almost like a small brick oven. Heat radiates from the bottom and sides simultaneously, creating that signature crust on cornbread, cobbler, and skillet cookies that you simply can’t replicate in a standard cake pan.
The Stovetop-to-Oven Advantage
One of the biggest practical benefits — and something every recipe in this list takes advantage of — is cast iron’s ability to move seamlessly between the stovetop and oven. You can build a crust on the stovetop and finish cooking through in the oven, all in the same pan. Fewer dishes. More control. Better results.
Sizing Matters More Than Most People Realize
A 10-inch skillet handles most of these recipes comfortably. A 12-inch gives you more room for things like chicken fajitas or shakshuka where ingredient volume matters. If you only own one, a 10-inch is the more versatile starting point. For the skillet cookie specifically, a 10-inch is ideal — a 12-inch spreads the dough too thin and you lose that fudgy center that makes the whole thing worth making.
1. Cast Iron Skillet Cornbread
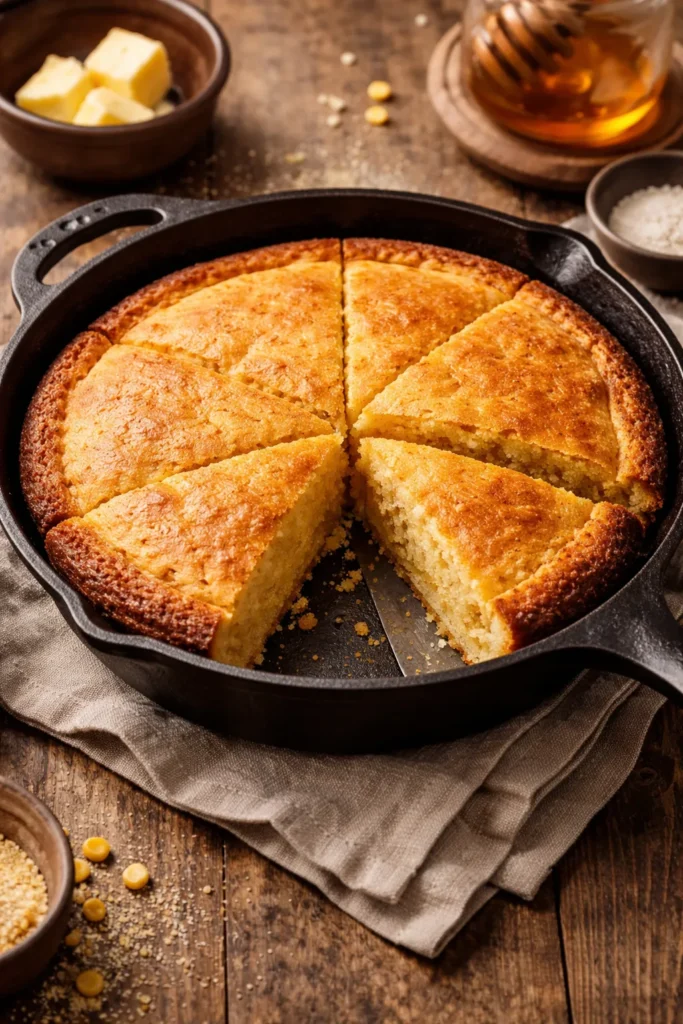
There’s cornbread, and then there’s cast iron skillet cornbread. The difference isn’t subtle. When you pour batter into a preheated, well-greased cast iron skillet, the bottom crust forms immediately on contact — crackling and golden before the bread even goes into the oven. The result is a bottom layer with the texture of a well-fried pancake wrapped around a tender, steamy interior. You can’t get that in a baking dish. You can’t get it in a muffin tin. It’s uniquely, specifically a cast iron thing.
Why This Recipe Works Every Time
The key move is preheating the skillet with butter or bacon fat before adding the batter. Three minutes in a 425°F oven with fat in the pan makes all the difference. The moment batter touches that hot surface, it sets — which means no sticking, and a crust that’s crisp rather than soft. Skip this step and you get decent cornbread. Do it and you get cornbread that people ask you for the recipe.
Ingredients
- 1 cup yellow cornmeal (stone-ground preferred for texture)
- 1 cup all-purpose flour
- 1 tablespoon baking powder
- 1 teaspoon fine salt
- 2 tablespoons granulated sugar (optional — Southern purists skip this entirely)
- 2 large eggs
- 1 cup whole buttermilk (or whole milk + 1 tbsp white vinegar, let sit 5 minutes)
- ¼ cup unsalted butter, melted, plus 1 tablespoon for the skillet
- Optional: 1 fresh jalapeño, seeded and finely diced; or ½ cup sharp cheddar, shredded
Yield: 8 wedges | Prep Time: 10 minutes | Cook Time: 20-22 minutes | Total Time: 30-32 minutes | Difficulty: Beginner — one bowl, minimal mixing, and a forgiving batter
Instructions
- Preheat the oven to 425°F (220°C). Place a 10-inch cast iron skillet in the oven while it heats.
- In a large bowl, whisk together cornmeal, flour, baking powder, salt, and sugar until combined.
- In a separate bowl, whisk eggs, buttermilk, and melted butter together until smooth.
- Pour the wet ingredients into the dry and stir until just combined — lumps are fine. Do not overmix or the cornbread will turn dense and tough.
- Fold in jalapeño or cheddar here if using.
- Carefully remove the hot skillet from the oven. Add 1 tablespoon of butter and swirl to coat the bottom and sides — it will sizzle and foam immediately.
- Pour in the batter. It should sizzle at the edges. Return to the oven immediately.
- Bake for 20-22 minutes, until the top is golden and a toothpick inserted in the center comes out clean.
- Cool in the pan for 5 minutes, then run a butter knife around the edge and invert onto a board or serve directly from the skillet in wedges.
Quick Tips
- Bacon fat beats butter for the skillet coating if you want that deeper, savory bottom crust
- Leftovers crumble into cold buttermilk for a traditional Southern after-dinner “treat” — surprisingly good
- Stone-ground cornmeal gives you more texture and a more complex corn flavor than fine-milled
2. Pan-Seared Ribeye with Garlic Butter
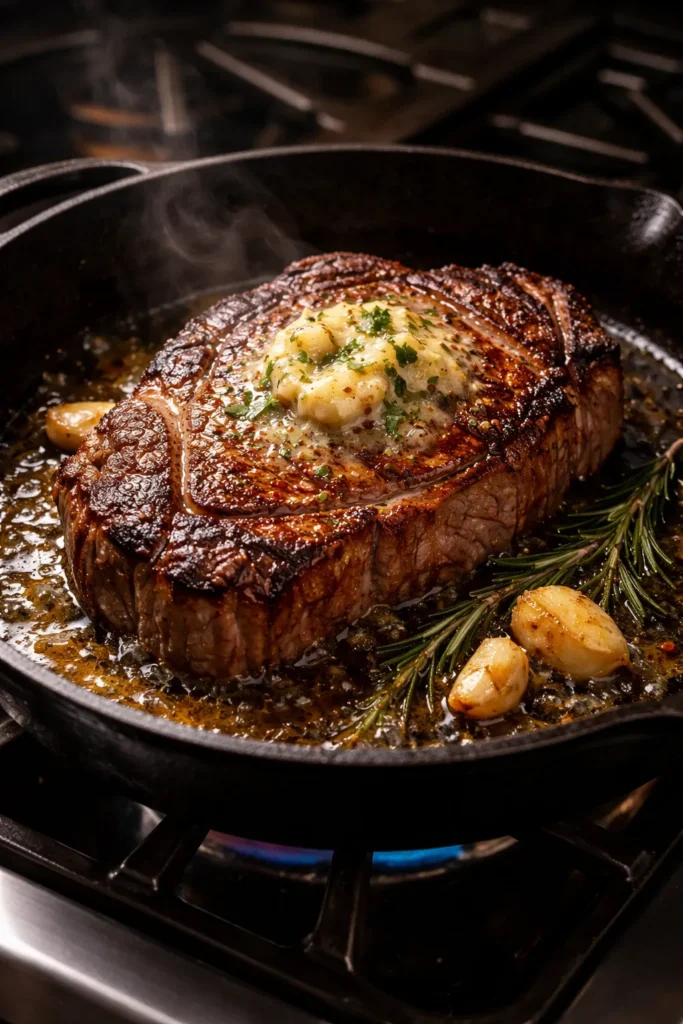
A well-seared ribeye is one of those things that feels like restaurant food until you realize how straightforward it is at home — provided you have the right pan. Cast iron is the only realistic option for home cooks wanting a proper steakhouse-style crust. The pan needs to be screaming hot, and it needs to stay hot when a cold, thick steak hits the surface. Cast iron does exactly that.
The Reverse-Sear Option Worth Knowing
For steaks thicker than an inch and a half, the reverse-sear method produces dramatically more even results. Cook the steak on a wire rack in a 275°F oven until it reaches 115°F internal temperature, then transfer it straight to a ripping-hot cast iron skillet for a 60-90 second sear per side. You get a crust with zero gray banding underneath — just edge-to-edge pink. For a standard 1-inch ribeye, the straightforward skillet method below works beautifully.
Ingredients
- 1 bone-in or boneless ribeye, at least 1 inch thick (roughly 12-16 oz)
- 1 teaspoon kosher salt per side, applied at least 45 minutes before cooking (or up to overnight in the fridge, uncovered)
- ½ teaspoon coarse black pepper
- 1 tablespoon neutral oil with a high smoke point (avocado or grapeseed)
- 2 tablespoons unsalted butter
- 3 garlic cloves, smashed and left in their skins
- 2 sprigs fresh thyme or rosemary
Yield: Serves 1-2 | Prep Time: 5 minutes active (plus 45 min salting) | Cook Time: 8-12 minutes | Total Time: 13-17 minutes active | Difficulty: Intermediate — timing and temperature control matter here
Instructions
- Take the steak out of the fridge at least 30 minutes before cooking. Pat completely dry with paper towels — surface moisture is the enemy of a good crust.
- Heat the cast iron skillet over high heat for 3-4 minutes until smoking. Add oil and swirl to coat.
- Lay the steak in the pan away from you. Do not move it. Sear for 2-3 minutes until a deep brown crust forms.
- Flip and sear the other side for 2 minutes.
- Stand the steak on its fat cap edge using tongs for 60 seconds to render the fat.
- Reduce heat to medium. Add butter, garlic, and herbs. As the butter melts and foams, tilt the pan and continuously spoon the hot butter over the steak for 1-2 minutes.
- Remove the steak and rest it on a wire rack for at least 5 minutes — this is non-negotiable. Cutting early loses every drop of juice you just worked for.
- Finish with a pinch of flaky salt just before serving.
Quick Tips
- A meat thermometer removes all guesswork: 130°F for medium-rare, 140°F for medium
- Flipping every 30 seconds during the early sear actually promotes faster, more even browning — contrary to the “flip once” mythology
- The garlic cloves left in their skins won’t burn as fast and impart a roasted, mellow flavor to the butter
3. Chocolate Chip Skillet Cookie
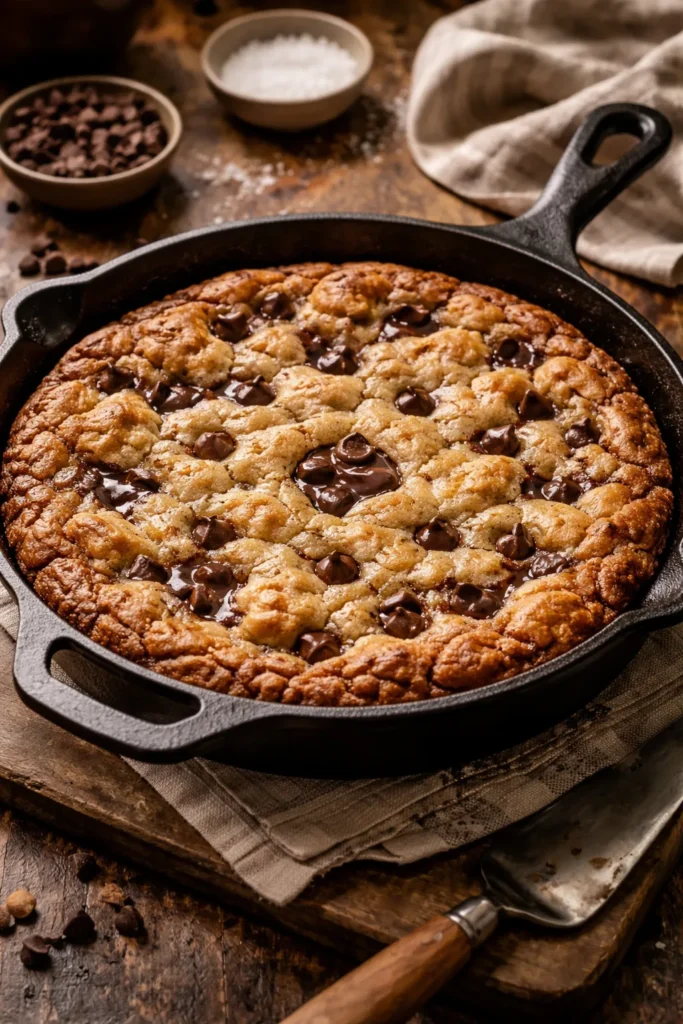
The skillet cookie — sometimes called a pizookie — is one of those recipes that sounds simple and tastes extraordinary. It’s a single giant chocolate chip cookie baked in a cast iron skillet, pulled from the oven slightly underbaked, and served warm with ice cream melting into the fudgy center. The cast iron creates crisp, almost caramel-edged sides while the middle stays molten and soft. It’s a completely different experience from a sheet pan cookie.
What Makes It Different From a Regular Cookie
The thermal mass of the skillet keeps the edges cooking long after the pan leaves the oven, so the contrast between the crisp perimeter and the gooey center is extreme and intentional. Don’t wait for the center to look done before pulling it — when the edges are set and golden but the middle still has a slight jiggle, that’s exactly when it comes out. It firms up as it rests.
Ingredients
- 1¼ cups all-purpose flour
- ½ teaspoon baking soda
- ½ teaspoon fine sea salt
- ½ cup (1 stick) unsalted butter, melted and slightly cooled
- ¾ cup light brown sugar, packed
- ¼ cup granulated sugar
- 1 large egg + 1 large egg yolk (the extra yolk adds richness and chew)
- 1½ teaspoons pure vanilla extract
- 1½ cups semi-sweet chocolate chips or chopped dark chocolate
Yield: 8-10 servings | Prep Time: 10 minutes | Cook Time: 18-22 minutes | Total Time: 30-32 minutes | Difficulty: Beginner — no mixer required, forgiving recipe
Instructions
- Preheat the oven to 350°F (175°C). Grease a 10-inch cast iron skillet lightly with softened butter.
- Whisk flour, baking soda, and salt together in a bowl. Set aside.
- In a large bowl, whisk the melted butter, brown sugar, and granulated sugar until combined and smooth.
- Add the egg, egg yolk, and vanilla. Whisk until the mixture lightens slightly in color, about 60 seconds.
- Switch to a wooden spoon or spatula. Add the flour mixture and stir until just combined.
- Fold in the chocolate chips.
- Press the dough evenly into the prepared skillet. It won’t fill the pan — that’s correct. It spreads as it bakes.
- Bake for 18-22 minutes, until the edges are set and golden brown but the center still has a slight wobble when you nudge the pan.
- Rest for 5 minutes before serving directly from the skillet with vanilla ice cream.
Quick Tips
- Brown the butter first (cook it over medium heat until nutty and amber) for a deeper, toffee-like flavor
- A sprinkle of flaky salt on top before baking cuts the sweetness and makes the chocolate flavor pop
- Swap half the chips for chopped pecans or walnuts for added texture
4. Chicken Fajitas
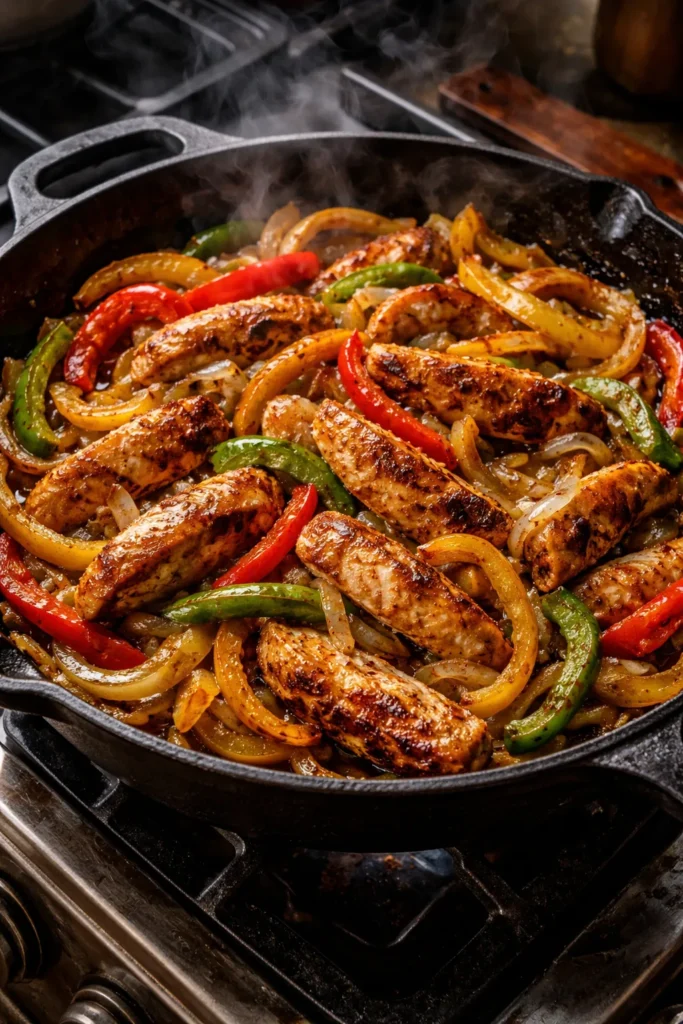
Cast iron fajitas are a different animal from what most people make at home. The high heat caramelizes the peppers and onions at the edges, chars the chicken skin slightly, and creates those sticky, browned bits at the bottom of the pan that carry enormous flavor. The sizzle when it hits the table is half the experience. Serve directly from the skillet for the full effect.
Getting the Sear Right
The biggest mistake with skillet fajitas is overcrowding the pan. If you pile everything in at once, the ingredients steam in their own moisture instead of searing, and you end up with pale, soft peppers rather than the charred, slightly sweet strips you’re after. Cook the chicken first, remove it, then cook the vegetables in the same pan so they pick up the fond (the browned drippings) from the chicken.
Ingredients
For the chicken:
- 1.5 lbs boneless skinless chicken thighs (thighs stay juicier than breasts under high heat)
- 2 tablespoons olive oil
- 1 tablespoon fresh lime juice
- 1½ teaspoons chili powder
- 1 teaspoon cumin
- ½ teaspoon smoked paprika
- ½ teaspoon garlic powder
- ½ teaspoon kosher salt
For the vegetables:
- 1 tablespoon olive oil
- 2 bell peppers (mix of colors), sliced into ¼-inch strips
- 1 large white onion, sliced into half-moons
- Salt and pepper to taste
To serve:
- Flour or corn tortillas, warmed
- Sour cream, guacamole, salsa, lime wedges, fresh cilantro
Yield: Serves 4-6 | Prep Time: 15 minutes + 30-min marinate | Cook Time: 20 minutes | Total Time: ~65 minutes | Difficulty: Beginner
Instructions
- Combine oil, lime juice, and spices in a bowl. Add chicken thighs and toss to coat. Marinate for at least 30 minutes at room temperature, or up to 8 hours in the fridge.
- Heat the cast iron over high heat until smoking. Add 1 tablespoon oil.
- Cook chicken thighs for 5-6 minutes per side without moving them, until cooked through and deeply browned. Internal temperature should reach 165°F.
- Transfer chicken to a cutting board and rest 5 minutes, then slice against the grain into strips.
- Return the pan to high heat. Add another tablespoon of oil and the onions. Cook without stirring for 2 minutes, then stir and cook 2 more minutes.
- Add the peppers and cook for 3-4 minutes until softened and charred at the edges.
- Return sliced chicken to the pan and toss everything together. Squeeze lime juice over the top.
- Serve directly from the skillet with warm tortillas and toppings.
5. Deep-Dish Skillet Pizza
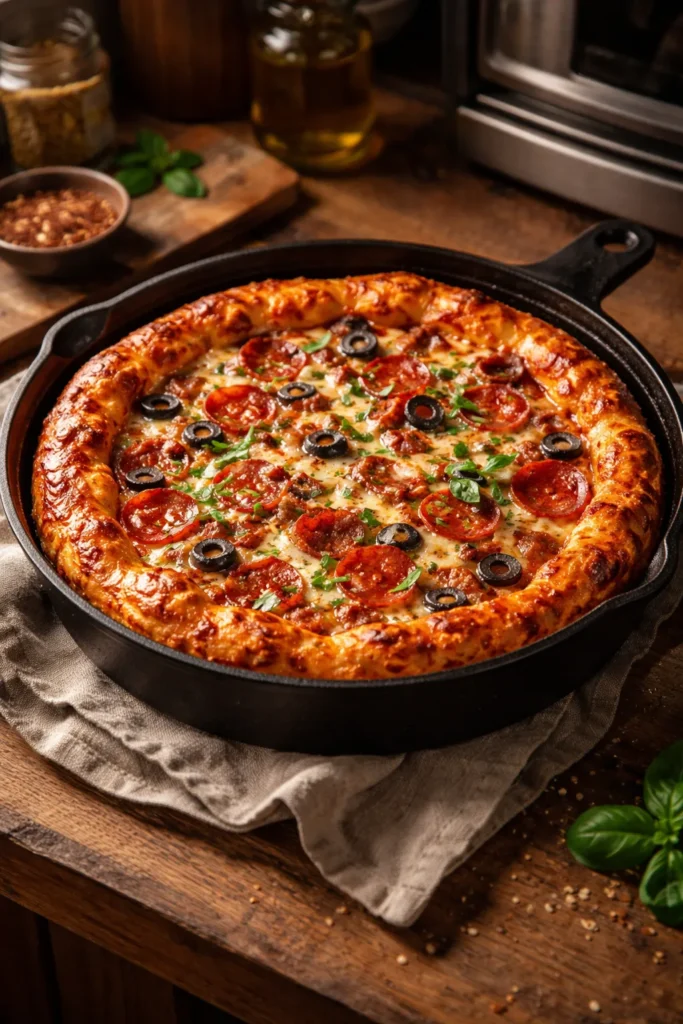
A cast iron skillet produces a style of pizza that most home ovens genuinely can’t achieve any other way — a thick, puffy crust that’s crispy and almost fried on the bottom from contact with the oiled pan, yet chewy and airy inside. Think less flat pizza, more focaccia-style depth. It’s forgiving with toppings, feeds a crowd from one pan, and requires no pizza stone, no special equipment, and no stretching skills whatsoever.
No-Knead Dough Is the Move Here
The best cast iron skillet pizza starts with a highly hydrated dough that you don’t need to knead or stretch. Mix it the night before, let it rise slowly in the fridge overnight, and by the next evening it’s ready to press directly into the oiled skillet. The long, cold rise develops flavor that a quick same-day dough simply doesn’t have time to build.
Ingredients
For the dough (make the night before):
- 2 cups all-purpose flour (or bread flour for extra chew)
- 1 teaspoon instant yeast
- 1 teaspoon kosher salt
- 1 cup lukewarm water
- 2 tablespoons olive oil, plus more for the pan
For the pizza:
- ½ cup crushed tomatoes or pizza sauce
- 1½ cups shredded low-moisture mozzarella
- Toppings of your choice: pepperoni, sliced mushrooms, roasted red peppers, fresh basil
- 2 tablespoons olive oil (for the skillet)
- Optional: ½ teaspoon dried oregano, red pepper flakes
Yield: Serves 4-6 | Prep Time: 10 minutes active + overnight rise | Cook Time: 25-30 minutes | Total Time: 10 minutes + overnight + 30 min bake | Difficulty: Beginner — the dough is hands-off, the technique is straightforward
Instructions
- The night before: Combine flour, yeast, and salt. Add water and oil. Stir until a shaggy, sticky dough forms. Cover and refrigerate overnight (up to 24 hours).
- Two hours before baking, pour 2 tablespoons of olive oil into a 10-inch cast iron skillet. Transfer the dough to the skillet.
- Using oiled fingers, gently stretch the dough toward the edges. It will resist — let it rest for 15 minutes and try again. After two attempts it will cooperate.
- Cover loosely with plastic wrap and let proof at room temperature for 90 minutes, until puffy and bubbly.
- Preheat oven to 500°F (260°C), or as high as your oven goes.
- Place the skillet on a stovetop burner over medium heat for 3-4 minutes. You’ll hear the bottom of the dough begin to sizzle and crisp. This step ensures a truly crunchy bottom crust.
- Remove from heat. Spoon sauce over the dough, leaving a 1-inch border. Add cheese and toppings.
- Transfer to the oven and bake for 15-20 minutes, until the crust is deeply golden and the cheese is bubbling and browned in spots.
- Run a thin spatula around the edges and underneath to check the crust. Let it rest in the pan for 5 minutes, then slide out onto a cutting board.
6. German Apple Pancake (Dutch Baby)
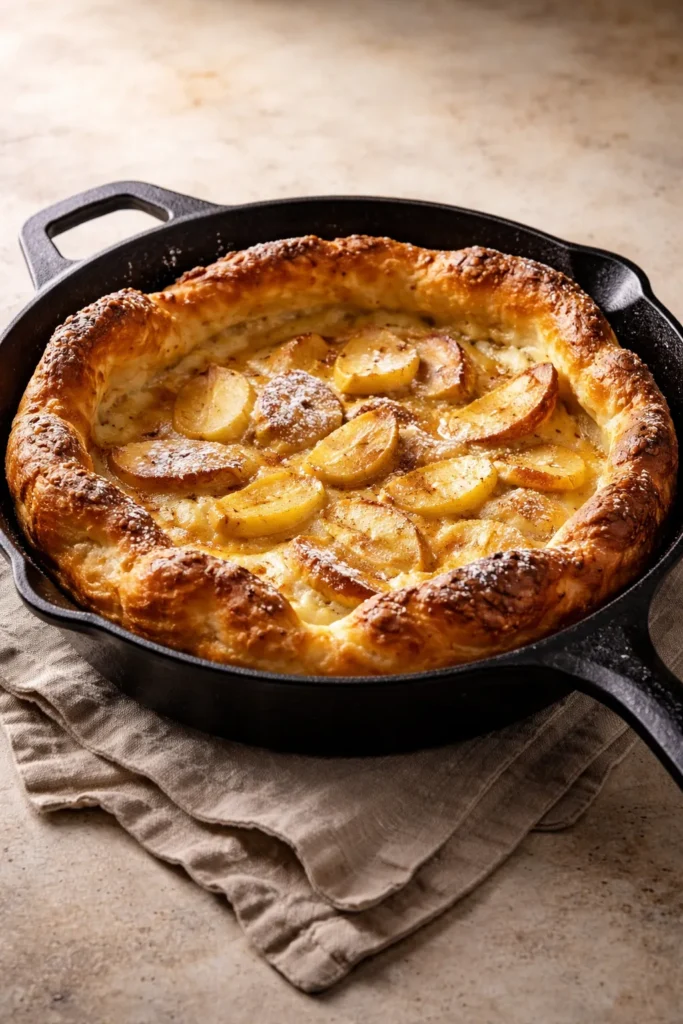
The German apple pancake — also called a Dutch baby — is one of the most satisfying things you can pull from an oven. You pour a thin, crepe-like batter into a hot buttered skillet, slide it into the oven, and what comes back 20 minutes later looks nothing like what went in. The edges puff dramatically and dramatically climb the sides of the pan, browning and crisping while the center stays custardy and tender. It deflates within minutes of coming out of the oven, so serve it immediately — this is not a dish that waits.
Why This Works Better in Cast Iron
The hot skillet at the start is what triggers the dramatic puff. The batter hits a surface that’s already hot enough to begin cooking immediately, which creates steam and causes the edges to rise fast. A cold pan produces a flat, crepe-like result. Cast iron holds the heat required throughout the full bake, while thinner pans often lose temperature partway through and produce uneven results.
Ingredients
- 3 large eggs, room temperature
- ¾ cup whole milk, room temperature
- ½ cup all-purpose flour
- 2 tablespoons granulated sugar
- 1 teaspoon pure vanilla extract
- Pinch of fine salt
- Pinch of freshly grated nutmeg
- 3 tablespoons unsalted butter
For the apple topping:
- 2 medium apples (Honeycrisp or Granny Smith), peeled, cored, and thinly sliced
- 2 tablespoons butter
- 3 tablespoons light brown sugar
- ½ teaspoon cinnamon
To serve: Powdered sugar, a squeeze of lemon, maple syrup, or whipped cream
Yield: Serves 3-4 | Prep Time: 10 minutes | Cook Time: 20-22 minutes | Total Time: 30-32 minutes | Difficulty: Beginner — the oven does all the dramatic work
Instructions
- Preheat oven to 425°F (220°C) with the cast iron skillet inside.
- Blend eggs, milk, flour, sugar, vanilla, salt, and nutmeg in a blender for 30 seconds until completely smooth. Let the batter rest for 5 minutes — this allows the gluten to relax and helps the pancake puff more evenly.
- In a separate skillet, cook the apple slices in butter with brown sugar and cinnamon over medium heat for 4-5 minutes until softened but not mushy. Set aside.
- Carefully remove the hot cast iron from the oven. Add butter and swirl to coat completely. The butter will foam and begin to brown immediately.
- Pour the batter into the center of the pan all at once. Arrange the sautéed apples over the top.
- Return to the oven immediately. Bake for 18-22 minutes without opening the door, until the edges have puffed dramatically and turned deep golden brown.
- Dust with powdered sugar and serve directly from the skillet at the table — it will deflate as it cools, and that’s expected.
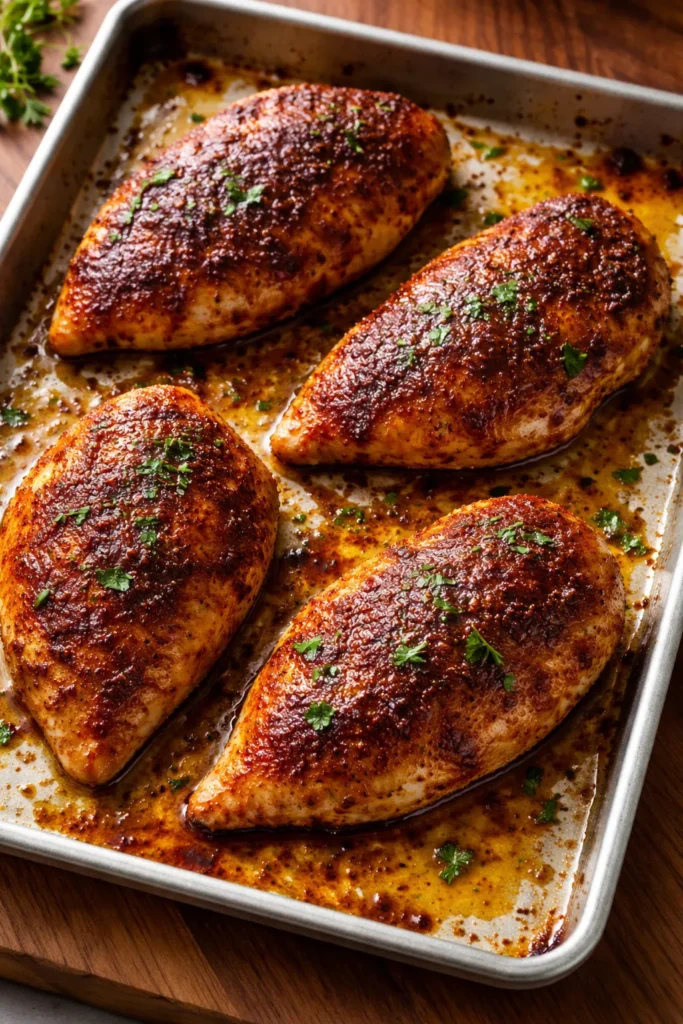
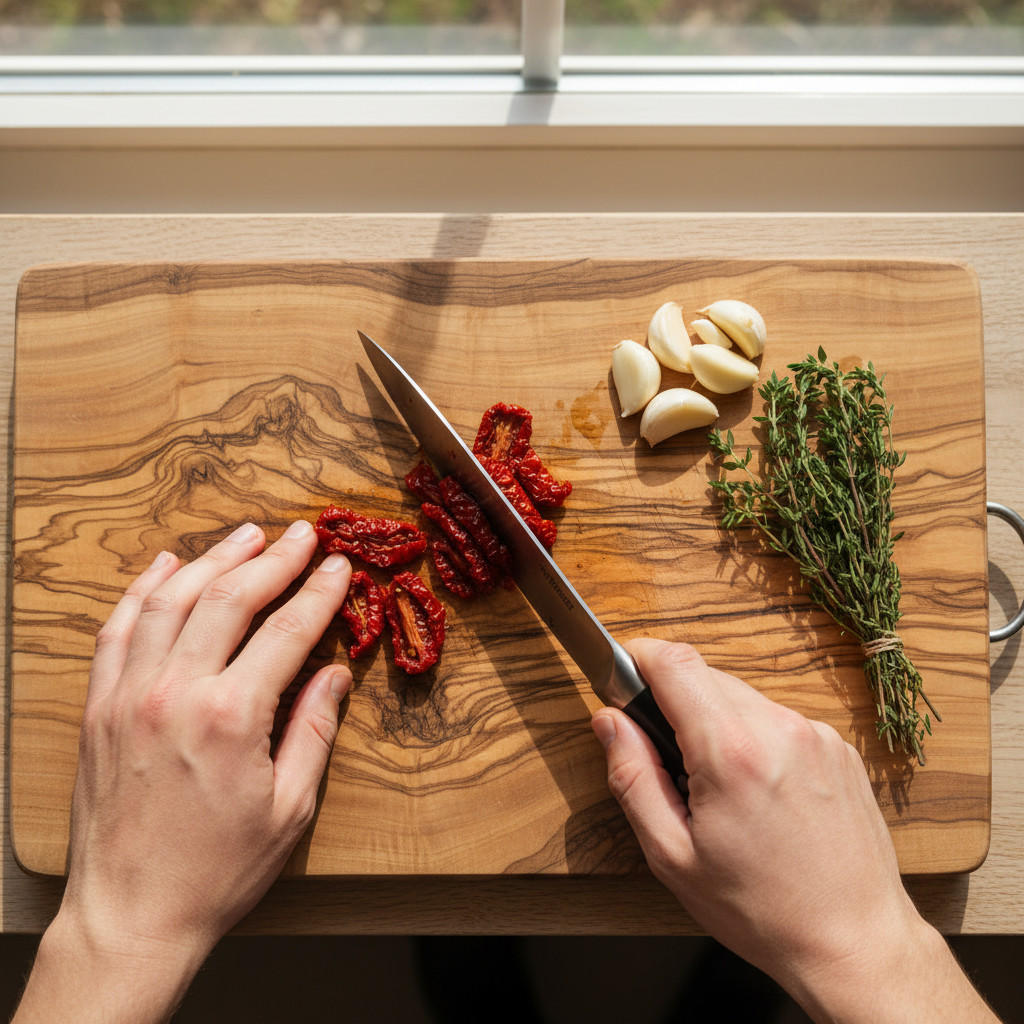
7. One-Pan Chicken Thighs with Garlic, Olives, and Lemon
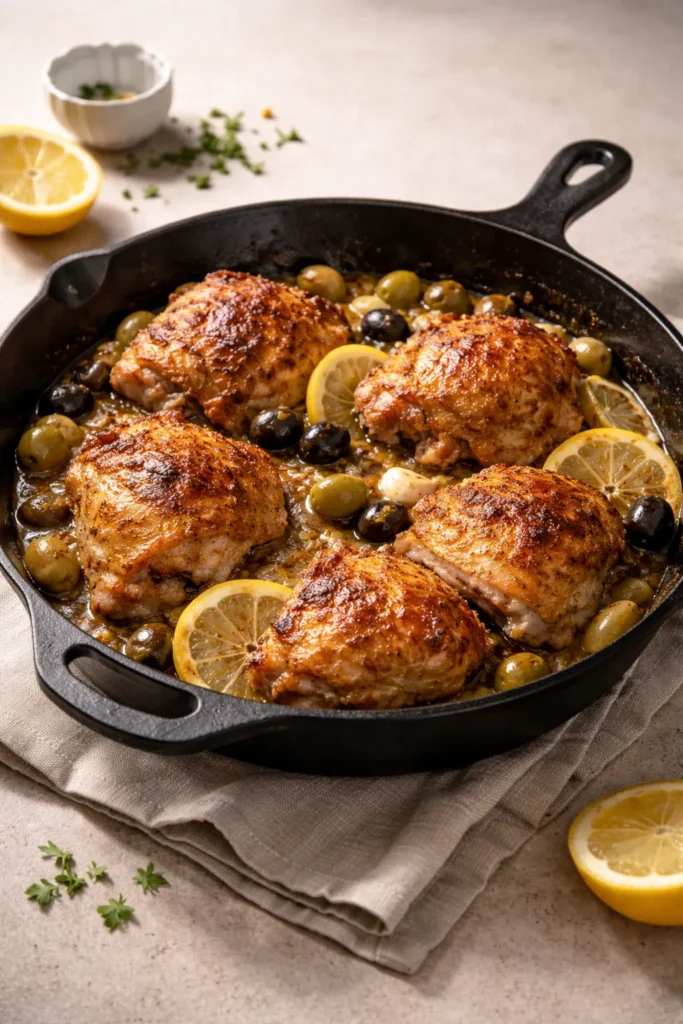
This is the kind of weeknight dinner that feels more considered than it actually is. Bone-in, skin-on chicken thighs sear in cast iron until the skin is shatteringly crisp, then finish in the oven while a pan sauce of garlic, olives, white wine, and lemon builds itself in the same pan. Everything comes together in one skillet, and the result is a complete dinner that’s as good for guests as it is for a Tuesday night.
Chicken Thighs Over Breasts — Always in Cast Iron
Chicken thighs contain more fat and connective tissue, which means they can handle high heat and extended cooking without drying out. Breasts lose moisture quickly under the same conditions. For cast iron recipes that involve both stovetop searing and oven finishing, thighs are the far better choice — they emerge more flavorful and more forgiving of a few extra minutes in the heat.
Ingredients
- 4 bone-in, skin-on chicken thighs
- 1 teaspoon kosher salt + black pepper
- 1 tablespoon olive oil
- 6 garlic cloves, peeled and smashed
- ½ cup pitted green or Castelvetrano olives
- ½ cup dry white wine (or low-sodium chicken stock)
- 2 tablespoons fresh lemon juice
- 1 teaspoon lemon zest
- 2 sprigs fresh rosemary or thyme
- 1 tablespoon unsalted butter (to finish)
- Fresh flat-leaf parsley for serving
Yield: Serves 4 | Prep Time: 10 minutes | Cook Time: 35 minutes | Total Time: 45 minutes | Difficulty: Beginner
Instructions
- Preheat oven to 425°F (220°C). Pat chicken dry and season generously with salt and pepper on both sides.
- Heat cast iron over medium-high. Add olive oil. When shimmering, place chicken skin-side down.
- Cook undisturbed for 8-10 minutes, until the skin releases naturally from the pan and is deeply golden. Resist the urge to move the chicken. If it’s sticking, it’s not ready to flip.
- Flip and cook the other side for 3 minutes. Transfer chicken to a plate temporarily.
- Reduce heat to medium. Add garlic to the pan and cook 60 seconds until fragrant.
- Pour in white wine. Scrape up any browned bits from the pan with a wooden spoon.
- Add olives, lemon juice, zest, and herb sprigs. Return chicken skin-side up to the pan.
- Transfer to the oven and roast for 20-22 minutes, until the skin is crisp and the thickest part of the thigh reads 165°F.
- Remove from oven. Stir butter into the pan juices. Spoon pan sauce over chicken and scatter parsley. Serve directly from the skillet.
8. Shakshuka (Baked Eggs in Spiced Tomato Sauce)
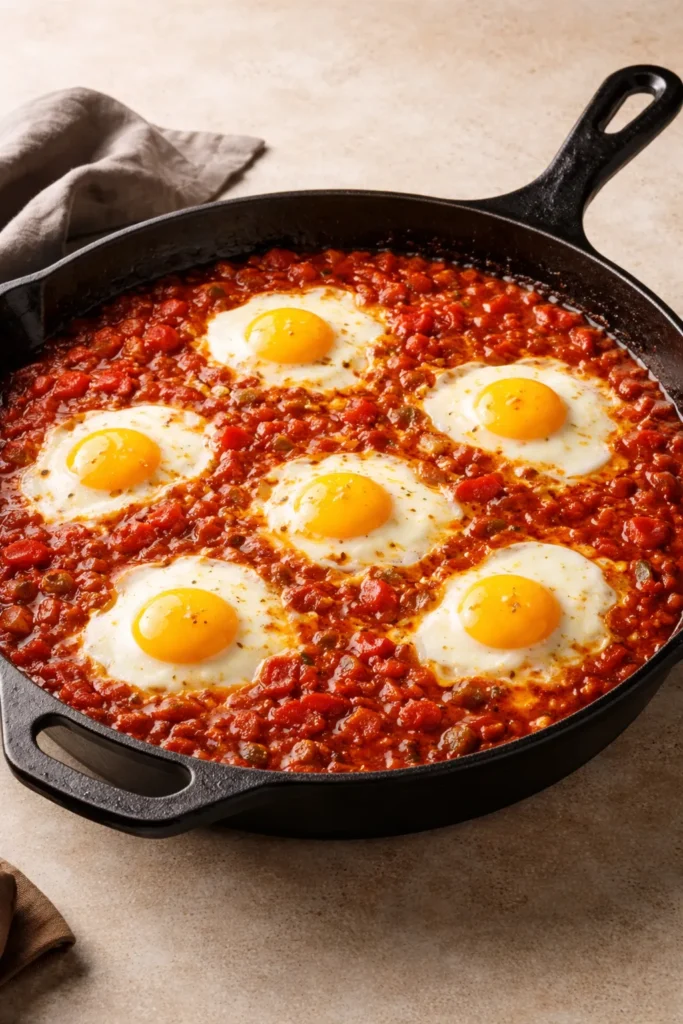
Shakshuka is the dish that convinces people breakfast-for-dinner is a legitimate lifestyle. Eggs poached directly in a spiced tomato and pepper sauce, finished in the oven, served in the pan with crusty bread on the side for dragging through the yolk and sauce. It comes together in under 30 minutes, requires pantry staples, and looks — and tastes — far more impressive than the effort involved.
The Cast Iron Advantage Here
A cast iron skillet holds heat so evenly that the eggs cook at an identical rate all the way around the pan, without the sauce scorching on one side while the eggs remain raw on the other. Thin stainless pans create hot spots that burn the tomato base before the whites are set. Cast iron gives you control — and it goes directly to the table, which is the only proper way to serve this dish.
Ingredients
- 2 tablespoons olive oil
- 1 medium yellow onion, finely diced
- 1 red bell pepper, diced
- 4 garlic cloves, minced
- 1 teaspoon ground cumin
- 1 teaspoon smoked paprika
- ½ teaspoon ground coriander
- ¼ teaspoon cayenne (adjust to heat preference)
- 1 can (28 oz) whole peeled tomatoes, crushed by hand
- 1 teaspoon sugar (balances acidity)
- Salt and pepper to taste
- 5-6 large eggs
- ½ cup crumbled feta cheese
- Fresh flat-leaf parsley or cilantro for serving
- Crusty bread or warm pita for serving
Yield: Serves 3-4 | Prep Time: 10 minutes | Cook Time: 20-25 minutes | Total Time: 30-35 minutes | Difficulty: Beginner — one pan, straightforward timing
Instructions
- Preheat oven to 375°F (190°C).
- Heat olive oil in cast iron over medium heat. Add onion and cook for 5 minutes until softened and translucent.
- Add bell pepper and cook another 3-4 minutes until softened.
- Add garlic, cumin, paprika, coriander, and cayenne. Cook for 60 seconds, stirring constantly, until the spices are fragrant and toasted.
- Pour in crushed tomatoes and add sugar. Stir to combine and simmer for 8-10 minutes, stirring occasionally, until the sauce thickens slightly. Season with salt and pepper.
- Use the back of a spoon to create 5-6 wells in the sauce. Crack one egg into each well. Season the eggs lightly with salt.
- Scatter feta over the sauce.
- Transfer to the oven and bake for 8-12 minutes. For runny yolks, pull at 8 minutes. For fully set yolks, go to 12. The whites should be fully opaque with no jiggle.
- Remove from oven, scatter parsley generously, and serve immediately directly from the skillet with plenty of bread.
Quick Tips
- Add 2 tablespoons of harissa paste with the spices for a deeper, more complex heat
- A handful of baby spinach stirred into the sauce before adding the eggs adds nutrition without changing the dish significantly
- Leftovers reheat poorly — make only what you’ll eat in one sitting
Cast Iron Care Between Cooks
A cast iron skillet only gets better with use — but only if you treat it reasonably between sessions. The rules are simpler than most people think.
After cooking, while the pan is still warm, rinse it with hot water and scrub with a stiff brush or a chainmail scrubber if anything is stuck. No dish soap is necessary for everyday cleaning, though a small amount won’t destroy a well-seasoned pan the way older advice insists. Dry the pan completely — either with a towel immediately or briefly on a burner over low heat.
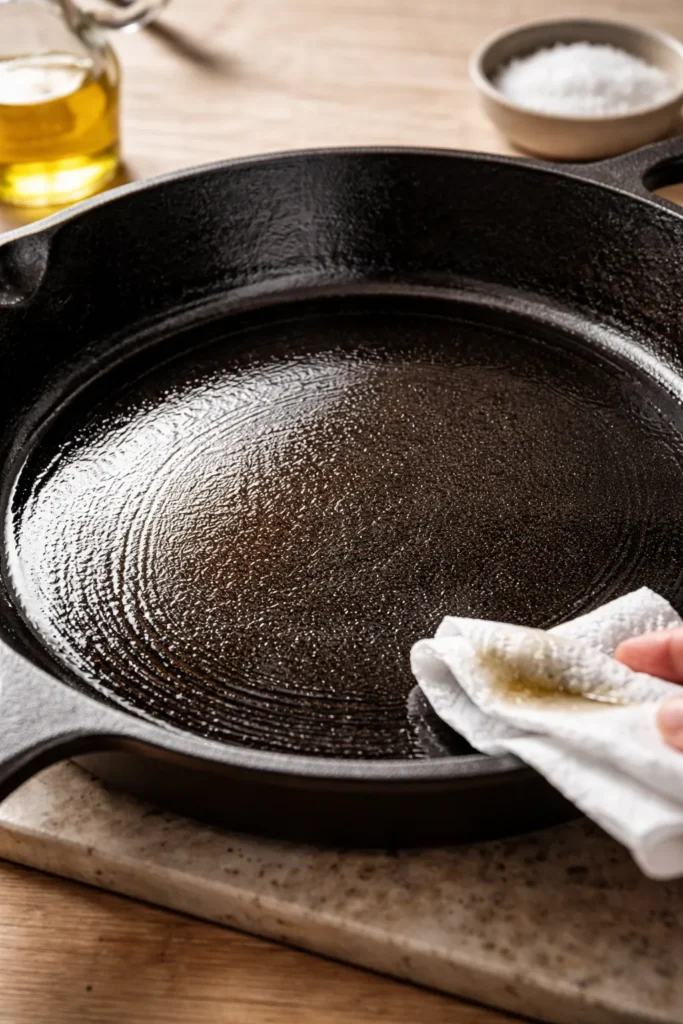
Once dry, rub a thin layer of oil (flaxseed, grapeseed, or avocado oil all work well) over the interior surface with a paper towel. The coating should be so thin it’s almost invisible — a thick oil layer goes rancid and turns sticky. Store in a dry spot.
What to Avoid
Soaking cast iron in water is the fastest way to invite rust. Even a few hours of sitting in the sink with water in it can begin to oxidize the surface. Similarly, avoid cooking highly acidic foods like tomato-based sauces for long periods until your seasoning is well-established — the acid strips the polymerized oil coating that makes cast iron perform so well. Once your pan has several months of regular use behind it, short-duration acidic cooking (like shakshuka) is completely fine.
When Your Pan Needs Re-Seasoning
If you see patches of rust, sticky residue, or food sticking persistently despite proper oiling, your pan needs a full re-season. Scrub off any rust with steel wool, wash thoroughly, dry completely in a 200°F oven for 10 minutes, then apply 4-5 thin coats of oil, baking each coat at 450°F for one hour with the pan upside-down. Each layer adds to the protective coating. Within a few rounds, you’ll be back to cooking without issue.
Final Thoughts
A cast iron skillet isn’t special because it’s old-fashioned or because it looks good hanging on the wall. It’s special because it genuinely makes food taste better — and the eight recipes above prove that across every meal of the day, from a puffed German pancake at breakfast to a chicken thigh dinner fragrant with lemon and olives.
The through-line in all of these recipes is that cast iron rewards confidence. Don’t move the steak. Don’t open the oven on the Dutch baby. Don’t pull the shakshuka too early if you want runny yolks. The pan does the work when you trust the heat and give the food time to do what it needs to do.
Start with whichever recipe feels most practical this week. The cornbread and skillet cookie are where most cooks start — low stakes, high reward, immediate confidence. The chicken thighs and ribeye follow naturally once you’ve felt what it’s like to pull a properly seared piece of protein from a ripping-hot pan. By the time you’re making deep-dish pizza and shakshuka, you’ll wonder why you ever reached for another pan at all.