Few condiments carry as much personality as a well-made chutney. Sweet, tangy, spiced, and deeply savory all at once — it’s the kind of thing that transforms a simple cheese board into something worth talking about, or turns a plain grilled chicken breast into a meal you’d actually be proud to serve guests.
Chutney has deep roots in Indian cuisine, where “chatni” referred to fresh, vibrant sauces made from herbs, spices, and whatever produce was at hand. When British colonizers encountered these condiments, they took the idea home and transformed it into the long-cooked, vinegar-preserved style that became a British pantry staple. Both traditions are worth knowing — and both are represented here.
What makes chutney so satisfying to cook at home is the formula itself. Fruit or vegetables, vinegar, sugar, onion, and spices — those five elements are all you need. The specific combinations are where your creativity comes in. You can work through a glut of summer tomatoes, rescue overripe mangoes from the fruit bowl, or build something worthy of a gift jar from whatever is growing in the garden.
The eight recipes below cover a wide range of flavors and styles, from a sharp and warming apple chutney to a silky fresh mint version that comes together in under ten minutes. Each one includes everything you need to make it from scratch with complete confidence, along with tips that come from the kind of repetition that only happens when you genuinely love eating something.
Table of Contents
- 1. Classic Apple Chutney
- Why Onions and Dried Fruit Are Non-Negotiable Here
- Serving and Storage Notes
- 2. Fresh Mango Chutney
- The Sweetener Swap Worth Knowing About
- Serving and Storage Notes
- 3. Quick Tomato Chutney
- Red Wine Vinegar vs. Malt Vinegar for Tomatoes
- Serving and Storage Notes
- 4. Red Onion Chutney
- Why Red Onions Specifically
- Serving and Storage Notes
- 5. Cranberry and Ginger Chutney
- The Spice Profile That Makes This One Stand Out
- Serving and Storage Notes
- 6. Fresh Green Mint and Cilantro Chutney
- Getting the Heat Level Right
- Serving and Storage Notes
- 7. Spiced Plum Chutney
- The Star Anise Question
- Serving and Storage Notes
- 8. Peach and Ginger Chutney
- Fresh Ginger vs. Preserved Ginger
- Serving and Storage Notes
- The Chutney-Making Techniques Every Batch Depends On
- The Plate Test for Doneness
- Why Maturation Isn’t Just Impatience
- Final Thoughts
1. Classic Apple Chutney
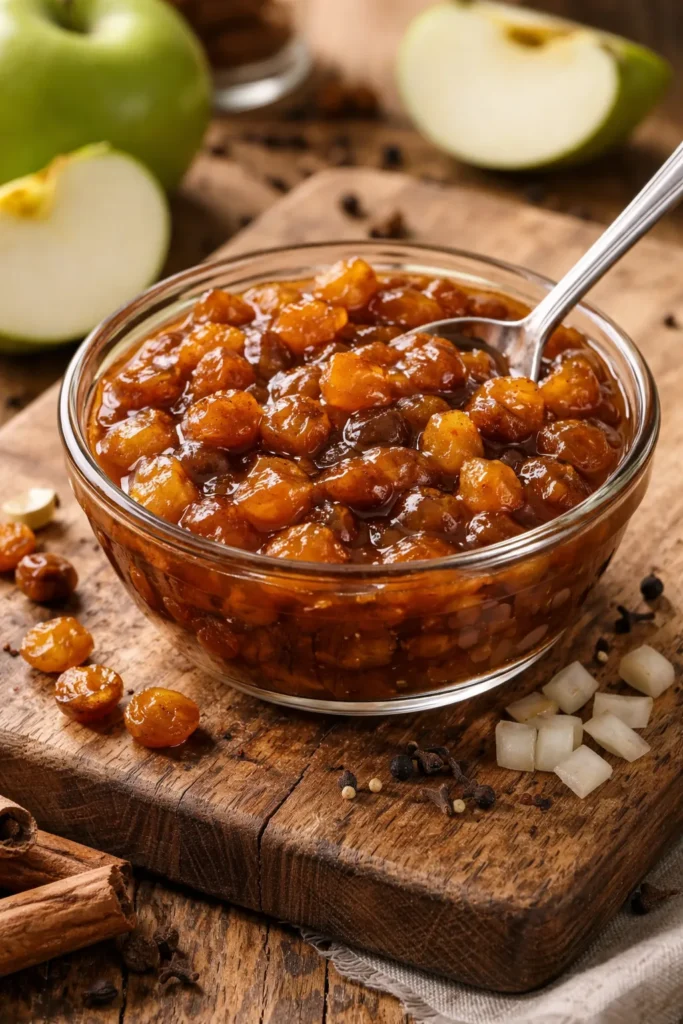
Apple chutney is the one that earns its place on every cheese board, every cold meat platter, and every ploughman’s lunch worth the name. It’s sharp, warming, and deeply savory — the kind of preserve that makes a sharp cheddar taste even better than it already did.
The magic here is in the apple variety. Bramley apples (the large, tart cooking apples beloved in British kitchens) break down beautifully during the long simmer and create a naturally thick, glossy chutney. Cox’s Orange Pippin or Gala work well too. What you want to avoid are firm, waxy apples like Pink Lady or Granny Smith — they don’t soften into that jammy consistency that makes a great chutney, and they leave the texture slightly grainy.
Why Onions and Dried Fruit Are Non-Negotiable Here
The supporting cast in apple chutney matters as much as the apples themselves. Onions bring depth and a slight savory bitterness that stops the chutney from tasting like spiced applesauce. Sultanas or raisins add a soft, plump sweetness and a textural contrast that plays nicely against the cooked-down apple. Don’t skip either — the three together create a balance that no single ingredient can achieve alone.
Yield: Makes 3–4 x 300ml jars Prep Time: 20 minutes Cook Time: 1 hour 30 minutes Total Time: 1 hour 50 minutes Difficulty: Beginner — no special skills required; just patience during the long simmer.
Ingredients:
- 1 kg Bramley apples (or Cox’s / Gala), peeled, cored, and roughly chopped
- 500g brown onions, peeled and diced
- 150g sultanas or raisins
- 500ml malt vinegar or cider vinegar
- 300g light brown sugar
- 1½ tsp fine salt
- 1 tsp ground ginger
- 1 tsp ground allspice
- ½ tsp ground cinnamon
- ¼ tsp ground cloves
- ¼ tsp dried chilli flakes (optional, but recommended)
- 2 garlic cloves, finely minced
- 1 x 5cm piece fresh ginger, peeled and finely grated
Method overview: Add all ingredients to a large, wide, non-reactive pan (stainless steel is ideal — avoid aluminium, which reacts with vinegar). Stir over medium heat until the sugar fully dissolves, then bring to a boil. Reduce to a steady simmer and cook uncovered for 1 hour to 1 hour 30 minutes, stirring every 10–15 minutes, more frequently toward the end. The chutney is ready when dragging a wooden spoon across the base of the pan leaves a clear trail that holds for several seconds. Ladle into sterilized jars while hot, seal tightly, and store for at least 2 weeks before eating.
Serving and Storage Notes
Apple chutney improves noticeably after a month in the jar — the vinegar mellows, the spices deepen, and the whole thing becomes rounder and more harmonious. Stored in a cool, dark place, it keeps for up to a year unopened. Once open, refrigerate and use within 4 weeks.
Best paired with: Mature cheddar, brie, pork pies, cold roast ham, or grilled sausages.
2. Fresh Mango Chutney
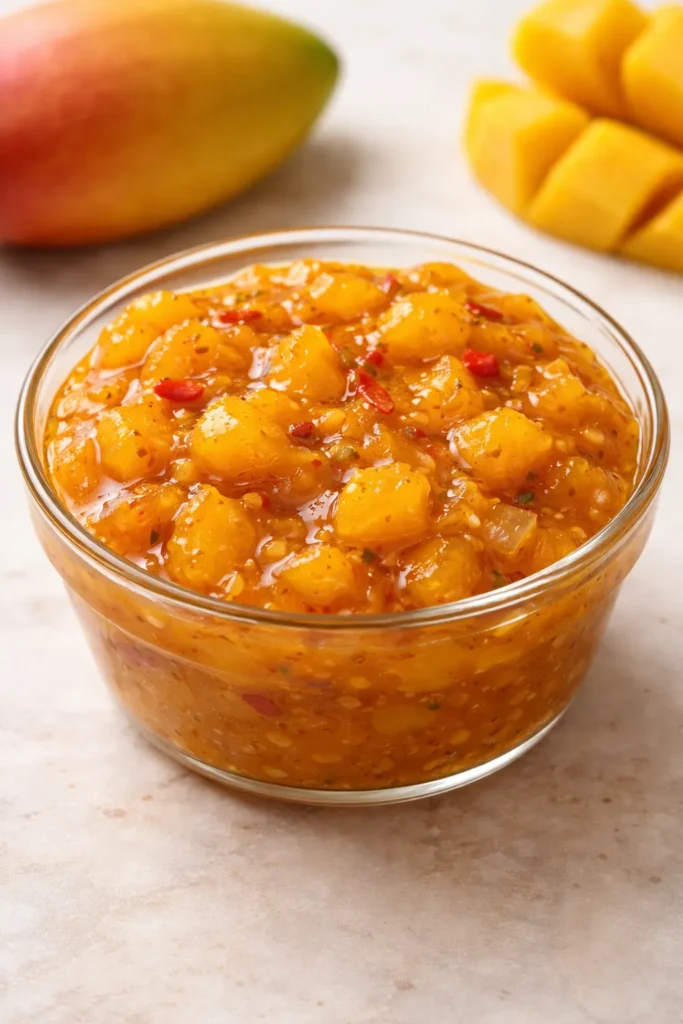
Mango chutney might be the most recognizable chutney outside India — and with good reason. Ripe mangoes bring a floral, tropical sweetness that, when balanced with vinegar, ginger, and garlic, produces something layered and genuinely complex. This version is a relatively quick cook, closer in spirit to the bright Indian original than the heavily reduced British-style preserve.
The most important thing: use ripe mangoes. Ataulfo (also called Champagne) mangoes work beautifully here — they’re fiberless, intensely sweet, and break down into a smooth, glossy texture. Tommy Atkins mangoes work too, though the flesh is slightly more fibrous and benefits from a quick mash after cooking if you prefer a smoother consistency. Unripe mangoes will give you something sharp and one-dimensional rather than the sweet-savory depth you’re after.
The Sweetener Swap Worth Knowing About
Traditional mango chutney uses white or light brown sugar, but swapping in maple syrup or honey (in equal measure by weight) gives the finished chutney a softer, more floral sweetness without the slight bitterness that granulated sugar can sometimes leave. Brown sugar works too and adds a mild caramel note. All three produce a great result — the choice is yours based on what’s in your kitchen.
Yield: Makes approximately 1 x 400ml jar (8 generous servings) Prep Time: 15 minutes Cook Time: 10–15 minutes Total Time: 25–30 minutes Difficulty: Beginner — fast and forgiving, with very little that can go wrong.
Ingredients:
- 2 large ripe mangoes (about 500g peeled flesh), diced into 1cm cubes
- ½ red onion, finely diced
- 2 tsp fresh ginger, finely grated
- 1 clove garlic, minced
- 60ml red wine vinegar
- 60ml maple syrup, honey, or light brown sugar
- Salt and black pepper to taste
- Optional spice additions: ½ tsp ground coriander, ½ tsp smoked paprika, ⅛ tsp ground cardamom, ¼ tsp ground cinnamon, ¼ tsp chilli powder or red pepper flakes
Method overview: Add all ingredients to a heavy-bottomed pan over medium-low heat. Simmer uncovered for 7–10 minutes, stirring frequently, until the mango has softened and the liquid has reduced to a syrupy consistency. Taste and adjust seasoning. Allow to cool before transferring to a clean jar — it thickens further as it cools. For a smoother texture, use the back of a spoon or a potato masher to break down some of the mango pieces.
Serving and Storage Notes
This mango chutney can be eaten immediately, but leaving it in the fridge overnight allows the flavors to settle and deepen. It keeps refrigerated for up to 2 weeks — which is plenty of time, since it has a habit of disappearing quickly.
Best paired with: Lamb chops, grilled salmon, curries, samosas, sharp cheddar and crackers, or served alongside naan as a quick dipping sauce.
Pro tip: If you’ve added the optional spices, reserve a small pinch of each to stir in at the very end off the heat — it keeps the brightness of the aromatics alive rather than cooking them all the way through.
3. Quick Tomato Chutney
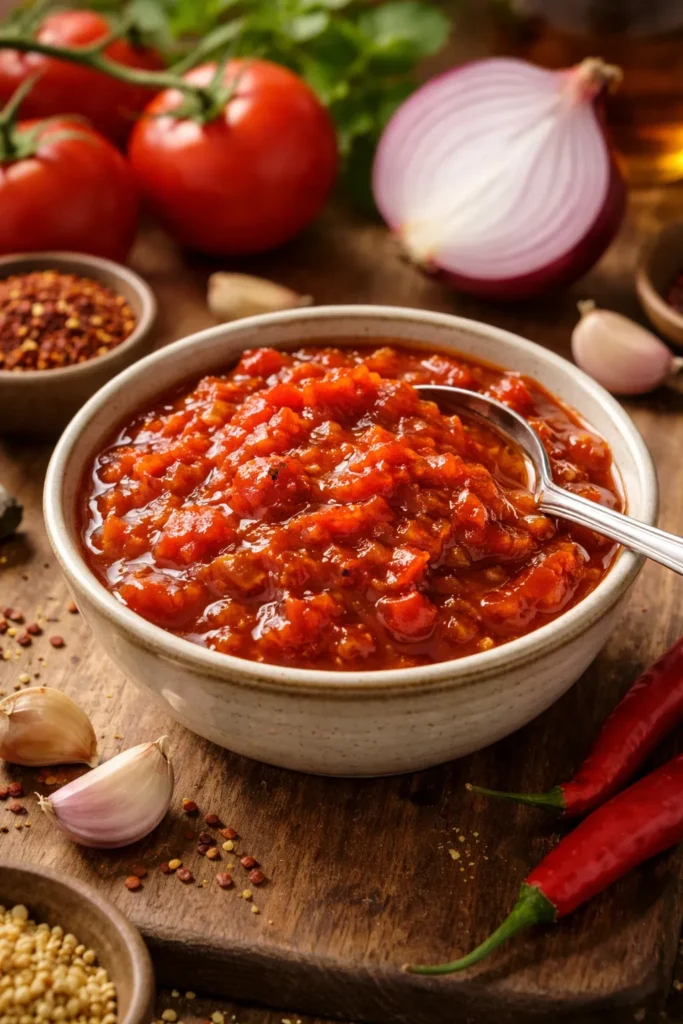
Tomato chutney sits at a crossroads between Indian and British traditions, and this version leans happily into both. Ripe tomatoes, onion, chilli, vinegar, and warm spices cook down into something deeply savory, slightly sweet, and very moreish. It’s also one of the faster chutneys to make — under an hour from start to jar.
Any tomato works here. Ripe beefsteak tomatoes bring body and sweetness. Cherry tomatoes add a bright, slightly acidic punch. Heirloom varieties in season produce a chutney with more complex flavor than anything available from a supermarket shelf. The one rule: don’t use underripe tomatoes. They lack the natural sugars that balance the vinegar, and the resulting chutney tastes flat and sharp no matter how long you cook it.
Red Wine Vinegar vs. Malt Vinegar for Tomatoes
Vinegar choice matters more in tomato chutney than in most others. Red wine vinegar is the ideal choice here — it’s assertive enough to preserve the chutney properly but doesn’t overwhelm the delicate tomato flavor the way malt vinegar tends to. Apple cider vinegar is a good second option and adds a subtle fruitiness. Malt vinegar, while excellent in apple chutney, tends to smother fresh tomato flavor and isn’t recommended for this particular recipe.
Yield: Makes 1 x 500ml jar (approximately 35 tablespoon-sized servings) Prep Time: 10 minutes Cook Time: 40 minutes Total Time: 50 minutes Difficulty: Beginner — one pot, minimal prep, straightforward technique.
Ingredients:
- 500g ripe tomatoes, roughly chopped (no need to peel)
- 250g red onions (about 2 large), peeled and diced
- 1 red chilli, finely chopped (seeds in for heat, seeds out for mild)
- 1 tbsp olive oil
- 1 tsp ground cumin
- 1 tsp ground coriander
- 1 tsp fine salt
- 75ml red wine vinegar
- 120g soft brown sugar
Method overview: Heat olive oil in a non-reactive pan over medium heat. Add the diced onion, chilli, salt, cumin, and coriander. Cook for 10 minutes, stirring regularly, until the onion is soft and fragrant. Add the tomatoes, vinegar, and sugar, then stir to combine. Bring to a boil, reduce heat, and simmer uncovered for 40 minutes until thick and glossy. The chutney is ready when a wooden spoon drawn through the mixture leaves a clean trail on the base of the pan. Ladle into sterilized jars and seal.
Serving and Storage Notes
Allow to mature for at least 2 weeks before opening — this gives the vinegar time to mellow and the spices to integrate. Keeps for up to a year in a cool cupboard; refrigerate after opening and use within a month.
Best paired with: Cheese toasties, cold roast chicken sandwiches, burgers, grilled halloumi, or spooned into Greek yogurt as a quick dip.
4. Red Onion Chutney
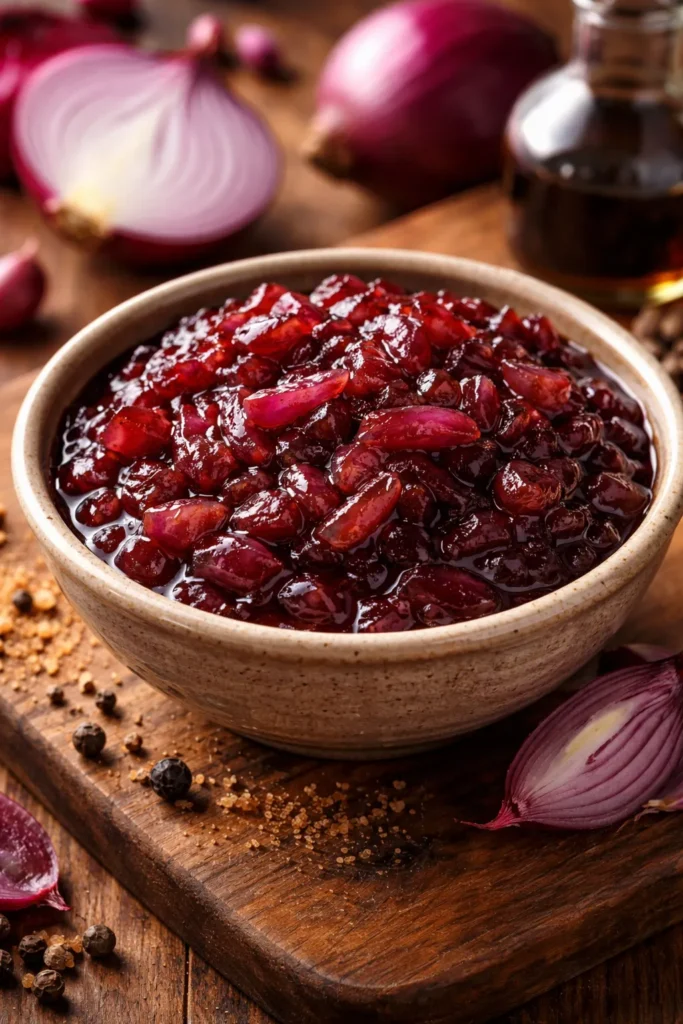
Red onion chutney has a cult following for good reason. Deeply caramelized onions, a touch of balsamic, and a gentle warmth from chilli flakes — it’s the chutney that makes a cheese board look like you’ve put serious thought into it, even when the whole thing came together in under 40 minutes.
The key is patience during the initial cooking of the onions. Don’t rush this stage. Fifteen to twenty minutes of slow cooking over low-medium heat coaxes out the natural sugars in the red onions, turning them from sharp and pungent to sweet, soft, and almost jammy. That caramelization is where most of the flavor comes from — the vinegar and sugar added later are there to balance and preserve it, not to create it from scratch.
Why Red Onions Specifically
Brown onions work, but they produce a chutney that’s sharper and more aggressively savory. Red onions, by contrast, have a sweeter flavor profile and a natural mild fruitiness that means less sugar is needed to bring the chutney into balance. The color is also more visually striking — a deep ruby-purple that looks gorgeous spooned onto a board next to pale cheeses.
Yield: Makes 2 x 200ml jars Prep Time: 10 minutes Cook Time: 25–30 minutes Total Time: 35–40 minutes Difficulty: Beginner — quick, simple, and very hard to get wrong.
Ingredients:
- 600g red onions (about 4 medium), peeled, halved, and thinly sliced
- 2 tbsp olive oil
- 1 tsp fine salt
- 100g soft brown sugar
- 75ml balsamic vinegar
- 50ml red wine vinegar
- ½ tsp dried chilli flakes
- 1 tsp fresh thyme leaves (optional but worth it)
Method overview: Heat oil in a wide, heavy pan over medium-low heat. Add onions, salt, and chilli flakes. Cook for 15–20 minutes, stirring every few minutes, until deeply softened and beginning to caramelize. Add the sugar and stir until dissolved. Pour in both vinegars, bring to a simmer, and cook for a further 10–12 minutes until thick and glossy. Stir in thyme if using, then ladle into sterilized jars while hot.
Serving and Storage Notes
Unlike most long-cooked chutneys, red onion chutney is genuinely excellent eaten the same day it’s made — though it does improve over the following week. Keeps for up to 3 months in the fridge or longer if properly sealed in sterilized jars in a cool cupboard.
Best paired with: Brie, goat’s cheese, sharp cheddar, cold roast beef sandwiches, gourmet burgers, hot dogs, or grilled pork chops.
5. Cranberry and Ginger Chutney
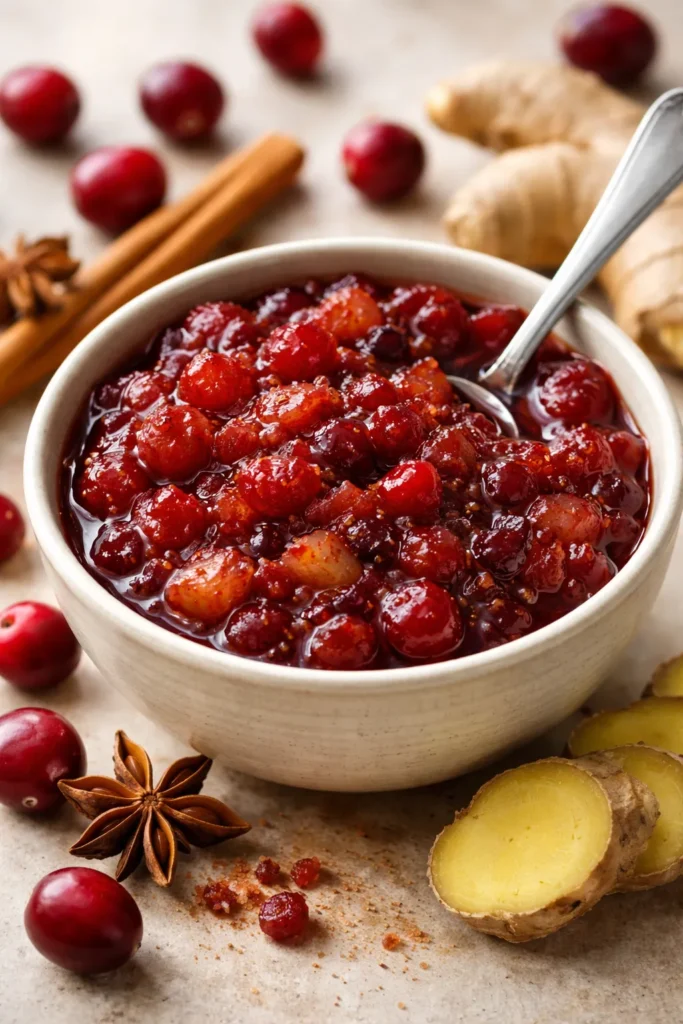
Cranberry chutney occupies a space somewhere between a traditional Christmas sauce and a proper spiced preserve — and it does both jobs better than either on its own. The cranberries provide natural pectin, which means this chutney thickens faster than fruit-based versions made with softer produce. The ginger adds a clean, lively heat that cuts through rich meats beautifully.
Fresh cranberries are the ideal choice, but frozen work equally well — don’t bother thawing them first, just add an extra 5 minutes of cooking time. The tart, almost sour edge of cranberries means you need slightly more sugar than in other fruit chutneys, but the result is a chutney with a vivid, jewel-toned color and a flavor that’s bright and complex in equal measure.
The Spice Profile That Makes This One Stand Out
This version uses a small combination of warm spices — cinnamon, allspice, and clove — that complement the cranberries without tipping into mulled wine territory. The fresh ginger is the element that keeps things lively and stops the chutney from feeling heavy. A pinch of orange zest stirred in at the end of cooking adds brightness without requiring any additional liquid.
Yield: Makes 2–3 x 200ml jars Prep Time: 10 minutes Cook Time: 20–25 minutes Total Time: 30–35 minutes Difficulty: Beginner — fast-cooking and naturally thick, making this one of the easiest chutneys to judge for doneness.
Ingredients:
- 350g fresh or frozen cranberries
- 1 medium white onion, finely diced
- 30g fresh ginger, peeled and finely grated
- 150g caster sugar or light brown sugar
- 150ml cider vinegar
- ½ tsp ground cinnamon
- ¼ tsp ground allspice
- Pinch of ground cloves
- Pinch of dried chilli flakes
- Zest of 1 orange (added off the heat at the end)
Method overview: Combine onion, ginger, sugar, vinegar, and spices in a pan. Bring to a simmer and cook for 5 minutes until onion has softened slightly. Add cranberries and cook over medium heat for 15–20 minutes, stirring regularly, until the berries have burst and the mixture has thickened to a jammy consistency. Stir in orange zest off the heat. Ladle into sterilized jars while hot.
Serving and Storage Notes
This chutney can be eaten within 48 hours and is one of the few in this list where the fresh-made version is already excellent. Keeps for 6 months in a sealed jar in a cool cupboard. Once opened, refrigerate and use within 3 weeks.
Best paired with: Roast turkey, cold cuts, brie or camembert, cream cheese and crackers, or glazed on a baked ham.
6. Fresh Green Mint and Cilantro Chutney
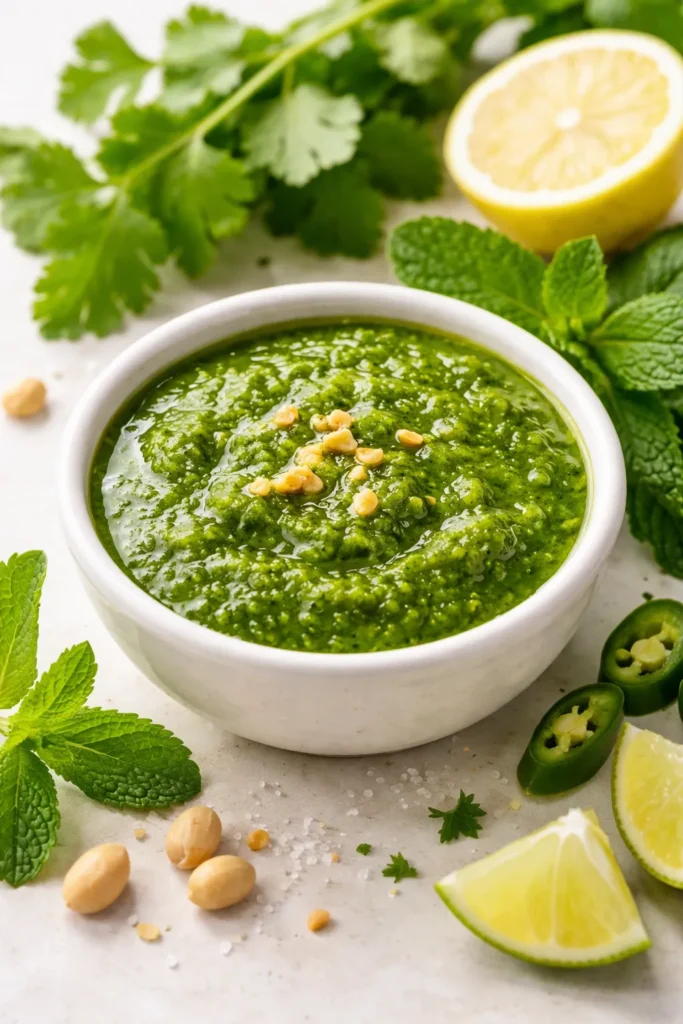
This is not a long-cooked, preserved chutney — it’s the fresh Indian-style version that has no vinegar, no sugar, and no time on the stove. It comes together in under 10 minutes in a blender or food processor, and it’s one of those condiments that makes everything around it taste more alive. Think of it as a deeply aromatic, bright green herbed sauce with serious character.
The base is cilantro and mint, blended with green chilli, garlic, lemon juice, and a handful of roasted peanuts (or coconut, depending on the regional tradition you’re working with). The peanuts add body and a subtle creaminess that stops the chutney from being watery — they act as an emulsifier in the same way tahini does in hummus.
Getting the Heat Level Right
The green chilli controls everything here. One small serrano chile gives a gentle warmth that most people find comfortable. Two chilies produce real heat. If the batch comes out hotter than intended, a tablespoon of plain yogurt stirred through immediately before serving cools it down without diluting the flavor. Taste as you go — every chilli is different, and the heat level can vary dramatically even within the same batch from the same plant.
Yield: Makes 1 x 200ml jar (approximately 8–10 servings) Prep Time: 10 minutes Cook Time: None Total Time: 10 minutes Difficulty: Beginner — blender required, no cooking whatsoever.
Ingredients:
- 1 large bunch fresh cilantro (coriander), roughly chopped — about 40g
- 1 small bunch fresh mint leaves — about 20g
- 1–2 small green chillies (serrano or Thai bird’s eye), roughly chopped
- 2 cloves garlic, roughly chopped
- 2 tbsp roasted unsalted peanuts (or 2 tbsp desiccated coconut for a South Indian style)
- Juice of 1 lemon (about 3 tbsp)
- ½ tsp fine salt
- 3–4 tbsp water, added gradually to reach your preferred consistency
- ½ tsp ground cumin
- Small piece fresh ginger (about 1cm), roughly chopped
Method overview: Add all ingredients except the water to a food processor or high-speed blender. Pulse to break everything down, then blend on high, adding water one tablespoon at a time until you reach a smooth, thick, spoonable consistency — it should hold its shape on a spoon but not be stiff. Taste and adjust salt, lemon, or chilli. Transfer to a clean jar or serving bowl.
Serving and Storage Notes
Fresh green chutney is best on the day it’s made — the herbs oxidize over time and the vivid color fades. It keeps in the fridge for 2–3 days, though the flavor remains excellent even as the color darkens slightly. Do not freeze — the herbs turn an unappetizing grey-black.
Best paired with: Samosas, pakoras, dosas, grilled corn, fish tacos, any kebab, or simply spread onto flatbread with some grilled halloumi.
7. Spiced Plum Chutney
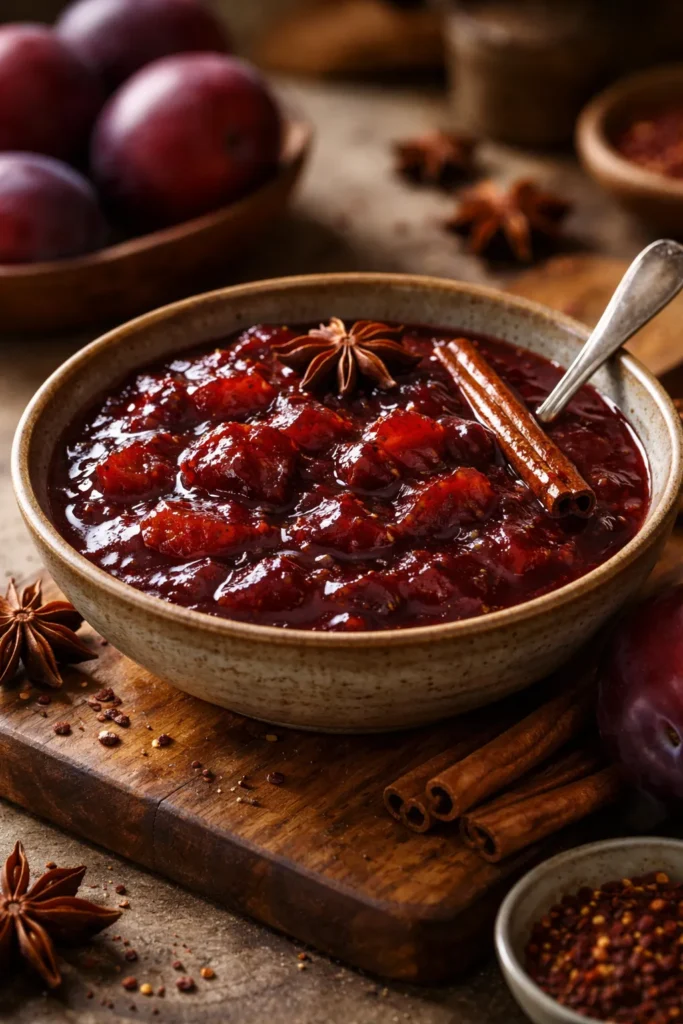
Plums have an intensity that most other fruits can’t match — deeply sweet when ripe, with a tartness just beneath the surface that makes them natural partners for vinegar and spice. This chutney has a dark, jewel-toned richness that comes partly from the fruit and partly from the dark brown sugar, which adds a molasses depth that lighter sugars simply don’t provide.
Any plum variety works here, but red or purple-skinned varieties produce the most dramatic color. Victoria plums, damsons, or blood plums are all excellent choices. Because plums contain a lot of moisture, this chutney requires a slightly longer reduction time than apple or tomato versions — the liquid needs to cook down properly before the chutney reaches that thick, glossy consistency. Don’t rush it.
The Star Anise Question
Star anise is optional in this recipe, but it’s worth including if you have it. A single star anise added to the pot during cooking and removed before jarring adds a subtle, warming anise note that threads through the plum flavor without identifying itself as a distinct spice. It works in the same quiet way that a bay leaf functions in a braise — you wouldn’t know it was there until you tried a batch without it.
Yield: Makes 3–4 x 300ml jars Prep Time: 20 minutes Cook Time: 1 hour 30 minutes Total Time: 1 hour 50 minutes Difficulty: Beginner/Intermediate — the only challenge is judging the right consistency; the plate-chill test (below) removes the guesswork.
Ingredients:
- 1 kg ripe plums, stoned and roughly chopped (skins left on)
- 350g brown onions, diced
- 100g raisins or dried cherries
- 2 garlic cloves, minced
- 25g fresh ginger, finely grated
- 300ml red wine vinegar or cider vinegar
- 250g dark brown sugar
- 1½ tsp fine salt
- 1 tsp ground cinnamon
- ½ tsp ground allspice
- ½ tsp ground coriander
- ¼ tsp ground cloves
- 1 star anise (optional)
- ½ tsp dried chilli flakes
Method overview: Combine all ingredients in a large, wide, non-reactive pan. Stir over medium heat until sugar dissolves completely. Bring to a boil, then reduce to a steady simmer. Cook uncovered for 1 hour to 1 hour 30 minutes, stirring regularly and more frequently as the chutney thickens. Remove star anise. To test for doneness, place a small spoonful on a cold plate, return to the fridge for 5 minutes — if the liquid is thick and doesn’t run freely, the chutney is ready. Ladle into sterilized jars while hot and seal immediately.
Serving and Storage Notes
This chutney genuinely benefits from maturation — the flavor at the 4-to-6-week mark is noticeably deeper and more balanced than fresh out of the pot. Keeps for up to a year sealed in a cool, dark place. Once opened, refrigerate and use within 4 weeks.
Best paired with: Duck, venison, pork belly, strong blue cheese, camembert, or spread onto a charcuterie board alongside cured meats.
8. Peach and Ginger Chutney

Peach and ginger is one of those flavor combinations that feels inevitable once you’ve tasted it — the peachy sweetness and the ginger’s sharp, lively heat seem purpose-built for each other. This is a chutney with warmth and brightness in equal measure, and it pairs with an unusually wide range of foods, from classic Indian curries to grilled pork chops to a simple cracker loaded with cream cheese.
Use ripe, fragrant peaches with deep golden flesh — white-fleshed varieties are less assertive in flavor and can produce a chutney that tastes slightly flat. Freestone peaches (where the pit separates cleanly from the flesh) are also much easier to prep than clingstone varieties. If ripe fresh peaches aren’t available, good-quality canned peaches in juice (not syrup) work surprisingly well — drain them thoroughly and reduce the sugar in the recipe by about 30 grams.
Fresh Ginger vs. Preserved Ginger
Both work here, but they contribute differently. Fresh grated ginger gives a sharp, clean, forward heat that you feel at the back of the throat. Preserved stem ginger (the kind sold in jars of syrup) is sweeter and more complex, with a slow-building warmth that lingers. Using both together — fresh ginger during cooking and a small amount of finely chopped stem ginger added at the very end — produces the most interesting result.
Yield: Makes 2–3 x 300ml jars Prep Time: 20 minutes Cook Time: 1 hour to 1 hour 15 minutes Total Time: 1 hour 20 minutes to 1 hour 35 minutes Difficulty: Beginner — follows the same basic method as classic fruit chutney with no unusual techniques required.
Ingredients:
- 1 kg ripe peaches, stoned and roughly chopped (skins left on — they dissolve during cooking and add color)
- 300g brown onions, finely diced
- 100g golden sultanas or raisins
- 30g fresh ginger, finely grated
- 20g preserved stem ginger in syrup, finely chopped (optional but recommended)
- 2 garlic cloves, minced
- 250ml cider vinegar
- 200g light brown sugar
- 1 tsp fine salt
- 1 tsp yellow mustard seeds
- ½ tsp ground coriander
- ½ tsp ground ginger (in addition to fresh)
- ¼ tsp ground cinnamon
- ¼ tsp dried chilli flakes or cayenne pepper
Method overview: Combine all ingredients except the preserved stem ginger in a large, wide, non-reactive pan. Stir over medium heat until sugar dissolves. Bring to a boil, reduce to a simmer, and cook uncovered for 1 hour to 1 hour 15 minutes, stirring regularly. The chutney is ready when it holds a clear trail when a wooden spoon is dragged through it. Stir in the preserved stem ginger (if using) off the heat. Ladle into sterilized jars while hot and seal immediately.
Serving and Storage Notes
Allow at least 2 weeks of maturation before opening — the sharpness of the vinegar mellows considerably during this time. Keeps for up to a year sealed in a cool, dark place. Once opened, refrigerate and eat within 4 weeks.
Best paired with: Grilled pork chops, roast chicken, curry (especially mild korma-style dishes), sharp cheddar, cream cheese, or as a glaze brushed over a pork loin during the last 20 minutes of roasting.
The Chutney-Making Techniques Every Batch Depends On
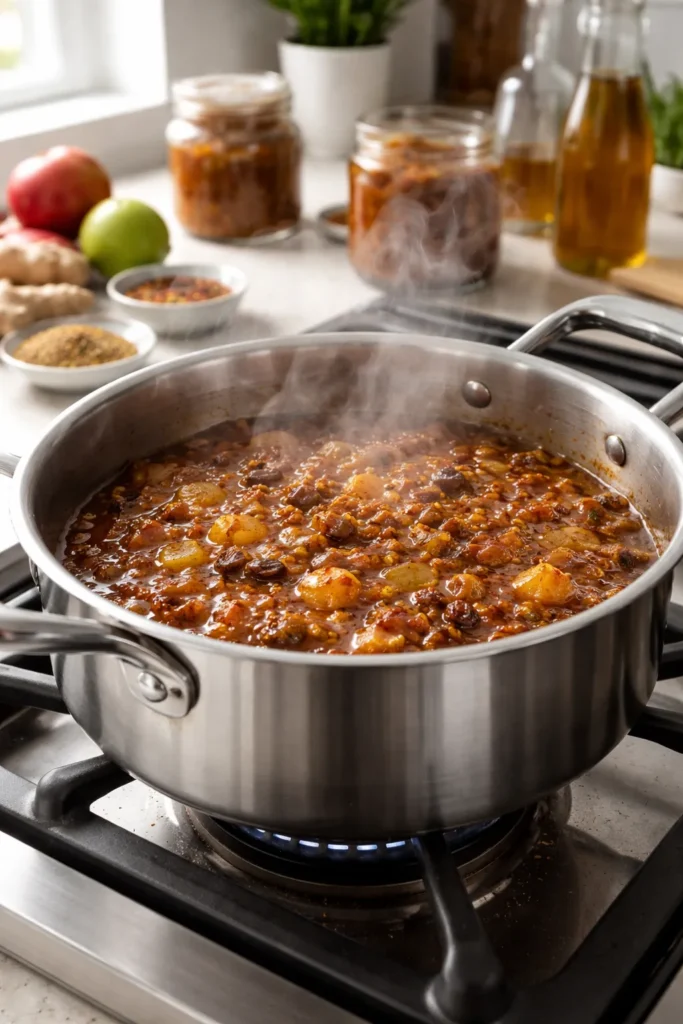
Before you commit to any of these recipes, a few practical fundamentals will make the difference between a chutney that lasts and one that disappoints.
Pan choice is not optional. Always use a non-reactive pan — stainless steel is the standard choice. Aluminium and unlined copper react with the vinegar and can give your chutney a metallic, unpleasant edge that no amount of spice will mask.
Sterilizing your jars properly matters more than any single ingredient. The easiest method: wash jars and lids thoroughly, then place jars upside down in an oven preheated to 140°C (275°F) for 15 minutes. Pour boiling water over the lids in a bowl, leave for 5 minutes, then drain and dry. Alternatively, run them through a hot dishwasher cycle and use immediately. Sterilize them right before you need them — not hours in advance — to minimize the chance of picking up new bacteria.
The Plate Test for Doneness
The single most reliable way to check that any long-cooked chutney is ready to jar: spoon a small amount onto a cold plate (kept in the fridge), wait 5 minutes, then tilt the plate. If the liquid runs freely across the plate, the chutney needs more time. If it holds its shape and moves only slowly, it’s ready. This removes the subjectivity from “looks thick enough,” which is the reason most runny chutneys happen.
Why Maturation Isn’t Just Impatience
The instruction to wait before eating freshly jarred chutney is one that many people skip — and then wonder why their homemade version tastes sharp and a bit raw compared to the commercial product they’ve been buying for years. The explanation is straightforward: freshly made chutney has a high acidity from the vinegar that hasn’t yet integrated with the other flavors. Given 2–4 weeks in a sealed jar, that acidity mellows, the spices settle into the fruit, and the whole thing becomes rounder, softer, and considerably more delicious. The wait is worth it every time.
Final Thoughts
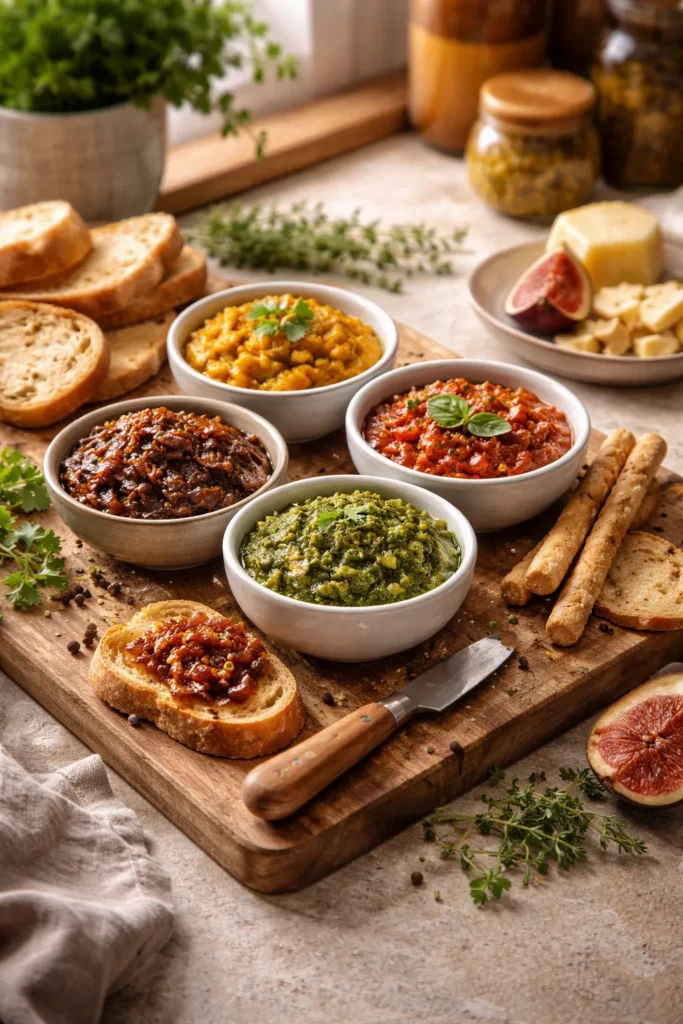
Chutney is one of those kitchen projects that delivers far more than the effort it takes. A few hours over a pot, some sterilized jars, and a few weeks of patience will leave you with something that makes cheese boards more interesting, sandwiches more satisfying, and plain roasted meats feel like something you actually planned.
The eight recipes here cover everything from a ten-minute fresh herb blitz to a slow-cooked fruit preserve built for long storage. Start with whichever sounds closest to what you’re already reaching for in the condiment aisle — and once that first jar is gone, you’ll find yourself looking at ripe fruit differently, always wondering what it might become with a pot, some vinegar, and a handful of spices.
The formula, once you feel it in your hands, becomes second nature. After that, every batch is an experiment — and most of them turn out worth keeping.