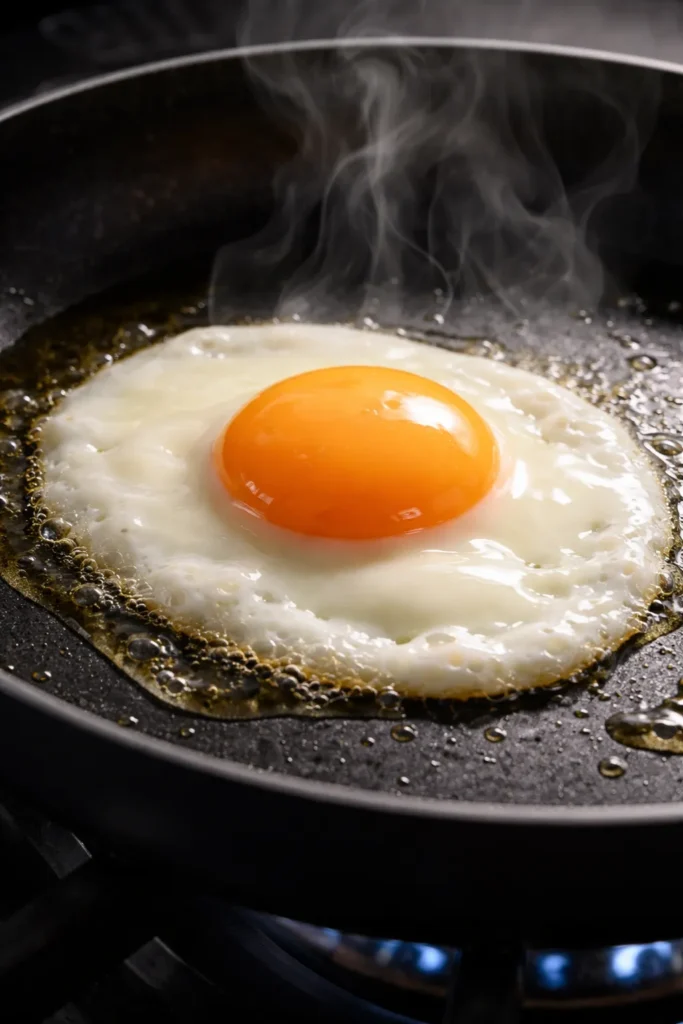
Eggs are one of those ingredients that never quite get the credit they deserve. They’re affordable, they’re packed with protein, and they’re sitting in your fridge right now, ready to go. But somewhere along the way, most home cooks settle into a two-move rotation — scrambled on busy mornings, fried on lazy ones — and leave an enormous range of cooking techniques completely unexplored.
The thing is, the method matters more with eggs than with almost any other ingredient. Change the heat source, the vessel, the timing, or the liquid ratio, and you get a completely different texture, flavor, and eating experience. A six-minute boiled egg and a two-minute fried egg are technically the same ingredient cooked the same number of minutes, but they couldn’t be more different on the plate.
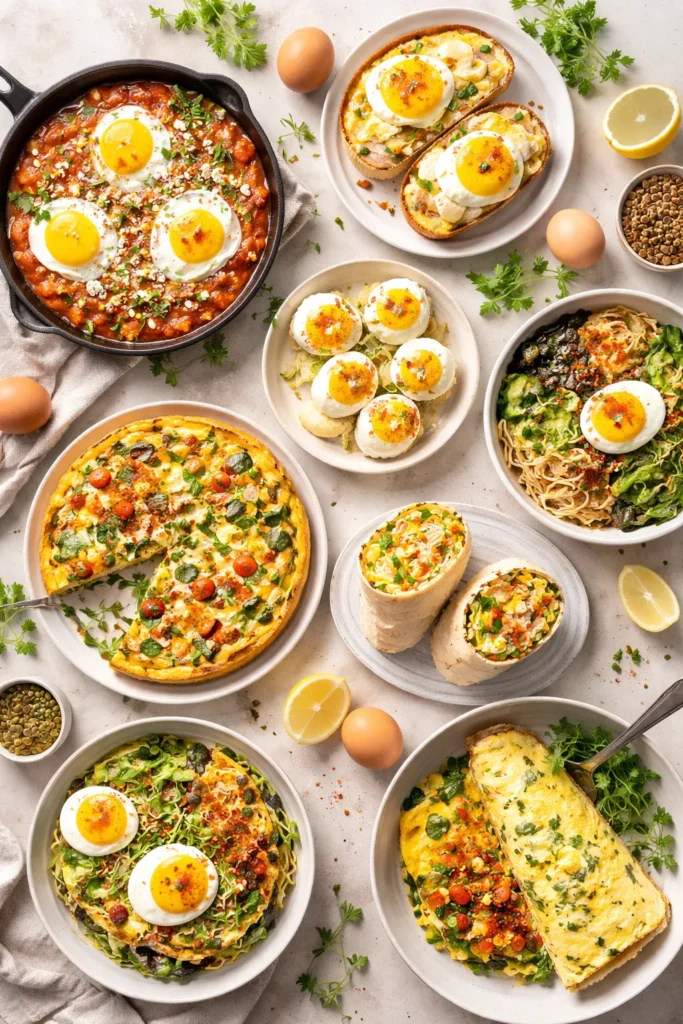
What follows are eight egg preparations that deserve a permanent spot in your cooking rotation. Some come from European bistros, some from North African kitchens, some from Japanese lunch boxes. All of them are approachable, all of them are deeply satisfying, and every single one will make you look at a carton of eggs with a fresh set of eyes.
Table of Contents
- Why Your Egg Repertoire Deserves a Serious Upgrade
- 1. Shakshuka: Eggs Poached in a Bold Spiced Tomato Sauce
- Building the Sauce Right
- Poaching the Eggs in the Sauce
- 2. Perfectly Soft-Boiled Eggs with Jammy, Golden Centers
- Why the Ice Bath Is Non-Negotiable
- Where to Use Jammy Eggs
- 3. Baked Eggs in Ramekins (Oeufs en Cocotte)
- The Layering Approach
- Timing Is Everything in a Water Bath
- 4. Tamagoyaki: The Japanese Layered Rolled Omelet
- The Technique Step by Step
- Shaping and Serving
- 5. Spanish Tortilla: A Thick Potato and Egg Cake
- Building the Tortilla
- The Flip (It’s Not as Hard as You Think)
- 6. Deviled Eggs with Creative, Bold Fillings
- Flavor Variations That Actually Deliver
- Getting the Texture Right
- 7. Frittata: The Effortless Oven-Finished Egg Bake
- The Filling-First Approach
- The Oven Finish
- 8. Steamed Egg Custard (Chawanmushi)
- The Egg-to-Dashi Ratio
- Fillings and Steam Control
- What These Methods Teach You About Egg Cookery
- Adapting These Recipes for Meal Prep and Larger Groups
- Final Thoughts
Why Your Egg Repertoire Deserves a Serious Upgrade
Most people learn to scramble and fry eggs early — often as teenagers cooking for themselves for the first time. Those two techniques stick because they work and they’re fast. But fast and familiar aren’t the same as best, and once you start experimenting with egg cookery beyond the basics, something interesting happens: the same humble dozen eggs you’ve been buying for years suddenly becomes one of the most versatile ingredients in your kitchen.
Nutrition-wise, eggs hold up exceptionally well regardless of cooking method. Each large egg delivers roughly 6 grams of complete protein, along with choline, B vitamins, and healthy fats concentrated in the yolk. Most of the preparations below use little to no additional fat beyond what’s already in the egg itself, which makes them genuinely nutritious options beyond their simplicity.
There’s also a creativity angle worth mentioning. Once you get comfortable with a few of these techniques, they stop feeling like recipes and start feeling like instincts. You’ll crack eggs into a simmering tomato sauce without thinking twice. You’ll slide a handful of cooked vegetables into a ramekin and pop it in the oven because you know the result takes care of itself. That’s the real reward here — not just the dishes themselves, but the fluency you build with an ingredient you already love.
1. Shakshuka: Eggs Poached in a Bold Spiced Tomato Sauce
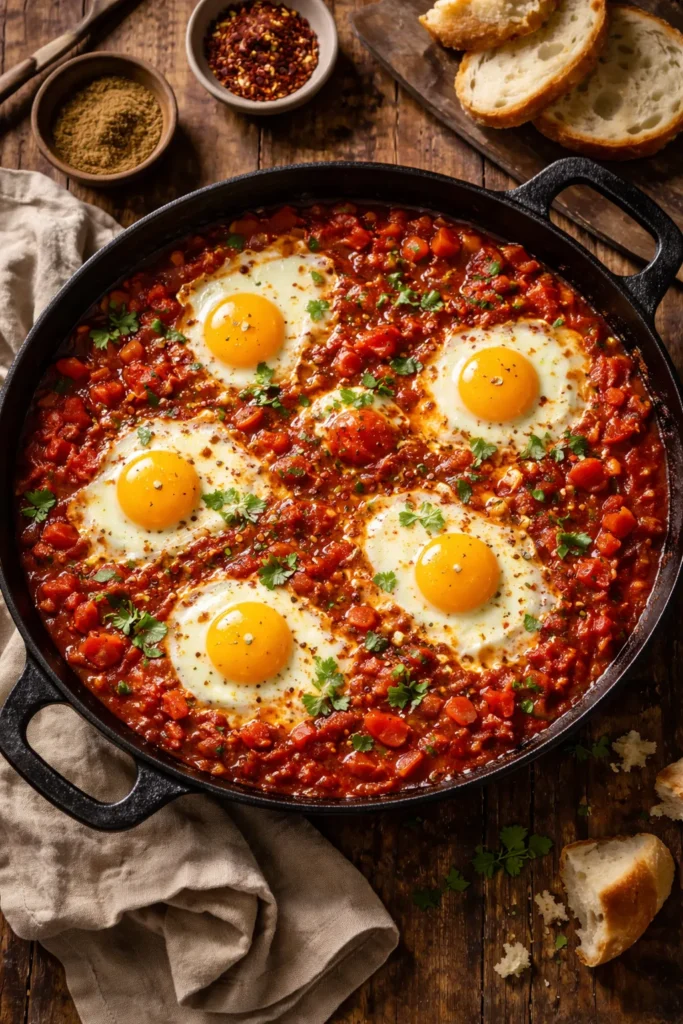
Shakshuka originated in North Africa — Tunisia is often credited as its home — and spread through Israel, the broader Middle East, and eventually into brunch menus across the Western world. The concept is beautifully efficient: you build a deeply flavored, slightly spicy tomato sauce in a skillet, then crack whole eggs directly into it and let them poach in the residual heat of the sauce itself. No separate pan. No water bath. The eggs cook gently in the steam trapped under a lid, with the whites setting fully while the yolks stay just barely runny.
What separates a good shakshuka from a forgettable one is the sauce. You need time for the base to develop — at least 15 minutes of simmering after the tomatoes go in. Canned whole San Marzano tomatoes, crushed by hand, give the best body. The spice combination of smoked paprika, ground cumin, and cayenne (or Aleppo pepper, if you can find it) creates a warmth that’s savory rather than just hot.
Building the Sauce Right
Start with 2 tablespoons of olive oil in a wide, oven-safe skillet — a 12-inch cast iron works perfectly. Sauté one diced yellow onion and one chopped red bell pepper over medium heat until they’re completely soft and lightly caramelized, about 10 minutes. Don’t rush this step. Undercooked aromatics give the sauce a raw, sharp taste that no amount of simmering will fix.
Add 4 cloves of minced garlic and cook for another 60 seconds until fragrant. Stir in 1 teaspoon of smoked paprika, 1 teaspoon of cumin, ½ teaspoon of cayenne, and a pinch of salt. Then add one 28-ounce can of crushed tomatoes. Let this simmer uncovered for at least 15 minutes, stirring occasionally, until it thickens noticeably and the color deepens from bright orange-red to a richer, darker hue.
Poaching the Eggs in the Sauce
Use the back of a large spoon to create 4 to 6 shallow wells in the sauce, spacing them evenly. Crack one egg into each well, then cover the skillet with a lid. Cook over medium-low heat for 5 to 8 minutes, checking often. You want the whites just set — no wobble, no translucency — while the yolks remain liquid and glossy. Every stove runs differently, so start checking at the 5-minute mark.
Serve straight from the skillet with crusty bread, warm pita, or thick sourdough toast. A crumble of feta cheese over the top and a handful of fresh flat-leaf parsley are the traditional finishes, and they’re there for good reason.
Pro tip: If you like your yolks fully set, transfer the covered skillet to a 375°F (190°C) oven for the last 3 minutes instead of finishing on the stovetop. The even, ambient heat sets them gently without overcooking the sauce underneath.
2. Perfectly Soft-Boiled Eggs with Jammy, Golden Centers
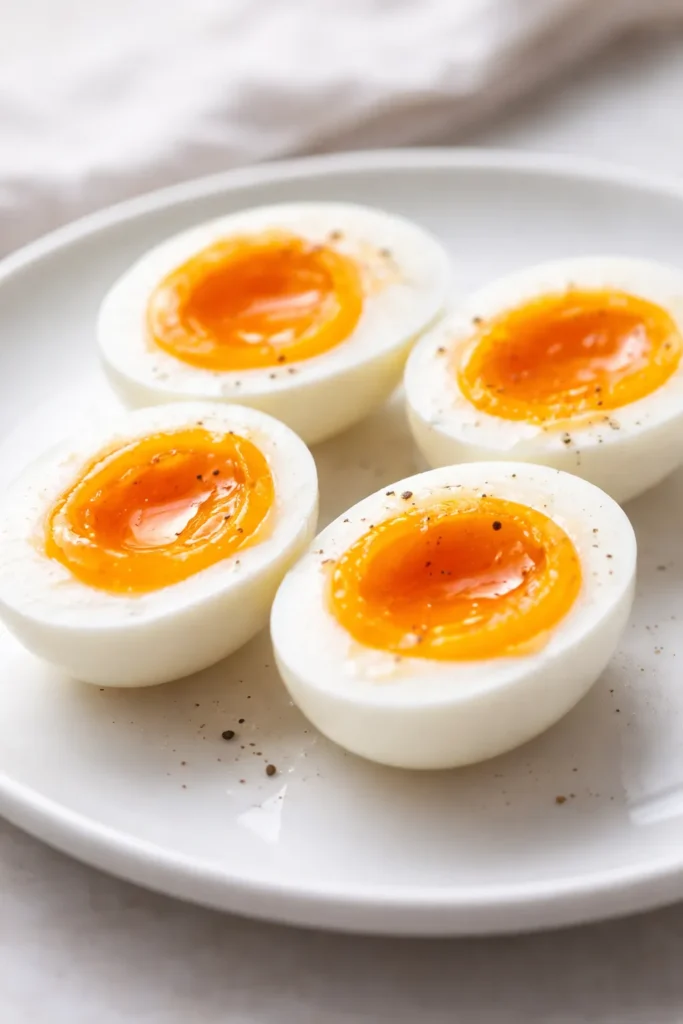
The soft-boiled egg sits in a sweet spot that hard-boiled never quite reaches. The white is fully firm and tender, with no rubbery texture, while the yolk is still partially liquid — not runny like a raw egg, but thick, glossy, and deeply golden, almost the consistency of warm honey. Getting that texture consistently takes precision, not skill.
The method is simple: Bring a medium pot of water to a full, rolling boil. Lower eggs in one at a time using a slotted spoon or spider strainer. Set a timer for exactly 6 minutes and 30 seconds for large eggs straight from the fridge, or 6 minutes if your eggs are at room temperature. When the timer goes off, transfer the eggs immediately to a bowl of ice water (a 50/50 mix of ice and cold water) and leave them for a full 2 minutes. This stops the cooking instantly and makes peeling dramatically easier.
Why the Ice Bath Is Non-Negotiable
Skipping the ice bath is the single most common reason home cooks end up with overcooked yolks when they were aiming for soft-boiled. Eggs retain heat in the shell and continue cooking after they leave the pot — sometimes for up to 90 seconds depending on the egg size and water temperature. The ice bath stops that carryover immediately, locking in the texture you worked to create.
Older eggs peel more cleanly than fresh ones because the air pocket between the egg white and the inner membrane grows as the egg ages, making separation easier. If you’re working with eggs that are fewer than 3 days old (common if you raise backyard chickens or shop at a farmers market frequently), add a teaspoon of baking soda to the boiling water — it raises the pH slightly and helps the shell release more cleanly.
Where to Use Jammy Eggs
This is where soft-boiled eggs become a genuine kitchen upgrade. Halved and nestled into a bowl of ramen, they absorb the broth and add richness that hard-boiled eggs can’t match. Sliced over a grain bowl with roasted vegetables and tahini dressing, the yolk becomes its own sauce. Placed on top of avocado toast with a pinch of flaky salt and chili flakes, they turn a snack into a proper meal.
For an even more intensely flavored version, make soy-marinated eggs (ajitsuke tamago): peel your soft-boiled eggs and submerge them in a marinade of ½ cup soy sauce, ¼ cup mirin, ¼ cup water, and 2 teaspoons sugar. Let them sit in the fridge for at least 4 hours, or up to 2 days. The whites take on a deep amber color and a savory-sweet flavor that’s genuinely addictive.
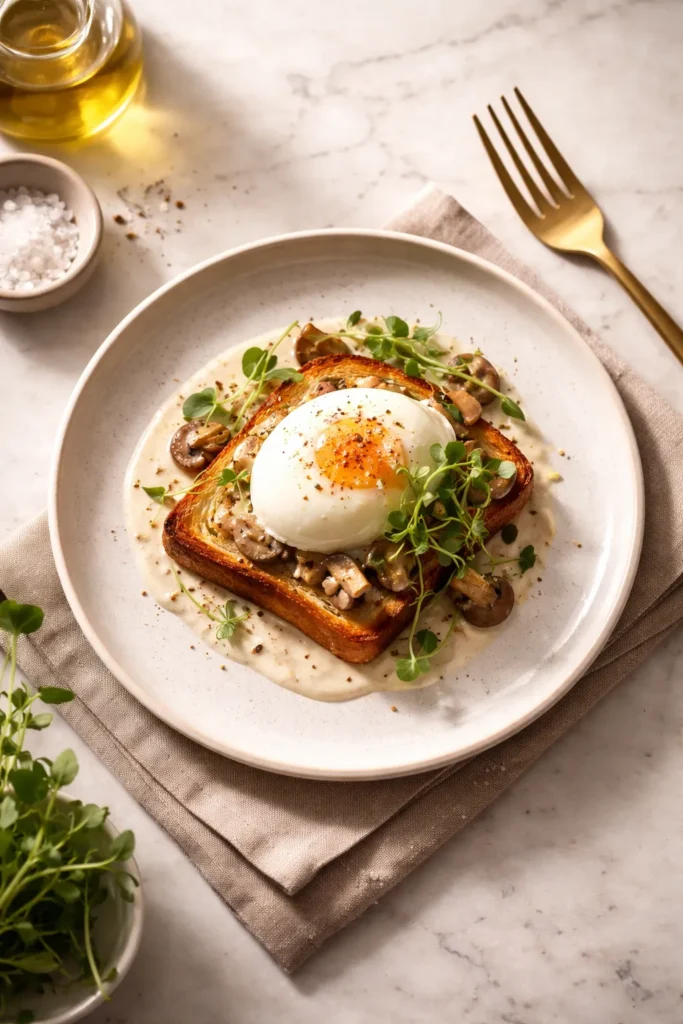
3. Baked Eggs in Ramekins (Oeufs en Cocotte)
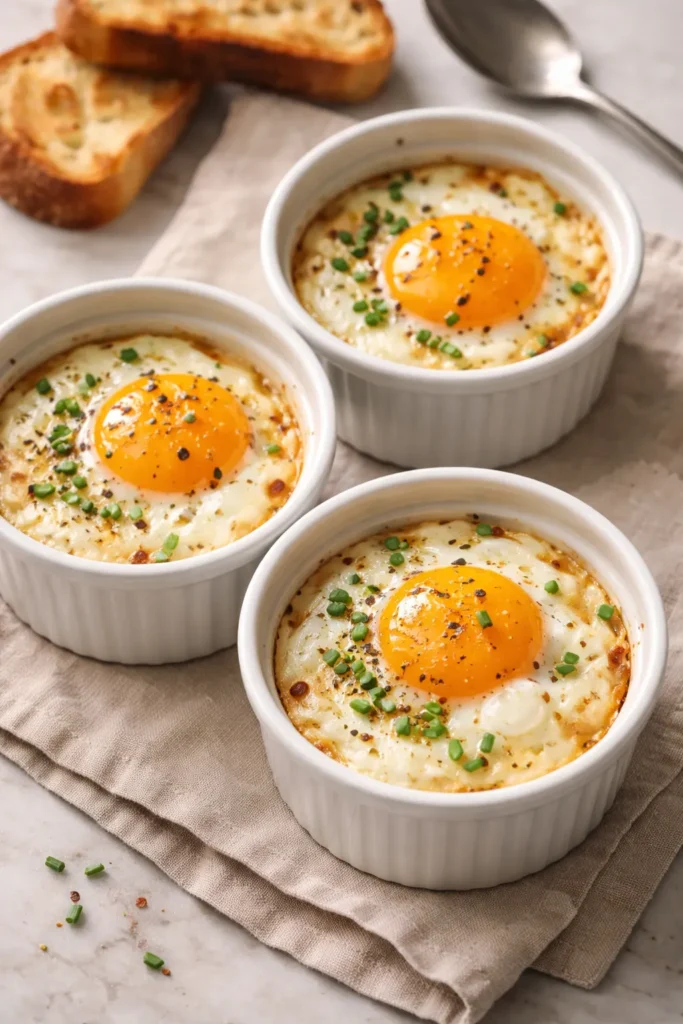
The French have a word for this preparation — oeufs en cocotte, meaning “eggs in a cocotte” (a cocotte being a small, lidded ceramic dish, though a standard ramekin works perfectly). The result is something between a poached egg and a soft scramble: the white is set and silky, the yolk is warm but flowing, and the whole thing is enriched by whatever cream, cheese, or aromatics you’ve layered underneath.
The technique itself couldn’t be simpler. You butter a 6-ounce ramekin, add a tablespoon or two of heavy cream, crack in one or two eggs, season with salt and a grind of pepper, and bake in a water bath at 325°F (165°C) for 12 to 15 minutes. The water bath — a deep baking dish filled with about an inch of hot water, with the ramekins sitting inside — ensures gentle, even heat that prevents the whites from turning rubbery while the yolk heats through.
The Layering Approach
The magic of oeufs en cocotte is how well it accepts add-ins. Before cracking in the egg, consider layering:
- A tablespoon of crème fraîche or thick Greek yogurt for extra tang and creaminess
- A handful of wilted spinach squeezed completely dry (wet spinach turns watery and dilutes the cream)
- Two or three slices of smoked salmon, arranged around the base
- A few roasted cherry tomatoes, broken slightly so they release their juices into the cream
- A teaspoon of truffle oil drizzled on top of the cream before adding the egg
Don’t overfill the ramekin — you want the egg to have room to cook properly without being crowded. Half the ramekin filled with add-ins is the limit.
Timing Is Everything in a Water Bath
The most common mistake is overbaking. Pull the ramekins out when the whites look just set at the edges but still have a slight jiggle at the center — the residual heat of the water bath and the ceramic ramekin will finish the cooking as they rest for 2 minutes on the counter. If the white looks completely firm in the oven, the yolk is already overcooked by the time it reaches the table.
Serve each ramekin directly in its dish, set on a small plate with a folded napkin underneath to prevent sliding. Toast sliced into thin fingers (“soldiers”) for dipping is the traditional accompaniment and the right one.
4. Tamagoyaki: The Japanese Layered Rolled Omelet

Tamagoyaki is an egg preparation that looks intimidating until you understand the rhythm, and then it becomes almost meditative. It’s made by cooking very thin sheets of seasoned beaten egg in a rectangular pan, rolling each layer onto the previous one as the egg sets, building up a tight, layered cylinder that slices into beautiful cross-sections of golden, delicate egg.
The flavor profile is unlike anything in Western egg cookery. A classic tamagoyaki is seasoned with mirin (sweet rice wine), soy sauce, dashi (a light Japanese stock made from kombu and bonito flakes), and sometimes a small amount of sugar. The result is subtly sweet, savory, and extraordinarily tender. It bears almost no resemblance to a Western omelet, even though the core ingredient is identical.
The Technique Step by Step
You’ll need a tamagoyaki pan — a rectangular nonstick pan roughly 5 by 7 inches. A round nonstick skillet can work in a pinch, but you’ll get uneven layers. For one serving, whisk together 3 large eggs, 1 tablespoon mirin, ½ teaspoon soy sauce, ½ teaspoon dashi (or a small pinch of dashi powder dissolved in a teaspoon of warm water), and ¼ teaspoon sugar.
Heat the pan over medium heat and brush lightly with neutral oil. Pour in just enough egg mixture to coat the bottom of the pan in a thin layer — roughly a quarter of the total mixture. Let it cook until the surface is about 80% set but still slightly wet-looking on top. Using chopsticks or a thin spatula, roll the egg toward you from the far end, creating a tight log at the bottom of the pan.
Push that log back to the far end, oil the pan again lightly, and pour in another thin layer of egg. Lift the existing roll to allow the fresh egg to flow underneath it, then roll the log forward again, incorporating the new layer. Repeat this two or three more times until all the egg is used. The result should be a compact, layered cylinder about 1½ to 2 inches thick.
Shaping and Serving
Wrap the finished tamagoyaki in a bamboo sushi mat and gently press it into a uniform rectangular shape while it’s still warm. Let it rest for 2 to 3 minutes before unwrapping and slicing into rounds about ¾ inch thick. The cross-sections reveal the beautiful, distinct layers.
Serve alongside steamed rice with a small mound of grated daikon radish and a drop of soy sauce, or pack slices into lunchboxes where they hold their texture remarkably well for hours.
5. Spanish Tortilla: A Thick Potato and Egg Cake
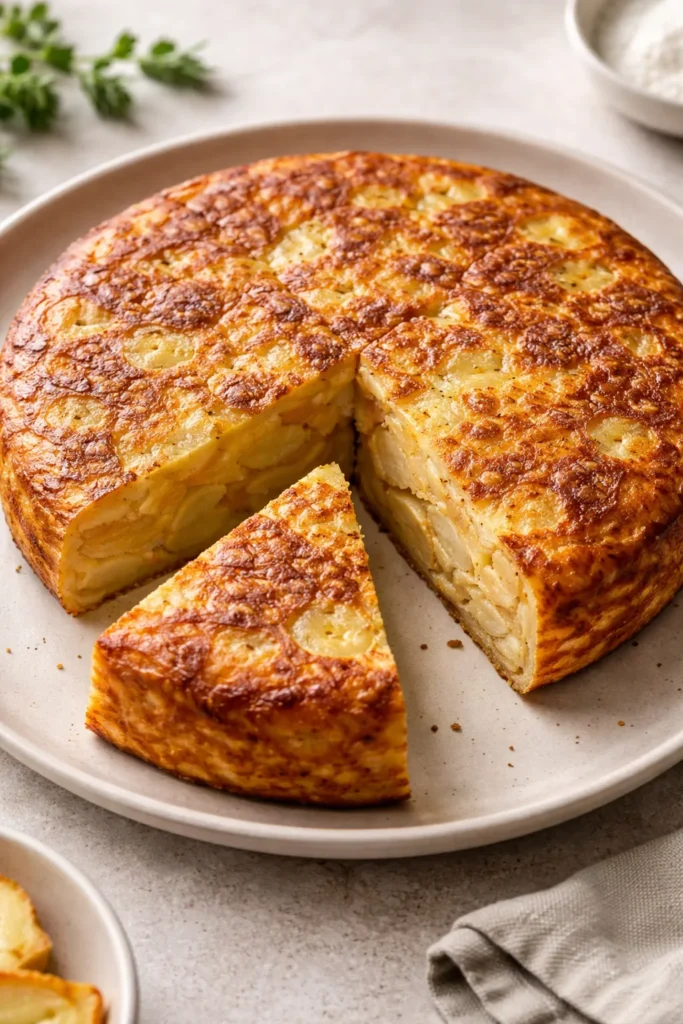
The Spanish tortilla — called tortilla española — has nothing to do with the Mexican flatbread of the same name. It’s a thick, round, golden cake made from thinly sliced potatoes, onions, and eggs, cooked low and slow in olive oil until the inside is custardy and the outside is set. At room temperature, it’s one of the finest things you can eat.
The key technique that makes a Spanish tortilla different from a frittata is the potato preparation. Rather than parboiling or roasting the potatoes separately, you confit them: cover thin-sliced potatoes and onions in a generous amount of olive oil and cook them slowly over low heat for 20 to 25 minutes until they’re completely tender but not browned. This gentler cooking method gives the potatoes a silkier, softer texture that integrates beautifully with the egg.
Building the Tortilla
For a standard 10-inch tortilla serving 4 to 6 people:
- Peel and slice 4 medium Yukon Gold potatoes about ⅛ inch thick (a mandoline makes this much faster)
- Thinly slice 1 large yellow onion
- Pour about 1 cup of olive oil into a 10-inch skillet and heat over medium-low
- Add the potatoes and onions, stirring occasionally, cooking at a low simmer for 20 to 25 minutes until completely tender
- Drain through a colander set over a bowl (save that oil — it’s now beautifully flavored and useful for cooking other things)
- Beat 6 large eggs with ½ teaspoon salt, then fold in the warm potato mixture
- Let this rest for 5 minutes to allow the potatoes to absorb the egg
Wipe out the skillet, add 2 tablespoons of the reserved oil, and heat over medium. Pour in the egg and potato mixture, spreading it into an even layer. Cook for 6 to 8 minutes until the edges are fully set and the center still has some movement. Now comes the flip — the part that feels scary the first time.
The Flip (It’s Not as Hard as You Think)
Place a flat plate larger than the skillet directly over the top of the pan. In one confident motion, flip the skillet over so the tortilla lands on the plate, cooked side up. Slide it back into the pan, raw side down, and cook for another 3 to 4 minutes until fully set. The tortilla should slide out cleanly onto a cutting board.
Serve warm, at room temperature, or cold from the fridge the next day — it’s honestly best at room temperature the morning after, when the flavors have melded and the texture has firmed just enough to hold a perfect slice. A dollop of aioli on the side is non-negotiable.
6. Deviled Eggs with Creative, Bold Fillings
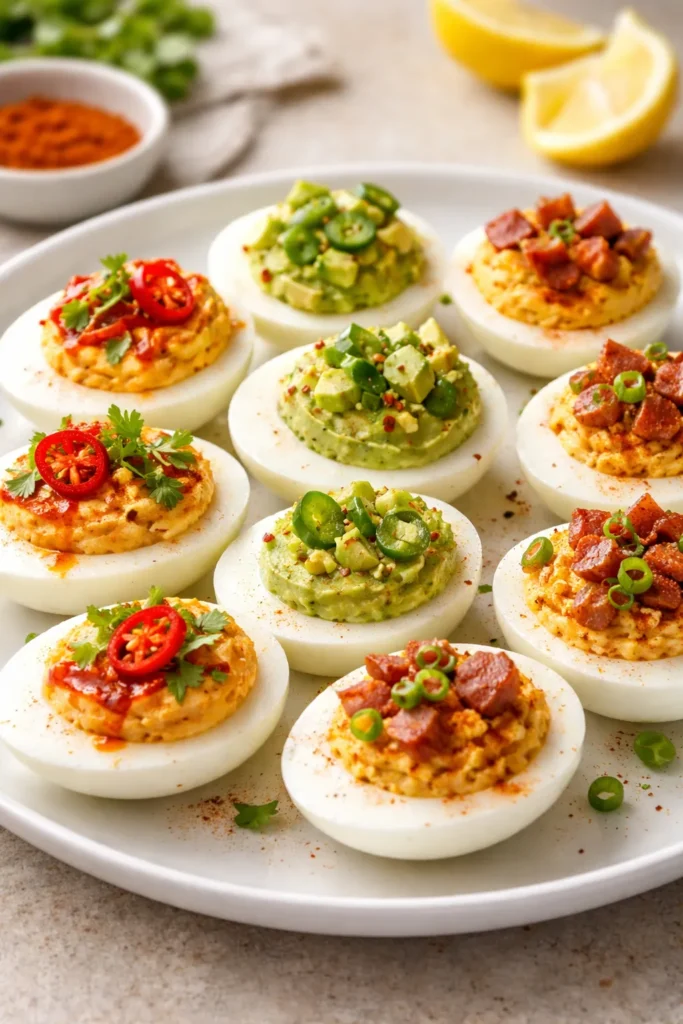
Deviled eggs have a reputation problem. People associate them with church potlucks and holiday relish trays, which isn’t entirely unfair — but those associations come from bland, under-seasoned versions that lean too heavily on grocery store mayonnaise and not enough on actual flavor. Made right, deviled eggs are one of the most satisfying, protein-dense snacks you can prepare in advance.
The base formula is solid and simple: hard-boil the eggs, halve them, mash the yolks with mayonnaise and a touch of Dijon mustard, a small splash of white wine vinegar for brightness, and salt. The ratio that works best is roughly 2 tablespoons of mayo and ½ teaspoon of Dijon per 3 egg yolks. This gives a filling that’s creamy without being greasy, and tangy without being sour.
Flavor Variations That Actually Deliver
Here’s where deviled eggs stop being retro and start being genuinely interesting. Each of these variations works from the base formula above:
- Sriracha and Lime: Add 1 teaspoon of sriracha and ½ teaspoon of lime zest to the base. Top with thinly sliced scallions and a drizzle of chili oil.
- Smoked Paprika and Jamón: Use smoked Spanish paprika in the filling (½ teaspoon) and top with a small curl of thinly sliced jamón serrano or prosciutto.
- Curry and Mango Chutney: Mix ¾ teaspoon of Madras curry powder into the filling and top with a small spoonful of mango chutney and fresh cilantro leaves.
- Everything Bagel: Fold in 1 teaspoon of cream cheese to the base and top with everything bagel seasoning and capers.
Getting the Texture Right
The filling’s texture depends almost entirely on how you process the yolks. Pressing them through a fine-mesh sieve gives you the smoothest, creamiest result — restaurant-quality with a bit more effort. A fork works well enough for rustic, slightly textured filling. A food processor works fast but risks over-processing into a gluey paste.
For clean piping, load the filling into a zip-top bag and snip a small corner off. A star piping tip gives elegant, ridged peaks, but a simple round opening works fine. Make deviled eggs up to 24 hours ahead — store the whites and filling separately, covered in the fridge, and pipe just before serving.
7. Frittata: The Effortless Oven-Finished Egg Bake
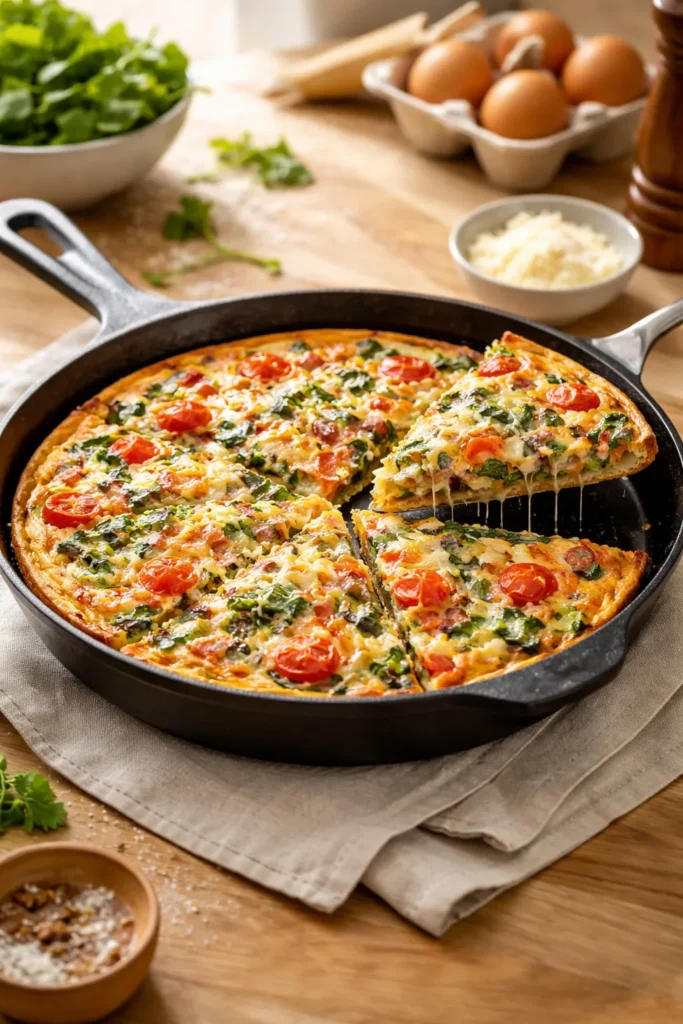
A frittata sits somewhere between a quiche and an omelet — heartier than the latter, simpler than the former, and more forgiving than either. The technique starts on the stovetop and finishes in the oven, which means you never have to attempt the nerve-wracking flip of a Spanish tortilla. The top browns gently under the broiler, the eggs puff slightly, and the whole thing slices cleanly into wedges that hold together beautifully.
The base ratio: 6 large eggs, 2 tablespoons of whole milk or cream, ½ teaspoon salt, and a grind of pepper, whisked until smooth. This fills a 10-inch oven-safe skillet and serves 4 people. The filling can be almost anything — the frittata is fundamentally a vehicle for whatever cooked vegetables, cheese, or proteins you want to use up.
The Filling-First Approach
Whatever you’re adding to the frittata needs to be fully cooked before the egg goes in. Raw vegetables release water as they cook, which pushes the egg away and creates wet, undercooked pockets. Sauté any vegetables first in the skillet until they’re tender and lightly browned, then spread them into an even layer across the bottom of the pan.
Some filling combinations worth knowing:
- Bacon, corn, and Gruyère: Crisp 4 strips of diced bacon, remove half to reserve for topping, then cook 1 cup of fresh or thawed frozen corn kernels in the bacon fat with 2 sliced scallions and 1 thinly sliced jalapeño.
- Roasted red pepper and feta: Use a layer of drained jarred roasted peppers with crumbled feta and fresh oregano leaves.
- Blistered asparagus and parmesan: Trim and halve asparagus spears and blister in a hot pan with olive oil, then arrange in the skillet with grated Parmesan.
The Oven Finish
Pour the egg mixture over the cooked filling and let it cook on the stovetop over medium heat for 3 to 4 minutes, without stirring, until the edges are set and just starting to pull away from the pan — the center should still look liquid. Transfer to a 375°F (190°C) oven and bake for 8 to 10 minutes until the center is just barely set with a very slight jiggle. Switch to the broiler for the final 60 to 90 seconds to get a lightly golden, slightly puffed top.
Rest for 5 minutes before slicing — this helps the frittata firm up and hold its shape. It’s excellent warm, but arguably better at room temperature 20 minutes later.
8. Steamed Egg Custard (Chawanmushi)
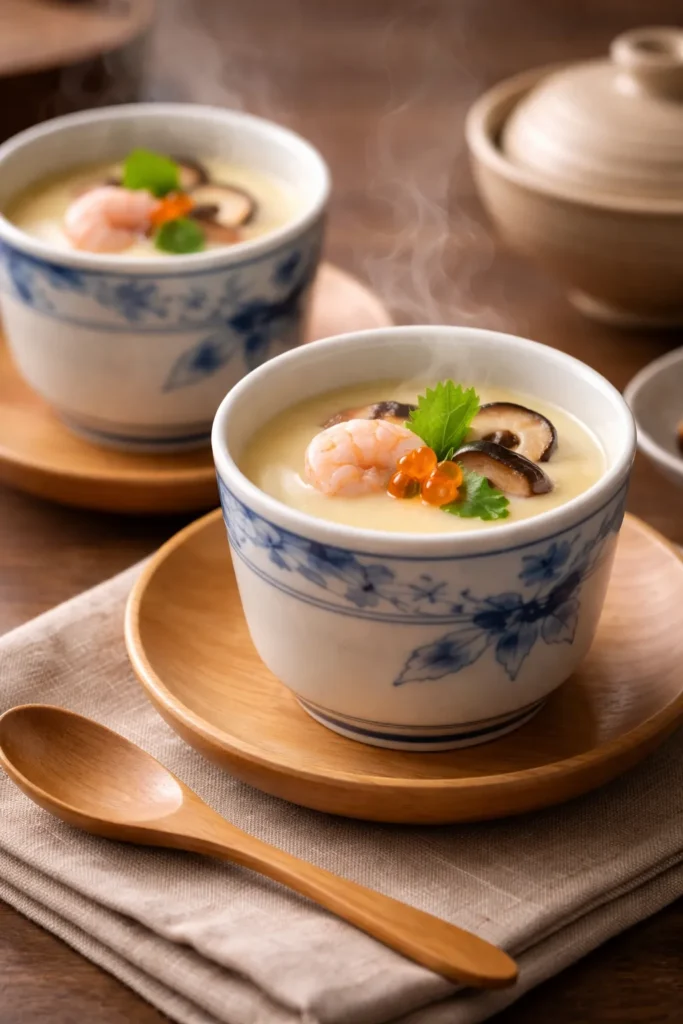
Of all the egg preparations on this list, chawanmushi — the Japanese savory steamed egg custard — is the one most likely to make someone who’s never tried it stop mid-bite and say “wait, what is this?” The texture is unlike anything else: silkier than a baked egg, softer than a scramble, somewhere between a very delicate custard and a warm, savory soup set just barely enough to hold a shape. It’s ethereal, genuinely, and one of the most comforting things you can eat.
The technique is pure simplicity, but it demands patience. You whisk eggs with a seasoned dashi stock — a light, clean Japanese broth made from kombu seaweed and bonito flakes — strain the mixture twice through a fine-mesh sieve, divide it into teacups or ramekins with a few small garnishes, and steam gently over very low heat for 12 to 15 minutes.
The Egg-to-Dashi Ratio
The ratio that produces the signature texture is 1 large egg to approximately ¾ cup of dashi. This is a significantly thinner mixture than you’d use for a baked egg custard or a quiche. If you make it too thick (less dashi), the custard firms up rubbery and dense. Too thin (more dashi), and it won’t hold a shape at all. Use a kitchen scale if you’re uncertain: 1 large egg weighs about 50 grams, and you want roughly 200ml of seasoned dashi to go with it for two small servings.
Season the dashi with 1 teaspoon of soy sauce, ½ teaspoon of mirin, and a pinch of salt. Whisk the eggs gently — don’t beat in air — and combine with the cooled dashi. Strain twice through a fine-mesh sieve. The straining removes the chalazae (the white stringy bits attached to the yolk) and any foam, giving you a perfectly smooth, bubble-free custard.
Fillings and Steam Control
Before adding the custard mixture, place small garnishes in the bottom of each cup:
- 1 medium shrimp, peeled and deveined
- 2 to 3 small shiitake mushroom caps
- A few small pieces of mitsuba (Japanese parsley) or regular flat-leaf parsley
- A small slice of fish cake (kamaboko) if you can find it
Pour the strained egg mixture gently over the garnishes, filling each cup about three-quarters full. Steam over low heat — this is critical. Too much heat causes the custard to bubble and set with a porous, uneven texture called “weeping.” The ideal temperature is around 170°F (77°C) inside the steamer, which means very low heat with the lid slightly ajar to prevent pressure buildup. Cook for 12 to 15 minutes until the custard is just set — it should jiggle gently as a whole when moved, not slosh.
What These Methods Teach You About Egg Cookery
Every preparation on this list is built around a single variable: heat control. A shakshuka uses trapped steam from a covered pan. Oeufs en cocotte use a water bath to moderate oven heat. Chawanmushi requires a barely-simmering steamer. Even a properly soft-boiled egg is really just an exercise in timing heat precisely.
Once you internalize this principle — that eggs respond to heat with extraordinary sensitivity, and that controlling that sensitivity is the whole game — every egg preparation becomes more intuitive. You start to read the pan, the steam, the visual cues, rather than relying entirely on a timer. That’s the difference between following a recipe and actually understanding how an ingredient behaves.
There’s also a world of technique available once you’re comfortable with these eight methods. A frittata skill set transfers directly to a quiche. Mastering tamagoyaki’s rolling technique makes Korean gyeran mari straightforward. Learning the shakshuka approach opens the door to Turkish menemen and Indian egg bhurji. Each method is a node in a much larger network of egg cookery, and pulling on any one thread reveals a dozen more worth exploring.
Adapting These Recipes for Meal Prep and Larger Groups
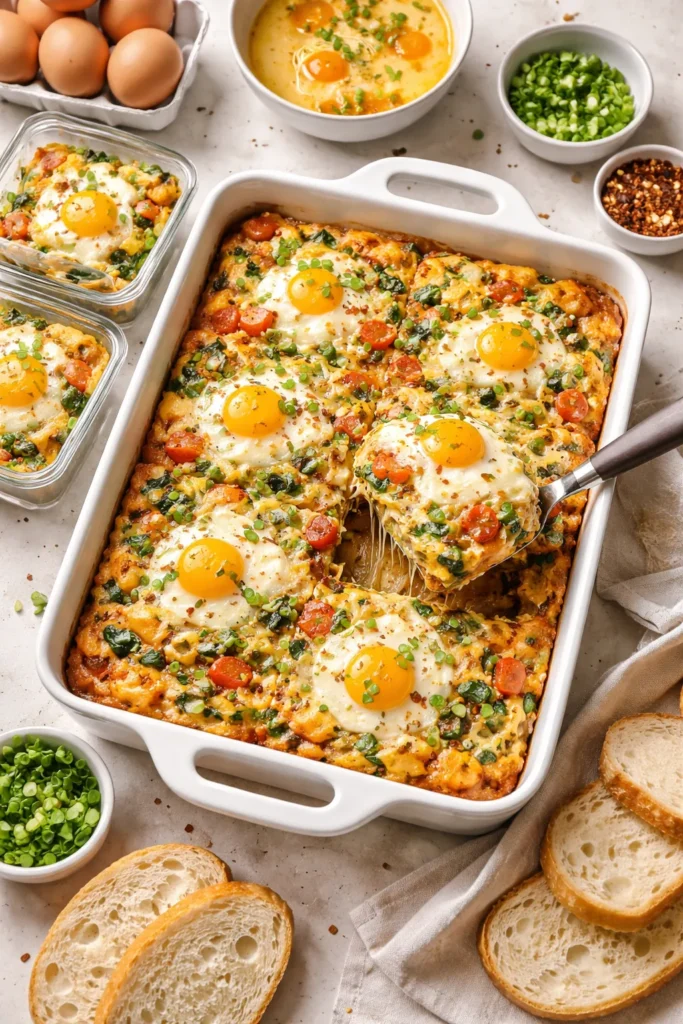
Most of these preparations scale up gracefully, which makes them valuable for feeding groups or preparing ahead. A shakshuka sauce can be made two to three days in advance and stored refrigerated — crack the eggs fresh just before serving. A frittata can be baked the night before and served at room temperature the next morning with no loss of quality.
The baked egg casserole approach (scaling the oeufs en cocotte concept up into a 9×13-inch baking dish) is particularly useful for feeding a crowd. A dozen eggs whisked with 1½ cups of whole milk and seasoned well, baked at 350°F for 25 to 30 minutes, yields 6 to 8 substantial portions that hold in the fridge for up to 5 days and reheat cleanly in the microwave in under a minute. Add shredded Pepper Jack or Gruyère, wilted spinach, or cooked crumbled sausage before baking for a heartier version.
Soy-marinated soft-boiled eggs, as mentioned earlier, actually improve over 24 to 48 hours in their marinade. Make a batch of four to six on a Sunday, and they become a meal-prep staple that elevates grain bowls, noodle dishes, and salads throughout the week with virtually no additional effort.
Final Thoughts
Eggs are one of those rare ingredients where the gap between what most people do with them and what’s actually possible is genuinely enormous. Scrambled and fried are fine — they’re classics for a reason. But shakshuka transforms Tuesday dinner into something worth sitting down for. A properly made Spanish tortilla served at room temperature the next day is better than almost any breakfast you could otherwise make. Chawanmushi takes ten minutes of active work and produces something that feels like it took years to learn.
The methods here aren’t ranked by difficulty, because they’re all accessible. They are ranked by how much they’ll change your relationship with an ingredient you already cook. Start with whichever sounds most appealing — maybe the jammy soft-boiled eggs if you want the fastest gratification, or the shakshuka if you want the most visually dramatic result — and build from there.
You’ve got a dozen eggs in the fridge. You now have eight very good reasons to stop defaulting to the same two things.