Hummus has a way of making people feel like they’ve done something impressive — and the truth is, from scratch doesn’t have to mean from-scratch complicated. The gap between reaching for a store-bought container and making a silky, rich, restaurant-quality bowl at home is smaller than most people think. We’re talking about ten minutes, a food processor or blender, and a handful of pantry ingredients that you probably already have.
What store-bought hummus gets wrong is the texture — stiff, gloopy, occasionally gritty — and the flavor, which tends to be flat and preserved-tasting. Homemade hummus is a completely different experience: lighter, nuttier, brighter, and endlessly customizable. Once you understand the base formula — chickpeas, tahini, lemon, garlic, and a splash of ice-cold water — you can riff on it in any direction.
The eight recipes here cover the full spectrum, from a pure classic that serves as your benchmark to bolder, more adventurous blends that bring something genuinely exciting to the table. Each one follows the same ten-minute method. Each one comes out creamy and smooth. And each one will make you wonder why you ever bothered with the grocery store version.
Table of Contents
- The Foundation: What Makes Hummus Come Together in 10 Minutes
- Equipment That Makes the Difference
- 1. Classic Creamy Hummus
- What Makes the Classic Work
- 2. Roasted Red Pepper Hummus
- Flavor Notes and Tips
- 3. Roasted Garlic Hummus
- Making It Work in 10 Minutes
- 4. Lemon Herb Hummus
- Keeping It Vibrant
- 5. Beet Hummus
- Beet Prep Shortcut
- 6. Spicy Harissa Hummus
- Harissa Brand Notes
- 7. Avocado Hummus
- The Avocado Timing Problem
- 8. Black Olive and Sun-Dried Tomato Hummus
- Balancing the Saltiness
- How to Serve and Top Your Homemade Hummus
- Storing Your Homemade Hummus
- Common Mistakes That Ruin Homemade Hummus
- Final Thoughts
The Foundation: What Makes Hummus Come Together in 10 Minutes
Before getting into the recipes, it’s worth understanding why hummus can go from ingredients to serving bowl so fast — and what separates a decent batch from an outstanding one.
Canned chickpeas are your best friend here. For a ten-minute timeline, you’re not soaking and boiling dried chickpeas from scratch. But there’s a trick that most recipes skip: simmering your canned chickpeas in a pot of water with ½ teaspoon of baking soda for 15 to 20 minutes before blending. The baking soda raises the pH of the water, which loosens the chickpea skins and breaks down the flesh to a much softer texture. The result? A smoother, creamier hummus that blends faster and more completely.
If you’re truly working within ten minutes — no simmering — just drain, rinse, and blend. Your hummus will still be good. Adding that quick simmer pushes it to great.
Tahini quality matters enormously. Because tahini’s flavor is so prominent in every bite, a bitter or rancid jar will tank an otherwise well-made hummus. Look for tahini made from hulled sesame seeds, which are far less bitter than unhulled varieties. Brands like Soom, Seed + Mill, and Al Kanater are widely praised by serious hummus makers. Whole Foods 365 tahini is a solid budget-friendly option. Always stir the jar well before measuring — the oil separates to the top and you want the whole jar incorporated, not just the paste at the bottom.
Ice-cold water is the secret weapon. Whether you’re using a food processor or a blender, adding ice-cold water (or aquafaba — the liquid from the can) while the machine is running transforms thick paste into a fluffy, whipped, airy dip. Start with 2 tablespoons and add more gradually until you hit your desired consistency.
Equipment That Makes the Difference
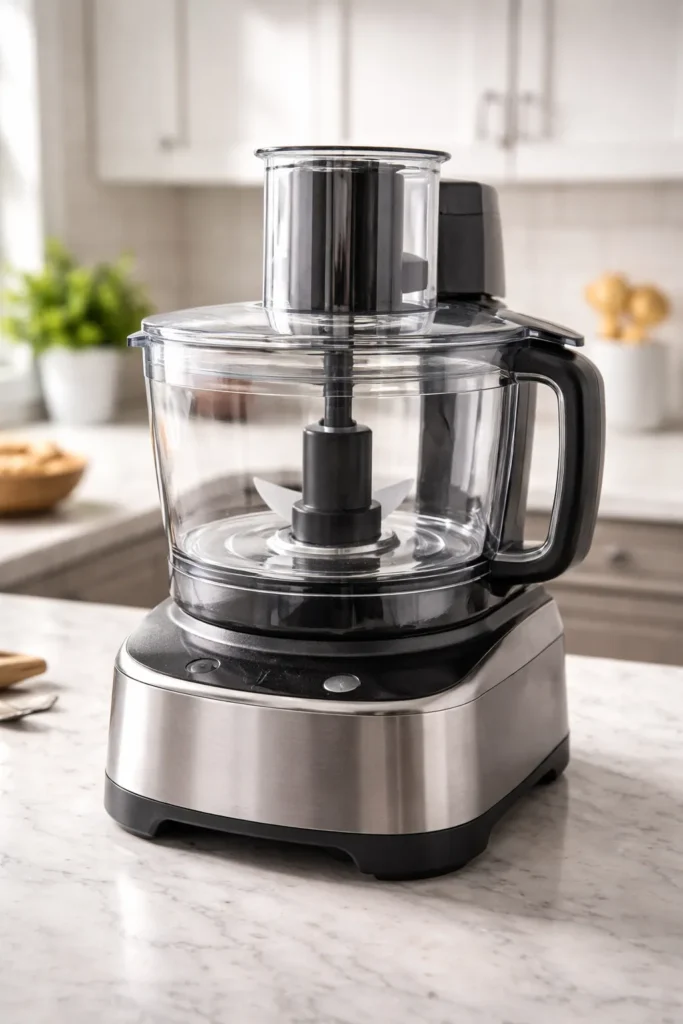
You don’t need much. A standard food processor handles this job well, though you’ll need to scrape down the sides a few times and let it run longer — typically 3 to 4 minutes — to get a truly smooth texture. A high-powered blender (Vitamix, Blendtec) produces a silkier result faster, often in under 2 minutes, but needs a baton to help push ingredients toward the blade.
Whatever you’re using, run it longer than feels necessary. The number one mistake people make with homemade hummus is stopping too early. Sixty seconds of blending gives you chickpea paste. Three to four minutes gives you something pillowy and smooth.
A small tip: warm your chickpeas before blending if you can. Blending warm chickpeas produces a lighter, fluffier texture than blending cold ones straight from the fridge. You experience the flavors more fully at room temperature or slightly warm — cold numbs both the nuttiness of the tahini and the brightness of the lemon.
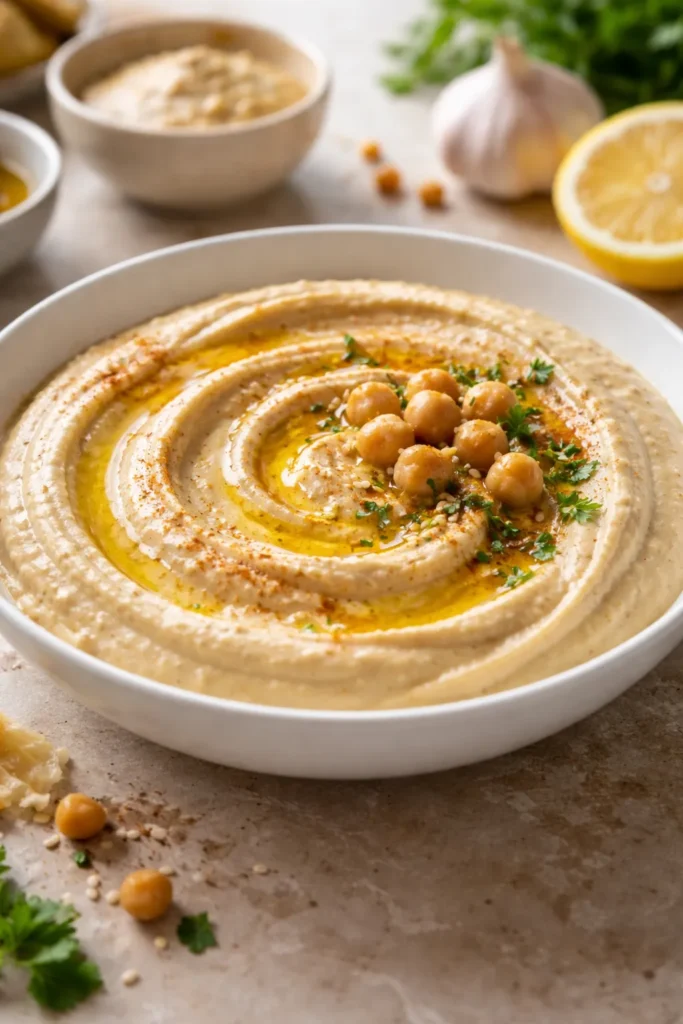
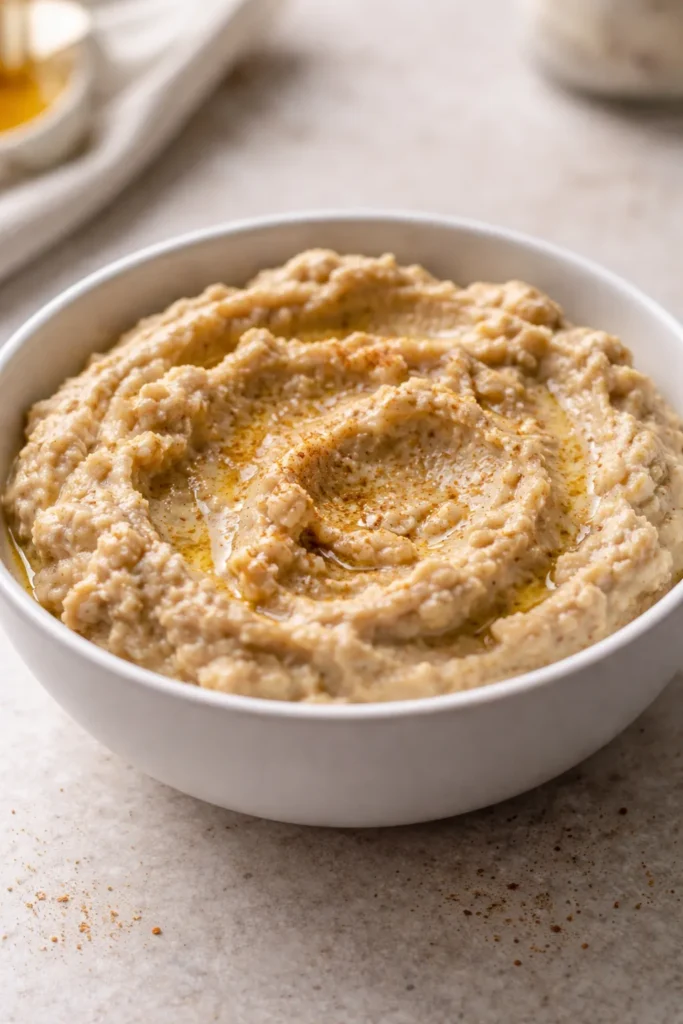
1. Classic Creamy Hummus
This is the benchmark — the version you make when you want hummus at its most honest. No distractions, no embellishments. Just clean, nutty, lemony, garlicky perfection that makes an extraordinary case for how good a simple dip can be.
The order of blending is what separates average hummus from something truly special. Whipping the tahini and lemon juice together first, before any chickpeas are added, aerates the tahini and creates a creamier base that carries every other ingredient better.
Yield: Makes about 1½ cups | Serves 4 to 6 Prep Time: 10 minutes Total Time: 10 minutes (or 30 minutes with the optional chickpea simmer) Difficulty: Beginner — five ingredients and one machine is all you need.
Ingredients:
- 1 can (15 oz) chickpeas, drained and rinsed
- ¼ cup well-stirred tahini
- 3 tablespoons fresh lemon juice (from about 1 large lemon)
- 1 small garlic clove, roughly chopped
- 2 tablespoons extra-virgin olive oil, plus more for serving
- ½ teaspoon ground cumin
- ½ teaspoon fine sea salt, or to taste
- 2 to 4 tablespoons ice-cold water or aquafaba (the liquid from the can)
- Smoked paprika or sumac, for garnish
Instructions:
- Add the tahini and lemon juice to the food processor. Run for 1 full minute, scrape the sides, then run for another 30 seconds. The mixture should look lighter in color and noticeably thicker — this is the tahini being “whipped.”
- Add the garlic, olive oil, cumin, and salt. Process for 30 seconds, scrape the sides, and process again for 30 seconds until fully combined.
- Add half the chickpeas and process for 1 minute. Scrape the sides, add the remaining chickpeas, and process for 1 to 2 more minutes until a thick, relatively smooth paste forms.
- With the processor running, slowly stream in 2 tablespoons of ice-cold water or aquafaba. Continue blending for 2 to 3 minutes, adding more water a tablespoon at a time until the hummus is fluffy and creamy. Taste and adjust with more salt, lemon juice, or cumin.
- Transfer to a serving plate, create a well in the center with the back of a spoon, drizzle with olive oil, and finish with a pinch of smoked paprika or sumac.
What Makes the Classic Work
The cumin is subtle, but don’t skip it. It adds a warm, earthy undertone that keeps the hummus from tasting one-dimensional. And using aquafaba instead of plain water in the final blending step creates a noticeably fluffier, more airy texture — the starch in the chickpea liquid acts almost like an emulsifier.
2. Roasted Red Pepper Hummus
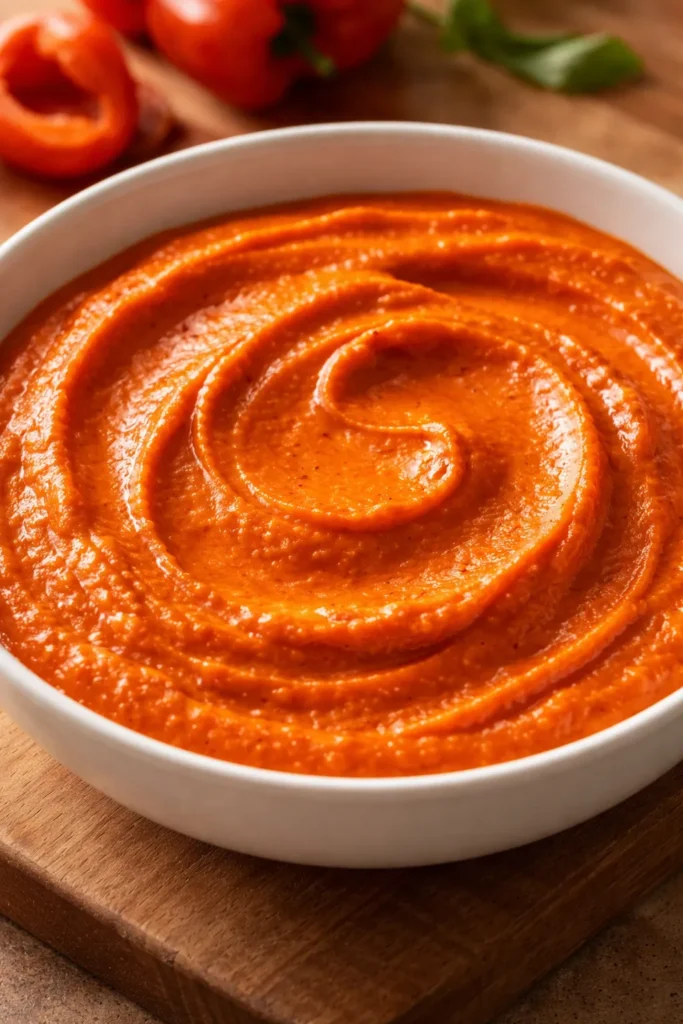
Roasted red pepper hummus has a smoky sweetness that makes it one of the most crowd-pleasing variations in existence. The peppers deepen the color to a vibrant orange-red, and a pinch of smoked paprika reinforces that roasted quality all the way through.
Ingredients:
- 1 can (15 oz) chickpeas, drained and rinsed
- ½ cup jarred roasted red peppers, drained and roughly chopped (about 2 to 3 peppers)
- 3 tablespoons tahini
- 3 tablespoons fresh lemon juice
- 1 garlic clove, roughly chopped
- 1 tablespoon extra-virgin olive oil, plus more for serving
- ½ teaspoon smoked paprika, plus more for garnish
- ½ teaspoon ground cumin
- ½ teaspoon fine sea salt
- 2 to 3 tablespoons ice-cold water
Instructions:
- Combine the tahini and lemon juice in the food processor. Process for 1 full minute until whipped and pale.
- Add the roasted red peppers, garlic, olive oil, smoked paprika, cumin, and salt. Process for 1 minute.
- Add the chickpeas in two batches, processing for 1 to 2 minutes per batch and scraping down the sides as you go.
- Stream in the ice water while the processor runs until you reach a smooth, creamy consistency. Blend for at least 2 more minutes.
- Taste and adjust salt or lemon. Serve topped with a drizzle of olive oil and an extra pinch of smoked paprika.
Flavor Notes and Tips
Drain the roasted red peppers thoroughly — excess liquid can make the hummus thinner than you want. Pat them dry with a paper towel before adding them to the processor. If you want an even smokier profile, add a small chipotle pepper in adobo sauce (about half a pepper) alongside the red peppers. It adds heat as well as smokiness, and the two play beautifully together.
3. Roasted Garlic Hummus
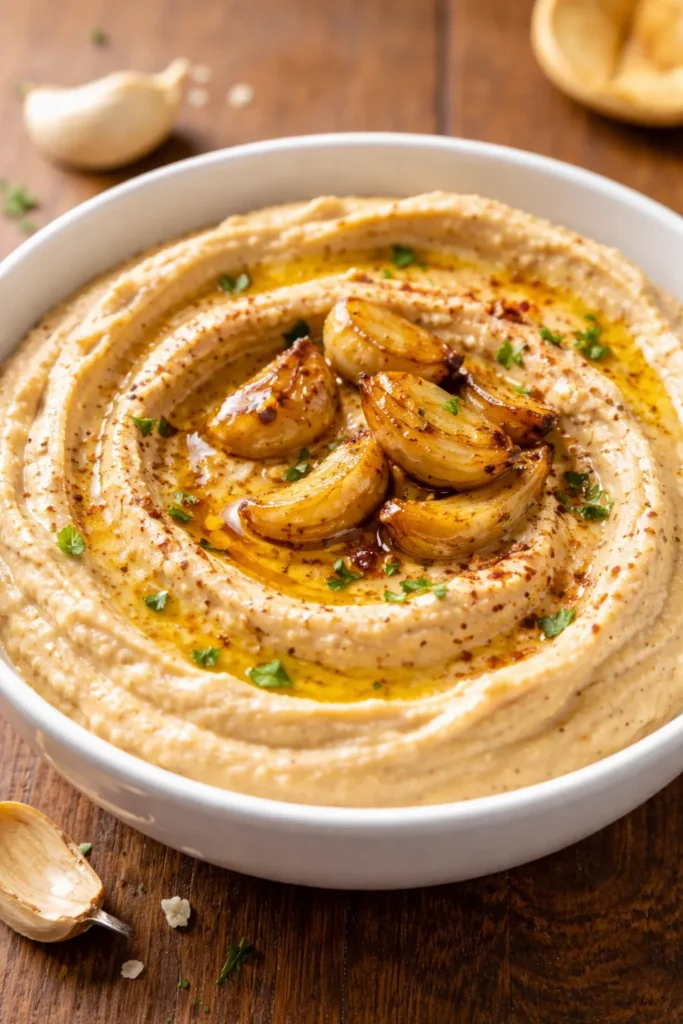
Raw garlic brings sharpness. Roasted garlic brings something entirely different — caramelized, mellow sweetness with none of the bite. This version is ideal for garlic lovers who want that flavor to permeate every bite without the sharp aftertaste.
Ingredients:
- 1 can (15 oz) chickpeas, drained and rinsed
- 1 full head of roasted garlic (all the cloves squeezed out, about 8 to 10 soft cloves)
- ¼ cup tahini
- 3 tablespoons fresh lemon juice
- 2 tablespoons extra-virgin olive oil, plus more for serving
- ½ teaspoon fine sea salt
- ¼ teaspoon freshly cracked black pepper
- 2 to 4 tablespoons ice-cold water
- Fresh thyme or chopped parsley, to garnish
Instructions:
- To roast garlic: slice the top off a whole head of garlic, drizzle with olive oil, wrap in foil, and roast at 400°F (200°C) for 35 to 40 minutes until the cloves are golden and completely soft. Squeeze the cloves out. This step can be done well ahead of time — roasted garlic keeps refrigerated for up to a week.
- Add the tahini and lemon juice to the food processor and process for 1 minute.
- Add the roasted garlic cloves, olive oil, salt, and pepper. Process for 1 minute, scraping the sides as needed.
- Add the chickpeas in two batches, processing for 1 to 2 minutes each time.
- Stream in the ice-cold water with the processor running until fluffy and silky. Blend for 2 to 3 more minutes total. Serve topped with a thin drizzle of olive oil and fresh thyme leaves.
Making It Work in 10 Minutes
If you need this on the table in ten minutes and haven’t pre-roasted your garlic, use three cloves of raw garlic but let them sit in the lemon juice for at least 10 minutes before blending. This trick — borrowed from chef Michael Solomonov — mellows the harsh, sharp bite of raw garlic and brings it considerably closer to the softened, mellow flavor of roasted garlic.
4. Lemon Herb Hummus
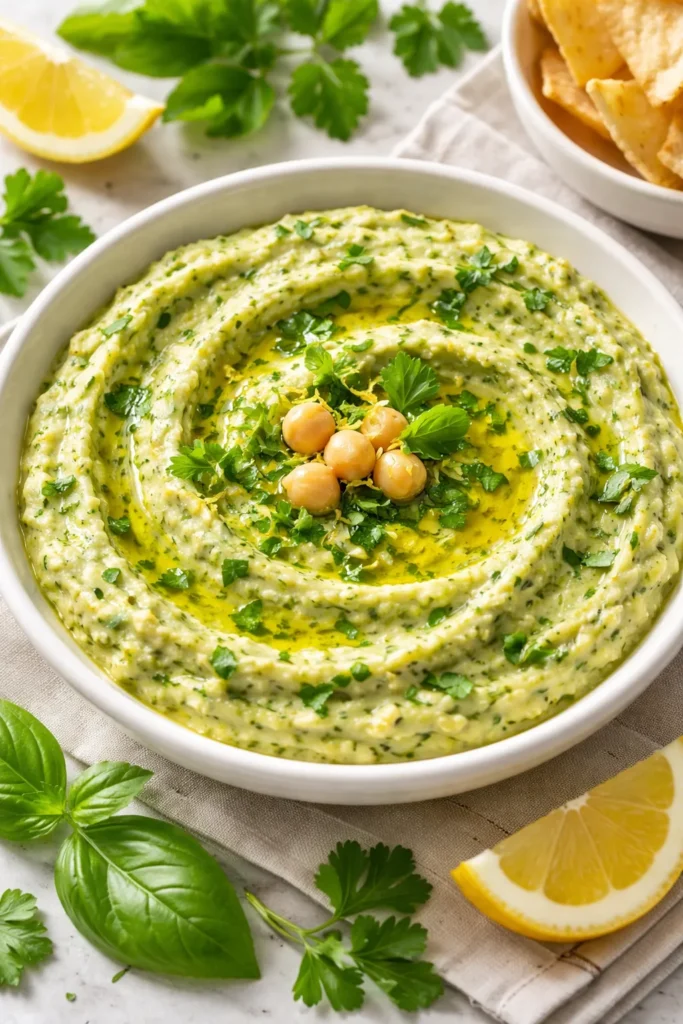
This version leans hard into brightness — a zippy, green-flecked hummus that feels genuinely fresh. Fresh parsley, basil, and extra lemon juice make it sing.
Ingredients:
- 1 can (15 oz) chickpeas, drained and rinsed
- ¼ cup tahini
- 4 tablespoons fresh lemon juice (from about 2 lemons), plus zest of 1 lemon
- 1 small garlic clove, roughly chopped
- ½ cup loosely packed fresh flat-leaf parsley
- ¼ cup loosely packed fresh basil leaves
- 1 tablespoon extra-virgin olive oil
- ½ teaspoon fine sea salt
- ¼ teaspoon black pepper
- 2 to 4 tablespoons ice-cold water
Instructions:
- Process the tahini and lemon juice together for 1 full minute until whipped and pale.
- Add the garlic, lemon zest, olive oil, salt, and pepper. Process for 30 seconds.
- Add the parsley and basil and process for 1 minute — the herbs will begin breaking down into green flecks throughout.
- Add the chickpeas in two batches, processing for 1 to 2 minutes each time, scraping down the sides.
- Stream in ice-cold water while the machine runs until smooth and fluffy. Taste and add more lemon juice if you want a punchier citrus flavor.
Keeping It Vibrant
Blanching the parsley briefly — just 15 seconds in boiling water, then immediately into ice water — before adding it to the processor preserves a brighter green color in the finished hummus. It’s a small step that makes a visible difference if you’re serving this at a dinner party or bringing it somewhere. Skip it for a weeknight snack and no one will notice.
5. Beet Hummus
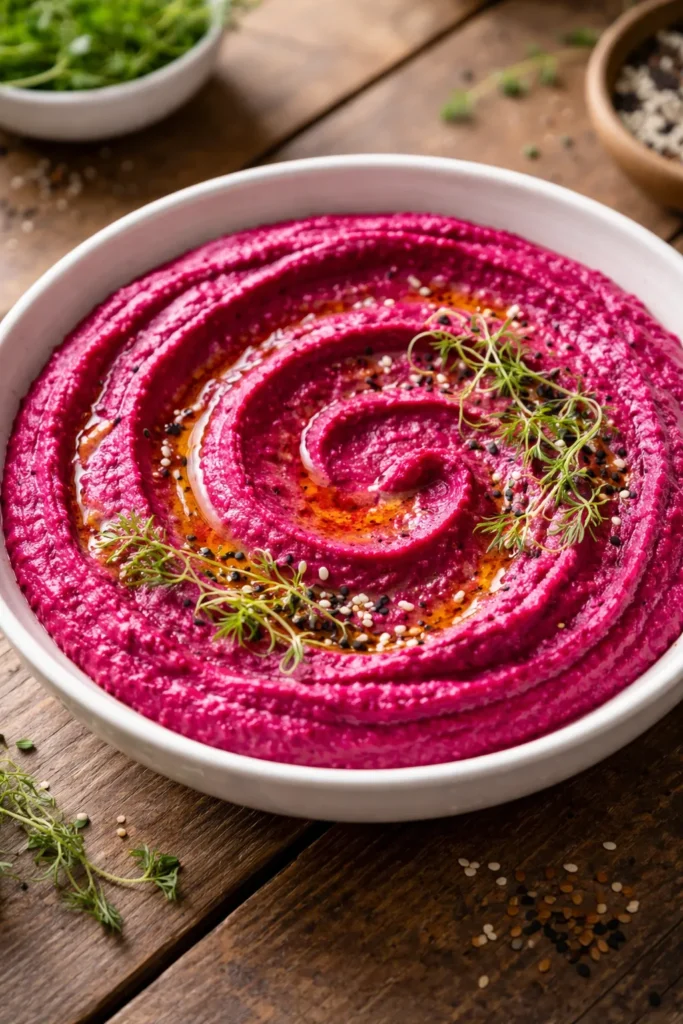
Beet hummus is as much about the visual impact as the flavor — that shocking magenta-pink color stops people in their tracks. But the flavor backs it up beautifully: earthy, slightly sweet, and still deeply nutty from the tahini.
Ingredients:
- 1 can (15 oz) chickpeas, drained and rinsed
- 1 medium beet, roasted and peeled (about ½ cup roughly chopped) — or ½ cup canned beets, drained and patted dry
- 3 tablespoons tahini
- 3 tablespoons fresh lemon juice
- 1 garlic clove, roughly chopped
- 1 tablespoon extra-virgin olive oil, plus more for serving
- ½ teaspoon ground cumin
- ½ teaspoon fine sea salt
- 2 to 4 tablespoons ice-cold water
- Fresh dill or microgreens, to garnish
Instructions:
- If roasting your beet: wrap in foil with a drizzle of olive oil and roast at 400°F (200°C) for 45 to 55 minutes until a knife slides through with no resistance. Cool, peel, and chop. For a true 10-minute version, use canned beets.
- Process the tahini and lemon juice for 1 full minute.
- Add the beet, garlic, olive oil, cumin, and salt. Process for 1 minute until the beet is fully broken down.
- Add the chickpeas in two batches, processing 1 to 2 minutes each time.
- Stream in ice water while running until you reach a smooth, vivid pink consistency. Taste and adjust salt and lemon.
Beet Prep Shortcut
Canned beets work well here — drain them, pat dry with paper towels, and you’re ready to go. The flavor is slightly less intense than freshly roasted beet, but the color is just as dramatic. A teaspoon of apple cider vinegar added with the lemon juice brightens the overall flavor and enhances the sweet-earthy character of the beet beautifully.
6. Spicy Harissa Hummus
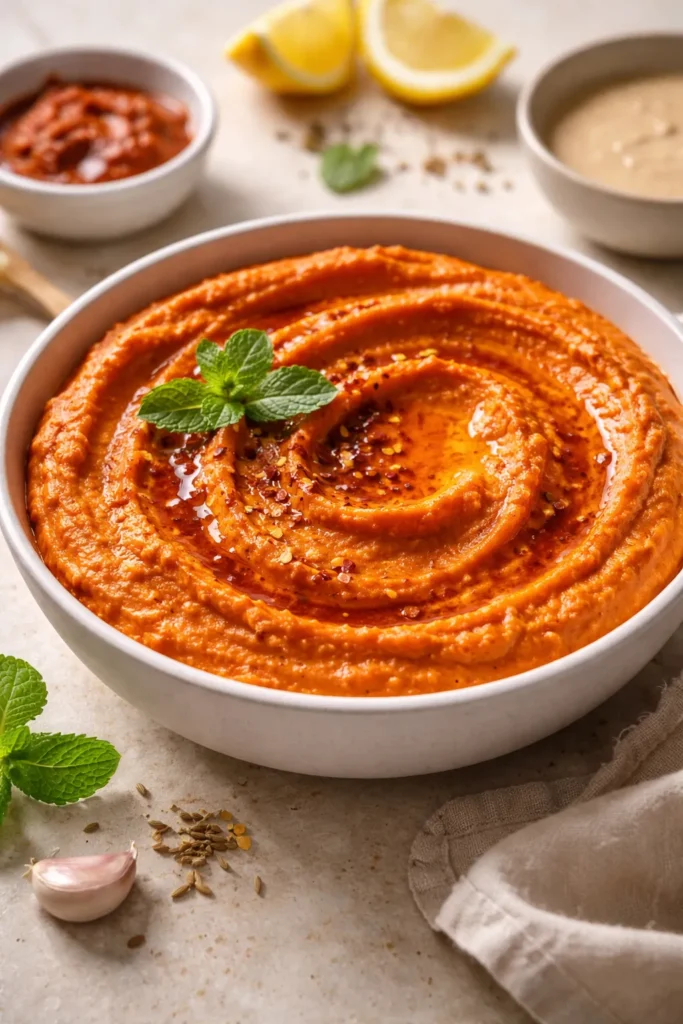
Harissa is a North African chili paste made from roasted peppers, garlic, and warm spices like caraway and coriander. Blended into hummus, it creates something bold, complex, and deeply satisfying — not just hot, but richly flavored.
Ingredients:
- 1 can (15 oz) chickpeas, drained and rinsed
- 2 to 3 tablespoons harissa paste (store-bought or homemade — start with 2 and add more to taste)
- ¼ cup tahini
- 3 tablespoons fresh lemon juice
- 1 garlic clove, roughly chopped
- 1 tablespoon extra-virgin olive oil, plus more for serving
- ½ teaspoon ground cumin
- ½ teaspoon fine sea salt
- 2 to 4 tablespoons ice-cold water
- Fresh mint leaves and a drizzle of harissa oil, to garnish
Instructions:
- Process the tahini and lemon juice together for 1 minute until whipped.
- Add the harissa paste, garlic, olive oil, cumin, and salt. Process for 1 minute.
- Add chickpeas in two batches, blending for 1 to 2 minutes each time.
- Stream in ice water while the machine runs until the hummus is smooth, creamy, and a deep reddish-orange color.
- Taste — harissa pastes vary in heat and saltiness, so adjust with more harissa, salt, or lemon as needed. Serve topped with a few fresh mint leaves, which cut through the heat brilliantly.
Harissa Brand Notes
Harissa quality varies as much as tahini quality. DEA and MINA brands are widely available and reliably good. If your harissa is quite thick and concentrated, start with 1½ tablespoons and taste as you go. Some brands are far hotter than others — there’s no standard heat level across jars, so your palate is the best guide.
7. Avocado Hummus

Creamy, green, and packed with healthy fats, avocado hummus bridges the gap between two beloved dips — and does it with more protein and fiber than guacamole alone. The tahini adds nuttiness that keeps this from tasting like green chickpea paste.
Ingredients:
- 1 can (15 oz) chickpeas, drained and rinsed
- 1 large ripe avocado, pitted and scooped from the skin
- ¼ cup tahini
- 3 tablespoons fresh lemon or lime juice (lime works beautifully here)
- 1 garlic clove, roughly chopped
- 1 tablespoon extra-virgin olive oil
- ½ teaspoon fine sea salt
- ¼ teaspoon ground cumin
- Pinch of cayenne pepper (optional)
- 2 to 3 tablespoons ice-cold water
- Fresh cilantro, pepitas, and flaky salt, to garnish
Instructions:
- Process the tahini and citrus juice together for 1 minute.
- Add the avocado, garlic, olive oil, salt, cumin, and cayenne. Process for 1 minute, scraping down the sides.
- Add the chickpeas in two batches, processing 1 to 2 minutes each time.
- Stream in ice-cold water while running until smooth and light green. Blend for at least 2 minutes — avocado can create a slightly thicker paste that needs extra time to fully incorporate.
- Taste and adjust lemon/lime and salt. Serve immediately or press plastic wrap directly onto the surface of the hummus before refrigerating — avocado oxidizes quickly, and direct contact prevents browning.
The Avocado Timing Problem
Avocado hummus is best eaten the day it’s made. The avocado will begin to oxidize and gray within 24 hours even with lemon juice present. Adding an extra tablespoon of citrus juice helps extend the color, and storing with plastic wrap pressed firmly against the surface (not just over the container) makes a noticeable difference. Serve this one fresh whenever possible.
8. Black Olive and Sun-Dried Tomato Hummus
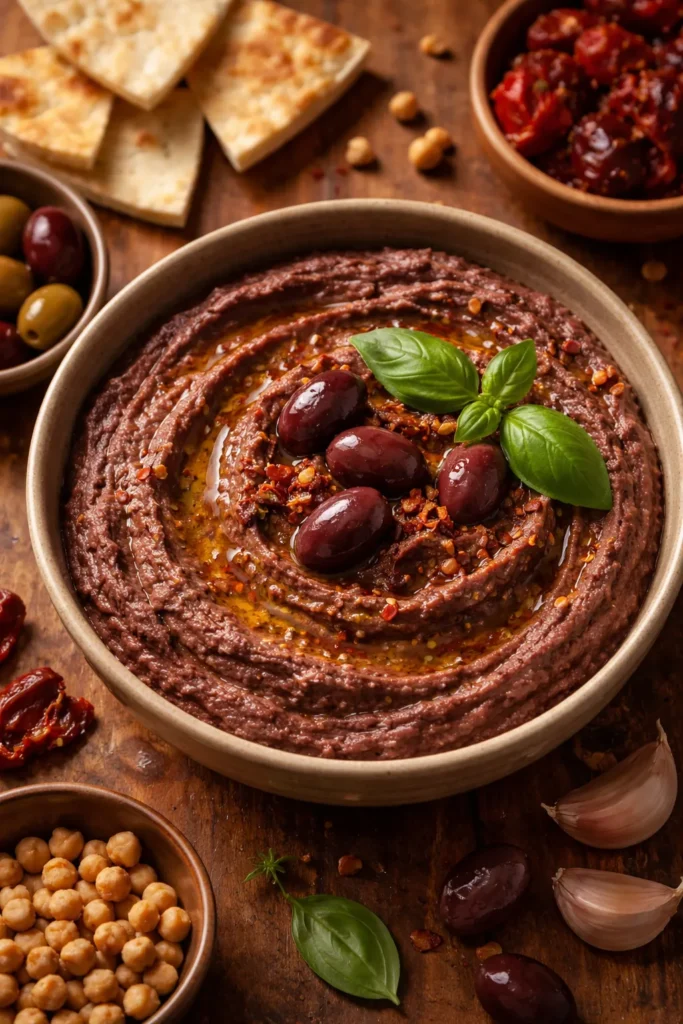
This is the most savory, most umami-forward variation on the list — deep, briny, and intensely flavored. It pairs beautifully with crusty bread and is the kind of dip that turns a simple platter into something people talk about.
Ingredients:
- 1 can (15 oz) chickpeas, drained and rinsed
- ⅓ cup pitted Kalamata olives, drained (not packed in oil)
- ¼ cup oil-packed sun-dried tomatoes, drained and roughly chopped
- 3 tablespoons tahini
- 2 tablespoons fresh lemon juice
- 1 garlic clove, roughly chopped
- 1 tablespoon extra-virgin olive oil, plus more for serving
- ½ teaspoon dried oregano
- ¼ teaspoon fine sea salt (the olives and tomatoes are both salty — start light)
- ¼ teaspoon freshly cracked black pepper
- 2 to 3 tablespoons ice-cold water
- Chopped fresh basil and a few whole Kalamata olives, to garnish
Instructions:
- Process the tahini and lemon juice together for 1 minute.
- Add the Kalamata olives, sun-dried tomatoes, garlic, olive oil, oregano, salt, and pepper. Process for 1 full minute, scraping the sides.
- Add the chickpeas in two batches, blending 1 to 2 minutes each time. The hummus will be a deep, brownish-purple color — that’s exactly right.
- Stream in ice-cold water while running until you reach a smooth, spreadable consistency. Blend for 2 to 3 minutes total.
- Taste carefully before adding salt — the olives and sun-dried tomatoes contribute significant saltiness. Adjust with lemon juice to brighten if needed. Serve garnished with whole olives and torn fresh basil.
Balancing the Saltiness
Both Kalamata olives and sun-dried tomatoes are naturally high in sodium. If your finished hummus tastes too salty, add more chickpeas or a splash of extra lemon juice rather than reaching for water alone. The acid cuts through salt perception quickly and restores balance without diluting the flavor.
How to Serve and Top Your Homemade Hummus

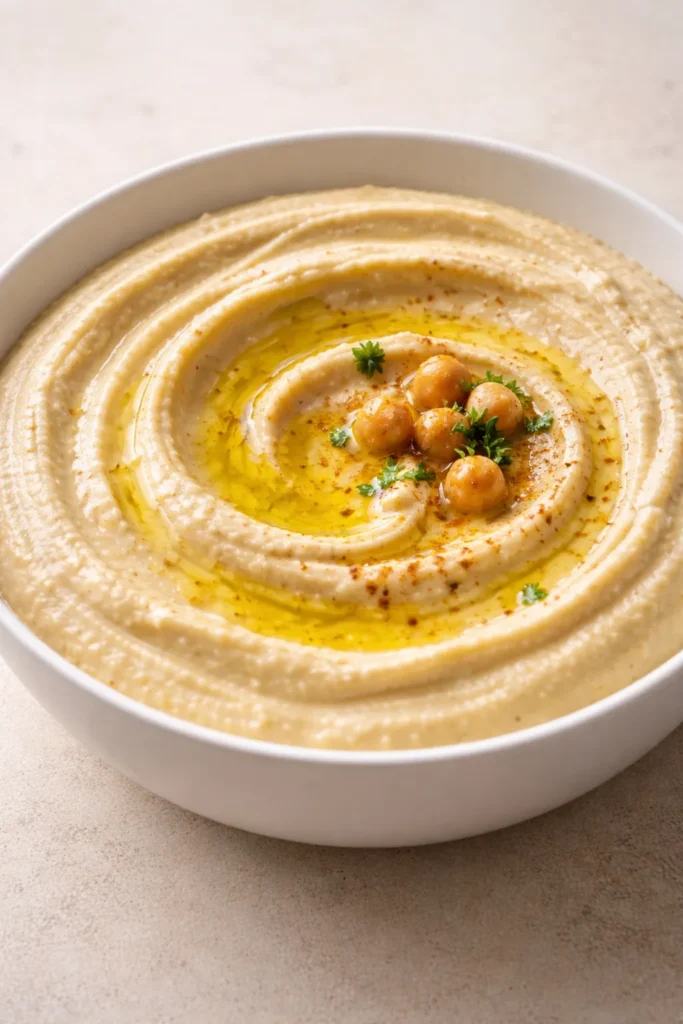
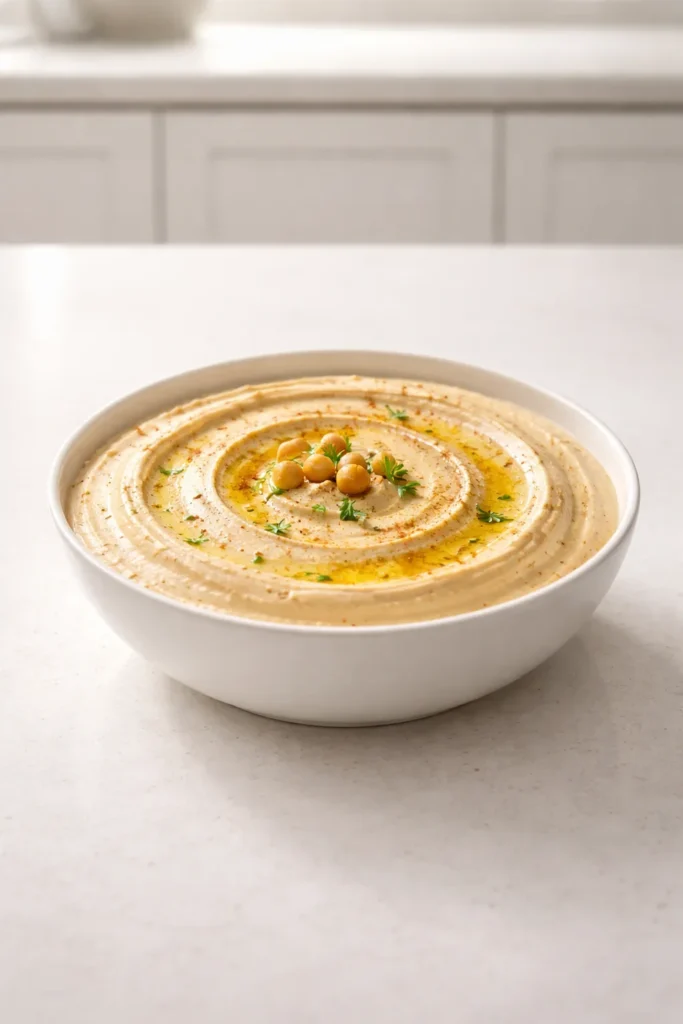
The presentation matters more than most people give it credit for. A bowl of hummus that looks inviting — properly swirled, generously drizzled, and garnished with color and texture — signals quality before the first bite is taken.
The swirl technique: Spoon your hummus into a shallow bowl (wide and shallow beats deep and narrow). Press the back of a large spoon into the center and rotate the bowl while dragging the spoon in a slow spiral outward. You’re creating a shallow well in the middle that catches olive oil and toppings.
Topping ideas that genuinely elevate the experience:
- A generous pour of high-quality extra-virgin olive oil into the center well — this is non-negotiable
- Sumac for a tangy, fruity sourness and deep pink color
- Smoked paprika for color and a mild smokiness
- Za’atar — a blend of thyme, sesame, and sumac — for herbal complexity
- Toasted pine nuts for crunch and a subtle buttery richness
- Chopped flat-leaf parsley for freshness and color contrast
- Aleppo pepper for a mild, fruity heat that’s less aggressive than regular chili flakes
- Fried garlic and lemon peel cooked briefly in olive oil — one of the most impressive toppings you can add, and it takes under 5 minutes
For serving vehicles, warm pita bread remains the gold standard. Cut it into wedges and either serve fresh or brush with olive oil and toast at 375°F for 8 to 10 minutes until crisp at the edges. Crudités — cucumber rounds, carrot sticks, bell pepper strips, radishes — add color and crunch to any platter.
Storing Your Homemade Hummus

All eight of these recipes store well in the refrigerator for up to five days in an airtight container. The one exception is the avocado hummus, which holds best for two to three days before the color degrades significantly.
To store: Pour a thin layer of extra-virgin olive oil across the surface of the hummus before sealing the container. This prevents the top layer from drying out and cracking, and it also means you have a built-in drizzle ready to go when you serve leftovers.
To reheat: Homemade hummus tastes noticeably better at room temperature or slightly warm than it does cold straight from the fridge. Take it out 20 to 30 minutes before serving. If you want it genuinely warm, add a couple of teaspoons of water and stir it through a small saucepan over low heat for a few minutes, or microwave it in 10-second increments, stirring between each round.
Freezing: Hummus freezes reasonably well — up to one month, stored in an airtight container with a thin olive oil layer on top. The texture changes slightly after thawing (it can become a little grainy), but a quick blitz in the food processor or a good stir after thawing brings it mostly back. Avocado hummus does not freeze well.
Common Mistakes That Ruin Homemade Hummus
Even with great ingredients and the right method, a few consistent mistakes can derail an otherwise good batch.
Not blending long enough is the most common error. Sixty seconds feels like a long time when you’re standing there watching a machine spin. But the hummus is still grainy at sixty seconds. Push past four minutes and you’ll feel the difference.
Using low-quality or old tahini. Tahini goes rancid, and rancid tahini tastes bitter and stale — and that flavor transmits directly to the hummus. Smell and taste your tahini before using it. Fresh tahini has a nutty, almost sweet aroma. If it smells like paint thinner or nail polish remover, it’s gone.
Skipping the ice water step. Plain room-temperature water works, but ice-cold water does something measurably different — it lightens the color of the tahini and creates a fluffier, airier texture that plain water doesn’t match. It takes five seconds to add ice to a glass of water. Do it.
Adding too much garlic or not mellowing it. Raw garlic is sharp and aggressive, and too much of it overwhelms everything else. Stick to one small clove for a subtle background flavor. For more garlic presence without the harsh bite, let minced garlic sit in the lemon juice for 10 minutes before blending — the acid mellows the compounds responsible for garlic’s sharpness.
Under-seasoning. Hummus needs enough salt to make the tahini and chickpea flavors pop. Taste at the end and don’t be shy — a properly seasoned hummus should taste vibrant and full. If it tastes flat, add more salt before adding more lemon juice, and see if that resolves it.
Final Thoughts
Making hummus at home takes ten minutes. That’s genuinely all it takes — and the gap in quality between these eight recipes and anything you’ll find in a store is not subtle. It’s dramatic.
Start with the classic. Make it once and pay attention to how the texture changes as you blend: the resistance at 30 seconds, the paste at 2 minutes, the cream at 4 minutes. Once you’ve felt that transformation happen, you’ll understand exactly what you’re working toward in every version.
From there, the variations become intuitive. Roasted vegetables, fresh herbs, spice pastes, bold add-ins — they all follow the same framework and respond the same way. The technique stays constant; only the flavors change.
Invest in good tahini. Use fresh lemons. Let the machine run longer than feels necessary. Those three habits alone will put your homemade hummus in a completely different category than anything that comes in a plastic tub.