Somewhere between the sticky fingers and the sugar-dusted countertops, something wonderful happens when you make marshmallow treats with kids. The kitchen becomes a place where science and creativity collide — where a plain white puff can transform into something gooey, golden, or rainbow-bright depending on what you do with it.
Marshmallows have a unique magic in kid-friendly cooking. They melt beautifully, they stick things together, they toast and stretch and take on whatever flavor you bring to them. That versatility means you’re never stuck with just one type of treat — you can go chocolatey and fudgy one afternoon, fruity and colorful the next. Most marshmallow-based recipes also require minimal baking (some need no oven at all), which makes them genuinely accessible for small hands and impatient appetites.
The eight recipes gathered here range from absolute beginner no-bake bars to slightly more involved cookie and brownie projects. Every single one has been chosen because it delivers on two fronts simultaneously: it tastes genuinely good, and it gives kids something real to do in the kitchen beyond just watching. Whether your child is five or twelve, there’s a treat here they’ll be proud to say they made themselves.
Table of Contents
- Why Marshmallows Make the Perfect Ingredient for Kids
- Setting Up Your Kitchen Before You Start
- 1. Classic Brown Butter Rice Krispie Treats
- Making It Yours
- Storage
- 2. S’mores Brownies with a Graham Cracker Crust
- What to Know About Cutting S’mores Brownies
- 3. Chocolate-Dipped Marshmallow Pops
- Kid-Assignment Ideas
- Storage
- 4. Hot Cocoa Marshmallow Cookies
- The Texture Breakdown
- 5. No-Bake Fruity Pebbles Marshmallow Bars
- Why Fruity Pebbles Work Especially Well Here
- 6. Oven S’mores Dip
- Serving This with Kids
- 7. Five-Minute Microwave Chocolate Marshmallow Fudge
- Why Marshmallows Make Better Fudge
- 8. Rainbow Marshmallow Bark
- Customizing for Themes and Occasions
- Tips for Cooking Marshmallow Treats with Kids
- Final Thoughts
Why Marshmallows Make the Perfect Ingredient for Kids
Before getting into the recipes themselves, it’s worth understanding why marshmallows work so well in kid-friendly cooking — because once you get it, you’ll see the opportunity in every bag.
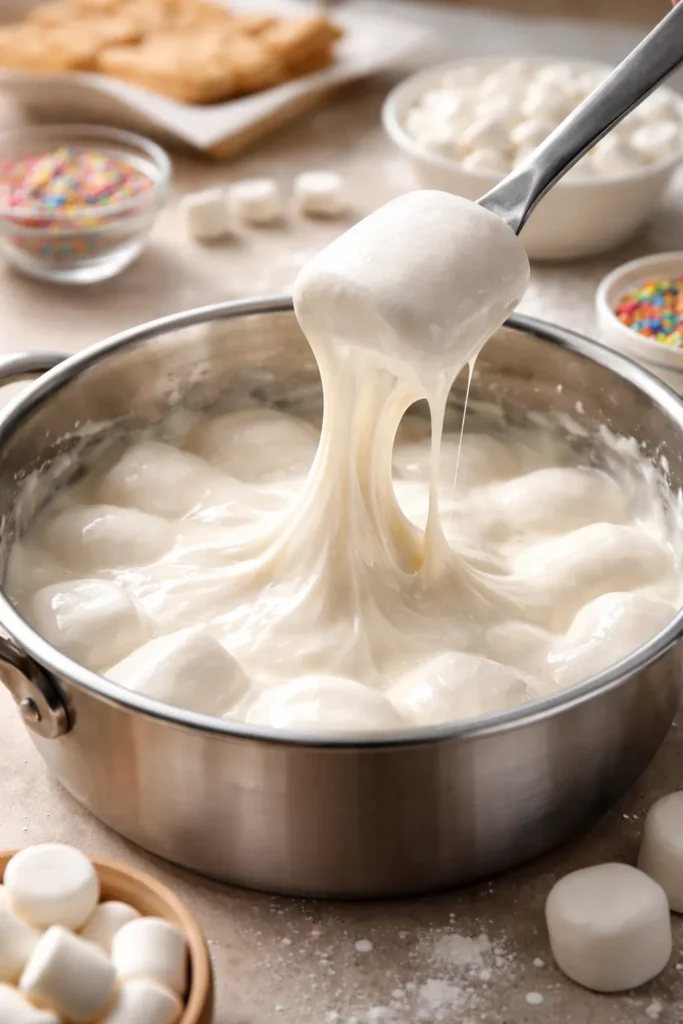
When marshmallows melt, they go through a visible, dramatic transformation that kids naturally find fascinating. A solid white puff becomes a glossy, stretchy liquid right before their eyes. That shift from solid to liquid is a hands-on lesson in states of matter, and it happens quickly enough to hold even a distracted child’s attention. Watching the pan and stirring the marshmallows is a job they take seriously.
Marshmallows are also extraordinarily forgiving. Unlike finicky pastry doughs or temperamental custards, a melted marshmallow mixture has a wide margin for error. If the cereal gets stirred in a little unevenly, the bars still taste great. If a marshmallow pop gets double-dipped in chocolate, that’s arguably better. There’s very little that can go truly wrong, which makes the whole experience feel encouraging rather than stressful.
The other underrated benefit? Marshmallows act as edible glue. In bar recipes, they bind cereal and mix-ins together. In candy bark, they add chew and structure. That binding function means kids can toss in their own additions — a handful of M&Ms here, some crushed pretzels there — and the recipe will still hold together. Personalization and creativity come built into the process.
Setting Up Your Kitchen Before You Start

A little preparation before the kids arrive at the counter makes the whole session run more smoothly. These recipes move fast once the marshmallows hit the heat, so having everything measured and ready is the single most important thing you can do.
Line your pans in advance. Parchment paper with a small overhang on each side turns unmolding from a stressful moment into a simple lift. Lightly grease the parchment with butter or a quick spritz of cooking spray for bar recipes.
Pre-measure all ingredients into small bowls. Melted marshmallow waits for no one — if you’re fumbling for a measuring cup while the mixture stiffens in the pan, the bars end up dense and dry. Set everything out before the butter hits the stove.
Assign age-appropriate jobs. Younger kids (ages 4–7) do well with pouring pre-measured ingredients, stirring mixes that have cooled slightly, and decorating finished treats. Older kids (ages 8 and up) can handle the stovetop stirring with close supervision, pressing bars into pans, and dipping marshmallow pops in chocolate. Give everyone a real role, and the treats taste better for it.
Keep a damp cloth close by. Melted marshmallow is impressively sticky. A warm, damp cloth handles cleanup far better than paper towels.
1. Classic Brown Butter Rice Krispie Treats
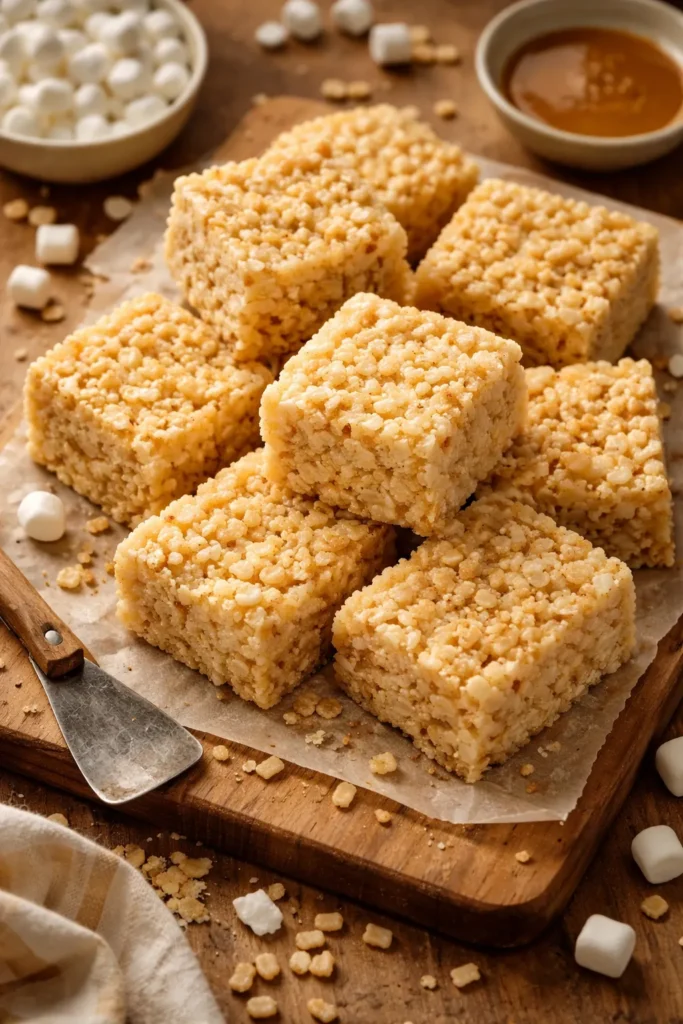
Rice Krispie treats are the recipe that starts most people’s love of marshmallow cooking — and with good reason. Three ingredients, one pan, and about fifteen minutes of active work. This version uses brown butter instead of plain melted butter, which adds a toasty, almost caramel-like depth that transforms the humble bar from a basic snack into something genuinely craveable.
The browning step takes an extra three minutes and makes a noticeable difference in flavor. It’s also a fantastic teaching moment: kids can watch the butter foam, then settle, then slowly turn golden and smell nutty. That’s the Maillard reaction happening right in front of them.
Yield: 16 bars (or 9 very generous ones) Prep Time: 10 minutes Cook Time: 5 minutes Total Time: 15 minutes active + 30 minutes setting Difficulty: Beginner — no special equipment needed, and the process is forgiving even for first-timers
Ingredients:
- 5 tablespoons (70g) unsalted butter
- 1 bag (10.5 oz / 297g) mini marshmallows, plus ½ cup extra for folding in at the end
- ¼ teaspoon fine sea salt
- ½ teaspoon pure vanilla extract (or ½ teaspoon almond extract for a more complex flavor)
- 6 cups (about 168g) Rice Krispies cereal
Instructions:
Brown the Butter and Melt the Marshmallows:
-
Line an 8-inch square baking pan with parchment paper, leaving a 1-inch overhang on two sides. Lightly grease the parchment with butter and set aside.
-
Measure all ingredients and have them ready before turning on the stove — the process moves quickly.
-
Melt the butter in a large, wide saucepan over medium heat. Continue cooking, swirling the pan occasionally, for 3 to 4 minutes until the butter foams, the foam subsides, and the milk solids at the bottom turn deep golden brown and smell nutty. Watch it closely — brown butter and burnt butter are separated by about 30 seconds.
-
Immediately add the 10.5 oz of mini marshmallows to the browned butter. Reduce heat to medium-low and stir continuously with a silicone spatula until the marshmallows are completely melted and smooth, about 2 to 3 minutes. Do not increase the heat to speed this up — overheated marshmallow mixture makes hard, dry bars.
-
Remove the pan from heat. Stir in the salt and vanilla extract.
Combine and Press:
-
Pour the Rice Krispies into the pan with the marshmallow mixture and fold gently until every piece of cereal is coated. The mixture will be very sticky and requires some patient folding.
-
Add the reserved ½ cup of mini marshmallows and fold them in quickly so they stay mostly intact, adding pockets of soft, gooey texture throughout the bars.
-
Transfer the mixture to the prepared pan. With lightly buttered hands or an oiled offset spatula, press the mixture evenly into the pan. Press gently — compacting too firmly makes the bars dense and tough instead of light and chewy.
-
Let the bars set at room temperature for at least 30 minutes, or place the pan in the refrigerator for 15 minutes to speed things up.
-
Lift the bars out using the parchment overhang and slice into 16 squares with a sharp knife.
Making It Yours
The base formula — butter, marshmallows, cereal — is endlessly flexible. Swap the Rice Krispies for Fruity Pebbles and you get vibrant, fruity bars. Use Cocoa Krispies with a handful of crushed Oreos folded in at the end for a cookies-and-cream version. Fold in ½ cup of mini chocolate chips or rainbow sprinkles right before pressing into the pan. The formula stays the same; the flavor is whatever your kid dreams up.
Storage
Store in an airtight container at room temperature. Best within 2 days; the texture softens and becomes slightly stale after that. Individual bars wrapped tightly in plastic wrap freeze well for up to 6 weeks.
2. S’mores Brownies with a Graham Cracker Crust
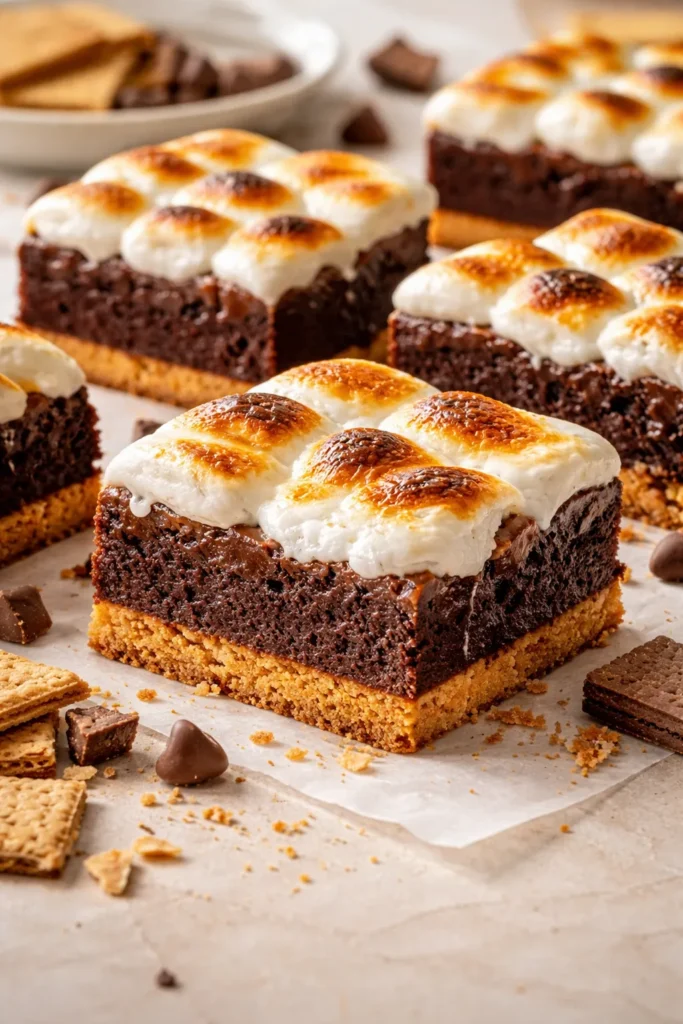
S’mores brownies solve the one problem with actual s’mores: mess management. The graham cracker, chocolate, and marshmallow combination is all there, but contained in a neat square that kids can hold without dropping marshmallow on their shoes.
The graham cracker base bakes slightly before the brownie layer goes on, which gives it enough structure to hold up to cutting. The marshmallow topping gets a quick pass under the broiler at the very end — that’s where the magic happens, turning the surface golden and toasted the way a campfire would.
Yield: 16 brownies Prep Time: 20 minutes Cook Time: 40 minutes Total Time: 1 hour (plus 30 minutes cooling) Difficulty: Intermediate — the broiler step requires adult supervision, but the rest is straightforward
Ingredients:
For the Graham Cracker Crust:
- 1½ cups (150g) graham cracker crumbs (from about 10 full crackers, finely crushed)
- 3 tablespoons granulated sugar
- 6 tablespoons (85g) unsalted butter, melted
For the Brownie Layer:
- ½ cup (113g) unsalted butter
- 4 oz (113g) dark chocolate (70%), roughly chopped
- ¾ cup (150g) granulated sugar
- 2 large eggs, room temperature
- 1 teaspoon pure vanilla extract
- ½ cup (60g) all-purpose flour
- 2 tablespoons unsweetened cocoa powder
- ¼ teaspoon fine salt
For the Topping:
- 2 cups (about 100g) mini marshmallows
Instructions:
Build and Bake the Crust:
-
Preheat the oven to 350°F (175°C). Line a 9×9-inch baking pan with parchment paper, leaving an overhang on two sides.
-
In a medium bowl, combine the graham cracker crumbs, sugar, and melted butter. Stir until the mixture resembles wet sand and holds together when pressed.
-
Press the crumb mixture firmly and evenly into the bottom of the prepared pan. Use the flat bottom of a measuring cup to get an even layer.
-
Bake the crust for 8 minutes until it feels slightly set and smells lightly toasted. Remove from the oven and set aside while you make the brownie batter.
Make the Brownie Layer:
-
Melt the butter and chopped chocolate together in a heatproof bowl set over a saucepan of gently simmering water, stirring until smooth. Remove from heat and let cool for 5 minutes.
-
Whisk the sugar into the chocolate mixture until combined. Add the eggs one at a time, whisking well after each. Stir in the vanilla extract.
-
Fold in the flour, cocoa powder, and salt until just combined — stop as soon as no dry streaks remain. Overmixing develops gluten and makes brownies cakey instead of fudgy.
-
Pour the brownie batter over the pre-baked crust and spread it into an even layer.
-
Bake for 25 to 28 minutes, until a toothpick inserted in the center comes out with moist crumbs (not wet batter). Remove from the oven.
Add the Marshmallow Topping:
-
Switch the oven to broil on high. Scatter the mini marshmallows evenly across the top of the warm brownies.
-
Place the pan under the broiler, watching constantly — 60 to 90 seconds is all it takes for the marshmallows to puff, golden, and toast. Pull them out the moment they’re golden with a few lightly charred edges. Never walk away from a broiler.
-
Let cool in the pan for at least 30 minutes before cutting. The marshmallow layer will firm up as it cools.
What to Know About Cutting S’mores Brownies
These are gloriously sticky to cut. Run a sharp knife under warm water, wipe dry, and cut in one clean downward motion without sawing. Wipe the blade between each cut. The effort is worth it — the cross-section of golden marshmallow, dark brownie, and pale crust is genuinely striking.
3. Chocolate-Dipped Marshmallow Pops
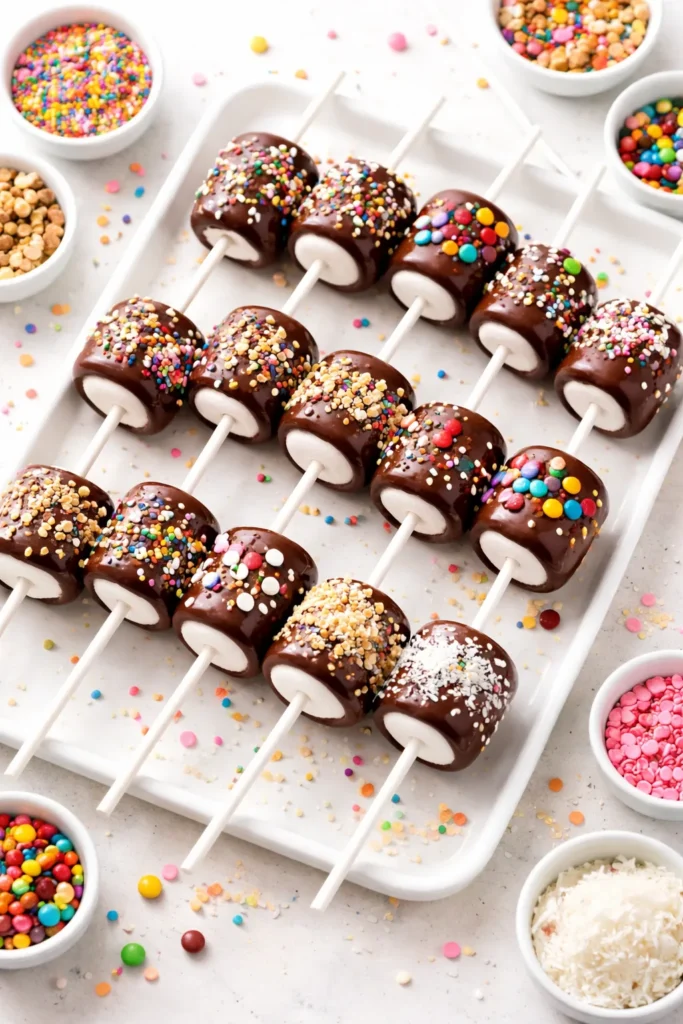
Marshmallow pops require zero baking, take about fifteen minutes, and give kids the most direct possible creative control. Each pop is a blank canvas: once the marshmallow is dipped in melted chocolate, there’s a short window to add sprinkles, crushed graham crackers, rainbow nonpareils, or any decoration they choose.
This is the recipe where younger kids especially shine. Sprinkling is a skill, and they know it.
Yield: 24 pops Prep Time: 5 minutes Total Time: 20 minutes (including drying time) Difficulty: Beginner — no heat involved once the chocolate is melted (and even that can be done by an adult in advance)
Ingredients:
- 24 regular-sized marshmallows
- 12 oz (340g) white or milk chocolate melting wafers (or good-quality white or milk chocolate, finely chopped)
- Your choice of toppings: rainbow sprinkles, crushed graham crackers, mini chocolate chips, colored sugar, rainbow nonpareils, or edible glitter
- 24 paper straws or lollipop sticks
Instructions:
-
Set up your workspace: line a large baking sheet with wax paper. Arrange small bowls of each topping within easy reach.
-
Melt the chocolate in a microwave-safe glass bowl: microwave on 50% power in 30-second bursts, stirring after each, until the chocolate is completely smooth. Avoid full power — it scorches chocolate quickly. If the melted chocolate seems too thick for dipping, stir in ½ teaspoon of coconut oil to loosen it.
-
Push a paper straw or lollipop stick firmly into the flat end of each marshmallow, pushing it about halfway through without breaking through the top.
-
Hold a marshmallow by its straw and dip it into the melted chocolate, turning it slowly to coat. Lift it out and let the excess drip back into the bowl for a few seconds.
-
Immediately — before the chocolate sets — sprinkle or roll the coated marshmallow in your chosen toppings. The chocolate sets fast, so decorating one at a time works best.
-
Stand the finished pop upright in a small cup or block of Styrofoam to dry, or lay it flat on the wax paper. Allow to set completely, about 10 minutes at room temperature (or 5 minutes in the refrigerator).
Kid-Assignment Ideas
For a group of kids, set up an assembly line: one person dips, one person sprinkles, one person places the finished pops on the tray. Rotate the jobs every few pops so everyone gets a turn at each station. For a birthday party, set out five or six different topping options and let each child decorate their own — they’ll eat the ones they decorated with extra enthusiasm.
Storage
Store in an airtight container at room temperature for up to one week. Do not refrigerate — condensation from the fridge causes chocolate to bloom (turn pale and spotty) and softens the coating.
4. Hot Cocoa Marshmallow Cookies
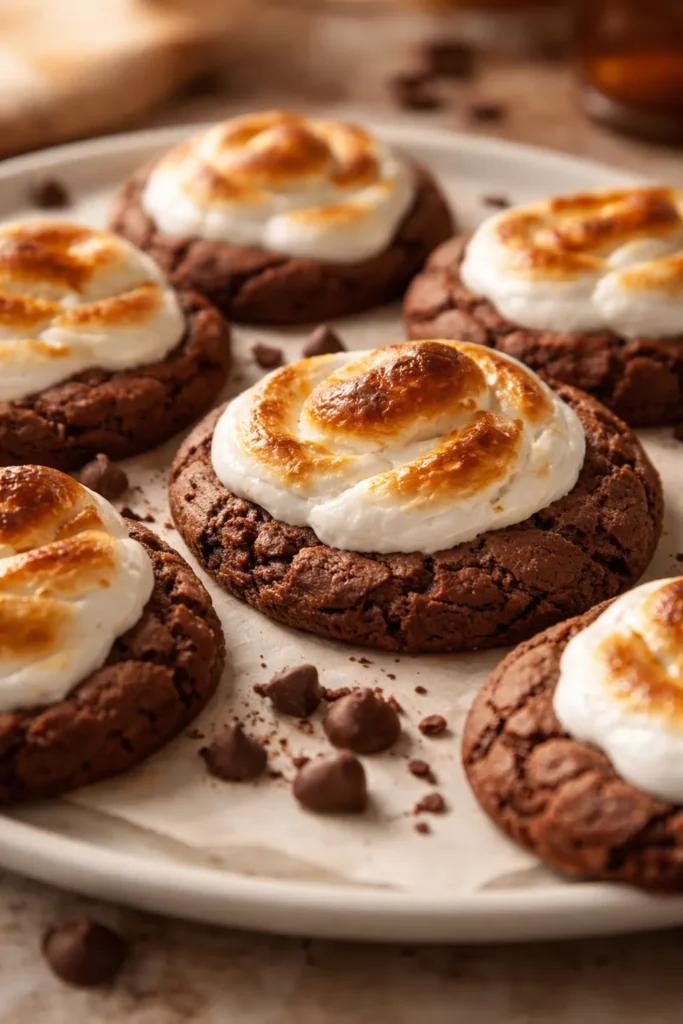
Hot cocoa cookies are exactly what they sound like: deeply chocolate cookies made with hot cocoa mix as part of the base, crowned with a swirl of marshmallow fluff that gets lightly toasted under the broiler. The result is chewy, rich, and covered in a golden marshmallow cloud that makes them look like a professional bakery made them.
Hot cocoa mix contains both cocoa and sugar plus a touch of dried milk, which gives the cookies a slightly more complex chocolate flavor than straight cocoa powder alone.
Yield: 24 cookies Prep Time: 15 minutes Cook Time: 10 minutes per batch Total Time: 45 minutes Difficulty: Beginner to Intermediate — the broiler step needs adult supervision
Ingredients:
- 1½ cups (190g) all-purpose flour
- ¼ cup (25g) unsweetened cocoa powder
- 2 packets (28g each) hot cocoa mix (classic milk chocolate flavor)
- 1 teaspoon baking soda
- ¼ teaspoon fine salt
- ½ cup (113g) unsalted butter, softened to room temperature
- ¾ cup (150g) granulated sugar
- ¼ cup (50g) packed light brown sugar
- 1 large egg, room temperature
- 1 teaspoon pure vanilla extract
- 1 jar (7 oz / 198g) marshmallow fluff
Instructions:
Mix the Dough:
-
Preheat the oven to 350°F (175°C). Line two baking sheets with parchment paper.
-
Whisk together the flour, cocoa powder, hot cocoa mix, baking soda, and salt in a medium bowl. Set aside.
-
In a large bowl, beat the softened butter with both sugars using a hand mixer on medium speed for 2 to 3 minutes, until pale and fluffy.
-
Add the egg and vanilla and beat for 30 more seconds. Scrape down the sides of the bowl.
-
Add the flour mixture and mix on low speed until just combined — a few small streaks of flour are fine. Finish folding by hand with a spatula so you don’t overmix.
Bake the Cookies:
-
Scoop the dough into 1.5-tablespoon balls and place them 2 inches apart on the prepared baking sheets.
-
Bake for 9 to 10 minutes, until the edges are set but the centers look just barely underdone. They will firm up as they cool — pulling them out slightly early is the key to chewy cookies.
-
Let the cookies cool on the baking sheet for 5 minutes before transferring to a wire rack.
Add the Marshmallow Topping:
-
Once all cookies have baked and cooled for 5 minutes on the rack, switch the oven to broil.
-
Spoon approximately 1 teaspoon of marshmallow fluff onto the center of each cookie. Return the cookies (on their parchment-lined baking sheet) to the oven under the broiler.
-
Broil for 60 to 90 seconds, watching through the oven window the entire time, until the marshmallow fluff is puffed, lightly golden, and has a few toasted edges. Remove immediately.
-
Let cool for 5 minutes before serving — the marshmallow topping will be extremely hot directly out of the oven.
The Texture Breakdown
When you bite into one of these, you get three distinct textures: crisp edges from the cookie base, a slightly fudgy center, and that pillowy-soft toasted marshmallow top. The hot cocoa flavor makes them taste like drinking a mug of cocoa in solid form, which is exactly the kind of thing that makes kids request them repeatedly.
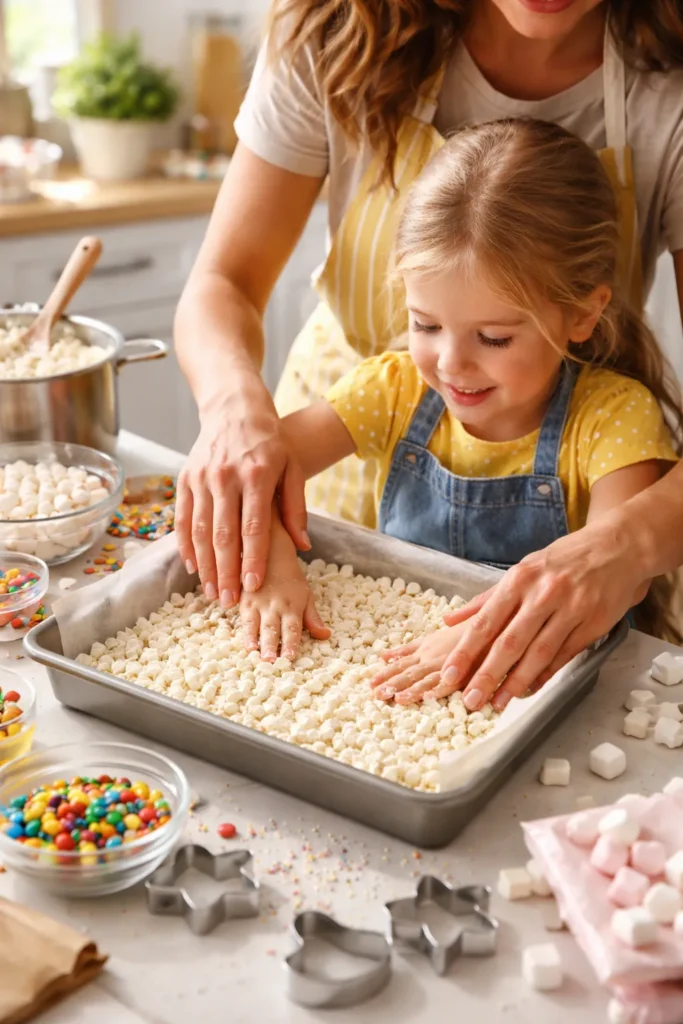
5. No-Bake Fruity Pebbles Marshmallow Bars
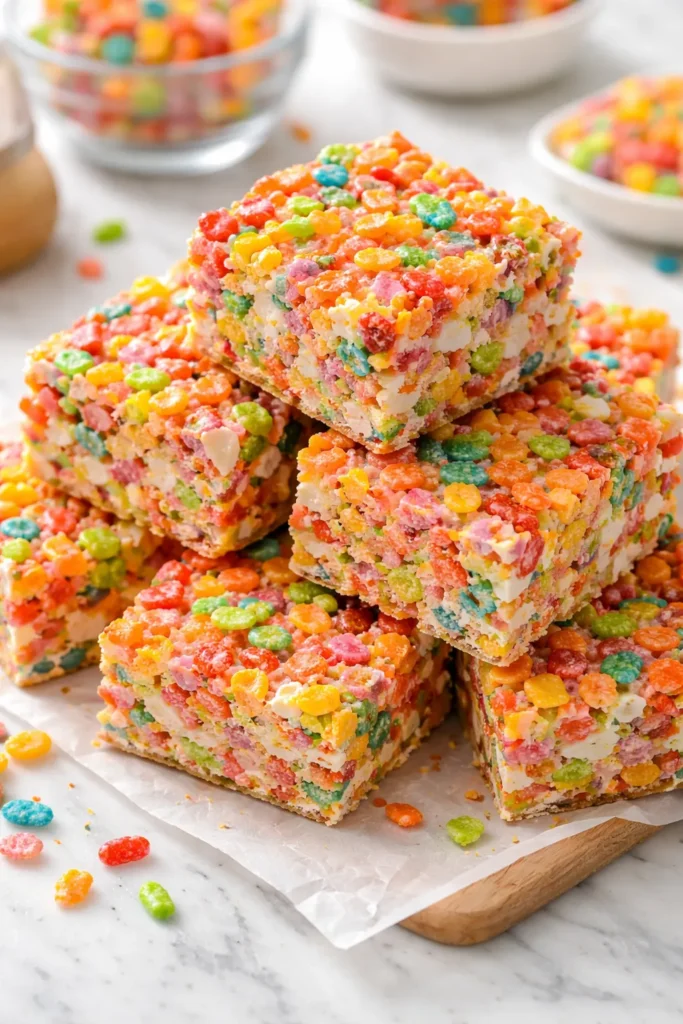
If Brown Butter Rice Krispie Treats are the classic, Fruity Pebbles bars are the chaotic, colorful, joyful cousin. The cereal’s natural fruit flavors pair with the sweetness of marshmallow in a way that’s simultaneously nostalgic and bright, and the finished bars look like confetti in every cross-section.
No oven. No waiting. Ready in under twenty minutes.
Yield: 24 bars Prep Time: 10 minutes Total Time: 15 minutes active + 15 minutes setting Difficulty: Beginner — this is a great first stovetop recipe for kids
Ingredients:
- 4 tablespoons (57g) salted butter
- 1 bag (10 oz / 283g) mini marshmallows
- ½ teaspoon pure vanilla extract
- 6 cups (approximately 168g) Fruity Pebbles cereal
- Optional mix-ins: ½ cup white chocolate chips, ½ cup rainbow sprinkles folded in at the end
Instructions:
-
Line a 9×13-inch baking pan with parchment paper and lightly grease the parchment. Set aside.
-
Have the Fruity Pebbles measured and ready in a large bowl before turning on the heat.
-
In a large, wide saucepan or Dutch oven over medium-low heat, melt the butter completely.
-
Add the mini marshmallows and stir continuously with a silicone spatula until completely melted and smooth, 2 to 3 minutes. Keep the heat on medium-low — high heat makes the bars hard and dry after setting.
-
Remove the pan from heat. Stir in the vanilla extract.
-
Pour the Fruity Pebbles into the marshmallow mixture (or pour the marshmallow mixture over the cereal in the large bowl if your saucepan isn’t big enough). Fold everything together quickly and thoroughly.
-
If using mix-ins, fold them in now while the mixture is still pliable.
-
Transfer the mixture to the prepared pan. With lightly buttered hands, press it evenly and gently across the pan. A light touch keeps the bars soft — pressing hard compacts the cereal and squeezes out air.
-
Let set at room temperature for 15 minutes, or refrigerate for 10 minutes.
-
Lift out using the parchment, slice into 24 bars, and serve.
Why Fruity Pebbles Work Especially Well Here
The rice-based cereal holds up well to the moisture of melted marshmallow without getting soggy, much like classic Rice Krispies. The difference is that Fruity Pebbles have a finer, denser texture, so the bars come out slightly firmer with a more compact crumb. That’s actually ideal for lunchboxes — they hold their shape better than looser-textured cereals.
6. Oven S’mores Dip
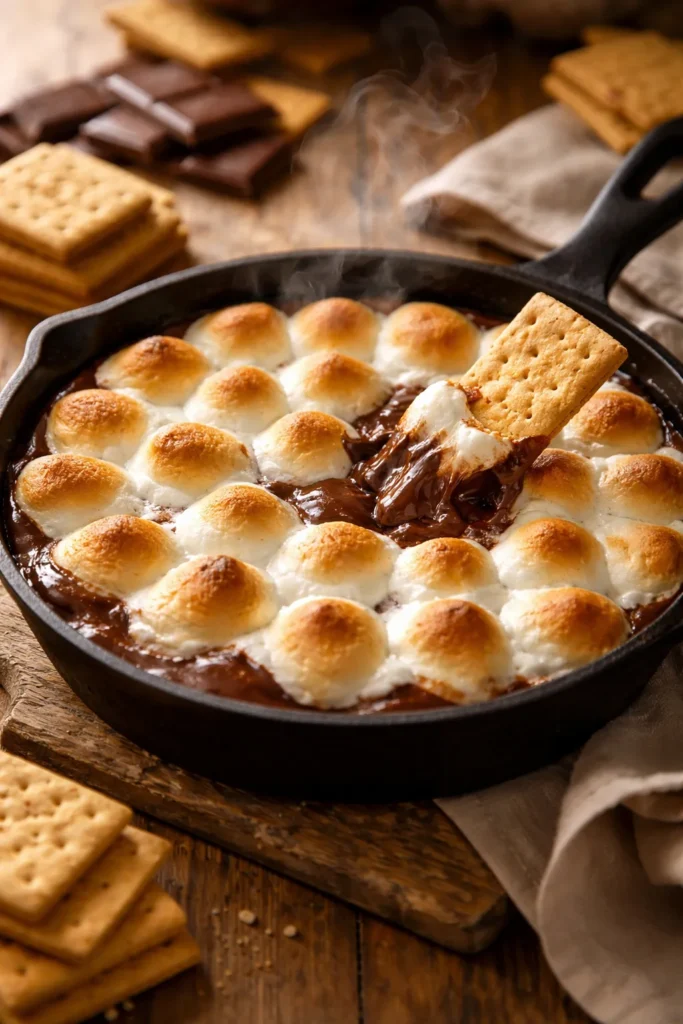
S’mores dip turns the campfire classic into a shareable, scoop-it-yourself dish that’s arguably more fun than the original. A cast-iron skillet or oven-safe dish gets filled with chocolate chips and topped with mini marshmallows, then baked until everything is melted and golden. Kids dip graham crackers, strawberries, or apple slices straight into the pan.
It’s warm, gooey, communal, and done in twelve minutes flat.
Yield: Serves 6 to 8 Prep Time: 3 minutes Cook Time: 8 to 10 minutes Total Time: 13 minutes Difficulty: Beginner — the oven does almost all the work
Ingredients:
- 2 cups (340g) milk chocolate chips (or a mix of milk and dark chocolate chips)
- 2 cups (approximately 100g) mini marshmallows
- 1 tablespoon heavy cream or whole milk (helps the chocolate melt smoothly)
- For dipping: graham crackers, strawberries, banana slices, apple slices, or pretzels
Instructions:
-
Preheat the oven to 400°F (205°C).
-
Pour the chocolate chips into a 9-inch cast-iron skillet or any oven-safe baking dish. Drizzle the tablespoon of cream over the chips.
-
Scatter the mini marshmallows in an even layer across the top of the chocolate chips, covering them completely.
-
Bake for 8 to 10 minutes, until the marshmallows are puffed, golden on top, and the chocolate beneath is visibly melted. For deeper golden color on the marshmallow tops, switch to broil for the final 60 seconds — watch it closely.
-
Remove from the oven and serve immediately in the pan with an arrangement of dippers alongside.
Serving This with Kids
The pan stays hot for a surprisingly long time — remind kids to dip carefully and let the chocolate cool slightly before eating. Setting the skillet on a wooden trivet in the center of the table and letting everyone dig in at once is the most fun way to serve this. The marshmallow pulls into long, dramatic strings when scooped, which delights children to an extent that feels slightly unreasonable and entirely wonderful.
7. Five-Minute Microwave Chocolate Marshmallow Fudge
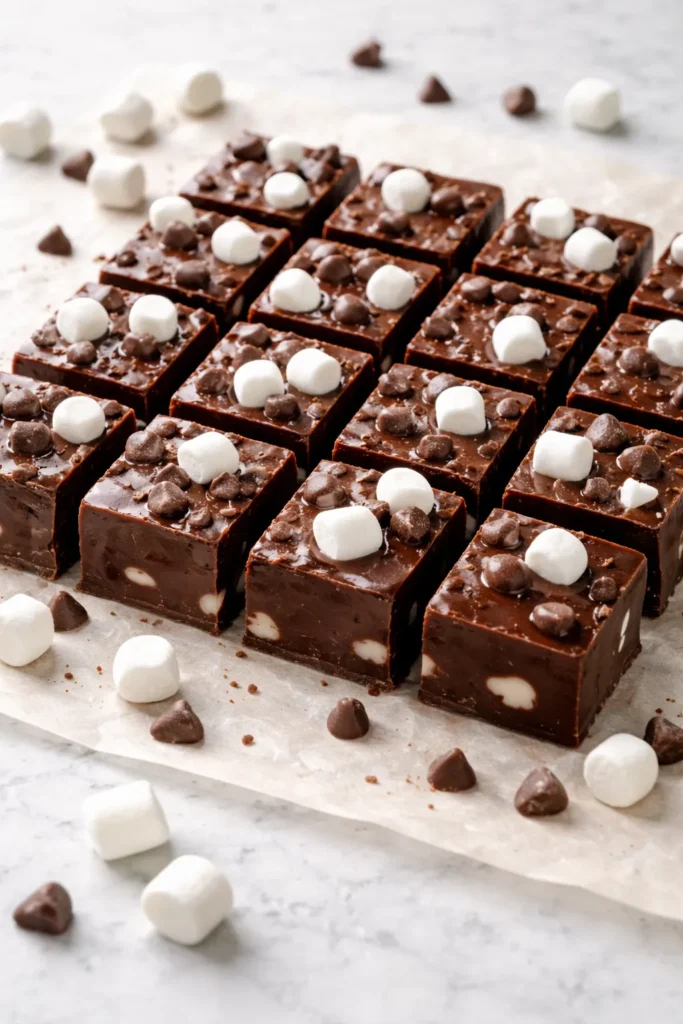
Fudge has a reputation for being finicky — all that candy thermometer monitoring and precise temperature management. This version skips all of that entirely. It relies on marshmallows (or marshmallow fluff) to stabilize the chocolate and provide the structure that traditional fudge gets from precise sugar crystallization. The result is rich, dense, and genuinely fudgy with no thermometer required.
The microwave does the heavy lifting. From bowl to pan in under ten minutes.
Yield: 36 small squares Prep Time: 5 minutes Total Time: 10 minutes active + 2 hours chilling Difficulty: Beginner — the only real skill involved is patience while it sets
Ingredients:
- 3 cups (510g) semi-sweet chocolate chips
- 1 can (14 oz / 396g) sweetened condensed milk
- 1½ cups (75g) mini marshmallows (or one 7 oz jar of marshmallow fluff)
- 2 tablespoons unsalted butter
- 1 teaspoon pure vanilla extract
- ¼ teaspoon fine salt
- Optional toppings: flaky sea salt, rainbow sprinkles, crushed graham crackers, chopped walnuts
Instructions:
-
Line an 8×8-inch baking pan with parchment paper, leaving an overhang on two sides. Lightly grease and set aside.
-
Combine the chocolate chips, sweetened condensed milk, and butter in a large microwave-safe bowl.
-
Microwave on high power for 1 minute. Stir well. Microwave for another 30 seconds and stir again. Continue in 20-second increments, stirring after each, until the chocolate is completely melted and the mixture is smooth. Don’t rush this — longer time at lower power is better than a shorter burst that scorches the chocolate.
-
Stir in the mini marshmallows (or marshmallow fluff) immediately while the chocolate mixture is still hot. Stir vigorously for 1 to 2 minutes — the marshmallows will melt partially, leaving some soft white swirls through the chocolate if you use mini marshmallows, or blending in more smoothly if you use fluff.
-
Stir in the vanilla extract and salt.
-
Pour the mixture into the prepared pan and spread it into an even layer with a spatula.
-
Sprinkle your chosen toppings immediately before the surface sets.
-
Refrigerate for at least 2 hours, until firm throughout.
-
Lift the fudge out using the parchment, place it on a cutting board, and cut into 36 small squares with a sharp knife.
Why Marshmallows Make Better Fudge
Traditional fudge achieves its smooth, dense texture through careful sugar crystallization — a process that requires exact temperatures and skilled technique. Marshmallows (which are essentially a stabilized sugar foam) provide a shortcut to that same texture by introducing pre-structured sugar that doesn’t require precise temperature control. The result is a fudge that’s slightly softer and more yielding than the traditional kind, which most kids prefer anyway.
Store in an airtight container in the refrigerator for up to two weeks, or freeze for up to three months.
8. Rainbow Marshmallow Bark
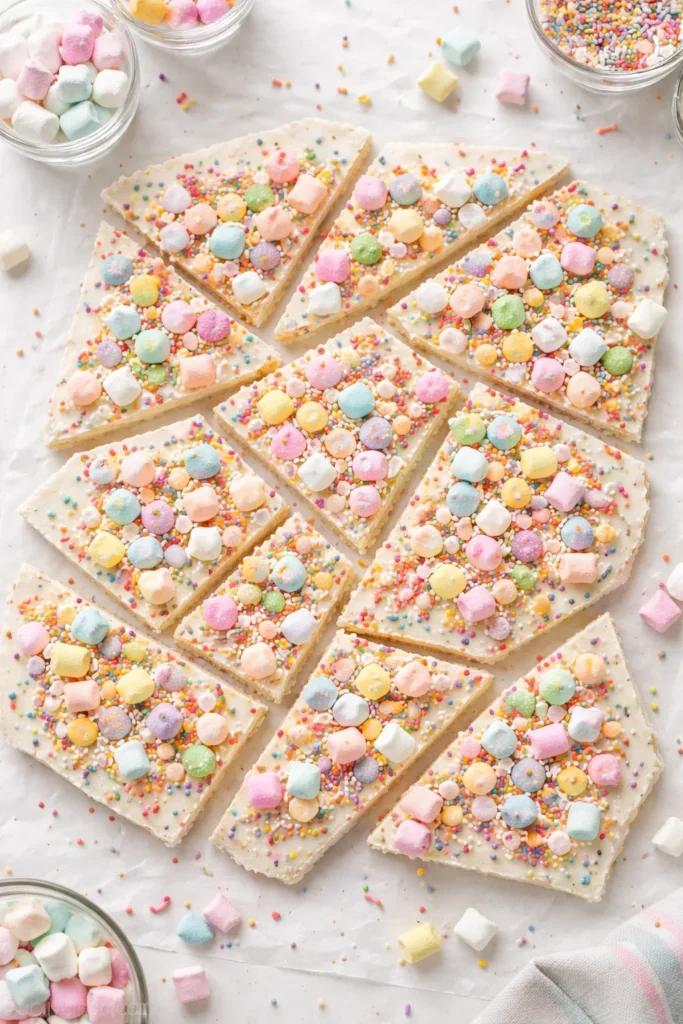
Bark is one of the most rewarding no-bake treats to make with kids because the finished product looks genuinely impressive with almost no technical skill involved. This version uses white chocolate as the base, a layer of mini marshmallows pressed in while the chocolate is still wet, and rainbow sprinkles or nonpareils scattered over the top for color. It snaps into jagged, organic pieces that look like something from a candy shop window.
Yield: About 20 pieces Prep Time: 10 minutes Total Time: 10 minutes active + 30 minutes setting Difficulty: Beginner — melting and spreading is the entire technique
Ingredients:
- 16 oz (453g) white chocolate melting wafers or good-quality white chocolate bars, finely chopped
- 1½ cups (75g) mini marshmallows
- 3 tablespoons rainbow nonpareils or jimmies sprinkles
- Optional: 2 tablespoons pastel-colored M&Ms, or a drizzle of contrasting colored candy melts for a more decorated look
Instructions:
-
Line a large baking sheet (roughly 12×17 inches) with parchment paper.
-
Melt the white chocolate in a microwave-safe glass bowl on 50% power in 30-second bursts, stirring after each, until completely smooth. White chocolate scorches more easily than dark or milk chocolate — 50% power is non-negotiable here.
-
Pour the melted white chocolate onto the parchment-lined baking sheet. Spread it into an even layer about ¼ inch thick using an offset spatula. You don’t need to fill the entire pan — an organic shape is part of the charm.
-
Immediately — while the chocolate is still fully liquid — scatter the mini marshmallows across the surface, pressing each one lightly so it adheres.
-
Scatter the rainbow nonpareils and any other toppings over the marshmallow-covered chocolate.
-
If drizzling with colored candy melts, melt them separately and drizzle from a spoon or piping bag in thin, random lines across the bark.
-
Let the bark set at room temperature for 30 minutes, or refrigerate for 15 minutes until completely firm.
-
Break into irregular pieces by hand or cut with a knife. Breaking by hand gives a more natural, jagged edge that looks more impressive.
Customizing for Themes and Occasions
White chocolate bark adapts effortlessly to any color scheme or occasion. Use red and pink sprinkles and heart-shaped candies for Valentine’s Day. Go with orange and black for Halloween. Swap white chocolate for dark chocolate and use crushed graham crackers and mini marshmallows for a s’mores bark. The technique is identical regardless of what goes on top, which means kids can redesign it every single time they make it.
Store bark in an airtight container at room temperature (away from heat and humidity) for up to one week.
Tips for Cooking Marshmallow Treats with Kids
A few things consistently make the difference between a smooth, fun session and a sticky disaster.
The biggest enemy of good marshmallow bars is heat that’s too high. When marshmallows get overheated during melting — whether on the stove or in the microwave — the sugar structure breaks down in a way that makes the finished bars hard and dry instead of soft and chewy. Medium-low heat on the stove, or short microwave bursts at reduced power, is always the right call. Patience at this stage pays off in every bite.
Don’t overpack the bars. This comes up in almost every bar recipe for a reason. Kids have a natural instinct to press down hard when transferring mixtures to a pan — it feels satisfying, like they’re really doing something. What it actually does is compress the cereal and squeeze out the air pockets that keep bars light and chewy. Lightly oiled hands pressing gently is the technique. Remind them: gentle hands, better bars.
Let chocolate-dipped things dry before touching them. This is a hard rule for children to follow, because a freshly dipped marshmallow pop looks exactly like something you should poke. But touching the chocolate before it’s set leaves fingerprints in the coating and can cause it to slide off. Setting a timer for ten minutes and giving kids a different job while the chocolate dries is the most effective solution.
Make cleanup part of the activity. Warm water cuts through marshmallow residue far more effectively than cold. Soaking the saucepan for five minutes before washing means the sticky coating dissolves rather than requiring aggressive scrubbing. Kids who help clean up learn something genuinely useful about the properties of sugar — and they’re more likely to want to cook again next time if the aftermath doesn’t feel like punishment.
Final Thoughts
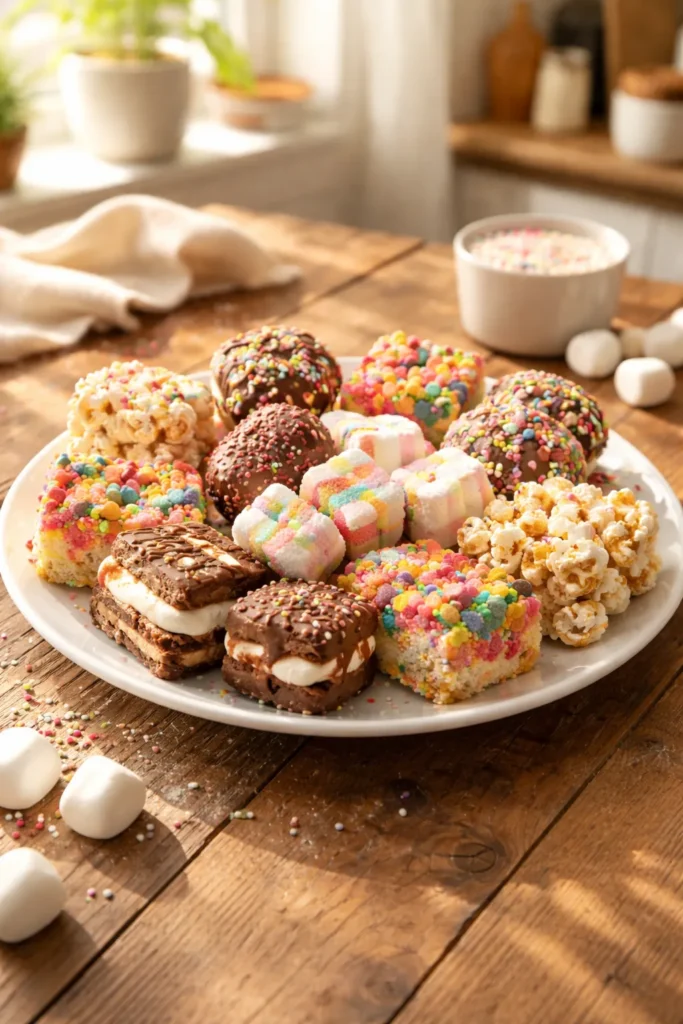
Marshmallow treats occupy a special place in kid-friendly cooking because they sit at the intersection of accessible and genuinely delicious. These aren’t simplified recipes that produce disappointing results — they’re real treats that adults reach for just as readily as children do.
The eight recipes here span a useful range of techniques and complexity levels, from the completely no-bake (fruity pebbles bars, marshmallow bark, s’mores dip) to those with a bit more oven involvement (brownies, cookies). Starting with the simpler ones builds confidence quickly, and kids who master melting marshmallows on the stove tend to feel genuinely capable in the kitchen in a way that spills over into everything else they try.
The most important thing, more than any specific technique, is letting them lead where they can. Let them choose the cereal. Let them pick the sprinkles. Let them decide whether the fudge gets flaky salt or rainbow nonpareils on top. The investment in that ownership is what makes a treat memorable — and what makes them want to come back and do it again.