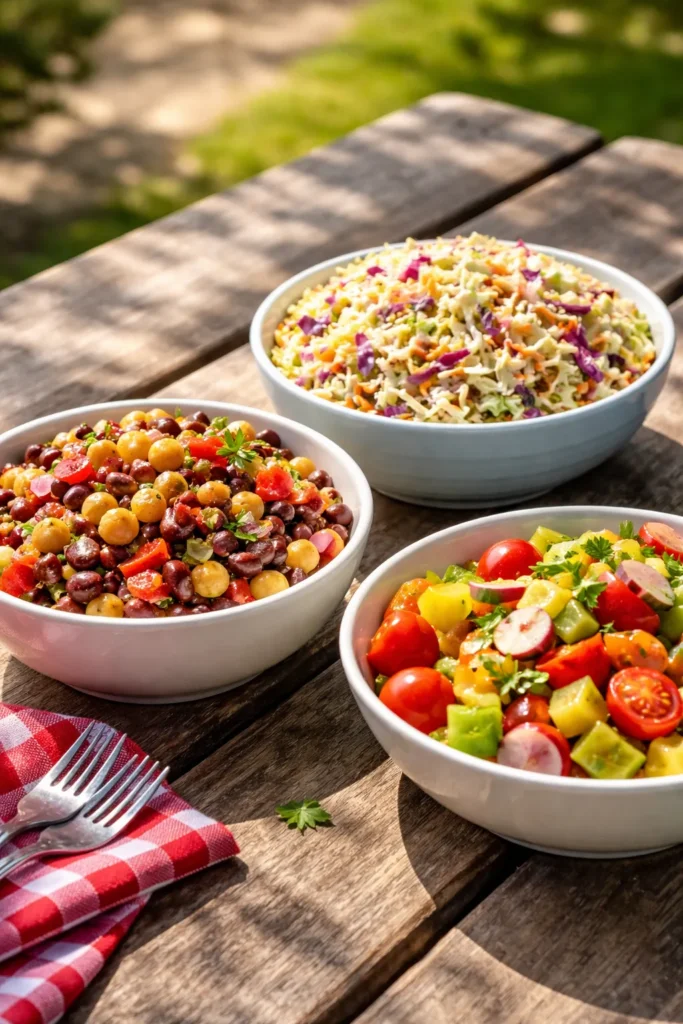
Picture this: you’ve packed the blanket, found the perfect shady spot, and the cooler is loaded. Then someone opens the lid and pulls out a limp, watery pasta salad that bled pink dye onto everything else. The sandwiches are soggy. The dip separated into a sad puddle. Sound familiar? Packing food for a picnic is genuinely harder than it looks — not because the cooking is complicated, but because most dishes simply aren’t built to survive a 45-minute car ride, an hour in a cooler, and the chaos of serving on a blanket with no counter space in sight.
The difference between a picnic hero and a picnic disaster comes down to one thing: choosing dishes that travel. A great picnic side holds its texture, keeps its flavor, and actually tastes better after a couple of hours as the ingredients meld together. It doesn’t need to be reheated, doesn’t require elaborate serving equipment, and looks presentable even after bouncing around in the back seat. That’s a surprisingly short list of qualities — but ruling out everything that doesn’t meet them narrows your options fast.
The eight dishes below were chosen specifically because they check every one of those boxes. Each one can be prepped ahead of time, packs without drama, and tastes genuinely good whether it’s eaten 30 minutes after making or three hours later. A few of them actually improve the longer they sit, which is basically the gold standard for outdoor dining.
Table of Contents
- What Makes a Picnic Side Dish Actually Work
- The Make-Ahead Advantage
- Pack-and-Serve Simplicity
- 1. Classic Pasta Salad with Lemon-Herb Vinaigrette
- How to Build It
- Why It Travels So Well
- 2. Ramen Noodle Coleslaw with Sweet Sesame Dressing
- The Dressing That Makes It
- What to Know Before You Pack It
- 3. German-Style Potato Salad with Bacon and Cider Vinegar
- Building the Bacon Vinaigrette
- Why It’s a Picnic All-Star
- 4. Caprese Skewers with Balsamic Glaze
- Picking the Right Ingredients
- Packing Without the Soggy Problem
- 5. Broccoli Bacon Salad with Creamy Tangy Dressing
- Breaking Down the Technique
- Why This Is Consistently the First Bowl Emptied
- 6. Deviled Eggs with Dill and Dijon
- The Perfect Hard-Boiled Egg Method
- Making Transport Work
- 7. Watermelon and Feta Salad with Mint and Lime
- Building the Salad
- Packing Notes for Picnics
- 8. Classic Baked Beans with Bacon and Brown Sugar
- The Full Method
- Why Baked Beans Win the Portability Test
- How to Pack Picnic Sides Without Making a Mess
- Cooler Strategy
- The One Rule That Covers Everything
- Final Thoughts
What Makes a Picnic Side Dish Actually Work
Not every delicious recipe belongs at a picnic. A dish that earns a standing ovation at the dinner table can completely fall apart — sometimes literally — the moment it leaves the kitchen.
Temperature stability is the first test. Mayo-heavy salads that separate in the heat, hot casseroles that go rubbery when cold, leafy greens that wilt the second they’re dressed — these are the dishes that disappoint on a blanket. The best picnic sides either hold at room temperature for a couple of hours without turning, or stay cold in a cooler and taste great cold.
Texture durability is equally important. Anything with a crunch component — think croutons, fried shallots, or toasted nuts — needs to either be packed separately or be a type of crunch that survives moisture. Hearty vegetables like broccoli, corn, and snap peas hold up beautifully. Delicate lettuces and raw herbs don’t.
The Make-Ahead Advantage
One underrated quality of a great picnic side is that making it in advance actually helps it. Marinated dishes, bean salads, coleslaw, and vinaigrette-dressed pastas all develop deeper, more cohesive flavor when the ingredients have time to get acquainted. This is the opposite of a fresh tossed salad, which needs to be dressed at the last possible second and eaten immediately.
If a dish is better on day two than day one, it’s practically designed for picnics.
Pack-and-Serve Simplicity
Serving food on a blanket, at a picnic table, or in a park pavilion means no running water nearby, no extra counter space, and minimal utensils. The ideal picnic side lives in one container, needs nothing more than a spoon to serve, and doesn’t require any last-minute assembly. The closer you can get to “open the lid and hand it out,” the better.
1. Classic Pasta Salad with Lemon-Herb Vinaigrette
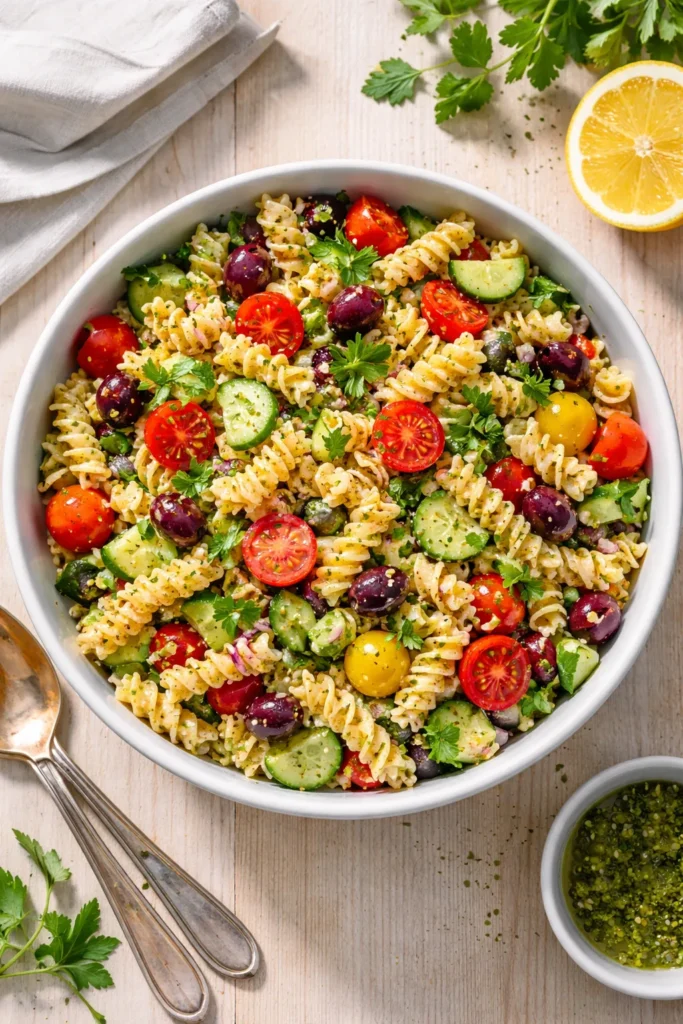
Pasta salad is the undisputed champion of picnic side dishes, and the reason is simple: it’s one of the few carb-based dishes that genuinely tastes better cold than warm. The key is using a bright, acidic vinaigrette instead of a heavy mayonnaise base. Mayo-dressed pasta salads can separate and turn gluey in the heat; olive oil and lemon hold up without any drama.
The shape of the pasta matters more than most people realize. Rotini, farfalle, and penne are your best options because their ridges and crevices grip the dressing and trap small bits of vegetable inside each piece. Flat pastas like spaghetti or fettuccine won’t work — they clump together and the dressing slides right off.
How to Build It
Cook 12 oz of rotini to just barely al dente — slightly firmer than you’d normally eat it, because it softens a little more as it absorbs the dressing. Drain and toss immediately with 3 tablespoons of olive oil to prevent sticking. While it cools, whisk together 4 tablespoons of olive oil, 3 tablespoons of fresh lemon juice, 1 teaspoon of Dijon mustard, 1 clove of minced garlic, salt, and black pepper.
Fold in diced cucumber, halved cherry tomatoes, pitted Kalamata olives, crumbled feta, and a generous handful of chopped fresh parsley. Pour the dressing over everything and toss well. Refrigerate for at least 2 hours before packing.
Why It Travels So Well
- The vinaigrette doesn’t separate or spoil the way mayo does at warmer temperatures
- The pasta and vegetables firm up in the fridge, making the whole salad more cohesive
- It fits in a single sealed container and needs only one serving spoon
- Flavor peaks at 3-4 hours after dressing, which aligns perfectly with picnic timing
Pro tip: Pack a small jar of extra dressing on the side. Pasta absorbs a lot of liquid as it sits, so a quick drizzle before serving refreshes the whole dish.
2. Ramen Noodle Coleslaw with Sweet Sesame Dressing

This one gets dismissed as a novelty at first glance. Crushed ramen noodles in a coleslaw? But give it one bite and the combination clicks — the noodles add a deeply satisfying crunch that’s different from anything else in a standard picnic spread, and the sweet-savory sesame dressing is genuinely addictive.
The genius of this dish is that the crunch holds. Unlike croutons or fried toppings that go soft the moment they touch moisture, the dry ramen noodles take longer to absorb the dressing, giving you a 30-45 minute window of that satisfying snap. If you pack the noodles separately and toss them in at the picnic, they stay crunchy even longer.
The Dressing That Makes It
Whisk together ½ cup of vegetable oil, ¼ cup of rice wine vinegar, 3 tablespoons of sugar (or honey), 2 tablespoons of soy sauce, and the seasoning packets from two packages of ramen noodles. The seasoning packets are the secret — they add umami depth that you can’t replicate by building from scratch.
Toss the dressing with one 14-oz bag of broccoli coleslaw mix, 4 sliced green onions, ½ cup of slivered almonds, and ¼ cup of sunflower seeds. Crush two packs of dry ramen noodles and add them right before serving for maximum crunch.
What to Know Before You Pack It
- The slaw mix and dressing can be combined up to 4 hours ahead — the cabbage softens slightly but stays crunchy enough
- The almonds and sunflower seeds are fine mixed in ahead of time; they’re sturdy enough to hold
- Pack the crushed ramen in a zip-top bag inside the main container so it’s there when you need it
- This dish serves a crowd efficiently — one batch feeds 12-16 people as a side
Worth knowing: Broccoli slaw mix (shredded broccoli stems, carrots, and red cabbage) travels better than regular green cabbage coleslaw because the denser shreds don’t go limp as quickly.
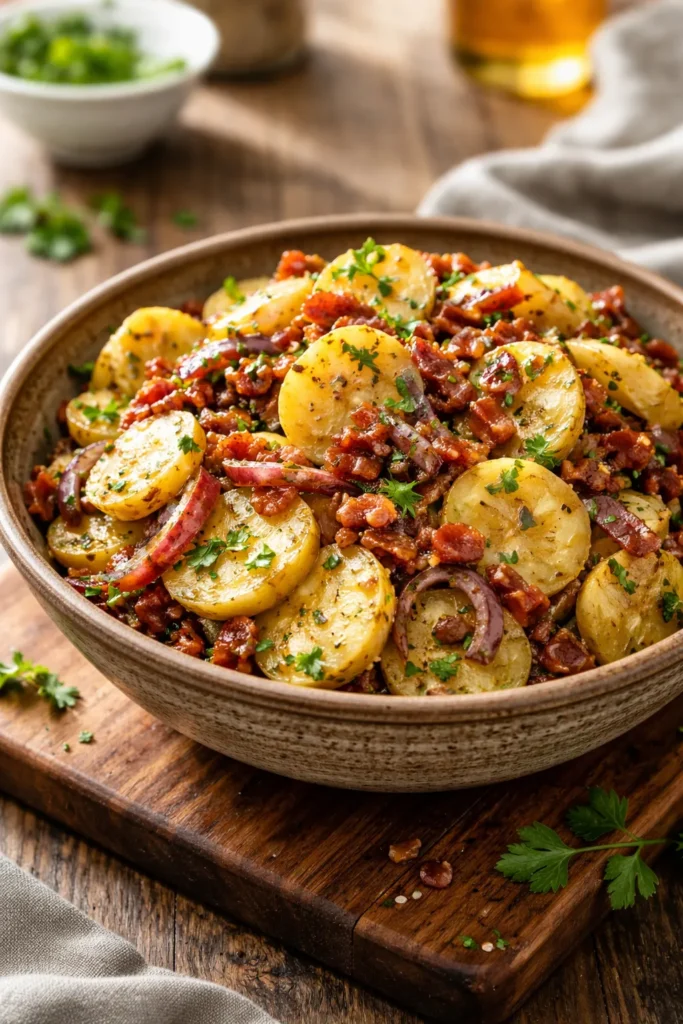
3. German-Style Potato Salad with Bacon and Cider Vinegar
German potato salad has one massive advantage over its American cousin: no mayonnaise. The dressing is a warm, bacon-fat-enriched vinaigrette made with apple cider vinegar, a little sugar, and whole-grain mustard. It soaks into the potatoes as they cool and stays perfectly stable at any temperature — no risk of spoilage, no separation, no greasy puddle at the bottom of the bowl.
Use Yukon Gold or red-skinned potatoes and cut them into ½-inch thick rounds rather than cubes. Thinner slices absorb the dressing more efficiently and create a better texture overall. Cook them until just tender — a fork should slide in with a little resistance, not easily — because overcooked potatoes will fall apart when tossed.
Building the Bacon Vinaigrette
Cook 6 strips of thick-cut bacon until crispy. Remove the bacon but leave about 2 tablespoons of fat in the pan. Add 1 small diced onion to the pan and cook until softened, about 4 minutes. Pour in ⅓ cup of apple cider vinegar, 2 teaspoons of sugar, 1 teaspoon of whole-grain mustard, and a generous pinch of salt and pepper. Let it bubble for 30 seconds, then pour the whole thing over the warm potatoes. Crumble the bacon over the top and scatter sliced green onions or fresh chives.
Why It’s a Picnic All-Star
- Safe at room temperature for up to 2 hours (no mayo risk)
- The vinegar dressing actually intensifies as the salad cools and the potatoes absorb it
- Bacon fat sets slightly when cold, giving the dressing a silkier texture
- Works served at room temperature, warm, or chilled — flexible for any picnic setup
Pro tip: Make this the night before and let it sit refrigerated overnight. The potatoes absorb the dressing completely, and the whole salad tastes more unified and developed the next day.
4. Caprese Skewers with Balsamic Glaze
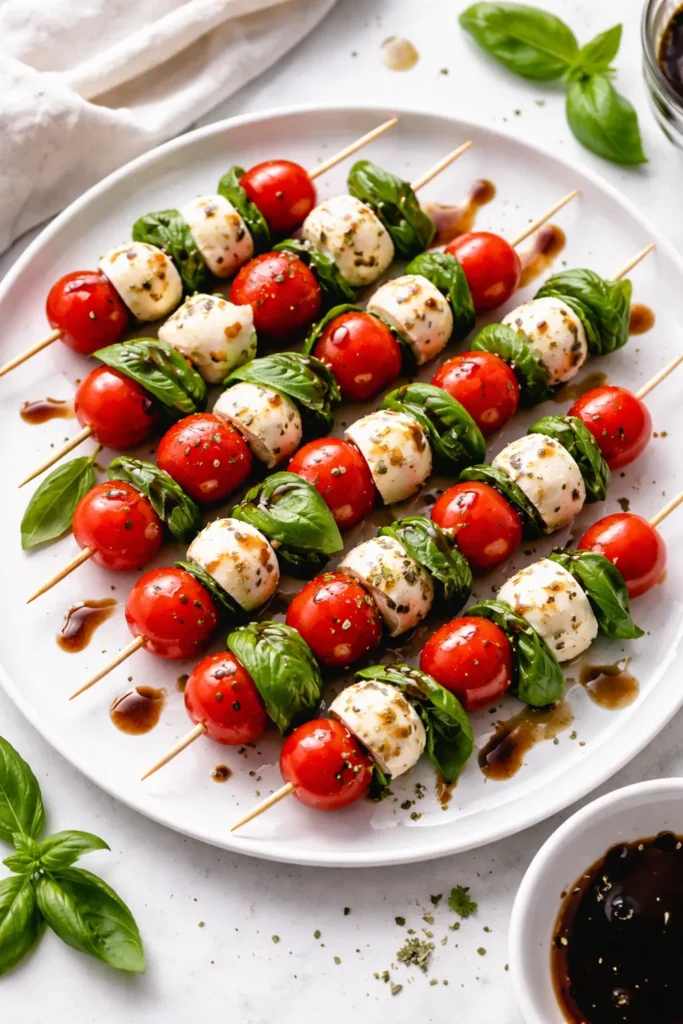
Caprese is one of those combinations so good that it barely needs to be a recipe — it just needs the right ingredients. Transforming it into skewers solves every practical problem a picnic creates: no cutting, no plating, no serving utensils required. Guests can just grab one and go.
Thread cherry tomatoes, fresh basil leaves (folded in half), and fresh mozzarella balls — the small ciliegine or bocconcini size — onto short wooden skewers in whatever order you like. Drizzle with good olive oil, a pinch of flaky sea salt, and cracked black pepper. A drizzle of thick balsamic glaze right before serving ties everything together with a sweet, tangy finish.
Picking the Right Ingredients
The quality of three ingredients makes or breaks this dish. Cherry tomatoes should be ripe, firm, and sweet — look for varieties like Sungold or Sweet 100 if you can find them. Fresh mozzarella must be the water-packed kind, not the low-moisture block used for pizza. Balsamic glaze (not balsamic vinegar — the thick, syrupy reduction sold in a squeeze bottle) won’t run or drip, which is important for a portable dish.
Packing Without the Soggy Problem
- Thread the skewers and lay them flat in a single layer in a shallow container with a tight lid
- Pack the balsamic glaze in a small jar or squeeze bottle separately and drizzle right before eating
- Keep them in a cooler — fresh mozzarella stays best at 40°F or below
- Skewers can be assembled up to 4 hours ahead; beyond that, the tomatoes start to release juice
Pro tip: Fresh basil wilts quickly once cut. If you’re making these more than 2 hours ahead, tuck the basil leaves under the mozzarella rather than leaving them exposed on top — they’ll stay greener and fresher longer.
5. Broccoli Bacon Salad with Creamy Tangy Dressing
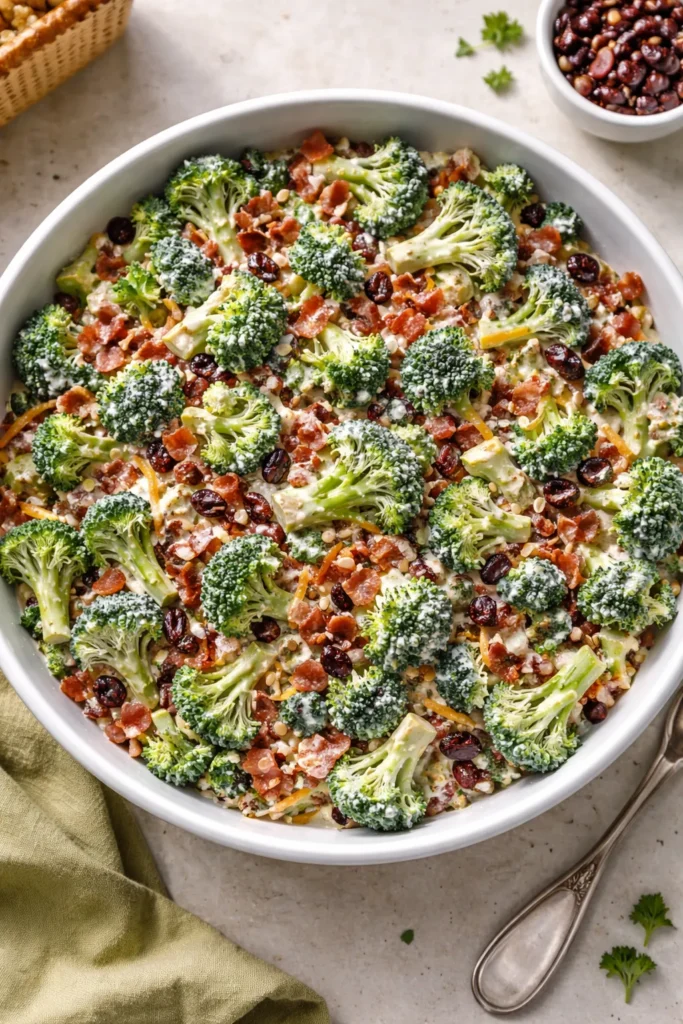
This is the picnic dish that always surprises people. Raw broccoli in a salad sounds like a health food obligation, but this version — with crispy bacon, sharp cheddar, dried cranberries, and a sweet-tangy dressing — is something people genuinely look forward to. It’s rich, crunchy, a little sweet, a little smoky, and absolutely holds its own alongside anything coming off the grill.
The dressing is what makes it: equal parts mayonnaise and sour cream, apple cider vinegar, a little sugar, and a pinch of salt. It’s creamy but not heavy, and it clings to every floret without pooling at the bottom of the bowl.
Breaking Down the Technique
Cut the broccoli into very small florets — bite-sized, roughly ½ inch across. Large pieces are unwieldy at a picnic and the dressing doesn’t penetrate them as effectively. Some cooks blanch the broccoli for 60 seconds to take the raw edge off, but if you’re making this the day before, the broccoli will naturally soften slightly in the dressing overnight, which is arguably better.
Combine 1 large head of broccoli (cut into small florets), 8 strips of cooked, crumbled bacon, ½ cup of diced sharp cheddar, ⅓ cup of dried cranberries, ¼ cup of sunflower seeds, and 3 tablespoons of finely diced red onion. Dress with ½ cup of mayo, ¼ cup of sour cream, 2 tablespoons of apple cider vinegar, and 1 tablespoon of sugar. Toss thoroughly and refrigerate.
Why This Is Consistently the First Bowl Emptied
- Texture contrast keeps every bite interesting: crispy bacon, tender broccoli, chewy cranberries, crunchy seeds
- The mayo-sour cream dressing is stable in the cooler for hours without separating
- It’s sweet, savory, and tangy all at once — crowd appeal is through the roof
- Make it up to 24 hours ahead; the broccoli softens just enough to absorb the dressing beautifully
Worth knowing: Toast the sunflower seeds in a dry pan for 3-4 minutes before adding them. The nutty depth they pick up changes the flavor of the whole salad in a way that’s hard to place but immediately noticeable.
6. Deviled Eggs with Dill and Dijon
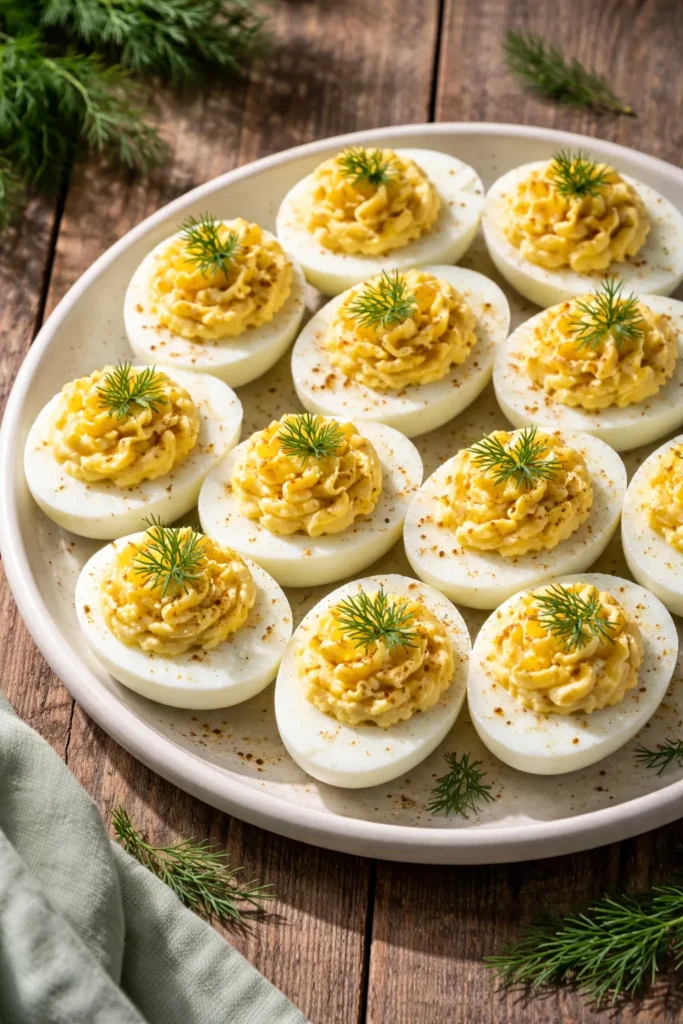
Deviled eggs are the dish that turns people into celebrities at potlucks. Something about a plate of perfectly filled egg halves creates a level of excitement that’s genuinely disproportionate to the effort involved. They disappear faster than almost anything else on the table, and they’re one of the few protein-forward picnic sides that doesn’t involve meat.
The filling here goes beyond the basic mayo-and-mustard template. Dijon mustard adds sharpness. Fresh dill brightens the whole thing. A splash of white wine vinegar gives it a clean, slightly tangy finish that cuts through the richness of the yolks. It’s still recognizable as a classic deviled egg, just noticeably better than what most people expect.
The Perfect Hard-Boiled Egg Method
Older eggs peel more cleanly than fresh ones — if you have the time, buy your eggs 3-4 days before you need them. Bring a pot of water to a full boil before adding the eggs (gently, with a spoon). Boil for exactly 12 minutes, then transfer immediately to an ice bath. Let them sit for 15 minutes before peeling.
Halve 12 eggs lengthwise and pop the yolks into a bowl. Mash with 3 tablespoons of mayonnaise, 1 tablespoon of Dijon mustard, 1 teaspoon of white wine vinegar, 2 tablespoons of finely chopped fresh dill, salt, and white pepper. Pipe or spoon the filling back in. Top with a sprinkle of smoked paprika.
Making Transport Work
- A dedicated deviled egg carrier is worth owning — the eggs sit in individual wells and don’t slide around
- Without a carrier: line a container with a layer of shredded lettuce or paper towels to stabilize the eggs
- Always keep deviled eggs cold — they contain cooked eggs and mayonnaise, which shouldn’t sit above 40°F for more than 2 hours
- Yolk filling can be made a day ahead and kept in a piped bag in the fridge; fill the eggs the morning of the picnic
Pro tip: Add 2 tablespoons of finely diced dill pickles or a teaspoon of pickle brine to the yolk mixture. The hit of acidity and crunch elevates the filling in a way that’s subtle but keeps people going back for seconds to figure out why they taste so good.
7. Watermelon and Feta Salad with Mint and Lime

This is the palate cleanser that every picnic spread needs. After the richness of potato salads, creamy slaws, and deviled eggs, a bowl of cold, juicy watermelon with salty feta and fresh mint is like a reset button. It’s light, hydrating, visually stunning, and takes about 10 minutes to pull together.
The combination of sweet-cold watermelon with salty crumbled feta and the bright, cooling punch of fresh mint works on a level that’s hard to explain until you try it. Adding fresh lime juice ties everything together — the acidity makes the watermelon taste even more intensely of itself, which sounds counterintuitive but absolutely works.
Building the Salad
Cut half a seedless watermelon into 1-inch cubes (roughly 6-8 cups). Add ¾ cup of crumbled feta — the type that comes in a block and is crumbled by hand has a better texture than the pre-crumbled kind. Tear 20-25 fresh mint leaves and scatter them over the top. Squeeze two limes over everything and add a pinch of flaky sea salt. Toss gently.
That’s the entire recipe. The restraint is intentional — this salad doesn’t need anything else, and over-dressing it ruins the clean simplicity that makes it work.
Packing Notes for Picnics
- Cut and cube the watermelon at home; whole watermelon is awkward to transport and impossible to cut on a blanket
- Keep the salad well-chilled — it should be cold when served, which makes the watermelon taste crisper and more refreshing
- Don’t assemble more than 2-3 hours ahead — the watermelon releases liquid over time, which dilutes the lime and makes the feta soggy
- Pack the feta and torn mint leaves separately if you’re preparing more than an hour before departure, then combine at the picnic
Pro tip: Lay a few thin slices of cucumber or avocado on top for extra substance if you want the salad to function as more of a filling side rather than a refresher. Both pair beautifully with the watermelon-feta combination without overwhelming it.
8. Classic Baked Beans with Bacon and Brown Sugar
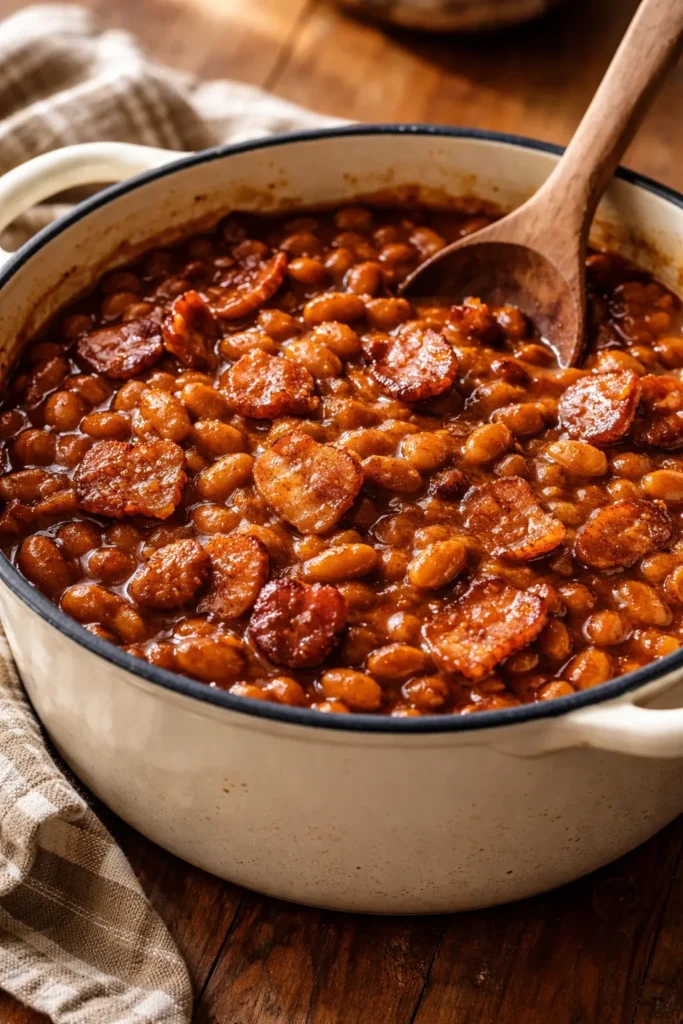
Baked beans are the rare picnic side that travels in any weather, feeds a crowd without any fuss, and costs almost nothing to make. They’re also one of the most forgiving dishes in this list — they taste great warm, at room temperature, or even cold, and they only get better the longer they sit. Make them the night before, tuck them in the cooler, and forget about them until it’s time to eat.
This version builds on canned beans for speed without sacrificing depth. Navy beans or great northern beans work best — they’re creamy enough to absorb the sauce but firm enough to hold their shape after hours in the oven. The flavor base comes from a combination of thick-cut bacon, yellow onion, brown sugar, apple cider vinegar, ketchup, dry mustard, and Worcestershire sauce.
The Full Method
Cook 6 strips of chopped thick-cut bacon in a Dutch oven or oven-safe pot until crispy. Remove the bacon and pour off most of the fat, leaving about 1 tablespoon. Add 1 diced yellow onion and cook until soft, about 5 minutes. Add 2 cans (15 oz each) of drained navy beans, the cooked bacon, ½ cup of ketchup, 2 tablespoons of brown sugar, 1 tablespoon of apple cider vinegar, 1 teaspoon of Worcestershire sauce, ½ teaspoon of dry mustard, ½ teaspoon of smoked paprika, and ½ cup of water. Stir to combine.
Bake at 325°F (165°C) uncovered for 60-75 minutes, stirring once halfway through, until the sauce is thick and glossy and the beans have absorbed most of the liquid. Let cool before refrigerating.
Why Baked Beans Win the Portability Test
- No temperature sensitivity — serve warm or cold, they’re equally good both ways
- The thick, glossy sauce doesn’t slosh or spill the way thinner dishes do
- One pot serves 10-12 people comfortably as a side
- They can be made 2 days ahead; flavor only improves with time in the fridge
Pro tip: A tablespoon of molasses stirred in with the other sauce ingredients adds a deep, slightly bitter richness that distinguishes homemade baked beans from every canned version out there. It’s one ingredient, and it’s the difference between good and “wait, can I have the recipe?”
How to Pack Picnic Sides Without Making a Mess
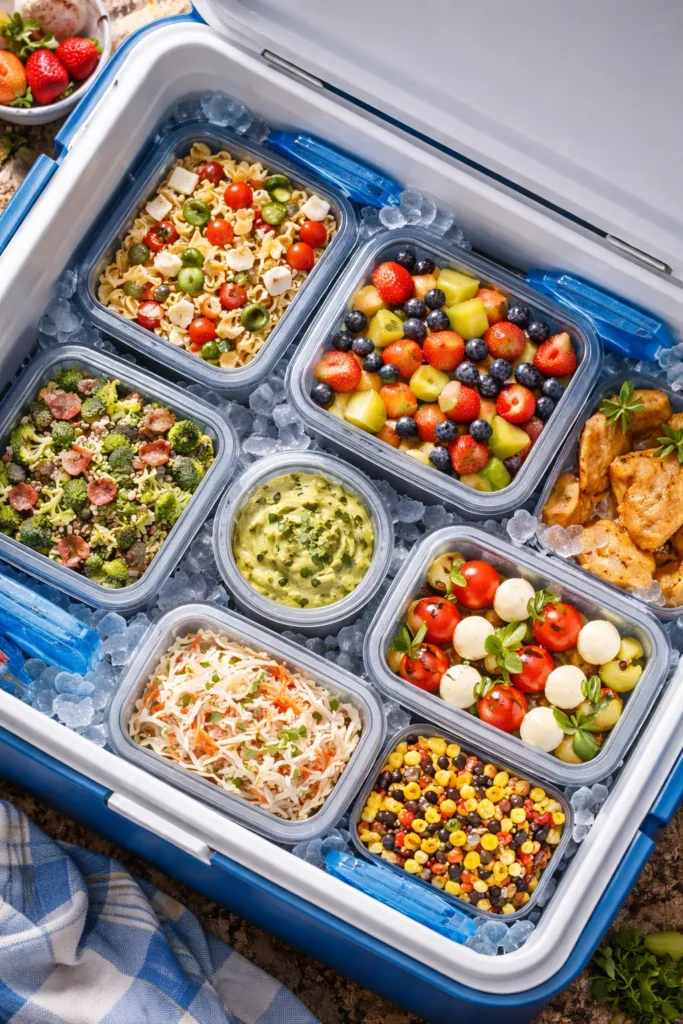
The right containers make the difference between food that arrives in good shape and food that’s leaked all over the cooler. Wide, shallow containers with locking lids are better than tall, narrow ones — they’re easier to scoop from, less likely to tip over, and cool down more evenly in the cooler.
For salads with components that need to stay separate (like the ramen coleslaw’s crunchy topping or the caprese skewers’ balsamic glaze), small containers or zip-top bags tucked inside the main container keep everything organized without requiring extra bags. Label containers with a piece of masking tape and a marker if you’re bringing multiple dishes to a potluck — it saves the “what’s in this one?” conversation at the table.
Cooler Strategy
Place ice packs on the bottom and around the sides of the cooler, not just on top. Cold air falls, so layering ice beneath the food actually keeps it colder than resting it on top. Dishes that need to stay coldest — deviled eggs, pasta salad with dairy, watermelon feta — go in the middle where they’re surrounded on all sides by cold.
Pack a separate bag with serving spoons, napkins, small plates, and any last-minute add-ins like toppings or dressings. Keeping it all together means nothing gets forgotten when you’re unloading at the park.
The One Rule That Covers Everything
Any dish containing eggs, dairy, or cooked meat should not sit at temperatures above 40°F for more than 2 hours. On a hot day, that window shrinks. When in doubt, leave it in the cooler until you’re ready to serve, and don’t let it sit out for the entire afternoon. Everything else — vinaigrette-dressed pastas, bean salads, baked beans, watermelon — is more forgiving, but common sense still applies.
Final Thoughts

A great picnic side doesn’t need to be complicated — it needs to be thought through. The eight dishes in this list were chosen because they’re genuinely delicious and genuinely practical, which is a harder combination to find than it sounds. Pick one or two that suit the crowd you’re feeding, make them a day ahead, and spend the actual picnic day enjoying yourself instead of stressing over food.
If there’s one takeaway worth holding onto, it’s this: vinegar is your friend. Acid-based dressings — whether it’s the lemon vinaigrette in the pasta salad, the cider vinegar in the German potato salad, or the lime juice on the watermelon — keep food tasting bright and fresh for hours longer than cream or mayo-based alternatives. When a dish needs to sit in a cooler and still taste good three hours later, acid is what keeps it alive.
The other thing that consistently separates a good picnic spread from a forgettable one is making dishes that actually belong outside — food that feels refreshing in warm weather, that pairs naturally with grilled proteins, and that doesn’t require plates, forks, or a microwave to be enjoyed. Pack any combination of these eight, and you’ll be the person people follow up with afterward asking for the recipes.
