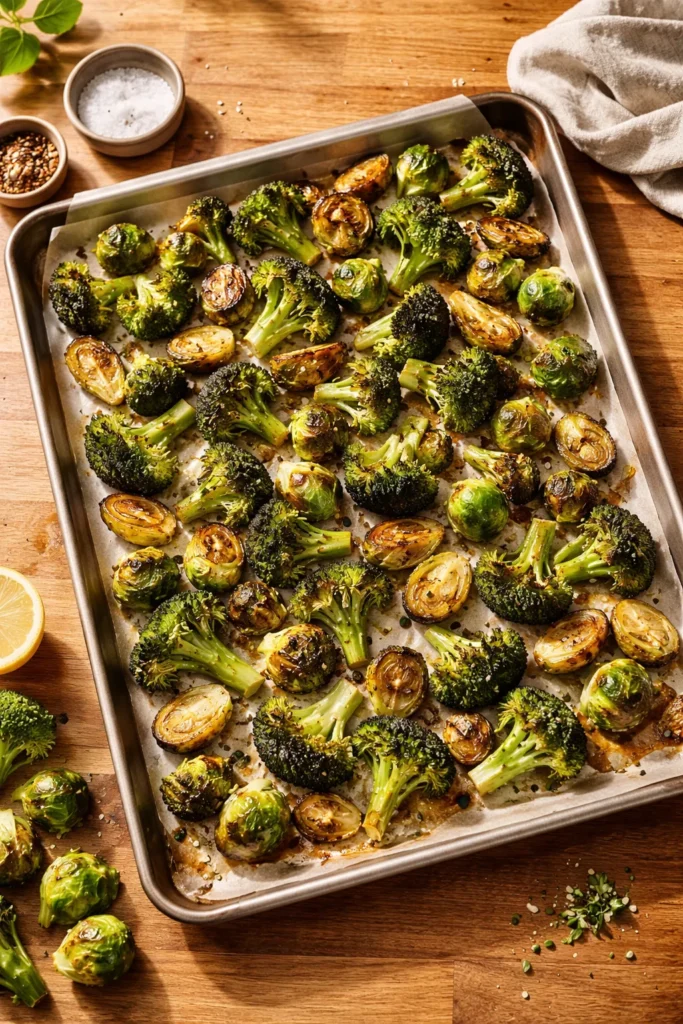
There’s a version of roasted broccoli and Brussels sprouts that most people have never tasted. Not the soggy, gray pile steamed into submission, but the genuinely crispy, caramelized, nutty version that comes out of a 425°F oven after 20 to 30 minutes on a sheet pan. The difference isn’t just technique — it’s the entire eating experience. Once you’ve had Brussels sprouts with crunchy outer leaves and a tender, sweet interior, or broccoli florets with charred tips that taste almost nutty, it’s hard to go back.
What makes these two vegetables such a natural pair for roasting is their texture and timing. Both are dense, fibrous, and respond beautifully to high heat — the kind of heat that triggers the Maillard reaction and converts naturally bitter compounds into something sweet and complex. Roasting broccoli and Brussels sprouts together means one pan, one oven temperature, and one cleanup. That’s hard to argue with.
The eight side dishes below range from weeknight-simple (five ingredients, 30 minutes) to impressively dressed (lemon vinaigrette, Parmesan, bacon, maple-Dijon). Each one brings something different to the table — a different flavor profile, a different finishing touch, a different reason to make it again next week. Whether you’re pairing a side dish with roast chicken, grilled salmon, a holiday feast, or a grain bowl, there’s a version here that fits.
Table of Contents
- 1. Classic Herb Roasted Brussels Sprouts and Broccoli
- The Herb Blend That Makes It Work
- How to Get Maximum Crispiness
- 2. Lemony Parmesan Roasted Broccoli and Brussels Sprouts
- Why the Lemon Goes on After Roasting
- Building the Lemon Dressing
- 3. Balsamic Glazed Brussels Sprouts and Broccoli with Green Vegetable Medley
- Finishing Touches That Elevate the Dish
- Timing and Pan Management
- 4. Maple Dijon Roasted Brussels Sprouts and Broccoli with Bacon
- The Maple Dijon Vinaigrette
- The Bacon Question
- 5. Garlic Butter Skillet Broccoli and Brussels Sprouts with Tomato
- The Cover-and-Caramelize Method
- When to Use This Method
- 6. Parmesan and Garlic Roasted Broccoli with Lemon Finish
- The Science Behind High-Heat Browning
- Getting the Garlic Right
- 7. Honey Dijon and Lemon Roasted Broccoli and Brussels Sprouts
- Making the Dressing While You Roast
- The Parmesan Option
- 8. Cheesy Pasta with Roasted Broccoli and Brussels Sprouts
- Building the Two-Cheese Sauce
- Pasta Shape Matters More Than You Think
- Tips for Perfect Roasted Broccoli and Brussels Sprouts Every Time
- Fresh Vegetables Only
- Choosing and Prepping Brussels Sprouts
- Choosing and Prepping Broccoli
- How to Store, Reheat, and Repurpose Leftovers
- Flavor Variations and Seasoning Ideas
- What to Serve Alongside These Side Dishes
- Final Thoughts
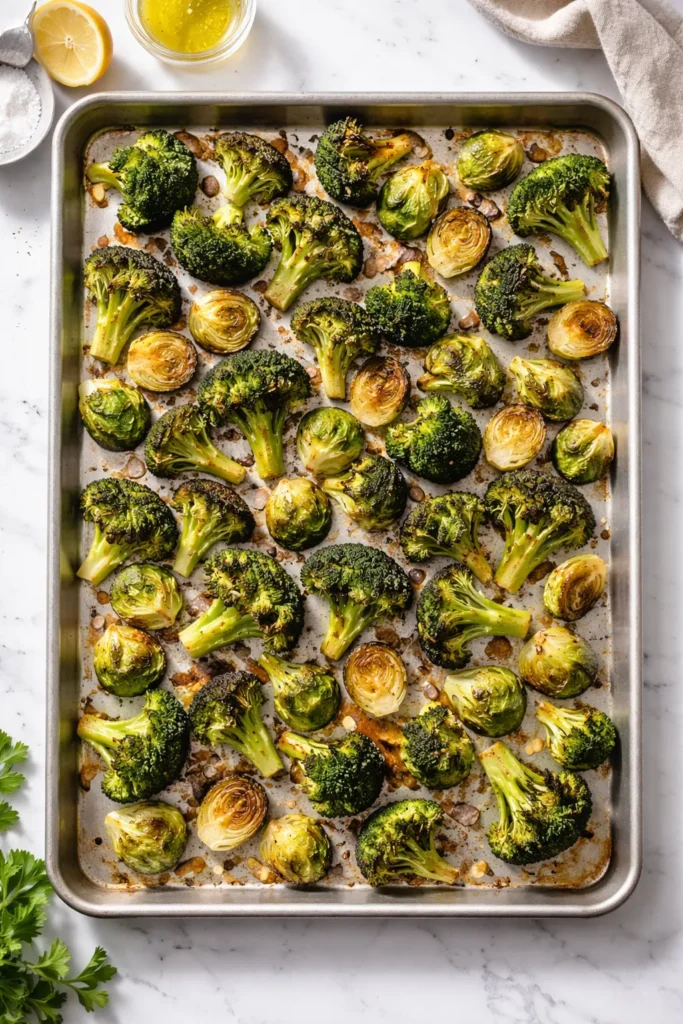
1. Classic Herb Roasted Brussels Sprouts and Broccoli
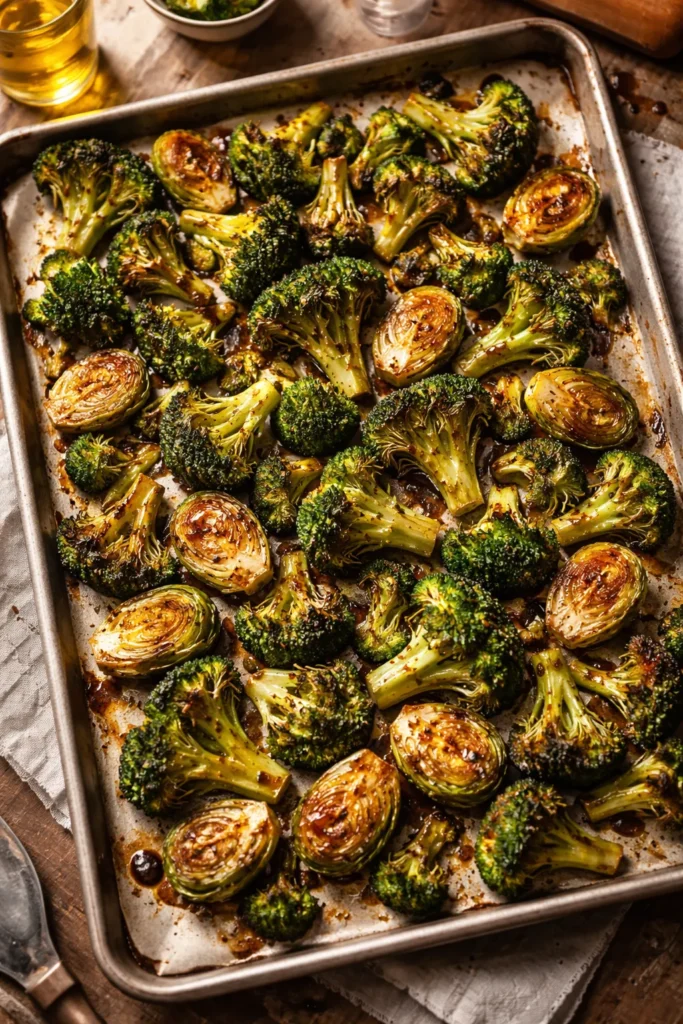
If there’s one version of this dish worth having in your permanent rotation, it’s this one. Equal parts Brussels sprouts and broccoli — about a pound of each — get tossed with olive oil, balsamic vinegar, and a generous mix of dried herbs before roasting at 425°F for 20 minutes. The result is crispy edges, caramelized cut surfaces, and a depth of flavor that makes this taste far more elaborate than it actually is.
The balsamic vinegar is the quiet star here. It adds just enough acidity and natural sweetness to balance the slight bitterness of the Brussels sprouts without overpowering the herbs. Use the best balsamic you have — even a mid-range one makes a visible difference.
The Herb Blend That Makes It Work
The combination of dried rosemary, thyme, and basil — one teaspoon each — creates a rounded, savory backdrop. Garlic powder and onion powder (¾ teaspoon and ½ teaspoon, respectively) deepen the flavor without requiring any chopping. Sprinkle everything on after the oil and vinegar drizzle, then use a spatula to toss the vegetables until every surface is coated.
How to Get Maximum Crispiness
Use a 12 x 17-inch sheet pan — or the largest rimmed baking sheet you own. Crowding the pan is the single biggest mistake people make with roasted vegetables. When pieces overlap, they steam each other instead of roasting, and you end up with soft, dull vegetables instead of crispy, caramelized ones. Halve the Brussels sprouts, cut any large broccoli florets in half, and always lay everything in a single layer with a bit of breathing room between pieces.
- Preheat your oven to 425°F before the pan goes in
- Toss vegetables in a bowl first, then spread onto the pan rather than tossing directly on the pan
- Don’t skip the balsamic — it promotes caramelization
- Roast for exactly 20 minutes and taste before adding more time
Yield: Serves 6 | Prep: 10 minutes | Cook: 20 minutes | Total: 30 minutes
2. Lemony Parmesan Roasted Broccoli and Brussels Sprouts
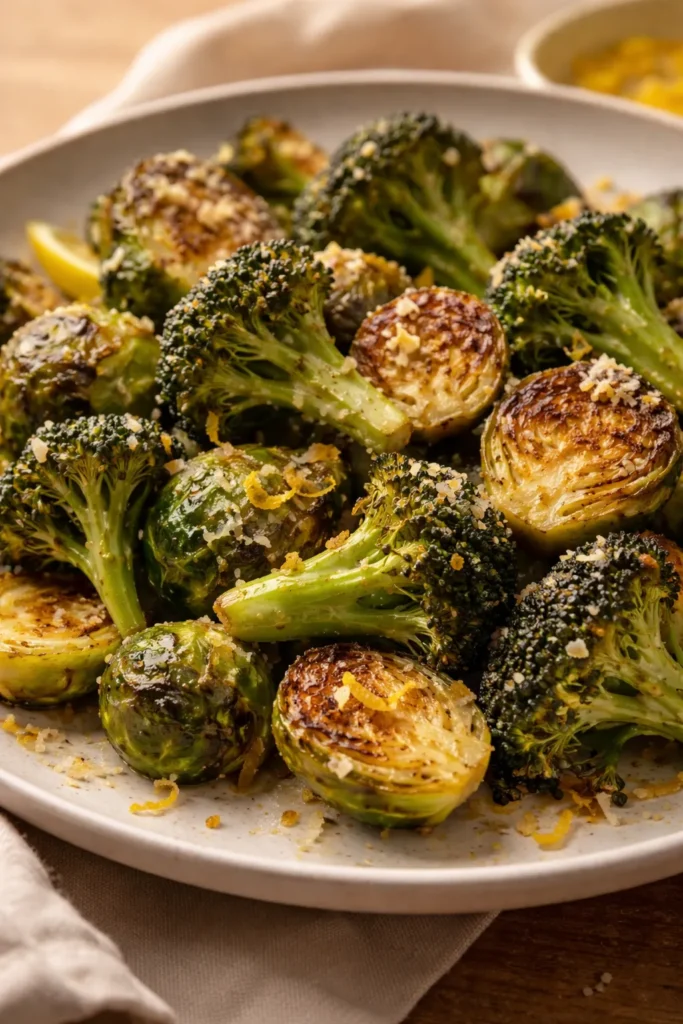
This is the version that consistently converts people who insist they don’t like Brussels sprouts. Freshly grated Parmesan melts into the vegetables during roasting, forming savory, lacey crusts on the cut surfaces. A quick lemon dressing — olive oil, fresh lemon zest and juice, a touch of Dijon, and a hint of honey — gets spooned over the hot vegetables the moment they come out of the oven. That bright, sharp finish cuts right through the richness of the cheese.
Crushed red pepper adds a gentle background heat that you almost don’t notice until the warmth builds at the back of your throat. It’s subtle, but it keeps the dish from feeling flat.
Why the Lemon Goes on After Roasting
Squeezing lemon over vegetables before they go into the oven causes the juice to evaporate and the zest to turn slightly bitter under high heat. Adding the lemon dressing immediately after roasting — while the vegetables are still hot enough to absorb it — gives you that bright, fresh citrus flavor without any of the bitterness. The acidity also helps any remaining Parmesan clinging to the pan release its flavor into the dish.
Building the Lemon Dressing
Whisk together while the vegetables roast:
- 2 tablespoons olive oil
- Zest and juice of 1 full lemon
- ½ teaspoon Dijon mustard
- ½ teaspoon honey (or maple syrup)
- A pinch of salt
Pour this directly over the hot vegetables in a serving dish, toss gently, and serve immediately. The dressing is thin enough to coat every piece without pooling at the bottom.
Pro tip: Add the Parmesan to the mixing bowl with the vegetables before they go on the pan — not after. It needs those 25 minutes in the oven to form that golden, savory crust rather than just melting limply onto finished vegetables.
Yield: Serves 6 | Prep: 10 minutes | Cook: 25 minutes | Total: 35 minutes
3. Balsamic Glazed Brussels Sprouts and Broccoli with Green Vegetable Medley
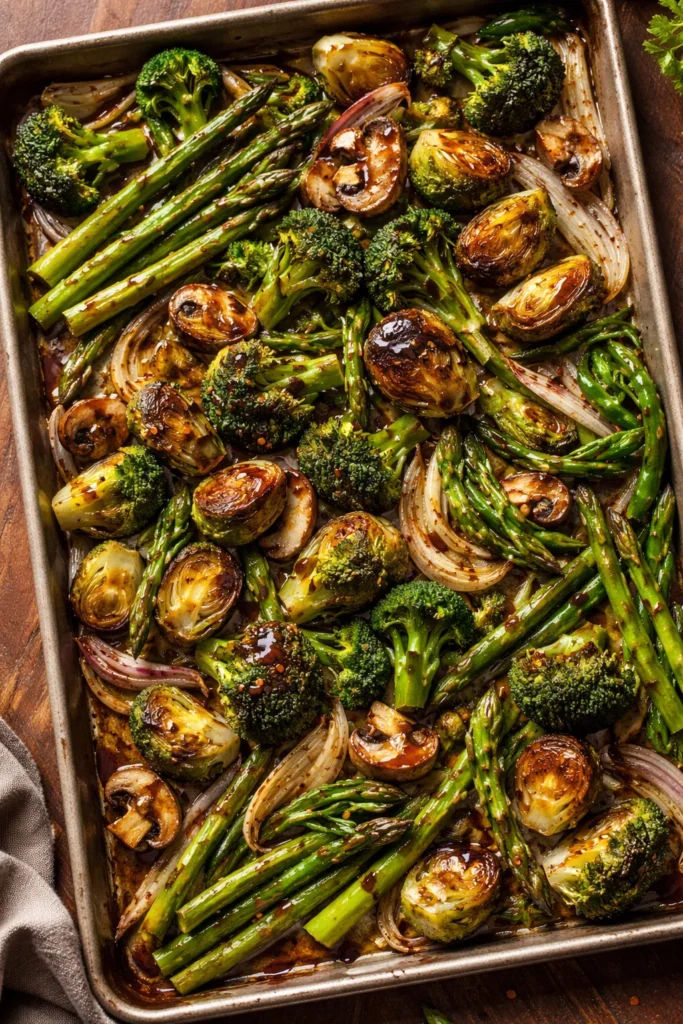
This is the version you bring to a dinner party when you want the vegetable side dish to actually generate conversation. The base is roasted Brussels sprouts and broccoli, but the addition of asparagus, green beans, mushrooms, fennel, and sliced onion transforms it into an entire medley of caramelized green vegetables. Everything roasts together at 425°F, and the whole pan comes out glossy, golden, and complex.
The trick is the balsamic and agave toss. Whisk olive oil, balsamic vinegar, and a tablespoon of maple syrup or agave together, pour it over all the vegetables in a large bowl, and toss until everything is coated before it goes onto the pan. The natural sugars in both the balsamic and agave accelerate caramelization, which means even the green beans develop color and sweetness that plain-roasted beans never achieve.
Finishing Touches That Elevate the Dish
After roasting, squeeze the halved lemon directly over the hot vegetables. This is a step that sounds minor but makes a significant difference — the heat of the vegetables opens them up to absorb the acidity in a way that cold vegetables can’t. Then add fresh basil, flat-leaf parsley, and optional Parmesan or toasted walnuts. The fresh herbs add brightness that balances the deep, roasted flavors.
Timing and Pan Management
With this many vegetables, you’ll likely need two rimmed baking sheets. A single overfull pan will produce steamed, soft vegetables instead of roasted ones. Swap the pans between oven racks at the halfway point so both spend time closer to the heat source.
- Cut everything to similar sizes — this is the single most important prep step for even cooking
- Roast for 20 to 22 minutes, stirring once at the halfway point
- Can be made up to 2 hours ahead; reheat at 350°F for 10 to 15 minutes
Yield: Serves 10 | Prep: 15 minutes | Cook: 20 minutes | Total: 35 minutes
4. Maple Dijon Roasted Brussels Sprouts and Broccoli with Bacon
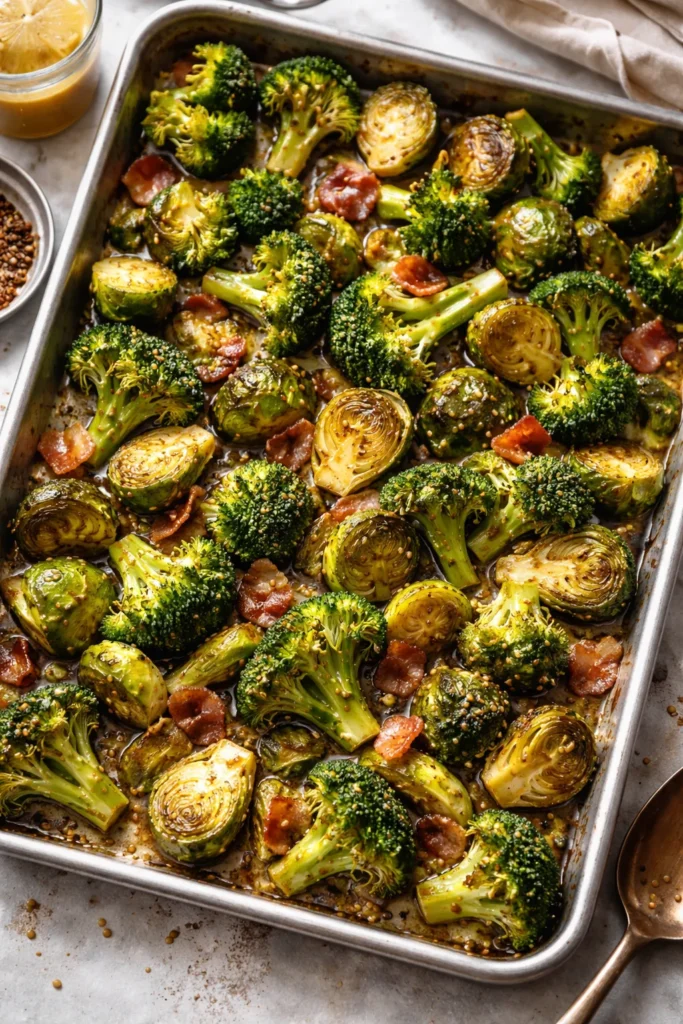
Here’s the dish that silences Brussels sprouts skeptics. Not because it’s smothered or disguised, but because the maple Dijon vinaigrette genuinely transforms how the vegetables taste — sweet, tangy, savory, and deeply satisfying all at once. The bacon doesn’t hurt either.
The vegetables themselves are roasted simply: toss with olive oil, salt, and pepper, spread on a sheet pan, and roast at 400°F for about 15 minutes until tender with some color. The magic comes from the vinaigrette you make while they’re in the oven.
The Maple Dijon Vinaigrette
Shake together in a small jar with a tight lid:
- 2 tablespoons real maple syrup
- 2 tablespoons white balsamic vinegar
- 2 tablespoons Dijon mustard
- 1 tablespoon whole-grain mustard
- 6 tablespoons olive oil
- 1 clove garlic, minced
- Salt and pepper to taste
Don’t use all of it. This vinaigrette is assertive, and you only need enough to lightly dress the vegetables — not drown them. Start with about half the jar, toss, taste, and add more if you want. The leftover vinaigrette keeps in the fridge for up to a week and works beautifully on green beans, roasted carrots, or grain salads.
The Bacon Question
Cook 4 strips of thick-cut bacon in a separate skillet until crisp, drain on paper towels, and crumble over the dressed vegetables just before serving. For a vegetarian version, skip it entirely — the vinaigrette is strong enough to carry the dish on its own. Some people add dried cranberries or diced sweet potato to this dish as well, and both work beautifully if you want to expand it into something more substantial.
Yield: Serves 4 to 6 | Prep: 10 minutes | Cook: 15 minutes | Total: 25 minutes
5. Garlic Butter Skillet Broccoli and Brussels Sprouts with Tomato
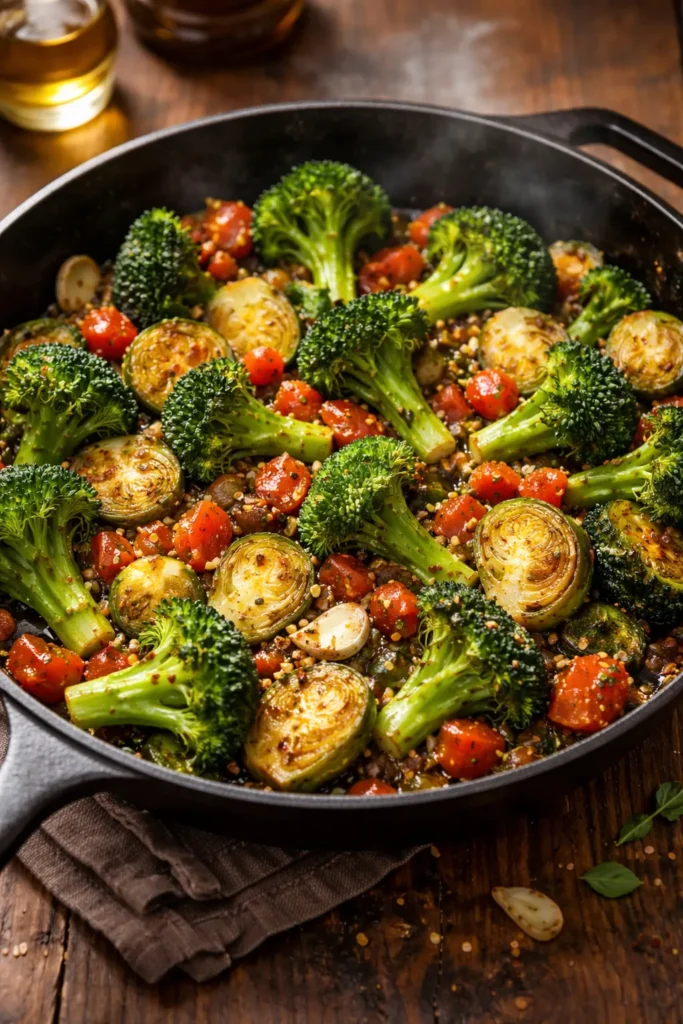
Not every roasted vegetable side dish has to come from a sheet pan. This skillet version cooks in under 10 minutes on the stovetop and produces caramelized, tender vegetables with a depth of flavor that comes from the combination of butter, garlic, and steam-finishing. It’s the approach to reach for when you don’t want to heat a full oven, or when you’re cooking a smaller amount of vegetables for two to four people.
Start with one tablespoon of butter in a wide skillet over medium heat. Cook two chopped garlic cloves for one to two minutes — just until fragrant, not golden — then add the halved Brussels sprouts and broccoli florets along with a diced, seeded tomato and the remaining two tablespoons of butter. A pinch of red pepper flakes adds heat.
The Cover-and-Caramelize Method
Cover the skillet immediately after adding the vegetables. Cook for about five minutes without stirring — this allows the cut surfaces to develop color from direct contact with the hot pan. Flip the vegetables, cover again, and cook for another four minutes. The steam trapped inside the skillet cooks the centers while the direct heat caramelizes the cut surfaces. You get tender insides and browned, slightly crispy outsides without ever turning on the oven.
When to Use This Method
This approach works best when:
- You’re cooking for 2 to 4 people (smaller quantities roast more evenly in a skillet)
- You want a quicker, weeknight-friendly option
- You’re already using the oven for a main dish and don’t have space
Pro tip: Substitute two tablespoons of olive oil for the butter to make this dairy-free. It changes the flavor slightly — less rich, more sharp — but it’s still a genuinely good dish.
Yield: Serves 4 | Prep: 15 minutes | Cook: 10 minutes | Total: 25 minutes
6. Parmesan and Garlic Roasted Broccoli with Lemon Finish
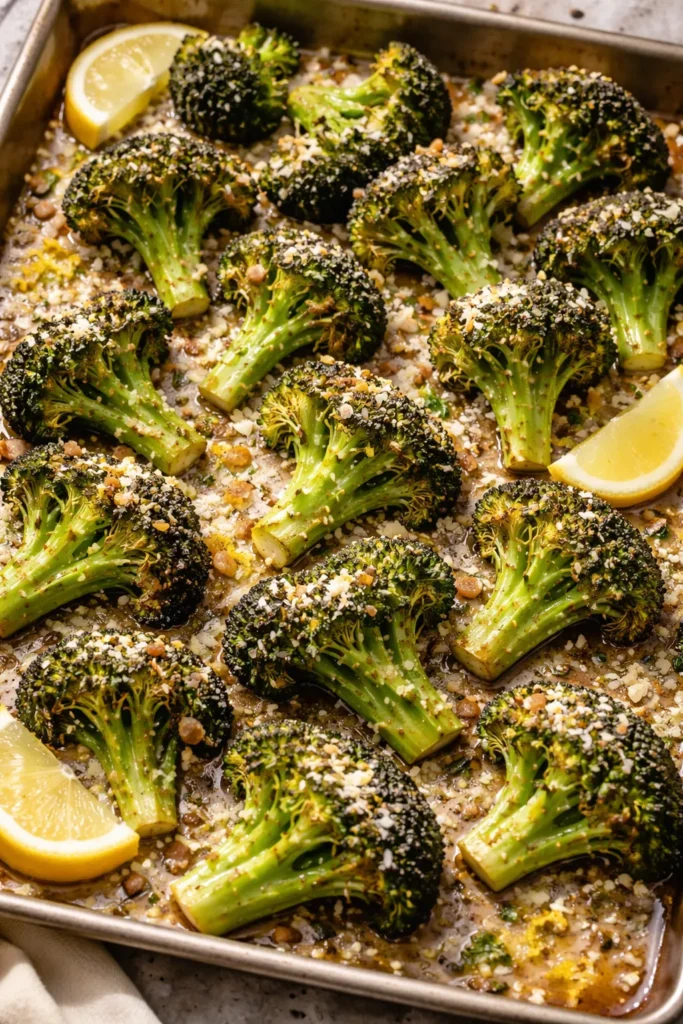
This one earns its reputation through restraint. Just broccoli — four pounds of it, cut into florets — tossed with thinly sliced garlic, a generous pour of olive oil, salt, and pepper. Roasted at 400°F for 20 to 25 minutes until the tips brown and the garlic gets crispy. Then, the moment it comes out of the oven, toss with a splash more olive oil, lemon zest, fresh lemon juice, and freshly grated Parmesan.
What makes this version stand out is the quantity of olive oil. Five tablespoons for four pounds of broccoli feels like a lot, and that’s exactly the point. Generous oil coverage is what separates properly roasted broccoli from dry, tough broccoli. Don’t skimp, and don’t substitute cooking spray.
The Science Behind High-Heat Browning
Roasting broccoli at high temperatures triggers the Maillard reaction — the same chemical process responsible for the golden crust on a seared steak or a properly baked bread. Compounds in the broccoli that taste mildly bitter at lower temperatures become sweet and nutty under intense heat. The tips of the florets, which have the most surface area, develop an almost crispy texture that contrasts with the tender interior of the stalk.
Getting the Garlic Right
Thinly sliced garlic — not minced, not pressed — roasts beautifully alongside broccoli at 400°F. The thin slices crisp up and turn golden without burning, adding a crunchy, toasted element to the finished dish. If your oven runs hot, add the garlic during the last 5 to 7 minutes of roasting rather than from the start to prevent it from turning bitter.
- Dry the broccoli thoroughly after washing — surface moisture steams rather than roasts
- Flip florets halfway through for even browning on multiple sides
- Add Parmesan and lemon immediately after the pan comes out of the oven, while still hot
- This dish holds well at room temperature for up to an hour
Yield: Serves 6 | Prep: 10 minutes | Cook: 25 minutes | Total: 35 minutes
7. Honey Dijon and Lemon Roasted Broccoli and Brussels Sprouts
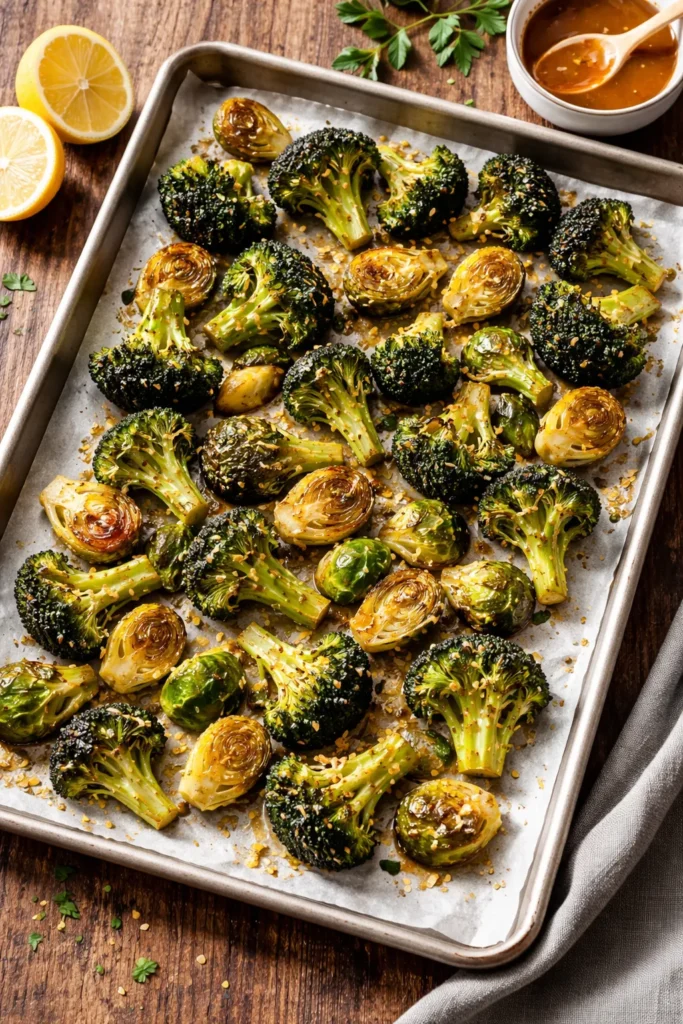
This version sits somewhere between the rustic herb versions and the more composed vinaigrette-dressed dishes. The vegetables roast simply — olive oil, garlic, salt, and pepper at 425°F — but finish with a punchy, balanced dressing made from honey, Dijon mustard, lemon juice, lemon zest, and a pinch of cayenne. The cayenne is small but important. It creates a warm, lingering heat that plays beautifully against the honey’s sweetness.
The dressing goes on while the vegetables are still warm, not piping hot. Let the pan rest for two to three minutes after it comes out of the oven before you toss. Hot vegetables absorb more dressing than you want them to — slightly cooled ones take on just enough to coat without becoming soggy.
Making the Dressing While You Roast
One of the practical strengths of this dish is that the dressing takes about two minutes to make while the vegetables are in the oven. Whisk together:
- 2 tablespoons olive oil (from the 4 tablespoons total)
- 1 tablespoon honey
- 2 teaspoons Dijon mustard
- Juice and zest of 1 lemon
- A pinch of cayenne
- Salt and pepper
That’s it. No cooking required for the sauce. The entire dish — vegetables and dressing — comes together in about 30 minutes, which makes this a genuinely realistic option for a weeknight dinner alongside roasted chicken or grilled fish.
The Parmesan Option
Optional, but worth mentioning: ¼ to ½ cup of freshly grated Parmesan tossed with the dressed vegetables adds a salty, savory richness that rounds out the tangy-sweet profile. Serve immediately if using Parmesan — it clumps as it cools. Without cheese, this dish actually holds well at room temperature and tastes excellent cold the next day tossed into a green salad.
Yield: Serves 4 | Prep: 10 minutes | Cook: 25 to 30 minutes | Total: 40 minutes
8. Cheesy Pasta with Roasted Broccoli and Brussels Sprouts
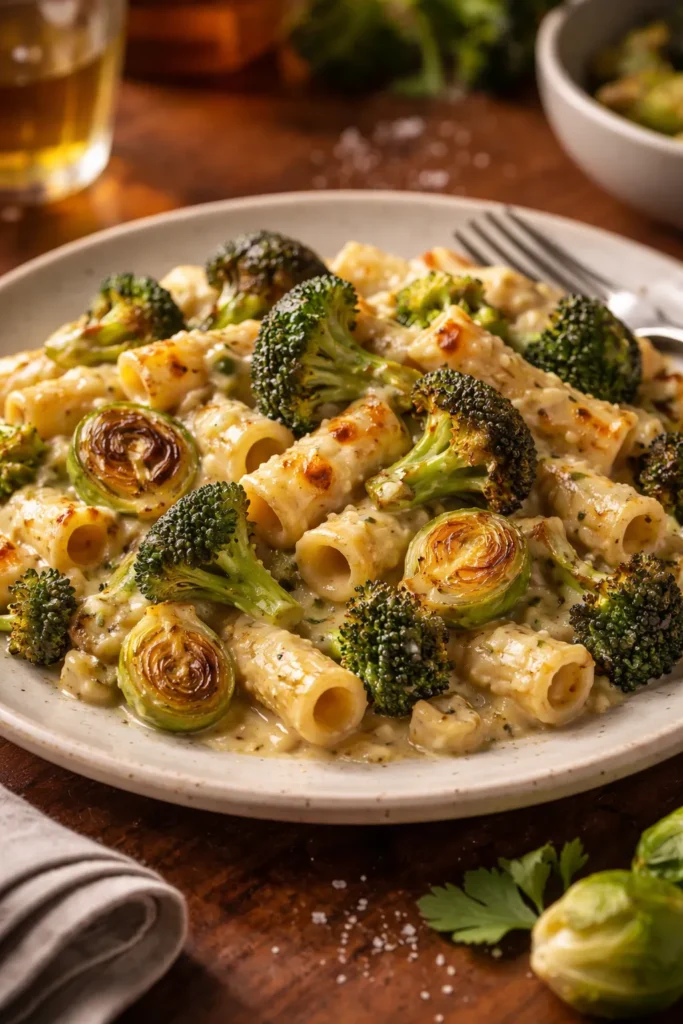
This is the one that turns a side dish into a full meal. Roasted broccoli and Brussels sprouts — caramelized, slightly charred at the edges, deeply savory — get folded into a two-cheese pasta sauce that’s luscious enough to feel indulgent but vegetable-forward enough to feel balanced. It’s weeknight comfort food that happens to be built around brassica vegetables.
The key to this dish working is staggered roasting. Brussels sprouts take longer than broccoli to become properly tender and caramelized. Start them in a 400°F oven for 10 minutes before adding the broccoli florets, then roast both together for another 10 minutes. Both finish at the same time with the same level of browning — something that’s easy to miss if you throw them on the pan simultaneously.
Building the Two-Cheese Sauce
A proper cheese sauce for pasta needs both a melting cheese and a sharper, more flavorful cheese to give it character. A combination of fontina or Gruyère (for creaminess) and sharp white cheddar or aged Parmesan (for depth) creates a sauce that coats pasta cleanly without being gluey. Make the sauce while the vegetables roast — it takes about the same amount of time.
Pasta Shape Matters More Than You Think
Short, ridged pasta — rigatoni, penne rigate, or cavatappi — works far better here than long pasta. The ridges and tubes catch the cheese sauce and hold pieces of roasted vegetable in every forkful. Don’t use spaghetti or linguine for this dish. The sauce slides off smooth strands, and the chunky vegetables become difficult to eat.
- Reserve about ½ cup of pasta cooking water before draining — starch helps the sauce cling to the pasta
- Fold the roasted vegetables in gently at the end to preserve their texture
- Finish with a drizzle of good olive oil and extra Parmesan at the table
- Leftovers reheat well with a splash of water or broth stirred in
Yield: Serves 4 to 6 | Prep: 15 minutes | Cook: 30 minutes | Total: 45 minutes
Tips for Perfect Roasted Broccoli and Brussels Sprouts Every Time
Across all eight dishes above, a handful of principles show up again and again — because they matter regardless of which flavor profile or method you choose.
The single-layer rule is non-negotiable. Every recipe in this article specifies spreading vegetables in a single layer, and that’s not a suggestion — it’s the difference between roasted and steamed. When vegetables pile on top of each other, the trapped steam prevents browning. Use your largest sheet pan, and if you’re doubling any of these recipes, use two pans instead of one.
Oven temperature is the other major variable. Most of these recipes call for 400°F to 425°F, and that range is deliberately high. Both broccoli and Brussels sprouts are dense, fibrous vegetables that need intense heat to caramelize their surface before the interior overcooks. A 350°F oven produces soft, limp vegetables that have none of the nutty, slightly sweet quality that makes roasted brassicas so compelling.
Fresh Vegetables Only
Frozen broccoli and frozen Brussels sprouts contain significant water content that releases into the pan during roasting. Instead of caramelizing, the vegetables steam in their own moisture and come out soft and gray. Every recipe here requires fresh vegetables — it’s not a preference, it’s a structural requirement for the cooking method.
Choosing and Prepping Brussels Sprouts
Look for Brussels sprouts that are tightly packed, bright green, and firm. Avoid any with yellowing outer leaves or soft spots. When prepping: trim the stem end, peel away one or two outer leaves (they’re often where most of the dirt hides), and halve each sprout through the stem. Large sprouts — anything over an inch in diameter — benefit from quartering rather than halving, which creates more surface area and faster, more even caramelization.
Choosing and Prepping Broccoli
A good head of broccoli should be deep green with tight, compact florets. Yellow florets are a sign of age — the broccoli is past its peak and will taste bitter no matter how well you roast it. Cut florets into 1 to 2-inch pieces and slice any larger ones in half through the stem so they have a flat surface to rest against the pan. That flat surface is where the caramelization happens.
Always dry your vegetables thoroughly after washing. Surface water turns to steam in the oven and slows browning. Pat them with paper towels or let them air-dry for a few minutes before tossing with oil.
How to Store, Reheat, and Repurpose Leftovers
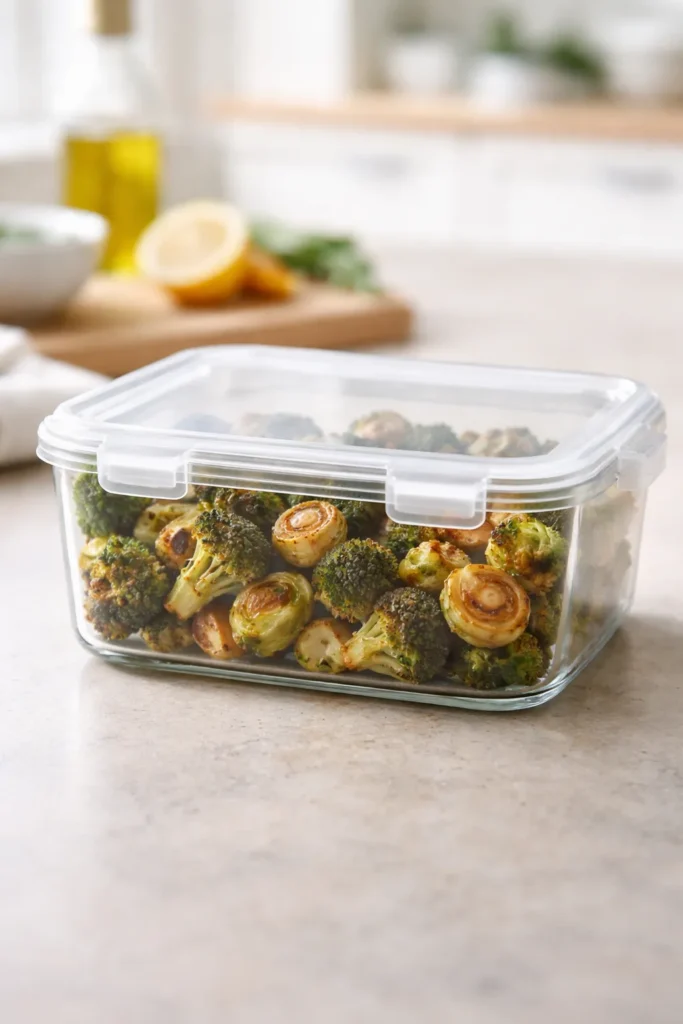
Roasted broccoli and Brussels sprouts keep well in an airtight container in the refrigerator for three to four days. The texture softens slightly overnight, but the flavor actually deepens — the caramelized notes become more pronounced as the vegetables rest.
To reheat: Spread on a sheet pan and warm at 375°F for 8 to 10 minutes. This brings back most of the crispiness that’s lost during refrigeration. Microwaving works in a pinch but produces a softer result.
Cold leftovers are genuinely excellent in other applications:
- Grain bowls: Toss over farro, quinoa, or brown rice with tahini dressing and a soft-boiled egg
- Salad topping: Chop roughly and add to arugula or spinach with a lemon vinaigrette
- Frittata filling: Fold into beaten eggs with Parmesan and cook in a cast iron skillet
- Pasta toss: Warm with pasta, garlic, olive oil, and a splash of pasta water for a fast weeknight meal
- Soup addition: Stir into a simple broth-based vegetable soup during the last few minutes of cooking
Flavor Variations and Seasoning Ideas
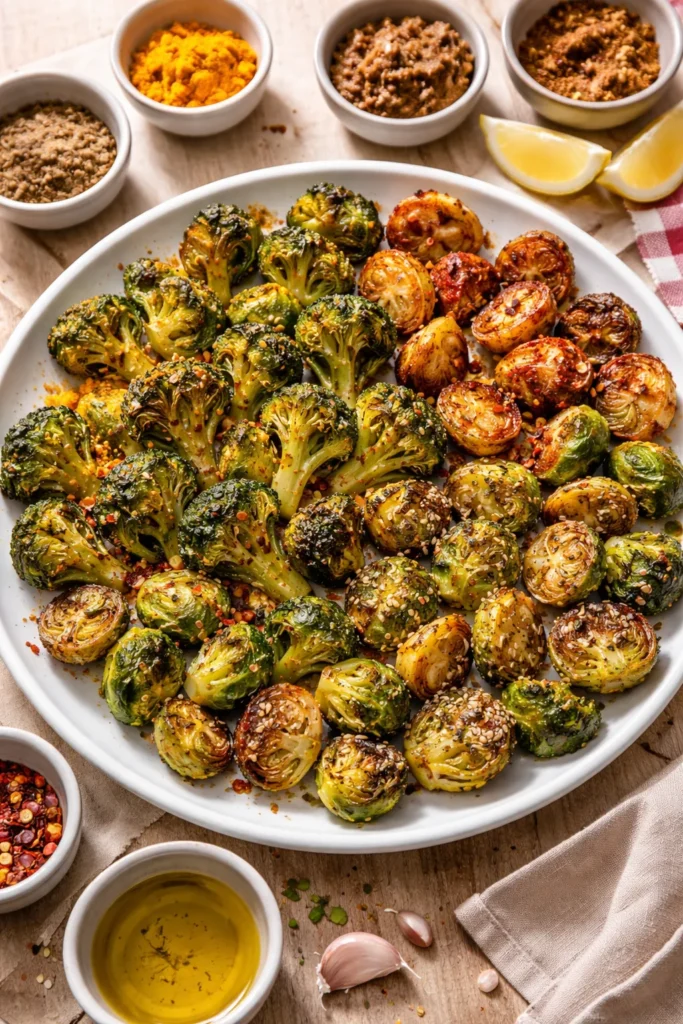
The eight dishes above cover a broad range of flavor profiles, but the base technique — high heat, single layer, good oil — adapts well to dozens of other seasoning combinations. Some worth trying:
- Turmeric, cumin, and smoked paprika with a squeeze of orange juice after roasting
- Sesame oil and soy sauce toss before roasting, finished with toasted sesame seeds and sliced scallions
- Za’atar and sumac with a drizzle of pomegranate molasses after roasting
- Miso and ginger paste thinned with a little rice vinegar and brushed onto the vegetables halfway through roasting
- Tahini and garlic sauce drizzled over the finished vegetables with a scattering of chopped flat-leaf parsley
Each of these works because the roasting method creates a neutral, caramelized base that takes on whatever flavors you bring to it. The vegetables themselves become a canvas once they’ve been properly roasted.
What to Serve Alongside These Side Dishes
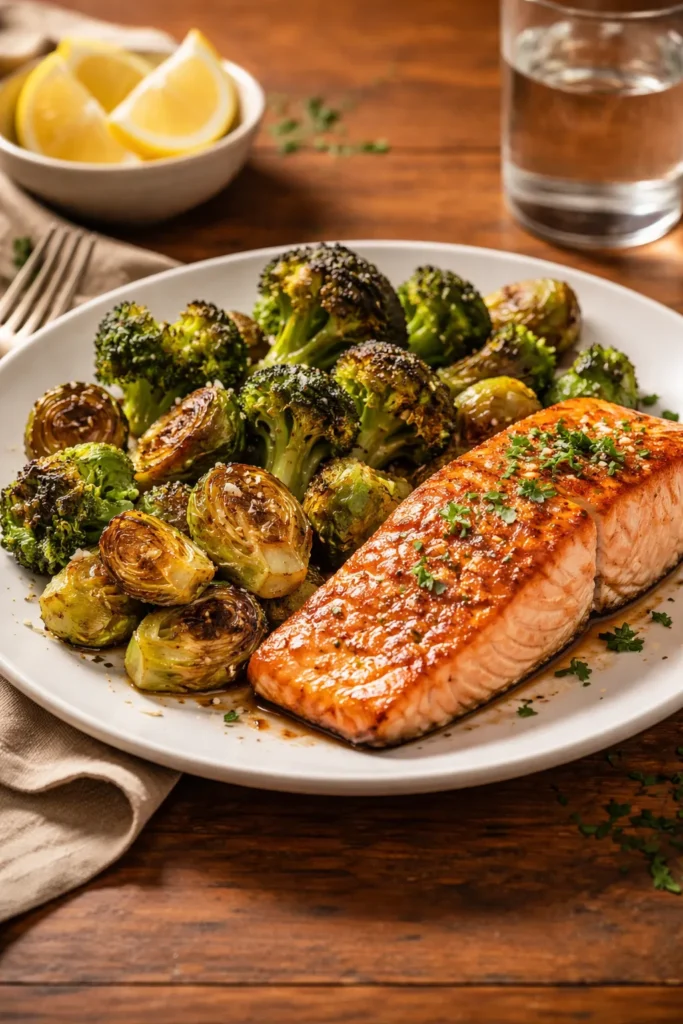
These eight roasted dishes pair naturally with a wide range of proteins and main courses. The classic combinations work for a reason:
- Roast chicken or chicken thighs: The savory, slightly bitter notes of roasted brassicas cut through the richness of chicken skin
- Salmon or white fish: The lemon-forward versions (dishes 2 and 7) are particularly well-suited to seafood
- Beef or pork: The balsamic and maple-Dijon versions hold their own alongside heavier, richer proteins
- Grain-based mains: Farro risotto, lentil soup, or a chickpea stew all benefit from the textural contrast of crispy roasted vegetables
- Holiday tables: Dishes 3 and 4, with their more elaborate finishes, are strong candidates for Thanksgiving and Christmas spreads where you want vegetable sides that feel intentional rather than afterthought
For casual weeknight meals, the simpler versions — classic herb (dish 1) or simple garlic and lemon (dish 6) — are done before the main course finishes resting and require almost no active cooking time.
Final Thoughts
The appeal of roasted broccoli and Brussels sprouts as a side dish comes down to a simple fact: high heat does most of the work for you. Fifteen minutes of prep, a hot oven, and a large sheet pan are genuinely all you need to produce something that tastes restaurant-quality without any of the effort that implies.
The range of dishes here — from a bare five-ingredient version to a Parmesan-dressed medley to a full cheesy pasta — means there’s a version appropriate for any occasion, any skill level, and any pantry. Start with whichever one matches what you have on hand, and pay attention to the two rules that matter most in every version: a hot enough oven and a single layer on the pan. Get those two things right and the rest takes care of itself.
One last thought worth keeping in mind: these vegetables actually taste better when you buy them in their peak season — fall through early winter for Brussels sprouts, and spring through fall for broccoli. During those windows, the flavor is sweeter, the texture is firmer, and the caramelization in the oven is noticeably more pronounced. It’s worth planning around, at least occasionally.