There’s a reason vegetable casseroles have earned a permanent place at every potluck table, holiday spread, and weeknight dinner rotation — they do things that few other dishes can. They take vegetables that kids might otherwise push around their plates and transform them into something bubbling, cheesy, and deeply satisfying. They feed a crowd from a single dish. And they somehow manage to feel both indulgent and nourishing at the same time.
The trick, of course, is in the execution. A poorly made veggie casserole can turn into a watery, bland mess. But a well-made one — with properly prepped vegetables, a thoughtfully seasoned sauce, and a golden, crunchy topping — is the kind of dish that disappears before anything else on the table.
Whether you’re looking for a meatless main that can hold its own or a show-stopping side dish to round out a protein-forward meal, these eight recipes cover all the bases. Some lean into rich, cheesy comfort. Others celebrate fresh produce with layered technique. A few come together in under 30 minutes. All of them are family-tested and genuinely delicious.
Table of Contents
- Why Veggie Casseroles Are a Family Dinner Win
- 1. Cheesy Broccoli and Cauliflower Casserole
- Tips for the Best Results
- 2. Classic Southern Squash Casserole
- Why Draining Matters More Than Anything Else
- 3. Loaded Mixed Vegetable Casserole
- Customizing the Mix-In Vegetables
- 4. Butternut Squash and Sage Gratin
- Getting the Squash Sliced Evenly
- 5. Homemade Green Bean Casserole
- 6. Sweet Potato Casserole with Brown Sugar Pecan Crumble
- Make-Ahead Notes
- 7. Mexican Street Corn Casserole
- Building the Elote Flavor Profile
- 8. Zucchini, Summer Squash, and Corn Casserole
- Tips for Making Every Veggie Casserole Better
- Storing, Reheating, and Freezing Veggie Casseroles
- Final Thoughts
Why Veggie Casseroles Are a Family Dinner Win

Before diving into the recipes, it’s worth understanding what makes the casserole format so effective for vegetables specifically. When you bake vegetables in a sauce — whether that’s a cream of mushroom base, a from-scratch cheese sauce, or a seasoned custard — the moisture from the veggies and the richness from the sauce create a deeply savory, cohesive filling that tastes far more complex than the individual parts suggest.
The crunchy topping matters more than most people give it credit for. Crushed Ritz crackers tossed in melted butter, buttery breadcrumbs, or crispy fried onions provide textural contrast that makes every bite interesting. Without that contrast, even the best-seasoned casserole filling can feel monotonous.
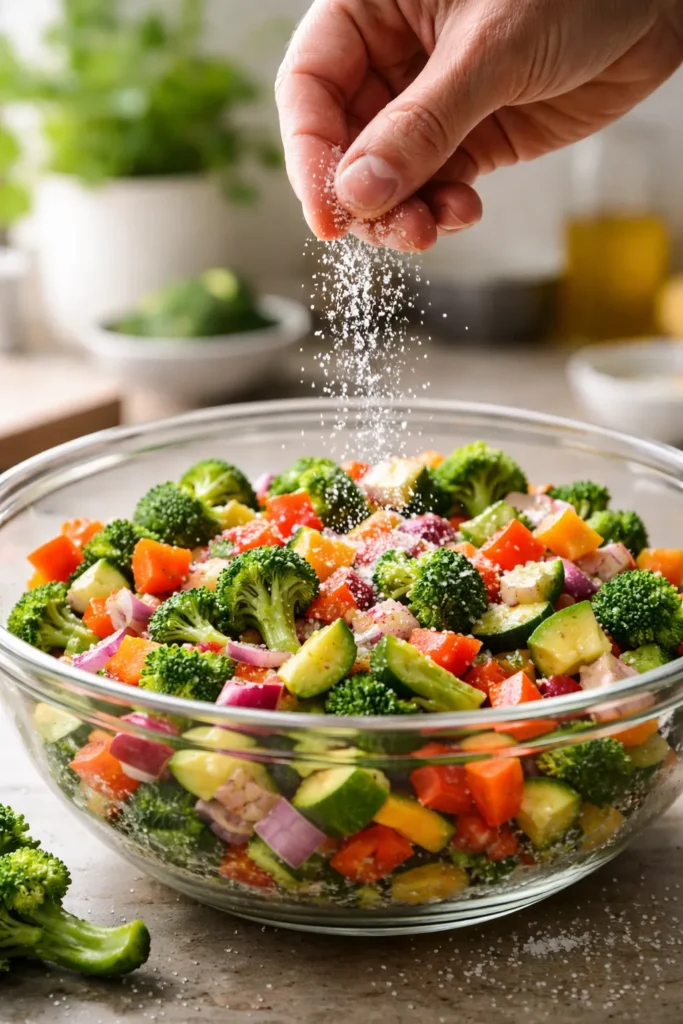
Frozen vegetables are your ally here. Quality frozen broccoli, cauliflower, corn, and mixed vegetable blends are flash-frozen at peak ripeness, which means the nutritional value stays intact. They’re also vastly more convenient than fresh for casserole purposes — no blanching, no lengthy prep, and no uneven texture. Just drain any excess water thoroughly before they go into the dish, and you’re already halfway to success.
One more thing worth knowing: casseroles are inherently forgiving. Swapping cheddar for Gruyère, cream of mushroom for cream of broccoli, or zucchini for yellow squash won’t break a single recipe here. Treat each one as a jumping-off point, and you’ll find yourself customizing these to your family’s specific tastes within the first few times you make them.
1. Cheesy Broccoli and Cauliflower Casserole

This is the one that converts skeptics. Packed with broccoli and cauliflower florets, layered with a creamy egg-and-mayonnaise sauce, and topped with a golden blanket of melted cheddar and mozzarella, it hits every note a crowd-pleasing casserole should. The water chestnuts add a subtle, satisfying crunch that you won’t find in most versions — and they’re the detail people can never quite identify when they ask what makes it so good.
Yield: Serves 10 to 12 Prep Time: 15 minutes Cook Time: 1 hour to 1 hour 15 minutes Total Time: 1 hour 30 minutes Difficulty: Beginner — the layering technique is straightforward, and frozen vegetables eliminate any complicated prep work.
Ingredients:
- 16 ounces frozen broccoli florets, thawed and drained well
- 16 ounces frozen cauliflower florets, thawed and drained well
- 8 ounces canned sliced water chestnuts, drained
- 8 ounces canned bean sprouts, drained (optional but recommended)
- 1 can (10.5 ounces) cream of mushroom soup
- 1 cup mayonnaise (full-fat gives the best texture)
- 1 medium yellow onion, finely diced
- 2 large eggs, beaten
- 1 teaspoon fine salt
- ½ teaspoon ground black pepper
- 8 ounces sharp cheddar cheese, freshly shredded
- 8 ounces low-moisture mozzarella, freshly shredded
Prepare the Dish:
-
Preheat the oven to 350°F (175°C). Grease a 9×13-inch glass baking dish with non-stick cooking spray and set aside.
-
In a large mixing bowl, whisk together the cream of mushroom soup, mayonnaise, beaten eggs, diced onion, salt, and black pepper until smooth and well combined.
Layer and Bake:
-
Spread half of the broccoli, cauliflower, water chestnuts, and bean sprouts in an even layer across the bottom of the prepared baking dish.
-
Pour half of the soup mixture over the vegetables, spreading it gently with a spatula to coat evenly.
-
Sprinkle half of the shredded cheddar and mozzarella over the soup layer. Repeat the layering once more — vegetables, soup mixture, then cheese — ending with the cheese on top.
-
Bake uncovered at 350°F for 60 to 75 minutes, until the cheese on top is deeply golden brown and the vegetables are completely tender when pierced with a fork. If the cheese begins to brown too aggressively before the hour mark, tent loosely with foil and continue baking.
-
Remove from the oven and allow to rest for 5 minutes before serving — this lets the filling settle and makes it much easier to portion cleanly.
Tips for the Best Results
Always thaw and drain your frozen vegetables completely before layering. Excess water from frozen broccoli or cauliflower is the #1 reason casseroles turn watery. Press the thawed vegetables gently between paper towels if they seem especially wet.
Shred your own cheese. Pre-shredded bags contain anti-caking agents that prevent the cheese from melting as smoothly. Grating a block of sharp cheddar takes three minutes and makes a noticeable difference in the final texture.
2. Classic Southern Squash Casserole
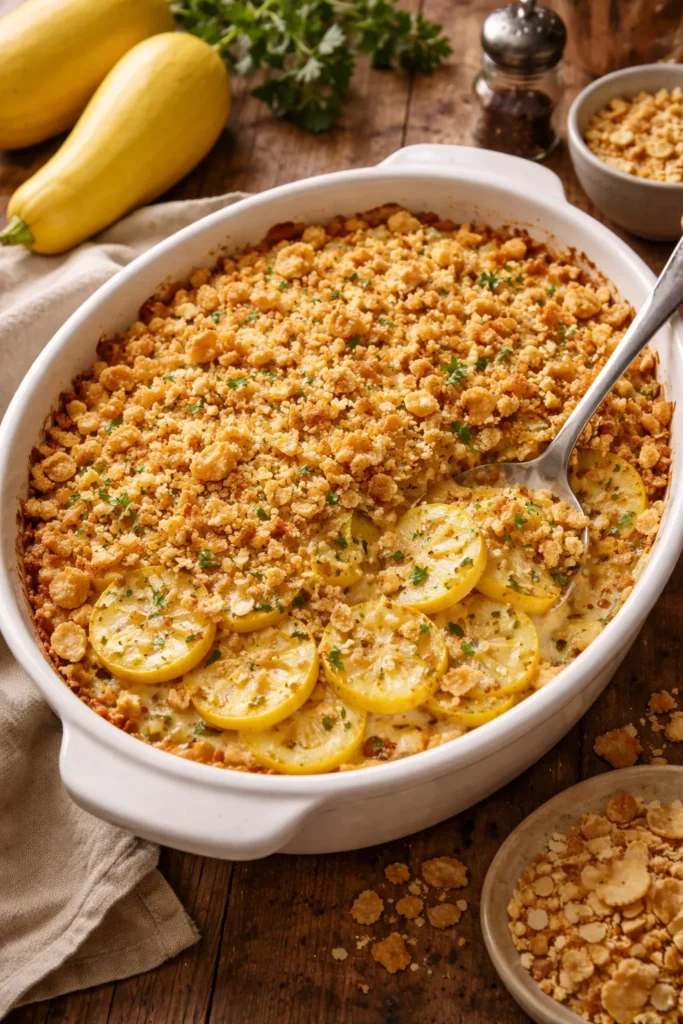
Yellow summer squash casserole is a cornerstone of Southern cooking, and for good reason. When squash is properly drained after sautéing, it creates a silky, savory filling that’s completely different from the watery squash bakes that give this dish a bad reputation. Topped with crushed buttery crackers, it’s pure comfort food that holds its own alongside anything from a Sunday roast to a simple grilled chicken breast.
Yield: Serves 8 Prep Time: 20 minutes Cook Time: 35 minutes Total Time: 55 minutes Difficulty: Beginner — the only hands-on technique is sautéing the squash, which takes about 10 minutes.
Ingredients:
- 2½ pounds yellow summer squash (about 5 medium squash), sliced into ¼-inch rounds
- 1 medium white onion, diced
- 2 tablespoons unsalted butter
- 1 can (10.5 ounces) cream of chicken soup (or cream of mushroom for a vegetarian version)
- ½ cup sour cream
- 1 cup shredded sharp cheddar cheese
- ½ teaspoon garlic powder
- ½ teaspoon salt
- ¼ teaspoon black pepper
- 1 sleeve Ritz crackers (about 32 crackers), crushed
- 3 tablespoons unsalted butter, melted
Prepare the Squash:
-
Preheat the oven to 350°F (175°C). Grease a 2-quart or 9×13-inch baking dish with butter or cooking spray.
-
Melt 2 tablespoons of butter in a large skillet over medium heat. Add the sliced squash and diced onion and cook, stirring occasionally, for 8 to 10 minutes — until the squash is completely softened and has released most of its moisture. Do not rush this step; undercooked squash releases water in the oven and ruins the texture.
-
Transfer the sautéed squash to a colander and press gently with the back of a spoon to squeeze out any remaining liquid. Allow to drain for 3 to 5 minutes.
Assemble and Bake:
-
In a large bowl, combine the drained squash mixture, cream of chicken soup, sour cream, shredded cheddar, garlic powder, salt, and black pepper. Stir until fully combined.
-
Spread the squash mixture evenly into the prepared baking dish.
-
In a small bowl, combine the crushed Ritz crackers with the 3 tablespoons of melted butter and toss to coat thoroughly. Spread the buttered cracker crumbs evenly over the squash filling.
-
Bake uncovered for 30 to 35 minutes, until the topping is deep golden brown and the filling is bubbling around the edges. Rest for 5 minutes before serving.
Why Draining Matters More Than Anything Else
Squash has an unusually high water content — roughly 95% by weight. If you skip the sautéing-and-draining step and go straight from raw squash to the baking dish, you’ll end up with a soggy, separated filling that no cracker topping can save.
The sauté step does two things at once: it softens the squash so it doesn’t need as long in the oven, and it drives off excess moisture before it can pool in your casserole. Don’t skip it. Not even once.
3. Loaded Mixed Vegetable Casserole

Think of this as the pantry-friendly workhorse of the veggie casserole world. Built on frozen mixed vegetables and canned diced potatoes, it comes together in about 30 minutes and feeds a crowd without requiring anything more than a large bowl and a baking dish. It’s the kind of recipe that becomes a go-to because it’s genuinely flexible — swap the cream of celery soup for cream of mushroom, use mozzarella or sharp cheddar interchangeably, and adjust the seasoning blend to whatever you have in the pantry.
Yield: Serves 8 Prep Time: 5 minutes Cook Time: 30 minutes Total Time: 35 minutes Difficulty: Beginner — one bowl, one dish, zero complicated techniques.
Ingredients:
- 30 ounces frozen mixed vegetables (carrots, corn, peas, green beans — standard blend)
- 1 can (15 ounces) diced potatoes, drained well
- 1 can (10.5 ounces) cream of celery soup
- ½ cup diced yellow onion
- ½ cup full-fat mayonnaise
- 1 cup shredded mozzarella cheese (or sharp cheddar)
- 2 tablespoons all-purpose seasoning or Italian seasoning blend
- 1 sleeve Ritz crackers (about 30 crackers), crushed
- ½ cup (1 stick) unsalted butter, melted
Assemble and Bake:
-
Preheat the oven to 350°F (175°C). Spray a 9×13-inch baking dish generously with non-stick cooking spray.
-
In a large bowl, combine the frozen mixed vegetables, drained diced potatoes, cream of celery soup, diced onion, mayonnaise, shredded cheese, and seasoning. Stir until everything is evenly coated.
-
Spread the mixture into the prepared baking dish in an even layer.
-
In a small bowl, combine the crushed Ritz crackers with the melted butter and stir to coat. Spread the buttered crumb mixture evenly over the vegetable filling.
-
Cover the dish with aluminum foil and bake for 20 minutes. Remove the foil and bake for an additional 10 minutes, or until the cracker topping is golden brown and the filling is bubbling actively around the edges.
-
Remove from the oven and let the casserole rest for 5 to 8 minutes before serving. This resting time allows the starches to re-absorb some of the liquid and prevents the filling from being too loose when portioned.
Customizing the Mix-In Vegetables
If your family has strong vegetable preferences, this recipe is the easiest one to adapt. Broccoli florets, cauliflower, sliced zucchini, canned corn, and even sliced water chestnuts all work without changing the baking time. A handful of chopped water chestnuts adds a pleasant crunch that cuts through the creaminess nicely.
If using frozen vegetables, don’t feel obligated to thaw them first — they’ll cook through during the covered baking phase. But if you do thaw them, drain thoroughly to prevent a watery filling.
4. Butternut Squash and Sage Gratin

This is the casserole for people who think they don’t like casseroles. It’s more refined than a standard cream-based bake — layers of thinly sliced butternut squash baked in a Dijon-spiked cream sauce, topped with herbed breadcrumbs, and finished with a shower of nutty Parmesan. The sage is non-negotiable; it has a specific affinity with butternut squash that makes the whole dish smell like autumn in the best possible way.
Yield: Serves 6 to 8 Prep Time: 20 minutes Cook Time: 50 minutes Total Time: 1 hour 10 minutes Difficulty: Intermediate — slicing the squash thinly and evenly is the most demanding step; a mandoline makes this significantly easier.
Ingredients:
- 3 pounds butternut squash, peeled, seeded, and sliced into ⅛-inch-thick rounds
- 1 cup heavy cream
- 2 tablespoons Dijon mustard
- 2 garlic cloves, minced
- 1 tablespoon fresh sage leaves, finely chopped (or 1 teaspoon dried sage)
- 1 teaspoon fine salt
- ½ teaspoon freshly cracked black pepper
- ¼ teaspoon freshly grated nutmeg
- ½ cup freshly grated Parmesan cheese
- ½ cup panko breadcrumbs
- 2 tablespoons unsalted butter, melted
- 1 tablespoon fresh thyme leaves
Make the Sauce and Layer:
-
Preheat the oven to 375°F (190°C). Butter a 9×13-inch or similar 3-quart baking dish.
-
In a bowl or measuring cup, whisk together the heavy cream, Dijon mustard, minced garlic, chopped sage, salt, pepper, and nutmeg until fully combined.
-
Arrange one-third of the butternut squash slices in overlapping layers on the bottom of the prepared dish. Pour one-third of the cream mixture over the squash. Repeat the layering twice more, ending with the cream mixture poured evenly over the top.
Make the Topping and Bake:
-
In a small bowl, combine the panko breadcrumbs, melted butter, Parmesan, and fresh thyme. Toss until the crumbs are evenly moistened. Spread the mixture over the top layer of the gratin.
-
Cover the dish tightly with foil and bake for 35 minutes. The squash should be fork-tender all the way through at this point.
-
Remove the foil and bake for an additional 12 to 15 minutes, until the breadcrumb topping is deeply golden and the cream is bubbling around the edges.
-
Allow the gratin to rest for 10 minutes before serving — the cream sauce thickens as it cools slightly and makes clean portioning much easier.
Getting the Squash Sliced Evenly
Unevenly sliced squash is the biggest pitfall with this recipe. Thick slices won’t cook through in time, while paper-thin slices can turn mushy. The target is ⅛ inch — thin enough to cook through completely but thick enough to hold their shape.
A mandoline slicer set to ⅛ inch is the most reliable tool for this. If you don’t have one, a sharp chef’s knife and slow, deliberate cuts will get you there. Take your time; this step makes or breaks the final texture.
5. Homemade Green Bean Casserole

The canned-soup version has its nostalgic place, but making this entirely from scratch is a genuinely different experience. The mushroom cream sauce here is built from real cremini mushrooms, shallots, and a touch of flour — it’s richer, more complex, and doesn’t have that slightly metallic edge that canned soups sometimes carry. Combined with fresh or frozen green beans and topped with crispy fried shallots, this is the version that earns requests year after year.
Yield: Serves 8 to 10 Prep Time: 25 minutes Cook Time: 35 minutes Total Time: 1 hour Difficulty: Intermediate — the from-scratch mushroom sauce requires 15 minutes of stovetop attention, but the technique is straightforward.
Ingredients:
For the Casserole:
- 1½ pounds fresh green beans, trimmed and halved (or 24 ounces frozen green beans, thawed and drained)
- 2 tablespoons unsalted butter
- 1 pound cremini mushrooms, cleaned and sliced
- 3 medium shallots, thinly sliced
- 3 garlic cloves, minced
- 3 tablespoons all-purpose flour
- 1½ cups whole milk
- ½ cup vegetable broth (low-sodium)
- 1 teaspoon Worcestershire sauce
- 1 teaspoon fine salt
- ½ teaspoon black pepper
- ¼ teaspoon fresh thyme leaves
For the Crispy Shallot Topping:
- 3 large shallots, peeled and sliced into thin rings
- ½ cup all-purpose flour
- ½ teaspoon salt
- ¼ teaspoon black pepper
- Neutral oil for frying (vegetable or canola), about 1 inch deep in a small pan
Make the Crispy Shallots:
-
Toss the shallot rings with the flour, salt, and pepper in a bowl until evenly coated. Shake off any excess flour.
-
Heat about 1 inch of neutral oil in a small heavy-bottomed pan over medium-high heat until it reaches 350°F. Fry the shallots in batches for 2 to 3 minutes per batch, until golden brown and crisp. Transfer to a paper-towel-lined plate. Set aside — they’ll crisp up further as they cool.
Build the Sauce and Assemble:
-
Preheat the oven to 375°F (190°C). Lightly grease a 9×13-inch baking dish.
-
Blanch the green beans in a large pot of well-salted boiling water for 4 to 5 minutes, until bright green and barely tender. Drain immediately and transfer to an ice bath for 2 minutes to stop the cooking. Drain again and pat dry.
-
In a large skillet over medium-high heat, melt the butter. Add the sliced cremini mushrooms and cook without stirring for 3 to 4 minutes, until the mushrooms are golden brown on one side. Stir, add the shallots and garlic, and cook for another 3 minutes.
-
Sprinkle the flour over the mushroom mixture and stir to coat. Cook for 1 minute, stirring constantly. Gradually whisk in the milk and vegetable broth, adding it in a slow, steady stream while whisking to prevent lumps. Add the Worcestershire sauce, salt, pepper, and thyme.
-
Cook, stirring frequently, for 3 to 4 minutes, until the sauce has thickened enough to coat the back of a spoon. Remove from heat.
-
Add the blanched green beans to the mushroom sauce and stir to combine. Pour everything into the prepared baking dish.
-
Bake uncovered for 25 to 30 minutes, until the sauce is bubbling throughout and the edges are lightly caramelized. Scatter the crispy fried shallots over the top and serve immediately — the shallots soften quickly, so don’t let this one sit.
6. Sweet Potato Casserole with Brown Sugar Pecan Crumble
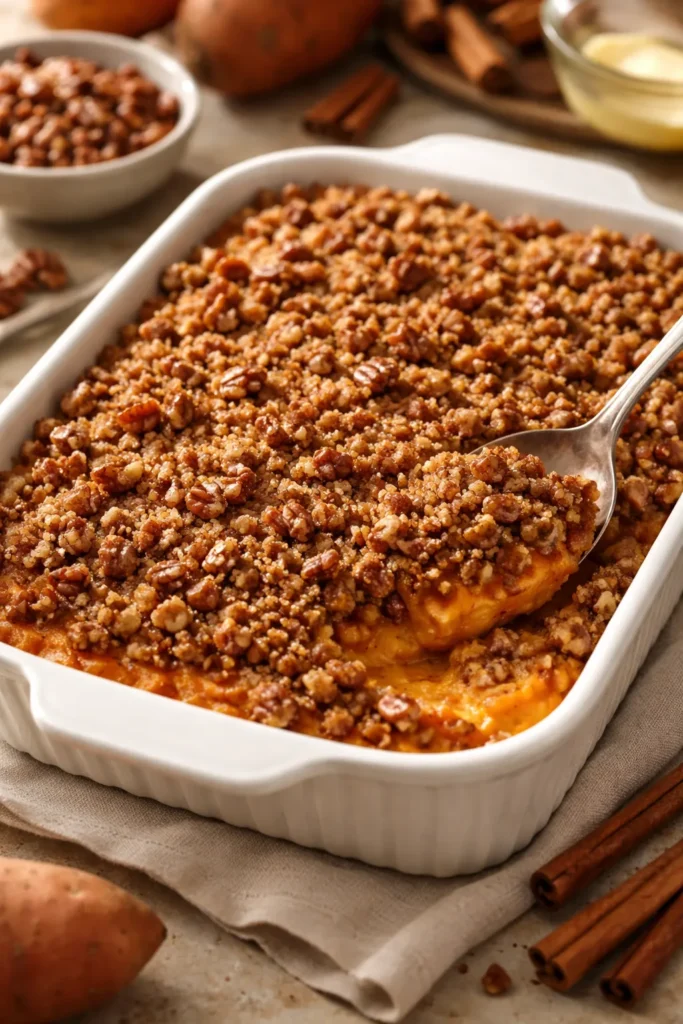
This one occupies a beautiful, unapologetic middle ground between side dish and dessert. The sweet potato base is rich and smooth — similar in texture to a filling but without any eggs — while the brown sugar and pecan crumble on top provides a nutty, caramelized crunch that makes every bite deeply satisfying. It works equally well alongside roast chicken, pork tenderloin, or as the centerpiece of a fully plant-based holiday plate.
Yield: Serves 10 to 12 Prep Time: 20 minutes Cook Time: 40 minutes Total Time: 1 hour Total Time (with roasting sweet potatoes): 1 hour 45 minutes if starting from raw sweet potatoes Difficulty: Beginner — if you use canned sweet potatoes, prep drops to under 10 minutes.
Ingredients:
For the Sweet Potato Base:
- 4 pounds sweet potatoes (about 6 medium), roasted and flesh scooped out (or 2 cans, 29 ounces each, sweet potato puree, drained)
- ⅓ cup unsalted butter, softened
- ¼ cup whole milk or heavy cream
- 3 tablespoons brown sugar (light or dark)
- 1 teaspoon pure vanilla extract
- ½ teaspoon cinnamon
- ¼ teaspoon ground nutmeg
- ½ teaspoon fine salt
For the Pecan Crumble Topping:
- 1 cup rolled oats
- ¾ cup chopped pecans
- ½ cup all-purpose flour
- ½ cup packed brown sugar
- ½ teaspoon cinnamon
- ¼ teaspoon salt
- 5 tablespoons cold unsalted butter, cut into small cubes
Prepare the Sweet Potato Base:
-
If starting from raw sweet potatoes: Preheat the oven to 400°F (205°C). Pierce each sweet potato several times with a fork and place on a foil-lined baking sheet. Roast for 50 to 60 minutes, until completely soft when squeezed. Allow to cool for 10 minutes, then scoop the flesh into a large bowl. Reduce oven to 350°F (175°C).
-
Mash the sweet potato flesh with the softened butter, milk or cream, brown sugar, vanilla extract, cinnamon, nutmeg, and salt. Mash until smooth and no large lumps remain — a hand mixer on low speed makes this faster and more consistent.
-
Grease a 9×13-inch baking dish and spread the sweet potato mixture into an even layer.
Make the Crumble and Bake:
-
In a medium bowl, combine the rolled oats, chopped pecans, flour, brown sugar, cinnamon, and salt. Add the cold butter cubes and use your fingertips to work the butter into the dry ingredients until the mixture resembles coarse, clumping crumbs with pea-sized pieces of butter still visible.
-
Scatter the pecan crumble evenly over the sweet potato layer.
-
Bake at 350°F for 35 to 40 minutes, until the topping is golden brown and fragrant and the sweet potato base is heated through.
-
Rest for 10 minutes before serving. The crumble firms up as it cools, making portions neater.
Make-Ahead Notes
This casserole is one of the best candidates for advance preparation in this entire collection. Prepare and refrigerate the sweet potato layer up to two days in advance, and make the crumble topping (storing it separately in the fridge) up to two days ahead as well. Assemble and bake on the day of serving — you may need to add 5 to 10 minutes to the bake time if starting from cold.
7. Mexican Street Corn Casserole

Elote — the beloved Mexican street food of grilled corn slathered in crema, chili powder, cotija cheese, and lime — translates brilliantly into a baked casserole format. This version brings together sweet corn kernels in a creamy, tangy sauce seasoned with smoked paprika, cumin, and a hit of lime zest. It’s finished with a shower of crumbled cotija and fresh cilantro. Don’t underestimate how well this pairs with roasted chicken or grilled fish — it’s a genuine crowd-stopper.
Yield: Serves 6 to 8 Prep Time: 10 minutes Cook Time: 35 minutes Total Time: 45 minutes Difficulty: Beginner — this is a one-bowl mix-and-bake situation with no complicated steps.
Ingredients:
- 4 cups frozen corn kernels (thawed) or fresh corn cut from 5 to 6 ears
- ½ cup mayonnaise
- ½ cup full-fat sour cream
- 1 cup shredded Monterey Jack cheese, divided
- ½ cup cotija cheese, crumbled and divided (or feta as a substitute)
- 1 teaspoon smoked paprika
- 1 teaspoon ground cumin
- ½ teaspoon chili powder
- Zest and juice of 1 lime
- ½ teaspoon fine salt
- ¼ teaspoon black pepper
- 2 tablespoons unsalted butter, melted
- ½ cup panko breadcrumbs
- Fresh cilantro, chopped, for serving
- Lime wedges, for serving
Mix, Top, and Bake:
-
Preheat the oven to 375°F (190°C). Lightly grease a 9×9-inch or 2-quart baking dish.
-
In a large bowl, combine the corn kernels, mayonnaise, sour cream, ¾ cup of the Monterey Jack cheese, ¼ cup of the cotija, smoked paprika, cumin, chili powder, lime zest, lime juice, salt, and black pepper. Stir until the corn is evenly coated in the creamy sauce.
-
Transfer the corn mixture to the prepared baking dish and spread into an even layer.
-
In a small bowl, toss the panko breadcrumbs with the melted butter until the crumbs are evenly moistened. Stir in the remaining ¼ cup Monterey Jack cheese.
-
Scatter the breadcrumb mixture evenly over the corn filling.
-
Bake for 30 to 35 minutes, until the topping is golden brown and the filling is bubbling around the edges. If the topping browns before the filling bubbles, tent loosely with foil for the final 10 minutes.
-
Remove from the oven. Immediately scatter the remaining cotija cheese over the top, followed by fresh chopped cilantro. Serve with lime wedges on the side for an extra squeeze of brightness.
Building the Elote Flavor Profile
The smoked paprika is what gives this casserole its subtle depth — it mimics the char you’d get from grilling corn directly on a flame. If you can find chipotle chili powder, swap it in for the regular chili powder for a smokier, spicier kick that pairs well with the lime.
Cotija is worth seeking out at a Latin grocery store or the specialty cheese section. It’s saltier and drier than feta, and it crumbles beautifully over the top of a hot casserole without melting into a puddle. Don’t substitute mozzarella here — it would mute the bright, tangy quality that makes this dish stand out.
8. Zucchini, Summer Squash, and Corn Casserole

This is the casserole that puts summer produce at the center of the plate without apologizing for it. Zucchini and yellow summer squash are layered with sweet corn in a light, herbed cream sauce, then topped with a Parmesan-panko crust that bakes to a satisfying crunch. It’s lighter than most casseroles on this list — fresher tasting, more vegetable-forward — and it pairs well with anything from grilled salmon to roast lamb.
Yield: Serves 8 Prep Time: 20 minutes Cook Time: 35 minutes Total Time: 55 minutes Difficulty: Beginner — the key technique is salting and draining the zucchini beforehand, which takes 15 minutes of passive time.
Ingredients:
- 2 medium zucchini (about 1 pound), sliced into ¼-inch rounds
- 2 medium yellow summer squash (about 1 pound), sliced into ¼-inch rounds
- 1½ cups fresh or frozen corn kernels
- 1 teaspoon fine salt (for salting the zucchini, not the sauce)
- 1 medium yellow onion, diced
- 3 garlic cloves, minced
- 2 tablespoons olive oil
- ½ cup heavy cream
- ½ cup vegetable broth
- 1 tablespoon fresh thyme leaves (or ½ teaspoon dried)
- 1 tablespoon fresh basil, chiffonade (or ½ teaspoon dried)
- ½ teaspoon fine salt (for the sauce)
- ¼ teaspoon black pepper
- ¾ cup freshly grated Parmesan cheese, divided
- ½ cup panko breadcrumbs
- 1 tablespoon olive oil or melted butter
Salt and Drain the Zucchini:
-
Place the sliced zucchini and yellow squash in a colander set over the sink or a large bowl. Toss with 1 teaspoon of salt and allow to sit for 15 minutes — this draws out excess moisture and prevents the casserole from becoming watery. After 15 minutes, pat the squash slices thoroughly dry with paper towels.
-
Preheat the oven to 375°F (190°C). Lightly oil a 9×13-inch baking dish.
Build the Sauce and Assemble:
-
Heat 2 tablespoons of olive oil in a large skillet over medium heat. Add the diced onion and cook for 4 to 5 minutes, until softened. Add the minced garlic and cook for 1 minute more, until fragrant.
-
Add the heavy cream, vegetable broth, thyme, basil, salt, and pepper to the skillet. Bring to a gentle simmer and cook for 3 minutes. Remove from heat and stir in ¼ cup of the Parmesan.
-
Arrange the drained squash slices and corn kernels in the prepared baking dish, overlapping the rounds in a relatively even layer. Pour the cream sauce over the vegetables, tilting the dish to encourage it to flow between the slices.
Top and Bake:
-
In a small bowl, combine the panko breadcrumbs, remaining ½ cup Parmesan, and 1 tablespoon of olive oil or melted butter. Toss to coat. Scatter the topping evenly over the casserole.
-
Bake for 30 to 35 minutes, until the topping is golden and crisp, the cream sauce is bubbling, and a fork slides easily through the squash without resistance.
-
Allow to rest for 5 minutes. Garnish with additional fresh basil or thyme if desired, and serve warm.
Tips for Making Every Veggie Casserole Better
Eight recipes in, certain patterns become clear. These are the principles that separate a casserole worth repeating from one that gets made once and forgotten.
Drain everything. This deserves emphasis because it’s the single most common source of casserole failure. Zucchini, squash, broccoli, and frozen vegetables all carry significant internal moisture that releases during baking. Salt and drain squash before using it. Thaw and press frozen vegetables. Drain canned vegetables completely. Ten extra minutes of draining translates into a casserole that holds together instead of pooling liquid on the plate.
Season in layers, not just at the end. Season the vegetables before they go into the dish, season the sauce while you build it, and taste the combined filling before it goes into the oven. A casserole that tastes slightly under-seasoned raw will taste noticeably flat after baking.
Don’t skip the resting time. Every casserole on this list improves from 5 to 10 minutes of resting after it comes out of the oven. The filling reabsorbs liquid, the cheese firms slightly, and the portions hold together cleanly. Cutting into a casserole straight from the oven is a recipe for a sloppy, watery plate.
Add the crunchy topping uncovered for the final stretch. Most casseroles benefit from covered baking for the majority of the cook time — this traps steam and ensures the vegetables cook through — followed by uncovered time to brown and crisp the topping. If your topping isn’t golden after the recommended time, run the dish under the broiler for 2 to 3 minutes. Keep a close eye on it; cracker and breadcrumb toppings go from golden to burned quickly.
Cheese quality matters. Block cheese that you shred yourself melts more evenly and produces a stretchier, glossier result than pre-shredded bags. The coating agents in pre-shredded cheese don’t melt cleanly, which gives the top of the casserole a slightly grainy texture. It’s a small upgrade that makes a visible difference.
Storing, Reheating, and Freezing Veggie Casseroles
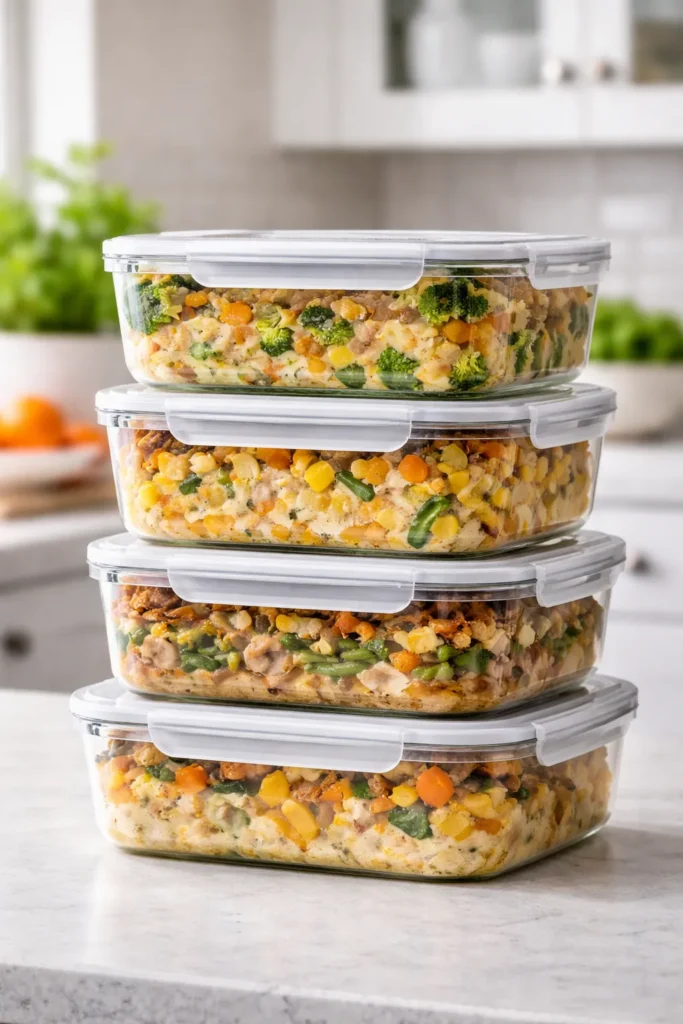
Most casseroles keep well for 3 to 4 days stored in an airtight container in the refrigerator. For casseroles baked in ceramic or glass dishes, cover tightly with foil or plastic wrap and refrigerate directly in the dish.
Reheating in the oven at 325°F (165°C) for 15 to 20 minutes produces the best results — it rewarms the filling evenly and can re-crisp the topping. The microwave is faster but tends to soften the crunchy topping. If you’re reheating in the microwave, leave the dish uncovered to allow steam to escape and prevent the topping from turning soggy.
For freezing, there are a few important caveats. Casseroles built with cream-based sauces freeze and reheat reasonably well. Casseroles containing high-moisture vegetables like zucchini or squash can develop excess water upon thawing — these are better enjoyed fresh or within a few days from the refrigerator. If you plan to freeze a casserole, leave the cracker or breadcrumb topping off until you’re ready to bake or reheat it. Add the topping fresh after thawing and bake as directed.
Most casseroles can be assembled up to 24 hours in advance, covered, and refrigerated unbaked. Add 5 to 10 minutes to the bake time if starting from cold, and check the center temperature or filling bubble before pulling from the oven.
Final Thoughts

Veggie casseroles are one of the most adaptable, forgiving, and crowd-pleasing categories in the entire repertoire of home cooking. The eight recipes here span a wide range — from the rich, layered indulgence of the broccoli and cauliflower casserole to the bright, summery freshness of the zucchini and corn bake — but they all share the same fundamental appeal: vegetables made deeply satisfying through technique, seasoning, and the right combination of textures.
The single most important habit to build is draining your vegetables before they go into the dish. Master that, and the rest of the process practically takes care of itself.
Don’t be afraid to swap vegetables based on what your family actually eats, what’s in the freezer, or what looks good at the market. These recipes are frameworks, not rigid formulas. A green bean casserole made with asparagus is still a green bean casserole in spirit, and a squash casserole that uses whatever summer vegetable you have too many of is a better use of your ingredients than following a recipe to the letter with produce you had to drag yourself to the store for.
Make one of these this week. Chances are, it won’t be the last time.