Ask most home cooks what they picture when they hear “French cooking,” and the answers come fast: complicated sauces, techniques with unpronounceable names, kitchens that require a brigade of trained chefs just to keep the butter from burning. It’s a reputation that’s stuck around for decades, and honestly, it’s mostly wrong.
Here’s what French cuisine actually is, at its core: good ingredients, treated with patience and a little technique. That’s it. The French grandmother who made the most extraordinary boeuf bourguignon you’ve ever tasted probably did it in a tiny kitchen with basic equipment and no culinary school diploma. The magic wasn’t in the complexity — it was in the process.
The eight dishes here have all been written off as “too hard” or “too fancy” by home cooks who’ve never attempted them. Some of them have a reputation that’s wildly out of proportion to how much effort they actually require. Others just need a single technique demystified — a how-to on caramelizing onions properly, or understanding why bone-in chicken pieces work better than breasts in a braise. Once you know the why, the how becomes straightforward.
None of these dishes require professional training. What they do require is a little time, quality ingredients, and the willingness to trust the process. Start with one, and don’t be surprised if it becomes a regular in your rotation.
Table of Contents
- 1. French Onion Soup
- Why the Technique Is Simpler Than It Sounds
- What to Know
- 2. Croque Monsieur
- Building the Sandwich Like a French Bistro
- What Makes It Different From Regular Grilled Cheese
- 3. Coq au Vin
- Choosing Your Chicken Pieces
- The Red Wine Question
- What to Know
- 4. Ratatouille
- The Simple Home Version
- How to Use It
- What to Know
- 5. Sole Meunière
- How the Lemon Butter Sauce Works
- Choosing the Right Fish
- What to Know
- 6. Beef Bourguignon
- The Beef Cut Matters More Than Anything
- Simplifying Without Sacrificing Quality
- What to Know
- 7. French Crêpes
- Why the Resting Step Is Non-Negotiable
- The Pan and the Pour
- Filling Ideas
- 8. Crème Brûlée
- Making the Custard Without Fear
- The Torch Technique
- What to Know
- Why French Home Cooking Clicks Once You Try It
- Final Thoughts
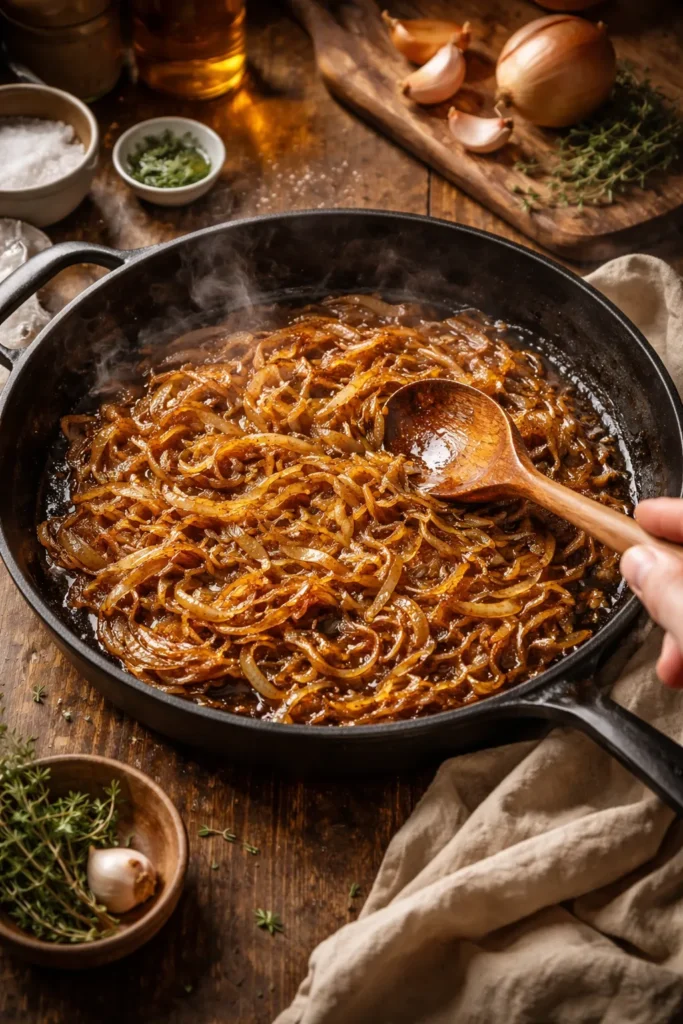
1. French Onion Soup
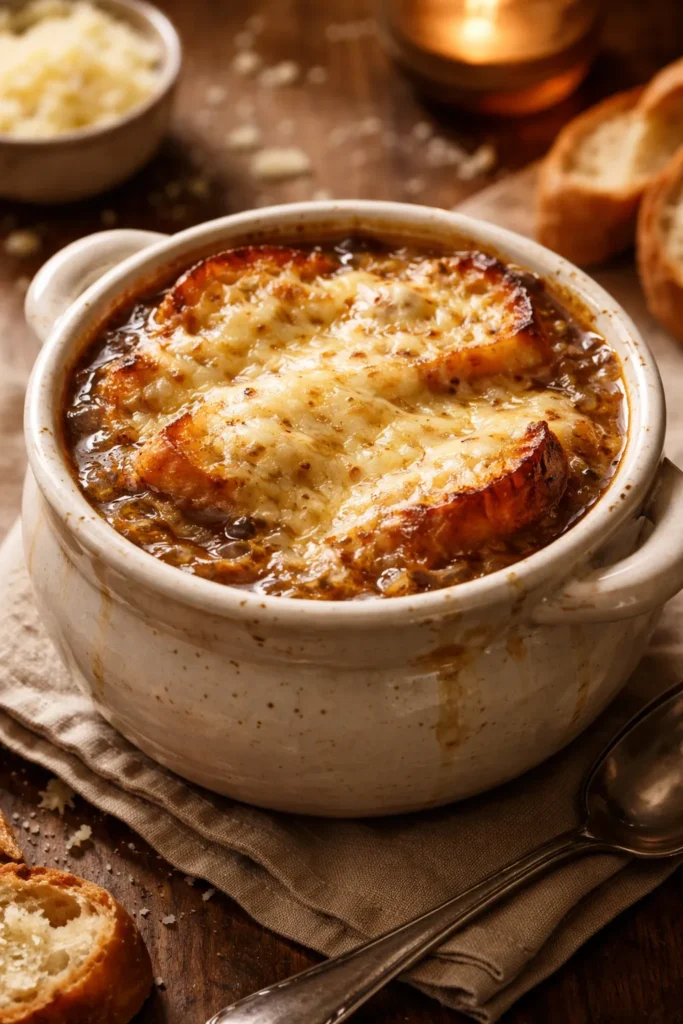
There’s a persistent myth that French onion soup is all-day work. People see “caramelized onions” and assume hours of standing over a stove, stirring constantly, terrified of burning. The truth? The onions take about 45 to 60 minutes — but almost none of that time requires your attention.
You add sliced onions to a heavy pot with butter and a pinch of salt, turn the heat to medium-low, and let time do the work. Stir every 10 minutes or so. Wander off. Make a phone call. The onions will slowly lose their sharpness, turn golden, then amber, then a deep, jammy mahogany that smells like nothing else in the world. That’s when the flavor is ready.
Why the Technique Is Simpler Than It Sounds
The only thing that trips people up is rushing. High heat caramelizes the outside of the onions before the sugars inside have time to develop fully — you get bitterness instead of sweetness. Medium-low heat, a heavy-bottomed pot (a Dutch oven is perfect), and patience are the three tools you actually need.
Once the onions are caramelized, the rest of the recipe is genuinely quick. A splash of dry white wine or sherry deglazes the pot. Good beef stock goes in. Ladle into oven-safe bowls, lay a thick slice of toasted baguette on top, pile on Gruyère, and broil until the cheese is bubbling and spotted with brown. Done.
What to Know
- Use a mix of yellow and sweet onions — yellow for depth, sweet onions for natural sugar
- Don’t skimp on the stock; this is one of those dishes where quality broth makes or breaks the final flavor
- The soup can be made completely in advance and reheated — only add the bread and cheese right before broiling
- Gruyère is the classic choice, but Comté or Emmental work beautifully and melt the same way
Worth knowing: A small splash of whiskey or cognac added along with the stock is a French bistro trick that adds remarkable depth without tasting boozy.
2. Croque Monsieur

If you’ve ever made a grilled cheese sandwich, you’re already most of the way to a croque monsieur. The difference is béchamel — a simple white sauce made from butter, flour, and milk — and that’s where most people get nervous. Béchamel has a reputation for being finicky and prone to lumps.
It isn’t. A proper béchamel takes about 8 minutes and uses three ingredients. The trick is adding warm milk to the butter-flour roux gradually, whisking constantly. That’s the entire secret. Do it in stages and whisk — no lumps, every time.
Building the Sandwich Like a French Bistro
A croque monsieur starts with good sandwich bread — something with a little structure, like a white Pullman loaf or thick slices of pain de mie. Spread Dijon mustard on the inside faces. Layer ham (ideally a good quality cooked ham, sliced thin) and Gruyère cheese. Close the sandwich.
Spread béchamel on the outside of the top slice, then top it with more Gruyère. Bake at 400°F (200°C) until the cheese is melted and golden — about 10 minutes. The béchamel on the outside creates this extraordinary crust that’s crisp at the edges, creamy in the middle, and nothing like what you’d get from pan-frying alone.
What Makes It Different From Regular Grilled Cheese
- The béchamel adds a rich, savory creaminess that ordinary grilled cheese can’t match
- Gruyère has a nutty, complex flavor that melts into long, satisfying strands
- Dijon mustard cuts through the richness with just the right amount of sharpness
- Add a fried or poached egg on top and it becomes a croque madame — arguably even better
Pro tip: Make a double batch of béchamel and keep it in the fridge. It’ll last three days and makes dinner decisions much easier on a Wednesday night.
3. Coq au Vin

The name is theatrical. The dish is a chicken braise — and if you’ve ever made a pot roast, you already understand the fundamental concept. Meat goes in liquid, heat goes on low, time does the rest. Coq au vin follows that exact same logic.
What makes it French — and extraordinary — is what goes into that liquid: red wine, lardons (small cubes of smoky bacon or pancetta), pearl onions, mushrooms, garlic, thyme, and a bay leaf. As the chicken slowly braises, it absorbs all of that flavor. The wine reduces and concentrates. The sauce becomes this deep, glossy, intoxicating thing that absolutely begs for a piece of crusty bread to soak it up.
Choosing Your Chicken Pieces
Use bone-in, skin-on thighs and drumsticks. This is non-negotiable if you want the dish to work the way it should. Breast meat dries out during the long braise and won’t contribute the collagen and fat that make the sauce rich and silky. Dark meat is built for this — it stays juicy at lower temperatures and actually improves with cooking time.
Sear the chicken pieces skin-side down in a hot Dutch oven until deeply golden before adding anything else. That step takes about 4 minutes per batch and creates a fond — the browned bits stuck to the bottom of the pot — that becomes the flavor foundation of the entire sauce.
The Red Wine Question
Use something you’d actually drink, but don’t overthink it. A Burgundy or Côtes du Rhône is traditional, but any decent dry red wine works. Half a bottle is the usual amount. The wine cooks down significantly, so any harsh notes mellow out during the braise.
What to Know
- Brown the chicken in batches — overcrowding the pot steams instead of sears, and you’ll lose that golden crust
- The dish tastes better the next day, making it ideal for dinner parties; make it the night before and reheat gently
- Pearl onions can be swapped for shallots if they’re easier to find — the flavor is similarly sweet and mild
- Serve with mashed potatoes, egg noodles, or simply a good baguette
Pro tip: Stir a tablespoon of tomato paste in with the vegetables before adding the wine — it adds body and a subtle depth that rounds out the sauce beautifully.
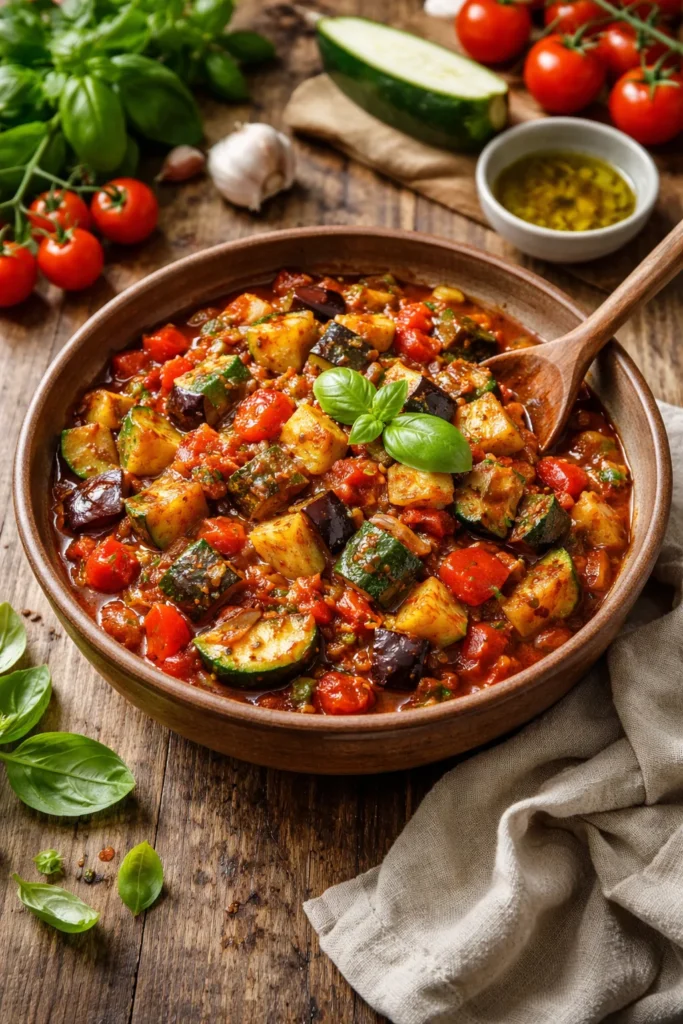
4. Ratatouille
Most people who’ve seen the Pixar film have a vague sense of what ratatouille is — a Provençal vegetable dish with summer produce — but they imagine it requires elaborate knife skills and restaurant-level precision to achieve those beautiful, perfectly overlapping vegetable rounds.
Here’s the thing: that’s confit bayaldi, a specific presentation style. Authentic French home-cooked ratatouille involves chopping your vegetables and tossing them together. No mandoline. No 47 paper-thin slices of zucchini arranged in a concentric spiral. Real French grandmothers made this dish on weeknights, not for magazine shoots.
The Simple Home Version
Dice eggplant, zucchini, red peppers, and onion into roughly 1-inch chunks. Sauté them in olive oil, either all together or in batches if you prefer more distinct texture. Add crushed tomatoes, garlic, herbes de Provence, and a splash of olive oil. Simmer, covered, for 25 to 30 minutes until everything is tender and the flavors have melded. That’s ratatouille.
The only technique worth mentioning: salt your eggplant cubes and let them sit for 20 minutes before cooking, then pat them dry. This draws out excess moisture and prevents the finished dish from becoming watery. Skip this step and you’ll notice — do it and the eggplant will be silky rather than soggy.
How to Use It
- Serve as a side dish alongside grilled chicken, fish, or lamb chops
- Spoon it over pasta with a little goat cheese crumbled on top
- Eat it at room temperature the next day as a room-temperature salad
- Use it as a topping for toasted baguette slices — essentially a vegetable bruschetta
What to Know
- This dish improves significantly with a day’s rest in the fridge; the flavors deepen and integrate
- Fresh basil added at the very end (not during cooking) keeps it bright and fragrant
- Quality olive oil matters here — this is Provençal cooking, and the oil is part of the flavor
Worth knowing: A small pinch of smoked paprika added along with the herbes de Provence adds a subtle smokiness that ties the vegetables together in a way that’s hard to pinpoint but unmistakably good.
5. Sole Meunière

If coq au vin is the dish people think will take all day, sole meunière is the one people assume requires professional-level fish cookery. Both assumptions are wrong in opposite directions. Sole meunière takes 15 minutes. Start to finish. Including the sauce.
The dish is nothing more than sole fillets dusted in flour, sautéed in clarified butter, and finished with a lemon-butter sauce made in the same pan. Julia Child famously called the sole meunière she ate in Rouen the most exciting meal of her life — a dish that ignited her entire relationship with French cooking. And it’s made with four ingredients.
How the Lemon Butter Sauce Works
After the fish comes out of the pan, you pour away any dark butter and start fresh with about 3 tablespoons of cold, unsalted butter. Let it foam and turn a pale golden color — not dark brown — then squeeze in fresh lemon juice and swirl the pan. The cold butter and lemon hit the hot pan and create an emulsified sauce that’s bright, rich, and slightly nutty from the butter. Pour it over the fish immediately.
This sauce takes 90 seconds. That’s the whole trick. Cold butter, lemon juice, a hot pan, and speed.
Choosing the Right Fish
Dover sole is traditional and yields the most delicate, elegant result. It’s not always easy to find or inexpensive. Good substitutes that cook the same way:
- Flounder — mild, thin fillets that work beautifully with the flour-butter method
- Tilapia — more accessible and still produces a good result
- Lemon sole — available at most good fishmongers and closer to the original in flavor
- Thin cod fillets — slightly heartier but still excellent with lemon butter
What to Know
- Pat the fish completely dry before flouring — moisture is the enemy of a golden, crisp crust
- The flour coating should be very light, just a thin dusting shaken off before the fish hits the pan
- Use a pan large enough that the fillets don’t touch; crowding causes steaming instead of searing
Pro tip: Add a few capers to the lemon butter sauce right at the end. It’s a small deviation from the classic but adds a briny pop that cuts through the richness perfectly.
6. Beef Bourguignon
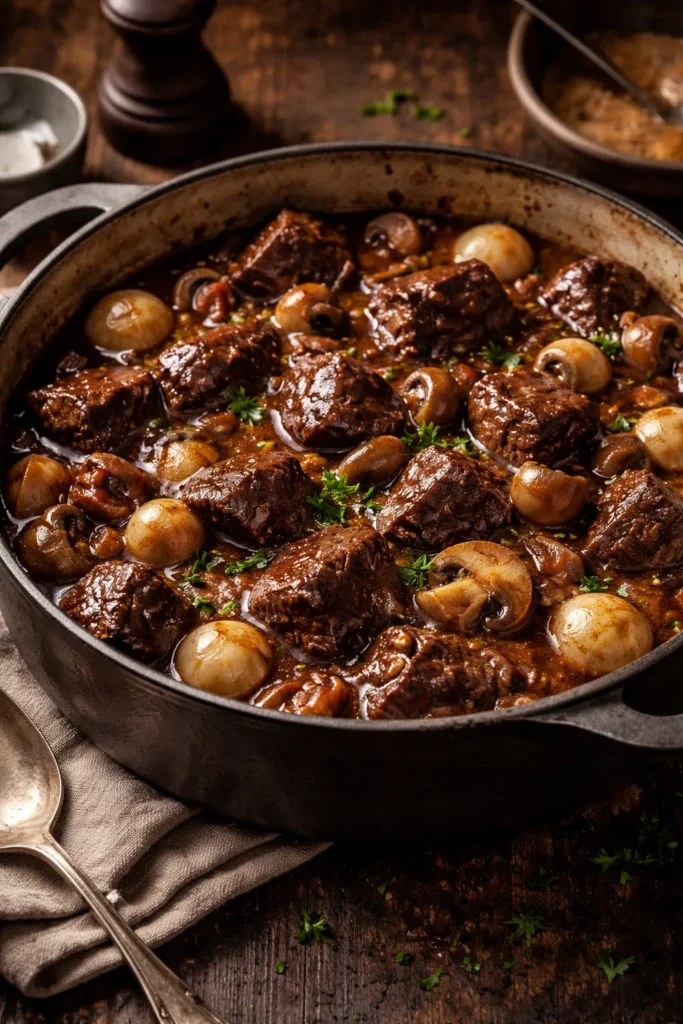
Here’s a dish with a reputation so grand that even its name — bœuf bourguignon — sounds like it should only be whispered in reverence. It’s braised beef. Delicious, deeply flavored, meltingly tender braised beef. Made from cheaper cuts of meat that become extraordinary precisely because of the long, slow cooking.
The reason it intimidates people is the wine component and the multi-step process: searing the beef, cooking the vegetables separately, making the sauce. None of these steps are difficult — they just require time spread across an afternoon. And the payoff is a dish that gets better with time. Make it on Sunday. Eat it on Monday. It will be better.
The Beef Cut Matters More Than Anything
Chuck roast is the right choice. Cut into 2-inch cubes, it has the right balance of fat and collagen to become tender and silky during a 2 to 3 hour braise. Stew beef from the grocery store is often chuck already, just cut smaller. Avoid anything labeled “lean” — the fat is what makes this dish extraordinary.
Don’t skip the searing step. Brown the beef in batches in a hot Dutch oven until deeply colored on at least two sides. This takes patience — each batch needs 3 to 4 minutes without moving the meat. The color you build in this step directly translates to flavor in the final sauce.
Simplifying Without Sacrificing Quality
The pearl onions and mushrooms are traditionally cooked separately, which does produce the best result. But if it’s your first time making this dish, cook them directly in the braise during the last 30 minutes. The flavor will be slightly different but still absolutely wonderful.
The wine should be a Burgundy or a good-quality Pinot Noir — the same grape region that gives the dish its name. Use the whole bottle. Yes, the whole bottle.
What to Know
- A Dutch oven is the ideal vessel; if you don’t have one, a deep, oven-safe casserole with a tight lid works
- The braise happens at a low 325°F (165°C) — this low, gentle heat is what transforms tough collagen into silky gelatin
- The finished sauce should coat the back of a spoon; if it’s too thin after braising, remove the beef and reduce the liquid on the stovetop for 10 minutes
- Serve with mashed potatoes, egg noodles, or crusty bread — something to absorb the sauce
Worth knowing: A small square of dark chocolate (70% cacao or higher) stirred into the sauce at the very end is a classic French technique that adds a subtle, velvety depth without tasting remotely like dessert.
7. French Crêpes

Crêpes look like they require skill. The thin, delicate pancake that spreads across the pan in a perfect circle — the casual flick of the wrist from a Parisian street vendor — seems like something that takes years to master. It doesn’t. What it takes is a rested batter and two or three practice crêpes to warm up the pan.
The batter itself is almost laughably simple. In fact, a French grandmother’s formula that’s been passed down for generations is: 1 cup of flour, 2 cups of milk, 3 large eggs. Whisk together, add a pinch of salt and a tablespoon of melted butter, and rest the batter in the fridge for at least 30 minutes (or up to overnight). That’s the full ingredient list.
Why the Resting Step Is Non-Negotiable
When the batter rests, the gluten in the flour relaxes. Batter made with tense, over-developed gluten produces rubbery, uneven crêpes that don’t spread properly. Rested batter flows freely and thin, giving you that characteristic delicate texture. Thirty minutes makes a measurable difference. Overnight resting makes them even better.
The first crêpe is almost always ugly — consider it a test crêpe and eat it immediately. After that first one, the pan is properly seasoned and at the right temperature, and every crêpe after it will be beautiful.
The Pan and the Pour
A non-stick skillet or crêpe pan works best. Heat it over medium heat, brush lightly with melted butter or a neutral oil, then pour in about 3 tablespoons of batter. Immediately tilt and rotate the pan in a circular motion to spread the batter into a thin, even round. It sets within 60 to 90 seconds. Flip with a thin spatula — the underside should be pale gold with small brown spots — and cook for another 30 seconds.
Filling Ideas
Sweet crêpes:
- Salted butter and granulated sugar (the Parisian classic)
- Nutella and sliced banana
- Fresh strawberries with whipped cream
- Lemon juice and powdered sugar
Savory crêpes (galettes):
- Ham, Gruyère, and a fried egg
- Sautéed mushrooms and crème fraîche
- Smoked salmon and cream cheese with fresh dill
Pro tip: Stack finished crêpes between sheets of parchment paper — they won’t stick together and can be kept warm in a low oven for up to 30 minutes while you work through the batch.
8. Crème Brûlée
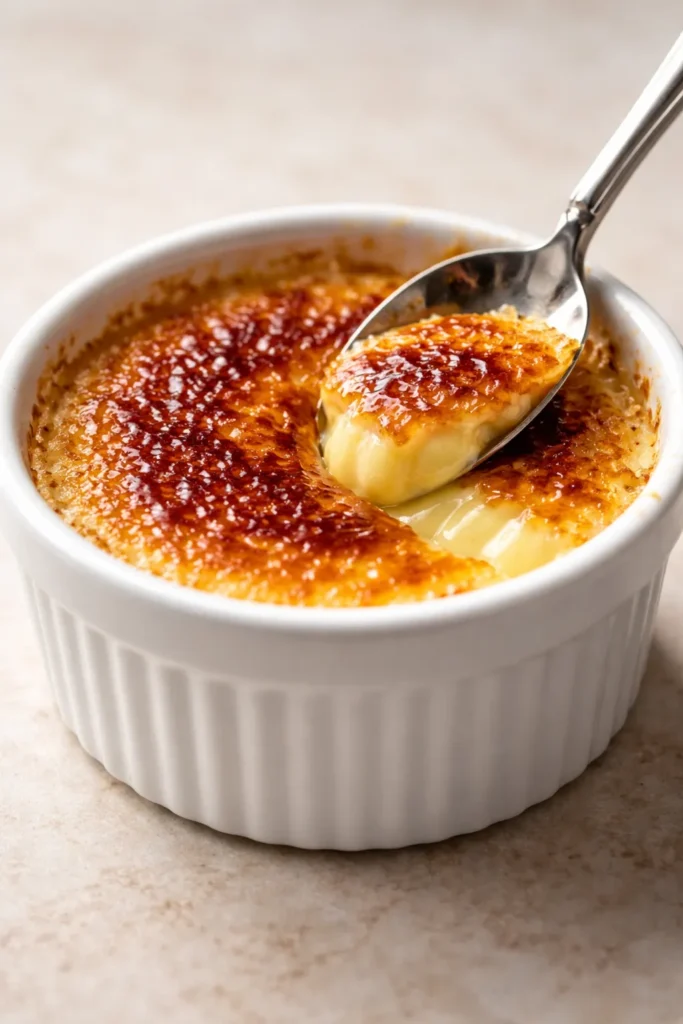
Crème brûlée might be the single most intimidating French dessert for home cooks. The silky custard. The perfect caramelized crust. The dramatic crack of a spoon breaking through. It feels like the kind of thing that belongs in a white-tablecloth restaurant, not a home kitchen.
But crème brûlée is, at its heart, baked cream and egg yolks. Four ingredients: heavy cream, egg yolks, sugar, and vanilla. The custard takes about 10 minutes to prepare. The oven does the rest. And the famous brûléed top? It takes a kitchen torch and about 20 seconds per ramekin.
Making the Custard Without Fear
The only potential pitfall is curdling — cooking the eggs too fast when you add the hot cream. This is called tempering, and the fix is simple: pour the hot cream into the egg yolks slowly, whisking constantly. Add it in a thin, steady stream at first, incorporating the heat gradually before adding the rest. Do this and the custard will be perfectly smooth every time.
Pour the custard into 4-ounce ramekins, set them in a deep baking dish, and pour hot water into the dish until it reaches halfway up the sides of the ramekins. This water bath (called a bain-marie) insulates the custard from direct oven heat, ensuring it sets gently and evenly without cracking or curdling.
The Torch Technique
After the custard is fully chilled (at least 2 hours, or overnight), sprinkle about a teaspoon of granulated sugar evenly over the top of each one. Hold the torch about 2 inches from the surface and move it in slow, steady circles. The sugar will bubble, caramelize, and harden into a brittle amber shell within 15 to 20 seconds per ramekin.
The double-brûlée technique — championed by professional pastry chefs — involves caramelizing the sugar once, letting it harden, then adding a second thin layer of sugar and caramelizing again. The result is an exceptionally thick, crackling crust that holds up far longer before softening. It’s worth doing every time.
What to Know
- Use real vanilla beans if you can — split and scrape the seeds directly into the cream before heating; the flavor difference is substantial
- Bake at a low 325°F (165°C) until the custard is just barely set at the edges and still has a gentle wobble in the center — like Jell-O, not liquid
- Chilling overnight is ideal; the texture becomes even silkier after a full night in the fridge
- Sugar for brûléeing: superfine sugar caramelizes more evenly than regular granulated sugar, though either will work
Pro tip: If you don’t own a kitchen torch, you can broil the ramekins — set them on the highest rack under the oven broiler, watching closely for 2 to 3 minutes. The result isn’t quite as precise, but it absolutely works.
Why French Home Cooking Clicks Once You Try It
There’s a reason these dishes have endured for generations — not because they’re complicated, but because they’re built on techniques that reliably produce extraordinary results. Caramelization, braising, emulsification, gentle heat: these are methods, not mysteries.
The biggest mental shift is understanding that time and patience are the main ingredients in most French classics. Onions caramelize low and slow. Beef bourguignon braises for hours. Crème brûlée chills overnight. The cook’s active involvement in each of these dishes is actually quite short — it’s just spread across a longer window.
Start with whichever dish here sounds most appealing to you, and trust that the first attempt will teach you more than any description can. French cooking tends to click that way — once you feel what properly caramelized onions smell like, or see how a crêpe batter flows when it’s rested and ready, the recipe becomes a part of how you cook, not just something you follow step by step.
French cuisine doesn’t belong to restaurants or culinary schools. It belongs to anyone willing to stand at a stove, taste as they go, and give the food a little time.
Final Thoughts
Of these eight dishes, none of them require special equipment beyond what most home kitchens already have — a Dutch oven, a skillet, a few ramekins. None of them demand ingredients that are impossible to source. And not one of them was originally created by or for professional chefs. They came from home kitchens, farmhouses, and bistros where feeding people well was the only goal.
The hardest part of any of these dishes is genuinely just starting. Pick one — French onion soup if you want something forgiving and deeply satisfying, crêpes if you want to impress someone on a Sunday morning, or beef bourguignon if you have an afternoon to fill and want something that will make your kitchen smell extraordinary.
Take your time, use good ingredients, and don’t be afraid of the butter. That’s as French as it gets.