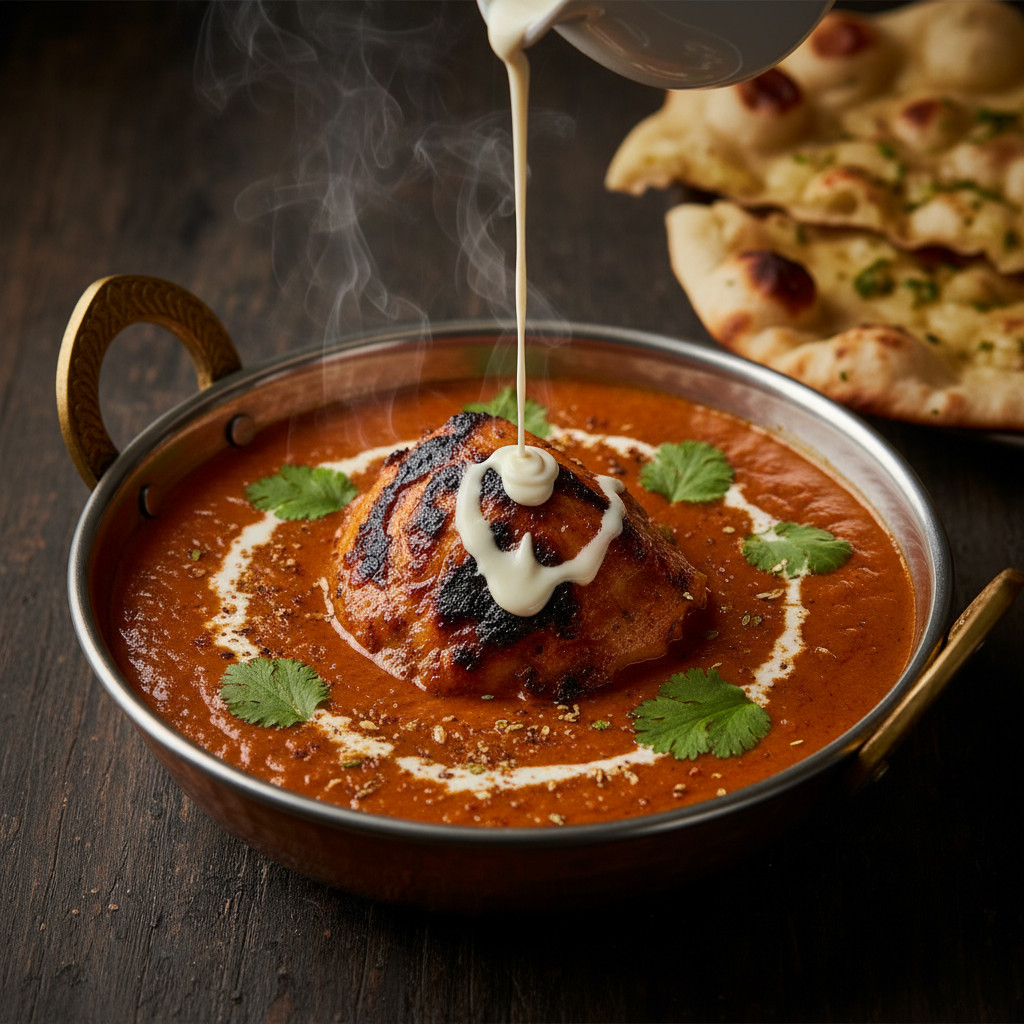
Few dishes spark as much passionate debate — or as much instant comfort — as butter chicken and chicken tikka masala. Ask ten people which one they prefer and you’ll get ten different answers, usually accompanied by a strong opinion about which restaurant does it best. But here’s what most home cooks don’t realize: both dishes are genuinely achievable in your own kitchen, and the version you make yourself can outshine the takeout version in almost every way.
The secret isn’t some rare ingredient or professional equipment. It’s understanding why each component works the way it does — the marinade science, the fat choices, the spice sequencing — so you can make confident decisions at every step. Whether you want the silky, subtly sweet warmth of butter chicken or the bolder, chunkier punch of tikka masala, these two dishes share enough DNA that mastering one makes the other click into place almost automatically.
Both dishes center on marinated, char-cooked chicken finished in a deeply spiced tomato-and-cream sauce. Yet the differences between them — in spice level, sauce texture, sweetness, and fat base — are meaningful enough that they serve completely different moods. What follows are eight essential techniques and insights that apply to both, drawn from years of testing and the collective wisdom of some of the most authoritative Indian cooking resources available.
Table of Contents
- 1. The Yogurt Marinade That Transforms Cheap Chicken Into Something Extraordinary
- How Long to Marinate
- Why Chicken Thighs Are the Right Call
- 2. Achieving Real Char Without a Tandoor Oven in Your Kitchen
- The Cast Iron Skillet Method
- Why the Char Matters Beyond Flavor
- 3. Building a Masala Sauce That Actually Develops Flavor
- Adding Spices at the Right Moment
- Tomato Selection Changes Everything
- 4. The Critical Difference Between Butter Chicken and Tikka Masala Sauce
- The Onion Question
- Fat Base: Butter vs. Oil vs. Ghee
- 5. Cream, Cashew Paste, or Coconut Milk: The Right Richness for Each Dish
- The Coconut Milk Option
- When to Add the Cream
- 6. Kashmiri Chili and Kasuri Methi: Two Ingredients That Change Everything
- Kasuri Methi: The Secret the Recipes Always Mention Last
- Garam Masala: Buy Fresh, Store Well
- 7. The One-Pan Shortcut That Doesn’t Sacrifice Flavor
- Building the Sauce in the Same Pan
- 8. Storage, Make-Ahead Strategies, and Why Leftovers Are Even Better
- Freezing Without Losing Texture
- Portioning for Meal Planning
- Serving Suggestions That Complete the Meal
- Variations Worth Trying Once You’ve Mastered the Original
- Final Thoughts
1. The Yogurt Marinade That Transforms Cheap Chicken Into Something Extraordinary
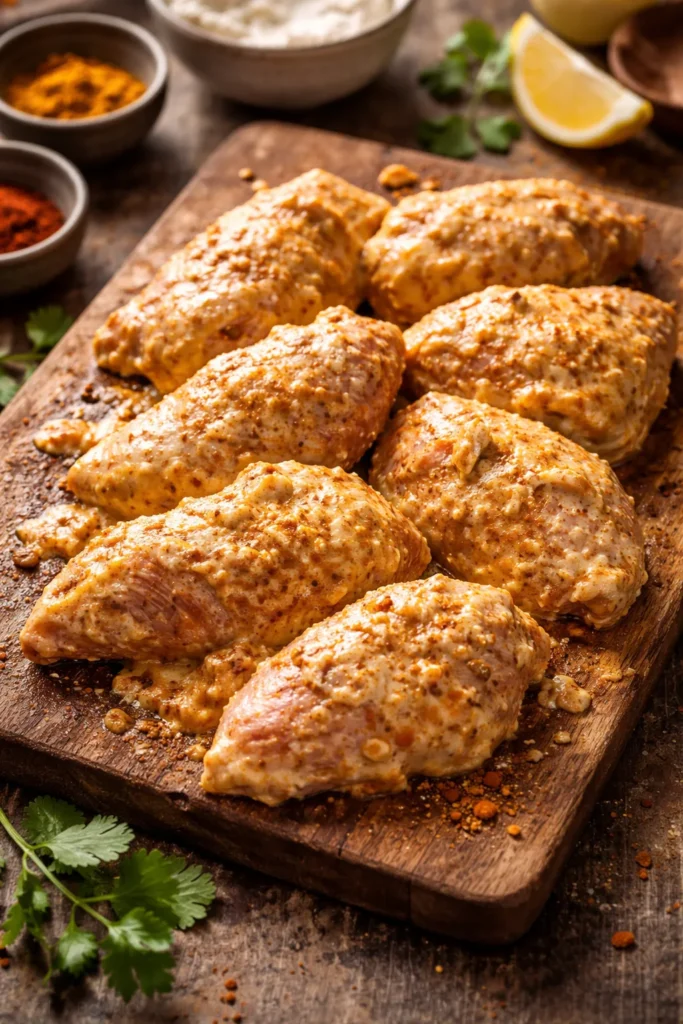
The marinade is where both butter chicken and tikka masala begin, and it does more work than most people give it credit for. Yogurt is the anchor ingredient, and its role is threefold: it tenderizes the meat through its mild acidity, it forms a protective coating that keeps the chicken from drying out under intense broiler or grill heat, and it carries the spices deep into the meat’s surface so every bite is fully seasoned — not just the outside.
The single most important variable in your marinade is the yogurt’s consistency. Runny, thin yogurt is the enemy here. When you place yogurt-coated chicken into a hot pan or under a broiler, watery yogurt drains off immediately, taking all the spices with it and leaving you with steamed, pale chicken sitting in a puddle of liquid. Greek yogurt or strained yogurt (called hung curd in Indian cooking) is thick enough to cling. It forms a flavorful crust as it cooks rather than running off.
For butter chicken, the marinade tends toward warmth and roundness — garam masala, paprika, a whisper of cayenne, ginger-garlic paste, and a squeeze of lime or lemon. Tikka masala’s marinade pushes harder on the heat and smokiness, often adding Kashmiri red chili powder for a vivid red-orange color without excessive burn.
How Long to Marinate
Minimum four hours. Eight hours is the sweet spot. Forty-eight hours in the fridge, if you plan ahead, produces chicken that is almost impossibly juicy and deeply seasoned all the way through.
If you’re genuinely pressed for time, three hours will work for chicken thighs but may leave breasts a little under-seasoned at the center. Anything less than two hours and you’re essentially just coating the surface — not a disaster, but a missed opportunity.
Why Chicken Thighs Are the Right Call
Boneless, skinless chicken thighs contain more intramuscular fat than breasts, which means they stay moist even when they hit the char. They also absorb marinade more readily and forgive overcooking better. Chef Floyd Cardoz was direct on this point when demonstrating his version of the dish: “They just have more flavor.” That’s not preference — it’s fat content, and fat carries flavor.
Chicken breasts work, but they require at minimum eight hours of marination and need to come off the heat the moment they hit 165°F (74°C). Pull them even a minute late and you’re chewing through something dry and disappointing.
Pro tip: Pat the chicken dry with paper towels before adding marinade. Any surface moisture dilutes the marinade and creates steam instead of char when the chicken hits high heat.
2. Achieving Real Char Without a Tandoor Oven in Your Kitchen

A traditional tandoor reaches temperatures of around 480–900°F (250–480°C). Your home oven maxes out at roughly 500–550°F with the broiler on. That gap is significant, but it’s bridgeable with the right approach.
The most effective method for home cooks is the broiler-finish technique. Thread marinated chicken on metal skewers (or soaked bamboo), lay them on a foil-lined rimmed baking sheet, and broil with the rack positioned about 4 inches from the heat element. Cook for 9–10 minutes per side, then switch to the broiler on high for a final 2–3 minutes to develop genuine charring on the edges. That char carries a faint smokiness that makes the finished dish taste like it came from a restaurant with a real tandoor.
An air fryer is a genuinely excellent alternative. At 400°F (200°C), it circulates intense dry heat all around the chicken simultaneously, creating exterior crust and interior tenderness in about 12 minutes total — 6 minutes per side. The results are remarkably close to oven-broiled tikka.
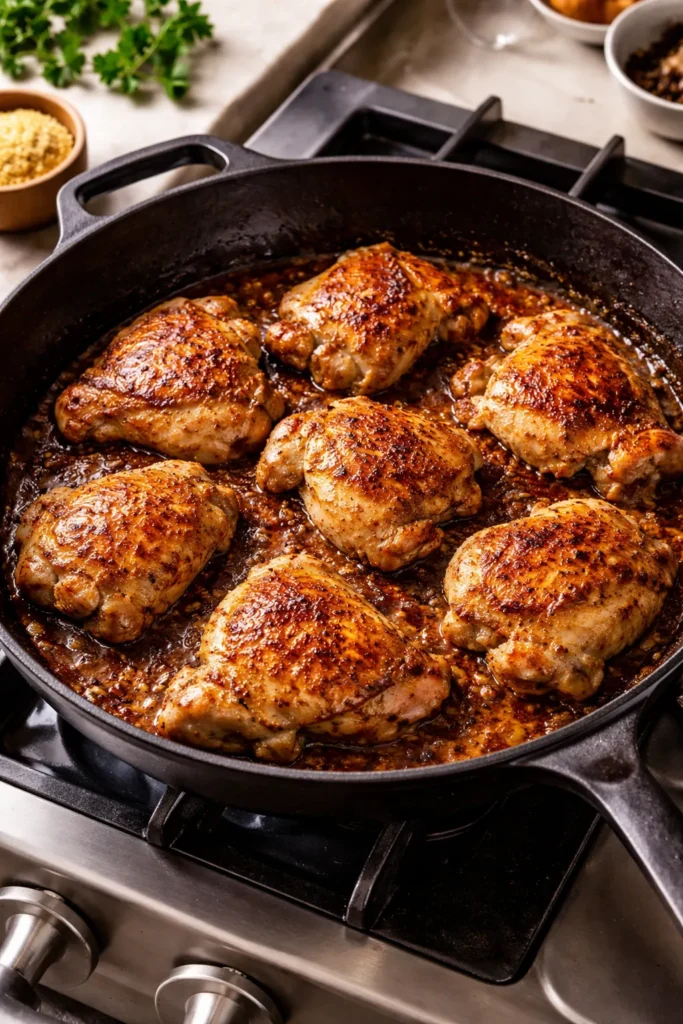
The Cast Iron Skillet Method
For those without oven space or an air fryer, a cast iron skillet on high heat is your best friend. Heat the pan until it’s genuinely smoking — this is not the moment for caution. Add 1 tablespoon of oil, let it shimmer, then add the marinated chicken pieces without crowding the pan. Cook in batches. Four minutes undisturbed on one side develops a proper sear and some char at the edges; another 3–4 minutes on the other side finishes the job.
The catch: the chicken doesn’t need to be fully cooked through at this stage. It will finish cooking in the sauce. If you push for full doneness in the pan, the chicken will continue cooking in the sauce and end up overcooked, tough, and rubbery. Pull it when it’s about 80% done — still slightly soft at the center — and trust the sauce to do the rest.
Why the Char Matters Beyond Flavor
Charred, caramelized surfaces on the chicken create Maillard reaction compounds — the same browned, complex flavors you get from grilling or roasting. When those charred pieces hit the masala sauce, they release a faint smoky depth that no amount of spice can replicate. Pale, un-charred chicken tikka sitting in sauce just tastes like braised chicken. The char is what makes it tikka.
3. Building a Masala Sauce That Actually Develops Flavor
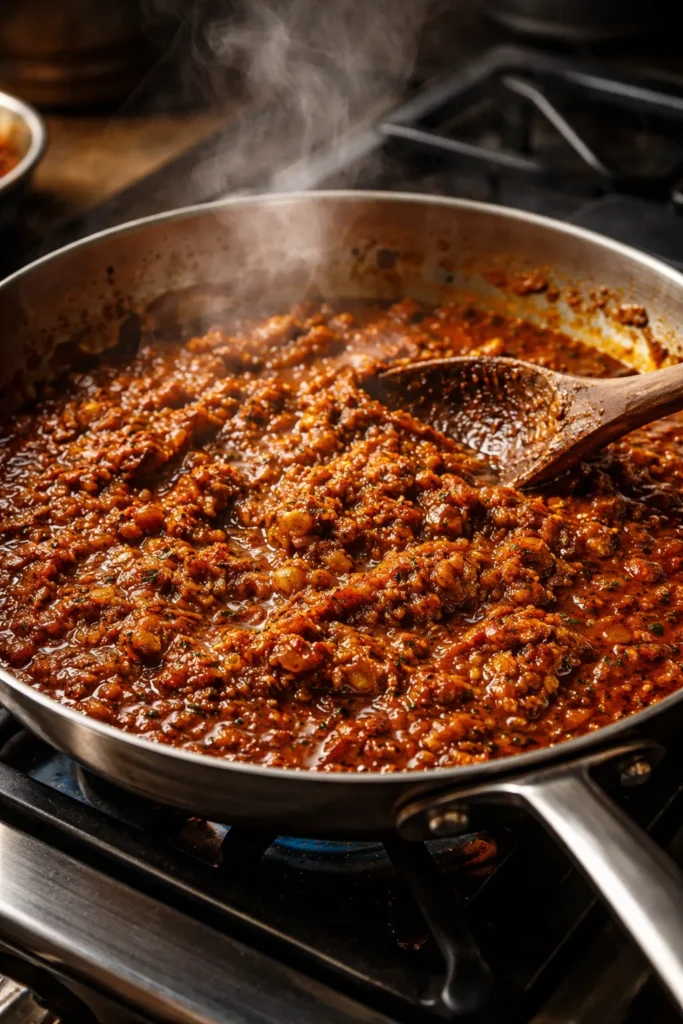
This is where patience separates a great curry from a flat one. The masala sauce — the onion-tomato base that becomes the rich, aromatic body of both dishes — needs time and heat to develop. Rushing it produces thin, acidic, one-dimensional sauce.
Step one is the onions. They need to cook until deep golden, not just translucent. Pale, softened onions add sweetness but lack depth. Deep golden onions that are almost caramelized at the edges contribute a savory, slightly sweet foundation that amplifies every spice you add afterward. This takes 12–15 minutes on medium heat. Don’t shortcut it.
Step two is the ginger-garlic paste. Add it after the onions are properly browned, and cook it for a full 40–60 seconds until the raw sharpness softens and you can smell something sweeter and more rounded. Under-cooked garlic and ginger are the single most common reason homemade curry tastes raw and unbalanced.
Adding Spices at the Right Moment
Spices go in after the ginger-garlic and before the tomatoes, with the heat turned down to low. This is called “blooming” — the fat in the pan carries the fat-soluble flavor compounds out of the dried spices and into the sauce, amplifying them dramatically compared to just stirring spice powder into liquid.
Stir quickly and keep the heat low. Ground spices can scorch in under 30 seconds if the heat is too high, and burnt spice creates a harsh, bitter note that no amount of cream will cover.
Tomato Selection Changes Everything
Fresh ripe tomatoes produce a brighter, slightly lighter sauce with more acidity and fresher flavor. Passata (sieved tomato purée) from a quality brand — Mutti is widely recommended for its natural sweetness — creates a deeper, more concentrated umami base. Canned fire-roasted tomatoes, like Muir Glen, add a gentle smokiness.
What to avoid: canned tomatoes with citric acid listed in the ingredients. That added acidity creates a metallic aftertaste that intensifies as the sauce reduces. Check the label before you buy.
Regardless of which tomato product you use, cook the sauce down until it’s genuinely thick — not just simmered for five minutes. The masala should look almost paste-like before you add water or cream. This concentration is where the flavor lives.
4. The Critical Difference Between Butter Chicken and Tikka Masala Sauce

These two dishes are often listed as interchangeable on restaurant menus, and plenty of home recipes blur the line between them. But they have real, meaningful differences that are worth understanding — both for cooking them correctly and for knowing which one to make based on the occasion.
Butter chicken (murgh makhani) is the sweeter, silkier, more forgiving of the two. Its sauce is built on butter rather than oil, contains no onions in the traditional Indian version, and achieves its creaminess from a generous pour of heavy cream. The result is smooth, mildly spiced, with a subtle sweetness that comes from the tomatoes, the butter, and sometimes a drizzle of honey. It’s approachable enough that even spice-averse eaters usually love it.
Tikka masala is bolder, chunkier, and more aggressively spiced. The Indian version builds its sauce from chopped onions that remain somewhat textured even after cooking, uses oil as the fat base, and pulls back on cream in favor of cashew paste for richness. The British version — which is arguably what most Western restaurants actually serve — uses passata and loads of cream, sitting somewhere between the two traditions in texture.
The Onion Question
Traditional Indian butter chicken contains no onions in the sauce. The tomatoes, butter, and cream carry everything. If you add onions, you’re making a dish that drifts toward tikka masala territory — not wrong, but worth knowing so you can choose deliberately.
Tikka masala, by contrast, depends on well-cooked onions for its sauce’s body and sweetness. They’re not optional.
Fat Base: Butter vs. Oil vs. Ghee
Butter gives the sauce its characteristic velvety richness and subtle dairy sweetness. Ghee adds even more depth — it’s clarified butter, so the milk solids have been removed and the fat can tolerate higher heat without burning. Oil produces a cleaner, more neutral base.
For butter chicken, use butter or a combination of butter and ghee. For tikka masala, neutral oil or ghee is traditional. A tablespoon of butter added at the very end of either dish — stirred in off the heat — creates a glossy, restaurant-quality finish that nothing else replicates.
5. Cream, Cashew Paste, or Coconut Milk: The Right Richness for Each Dish
The creamy element in both dishes is more nuanced than just “pour in some cream.” The fat you choose changes the flavor, the texture, and the caloric density of the finished sauce in ways that are worth thinking through.
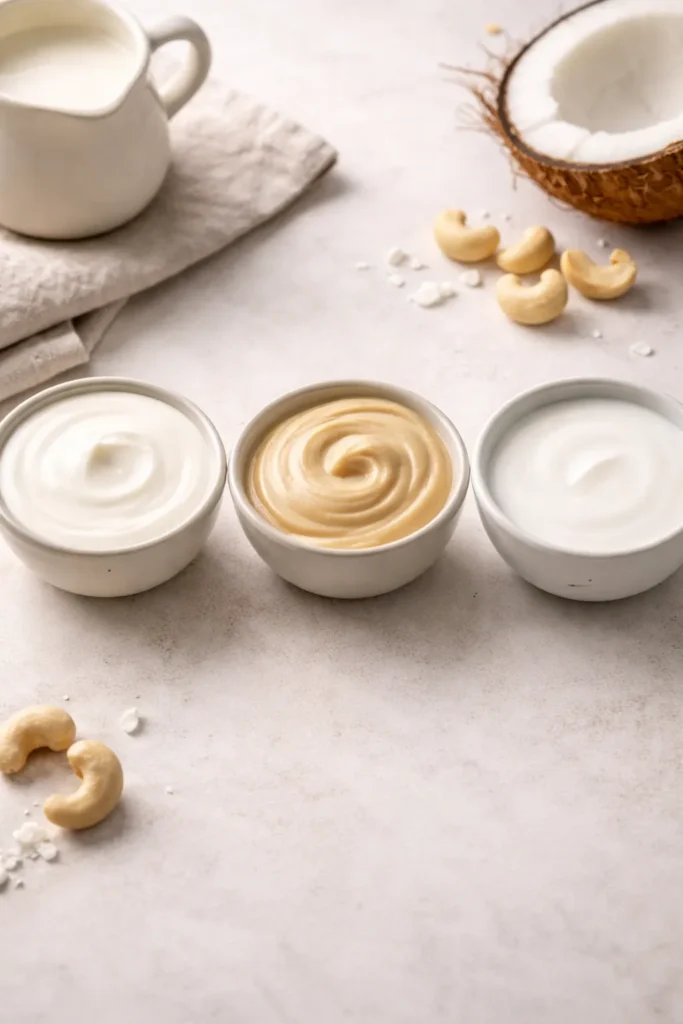
Heavy cream (or whipping cream) is the richest choice and the one most associated with restaurant versions of both dishes. It adds a full, dairy-forward richness and blends seamlessly into the tomato base. For butter chicken, it’s almost non-negotiable — the buttery richness is the whole point. For tikka masala, it softens the spices and adds body, though a little goes a long way.
Cashew cream is the traditional Indian tikka masala alternative. Grind 30 whole raw cashews to a fine powder in a blender, then add ⅓ cup of water and blend to a thick, smooth paste. You’ll get about ½ cup of cream-like richness with a subtly sweet, nutty flavor that complements the spices without the heaviness of dairy cream. It’s also naturally thickening — cashews have starch content that tightens a sauce as it simmers.
The Coconut Milk Option
Coconut milk, used in Chef John’s well-tested version from Allrecipes, is an interesting swap that changes the dish’s flavor profile rather than simply substituting for cream. Its subtle tropical sweetness works beautifully against the garam masala and coriander, producing a sauce that tastes lighter and brighter without sacrificing body. It’s a good choice if you’re cooking for dairy-free guests or simply want a different angle on the dish.
One caution: full-fat coconut milk is essential. The light version is too thin and will produce a watery sauce. Shake the can before opening, and stir the solidified cream at the top into the liquid before adding it to the pan.
When to Add the Cream
Add cream after the tomato sauce has fully reduced and thickened — never before. Cream added to thin, acidic tomato liquid can curdle or separate. Once the tomatoes have cooked down to a paste-like consistency and the oil starts to separate slightly at the edges (a sign called “bhuno”), the sauce is ready for cream. Stir it in, reduce the heat, and let everything marry together for 5–8 minutes.
6. Kashmiri Chili and Kasuri Methi: Two Ingredients That Change Everything
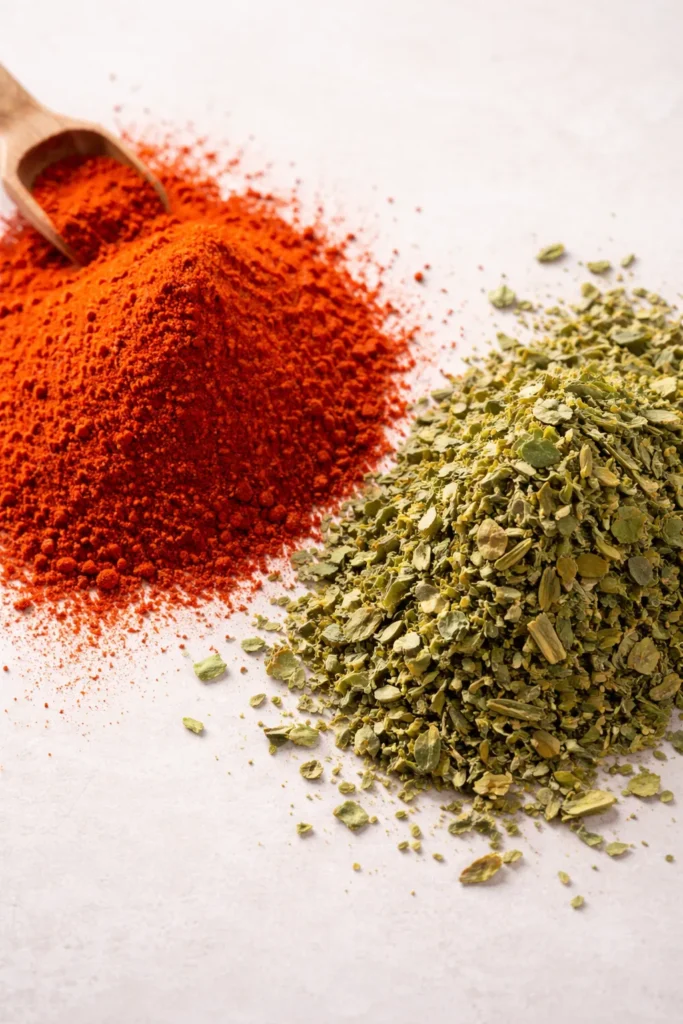
Home cooks who skip these two ingredients and substitute generic chili powder and dried oregano are making a fundamentally different dish. Kashmiri red chili powder and kasuri methi (dried fenugreek leaves) are what give both butter chicken and tikka masala their signature aroma and color.
Kashmiri red chili powder is made from a specific variety of dried red chilies from the Kashmir region of northern India. Its defining characteristic is a vivid, deep red-orange color with moderate heat — far less burn than cayenne or standard Indian red chili powder. It gives the sauce that distinctive brick-red hue you see in restaurant versions without making the dish dangerously spicy. Substitute with sweet smoked paprika if you genuinely can’t find it, but the color won’t be quite as saturated.
A tablespoon of Kashmiri chili in the sauce and up to a teaspoon in the marinade is a good starting point. For those who want more heat, add regular Indian red chili powder separately so you can control the burn without muddying the color.
Kasuri Methi: The Secret the Recipes Always Mention Last
Dried fenugreek leaves have a maple-sweet, slightly bitter, deeply aromatic quality that is almost impossible to describe until you’ve smelled it cooking. Serious Eats food writer Max Falkowitz, writing about Floyd Cardoz’s version of the dish, was unequivocal: “The secret to this dish, if there is one, is the fenugreek.” Toast the dried leaves in a dry pan for 30–60 seconds until they darken slightly and become fragrant, then crush them between your palms before adding them to the finished sauce.
This matters. Untoasted kasuri methi has flavor, but toasted and crushed kasuri methi has extraordinary flavor — complex, floral, and deeply savory in a way that makes the finished dish taste like it was made by someone who knows what they’re doing.
Add kasuri methi at two points: once in the marinade and once in the finished sauce. The double hit amplifies its presence without overpowering the other spices.
Garam Masala: Buy Fresh, Store Well
Garam masala is a spice blend — typically black pepper, green cardamom, mace, cloves, and cinnamon — and its potency diminishes significantly after the jar has been open for more than six months. Stale garam masala smells like dust. Fresh garam masala smells like a warm kitchen.
If your current jar has been in the cupboard for over a year, replace it before making either of these dishes. It makes a larger difference than most people expect.
7. The One-Pan Shortcut That Doesn’t Sacrifice Flavor
Not every cook has time for an overnight marinade, a separate grilling session, and a 45-minute sauce. The good news: you can build an excellent butter chicken or tikka masala in a single pan on a weeknight without losing the dish’s essential character. The key is smart sequencing.
Start by searing the marinated chicken directly in a heavy skillet — cast iron or stainless steel, not non-stick — in small batches at high heat. Don’t crowd the pan. Crowded chicken steams instead of searing, which means pale exterior, no browning, no flavor development. Give each piece at least 3 minutes completely undisturbed before turning. You want confident browning, not a quick flip-and-stir.
Once the chicken is seared and removed, don’t wipe the pan. Those browned bits stuck to the bottom — called fond — are concentrated flavor. When you sauté the onions next, they’ll lift off naturally as the onions release moisture. This is called deglazing, and it folds an extra layer of depth into the sauce without any extra work.
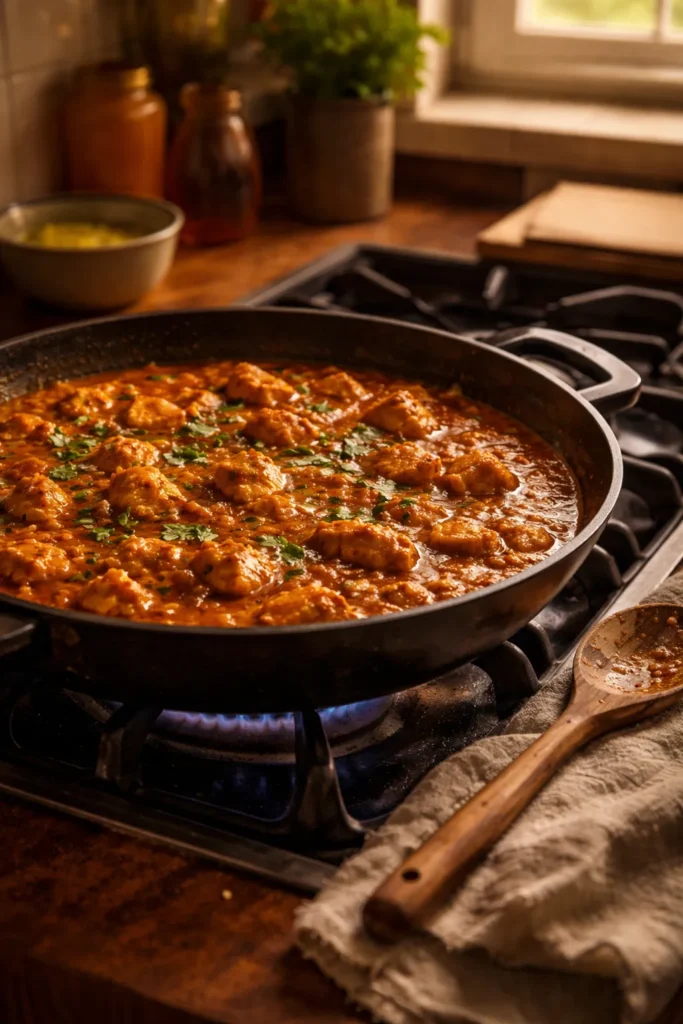
Building the Sauce in the Same Pan
Add your butter or oil, then the onions. Scrape as you stir. Add ginger-garlic paste, let it cook for a minute, then add your ground spices and cook them for 30 seconds before adding tomato puree. Let the sauce reduce properly — 10–15 minutes on medium-high — until it darkens to a deep reddish-brown and the oil visibly separates at the edges.
Add cream or cashew paste, stir it through, then return the chicken and any accumulated juices. Simmer for 8–10 minutes until the chicken is fully cooked through and the sauce coats it thickly. Crush and add a tablespoon of kasuri methi, taste for salt and balance, adjust with a pinch of sugar if the tomatoes are sharp. Done.
The entire process, from cold pan to finished curry, takes 40–45 minutes — faster than delivery, and miles better in quality.
8. Storage, Make-Ahead Strategies, and Why Leftovers Are Even Better
Both butter chicken and tikka masala are unambiguously better the next day. This isn’t wishful thinking — it’s flavor chemistry. As the finished dish sits in the refrigerator, the spices continue to bloom, the cream or cashew fat absorbs the tomato and spice flavors, and the chicken draws in more sauce. What tastes good the night you make it tastes genuinely special 24 hours later.
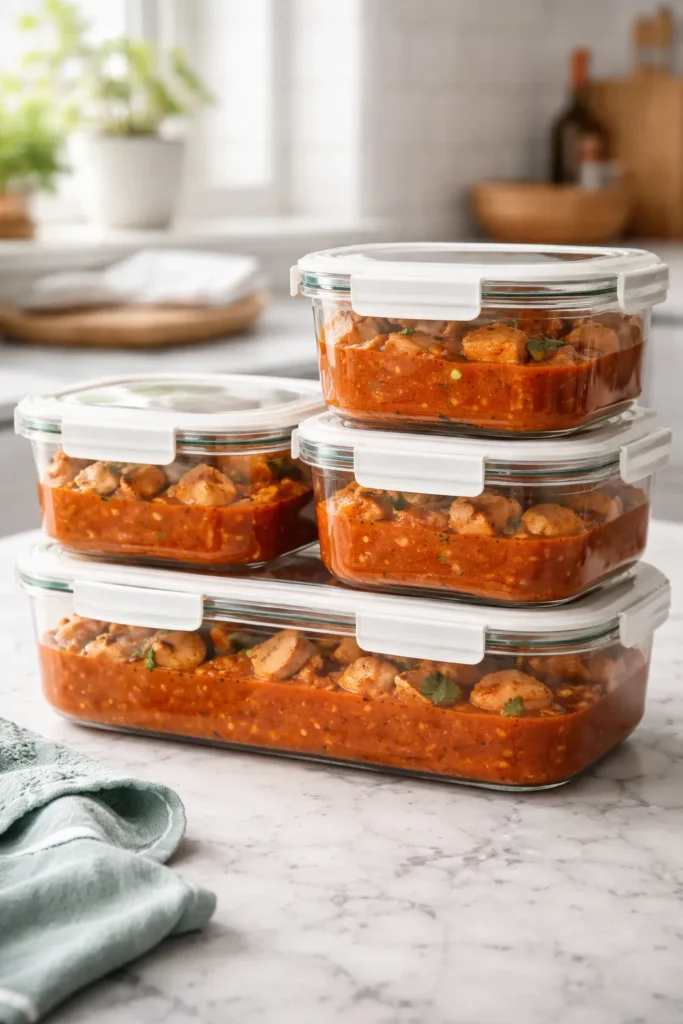
This makes both dishes ideal for meal prep and advance cooking. The sauce can be made entirely up to three days ahead and stored in an airtight container in the refrigerator. The chicken can be marinated for up to 48 hours and grilled or seared separately. On the day you want to eat, you simply heat the sauce, cook the chicken, combine them, and simmer for 8 minutes. The hands-on time on the actual day is about 20 minutes.
Freezing Without Losing Texture
Both dishes freeze well, though cream-based sauces can sometimes separate slightly when thawed. To minimize this, freeze the dish before adding the final cream. Reheat the tomato-spice base from frozen, bring it back to temperature, then stir in fresh cream at the end. The result is as good as a freshly made batch.
Alternatively, freeze the complete dish and reheat gently over low heat, stirring constantly and adding a splash of water or broth to bring the sauce back to the right consistency. Don’t microwave on high heat — the uneven heat causes cream sauces to break. Low and slow, covered, with occasional stirring is the correct approach.
Store in large zip-top freezer bags laid flat, or in freezer-safe containers with minimal headspace. Both dishes keep well for up to two months in the freezer.
Portioning for Meal Planning
A batch using 700 grams (1½ lbs) of chicken comfortably serves four people as a main course over rice, or six people with naan and a side salad. Doubling the recipe for a crowd is straightforward — the only adjustment needed is to cook the onions slightly longer (they’ll steam more with higher volume) and add water in ½ cup increments if the sauce becomes too thick before the chicken goes in.
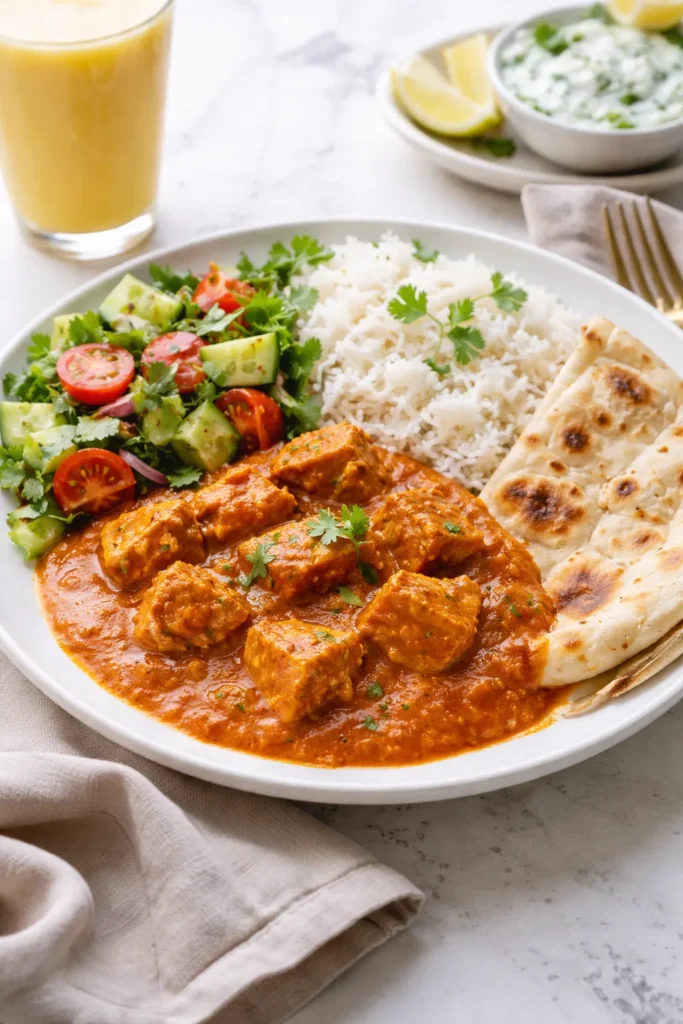
Serve with fluffy basmati rice cooked with a pinch of salt and a small knob of butter, or with warm butter naan. A cooling cucumber raita — plain yogurt, grated cucumber, a pinch of cumin, and a few torn mint leaves — cuts through the richness of the sauce and resets the palate between bites.
Serving Suggestions That Complete the Meal
Neither butter chicken nor tikka masala needs much to become a complete, satisfying dinner. The sauce is complex enough to carry the meal on its own. But a few thoughtful additions elevate the whole table.
Basmati rice is the most natural companion — its long, fragrant grains separate cleanly and don’t clump under the sauce the way short-grain rice would. Jeera rice (basmati cooked with toasted cumin seeds and a bay leaf) adds another aromatic layer that pairs particularly well with tikka masala’s bolder profile.
For flatbread, butter naan is the obvious choice — the mild, pillowy texture soaks up sauce beautifully. Roti or whole-wheat chapati works for a lighter option. If you’re making naan from scratch, the effort pays off enormously; homemade naan is a different food entirely from the packaged supermarket version.
A simple kachumber salad — finely diced cucumber, tomato, red onion, and cilantro with a squeeze of lemon and a pinch of salt — adds freshness and crunch that contrasts with the richness of the curry.
For drinks, a sweet mango lassi balances the spice, while a sweet-and-salty regular lassi (yogurt blended with water, sugar, and a pinch of salt) is the more traditional pairing in northern Indian cooking.
Variations Worth Trying Once You’ve Mastered the Original
Once you’re comfortable with the base recipe for either dish, the sauce becomes a canvas. The technique transfers to other proteins and meat-free alternatives with very little adjustment.
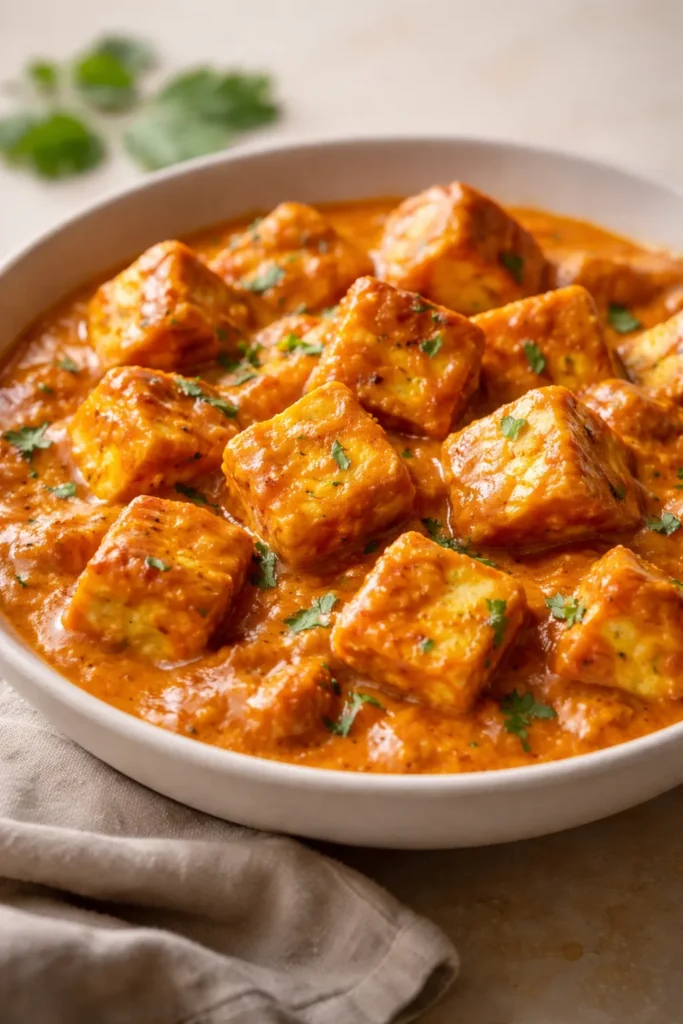
Paneer is the most natural swap — cube it into 1-inch pieces, pan-fry until golden, and treat it exactly as you would the chicken from the point of sauce addition onward. The result is a deeply satisfying vegetarian meal.
Shrimp works beautifully but needs far less cooking time. Add peeled, deveined shrimp directly to the finished sauce for just 4–5 minutes. Overcook shrimp and they become rubbery — pull them the moment they curl into a C shape and turn opaque.
Cauliflower florets, roasted at 425°F (220°C) for 20 minutes until edges are charred, add a smoky, slightly nutty element to the sauce that convincingly mimics the char of tikka without any meat.
Tofu pressed firm, cubed, and pan-fried golden is another excellent protein swap, particularly in the butter chicken preparation where the sweeter, gentler sauce complements the tofu’s mild flavor.
Final Thoughts
The real key to both of these dishes is respecting the process. The marinade deserves time. The onions deserve patience. The spices deserve heat and fat. The sauce deserves a proper reduction. None of these steps is complicated — they just require attention and the willingness not to rush.
What both butter chicken and tikka masala reward, more than any other quality, is confidence. Don’t second-guess your spice levels after you’ve already added them. Don’t stir constantly when the sauce needs to sit and reduce. Don’t pull the chicken from the marinade after two hours and expect the same depth as an overnight soak.
Make either dish once with full attention, and you’ll understand exactly where each flavor comes from. Make it twice, and you’ll start tweaking instinctively — a little more kasuri methi, a touch more sugar to balance the tomatoes, an extra minute on the onions. That’s the point where home cooking becomes genuinely better than takeout.
Both dishes keep, both dishes freeze, and both dishes taste better the next morning over scrambled eggs with warm roti than they did the night before. That last part isn’t a recipe tip. It’s just the truth.