Few culinary traditions on earth turn the act of eating into something as communal, sensory, and deeply satisfying as Ethiopian cuisine does. The moment a server sets down a wide, cloth-lined basket lined with a spongy sheet of injera — then spoons fragrant stews in brilliant oranges, deep reds, and earthy greens across its surface — something shifts. The silverware stays on the table. Hands reach in. Conversation moves faster.
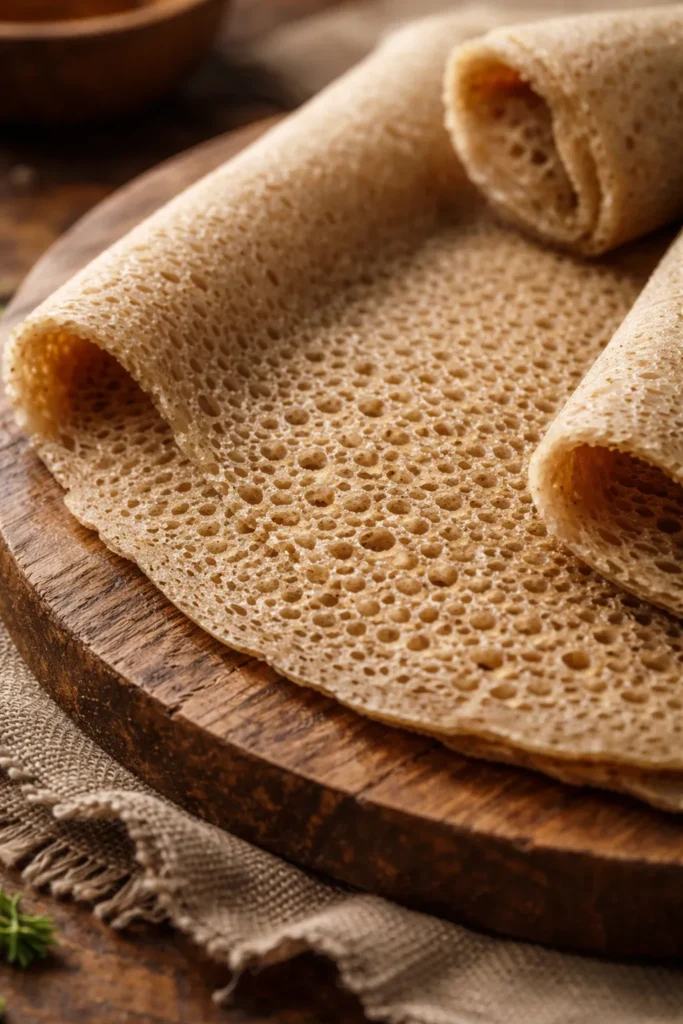
Injera is the anchor of the entire Ethiopian table. It’s simultaneously the plate, the bread, and the utensil. That soft, slightly sour, crater-dotted flatbread made from fermented teff absorbs every sauce that lands on it, and those sauce-soaked bites at the end of a meal are arguably the best part. But injera alone is only half the equation. What gets piled on top of it — the stews, the lentils, the spiced vegetables, the slow-cooked meats — is where Ethiopian cooking really reveals its depth.
The eight dishes here are the ones worth knowing. Some take patience and a well-stocked spice rack. Others come together with pantry staples in under an hour. What they all share is an affinity for injera that no other bread can replicate — that particular combination of sponge, tang, and chew that makes tearing off a piece and scooping up a mound of Doro Wat or Misir Wat feel like the only logical way to eat.
Whether you’re new to Ethiopian food or you’ve been a fan for years, cooking these dishes at home is more approachable than it looks. The recipes below cover the full spread — spiced chicken, red lentils, spiced beef, chickpea stew, braised greens, and more — along with a straightforward injera recipe that works even if you’ve never made it before.
Table of Contents
- What Injera Actually Is and Why It Changes Everything
- How to Make Injera at Home (Quick Method)
- How an Ethiopian Platter Comes Together
- ## 1. Doro Wat — The Spiced Ethiopian Chicken Stew
- What Makes Doro Wat Different from Other Chicken Stews
- Key Ingredients and Technique
- ## 2. Misir Wat — Red Lentil Stew with Berbere
- Why Red Lentils Work So Well Here
- Key Ingredients
- ## 3. Tibs — Ethiopian Sautéed Meat
- The High-Heat Technique That Defines Tibs
- Key Ingredients
- ## 4. Shiro Wat — Chickpea Flour Stew
- Using Shiro Powder
- Key Ingredients
- ## 5. Gomen — Ethiopian Braised Collard Greens
- How to Get Gomen Right
- Key Ingredients
- ## 6. Atkilt Wat — Spiced Potato, Cabbage, and Carrot Stew
- The Layering Method
- Key Ingredients
- ## 7. Yemisir Kik Alicha — Yellow Split Pea Stew
- Building the Flavor Without Heat
- Key Ingredients
- ## 8. Kitfo — Ethiopian Spiced Beef
- Choosing Your Level of Doneness
- Key Ingredients
- The Ethiopian Pantry: What You Actually Need
- Tips for Building a Successful Ethiopian Feast at Home
- How to Store and Reheat Everything
- Final Thoughts
What Injera Actually Is and Why It Changes Everything
Before getting into the stews, it’s worth understanding what injera actually does, because it’s not a passive backdrop — it actively changes how you taste the food on top of it.
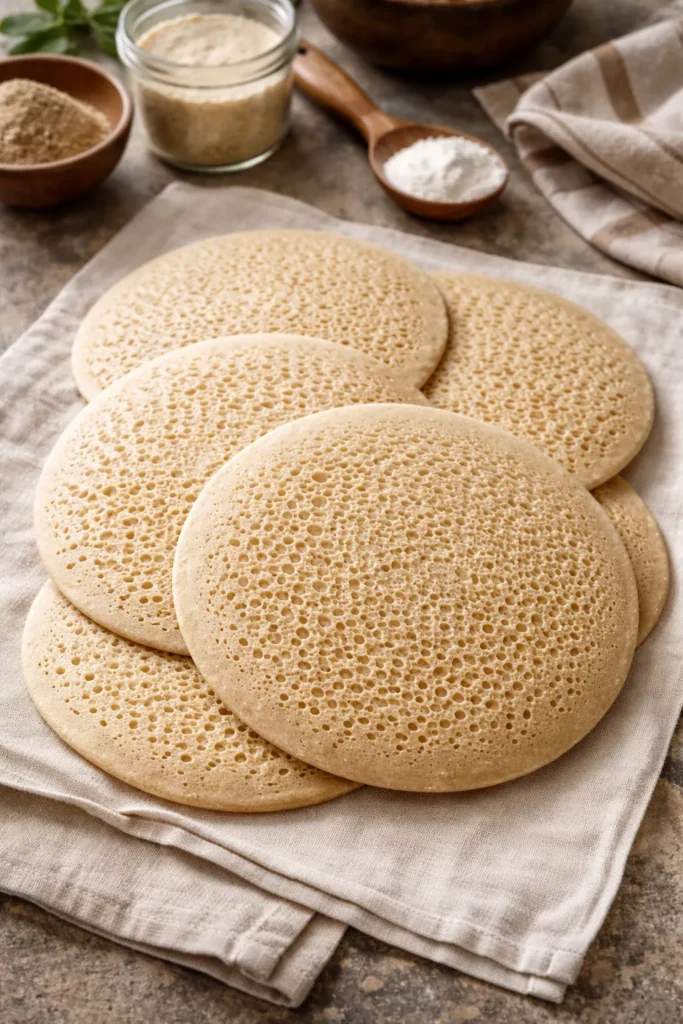
Traditional injera is made from teff, a tiny grain native to the Horn of Africa. Teff flour gets mixed with water and left to ferment for two to three days, during which wild yeasts and bacteria transform the batter into something tangy, almost sourdough-like. When that fermented batter hits a hot griddle and cooks on one side only, the surface erupts into the characteristic “eyes” — hundreds of tiny holes that act like sponges, pulling in every drop of sauce from the stews above.
The sourness isn’t just there for flavor. It acts as a counterbalance to the heat of berbere-heavy stews and cuts through the richness of niter kibbeh (spiced clarified butter), making each bite feel balanced rather than heavy. A dish that might taste overwhelmingly rich on its own becomes perfectly calibrated when eaten with injera.
Quick injera — made with sourdough starter, teff flour, all-purpose flour, and baking powder — skips the multi-day fermentation and still delivers the texture and most of the flavor. If you have an active sourdough starter in the fridge, you’re twenty minutes away from workable injera. For the full recipe, check the dedicated injera section below.
How to Make Injera at Home (Quick Method)
Injera doesn’t require special equipment or a trip to an Ethiopian market. A 12-inch nonstick skillet with a lid and a blender are all you need.
Yield: 8 to 10 twelve-inch rounds Prep Time: 15 minutes Resting Time: 15 minutes Cook Time: 20 to 25 minutes Total Time: 50 minutes active Difficulty: Intermediate — the batter is simple, but tilting the pan to spread it takes a few attempts to master.
Ingredients:
- 160g (about 1 cup) teff flour
- 230g (about 1¾ cups) all-purpose flour
- 250g (about 1 cup) active sourdough starter
- 945g (4 cups) water
- 1 tablespoon baking powder
- 1 tablespoon cornstarch
- Neutral oil, for wiping the pan
Instructions:
Blend the Batter:
-
Add the water and teff flour to a blender. Start on low speed and gradually increase to high. Blend for 1 to 2 minutes until the teff feels noticeably less grainy when rubbed between wet fingers — it won’t be perfectly smooth, but the texture should be much finer than when you started.
-
Add the all-purpose flour and blend on low just to combine. Scrape the sides, then blend on high for 15 to 30 seconds until the batter is smooth and lump-free. Do not over-blend at this stage — overdeveloping the gluten will give you a rubbery injera.
-
Add the sourdough starter and blend to incorporate. While the blender runs, add the baking powder and cornstarch. Increase speed to high and blend for 30 seconds.
Rest and Cook:
-
Allow the batter to rest for 15 minutes. This gives the sourdough starter time to activate and begin producing the bubbles that create the injera’s signature eyes.
-
Heat a 12-inch nonstick skillet over high heat until a drop of water sizzles and evaporates on contact. Wipe the surface with a paper towel lightly dampened with oil.
-
Pour ½ to ¾ cup of batter into the center of the pan and immediately tilt the pan in all directions until the batter spreads evenly across the entire surface. Work fast — the batter firms up within seconds.
-
Cook on high heat for about 15 seconds until holes (the “eyes”) appear across the surface and the batter begins to firm. Cover the pan with a lid and continue cooking for 1½ to 3 minutes, until the edges curl up from the pan and the injera slides freely when you shake the skillet. Wipe condensation from the lid frequently — any water droplets falling onto the surface will create gummy spots.
-
Slide the injera onto a clean flour-sack towel to cool. Do not stack them until they are fully cooled to the touch — warm injera stacked together will fuse and become unusable.
-
Repeat with the remaining batter, wiping the pan with the oiled towel between each round.
Pro tip: If the injera tears or sticks, add 40g (¼ cup) of rice flour blended into the remaining batter to firm it up. If it comes out too thick and dry, stir in 2 to 4 tablespoons of water to thin the batter slightly.
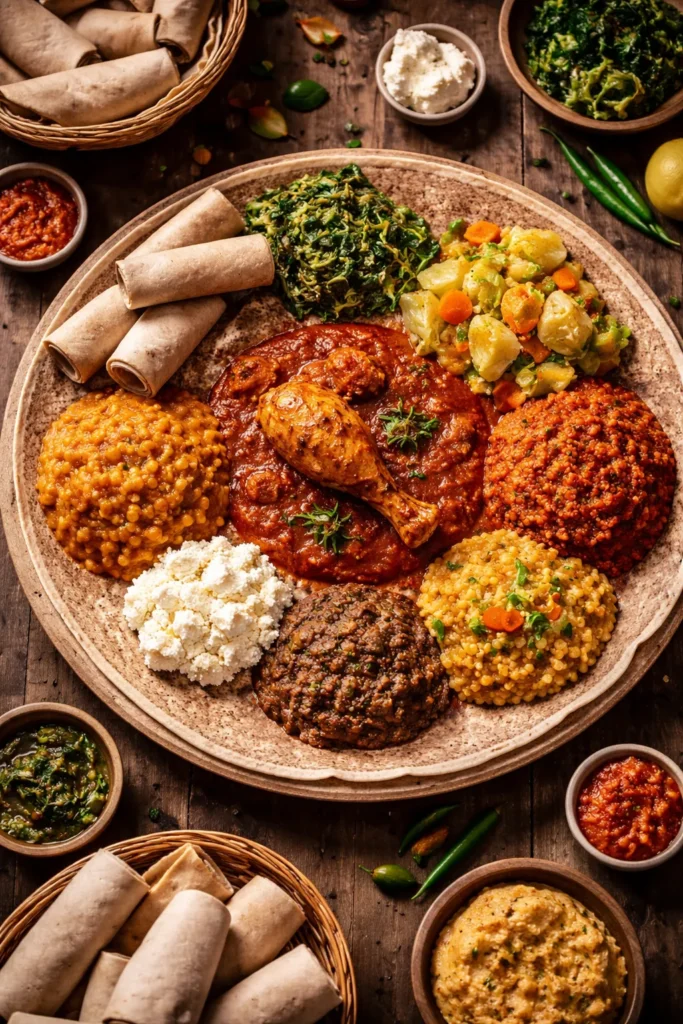
How an Ethiopian Platter Comes Together
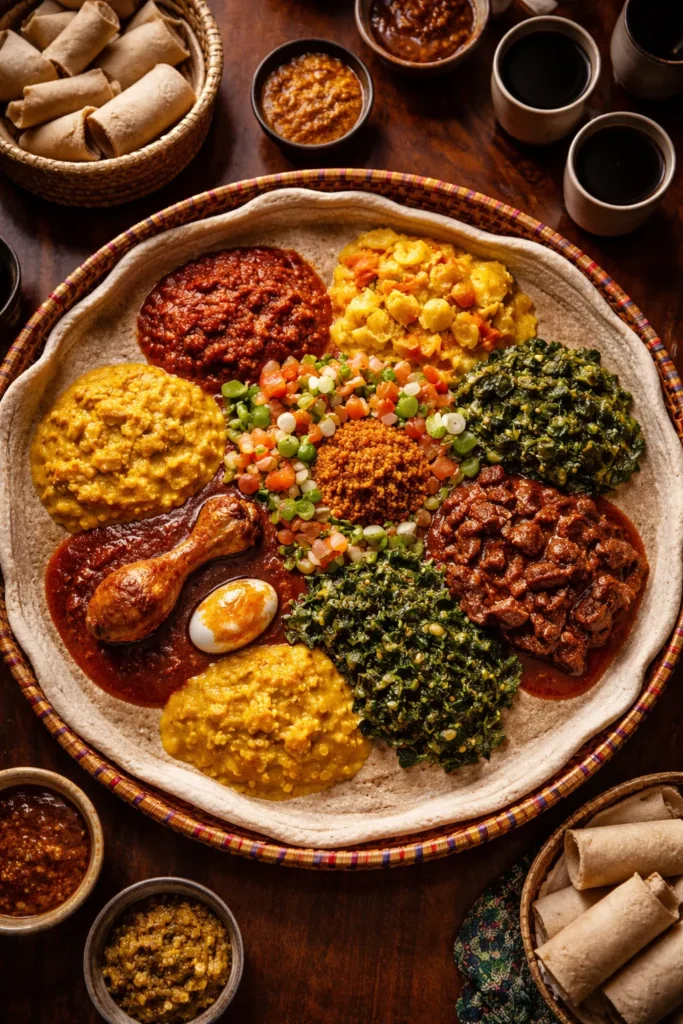
An Ethiopian meal is designed to be shared. The tradition involves layering different stews and sides across a single large injera on a communal platter, with extra rolled injera served on the side for scooping.
The key to a balanced platter is contrast. You want heat balanced by something mild, richness balanced by something bright, and meat dishes balanced by vegetable and lentil options. A classic spread might include one meat stew (like Doro Wat or Tibs), one lentil stew (Misir Wat or Shiro), one vegetable side (Gomen or Atkilt Wat), and a small mound of fresh ayib (Ethiopian farmer’s cheese) to cool things down.
Diners tear off pieces of injera and use them to pinch and scoop each dish. Nothing is served separately. Everything mingles. The injera beneath the stews gradually becomes saturated with their sauces, and eating that soaked portion at the end is considered by many — including Ethiopian food lovers who grew up eating this way — to be the best bite of the whole meal.
## 1. Doro Wat — The Spiced Ethiopian Chicken Stew
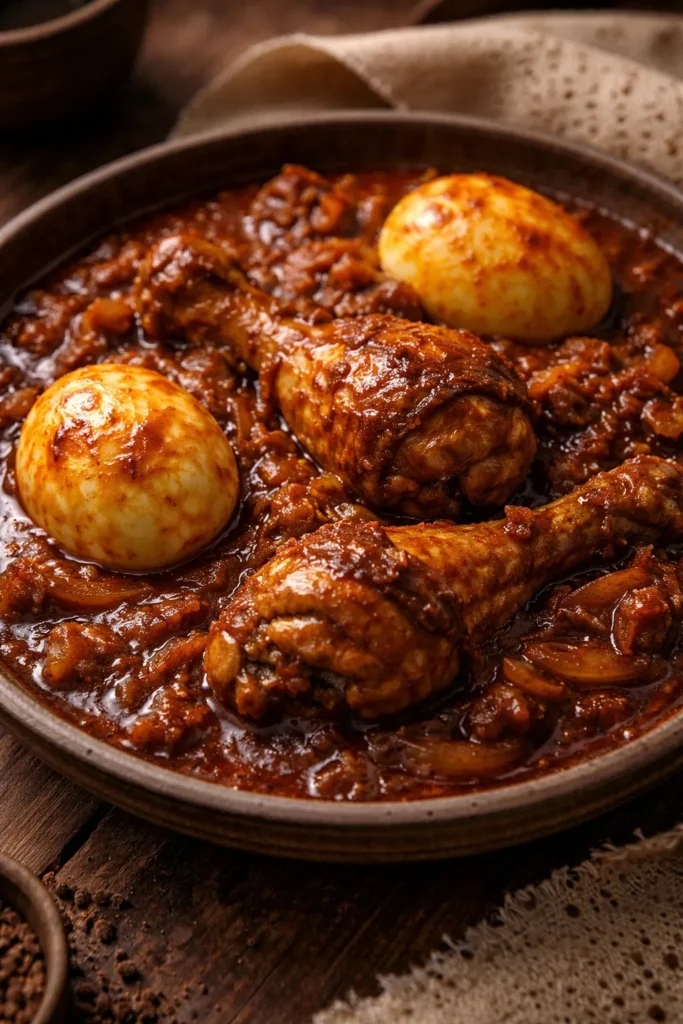
Doro Wat is the dish most Ethiopians would consider their national stew, and for good reason. Slow-cooked chicken drumsticks and hard-boiled eggs sit in a deep, brick-red sauce built from caramelized onions, berbere spice blend, and niter kibbeh (spiced clarified butter). The flavor is complex, warming, and rich without tipping into heaviness — exactly what injera was designed to carry.
What Makes Doro Wat Different from Other Chicken Stews
The foundation of Doro Wat is patience with the onions. You cook a large quantity of finely chopped onions — dry, with no oil — over low heat for 30 to 45 minutes, stirring constantly until they reduce to a dark, sweet paste. This step alone gives the stew its body and sweetness before a single piece of chicken goes in.
Berbere is the other defining element. This blend typically includes dried chilies, fenugreek, coriander, black pepper, cardamom, korarima (Ethiopian cardamom), and a handful of other spices. The proportions vary by household and region, but the result should be warm, complex, and deeply red. Adding two to three tablespoons of niter kibbeh — clarified butter infused with onion, garlic, ginger, turmeric, and black cardamom — brings everything together and adds the nutty, aromatic richness the stew is known for.
Key Ingredients and Technique
- 4 to 6 chicken drumsticks, skin removed and scored with a sharp knife
- 3 large yellow onions, finely chopped (about 4 cups)
- 3 tablespoons niter kibbeh or ghee
- 3 tablespoons berbere spice blend
- 4 cloves garlic, minced
- 1-inch piece of ginger, grated
- 4 hard-boiled eggs, peeled and scored with a knife tip
- Salt to taste
Dry-cook the onions first with no fat until they’re almost jammy. Add niter kibbeh, garlic, and ginger, then build the berbere into the onion base before adding the chicken. The eggs go in during the last 15 minutes, their scored surfaces soaking up the brick-red sauce. Serve over a full sheet of injera with the eggs placed prominently on top.
Worth knowing: Scoring the eggs with a paring knife isn’t decorative — it lets the sauce penetrate the egg white and infuse each bite with flavor all the way through.
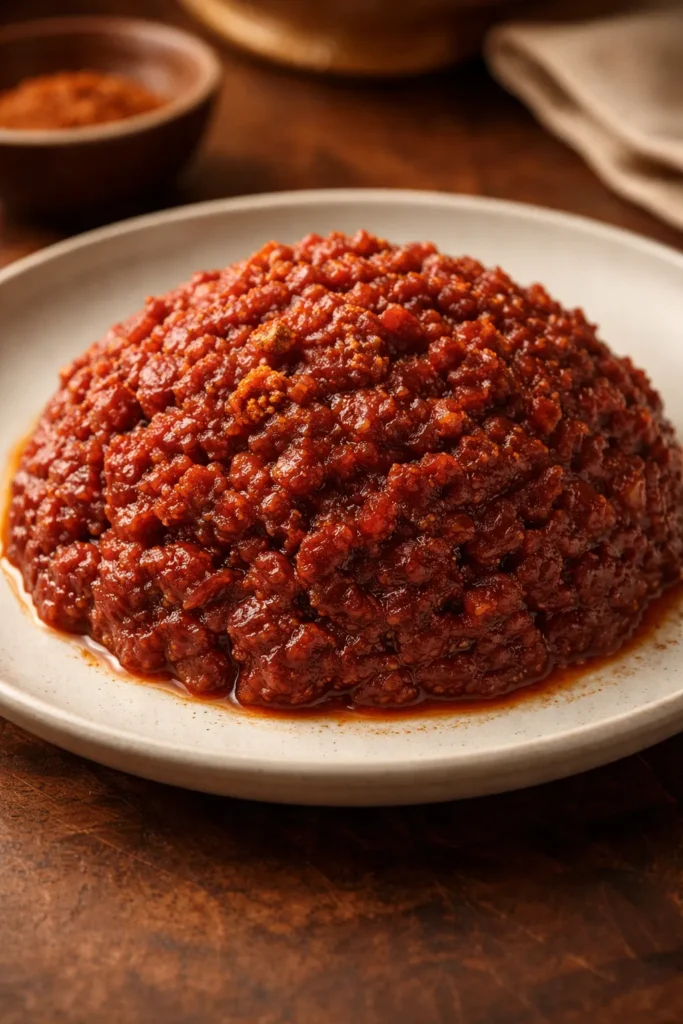
## 2. Misir Wat — Red Lentil Stew with Berbere

If there’s a single dish that converts skeptics into Ethiopian food devotees, it’s usually Misir Wat. Red lentils cook down into a thick, creamy stew charged with berbere heat and the unmistakable richness of niter kibbeh. It’s one of those dishes that tastes like it required hours of work and actually comes together in about 40 minutes.
Why Red Lentils Work So Well Here
Red lentils dissolve as they cook, thickening the stew naturally without needing any added flour or starch. By the time they’re done, the texture sits somewhere between a thick dal and a chunky purée — hearty enough to pile on injera but fluid enough to soak in.
The onion technique mirrors Doro Wat. Dry-cooking the onions first is non-negotiable for developing the base flavor. Once they’ve caramelized and the niter kibbeh goes in, you’re building a spice-forward paste before the lentils ever touch the pot.
Key Ingredients
- 1½ cups red lentils, rinsed well
- 2 large yellow onions, finely chopped
- 3 tablespoons niter kibbeh or clarified butter
- 2½ tablespoons berbere
- 3 cloves garlic, minced
- 1 teaspoon turmeric
- 3 cups water or light vegetable broth
- Salt to taste
Dry-cook the onions for 20 minutes until reduced and lightly browned. Add niter kibbeh, garlic, berbere, and turmeric, stirring for 2 minutes. Add the lentils and water, bring to a boil, then reduce heat and simmer uncovered for 20 to 25 minutes, stirring occasionally, until the lentils have broken down completely and the stew is thick enough to mound on a spoon. Season with salt and finish with an extra tablespoon of niter kibbeh stirred in at the end.
Pro tip: A squeeze of lemon juice stirred in just before serving brightens the deep, earthy flavors without changing the character of the dish.
## 3. Tibs — Ethiopian Sautéed Meat
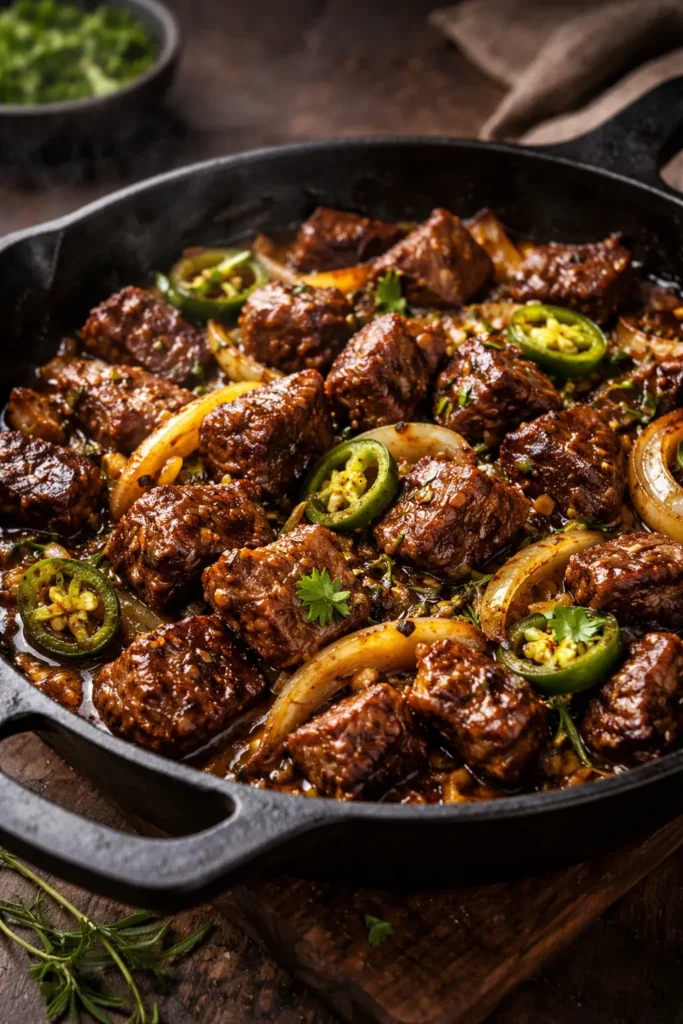
Tibs takes a completely different approach from the long-simmered stews. It’s a dry, fast-cooked dish — chunks of beef or lamb seared at high heat with onions, jalapeño, and aromatics until the meat is lightly caramelized on the outside and tender within. The result is bold and savory in a way that contrasts nicely with the creamy lentil and chickpea stews on the same platter.
The High-Heat Technique That Defines Tibs
The word “tibs” itself refers to the sauté method. You need a screaming-hot pan — cast iron works well here — and you should cook the meat in a single layer without crowding. Crowding the pan drops the temperature and causes the meat to steam rather than sear, which eliminates the caramelization that gives Tibs its character.
Common versions include Ye’beg Tibs (lamb), Siga Tibs (beef), and Mushroom Tibs for a vegetarian option that holds up surprisingly well. The meat gets seasoned with mitmita (a spicy, orange-hued Ethiopian spice blend that’s hotter than berbere), garlic, rosemary, and a little niter kibbeh.
Key Ingredients
- 500g (about 1 lb) beef sirloin or lamb shoulder, cut into 1-inch cubes
- 1 large red onion, sliced into half-moons
- 2 jalapeños, sliced (seeds in for more heat, removed for less)
- 3 cloves garlic, minced
- 1½ tablespoons niter kibbeh
- 1 teaspoon mitmita or berbere
- Fresh rosemary sprig
- Salt and black pepper
Heat a cast iron pan until it smokes. Add the niter kibbeh, then the meat in a single layer. Sear without stirring for 2 minutes, then turn and sear the other sides. Add the onion, jalapeño, and garlic and cook for another 3 to 4 minutes until the onions soften and pick up some color. Season with mitmita, salt, and pepper, add the rosemary, and toss to combine. Serve immediately — Tibs loses its appeal quickly once it starts to steam.
## 4. Shiro Wat — Chickpea Flour Stew
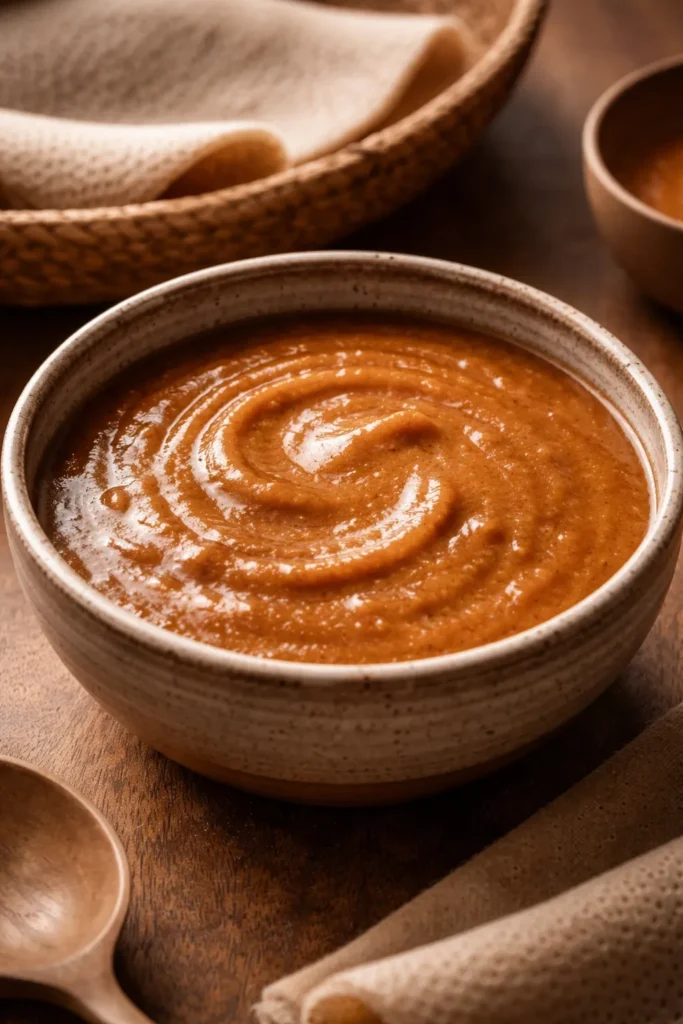
Shiro is a sleeper hit. Made from roasted chickpea flour (or a spiced chickpea-and-bean flour blend sold as shiro powder), it cooks into a silky, almost velvet-textured stew that’s among the most comforting things to eat with injera. It’s also one of the fastest stews in the Ethiopian repertoire — the whole thing can be ready in 15 to 20 minutes once the base is set.
Using Shiro Powder
The key ingredient here is shiro powder — a pre-spiced chickpea flour blend available at Ethiopian grocery stores and online. It already contains dried chilies, garlic, and various aromatics, so the seasoning process is largely built in. You can also make a simpler version using plain roasted chickpea flour with berbere and niter kibbeh added separately.
The technique is almost foolproof. Caramelize onions with niter kibbeh and garlic, whisk the shiro powder into hot water until smooth, then combine and simmer. The stew thickens as it cooks and needs frequent stirring to prevent lumps. Finished Shiro Wat should be thick enough to hold its shape when spooned onto injera but fluid enough to spread slightly.
Key Ingredients
- 1 cup shiro powder (spiced chickpea flour)
- 2 medium yellow onions, finely diced
- 3 tablespoons niter kibbeh
- 3 cloves garlic, minced
- 2 cups hot water (add more to adjust consistency)
- 1 tablespoon berbere (optional, if your shiro isn’t pre-spiced)
- Salt to taste
Pro tip: A drizzle of fresh niter kibbeh over the top of Shiro Wat just before serving adds a glossy finish and an extra layer of aroma that transforms the presentation.
## 5. Gomen — Ethiopian Braised Collard Greens
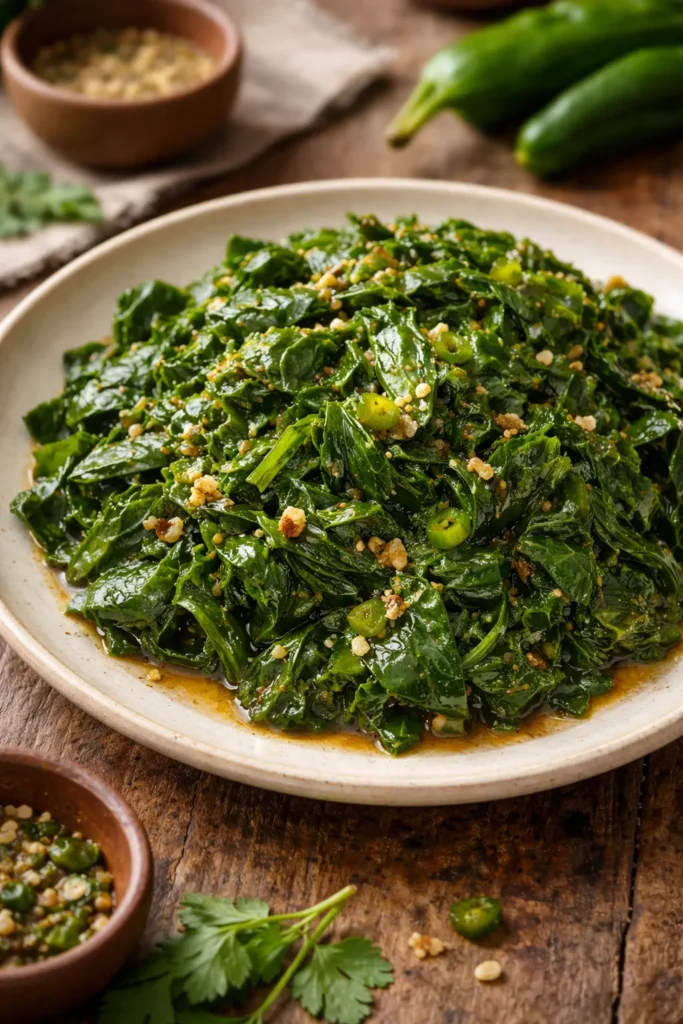
Gomen provides the necessary freshness and bitterness on an Ethiopian platter — the counterweight to the rich, spice-forward stews surrounding it. Collard greens get braised until tender with garlic, ginger, jalapeño, and just enough niter kibbeh to coat each leaf with something warm and fragrant. It’s not a stew in the traditional sense, but it’s every bit as essential to a complete spread.
How to Get Gomen Right
The biggest mistake most home cooks make with Gomen is under-cooking the greens or, conversely, cooking them until they’ve lost all their color. The goal is a vibrant, deep green with tender but not mushy texture — greens that yield easily to a bite but still have some body.
Strip the collard leaves from their tough center ribs and chop them into roughly 1-inch pieces. Sauté with garlic, ginger, and jalapeño in niter kibbeh until the garlic is fragrant, then add the greens with a splash of water. Cover and braise over medium-low heat for 20 to 25 minutes, checking occasionally and adding water by the tablespoon if the pan dries out.
Key Ingredients
- 1 large bunch collard greens (about 500g), stripped from ribs and chopped
- 3 tablespoons niter kibbeh or olive oil
- 4 cloves garlic, minced
- 1-inch piece fresh ginger, grated
- 1 to 2 jalapeños, finely chopped
- ¼ cup water
- Salt to taste
Kale works as a substitute, though it takes slightly less time to braise. Swiss chard cooks faster still and has a more delicate flavor. Collards are the traditional choice and hold up best under the weight of accompanying stews on a shared platter.
## 6. Atkilt Wat — Spiced Potato, Cabbage, and Carrot Stew
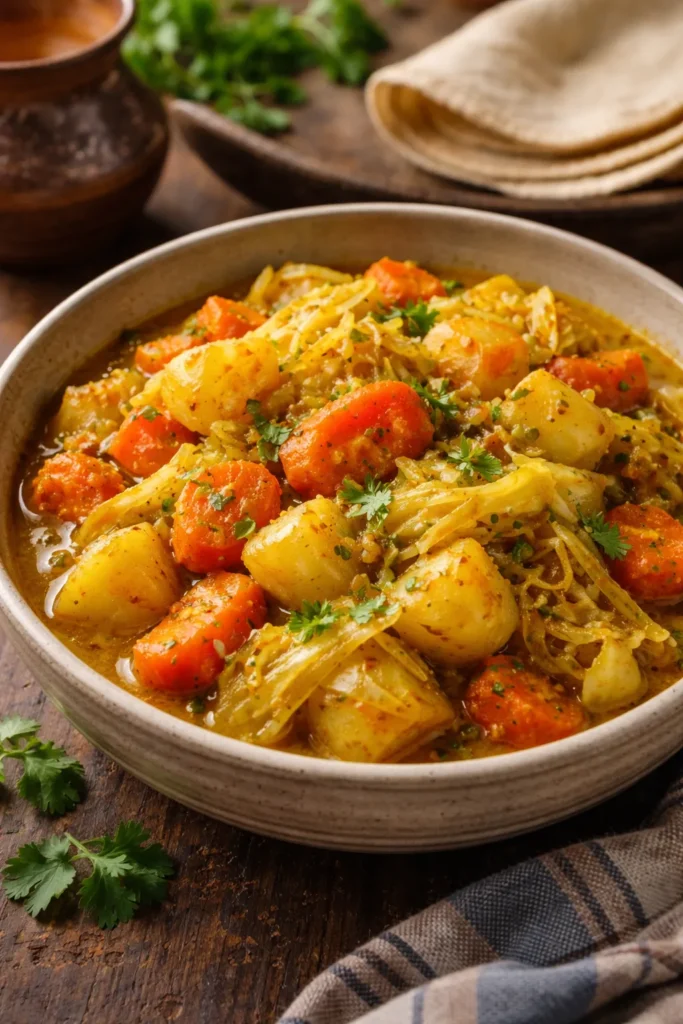
Atkilt Wat is one of the most-ordered vegetarian dishes at Ethiopian restaurants, and it earns its place on a platter through sheer versatility. Potatoes, carrots, and cabbage cook together in turmeric-stained oil with garlic and jalapeño until the vegetables are completely tender and the cooking liquid has reduced to a thick coating sauce. It’s mild, warming, and acts as a bridge between the spicier stews around it.
The Layering Method
Unlike most Ethiopian stews, Atkilt Wat builds its flavor from turmeric, cumin, and fresh aromatics rather than berbere. This makes it the mildest dish on most platters and the one that tends to disappear first — it’s approachable for anyone who finds berbere too intense, while still tasting distinctly Ethiopian.
The technique involves layering the vegetables in order of cooking time: onions and aromatics first, then carrots and potatoes, then cabbage last. Cabbage needs far less time than potatoes and will turn to mush if added at the beginning.
Key Ingredients
- 3 medium Yukon Gold potatoes, peeled and cut into 1-inch chunks
- 2 large carrots, sliced into ½-inch rounds
- ½ small head green cabbage, roughly chopped
- 1 large yellow onion, finely diced
- 4 cloves garlic, minced
- 1 jalapeño, finely chopped
- 3 tablespoons neutral oil or niter kibbeh
- 1 teaspoon turmeric
- ½ teaspoon cumin
- ½ cup water
- Salt to taste
Pro tip: A handful of fresh cilantro stirred in at the very end adds brightness that cuts through the starchy richness of the potatoes.
## 7. Yemisir Kik Alicha — Yellow Split Pea Stew
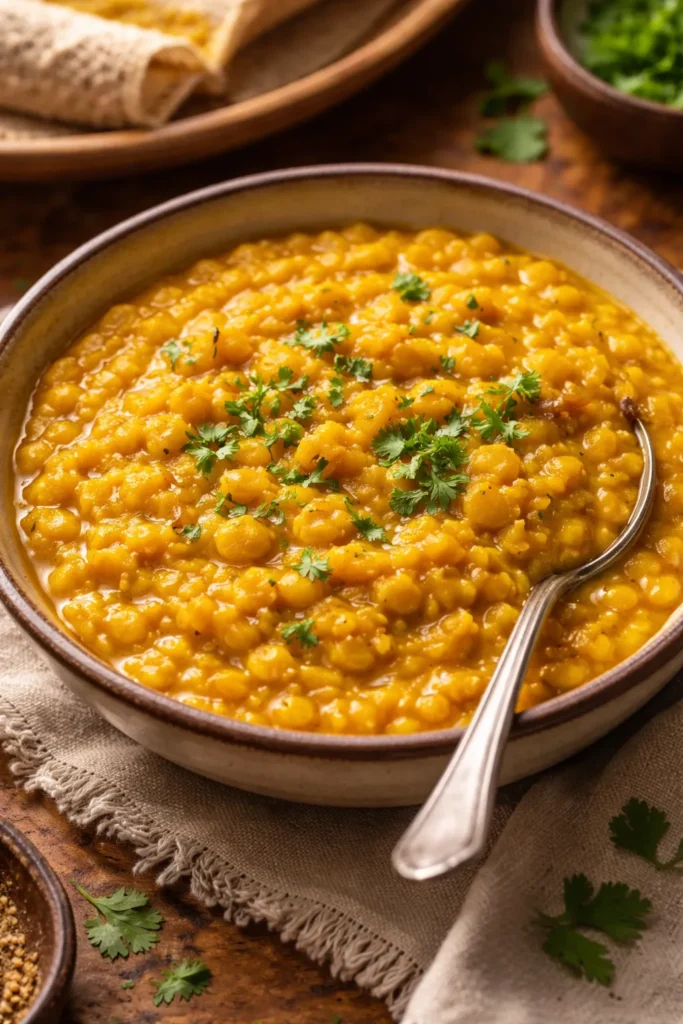
Where Misir Wat brings the heat, Yemisir Kik Alicha brings the calm. This mild, golden split pea stew gets its color from turmeric rather than berbere, making it one of the gentler options on any Ethiopian platter. It’s satisfying, creamy, and deeply savory despite using minimal fat — a dish that demonstrates just how much flavor you can extract from onions, garlic, and good-quality spices.
Building the Flavor Without Heat
The absence of berbere in Alicha dishes (“alicha” refers to mild, non-spicy preparations in Amharic) means the sweetness of caramelized onions and the earthiness of turmeric do more of the heavy lifting. Don’t rush the onion stage — giving them a full 20 to 25 minutes over low heat to slowly caramelize is what gives the stew its rounded, almost sweet depth.
Yellow split peas cook faster than green lentils and create a thicker, starchier texture that clings to injera perfectly. They’re also more forgiving than red lentils — they won’t turn to slurry if you get distracted, and they reheat beautifully the next day.
Key Ingredients
- 1½ cups yellow split peas, rinsed
- 2 large yellow onions, finely diced
- 3 cloves garlic, minced
- 1 teaspoon fresh ginger, grated
- 1 teaspoon turmeric
- ½ teaspoon cumin
- 3 tablespoons niter kibbeh or ghee
- 3½ cups water or vegetable broth
- Salt to taste
Simmer the split peas until completely soft and beginning to break down, about 35 to 40 minutes. Finish with a final spoonful of niter kibbeh and taste carefully for salt — split peas absorb a surprising amount of it.
## 8. Kitfo — Ethiopian Spiced Beef
Kitfo is not a stew, and that’s precisely what makes it such a compelling addition to an Ethiopian platter. At its most traditional, it’s finely minced raw beef — Ethiopian beef tartare, essentially — dressed with mitmita and niter kibbeh. Most home cooks and many restaurants now offer it leb leb (slightly cooked) or fully cooked, and all three versions are worth knowing.
Choosing Your Level of Doneness
The raw version demands the highest-quality beef you can find — ideally fresh-ground from a butcher you trust, made the day you plan to serve it. The mitmita (a blend of bird’s eye chilies, cardamom, and cloves) and warm niter kibbeh don’t cook the beef but season it deeply, giving each bite intense heat and a complex, warming finish.
Leb leb — the “barely cooked” version — gets the seasoned mince into a warm pan for 60 to 90 seconds, just enough to gray the surface while the interior stays pink and tender. This is the version that works best for home cooking because it eliminates the food safety concerns of serving raw beef while preserving the texture and flavor the dish is known for.
Fully cooked Kitfo is crumbled and browned like ground beef, then seasoned. It loses some of its characteristic tenderness but remains deeply flavored from the mitmita and niter kibbeh.
Key Ingredients
- 400g (about 14 oz) lean beef (sirloin or tenderloin), very finely minced or freshly ground
- 3 tablespoons niter kibbeh, warmed until liquid
- 1½ teaspoons mitmita (more if you like aggressive heat)
- Salt to taste
To serve, mix the warm niter kibbeh and mitmita into the beef and portion onto injera immediately. Kitfo is traditionally served with Ayib (Ethiopian fresh cheese similar to ricotta or cottage cheese) and Gomen on the side — the cool, mild cheese is the essential counterpoint to the spice.
Pro tip: Ask your butcher to grind sirloin to order rather than using pre-packaged ground beef. The texture difference is significant — fresh-ground sirloin has a clean, buttery quality that elevates the entire dish.
The Ethiopian Pantry: What You Actually Need
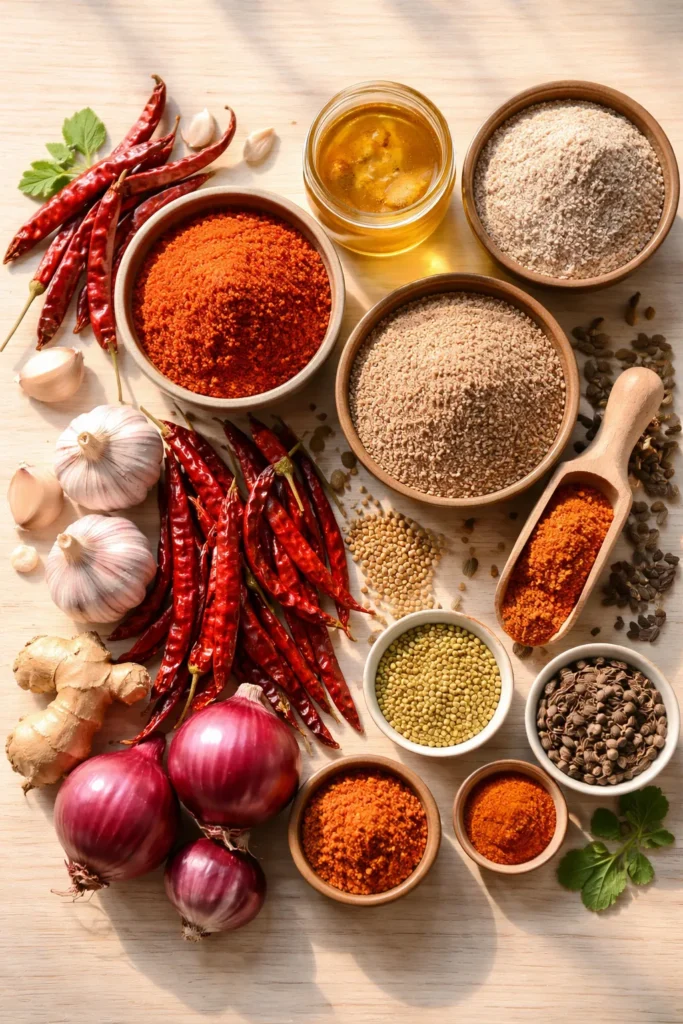
Ethiopian cooking looks daunting from the outside because of the unfamiliar ingredients. The honest truth is that once you have four or five staples in your pantry, most of these dishes follow naturally.
Berbere is the first priority. This complex spice blend is the backbone of most red stews and can be bought pre-made or assembled at home from dried chilies, fenugreek, coriander, cinnamon, black pepper, cardamom, and a few other spices. Quality varies between brands — Ethiopian specialty stores carry blends that are noticeably more complex than grocery store versions.
Niter kibbeh is clarified butter infused with onion, garlic, ginger, turmeric, korarima, black cardamom, and dried herbs. You can make a batch and refrigerate it for weeks, using it wherever regular butter or ghee would go. It adds an unmistakable fragrance to everything it touches.
Teff flour is available through most natural food retailers and online. Bob’s Red Mill carries a widely available 24-ounce bag. For full Ethiopian markets with bulk pricing, Ethiopian specialty grocery stores in major cities are your best option.
Mitmita rounds out the basics — hotter than berbere, more fragrant, and the defining spice in Kitfo and many Tibs preparations. If you can’t find it locally, a combination of bird’s eye chili powder, ground cardamom, and ground cloves comes close.
Tips for Building a Successful Ethiopian Feast at Home
Cooking Ethiopian food for a group requires advance planning, but the payoff is a meal that generates conversation and feels genuinely special without requiring you to plate anything individually.
Make the stews a day ahead. Almost every dish here — Doro Wat, Misir Wat, Shiro Wat, Atkilt Wat, and the split pea stew — tastes better after spending a night in the refrigerator. The flavors deepen as the spices continue to bloom in the sauce. Reheat gently with a splash of water to loosen any stew that has thickened overnight.
Make the injera the morning of serving. It needs time to cool completely before stacking, and day-old injera is actually softer and more flexible than fresh. Store stacked injera wrapped in plastic film at room temperature for up to two days, or refrigerate for three.
For the platter presentation: Start with a large, full sheet of injera as the base. Arrange the stews and sides in distinct mounds around the platter — no need for barriers or separation, the visual contrast of the different colors does the work. Roll additional injera into cylinders and stand them upright in a basket or pile them on a side plate for scooping.
Ayib (fresh Ethiopian cheese) is easy to approximate with full-fat cottage cheese strained through cheesecloth for an hour, or with a simple fresh ricotta. Set it on the platter in a small mound alongside Gomen — that pairing is traditional and genuinely satisfying.
How to Store and Reheat Everything
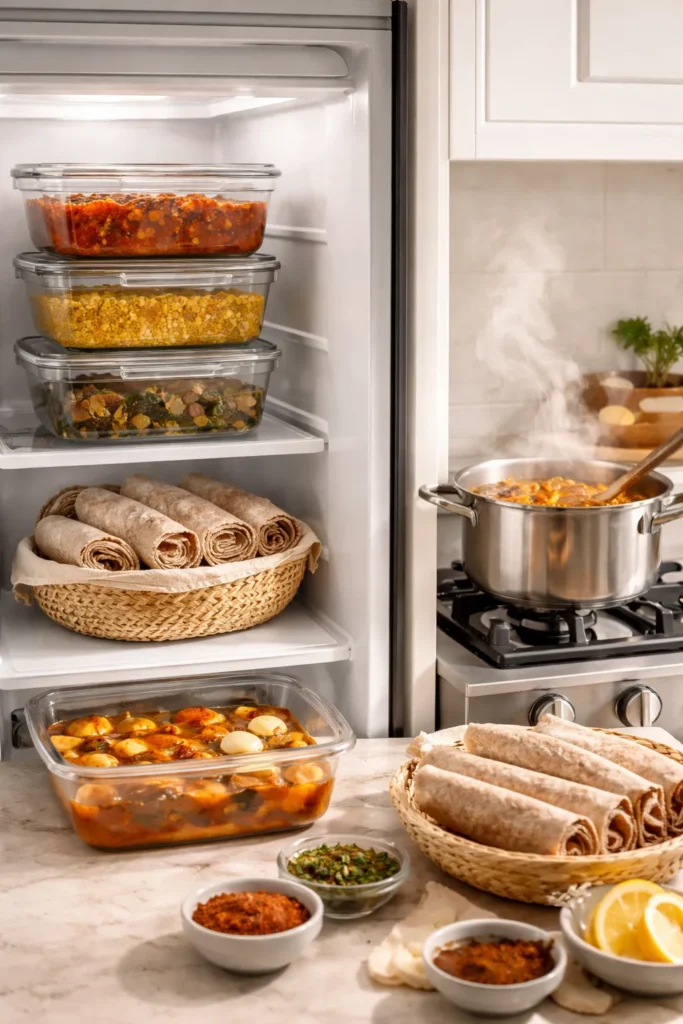
All eight stews freeze well, which makes this cuisine perfectly suited to batch cooking. Doro Wat actually freezes exceptionally well — freeze the stew without the eggs, then add freshly boiled eggs when reheating.
For refrigerator storage, most stews keep for four to five days in airtight containers. Atkilt Wat is the exception — the cabbage softens further after the first day and can become mushy by day three. Eat it first, or make it the day of serving.
Reheat stews on the stovetop over medium-low heat with a splash of water, stirring occasionally. The microwave works in a pinch but tends to make berbere-heavy stews taste flat. Ten minutes on the stovetop restores the layered quality that makes these dishes worth eating.
Injera doesn’t reheat well in a microwave. Stack leftover injera, wrap tightly in a damp paper towel, and heat in a covered pan over low heat for 2 to 3 minutes. For frozen injera, thaw at room temperature, still wrapped, before reheating.
Final Thoughts

Ethiopian food is one of those cuisines that rewards curiosity — the first time you try it, you might focus on one dish. The second time, you start tasting how everything on the platter interacts. By the third time, you understand why the injera below the stews might be the most anticipated bite of the whole meal.
The eight dishes here give you the range to build a proper Ethiopian spread: something hot and something mild, something meat-based and something fully vegetarian, something fast (Tibs, Shiro) and something worth the longer effort (Doro Wat). None of them are particularly difficult once you understand the underlying technique — caramelize the onions slowly, don’t skip the niter kibbeh, and taste as you go.
Start with Misir Wat and a batch of quick injera. Those two together will tell you everything you need to know about why this cuisine has earned such devoted fans. Add dishes from there as your pantry grows. Before long, you’ll have a rotation that makes an Ethiopian feast feel like a completely natural thing to cook on a weekend.