Bao buns have a way of making any meal feel like an event. There’s something about that first pull — the soft give of the dough, the steam rising off the wrapper, the filling packed inside — that stops people mid-bite and makes them want to immediately eat another one. It’s no accident that these little folded parcels have conquered everything from Taiwanese street corners to trendy restaurant menus in cities around the world.
The dough itself is deceptively simple: flour, yeast, a touch of baking powder, water or milk, and a splash of neutral oil. What makes bao buns different from other bread is the steam cooking method, which creates that distinctive glossy, pillowy skin you don’t get from baking. The texture sits somewhere between a soft dinner roll and a cloud, and once you’ve eaten one fresh from the steamer, frozen grocery store versions feel like a pale substitute.
What makes this format so endlessly appealing is its versatility. The wrapper is a neutral canvas — slightly sweet, milky, and soft — built to support bold fillings. Braised pork belly, gochujang-marinated chicken, sticky char siu, miso salmon, even custard cream: all of them work, and work brilliantly. The question isn’t really whether bao buns can handle your filling. The question is which direction you want to take them tonight.
The eight recipes below cover the full spectrum — from traditional Chinese fillings to creative modern riffs, with options for meat-eaters, seafood lovers, vegetarians, and those craving something sweet. A master dough recipe anchors everything, and each filling is written with enough detail that you can pull it off confidently the very first time.
Table of Contents
- The Master Bao Bun Dough That Works for All Eight Recipes
- Ingredients for the Master Bao Dough
- Step-by-Step Dough Instructions
- A Note on Flour Choices
- 1. Classic Char Siu Pork Bao
- 2. Gua Bao with Braised Pork Belly and Pickled Mustard Greens
- 3. Korean Gochujang Chicken Bao with Sesame Slaw
- 4. Hoisin Tempeh and Avocado Bao (Plant-Based)
- 5. Crispy Peking Duck Bao with Hoisin Sauce and Scallions
- 6. Miso Glazed Salmon Bao with Quick Cucumber Pickle
- 7. Sweet Chili Halloumi Bao with Herb Slaw
- 8. Custard Cream Bao (Sweet Dessert Bao)
- How to Steam Bao Without a Bamboo Steamer
- Filling and Folding Tips for a Better Bao
- Storing, Freezing, and Reheating Bao Buns
- Final Thoughts
The Master Bao Bun Dough That Works for All Eight Recipes
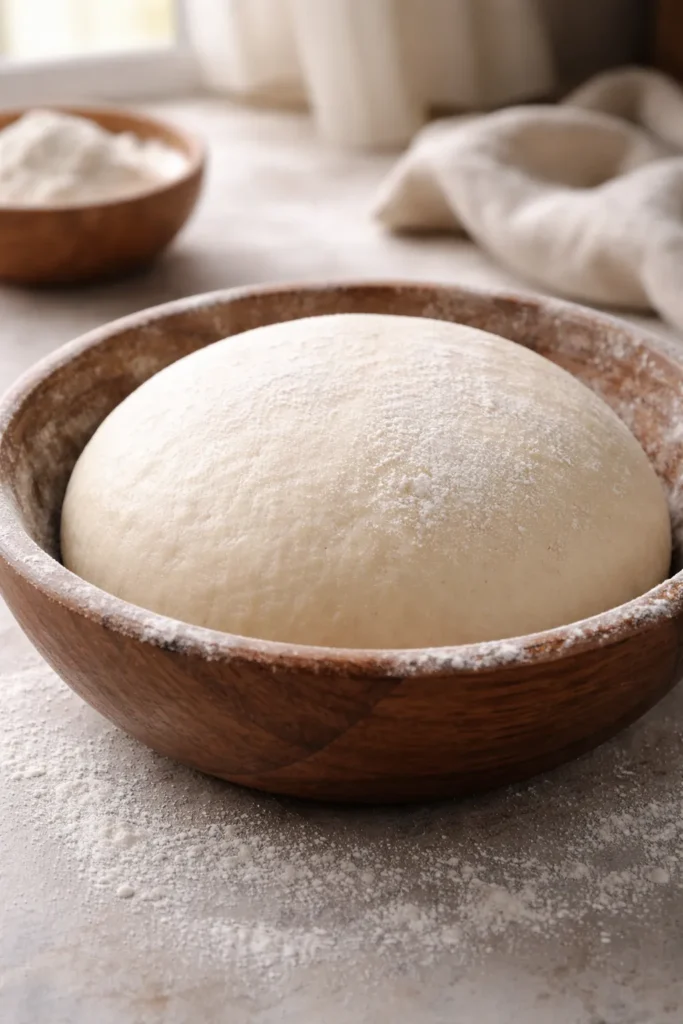
Before getting into the fillings, it’s worth nailing the dough — because every one of these recipes uses the same base. The version here uses both instant yeast and baking powder, which dramatically cuts proofing time without sacrificing that signature soft, airy texture.
The combination of the two leaveners is worth understanding. Yeast creates long, slow fermentation that builds flavor and structure. Baking powder acts faster, giving the dough a second boost of lift the moment it hits the steam. Together, they produce a wrapper that rises beautifully without requiring a two-hour proof. You can have bao buns shaped, steamed, and on the table in well under 90 minutes.
Yield: Makes 12 bao buns Prep Time: 20 minutes Rising/Rest Time: 30 minutes Cook Time: 10–12 minutes per batch Total Time: Approximately 1 hour Difficulty: Beginner — no stand mixer required, though one makes the job easier.
Ingredients for the Master Bao Dough
- 300g (2 cups + 2 tablespoons) all-purpose flour, plus extra for dusting
- 1¼ teaspoons instant yeast
- 1 teaspoon baking powder
- 1 teaspoon white sugar
- 165g (¾ cup) lukewarm water or whole milk (milk produces a slightly softer, richer wrapper)
- 1 tablespoon neutral cooking oil (canola, sunflower, or vegetable oil)
- Extra neutral oil, for brushing
Step-by-Step Dough Instructions
Mix and Knead:
- In a large bowl, combine the flour, instant yeast, baking powder, and sugar. Stir the dry ingredients together until evenly distributed.
- Pour in the lukewarm water or milk gradually, stirring with chopsticks or a wooden spoon as you pour. Add the oil. Continue stirring until a rough, shaggy dough forms.
- Use your hands to bring the dough together into a ball. Knead it briefly in the bowl to collect any stray flour from the sides, then turn it out onto a lightly floured surface.
- Knead the dough for 8 to 10 minutes, pushing it away from you with the heel of your hand, folding it back, giving it a quarter turn, and repeating. The dough is ready when it feels smooth, supple, and springs back lightly when you poke it. If using a stand mixer with the dough hook, knead on low speed for 8 minutes.
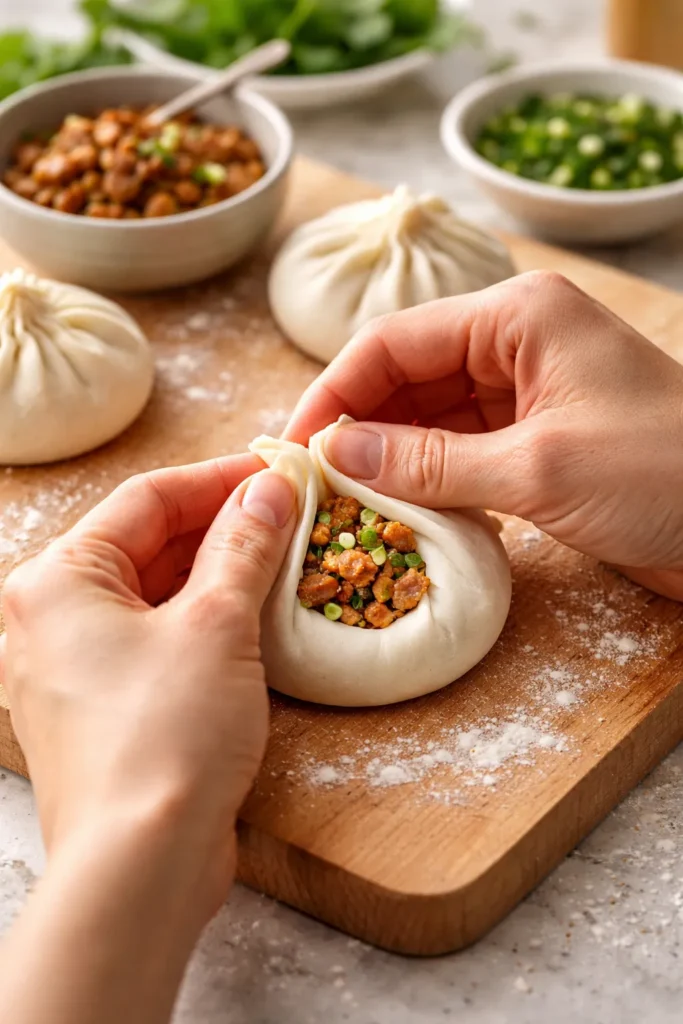
Shape the Buns:
- Divide the dough into 12 equal pieces — a kitchen scale makes this precise, targeting about 40g per piece.
- Working with one piece at a time and keeping the others covered with a clean kitchen towel, roll the dough into a smooth ball. Use a rolling pin to roll it into an oval roughly 3 inches long and ¼ inch thick.
- Brush the exposed surface lightly with neutral oil, then fold the oval in half lengthways. Press gently so the two layers stick, but don’t flatten the bun completely — you want it to stay puffy in the center.
- Place each shaped bun on a small square of parchment paper (approximately 4cm x 4cm). Arrange the buns in your steamer basket, leaving at least 2 inches between each one, as they expand during cooking.
Proof and Steam:
- Cover the buns loosely with plastic wrap or a clean towel. Leave them to proof at room temperature for 30 minutes. They won’t double in size, but they will look noticeably plumper and feel lighter when you pick them up.
- Fill the pot or wok with 2 cups of water. Place the steamer basket on top and bring the water to a boil over high heat. Once you see steam actively escaping from the gaps, turn the heat down to medium-low. Steam for 10 minutes.
- Remove the pot from the heat. Do not lift the lid immediately. Let the buns rest inside the covered steamer for 4 minutes — this resting period prevents temperature shock that causes the buns to shrink or dimple on the surface.
- Open the lid, gently remove the buns, and fill them while they’re warm. Bao buns are best eaten within minutes of steaming.
A Note on Flour Choices
All-purpose flour with a moderate protein content (around 10–11g per 100g) is the go-to here. If you want a softer, less chewy wrapper, swap out 50g of the all-purpose flour for cornstarch. For the palest, most pristine white buns you might recognize from dim sum restaurants, specialty bao flour from an Asian grocery store works, though it’s more processed and carries less natural wheat flavor. Bread flour is acceptable but gives a chewier, denser result — dial it back by replacing one-fifth of the quantity with cornstarch.
1. Classic Char Siu Pork Bao
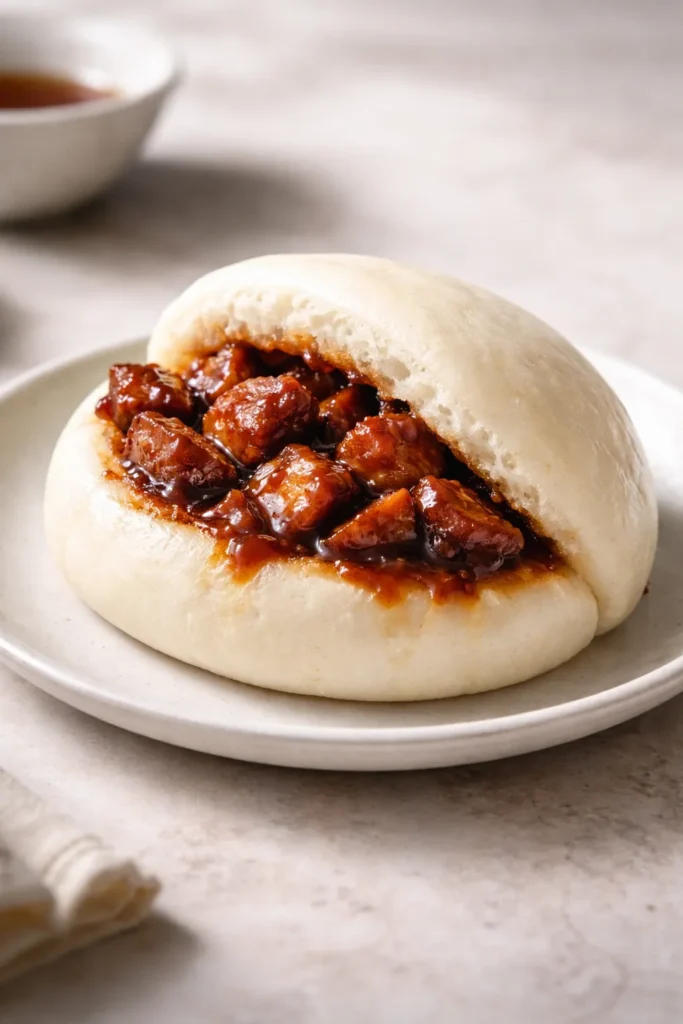
Char siu bao is the reason many people first fall in love with bao buns. The filling — sweet, smoky, and deeply savory — is made from Chinese BBQ pork (char siu) glazed with hoisin, honey, and soy, and it’s been the defining bao filling for generations. This is the traditional benchmark. Everything else on this list is measured against it.
The secret to a char siu filling that doesn’t taste flat is the sauce reduction at the end. Once the pork is cooked and chopped, you toss it in a sauce that you cook down until it’s almost jammy — thick enough to cling to every piece without making the bun soggy. Cornstarch helps achieve this, turning a thin braising liquid into something glossy and concentrated.
Char Siu Pork Filling Ingredients:
- 400g (14 oz) pork shoulder or pork belly, cut into thick strips
- 3 tablespoons hoisin sauce
- 2 tablespoons soy sauce
- 1 tablespoon oyster sauce
- 1 tablespoon honey
- 1 teaspoon Shaoxing rice wine (or dry sherry)
- ½ teaspoon Chinese five-spice powder
- 1 teaspoon sesame oil
- 1 teaspoon cornstarch, dissolved in 1 tablespoon cold water
- 2 scallions (spring onions), finely sliced
Instructions:
- Combine the hoisin, soy, oyster sauce, honey, rice wine, and five-spice. Toss the pork strips in half the marinade. Cover and refrigerate for at least 2 hours, or overnight.
- Roast the marinated pork at 425°F (220°C) for 20 to 25 minutes, basting with the reserved marinade halfway through, until the edges are lightly caramelized and the pork is cooked through.
- Let the pork rest for 10 minutes, then chop it into small, rough pieces — not uniform cubes, because the variation in size creates better texture in the bun.
- In a small pan, heat the remaining marinade over medium heat. Add the cornstarch slurry and stir constantly until the sauce thickens enough to coat the back of a spoon. Add the chopped pork and toss to coat. Remove from heat, stir in sesame oil.
- Fill each steamed bao bun with a generous spoonful of the pork filling and a pinch of sliced scallions. Serve immediately.
Worth knowing: If you have access to a Chinese barbecue shop that sells pre-made char siu, buying it ready-roasted cuts the process down to 15 minutes of sauce work. The result is genuinely excellent.
2. Gua Bao with Braised Pork Belly and Pickled Mustard Greens
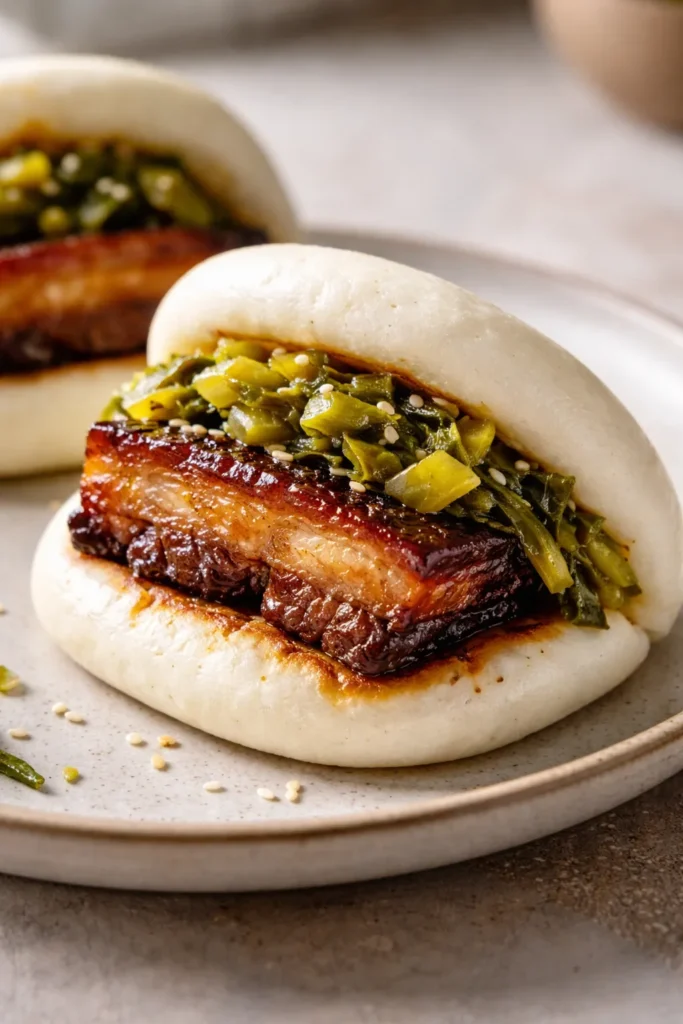
Gua bao — the Taiwanese original that started the global bao obsession — is a more dramatic eating experience than its char siu cousin. Braised pork belly, pink and tender, sits alongside sour pickled mustard greens, crushed toasted peanuts, and fresh cilantro. The contrast between the rich, fatty pork and the sharp, acidic pickles is what makes it completely addictive.
The pork belly here is braised low and slow in soy, sugar, rice wine, and aromatics until it’s yielding and almost gelatinous. Don’t rush this. The difference between 90 minutes and 2 hours of braising time is significant — at 2 hours, the fat has rendered and the meat collapses at the touch of a chopstick.
Braised Pork Belly Filling Ingredients:
- 600g (1.3 lb) skin-on pork belly, cut into ½-inch slices
- 3 tablespoons soy sauce
- 2 tablespoons dark soy sauce (for color)
- 3 tablespoons Shaoxing rice wine
- 2 tablespoons brown sugar
- 3 cloves garlic, smashed
- 2-inch piece of ginger, sliced
- 1 cup water or pork stock
- ½ cup (80g) pickled mustard greens (ya cai or suan cai), rinsed and roughly chopped
- 3 tablespoons roasted peanuts, roughly crushed
- A handful of fresh cilantro leaves
- 1 tablespoon finely ground roasted peanut powder (optional, for dusting)
Instructions:
- Blanch the pork belly slices in boiling water for 5 minutes to remove impurities. Drain and pat dry.
- In a heavy-bottomed pot or Dutch oven, combine the soy sauces, rice wine, brown sugar, garlic, ginger, and water. Bring to a simmer over medium heat, stirring to dissolve the sugar.
- Add the blanched pork belly. The liquid should come about halfway up the meat. Cover and braise over low heat for 1 hour 45 minutes to 2 hours, turning the pork every 30 minutes, until the meat is fork-tender and the braising liquid has reduced to a thick, glossy sauce. The skin should jiggle when you shake the pot.
- Remove the pork and set aside. If the braising sauce is still thin, reduce it over medium-high heat for 5 minutes until it coats a spoon.
- To assemble: open a warm steamed bao, spread a little braising sauce inside, add 1–2 slices of pork belly, a pinch of pickled mustard greens, crushed peanuts, and fresh cilantro. Dust with peanut powder if using.
3. Korean Gochujang Chicken Bao with Sesame Slaw
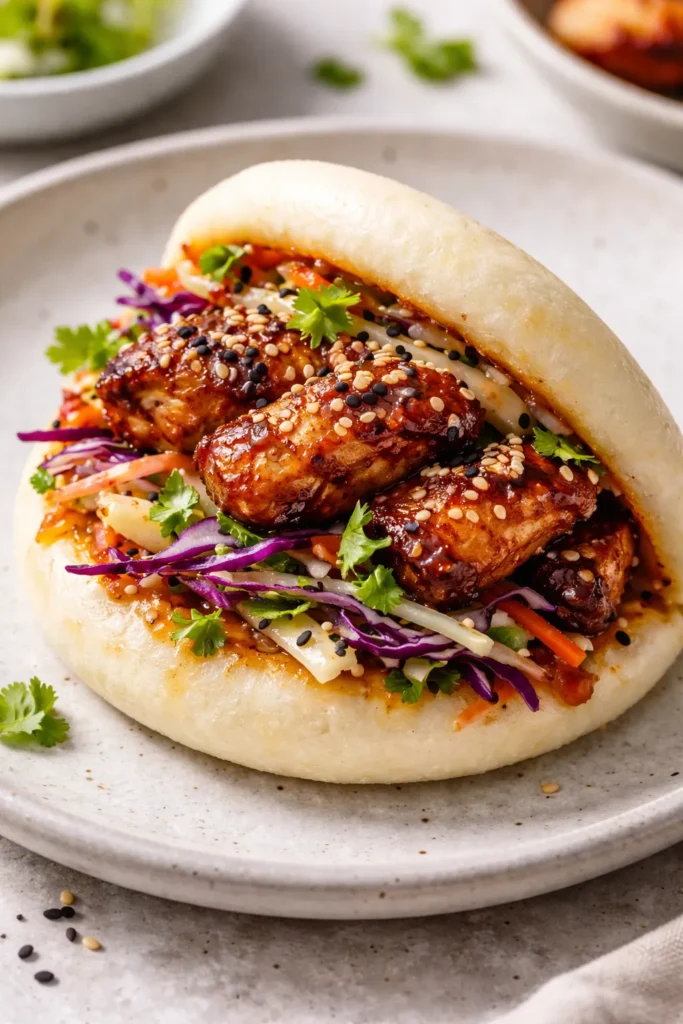
This one cuts the richness of traditional pork-based fillings with heat, char, and crunch. Chicken thighs marinated in gochujang paste, soy, sesame oil, and sweet chili jam get roasted or air-fried until the edges go dark and slightly crispy, then they’re loaded into bao with a bright, crunchy sesame slaw. It’s a full flavor experience in a three-inch package.
Chicken thighs are non-negotiable here — chicken breast goes dry in the oven and lacks the fat to carry the bold marinade. Thighs stay juicy even with high-heat cooking, and those charred bits at the edges are genuinely the best part.
Gochujang Chicken Filling Ingredients:
- 500g (1 lb) boneless, skinless chicken thighs, cut into bite-sized pieces
- 1 tablespoon gochujang paste
- 1 tablespoon soy sauce
- 1 tablespoon sesame oil
- 1 tablespoon rice vinegar
- 1 tablespoon sweet chili jam
- 1 teaspoon garlic powder
For the Sesame Slaw:
- ¼ small head red cabbage, thinly sliced
- ½ cucumber, deseeded and julienned
- 3 scallions, sliced thinly on the diagonal
- A small handful of cilantro leaves
- 1 tablespoon sesame seeds, toasted
- 1 tablespoon rice vinegar
- 1 tablespoon sesame oil
- 1 teaspoon fish sauce (or soy sauce for a vegetarian slaw)
- ½ teaspoon salt
To serve: garlic aioli or gochujang mayo, extra chili jam, lime wedges
Instructions:
- In a bowl, combine all the marinade ingredients. Add the chicken and toss thoroughly. Marinate for at least 20 minutes at room temperature, or up to 8 hours in the fridge.
- Oven method: Roast at 480°F (250°C) on a parchment-lined tray for 18–20 minutes until charred at the edges. Air fryer method: Cook at 400°F (200°C) for 10–12 minutes, shaking the basket halfway through.
- While the chicken cooks, toss all the slaw ingredients together in a bowl. Let it sit for at least 10 minutes — the vinegar softens the cabbage slightly and draws out a little liquid, which is exactly what you want.
- To assemble: spread a little gochujang mayo or garlic aioli on the inside of each warm bao. Add a pinch of slaw, then 2–3 pieces of gochujang chicken. Drizzle with a little extra chili jam and scatter sesame seeds on top. Squeeze a wedge of lime over everything before eating.
4. Hoisin Tempeh and Avocado Bao (Plant-Based)
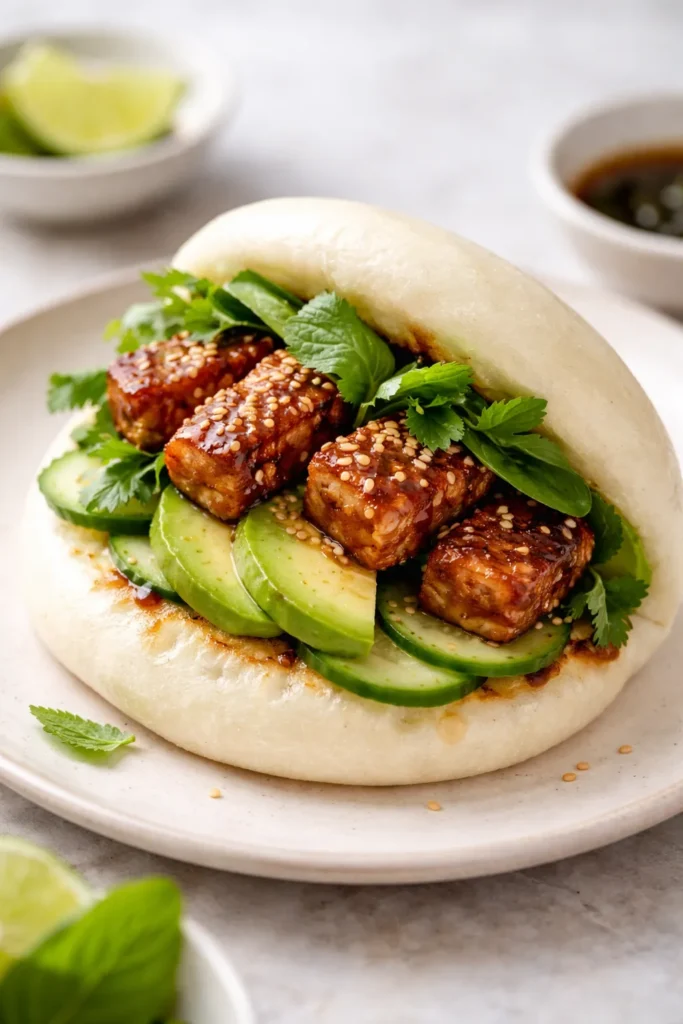
Don’t let the plant-based label fool you into thinking this filling is a consolation option. Tempeh — fermented soybeans pressed into a firm, dense cake — has a meatiness and depth that tofu can’t match, and when you steam it, marinate it in hoisin, sriracha, ginger, and lime, then bake it until the edges caramelize, the result is genuinely bold. Pair it with buttery avocado, fresh herbs, sliced cucumber, and a squeeze of lime, and this might be the most refreshing bao on the list.
Steaming the tempeh before marinating is a step many recipes skip, but it matters. Raw tempeh has a faint bitterness that steaming removes, and the open, porous structure that results from steaming also absorbs marinade more deeply. Give it 10 minutes in the steamer before it even touches the sauce.
Hoisin Tempeh Filling Ingredients:
- 225g (8 oz) tempeh, sliced into strips about ½ inch thick
- 4 tablespoons hoisin sauce
- 2 tablespoons sriracha (reduce to 1 tablespoon for less heat)
- 1 teaspoon fresh ginger, finely grated
- 1 teaspoon lime zest
- 1 tablespoon soy sauce or tamari
For serving:
- 1 ripe avocado, sliced, with a squeeze of lime to prevent browning
- ½ cucumber, thinly sliced
- 1 medium carrot, julienned or peeled into ribbons
- Fresh cilantro and/or mint leaves
- 1–2 Thai red chiles, finely diced
- Sesame seeds
- Lime wedges
Instructions:
- Steam the tempeh strips for 10 minutes over boiling water. Transfer to a plate and let them cool for 5 minutes.
- Whisk together the hoisin, sriracha, ginger, lime zest, and soy sauce in a small bowl. Set aside half the sauce for serving.
- Toss the steamed tempeh in the remaining sauce. Let it marinate for 20 minutes.
- Preheat the oven to 425°F (220°C). Arrange the marinated tempeh on a parchment-lined baking sheet in a single layer. Bake for 10–12 minutes, until the edges are darkened and the marinade has set into a sticky glaze. Don’t flip them — the bottom caramelizes against the hot pan and that’s the best part.
- To assemble: open a warm bao and layer in avocado slices, cucumber, carrot ribbons, a strip or two of tempeh with a drizzle of the reserved sauce, fresh herbs, chiles, and sesame seeds. Finish with a squeeze of lime.
5. Crispy Peking Duck Bao with Hoisin Sauce and Scallions
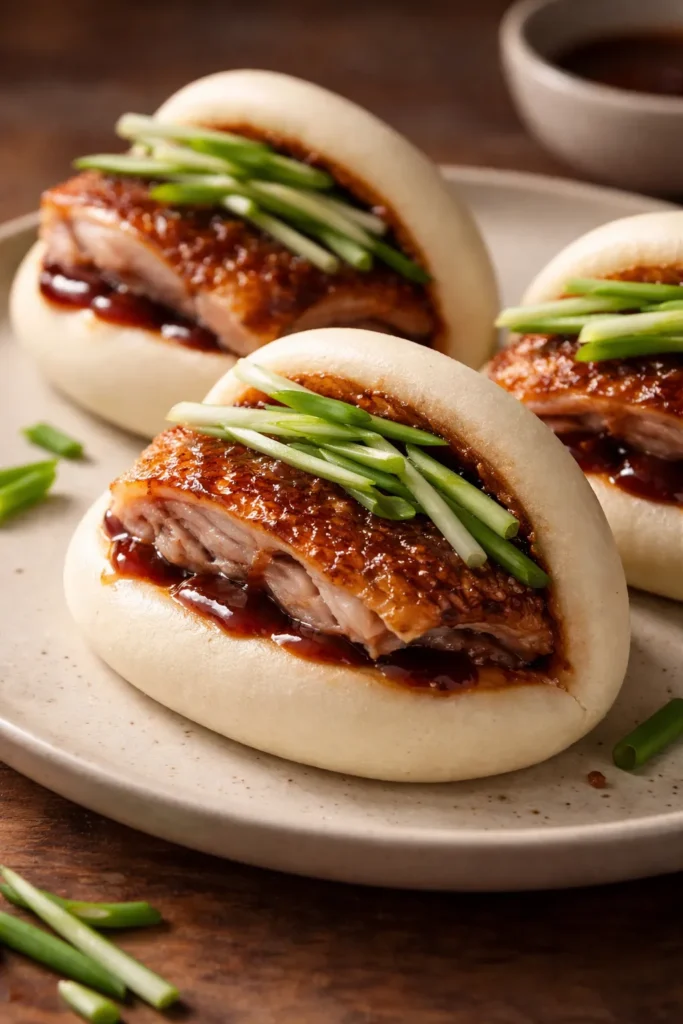
Peking duck bao is one of the most elegant-feeling fillings on this list, and it’s considerably easier to pull off at home than the name implies. The traditional approach uses fresh lotus leaf bao (He Ye Bing) as the wrapper — which is exactly the folded bao dough in the master recipe above — with sliced duck, scallions, and hoisin sauce. This version uses roasted duck legs, which are much more practical for home cooking than a whole Peking-style bird.
The skin is the whole point. Roast the duck legs low and slow first, then crank the heat at the end to render the fat and crisp the skin until it shatters. That textural contrast — shatteringly crisp skin against the pillowy, soft bao — is what makes this combination so celebrated.
Crispy Duck Filling Ingredients:
- 2 large duck legs, scored with a sharp knife through the skin (not the meat)
- 1 teaspoon Chinese five-spice powder
- 1 teaspoon salt
- ½ teaspoon black pepper
- 4 tablespoons hoisin sauce, for serving
- 4 scallions, cut into thin 2-inch strips
- ½ cucumber, cut into thin matchsticks
Instructions:
- Pat the duck legs completely dry with paper towels. This is non-negotiable for crispy skin — any surface moisture turns to steam in the oven and softens the skin.
- Rub the five-spice, salt, and pepper all over the duck legs, including under any loose skin. Place them skin-side up on a wire rack set over a baking tray. Leave them uncovered in the fridge for at least 4 hours (or overnight) to dry out further.
- Roast at 300°F (150°C) for 1 hour 30 minutes. The fat will render slowly and the meat will become tender.
- Increase the oven to 450°F (230°C) and roast for a further 20–25 minutes until the skin is deeply golden and crackles when tapped. Let rest for 10 minutes before shredding the meat and slicing or breaking the skin into pieces.
- To assemble: spread hoisin sauce on the inside of each warm bao. Add shredded duck meat, a few pieces of crispy skin, scallion strips, and cucumber matchsticks. Fold and eat immediately — the skin softens quickly.
6. Miso Glazed Salmon Bao with Quick Cucumber Pickle
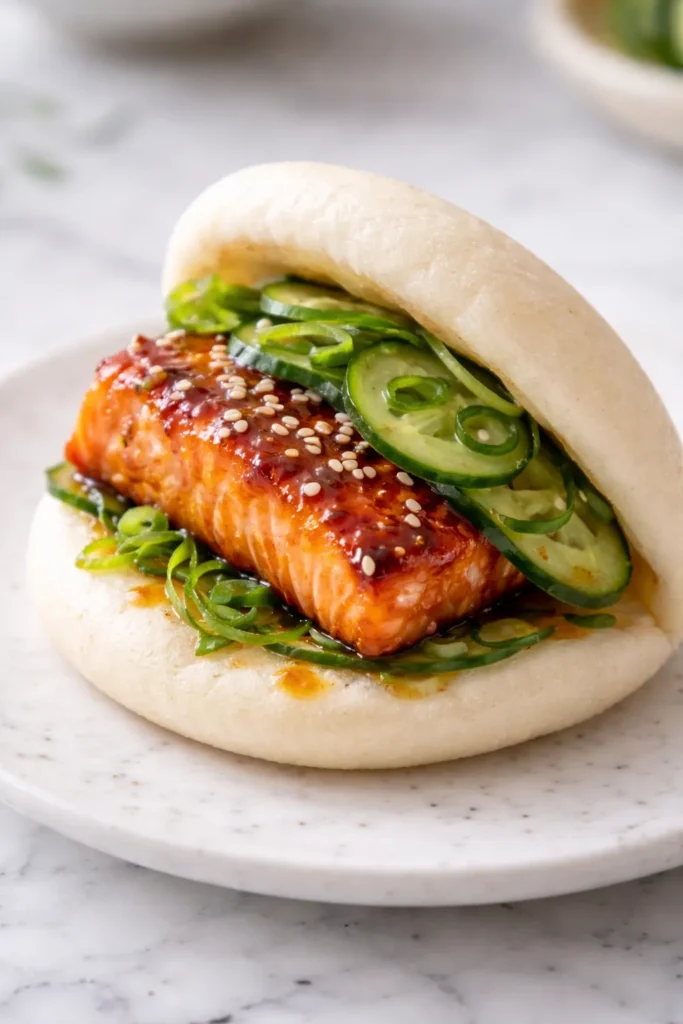
Salmon and bao might sound unexpected, but the combination makes complete sense once you think through the flavors. Miso is fermented, savory, and slightly sweet — it does for salmon what hoisin does for pork. Broiled with a miso and mirin glaze until lacquered and caramelized, the salmon becomes intensely flavorful in a way that holds its own inside the bao wrapper.
The quick cucumber pickle is a 15-minute prep that transforms thinly sliced cucumber into something tangy, slightly sweet, and faintly spicy. It cuts through the richness of the fish in exactly the same way pickled mustard greens work in gua bao. Don’t skip it.
Miso Salmon Filling Ingredients:
- 400g (14 oz) salmon fillet, skin removed, cut into 12 rough pieces
- 2 tablespoons white miso paste
- 1 tablespoon mirin
- 1 tablespoon soy sauce
- 1 teaspoon honey
- 1 teaspoon sesame oil
For the Quick Cucumber Pickle:
- 1 large cucumber, halved lengthwise, deseeded, and thinly sliced
- 1 tablespoon rice vinegar
- 1 teaspoon sugar
- ½ teaspoon salt
- ½ teaspoon sesame oil
- A pinch of chili flakes (optional)
To serve: sliced scallions, sesame seeds, pickled ginger (optional)
Instructions:
- Start the cucumber pickle first so it has time to sit. Toss the cucumber slices with rice vinegar, sugar, salt, sesame oil, and chili flakes. Let them sit at room temperature for at least 15 minutes, tossing once halfway through. The cucumber will soften slightly and release some liquid — that’s exactly right.
- In a small bowl, whisk together the miso paste, mirin, soy sauce, honey, and sesame oil until smooth.
- Pat the salmon pieces dry and place them on a foil-lined baking tray. Spoon or brush the miso glaze generously over each piece.
- Broil on a high setting for 6 to 8 minutes — watch them closely. The glaze should bubble and darken at the edges without burning. The salmon is done when it flakes easily but still looks glossy and slightly translucent in the very center.
- To assemble: place a small pile of drained cucumber pickle inside each warm bao. Add a piece of miso salmon, a pinch of pickled ginger if using, and scatter with sliced scallion and sesame seeds.
7. Sweet Chili Halloumi Bao with Herb Slaw
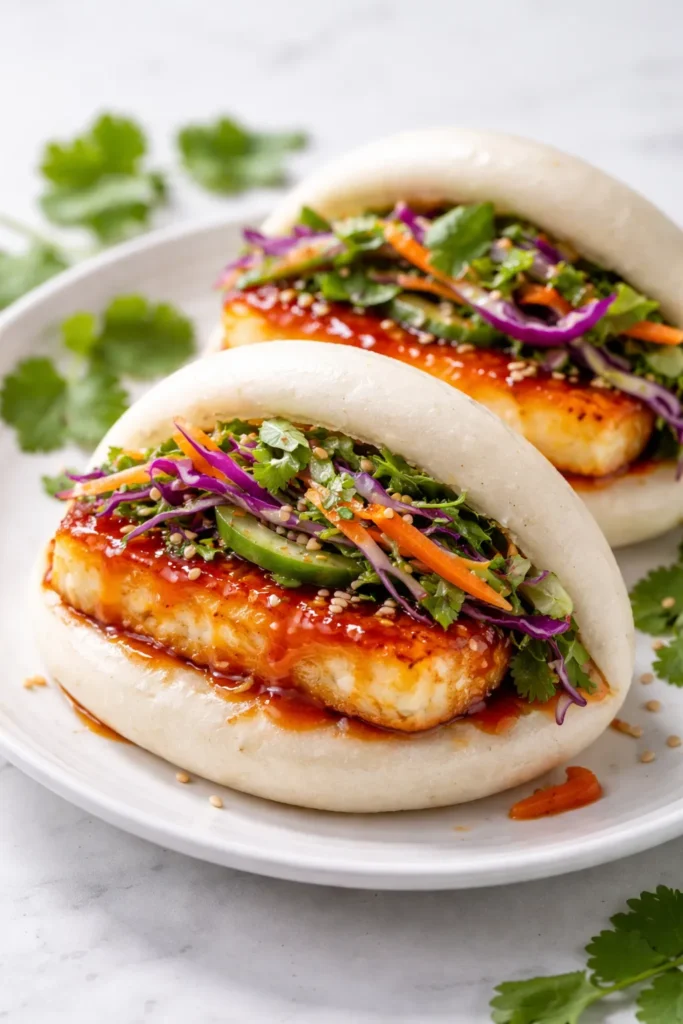
Halloumi’s unique cooking properties — it holds its shape under high heat and develops a firm, golden crust — make it one of the best vegetarian proteins to put inside a bao. Tossed in sweet chili sauce and seared until caramelized on each side, it has a satisfying chew and a bright, sticky sweetness that pairs perfectly with a herby, vinegary slaw.
The critical thing with halloumi is pan temperature. The pan must be genuinely hot before the halloumi goes in — a medium-warm pan leads to rubbery, pale cheese. A properly hot, dry pan produces that golden, slightly crisp exterior in about 2 minutes per side.
Sweet Chili Halloumi Filling Ingredients:
- 250g (9 oz) halloumi, sliced into ½-inch-thick rectangles
- 3 tablespoons sweet chili sauce, plus extra for serving
- 1 tablespoon soy sauce
- 1 tablespoon sesame oil
For the Herb Slaw:
- 2 cups (about 150g) shredded green or white cabbage
- ½ cup (about 20g) fresh mint leaves, roughly torn
- ½ cup (about 20g) fresh cilantro leaves
- 1 scallion, thinly sliced
- 2 tablespoons rice vinegar
- 1 tablespoon lime juice
- 1 teaspoon sesame oil
- 1 teaspoon sugar
- ½ teaspoon salt
Instructions:
- Make the herb slaw first: toss the cabbage, mint, cilantro, and scallion in a bowl. In a small separate bowl, whisk together the rice vinegar, lime juice, sesame oil, sugar, and salt. Pour over the cabbage mixture and toss well. Let sit for 10 minutes while you cook the halloumi.
- Mix the sweet chili sauce, soy sauce, and sesame oil in a small bowl. Pat the halloumi slices completely dry with paper towels.
- Heat a non-stick or cast iron pan over high heat until it’s properly hot — hold your hand an inch above the surface and you should feel intense heat radiating up.
- Add the halloumi slices to the dry pan (no oil needed — halloumi releases its own). Sear for 2 minutes without touching, until the bottom is deeply golden. Flip and sear the other side for 1 to 2 minutes.
- Pour the sweet chili mixture over the halloumi in the pan. It will sizzle and caramelize quickly — swirl the pan and cook for 30 seconds until the sauce coats every piece.
- To assemble: add a generous pinch of herb slaw to each warm bao, top with 1–2 pieces of glazed halloumi, and drizzle with extra sweet chili sauce.
8. Custard Cream Bao (Sweet Dessert Bao)
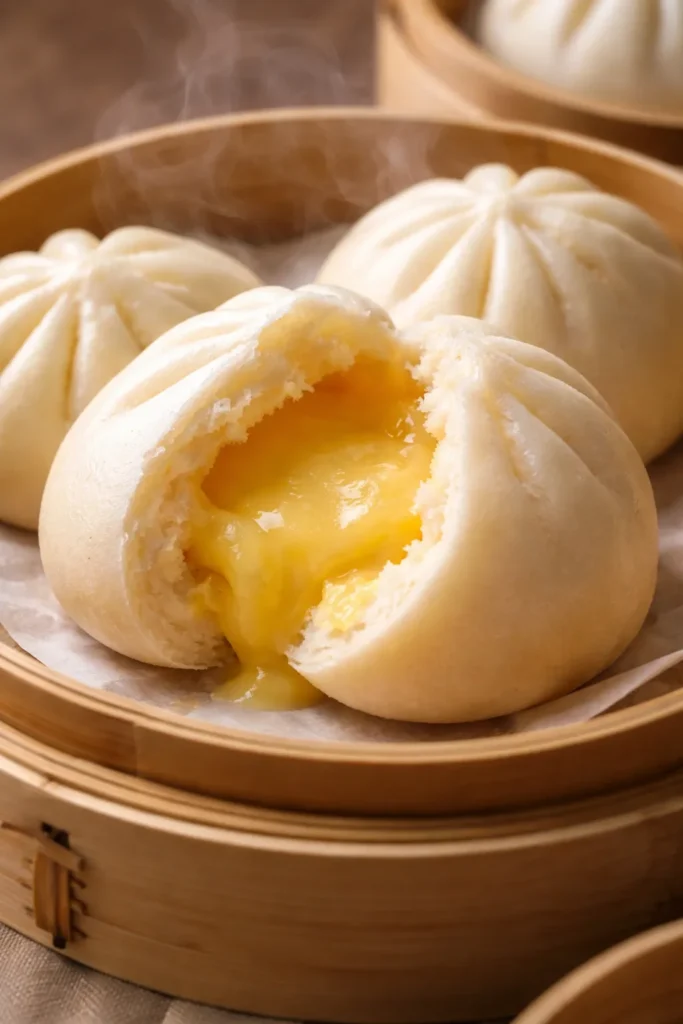
Dessert bao might be the most underrated option on this list. Steamed custard buns — nai wong bao — are a classic dim sum item: a subtly sweet, eggy custard filling encased in the same soft, white dough. They’re lighter than they sound, and eating one warm from the steamer, with the custard just barely set and still slightly molten in the center, is a genuinely different experience from anything you get from a savory filling.
For folded bao (rather than sealed, pleated buns), the custard needs to be thick enough to hold its shape when the bun is opened. A pastry cream-style custard, set firmly in the fridge before using, works perfectly.
Sweet Custard Filling Ingredients:
- 4 large egg yolks
- 4 tablespoons (50g) caster sugar
- 2 tablespoons (20g) cornstarch
- 1 tablespoon (10g) all-purpose flour
- 250ml (1 cup) whole milk
- 1 tablespoon unsalted butter
- 1 teaspoon vanilla extract
- ¼ teaspoon fine salt
To finish:
- A pinch of powdered sugar for dusting (optional)
- A drizzle of condensed milk (traditional and excellent)
Instructions:
- Whisk the egg yolks, sugar, cornstarch, and flour together in a bowl until completely smooth and pale. This step removes lumps — take your time with it.
- Heat the milk in a small saucepan over medium heat until it just begins to steam and small bubbles appear at the edges (don’t boil it).
- Slowly pour about a third of the hot milk into the egg mixture, whisking constantly to temper the eggs. Pour the tempered egg mixture back into the saucepan with the remaining milk.
- Cook over medium heat, stirring continuously with a rubber spatula, until the mixture thickens noticeably — about 4 to 5 minutes. The custard is ready when it holds a clear track when you drag the spatula across the bottom of the pan.
- Remove from heat. Add the butter, vanilla, and salt. Stir until the butter melts completely into the custard.
- Transfer to a bowl. Press plastic wrap directly against the surface of the custard (this prevents a skin from forming). Refrigerate until fully set and cold, at least 2 hours.
- To assemble: open a warm steamed bao and spoon in a generous amount of cold custard filling. The contrast of warm bun and cool custard is part of the appeal — don’t warm the custard before filling. Dust with a pinch of powdered sugar if you’d like, or drizzle with a little condensed milk.
Worth knowing: The custard bao is best eaten within 10 minutes of being filled. As the warm bun sits against the cold custard, the filling softens and begins to melt into the dough — delicious immediately, but messy if left to sit.
How to Steam Bao Without a Bamboo Steamer
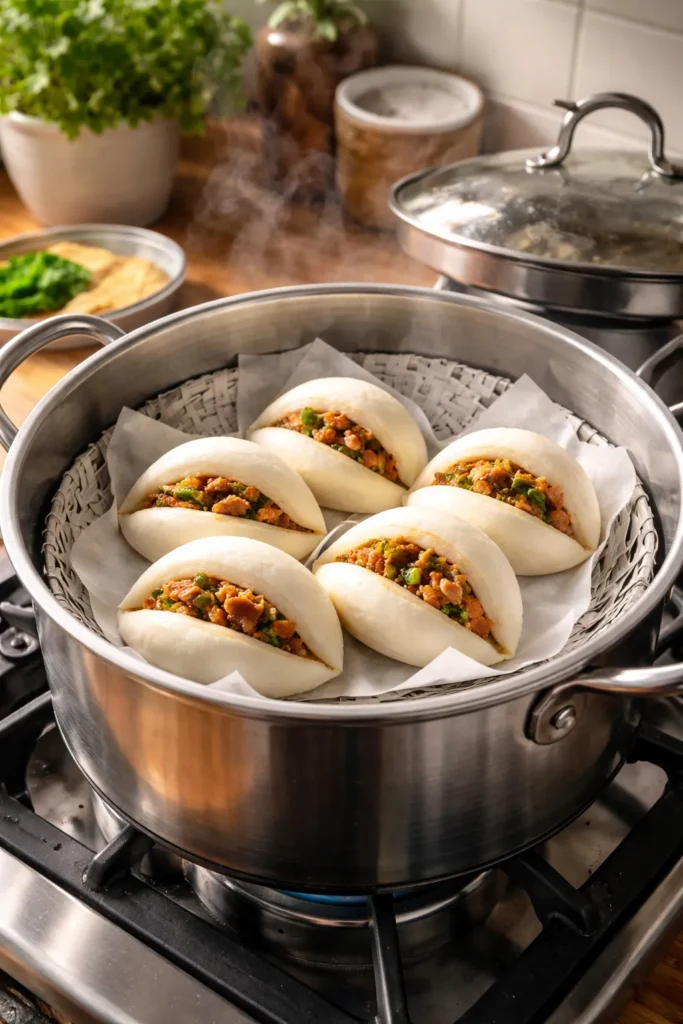
A bamboo steamer is worth owning if you make bao regularly — it absorbs excess moisture, preventing condensation droplets from falling on the buns and creating wet patches. But it’s not essential.
A metal or plastic steamer basket that fits over a pot works just as well. Line the basket with parchment paper cut into small squares (one under each bun) or use a single liner with holes punched through it to allow steam to circulate.
No steamer at all? Improvise with a large pot, three golf-ball-sized pieces of crumpled aluminum foil arranged in a triangle, and a heatproof plate set on top of the foil. The plate sits above the water line, the buns go on the plate, and the pot gets covered with a lid or a second large pot turned upside down. It works surprisingly well. Steam for the same time — 10 to 12 minutes over medium-low heat after bringing the water to a boil.
One rule applies to every steaming method: never lift the lid in the first 10 minutes, and always let the buns rest for 3 to 4 minutes with the heat off before you open up. The thermal shock of cold air hitting hot dough is what causes bao to deflate or develop dimpled, wrinkled surfaces.
Filling and Folding Tips for a Better Bao
Bao buns are forgiving, but a few habits separate buns that look and eat well from ones that fall apart or turn soggy before you finish assembling them.
Keep the fillings dry. Any filling with excess liquid will soak into the dough within minutes. Sauces should be thick and clingy, not loose and pourable. Reduce pan sauces further than you think you need to. Pat proteins dry before adding them to any sauce.
Assemble at the last moment. The filling goes in when you’re ready to eat — not five minutes before. Even the most carefully prepared bao becomes soggy if the filling sits inside a warm, steaming bun for too long.
Temperature contrast is your friend. The custard bao illustrates this beautifully, but it applies to savory fillings too. Cool pickles against warm pork, crisp slaw against hot chicken, chilled cucumber against broiled salmon — the contrast keeps every bite interesting.
Don’t overfill. A bao bun holds less than you think. Two or three strips of filling, a modest pinch of vegetables, and a drizzle of sauce is plenty. Overstuffed bao spill their contents and are genuinely difficult to eat cleanly. Less is more here.
Storing, Freezing, and Reheating Bao Buns
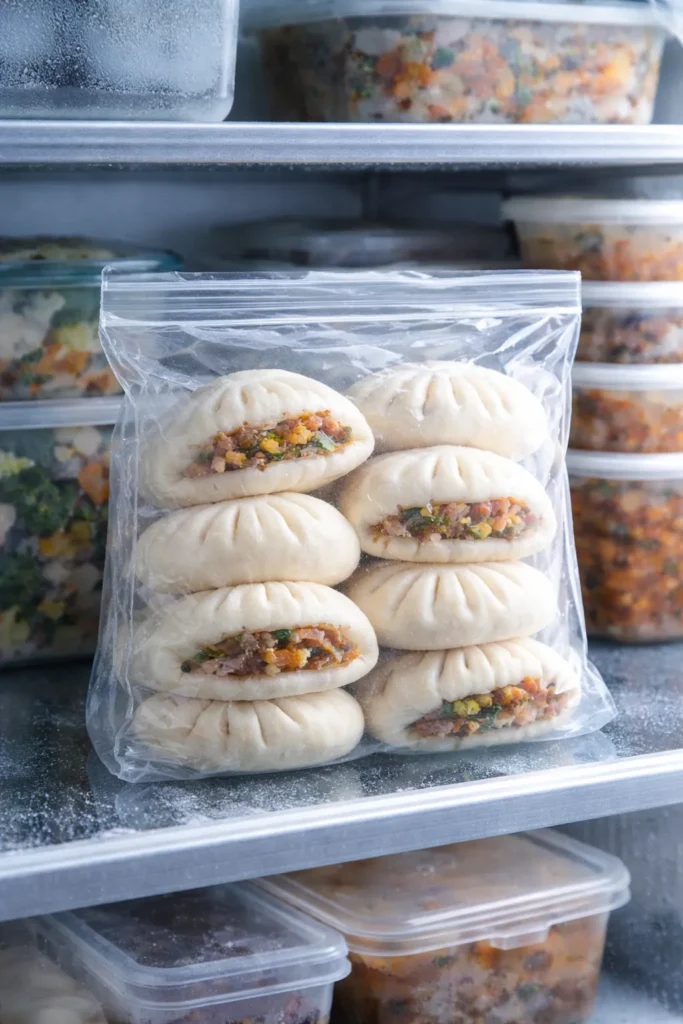
Plain steamed bao buns freeze exceptionally well, which makes batch cooking worthwhile. Steam a full batch of 12 bao, let them cool completely on a wire rack, then freeze them on a flat tray until solid. Transfer them to zip-lock freezer bags and store for up to 2 months.
To reheat from frozen: steam over boiling water for 10 to 12 minutes. No thawing needed. The buns come out almost indistinguishable from freshly made.
From the refrigerator: store bao in an airtight container for up to 3 days and re-steam for 5 minutes, or microwave individual buns wrapped in a damp paper towel for 30 seconds. The microwave method is faster but the texture isn’t quite as good — the steam method always wins.
One important rule on freezing: freeze the buns and the fillings separately. Most fillings (braised pork, char siu, the custard) freeze well on their own, but they don’t reheat properly if packed inside the bun. Store them in separate containers, defrost individually, and assemble fresh.
Final Thoughts
Bao buns reward the cook in a way few dishes do. The dough is genuinely forgiving — more so than most bread recipes — and the fillling options span practically every flavor profile, dietary preference, and occasion you can think of.
The master dough recipe and the steaming method are the foundation. Get those right once, and every single filling on this list becomes straightforward. Start with whichever recipe sounds most appealing to you right now — the char siu pork if you want something traditional, the gochujang chicken if you want something quick, the custard if you want to surprise someone at the end of a meal.
Make a double batch of bao, stuff your freezer, and you’re permanently 10 minutes away from a genuinely satisfying meal. That’s the real case for mastering bao at home — not just the quality of the food, but the sheer convenience of having them on standby whenever the mood strikes.