There’s a particular kind of dinner magic that happens when a bubbling, golden-topped casserole dish hits the table and everyone immediately reaches for a piece of nori to scoop it up. That’s exactly what sushi bake delivers — all the creamy, umami-packed satisfaction of your favorite sushi roll, baked into a shareable casserole that anyone can pull off on a Tuesday night.
Sushi bake has an interesting origin story. A nail artist named Mimi Qiu Reyes is widely credited with creating the first version, inspired by the California roll, back around 2015. Filipino restaurants picked it up quickly, turning it into a restaurant staple before home cooks everywhere embraced it as their own. What started as a quiet trend exploded into a full-on phenomenon, and for good reason — it takes the most craveable parts of sushi and removes every barrier that makes homemade sushi intimidating.
No bamboo rolling mat. No precise knife skills. No stressing over whether your nori will crack or your roll will fall apart mid-slice. You press seasoned rice into a baking dish, pile on a creamy seafood mixture, bake until golden, and serve it in scoopable, taco-style bites. The hardest part is choosing which version to make first.
These eight sushi bake recipes cover everything from the stripped-back classic to bold, personality-packed twists. Some lean into rich umami depth, others play with heat and smoke, and a couple are creative enough to genuinely surprise your guests. Whether you’re cooking for a crowd or a cozy weeknight dinner for four, there’s a version here that fits the mood.
Table of Contents
- What Makes Sushi Bake So Addictive
- The Foundation: Getting Your Sushi Rice Right
- Choosing the Right Rice
- Seasoning the Rice Properly
- Pressing the Rice Into the Pan
- 1. Classic California Roll Sushi Bake
- Why This Version Works Every Time
- Ingredients
- Instructions
- 2. Spicy Salmon Sushi Bake
- Building the Salmon Layer
- Key Differences From the Classic
- 3. Crab and Cream Cheese Sushi Bake
- The Cream Cheese Ratio
- What to Add to the Top
- 4. Spicy Tuna Sushi Bake
- Choosing and Preparing the Tuna
- The Seaweed Layer Technique
- 5. Spam Musubi Sushi Bake
- Caramelizing the Spam Properly
- Layering Strategy
- 6. Salmon Mentaiko Sushi Bake
- Finding and Using Mentaiko
- The Torch Finish
- 7. Shrimp Tempura Sushi Bake
- Using Frozen Tempura Shrimp
- The Crunch Layer on Top
- 8. Philly Roll Sushi Bake
- Building the Philly Bake
- The Cold Salmon Technique
- Tips for Serving and Storing Your Sushi Bake
- Letting It Rest Before Serving
- The Best Way to Serve It
- Storing Leftovers
- Making It Ahead
- Final Thoughts
What Makes Sushi Bake So Addictive
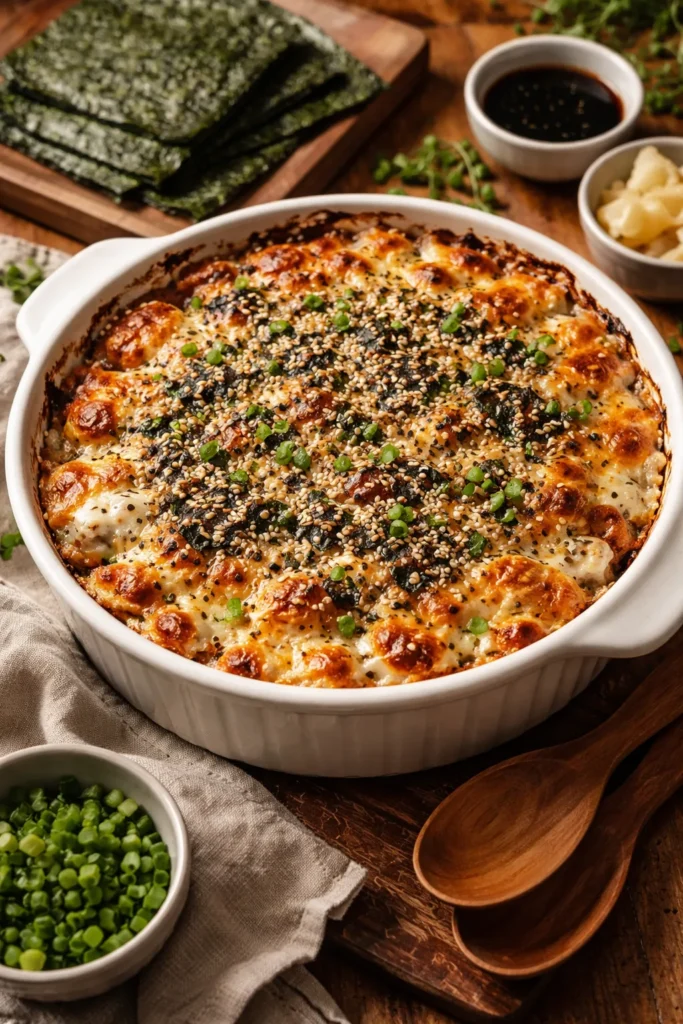
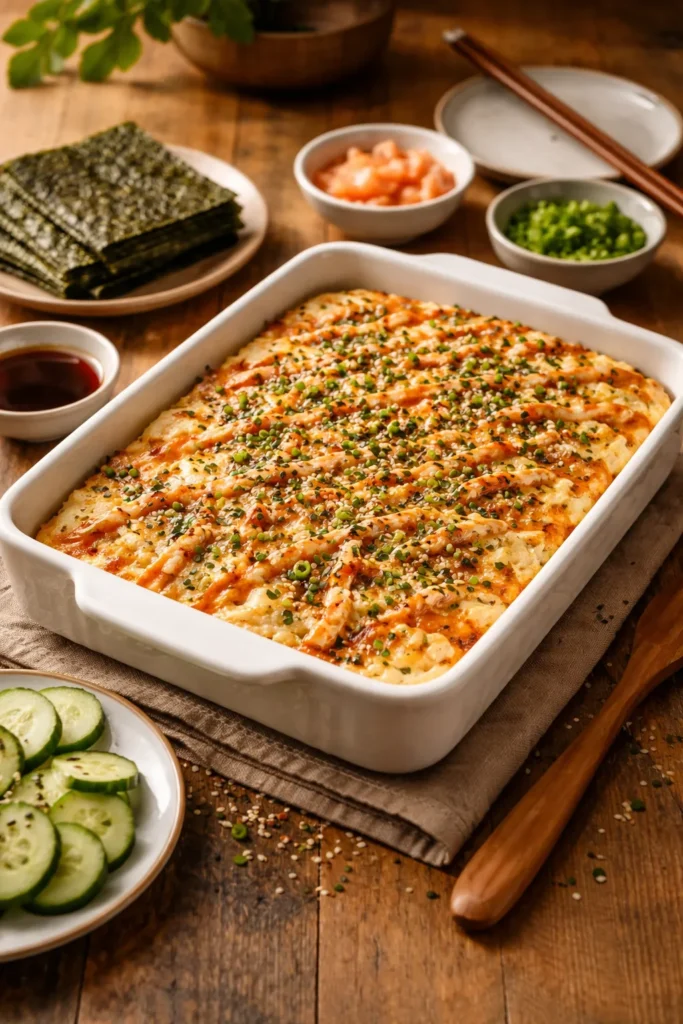
At its core, a sushi bake is a layered casserole built on the same flavor logic as a great sushi roll — sticky seasoned rice, rich protein, creamy sauce, and the sharp contrast of seaweed and fresh toppings. But the oven changes the texture equation in ways that make it arguably more satisfying than a cold roll.
The heat causes the mayo-based topping to blister and brown slightly, creating crispy caramelized edges and a bubbling, creamy center. The rice firms up into a cohesive base that holds its shape when you scoop it. The seafood mixture melds together instead of sitting as separate ingredients. Warm, savory, and deeply rich — it hits notes that a cold sushi roll simply can’t reach.
Furikake is one of the non-negotiable secrets here. This Japanese seasoning blend — typically a mix of dried seaweed flakes, bonito, sesame seeds, and salt — goes on both the rice layer and the top of the filling. It adds a nutty, savory depth that ties every layer together. Skip it and the dish tastes flat. Use it and you’ll understand why people put furikake on everything.
The communal eating style also plays a huge role in why this dish works so well at a dinner party or family night. Serving a platter of nori sheets alongside the baking dish and letting everyone scoop their own little sushi tacos transforms dinner into an interactive experience. It’s the kind of meal that generates conversation.
The Foundation: Getting Your Sushi Rice Right
Before diving into the eight variations, it’s worth talking about the rice — because this is where most sushi bakes succeed or fail. The right rice makes a sturdy, flavorful base that enhances every bite. The wrong rice produces a mushy, flavorless layer that drags the whole dish down.
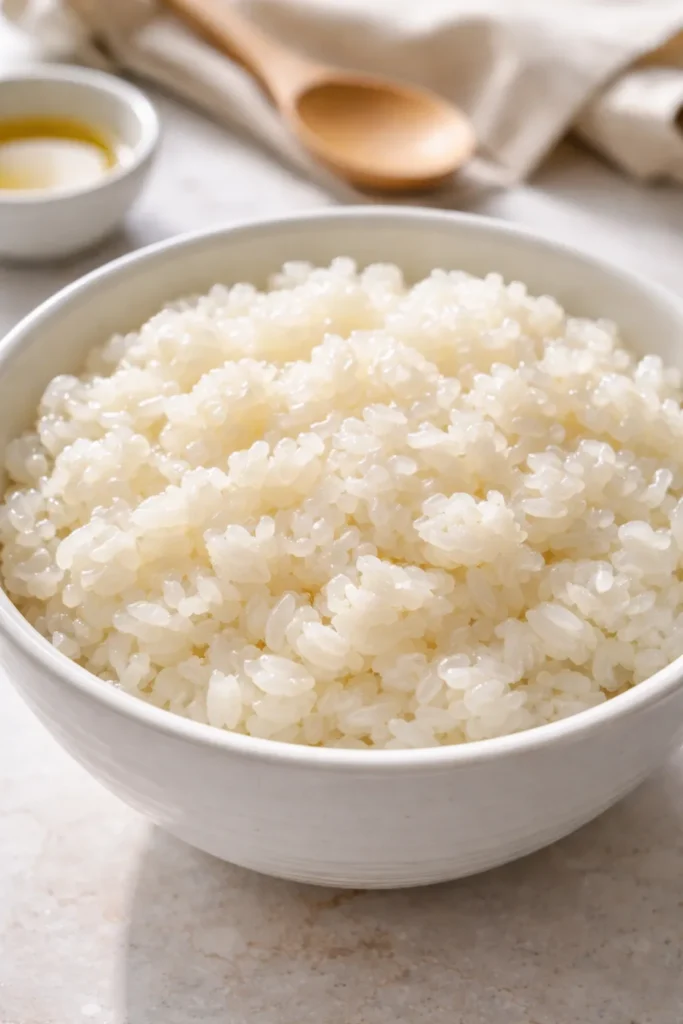
Choosing the Right Rice
Short-grain or medium-grain Japanese rice is non-negotiable for authentic texture. Look for labels like Calrose, Koshihikari, Botan, or simply “sushi rice.” These varieties have a higher starch content that creates the characteristic sticky, chewy texture as they cook. Long-grain rice — jasmine, basmati, regular white rice — doesn’t have enough starch to hold together when pressed into a baking dish, and it won’t absorb the vinegar seasoning the same way.
Rinse the rice under cold water before cooking, stirring it with your fingers until the water runs clear. This removes excess surface starch that would otherwise make the rice gluey rather than sticky. It takes about 60-90 seconds of rinsing and it makes a meaningful difference in the final texture.
Seasoning the Rice Properly
Sushi rice gets its signature tangy-sweet flavor from a mixture of rice vinegar, sugar, and salt folded in while the rice is still hot. A standard ratio for 2 cups of uncooked rice is 3 tablespoons rice vinegar, 2 tablespoons sugar, and 1 teaspoon salt. Fold this in with a slicing motion using a wooden spoon or rice paddle — don’t stir aggressively or you’ll break the grains and lose that sticky-but-separate texture.
Pressing the Rice Into the Pan
One step that significantly affects the final dish: press the rice firmly and evenly into your baking dish before adding the topping. Use the back of a spoon, a flat spatula, or even damp fingers. The goal is a compact, level base — roughly ¾ inch thick — that holds together when scooped. Rice that’s pressed too loosely will crumble when you serve it; rice that’s packed too tightly can become dense and chewy. Aim for firm but not rock-solid.
1. Classic California Roll Sushi Bake
The dish that started it all, and still the one that converts the most skeptics. If someone at your table isn’t sure about sushi bake, start here. It’s familiar, approachable, and built entirely around the flavors people already know they love.
Why This Version Works Every Time
The California roll combination of imitation crab, creamy mayo, and cucumber has an almost universal appeal. In baked casserole form, the imitation crab — which is actually seasoned surimi, a processed fish product made from pollock — shreds easily and absorbs the creamy mayo sauce while developing a lightly browned top in the oven.
Using Kewpie mayonnaise here makes a genuine difference. It’s richer, slightly sweeter, and more umami-forward than standard American mayo because it uses only egg yolks (not whole eggs) and rice vinegar. If you can’t find it at an Asian grocery store or international aisle, whisk together regular mayo with a splash of rice vinegar and a pinch of sugar as a workable substitute — it won’t be identical, but it gets the job done.
Adding cream cheese to the crab mixture is the move that takes this from good to genuinely crave-worthy. It makes the filling thicker, richer, and closer in texture to the cream cheese inside a Philadelphia-style roll.
Ingredients
For the Sushi Rice:
- 2 cups uncooked Calrose or short-grain sushi rice
- 2½ cups water
- 3 tablespoons seasoned rice vinegar
- 2 tablespoons granulated sugar
- 1 teaspoon fine salt
For the Crab Filling:
- ½ pound imitation crab meat, finely shredded
- ½ cup Kewpie mayonnaise, plus more for drizzling
- 2 ounces cream cheese, softened to room temperature
- 2 green onions, thinly sliced
- 1 tablespoon sriracha (adjust to taste)
- ¼ cup furikake seasoning, divided
For Serving:
- Roasted seaweed snack sheets or nori sheets, cut to size
- 1 Persian cucumber, thinly sliced into rounds
- 1 ripe avocado, sliced
- Soy sauce, for dipping
Yield: Serves 4 to 6 Prep Time: 20 minutes Cook Time: 15 minutes Total Time: 35 minutes + rice cooking time (20-25 minutes) Difficulty: Beginner — no special equipment needed and every step is straightforward even on a first attempt.
Instructions
Cook and Season the Rice:
-
Rinse the sushi rice under cold running water in a fine-mesh sieve, mixing with your fingers, until the water runs completely clear — about 60-90 seconds. Drain well.
-
Combine the rinsed rice and water in a medium saucepan. Bring to a boil over high heat, then immediately reduce to the lowest heat setting, cover tightly, and cook for 18 minutes. Remove from heat and let steam, covered, for 5 additional minutes. Do not lift the lid during cooking.
-
In a small bowl, stir together the rice vinegar, sugar, and salt until the sugar fully dissolves. Transfer the cooked rice to a large bowl and drizzle the vinegar mixture over it. Fold it in using a slicing motion — not a stirring motion — until every grain is coated. Set aside to cool slightly.
Assemble and Bake:
-
Preheat oven to 400°F (200°C). Lightly grease an 8×8 or 9×9 inch baking dish.
-
Press the seasoned rice firmly and evenly into the bottom of the prepared dish in a layer approximately ¾ inch thick.
-
Sprinkle 2 tablespoons of furikake evenly over the rice layer.
-
In a medium bowl, beat the softened cream cheese until smooth. Add the shredded imitation crab, Kewpie mayo, green onions, and sriracha. Mix until fully combined — the filling should be thick and cohesive, not loose.
-
Spread the crab mixture evenly over the rice layer, pressing gently to fill the dish edge to edge. Sprinkle the remaining 2 tablespoons of furikake over the top. Drizzle with a little extra Kewpie mayo.
-
Bake for 15 minutes, until the top is lightly golden and bubbling at the edges. For a slightly crispier top, switch to broil for 2 minutes — watch it constantly under the broiler, as it can go from golden to burnt in under a minute.
-
Allow the dish to rest for 8-10 minutes before serving. This lets the layers settle and makes it easier to scoop cleanly.
To Serve:
- Arrange the seaweed sheets, cucumber slices, and avocado alongside the casserole dish. Scoop a generous spoonful onto a seaweed sheet, add a cucumber round and a slice of avocado, fold it into a taco shape, and dip into soy sauce.
2. Spicy Salmon Sushi Bake
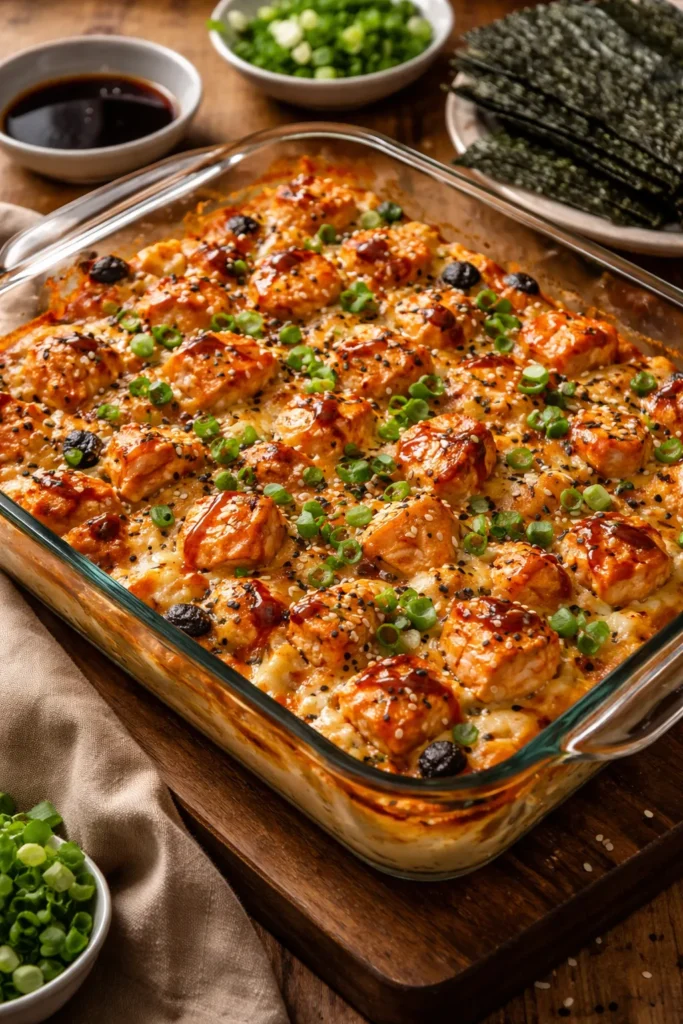
If the classic California roll version is the crowd-pleaser, the spicy salmon version is the one that makes people text you the next day asking for the recipe. Salmon’s rich fat content pairs beautifully with heat, and the spicy mayo topping practically caramelizes in the oven into something close to a glaze.
Building the Salmon Layer
You have two solid options for the salmon here. Fresh salmon gives you the most control over flavor — season a 6-8 oz fillet with salt and a splash of soy sauce, then bake at 400°F for 12-14 minutes or air-fry at 400°F for 10-12 minutes until it flakes easily. Let it cool, then break it into rough flakes with a fork.
Canned salmon is the weeknight shortcut that actually works surprisingly well. Drain it thoroughly, pick out any skin or bones, and proceed. The texture is slightly softer but the flavor holds up well once mixed with the spicy mayo.
The key to the spicy salmon filling is balancing the heat with enough fat to round it out. A tablespoon of sriracha in the salmon mixture is a good baseline; if you want it genuinely hot, push to 2 tablespoons and add ½ teaspoon of wasabi paste for a sharp, sinus-clearing kick that mimics the heat profile of a real spicy salmon roll.
Key Differences From the Classic
This version swaps imitation crab entirely for salmon, skips the cream cheese (the salmon’s natural fat content carries the richness on its own), and doubles down on the spicy mayo — both mixed into the filling and drizzled generously on top before baking. The result is a slightly more intense, more deeply savory dish with beautiful orange-red color from the sriracha-mayo.
Pro tip: After the sushi bake comes out of the oven, drizzle a little unagi (eel) sauce over the top. The sweet, soy-based glaze creates a striking flavor contrast with the spicy topping and gives the casserole a restaurant-quality finish that takes about 10 seconds of extra effort.
3. Crab and Cream Cheese Sushi Bake

Think of this as the Philadelphia roll translated into casserole form — and executed at maximum richness. Where the classic California roll version uses cream cheese as a supporting player, this recipe puts it front and center, creating a filling that’s thicker, more indulgent, and almost cheesecake-dense in the best possible way.
The Cream Cheese Ratio
Most sushi bake recipes use 1-2 ounces of cream cheese per batch. This version uses 4 ounces — a full half block — beaten until completely smooth before being mixed with the crab and mayo. The difference in texture is noticeable: the filling sets up almost like a dip rather than a loose mixture, and it slices cleanly after the bake rests for 10 minutes.
Beat the cream cheese on its own first. If you add cold, un-softened cream cheese directly to the crab mixture, you’ll end up with lumps that never fully incorporate. Room temperature cream cheese, beaten for 60 seconds with a fork or hand mixer, becomes silky and smooth before you add anything else.
What to Add to the Top
This version benefits from a few garnishes that the other recipes don’t use. Masago — the small, bright orange smelt roe you often see coating the outside of California rolls — adds a delicate pop of texture and a mild oceanic flavor when scattered over the top right before serving. It’s available at most Asian grocery stores and keeps well in the freezer.
A drizzle of eel sauce (a thick, sweet, soy-based glaze sold at Asian markets and some mainstream grocery stores) over the finished dish creates a beautiful visual contrast and a sweet-savory flavor that complements the rich cream cheese filling without overwhelming it. Keep it light — about a tablespoon in a thin zigzag pattern is enough.
4. Spicy Tuna Sushi Bake

Spicy tuna is one of the most ordered sushi roll fillings for a reason — the combination of rich ahi tuna and sharp heat is clean, bold, and highly addictive. In sushi bake form, it becomes even more interesting because the oven partially cooks the surface of the tuna while the interior stays tender and moist.
Choosing and Preparing the Tuna
For this version, sushi-grade ahi tuna cut into ½-inch cubes is the ideal choice. Cut it into pieces rather than shredding it — you want distinct bites of tuna throughout the casserole, not a blended paste. The cubes hold their shape during the short bake time, giving you tender, lightly cooked tuna with a slightly more set exterior.
The marinade is the star here: 3 tablespoons Kewpie mayo, 1 teaspoon sriracha, 1 teaspoon soy sauce, and a few drops of sesame oil. Toss the tuna cubes in this mixture and let them sit for 10 minutes while you prepare the rice. The soy sauce adds depth; the sesame oil adds a nutty aroma that comes alive in the oven.
The Seaweed Layer Technique
One unique structural detail in this version: lay full nori sheets directly over the pressed rice before adding the tuna mixture on top. The seaweed layer does two things — it adds that authentic sushi flavor throughout every bite, and it creates a distinct textural boundary between the rice and the filling. The nori softens during baking, becoming tender and slightly chewy rather than crisp.
If you want crisp nori in your final dish, serve it on the side and skip the interior layer. But if you want that full seaweed flavor baked into every component, the interior layer is worth doing.
5. Spam Musubi Sushi Bake
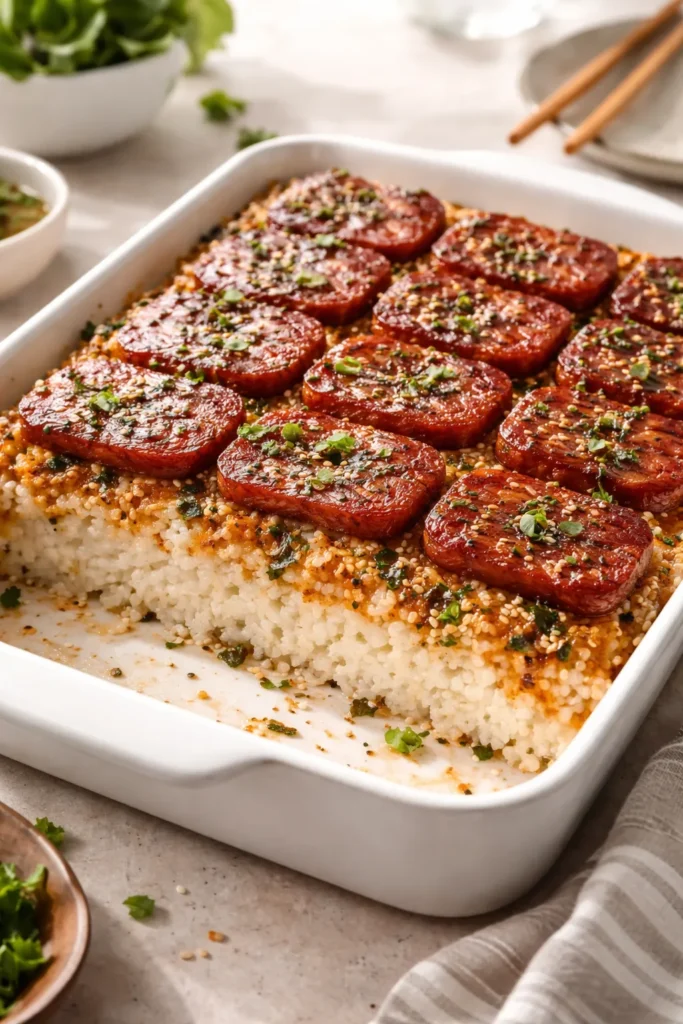
This one sits at the intersection of Hawaiian musubi culture and Filipino sushi bake tradition, and the combination shouldn’t work as well as it does. It is, somehow, even better than either dish on its own. The salty, caramelized Spam on top of seasoned rice with a drizzle of spicy mayo creates something that tastes simultaneously familiar and completely new.
Caramelizing the Spam Properly
The difference between mediocre Spam in this dish and genuinely craveable Spam comes down to the glaze. Slice one can of Spam into ¼-inch thick planks — you’ll get about 8-10 slices. Make a quick marinade of 2 tablespoons soy sauce, 1 tablespoon oyster sauce, 1 tablespoon brown sugar, and a splash of mirin. Toss the Spam slices in this mixture, then pan-fry in a dry skillet over medium-high heat for 2-3 minutes per side, until deeply golden and caramelized.
The sugar in the marinade creates a sticky, slightly sweet crust on each slice that browns beautifully and doesn’t burn easily. Don’t use oil in the pan — Spam has enough fat on its own to self-baste as it cooks, and adding oil just makes it greasy.
Layering Strategy
Press the seasoned rice into the baking dish, sprinkle with furikake, then arrange the caramelized Spam slices in a single, overlapping layer on top. Drizzle with Kewpie mayo mixed with a small amount of sriracha. Bake at 400°F for 10 minutes — the goal here is just to warm everything through and let the mayo brown slightly, since the Spam is already cooked and doesn’t need much oven time. Finish with sliced green onions and serve with nori sheets.
6. Salmon Mentaiko Sushi Bake
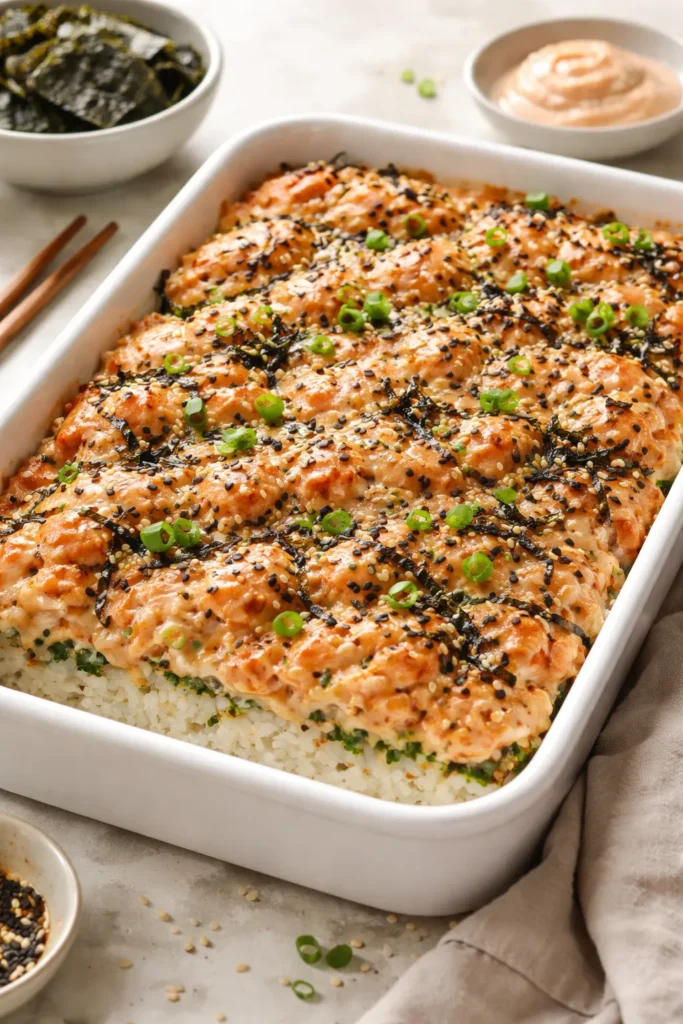
Mentaiko — spicy, cured pollock roe — is one of Japan’s most prized condiment ingredients. Mixed into a mayo-based sauce, it creates a deeply savory, subtly smoky, complex flavor that standard sriracha-mayo can’t replicate. This version uses that mentaiko mayo as both the binder for the salmon filling and the finishing drizzle, resulting in a dish with noticeably more depth than the average sushi bake.
Finding and Using Mentaiko
Mentaiko is sold at Japanese grocery stores and many Korean markets, typically in small vacuum-sealed packs in the refrigerated section. It comes in two styles: mentaiko (spiced with red pepper) and karashi mentaiko (more aggressively spiced). Either works here. To make the sauce, split the mentaiko sac and scrape the roe into a bowl — you’ll want about 2 tablespoons. Mix with ¼ cup Kewpie mayo and a teaspoon of soy sauce. The result is a pale pinkish-orange sauce with a complex, briny, slightly smoky flavor.
If you genuinely cannot find mentaiko, you can approximate the flavor profile by mixing Kewpie mayo with 1 tablespoon tobiko or masago, a teaspoon of sriracha, and a small splash of fish sauce. It won’t be identical, but it gets close.
The Torch Finish
If you have a kitchen torch, use it here. After the casserole comes out of the oven, drizzle the remaining mentaiko mayo generously over the top and torch it for 10-15 seconds, moving in slow sweeping arcs rather than staying in one spot. The mayo blisters and chars slightly at the edges, releasing a subtle smoky note that elevates the whole dish. This is the technique that salmon mentaiko hand rolls at high-end sushi restaurants rely on, and it works just as well on a casserole.
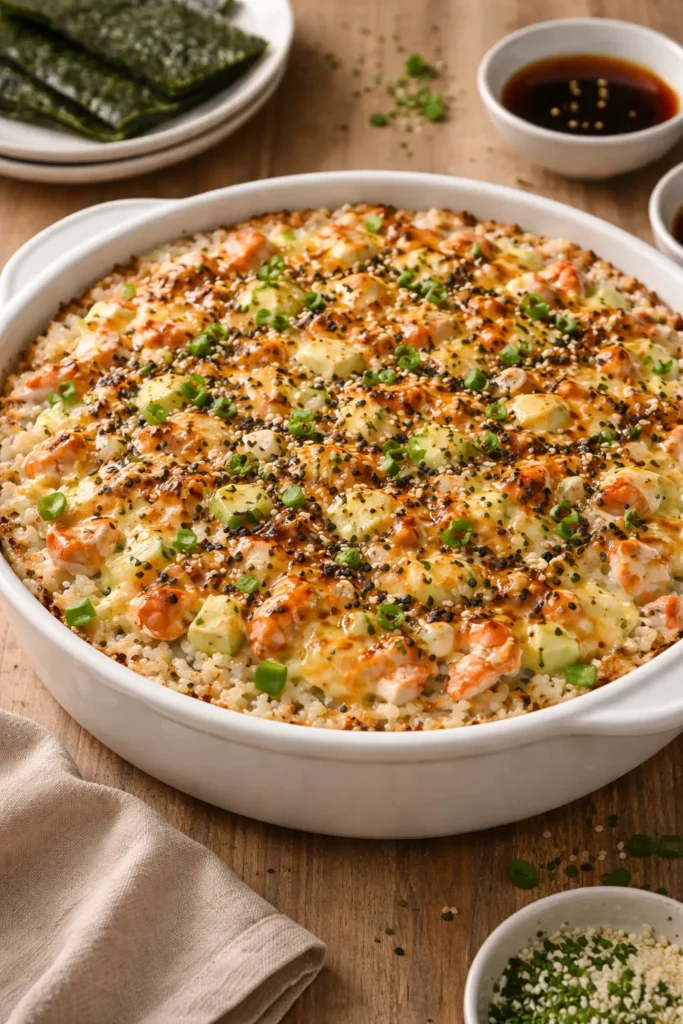
7. Shrimp Tempura Sushi Bake
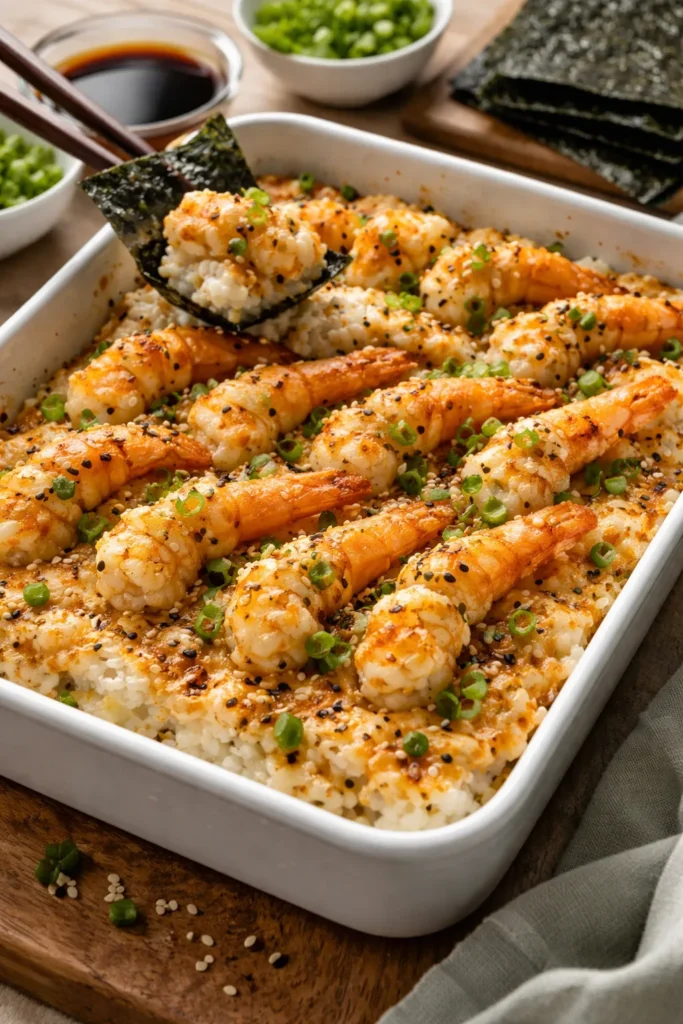
Every other version on this list focuses on the creamy, rich flavor profile of traditional sushi bake. This one goes after something different: crunch. By incorporating shrimp tempura — either homemade or store-bought frozen tempura shrimp — this version adds a textural contrast that changes the entire eating experience. You get the soft, creamy rice base, the warm seafood filling, and then crispy, battered shrimp that snap when you bite into them.
Using Frozen Tempura Shrimp
Frozen tempura shrimp from the grocery store works perfectly here and cuts your prep time in half. Cook the shrimp according to package directions — usually 15-18 minutes at 400°F — until crispy and golden. Don’t overcook them; they’ll spend a few more minutes in the oven once the casserole is assembled, and you want them to still have some crunch at the end.
For the filling layer, mix a small amount of Kewpie mayo with sriracha and use it to bind roughly chopped pieces of the cooked tempura shrimp. The breading will absorb some of the mayo and soften slightly, which is fine — it creates a textured, chunky filling rather than a uniform paste.
The Crunch Layer on Top
After baking, immediately scatter panko breadcrumbs toasted in a dry pan with a few drops of sesame oil over the top. They’ll absorb a little moisture from the casserole but retain enough crunch to add texture with every bite. This toasted panko topping is also excellent on the classic California roll version if you want a textural upgrade without changing the flavor profile.
8. Philly Roll Sushi Bake
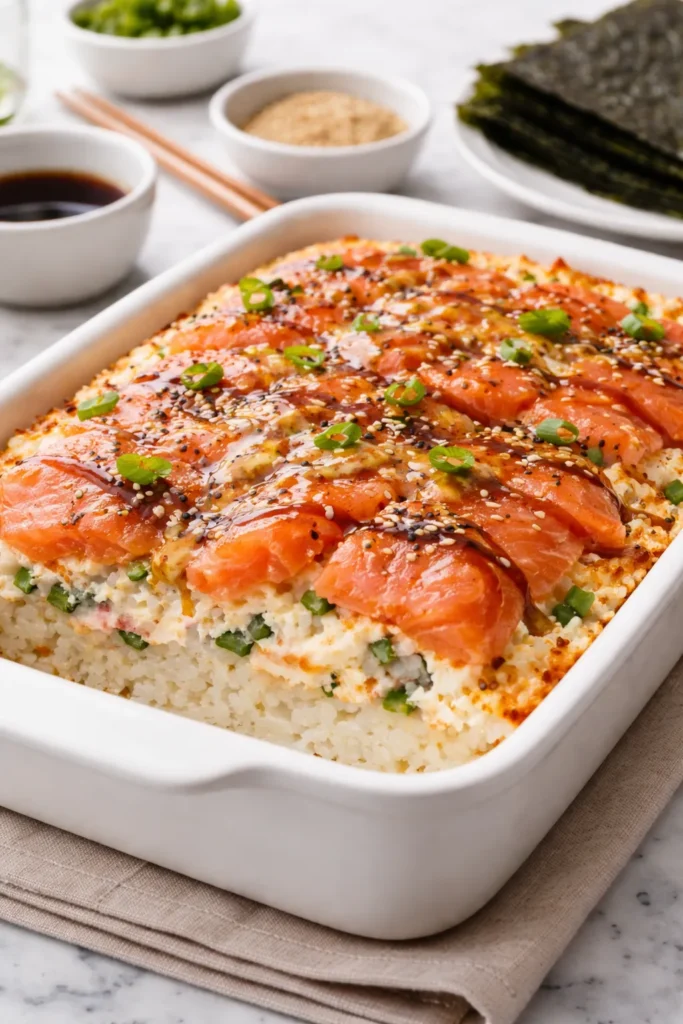
The Philadelphia roll — smoked salmon, cream cheese, cucumber — has a devoted following, and this baked version is arguably the most elegant of all the variations. The cold-smoked salmon doesn’t go into the oven; instead, it drapes over the top of the hot casserole right after baking, where it barely warms through and develops an impossibly silky texture while maintaining its distinctive smoky flavor.
Building the Philly Bake
The base layer here is the standard seasoned sushi rice pressed into the dish with furikake. For the “filling” layer before baking, make a simple mixture of 4 ounces softened cream cheese, 2 tablespoons Kewpie mayo, 1 tablespoon soy sauce, and 1 tablespoon finely chopped chives. Spread this in a thin, even layer over the rice. Bake at 400°F for 12-14 minutes until lightly puffed and golden at the edges.
The Cold Salmon Technique
Pull the casserole from the oven and let it rest for 3 minutes. Lay 4-6 ounces of cold-smoked salmon (the thin-sliced lox-style salmon, not hot-smoked) in an even layer over the top. The residual heat from the casserole gently warms the salmon without cooking it fully, leaving it silky and tender rather than firm and flaky.
Finish with thinly sliced cucumber arranged decoratively over the salmon, a drizzle of Kewpie mayo and a touch of wasabi mayo (2 tablespoons Kewpie + ½ teaspoon wasabi paste, whisked), and a sprinkle of capers if you want to push the Philly roll flavor profile even further. This version cuts beautifully into portions and looks impressive enough for a dinner party, despite being genuinely easy to prepare.
Tips for Serving and Storing Your Sushi Bake
No matter which version you make, a few universal serving and storage guidelines will protect your effort and ensure every bite tastes as good as the first.
Letting It Rest Before Serving
Every sushi bake needs 8-10 minutes of resting time after it comes out of the oven. The layers settle, the filling firms up slightly, and the rice base cools just enough to hold its shape when scooped. Cutting or scooping a sushi bake too soon results in messy, collapsing portions. Set a timer and use those 10 minutes to arrange your toppings and seaweed sheets on the table.
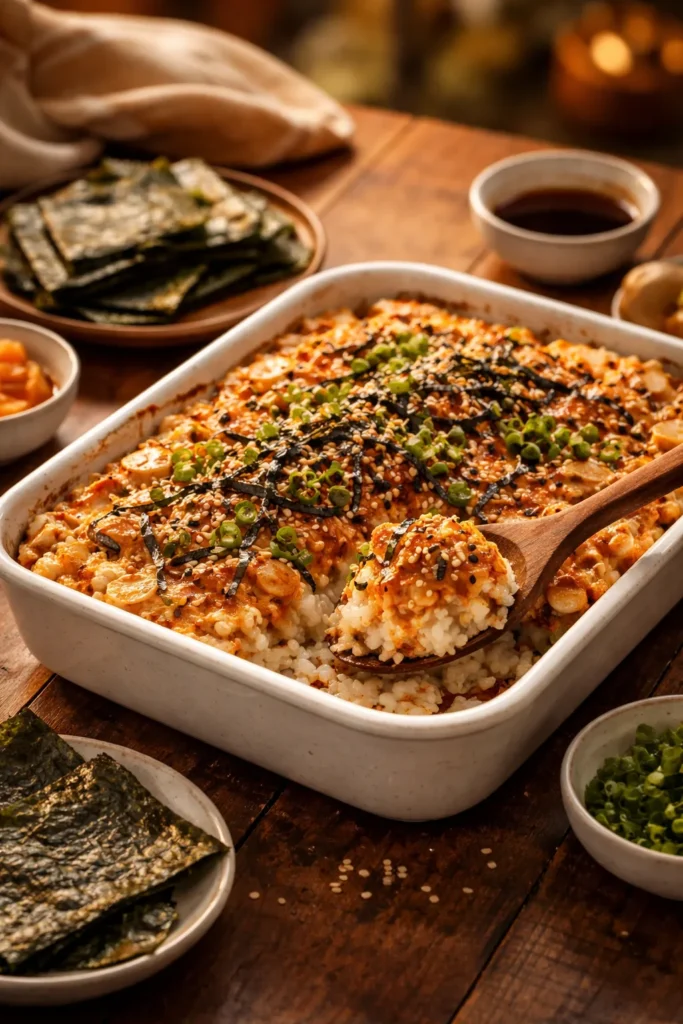
The Best Way to Serve It
Set out the baking dish in the center of the table with a large spoon or spatula for scooping. Arrange nori sheets, cucumber rounds, avocado slices, and any sauces in small dishes around it. Soy sauce for dipping is standard. A small dish of pickled ginger on the side adds the same palate-cleansing quality it provides at a sushi restaurant and balances the richness of the creamy filling.
For more formal occasions, scoop portions onto individual nori sheets ahead of time and plate them as small sushi tacos — they hold their shape for 5-7 minutes and look impressive on a shared platter.
Storing Leftovers
Leftover sushi bake keeps well in an airtight container in the refrigerator for up to 3 days. Store it without fresh toppings like cucumber and avocado — those go soggy in the fridge and should be added fresh when serving. The casserole itself reheats well in the microwave in 60-90 second increments, or in a 325°F oven for 10-12 minutes if you want to revive a bit of the crispy top.
Freezing is not recommended. The rice texture changes significantly after freezing and thawing, becoming grainy and dry, and the seafood filling can turn watery. This dish is best made fresh and eaten within a few days.
Making It Ahead
You can assemble any sushi bake up to 24 hours ahead of time. Press the rice, add the filling layers, cover tightly with plastic wrap, and refrigerate. When you’re ready, pull it from the fridge, let it sit at room temperature for 15 minutes while the oven preheats, and bake as directed — you may need to add 3-5 extra minutes since the dish will be cold from the fridge.
Final Thoughts
Sushi bake succeeds because it refuses to take itself too seriously. It takes the intimidating craft of traditional sushi and translates it into something warm, communal, and deeply satisfying without losing any of the flavors that make sushi worth craving in the first place.
The eight versions here range from the approachable classic to the more adventurous Philly roll and mentaiko variations, but they all follow the same core logic — great seasoned rice, a creamy seafood filling, furikake, and the simple joy of eating something with your hands. Start with the California roll version if you’re new to the dish, then work your way through the others as the mood strikes.
The real strength of sushi bake as a recipe category is how easily it bends to whatever you have on hand. Leftover salmon from last night? Use it. Spotted frozen tempura shrimp on sale? Build a whole version around them. The structural template stays the same; the filling is wherever your curiosity takes you.
If you make one of these for your next dinner night, leave the nori sheets, cucumber, and avocado visible on the table from the start. Watching people discover how to eat it — scooping, folding, dipping — is half the fun of serving it.