There’s a moment at every great dinner party — you glance down the table, you notice something happening, and it has nothing to do with the roast chicken. People are scraping the serving dish clean. They’re asking who made that. They’re going back for thirds of something that was never supposed to be the star.
Side dishes have a reputation problem. For too long, they’ve been treated as an afterthought — a handful of green beans thrown in the oven, a box of instant rice, a bag salad dumped in a bowl. But any experienced cook will tell you that the side dish is where real creativity lives. Freed from the pressure of anchoring the entire meal, a brilliant side can swing for the fences with bold flavors, unexpected textures, and combinations that stop a conversation mid-sentence.
The ten dishes below have one thing in common: they consistently, reliably steal the show. Some are weeknight-simple; others take a little more attention. All of them deliver flavors bold enough that your guests will be asking for the recipe before they’ve even finished their plate — and more than a few of them will have people completely forgetting what the main course was in the first place.
Table of Contents
- What Makes a Side Dish Truly Memorable
- 1. Honey Habanero Roasted Brussels Sprouts with Toasted Pecans
- Why This Dish Upstages Everything Else
- What to Know Before You Make It
- 2. Crispy Smashed Potatoes with Garlic Herb Butter
- The Technique That Makes the Difference
- Herb and Finishing Options
- 3. Mexican Street Corn (Elote) Off the Cob
- Getting the Char Right at Home
- The Dressing Breakdown
- 4. Broccoli Crunch Salad with Bacon, Cranberries, and Sunflower Seeds
- Why Raw Broccoli Works Here
- The Dressing Ratio That Makes It Sing
- 5. Lemon Basil Orzo Salad with Feta and Cherry Tomatoes
- The Warm-Toss Method Explained
- Additions That Work Beautifully
- 6. Cajun Corn and Crab Fritters with Spicy Dipping Sauce
- Building the Batter Right
- Cajun Spice Without Premade Mixes
- 7. Garlic Parmesan Cauliflower Steaks with Herb Oil
- Cutting and Seasoning the Steaks
- Roasting Temperature and Timing
- 8. Bacon-Wrapped Green Beans with Brown Sugar Glaze
- Getting Even Cooking
- The Glaze Ratio
- 9. Spinach Salad with Warm Bacon Dressing
- The Warm Dressing Method
- What Goes Into the Bowl
- 10. Cheesy Grits Casserole with Sharp Cheddar and Chives
- Stone-Ground vs. Quick Grits
- The Make-Ahead Advantage
- Pairing These Sides with the Right Main Course
- Final Thoughts
What Makes a Side Dish Truly Memorable
Before getting into the recipes, it’s worth understanding the mechanics behind a genuinely great side dish. The difference between a forgettable side and a plate-clearing one usually comes down to contrast — something that pushes back against the main course rather than just sitting quietly beside it.
A rich, fatty main like braised short ribs needs something acidic and bright to cut through. A lean grilled chicken breast begs for a side with body and creaminess. A simple pasta calls for something with crunch and bold seasoning. The best sides don’t just fill the plate; they create balance — and that’s where they earn their moment in the spotlight.
Texture plays the biggest role most cooks underestimate. A side dish that brings a contrasting crunch, a silky creaminess, or a caramelized char against something soft creates a more memorable eating experience than two dishes that feel the same in your mouth.
The other factor is a concentrated flavor. Because sides are eaten in smaller portions, their seasoning needs to punch harder per bite than a main course. Salt, acid, fat, and heat — when dialed in correctly — make a side dish feel more vibrant and alive than anything else on the table.
1. Honey Habanero Roasted Brussels Sprouts with Toasted Pecans
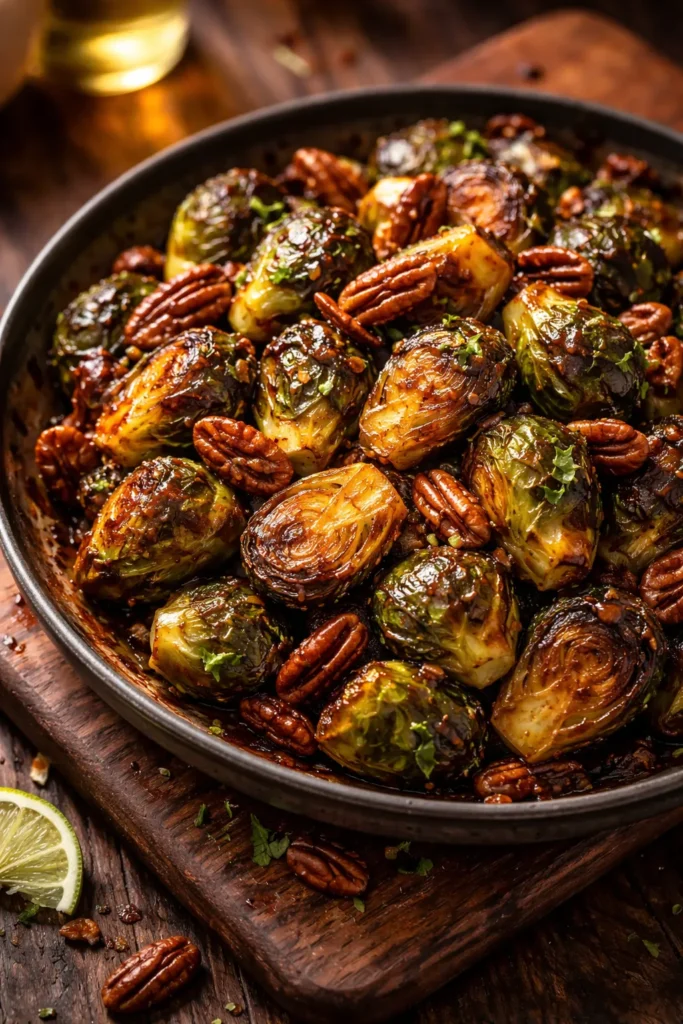
Brussels sprouts have fully earned their comeback, but this version takes the standard roasted-until-crispy formula and adds a glaze that genuinely changes the conversation. Tossed in a honey-habanero mixture before hitting a 425°F oven, these sprouts caramelize into something sticky, spicy, and deeply savory — finished with chopped toasted pecans and a squeeze of fresh lime.
The habanero doesn’t make this blow-your-head-off spicy. It adds a fruity, floral heat that works with the honey rather than fighting it. That combination of sweet and gently fiery against the natural bitterness of the sprout is what makes this so hard to stop eating.
Why This Dish Upstages Everything Else
The textural contrast here is extraordinary. The outer leaves of each sprout go almost shatteringly crisp while the interior stays tender, and the glaze creates a lacquered crust that caramelizes dark at the edges. The pecans add a buttery crunch that breaks up each bite.
This is also a side that holds its own visual ground. Deep mahogany and caramel-colored sprouts scattered with golden pecans and finished with bright lime zest look striking on any table — far more interesting visually than most main courses.
What to Know Before You Make It
- Spread sprouts cut-side down on the pan — this maximizes caramelization on the flat face of each sprout
- Don’t crowd the pan; Brussels sprouts steam instead of roast when they’re packed too close, and you lose the crispy exterior
- Toss the glaze on with 5 minutes left in cooking, not at the start — honey burns fast at high heat
- Toasted pecans go on after the oven, not before, so they stay crunchy instead of turning soft
Worth knowing: A pinch of smoked salt on these as they come out of the oven amplifies the sweet-heat contrast in a way that regular sea salt simply can’t match.
2. Crispy Smashed Potatoes with Garlic Herb Butter
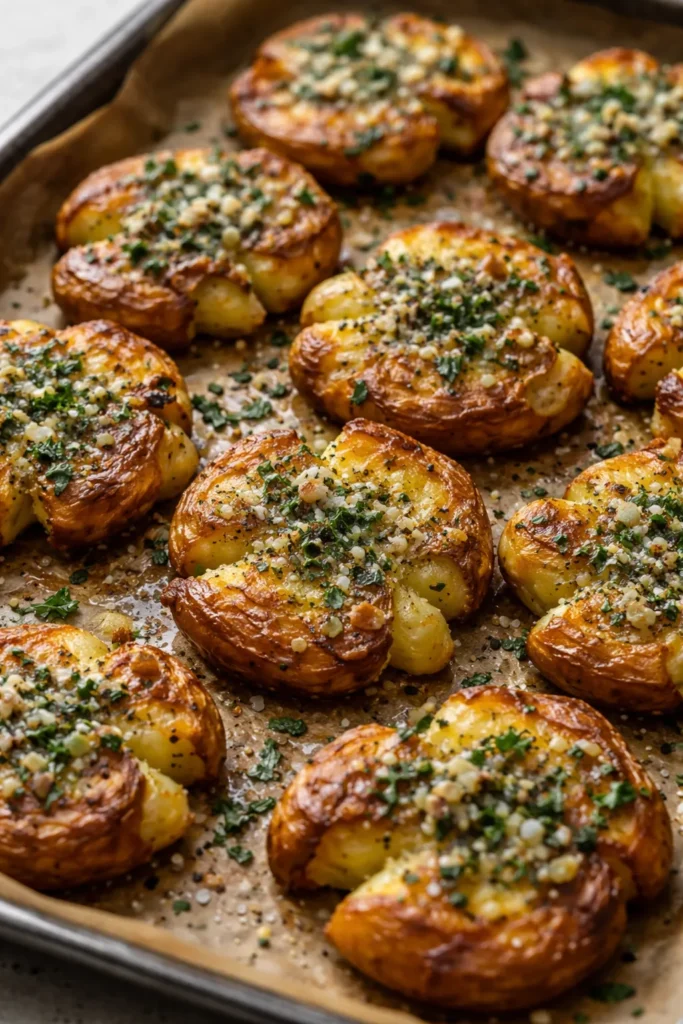
These are not mashed potatoes. They’re not roasted potatoes. They occupy a category entirely their own — boiled until tender, smashed flat on a sheet pan, slathered in garlic butter, and roasted at high heat until the edges turn into something that can only be described as potato chips fused to fluffy, cloud-like centers.
The technique is disarmingly simple, but the result is sophisticated enough to hold its own next to anything. Golden and shatteringly crisp on the outside, impossibly light inside, and perfumed with garlic and fresh herbs, these disappear faster than any other dish on the table — every single time.
The Technique That Makes the Difference
The two-stage cooking process is non-negotiable for getting this right. Boiling first fully cooks the potato and makes the interior tender and light. Smashing creates maximum surface area, which means more of the potato makes direct contact with the hot pan — and that’s where the crunch comes from.
Use smaller potatoes — baby Yukons or small red potatoes, around 1.5 to 2 inches across. Larger potatoes don’t smash evenly and the ratio of crust to interior gets thrown off. Smaller ones give you a higher proportion of crispy exterior relative to soft center, which is where all the magic lives.
Herb and Finishing Options
- Classic garlic and fresh rosemary butter is the gold standard
- A finishing sprinkle of flaky sea salt and fresh chives after roasting adds brightness
- Grated Parmesan pressed onto each smashed potato 5 minutes before the end creates a frico-style crust that’s borderline unreasonable
- A drizzle of truffle oil right before serving makes these appropriate for dinner party territory without much extra effort
Pro tip: Let the potatoes steam dry for 5 minutes after draining before smashing. Any surface moisture is the enemy of crunch.
3. Mexican Street Corn (Elote) Off the Cob

On-the-cob elote is iconic, but serving it cut off the cob turns a messy street food into a sophisticated side dish that slots perfectly onto any dinner table. Char the corn kernels in a dry cast-iron skillet until they develop dark, smoky spots, then toss them in a lime-spiked crema, fold in crumbled cotija cheese, Tajín, fresh cilantro, and a touch of mayonnaise that binds everything together.
The flavor profile here covers every base — sweet from the corn, tangy from the lime and crema, salty and funky from the cotija, smoky from the char, and gently spiced from the chili powder. That kind of layered complexity in a single side dish is what makes guests reach for seconds before they’ve finished their firsts.
Getting the Char Right at Home
The key to authentic-tasting elote off the cob is dry heat. No butter, no oil, no steam — just corn kernels in a dry cast-iron or stainless steel pan over high heat. Let them sit without stirring for 45 to 60 seconds at a time so they actually char rather than steam. You want some kernels to be fully blackened at the tips. That char is where the smoky depth comes from.
Frozen corn works surprisingly well here. Thaw it completely and pat it bone dry before it hits the pan — any residual moisture creates steam instead of char and you lose the entire effect.
The Dressing Breakdown
- Mayonnaise: 3 tablespoons — this is the binder that carries everything else
- Mexican crema or sour cream: 2 tablespoons for tang and lightness
- Fresh lime juice: juice of 1 full lime, added at the end so it stays bright
- Tajín or chili powder: start with 1 teaspoon, adjust to heat preference
- Cotija cheese: crumbled, not grated — the larger crumbles give it textural pops
Pro tip: Make the dressing 30 minutes ahead and refrigerate it. Cold dressing against hot corn creates a contrast that makes this side feel restaurant-quality rather than home-cooked.
4. Broccoli Crunch Salad with Bacon, Cranberries, and Sunflower Seeds
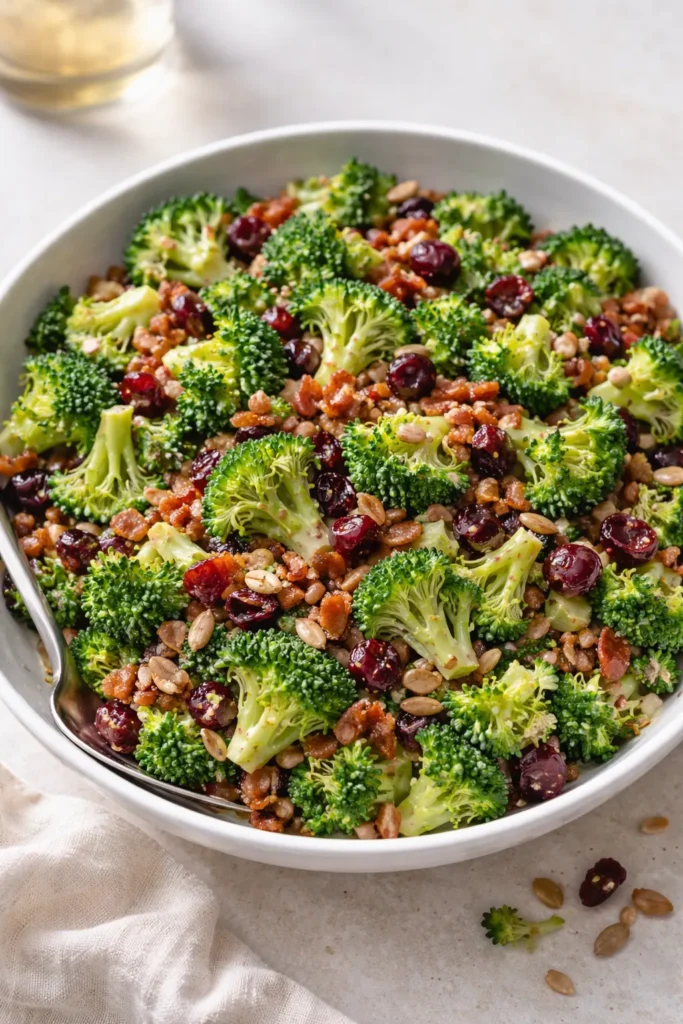
This salad has been starting arguments about what the “best thing on the table” is for decades, and it deserves every moment of the controversy. Raw broccoli florets — cut small enough to eat without effort — tossed with crispy bacon, dried cranberries, roasted sunflower seeds, and red onion in a tangy-sweet dressing of mayonnaise, apple cider vinegar, and honey.
What makes this genuinely special is that it gets better as it sits. The dressing slightly softens the broccoli over 30 minutes of resting, taking the edge off the rawness without losing any of the crunch. The bacon stays crispy. The cranberries plump slightly. The whole thing comes together into something that tastes like it took far more effort than it did.
Why Raw Broccoli Works Here
Raw broccoli in a salad sounds like an aggressive health food move, but the cut size and dressing technique matter enormously. Cut the florets into pieces no larger than a thumbnail — small enough that each forkful contains a mix of broccoli, bacon, cranberry, and seed rather than one giant floret dominating a bite.
The vinegar in the dressing does light work on the broccoli’s cell structure over 20 to 30 minutes of resting, making it less harsh on the palate without cooking out the pleasant firmness that makes this salad so satisfying to eat.
The Dressing Ratio That Makes It Sing
- ½ cup mayonnaise
- 2 tablespoons apple cider vinegar
- 1 tablespoon honey (or more, depending on how tangy you want it)
- Salt and pepper to taste
That 4:1 ratio of mayo to vinegar hits the sweet-tangy balance that makes this dressing addictive without being cloying. Taste and adjust — if your cranberries are very sweet, lean toward more vinegar; if your bacon is very salty, back off the added salt.
Insider note: Toasting the sunflower seeds in a dry pan for 3 minutes before adding them to the salad intensifies their nuttiness dramatically.
5. Lemon Basil Orzo Salad with Feta and Cherry Tomatoes
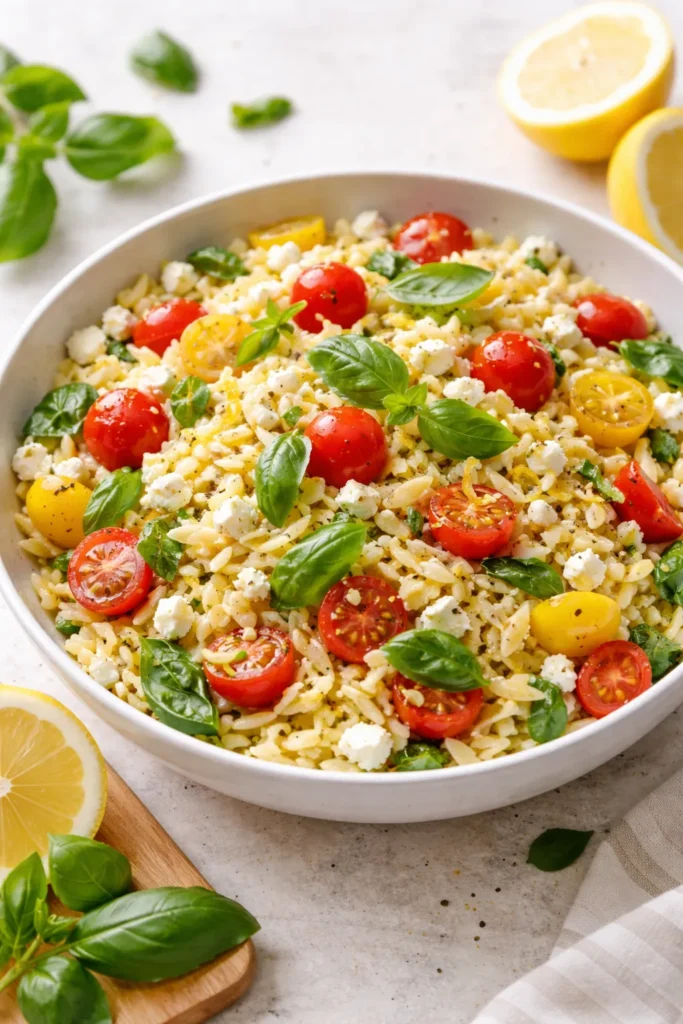
There’s a category of side dish that looks deceptively simple but delivers a flavor payoff far out of proportion to the effort — and this orzo salad sits at the top of that category. Cooked orzo, tossed while still warm with a generous pour of olive oil and fresh lemon juice, absorbs that dressing all the way through rather than sitting in a separate pool at the bottom of the bowl.
Once it’s cooled to room temperature, halved cherry tomatoes, crumbled feta, torn fresh basil, and toasted pine nuts get folded in. The result is bright, fresh, and surprisingly substantial — the kind of side that makes people think “wait, why haven’t I been eating this all my life?”
The Warm-Toss Method Explained
Tossing orzo with dressing while it’s still hot is not optional — it’s the technique that separates a forgettable pasta salad from a memorable one. Hot pasta absorbs dressing ingredients rather than just being coated by them, which means the lemon and olive oil flavors end up inside every piece of orzo rather than sitting on the surface.
Use more lemon than feels reasonable. The zest of a full lemon plus the juice of 1½ lemons might seem like a lot for a pound of orzo, but the pasta absorbs aggressively as it cools, and what tastes sharp right after tossing will mellow to perfectly bright by the time it reaches the table.
Additions That Work Beautifully
- Kalamata olives (pitted and halved): adds briny depth
- Arugula (folded in just before serving): wilts slightly and adds peppery bite
- Grilled shrimp laid across the top: converts this into a near-complete meal
- Toasted pistachios instead of pine nuts: earthier and more complex, pairs especially well with the feta
6. Cajun Corn and Crab Fritters with Spicy Dipping Sauce
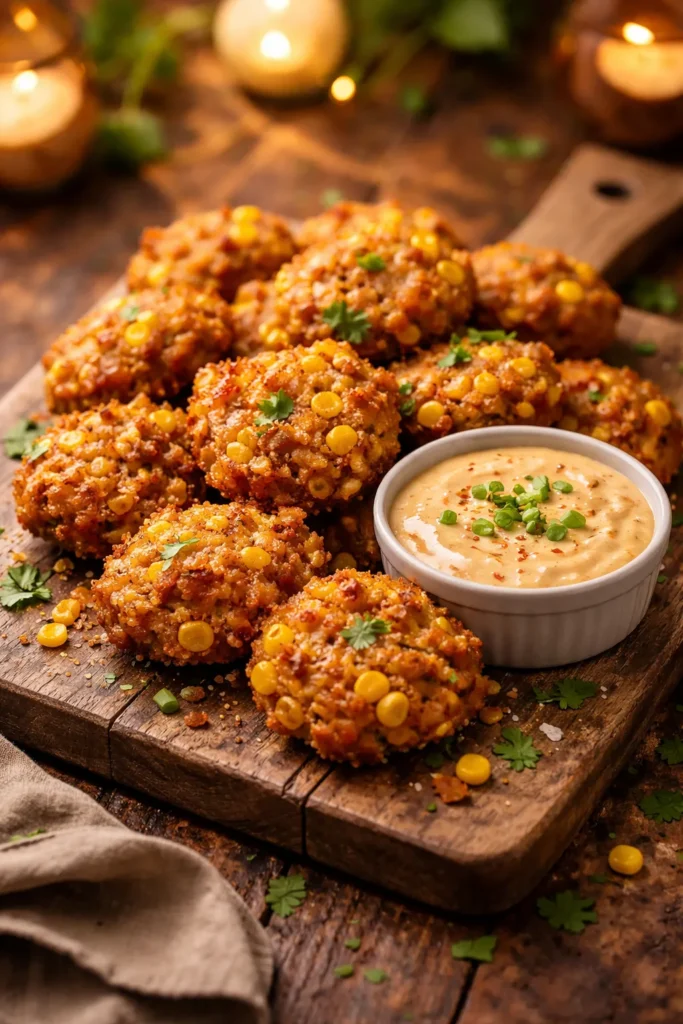
These fritters belong at a dinner party, a backyard cookout, a holiday table — honestly anywhere. Sweet fresh corn kernels and lump crab meat folded into a Cajun-spiced batter, pan-fried until the exterior is deeply golden and audibly crispy, and served with a rémoulade or spicy mayo for dipping.
The crab isn’t there to be subtle. You taste it in every bite, sweet and slightly oceanic against the smoky Cajun spice and the pop of fresh corn. These fritters are substantial enough to serve as an appetizer and bold enough to completely steal focus from whatever protein is coming out of the oven.
Building the Batter Right
The batter should be thick enough to hold its shape when spooned into the pan but not so dense that the fritter ends up doughy in the center. A ratio of ¾ cup flour, 1 egg, and ¼ cup buttermilk for every 1 cup of corn and 6 ounces of crab meat hits the right consistency — the fritter should spread to about 3 inches in diameter on its own when it hits the pan.
Don’t skip the resting time. Let the batter sit for 10 minutes after mixing. This hydrates the flour fully and makes the texture more cohesive, which means the fritters hold together better during flipping and develop a more even crust.
Cajun Spice Without Premade Mixes
A simple homemade blend gives better control over heat and salt level:
- 1 teaspoon smoked paprika
- ½ teaspoon garlic powder
- ½ teaspoon onion powder
- ¼ teaspoon cayenne (adjust to preference)
- ¼ teaspoon dried thyme
- ¼ teaspoon black pepper
This base works for almost any Cajun-style application and keeps the sodium far lower than most commercial blends.
7. Garlic Parmesan Cauliflower Steaks with Herb Oil
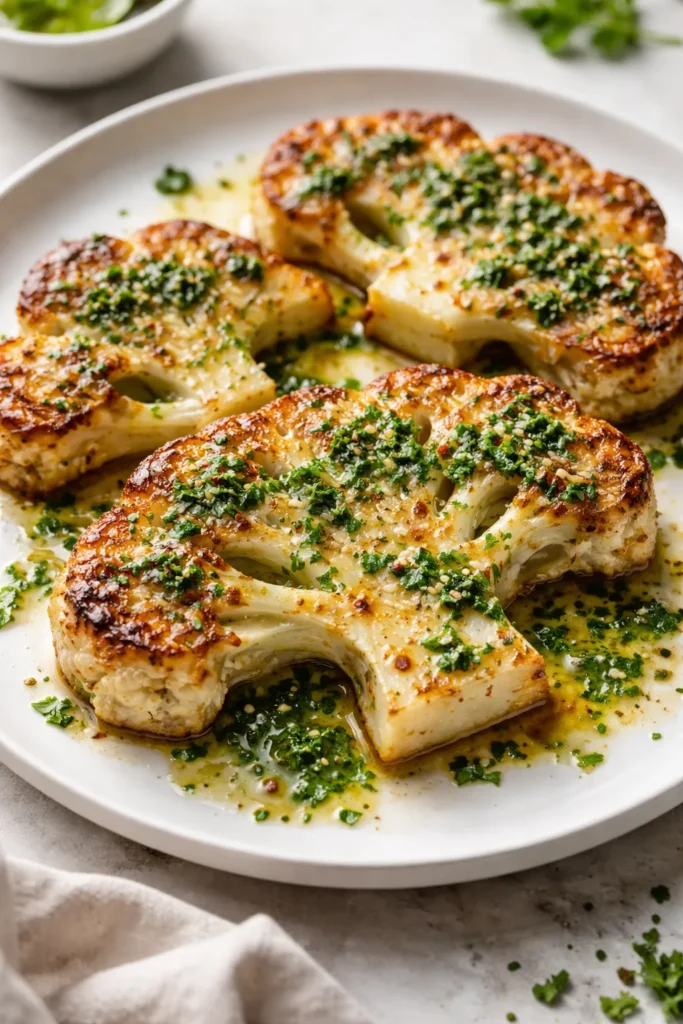
Slicing a whole head of cauliflower into 1-inch-thick steaks and roasting them — rather than breaking it into florets — changes everything about how this vegetable eats. Each steak develops a broad, flat caramelized crust across its entire face, and the Parmesan that gets pressed onto the top in the final few minutes of roasting melts into a golden, savory shell that makes this one of the most visually striking things you can put on a table.
Finished with a quick herb oil made from blended fresh parsley, garlic, and olive oil drizzled over the hot steaks as they come out of the oven, this is the kind of side dish that makes vegetable skeptics quietly ask for the recipe.
Cutting and Seasoning the Steaks
Start from the center of the head and cut outward — the center slice holds together best because the core runs through it, binding the florets. You’ll typically get 2 to 3 solid steaks from one head, with some loose florets on the sides that you can roast separately as a bonus snack for the cook.
Season both sides aggressively. Cauliflower is mild by nature and needs a generous amount of salt, pepper, and olive oil to develop flavor during roasting. Rub the oil on with your hands rather than drizzling — direct contact ensures even coverage, which means even browning.
Roasting Temperature and Timing
- 450°F — not 400°F, not 425°F. The higher temperature is what drives the deep caramelization that makes these special
- 20 minutes on the first side without moving them — patience here is rewarded with a proper crust
- Flip, add Parmesan, return to oven for 8 to 10 more minutes
- Rest for 2 minutes before adding the herb oil — this prevents the oil from cooking off immediately and keeps the herb flavor fresh and bright
8. Bacon-Wrapped Green Beans with Brown Sugar Glaze
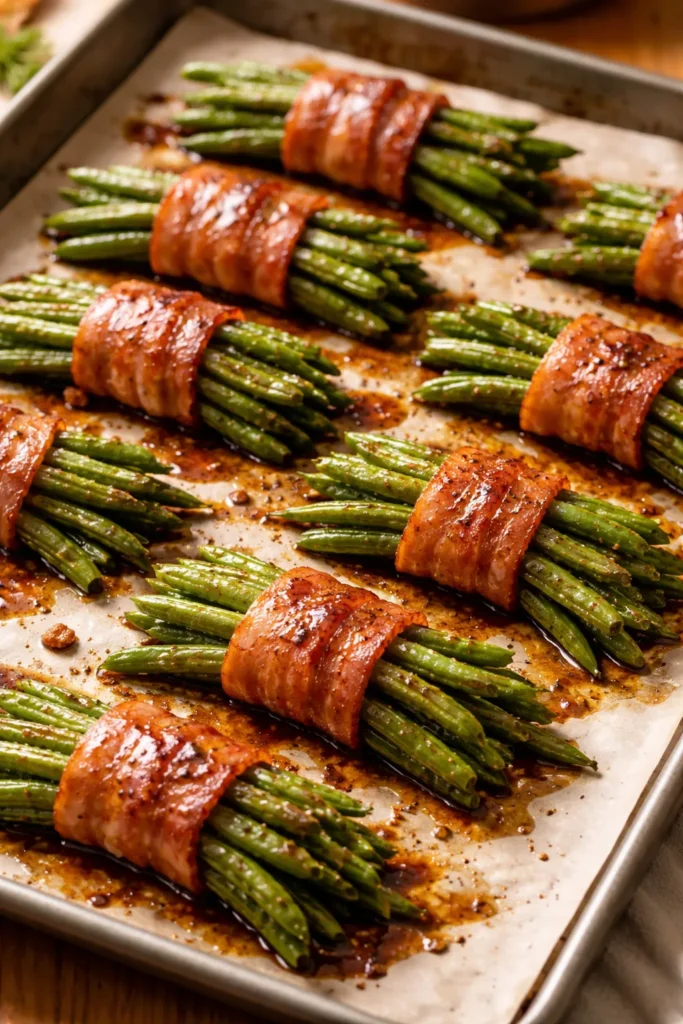
This side is unapologetically crowd-pleasing. Fresh green beans bundled in groups of 6 to 8, wrapped tightly in a strip of bacon, arranged on a sheet pan, and glazed with a mixture of brown sugar, butter, and garlic powder before roasting until the bacon is lacquered and deeply caramelized at the edges.
The bundled presentation looks like genuine effort was involved, but the total hands-on time is under 15 minutes. The bacon fat renders into the green beans as everything roasts together, seasoning them from the outside in. The brown sugar melts into the bacon to create a sticky glaze that catches and caramelizes at the edges of each bundle.
Getting Even Cooking
The biggest challenge with bacon-wrapped anything is getting the bacon fully cooked without overcooking whatever it’s wrapped around. The solution is thin-cut bacon — not thick-cut. Thick bacon needs more time to render and crisp than the green beans can withstand without turning mushy.
Place the bundles seam-side down so the overlapping edge of the bacon strip rests on the pan — this holds each bundle together during the first half of cooking. By the time you need to flip them, the bacon is partially cooked and will stay wrapped on its own.
The Glaze Ratio
- 3 tablespoons brown sugar (packed)
- 2 tablespoons melted butter
- 1 teaspoon garlic powder
- ¼ teaspoon black pepper
Brush this over the bundles when you put them in, then again at the halfway point. A second application of glaze deepens the caramelization and gives each bundle that lacquered finish that makes them look as good as they taste.
Worth knowing: Blanching the green beans for 2 minutes in salted boiling water before wrapping them isn’t strictly necessary, but it guarantees they’re tender all the way through by the time the bacon is done — no half-raw beans hiding in the center of the bundle.
9. Spinach Salad with Warm Bacon Dressing
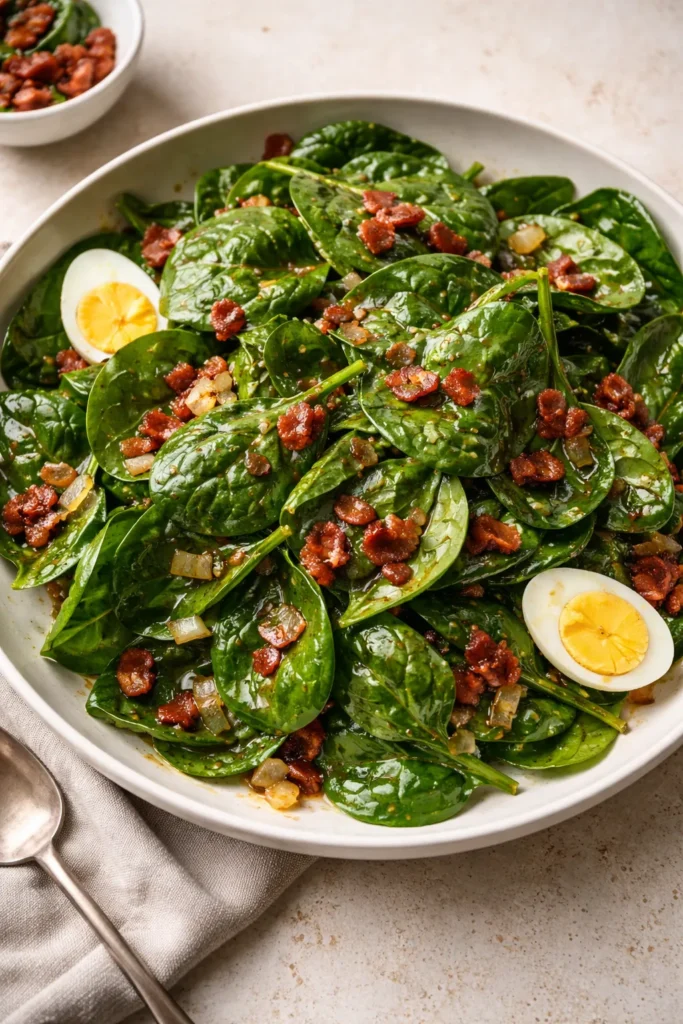
A warm dressing poured over fresh spinach wilts the leaves just slightly — enough to soften their texture without cooking them, creating something that sits exactly between a salad and a hot vegetable side. The dressing itself is made in the pan where the bacon cooked, built from the rendered fat, red wine vinegar, a touch of Dijon, and a small spoonful of brown sugar that balances the vinegar’s sharpness.
The result is intensely savory, slightly tangy, and finished with the crumbled bacon and sliced hard-boiled eggs that turn this into something substantial enough to hold its own as the most memorable component of any meal.
The Warm Dressing Method
This dressing comes together in under 5 minutes, which means timing is everything — you want to pour it over the spinach the moment it’s done so the residual heat from the pan does its job.
Cook 4 strips of bacon in a skillet until crispy. Remove the bacon and leave 2 tablespoons of the rendered fat in the pan — pour off anything over that amount. Add 3 tablespoons red wine vinegar, 1 teaspoon Dijon, and 1 teaspoon brown sugar directly to the pan over medium heat. Whisk until the sugar dissolves and the mixture just simmers. Pour immediately over the spinach and toss quickly.
What Goes Into the Bowl
- 5 to 6 ounces fresh baby spinach — the flat, tender leaves, not the large crinkled variety
- 2 hard-boiled eggs, thinly sliced
- ¼ of a red onion, very thinly sliced
- 4 strips of bacon, cooked and crumbled
- Optional: sliced mushrooms, which add an earthy depth that pairs well with the tangy dressing
The spinach wilts to about half its original volume when the hot dressing hits — this is correct, and it’s why starting with what seems like a generous amount of spinach is important.
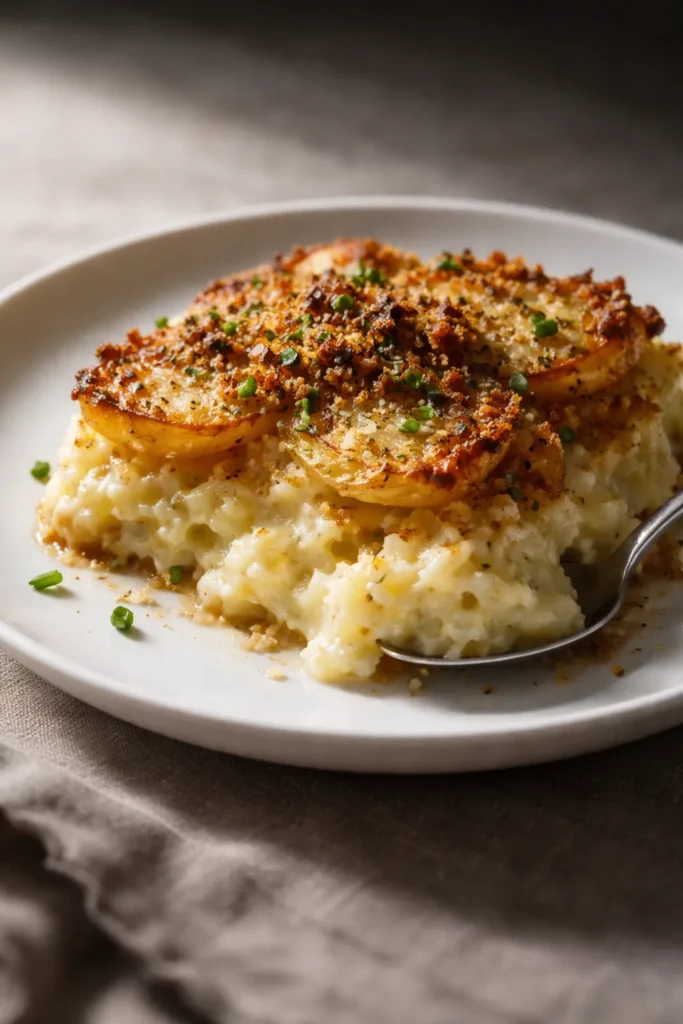
10. Cheesy Grits Casserole with Sharp Cheddar and Chives
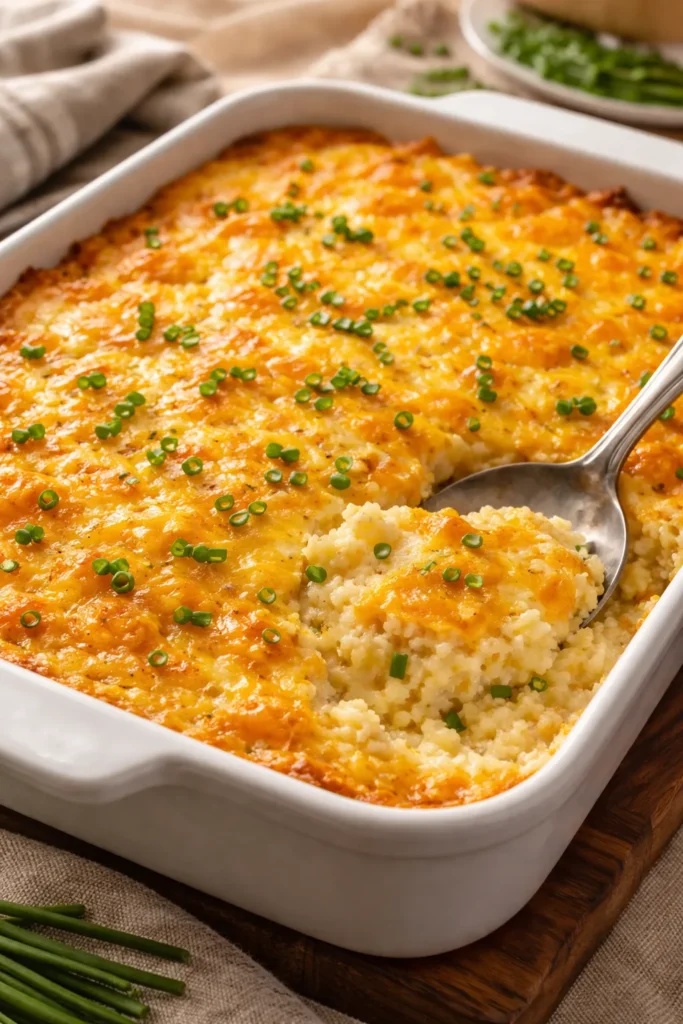
Grits get overshadowed in most conversations about great sides, which is exactly why this dish tends to produce the loudest reactions at the table. Stone-ground grits cooked low and slow in a combination of chicken broth and whole milk, loaded with a generous amount of sharp cheddar, stirred together with butter and eggs, then baked until the top is set and lightly golden with a slight crust at the edges.
The interior stays creamy and spoonable — closer to a savory custard than a dense casserole — and every bite carries that deep, slightly sharp cheddar flavor that makes this the kind of comfort food that people specifically request for holidays, family dinners, and any occasion where the food is supposed to matter.
Stone-Ground vs. Quick Grits
There’s no polite way to say this: use stone-ground grits. Quick-cook grits and instant grits have had most of their texture processed away, and the result is a casserole that feels flat and one-dimensional. Stone-ground grits cook in 25 to 35 minutes on the stovetop with regular stirring, and the difference in flavor — nutty, complex, with a slight chew — is worth every minute.
Cook the grits in broth, not just water. Chicken broth adds a layer of savory depth that pure water simply can’t provide, and that depth is what makes the casserole taste more complex than its short ingredient list suggests.
The Make-Ahead Advantage
This casserole is genuinely better when made ahead. Prepare it through the mixing stage, pour it into the baking dish, cover with plastic wrap, and refrigerate overnight. Pull it from the fridge 30 minutes before baking to take off the chill, then bake as directed — the texture is actually creamier after an overnight rest because the grits have more time to fully hydrate.
- Bake at 350°F for 45 to 55 minutes until the center is just barely set with a slight jiggle
- Scatter sliced chives and an extra handful of cheddar over the top in the last 10 minutes
- Rest for at least 10 minutes before serving — this lets the casserole firm enough to scoop cleanly
Pro tip: A pinch of cayenne in the batter adds a background warmth that keeps this from feeling too rich. You won’t taste the heat directly; it just cuts through the fat in a way that makes each bite feel lighter.
Pairing These Sides with the Right Main Course
Not every showstopper side works next to every main. A few pairing notes that make the difference between a harmonious meal and one that feels like a collection of competing flavors:
Rich, heavy mains (braised beef, roasted pork belly, lamb) need acidic sides that cut through fat. The lemon basil orzo salad, the spinach salad with warm bacon dressing, or the broccoli crunch salad all do this work brilliantly.
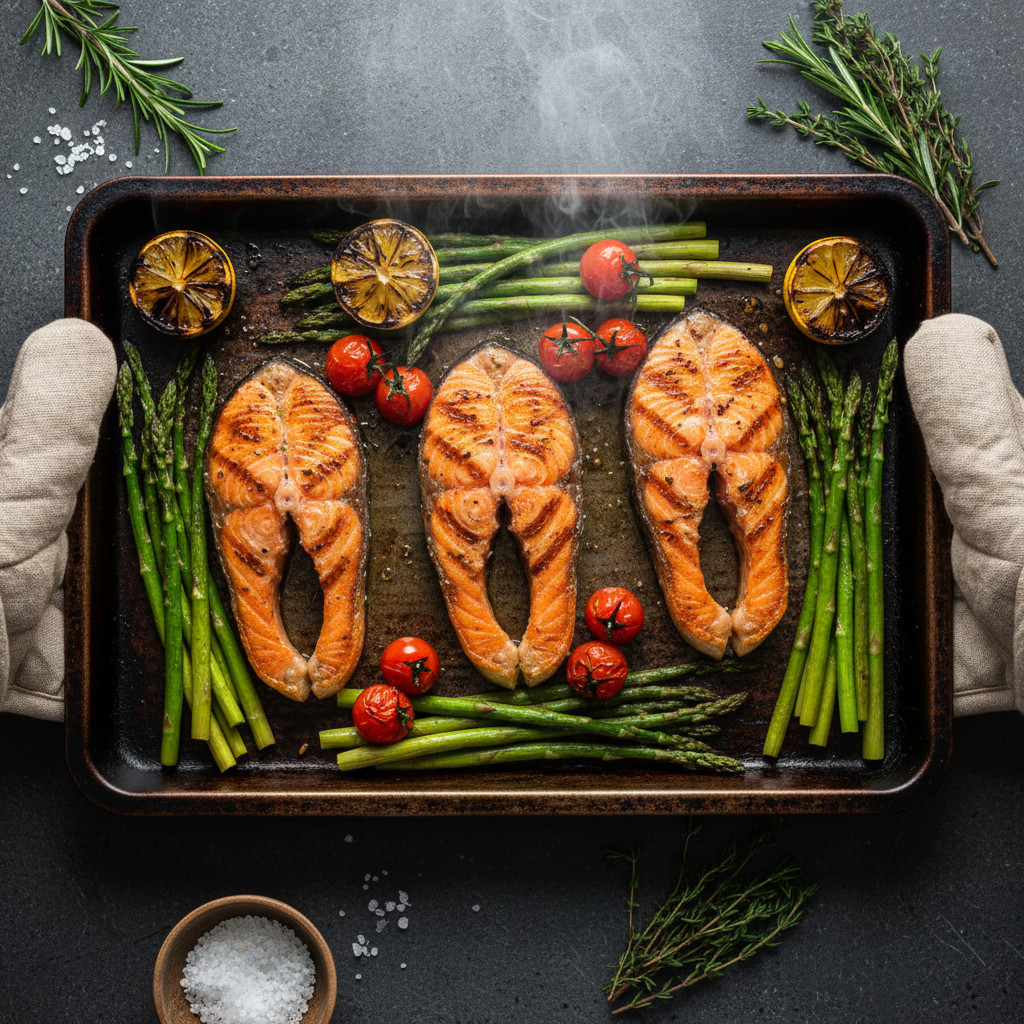
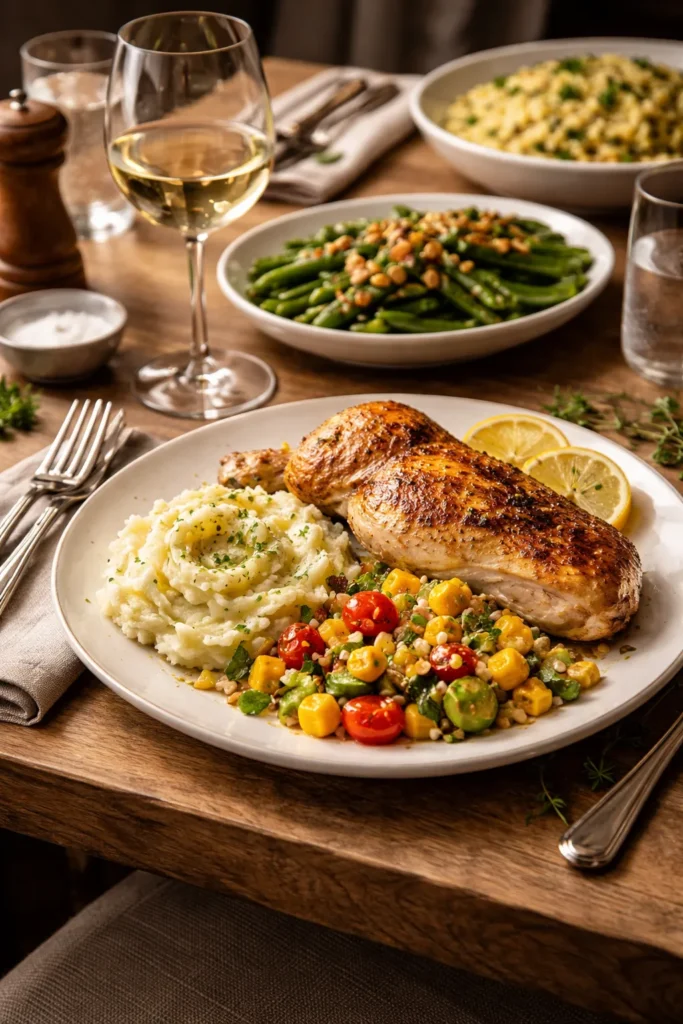
Lean, simple proteins (grilled chicken breast, baked white fish, pan-seared tofu) have room for richer, creamier sides. The cheesy grits casserole, crispy smashed potatoes, and Cajun corn and crab fritters bring the body and flavor that these proteins can’t provide on their own.
Spiced or boldly seasoned mains (blackened salmon, Cajun shrimp, jerk chicken) are best balanced by sides that offer sweetness or coolness to contrast the heat. The honey habanero Brussels sprouts complement the spice while matching its boldness; the lemon orzo or broccoli salad cools things down.
Final Thoughts

The best dinner tables share one quality — every dish on them earned its place. That’s the standard worth holding a side dish to. Not “does this fill the plate?” but “does this make everyone at the table stop and pay attention?”
Each of these ten sides has a clear reason it belongs there: a technique that creates memorable texture, a flavor combination that earns its boldness, or a presentation that makes people look twice before they’ve even tasted it. Start with whichever one speaks to you, make it once with full attention to the technique, and then watch what happens at the table.
The main course gets the credit on paper. The side dish gets the requests for the recipe.