There’s a specific kind of compliment that only comes at potlucks. It’s not the polite “this is nice” you get when someone’s being kind. It’s the person who tracks you down across the room, points at the half-empty dish you brought, and says, “You have to send me that recipe.” That’s the benchmark — and it’s harder to hit than it sounds.
The truth is, most potluck dishes fail for the same two reasons: they don’t travel well, or they taste like an afterthought. The dish that sat in your car for 40 minutes before anyone ate it, the dip that separated, the salad that went soggy — nobody’s asking for those recipes. What people request again and again are the dishes that somehow taste better at room temperature than they did fresh out of the oven, that hold up in a casserole dish on a folding table, and that manage to please the meat-eater, the picky kid, and the person who “doesn’t really eat much” all at once.
Every recipe here has earned its reputation the hard way — through packed church halls, neighborhood block parties, office holiday spreads, and backyard cookouts where the table groans under the weight of fifteen dishes and yours is the one that disappears first. These are the eight potluck recipes that get you the text the next morning asking when you’re making them again.
Table of Contents
- 1. King Ranch Chicken Casserole
- What You’ll Need
- How to Make It
- Tips That Make a Difference
- 2. Slow Cooker Swedish Meatballs
- What You’ll Need
- How to Make It
- Tips That Make a Difference
- 3. Baked Ziti with Sausage and Three Cheeses
- What You’ll Need
- How to Make It
- 4. Creamy Macaroni Coleslaw
- What You’ll Need
- How to Make It
- What Sets This Apart
- 5. Texas Sheet Cake
- What You’ll Need
- How to Make It
- Why It Travels So Well
- 6. Seven-Layer Dip with Homemade Guacamole
- What You’ll Need
- How to Assemble It
- 7. Slow Cooker Pulled Pork Sliders
- What You’ll Need
- How to Make It
- The Potluck Advantage
- 8. Banana Pudding with Vanilla Wafers
- What You’ll Need
- How to Make It
- Why People Remember This One
- Final Thoughts
1. King Ranch Chicken Casserole
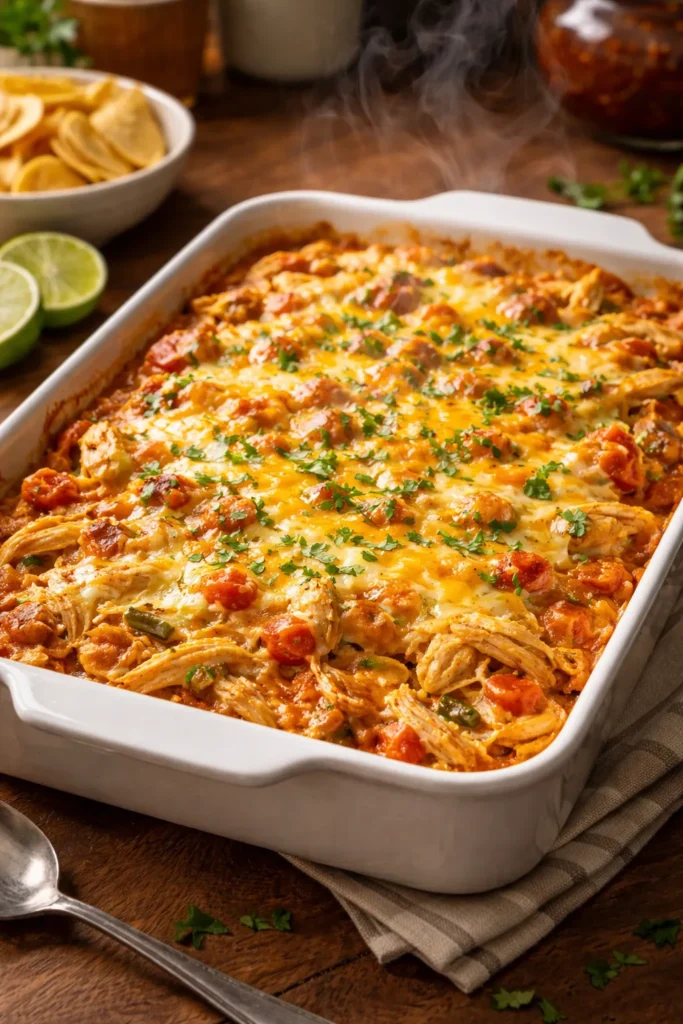
If you’ve never brought a King Ranch Chicken Casserole to a potluck, you’re leaving your best card unplayed. This Tex-Mex layered casserole hits every note a crowd-pleasing dish needs to hit: it’s cheesy, hearty, mildly spicy, and travels in the exact same baking dish you cooked it in. No transfer, no fuss, no watching it slide around in your trunk.
The genius of King Ranch Chicken is in the layers. Corn tortillas act as a base that soaks up all the savory liquid from diced tomatoes with green chiles, keeping everything moist without turning soggy. The chicken is shredded — rotisserie works perfectly here and cuts your active prep time down to about 15 minutes — and the whole thing gets blanketed in a double layer of Monterey Jack and sharp cheddar.
What You’ll Need
Yield: Serves 10 to 12 Prep Time: 20 minutes Cook Time: 45 minutes Total Time: 1 hour 5 minutes Difficulty: Beginner — the steps are simple layering and the oven does the rest.
Ingredients:
- 3 cups cooked, shredded chicken (one rotisserie chicken, skin removed)
- 12 corn tortillas, torn into quarters
- 1 can (10 oz) diced tomatoes with green chiles (like Rotel), undrained
- 1 can (10.5 oz) cream of mushroom soup
- 1 can (10.5 oz) cream of chicken soup
- 1 cup sour cream
- 1 medium yellow onion, finely diced
- 1 green bell pepper, finely diced
- 2 teaspoons cumin
- 1 teaspoon chili powder
- ½ teaspoon garlic powder
- 2 cups shredded Monterey Jack cheese
- 2 cups shredded sharp cheddar cheese
- 2 tablespoons olive oil
- Salt and black pepper to taste
How to Make It
- Preheat the oven to 350°F (175°C) and grease a 9×13-inch baking dish with cooking spray.
- Warm the olive oil in a skillet over medium heat. Add the diced onion and bell pepper and cook for 5 to 6 minutes, stirring occasionally, until softened and the onion turns translucent.
- In a large bowl, stir together the cream of mushroom soup, cream of chicken soup, sour cream, diced tomatoes with their liquid, cumin, chili powder, and garlic powder until smooth. Fold in the cooked onion and pepper mixture. Season with salt and black pepper.
- Spread a thin layer of the soup mixture across the bottom of the baking dish — just enough to coat it.
- Arrange half the torn tortillas in an even layer over the sauce. Top with half the shredded chicken, then half the remaining soup mixture, then half of both cheeses combined.
- Repeat the layers: tortillas, chicken, soup mixture, cheese.
- Cover tightly with foil and bake for 30 minutes. Remove the foil and bake for another 12 to 15 minutes, until the cheese is bubbling and the edges are lightly golden.
- Allow the casserole to rest for 10 minutes before serving — this helps the layers set so it serves cleanly.
Tips That Make a Difference
Make it the day before. This casserole actually improves overnight as the tortillas absorb the sauce and the flavors deepen. Cover it unbaked, refrigerate, then bake the day of your potluck. Add 10 minutes to the covered baking time if going straight from fridge to oven.
Don’t skip the resting time after baking. Ten minutes feels like forever when people are hungry, but it’s the difference between a dish that serves in clean squares and one that collapses into a heap on the serving spoon.
2. Slow Cooker Swedish Meatballs
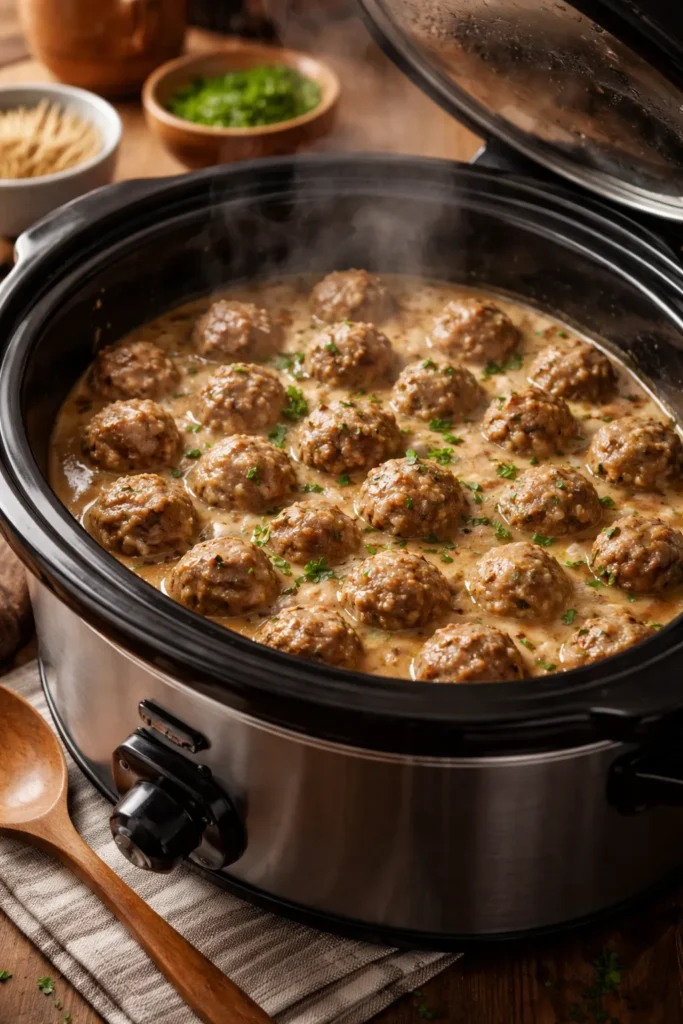
Swedish meatballs might be the single most crowd-pleasing potluck dish in existence. There’s something about tender, perfectly spiced beef and pork meatballs in a rich, creamy gravy that bypasses every dietary preference and picky-eater tendency and just gets eaten. Serve them over egg noodles or on their own with toothpicks, and either way they’ll be gone before you’ve had a chance to get your own plate.
The slow cooker is what makes this potluck-friendly. You can cook the meatballs and keep them warm in the same vessel, transport with the lid locked, and plug in when you arrive. No reheating drama, no dry-out, no cold spots.
What You’ll Need
Yield: Serves 8 to 10 (makes approximately 40 meatballs) Prep Time: 30 minutes Cook Time: 4 hours on LOW or 2 hours on HIGH Total Time: 4.5 hours (mostly hands-off) Difficulty: Intermediate — the meatball rolling takes patience, but the slow cooker handles the rest.
For the Meatballs:
- 1 lb ground beef (80/20 blend)
- ½ lb ground pork
- ½ cup plain breadcrumbs
- ¼ cup whole milk
- 1 large egg, lightly beaten
- 1 small yellow onion, grated on a box grater
- 1 teaspoon fine sea salt
- ½ teaspoon black pepper
- ¼ teaspoon ground allspice
- ¼ teaspoon ground nutmeg
- 2 tablespoons butter (for browning)
For the Gravy:
- 2 cups beef broth
- 1 cup heavy cream
- 2 tablespoons all-purpose flour
- 1 tablespoon Worcestershire sauce
- 1 teaspoon Dijon mustard
- Salt and pepper to taste
- Fresh parsley, chopped (for garnish, optional)
How to Make It
- In a large bowl, combine the breadcrumbs and milk and let them soak for 2 minutes until the breadcrumbs absorb the liquid.
- Add the ground beef, ground pork, egg, grated onion, salt, pepper, allspice, and nutmeg to the bowl. Mix gently with your hands until just combined — do not overwork the meat or the meatballs will turn dense and tough.
- Roll the mixture into balls approximately 1½ inches in diameter (about the size of a large walnut). You should get around 38 to 42 meatballs.
- Melt the butter in a large skillet over medium-high heat. Working in batches, brown the meatballs on all sides — about 2 to 3 minutes per batch. They don’t need to cook through; you’re building flavor and color on the outside. Transfer to the slow cooker as you go.
- Whisk together the beef broth, heavy cream, flour, Worcestershire sauce, and Dijon mustard until smooth, then pour over the meatballs in the slow cooker.
- Cook on LOW for 4 hours or HIGH for 2 hours, until the meatballs are cooked through and the gravy has thickened. Stir gently halfway through if possible.
- Taste the gravy and adjust seasoning. Garnish with chopped fresh parsley before serving.
Tips That Make a Difference
Browning the meatballs before slow cooking is non-negotiable for flavor. Skipping this step produces pale, steamed meatballs that lack depth. That golden crust also helps them hold their shape in the gravy.
Grating the onion (rather than dicing it) is the move that separates good Swedish meatballs from great ones. Grated onion dissolves into the meat mixture, adding moisture and flavor without any crunchy bits.
3. Baked Ziti with Sausage and Three Cheeses

Baked ziti is lasagna’s more approachable, equally delicious cousin. No precise layering, no wide noodles that tear the moment you try to handle them — just pasta, sauce, sausage, and an obscene amount of melted cheese baked together in one dish. It serves twelve people easily, reheats without losing its soul, and appeals to virtually everyone at the table.
The key to a baked ziti that gets requested again and again is not overcooking the pasta before baking. Pull it two minutes before the package says it’s done. It’ll finish cooking in the oven, and you won’t end up with mush.
What You’ll Need
Yield: Serves 10 to 12 Prep Time: 25 minutes Cook Time: 40 minutes Total Time: 1 hour 5 minutes Difficulty: Beginner — straightforward assembly with no special technique required.
Ingredients:
- 1 lb ziti or penne pasta, cooked 2 minutes shy of al dente
- 1 lb Italian sausage (sweet or hot, casings removed)
- 1 jar (24 oz) marinara sauce
- 1 can (14.5 oz) crushed tomatoes
- 15 oz whole-milk ricotta cheese
- 1 large egg
- 2 cups shredded mozzarella cheese, divided
- ½ cup grated Parmesan cheese, divided
- 2 teaspoons dried basil
- 1 teaspoon dried oregano
- 1 teaspoon garlic powder
- Salt and black pepper to taste
- Fresh basil or parsley for garnish
How to Make It
- Preheat the oven to 375°F (190°C). Lightly grease a 9×13-inch baking dish.
- Brown the Italian sausage in a large skillet over medium-high heat, breaking it into crumbles, until cooked through and no pink remains — about 8 minutes. Drain off excess fat.
- Add the marinara sauce and crushed tomatoes to the skillet with the sausage. Stir in the dried basil, oregano, and garlic powder. Simmer for 5 minutes, then remove from heat.
- In a separate bowl, whisk together the ricotta, egg, half the Parmesan (¼ cup), salt, and pepper until smooth.
- Combine the undercooked pasta with the meat sauce in a large bowl, stirring to coat every piece.
- Spread half the pasta mixture in the prepared baking dish. Dot the ricotta mixture evenly across the surface, then sprinkle with 1 cup of the shredded mozzarella.
- Top with the remaining pasta mixture, then finish with the remaining mozzarella and Parmesan.
- Cover tightly with foil and bake for 25 minutes. Remove the foil and bake for another 12 to 15 minutes, until the cheese is bubbly with golden spots and the edges are sizzling.
- Let the dish rest for at least 10 minutes before cutting and serving.
4. Creamy Macaroni Coleslaw
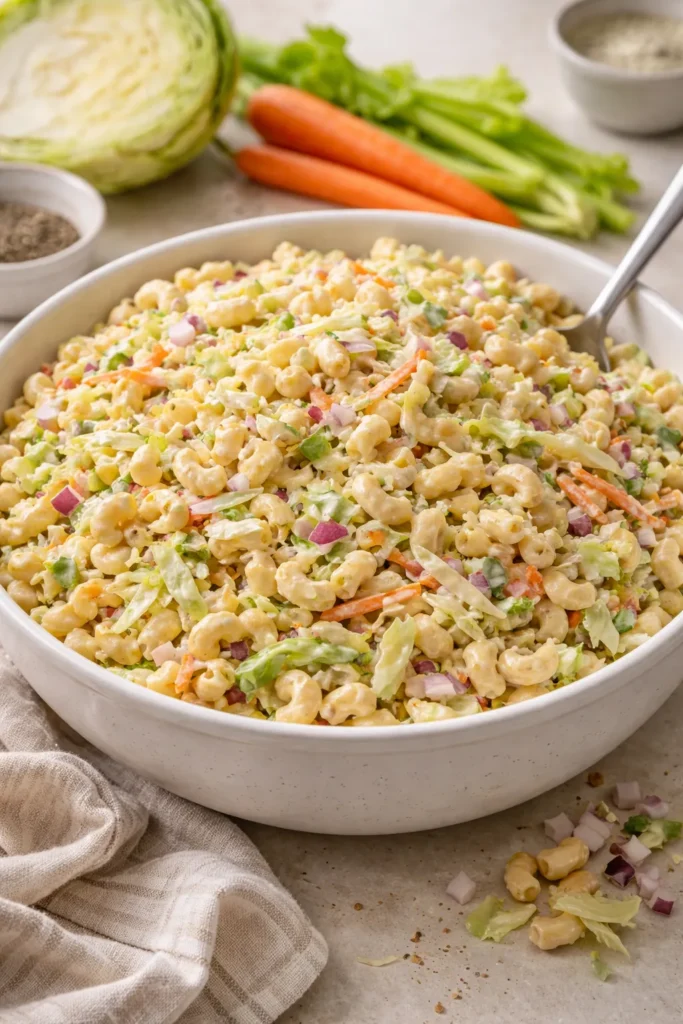
Nobody goes home from a potluck asking for the recipe for a plain green salad. But a well-made macaroni coleslaw? People actually track the recipe down. This dish combines two classic picnic staples — creamy macaroni salad and crunchy coleslaw — into one cold side dish that holds up on a table for hours without wilting, separating, or losing its texture.
The secret weapon is salting and draining the shredded cabbage before adding the dressing. This draws out excess moisture so your dressing doesn’t turn watery and thin after an hour sitting out. It’s the step that 90% of home cooks skip, and it’s exactly why their versions never taste quite as good.
What You’ll Need
Yield: Serves 14 to 16 Prep Time: 25 minutes Chill Time: 1 hour minimum (overnight is better) Total Time: 25 minutes active + 1 hour chilling Difficulty: Beginner — no cooking required beyond boiling pasta.
Ingredients:
- 2 cups elbow macaroni, cooked to package directions, drained, and rinsed with cold water
- 3 cups shredded green cabbage (about ¼ small head)
- 1 cup shredded carrots (about 2 medium)
- ½ cup thinly sliced celery
- ½ cup diced red onion
- 1 teaspoon salt (for salting cabbage)
For the Dressing:
- 1 cup mayonnaise
- 3 tablespoons apple cider vinegar
- 2 tablespoons sugar
- 1 tablespoon Dijon mustard
- ½ teaspoon celery seed
- Salt and black pepper to taste
How to Make It
- Toss the shredded cabbage with 1 teaspoon of salt in a colander and let it sit over the sink for 15 minutes. Rinse thoroughly with cold water, then squeeze out as much moisture as possible with your hands or a clean towel. This step is what keeps the dressing thick and creamy rather than watery.
- In a large bowl, whisk together the mayonnaise, apple cider vinegar, sugar, Dijon mustard, and celery seed until smooth. Season generously with salt and pepper.
- Add the cooked, cooled macaroni to the bowl and stir to coat.
- Add the salted and dried cabbage, shredded carrots, celery, and red onion. Toss until everything is evenly coated.
- Cover and refrigerate for at least 1 hour. Taste again before serving and adjust seasoning — the pasta absorbs the dressing as it chills, so it often needs another pinch of salt or a splash more vinegar.
What Sets This Apart
The combination of macaroni and cabbage creates a more substantial, satisfying dish than either salad alone. The macaroni adds bulk and absorbs the dressing beautifully; the cabbage provides crunch that holds up where lettuce would wilt. This is the rare cold potluck dish that actually tastes better at hour three than it did when you made it.
5. Texas Sheet Cake
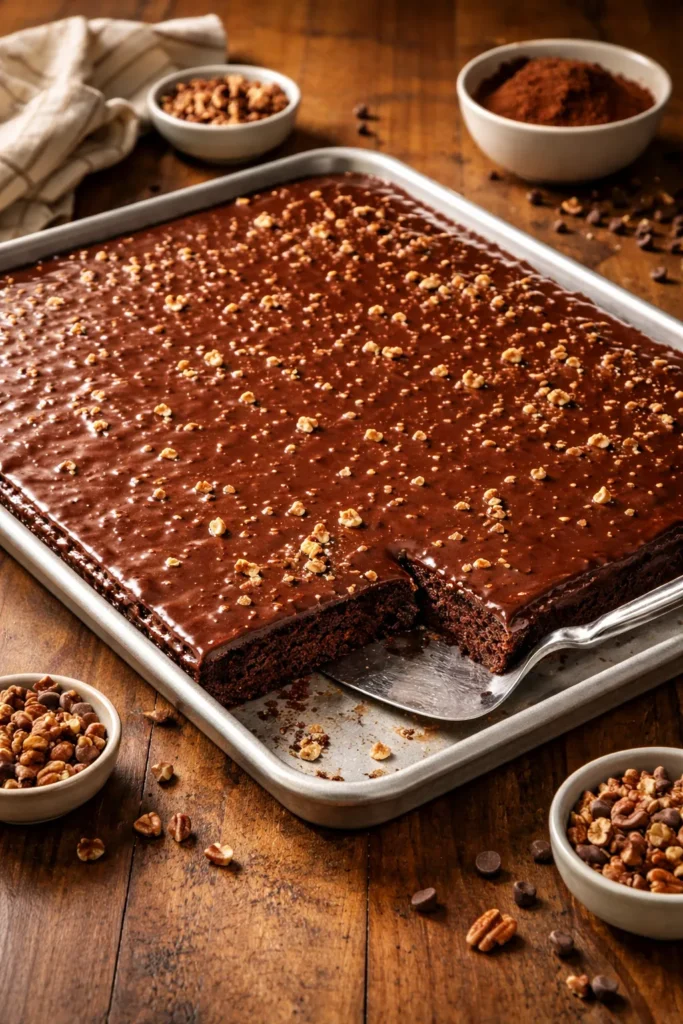
If you’re responsible for dessert and you show up with Texas Sheet Cake, you will be treated as a hero. This is not hyperbole. A proper Texas Sheet Cake — thin, fudgy chocolate cake baked in a half-sheet pan, covered in a warm chocolate icing poured directly onto the cake the moment it comes out of the oven — is one of the most crowd-friendly baked goods ever conceived. One batch feeds 24 people and requires almost no decorating skill.
The warm icing is what makes this recipe legendary. You pour it over the hot cake where it soaks into the surface slightly before setting into a shiny, fudgy crust. No frosting bags, no offsets, no nothing. Just pour and spread.
What You’ll Need
Yield: Makes one 18×13-inch sheet cake, serves 24 Prep Time: 20 minutes Cook Time: 20 minutes Total Time: 40 minutes (plus 30 minutes cooling before cutting) Difficulty: Beginner — this is a one-bowl, no-mixer-needed cake.
For the Cake:
- 2 cups all-purpose flour
- 2 cups granulated sugar
- ½ teaspoon fine sea salt
- 1 teaspoon baking soda
- 1 cup (2 sticks) unsalted butter
- 1 cup water
- ¼ cup unsweetened cocoa powder
- ½ cup buttermilk
- 2 large eggs, lightly beaten
- 1 teaspoon pure vanilla extract
For the Chocolate Icing:
- ½ cup (1 stick) unsalted butter
- 6 tablespoons whole milk
- ¼ cup unsweetened cocoa powder
- 3½ cups powdered sugar, sifted
- 1 teaspoon pure vanilla extract
- Pinch of fine sea salt
How to Make It
Prepare the Cake:
- Preheat the oven to 375°F (190°C). Grease an 18×13-inch half-sheet pan (rimmed baking sheet) with butter or cooking spray.
- In a large bowl, whisk together the flour, sugar, salt, and baking soda. Set aside.
- In a medium saucepan over medium heat, combine the butter, water, and cocoa powder. Stir and bring to a rolling boil, then remove from the heat immediately.
- Pour the hot cocoa mixture over the flour mixture and stir until just combined.
- Add the buttermilk, beaten eggs, and vanilla extract. Stir until smooth — the batter will be thin and pourable.
- Pour the batter into the prepared pan and spread it into an even layer with a spatula.
- Bake for 18 to 20 minutes, until a toothpick inserted in the center comes out clean and the cake springs back when pressed lightly in the middle.
Make the Icing (Start This 5 Minutes Before the Cake Comes Out):
- In a medium saucepan over medium heat, combine the butter, milk, and cocoa powder. Bring to a boil while stirring, then remove from heat.
- Add the sifted powdered sugar, vanilla, and salt. Whisk vigorously until smooth.
- The moment the cake comes out of the oven, pour the warm icing over the entire surface and spread to the edges with an offset spatula or the back of a spoon. The icing sets as it cools, so work quickly.
- Allow the cake to cool completely — at least 30 minutes — before cutting into squares.
Why It Travels So Well
Texas Sheet Cake is designed for transport. It bakes directly in the pan you serve it from, the icing sets firm so nothing smears, and the thin profile means you can cover it flush with foil without disturbing the surface. Cut it into squares at the potluck, and every piece lifts out cleanly.
6. Seven-Layer Dip with Homemade Guacamole
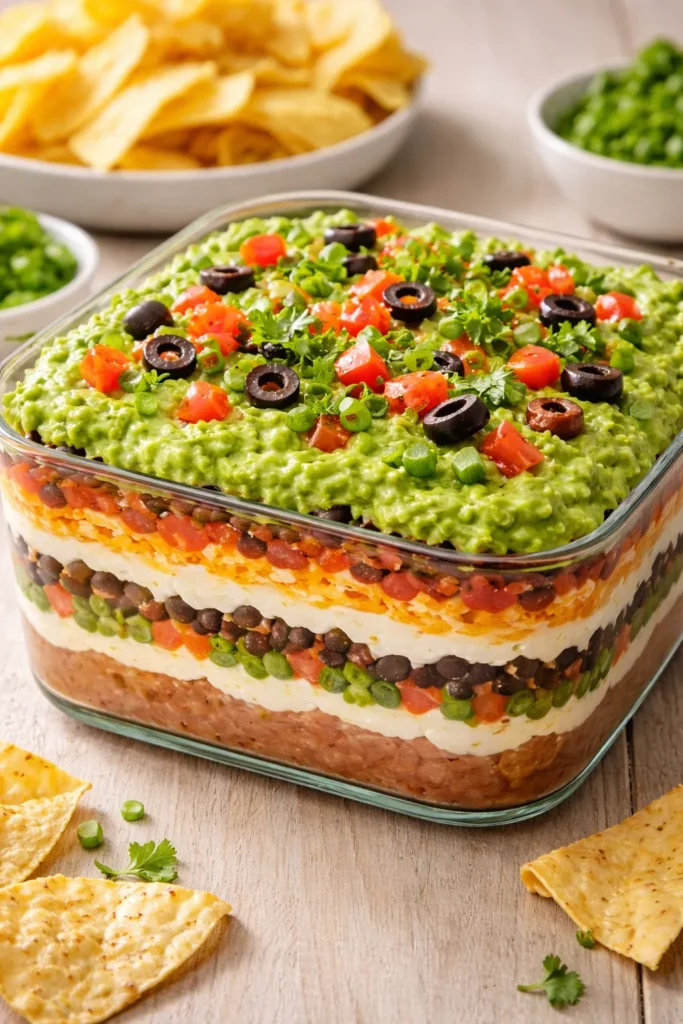
A seven-layer dip is the appetizer equivalent of a greatest hits album — every element is something people already love, and stacking them together makes each one better than it was on its own. What separates a remarkable seven-layer dip from a mediocre one is exclusively the quality of each individual layer. Use canned guacamole and you’ve already lost. Make it yourself and you’ve already won.
This version builds on the classic foundation with a few specific upgrades: refried beans seasoned with cumin rather than served plain from the can, genuinely fresh guacamole with lime and jalapeño, and a sharp cheddar-jack blend instead of the pre-shredded stuff that never melts properly.
What You’ll Need
Yield: Serves 16 to 20 as an appetizer Prep Time: 25 minutes Total Time: 25 minutes (no cooking required) Difficulty: Beginner — assembly only, no heat required.
Ingredients (Layer by Layer):
- Layer 1: 2 cans (16 oz each) refried beans + 1 teaspoon cumin + ½ teaspoon garlic powder + salt to taste
- Layer 2: 3 ripe avocados, mashed with juice of 1½ limes, ½ teaspoon salt, 1 small jalapeño (seeds removed, minced), and 2 tablespoons finely diced white onion
- Layer 3: 1½ cups sour cream mixed with 1 packet (1 oz) taco seasoning
- Layer 4: 1½ cups shredded sharp cheddar-jack cheese blend
- Layer 5: 1 cup jarred salsa, drained of excess liquid
- Layer 6: ¾ cup sliced black olives, drained
- Layer 7: 3 green onions, thinly sliced + 1 cup diced fresh tomatoes (seeds removed)
- Tortilla chips for serving
How to Assemble It
- Mix the refried beans with cumin, garlic powder, and salt until combined. Spread in an even layer across the bottom of a 9×13-inch dish or a wide, shallow serving bowl.
- Mash the avocados in a separate bowl with the lime juice, salt, jalapeño, and onion until smooth with some texture remaining. Spread evenly over the bean layer. Press plastic wrap directly against the guacamole surface if making more than 30 minutes ahead to prevent browning.
- Stir the taco seasoning into the sour cream until smooth. Spread gently over the guacamole.
- Sprinkle the shredded cheese evenly across the sour cream layer.
- Spoon the drained salsa in small dollops across the cheese, then spread gently.
- Scatter the black olives evenly.
- Top with the sliced green onions and diced tomatoes right before serving.
Transport tip: Build layers 1 through 6 the night before and refrigerate. Add the fresh tomatoes and green onions at the potluck so they stay bright and fresh.
7. Slow Cooker Pulled Pork Sliders
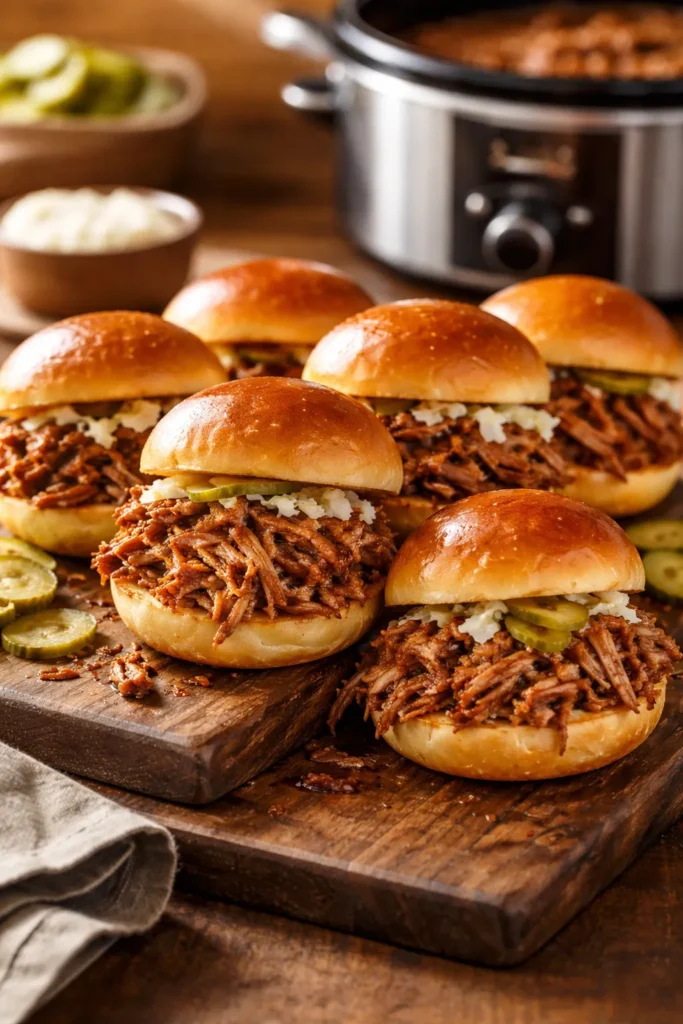
Pulled pork sliders are the potluck dish that makes you look like you put in far more effort than you actually did. A pork shoulder goes into the slow cooker the night before with nothing more than a dry rub and a splash of apple cider vinegar, and 8 to 10 hours later you have fork-tender, smoky pulled pork that serves 20 people on soft slider buns. The slow cooker is the serving vessel. You show up, plug it in on warm, and that’s essentially all there is to it.
The dry rub is where all the flavor lives, so don’t cut corners with it. Smoked paprika, brown sugar, garlic powder, and a real hit of black pepper give the pork its depth before a drop of sauce touches it.
What You’ll Need
Yield: Serves 18 to 22 (enough for 20+ sliders) Prep Time: 15 minutes Cook Time: 8 to 10 hours on LOW Total Time: 8 to 10 hours (mostly hands-off overnight cooking) Difficulty: Beginner — set it, forget it, and show up like a star. Best Served: Immediately from the slow cooker while warm.
For the Pork:
- 4 to 5 lbs boneless pork shoulder (also called pork butt), excess fat trimmed
- 2 tablespoons smoked paprika
- 2 tablespoons brown sugar
- 1 tablespoon garlic powder
- 1 tablespoon onion powder
- 1 tablespoon kosher salt
- 1½ teaspoons black pepper
- 1 teaspoon cumin
- ½ teaspoon cayenne pepper (optional but recommended)
- ½ cup apple cider vinegar
- ¼ cup water
For Serving:
- 24 slider buns or small potato rolls
- 1½ cups your preferred barbecue sauce
- Pickle slices
- Coleslaw (optional, highly recommended)
How to Make It
- Combine the smoked paprika, brown sugar, garlic powder, onion powder, salt, black pepper, cumin, and cayenne in a small bowl. Pat the pork shoulder dry with paper towels, then rub the spice mixture all over every surface of the meat. Press it in firmly — you want it to adhere.
- Place the rubbed pork in the slow cooker. Pour the apple cider vinegar and water around the base (not over the top — you don’t want to wash off the rub).
- Cook on LOW for 8 to 10 hours, until the meat shreds effortlessly when pulled with two forks. The meat is ready when it falls apart at the touch — if it resists at all, give it another hour.
- Remove the pork to a cutting board and shred with two forks, discarding any large pieces of fat. Return the shredded meat to the slow cooker and stir in the barbecue sauce.
- Keep on WARM to transport and serve. Pile generously onto slider buns with pickle slices and coleslaw if using.
The Potluck Advantage
Pulled pork is one of the few dishes where overnight cooking is actually the right move, not a compromise. Making it the night before means you’re not frantically watching the clock the day of the potluck. By the time you wake up, your potluck contribution is done and already smelling incredible.
8. Banana Pudding with Vanilla Wafers
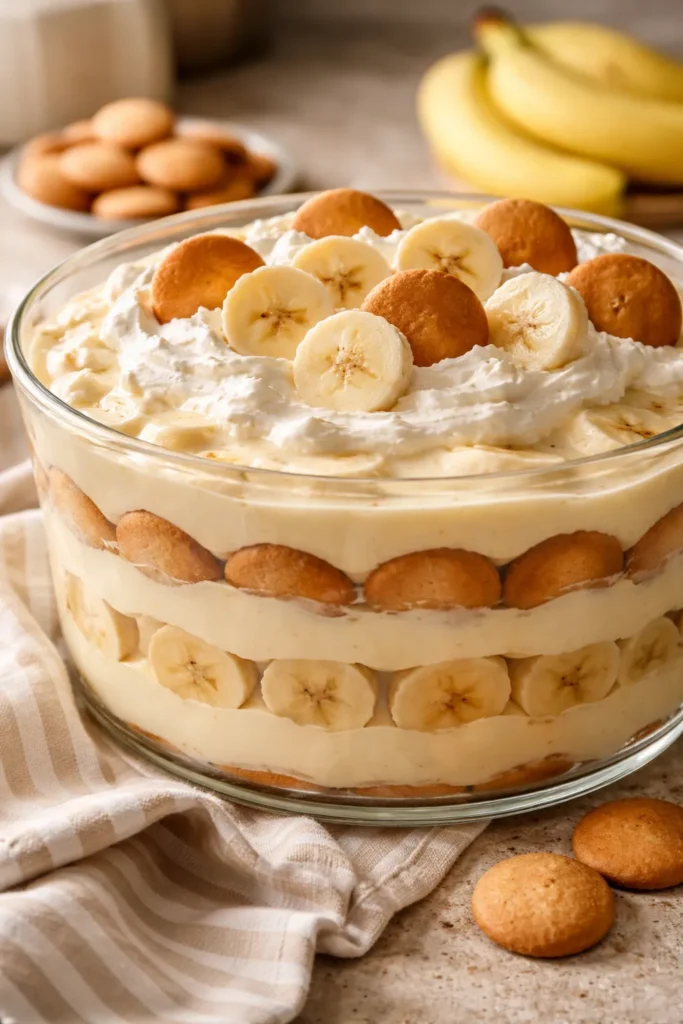
Banana pudding is the dessert that clears out before people even get to the table. There’s a deep nostalgia wired into the combination of creamy vanilla custard, ripe banana slices, and soft-crisp wafers — it’s comfort food at its most disarming. Southern potlucks have known this for decades, and the rest of the country is catching up.
This version uses a cooked vanilla custard instead of instant pudding mix, and the difference is not subtle. The custard is silkier, richer, and has that eggy depth that no packet can replicate. It takes an extra 10 minutes of active cooking, and it’s worth every second.
What You’ll Need
Yield: Serves 14 to 16 Prep Time: 20 minutes Cook Time: 15 minutes Chill Time: 4 hours minimum (overnight is ideal) Total Time: 35 minutes active + 4 hours chilling Difficulty: Intermediate — the custard requires attention at the stove, but it’s straightforward once you know what to look for.
For the Vanilla Custard:
- 4 cups whole milk
- 1 cup granulated sugar
- ⅓ cup all-purpose flour
- ¼ teaspoon fine sea salt
- 4 large egg yolks, beaten
- 2 teaspoons pure vanilla extract
- 2 tablespoons unsalted butter
For Assembly:
- 1 box (11 oz) vanilla wafer cookies (like Nilla Wafers)
- 4 to 5 ripe but firm bananas, sliced into ¼-inch rounds
For the Topping:
- 2 cups cold heavy whipping cream
- 3 tablespoons powdered sugar
- 1 teaspoon pure vanilla extract
How to Make It
Make the Custard:
- Whisk together the sugar, flour, and salt in a medium saucepan. Gradually whisk in the milk until smooth, making sure no lumps remain from the flour.
- Cook the mixture over medium heat, stirring constantly with a wooden spoon or heatproof spatula, until it thickens enough to coat the back of a spoon — about 10 to 12 minutes. Do not walk away or stop stirring; the custard can scorch on the bottom.
- Remove about ½ cup of the hot custard and whisk it into the beaten egg yolks (this is called tempering — it prevents the eggs from scrambling). Pour the tempered yolk mixture back into the saucepan.
- Return the saucepan to medium-low heat and cook, stirring constantly, for 2 more minutes until the custard is thick and just begins to bubble. Remove from heat and stir in the butter and vanilla. The finished custard should be thick enough that a line drawn through it with a spatula holds its shape briefly.
- Press plastic wrap directly against the surface of the custard and cool for 20 minutes.
Assemble the Pudding:
- In a large trifle dish or 9×13-inch baking dish, layer one-third of the vanilla wafers in a single layer. Top with one-third of the banana slices, then one-third of the warm custard, spreading it to the edges.
- Repeat this layering process two more times, ending with custard on top.
- Whip the heavy cream with the powdered sugar and vanilla until firm peaks form. Spread or pipe over the top of the pudding.
- Crush a small handful of vanilla wafers and scatter over the whipped cream. Cover and refrigerate for at least 4 hours — overnight is even better, as the wafers soften into a cake-like texture.
Why People Remember This One
The layered structure means every spoonful has the full experience: soft wafer, banana slice, silky custard, cloud of cream. It’s not just a dessert — it’s a texture and flavor conversation that plays out differently in each bite. The cooked custard also holds up beautifully over several hours, whereas instant pudding tends to weep and deflate. Bring it cold, serve with a big spoon, and watch the dish empty from the bottom up.
Final Thoughts
The common thread running through all eight of these dishes is the same thing that makes any potluck food worth bringing: they were designed to share, not just to show off. They taste great at room temperature, they hold up over time, and they work in a crowd where preferences range from adventurous to “just give me something I recognize.”
A few things worth keeping in mind before your next potluck: bring your own serving utensil, label your dish if it contains common allergens, and if you can, pack it in the same vessel you’ll serve it in. Transferring food at the host’s kitchen creates chaos and extra dishes. The best potluck guests arrive ready to set their dish down and enjoy the party.
One last thing — don’t wait for someone to specifically request a dish before you make it. Bring one of these on your own initiative, and the request will follow naturally. That’s just how it always works.