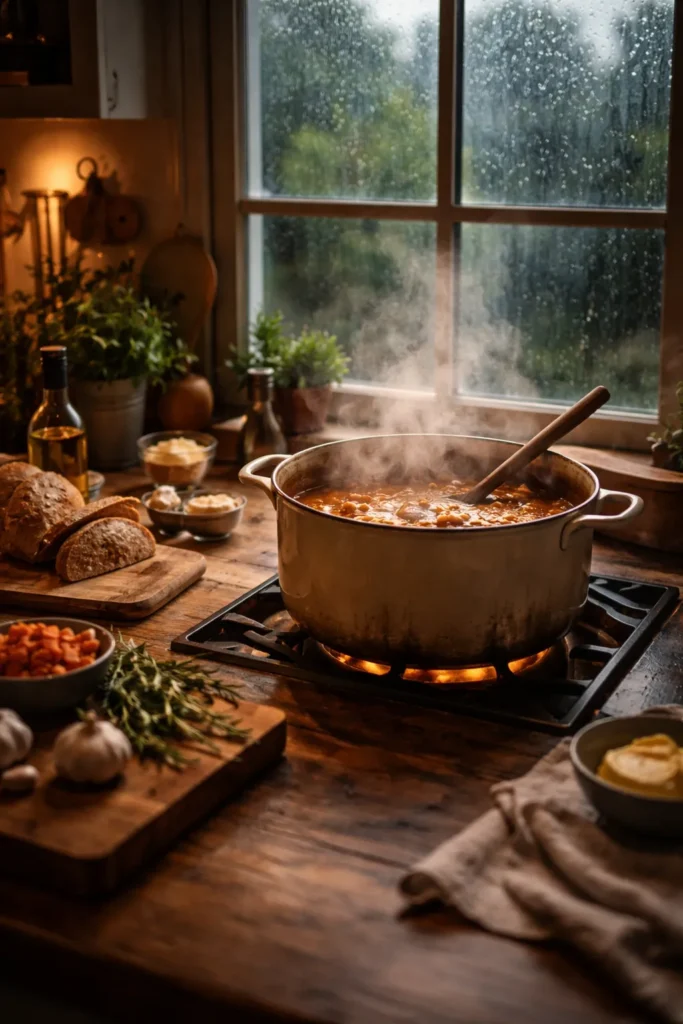
There’s a particular kind of magic that happens when rain starts tapping against the windows and you realize you have nowhere to be. The day suddenly opens up — and with it, the kitchen. That grey, damp energy outside becomes the best possible excuse to tie on an apron, let something bubble low and slow on the stove, and let the smell of real cooking fill every room.
Rainy day cooking is its own category, and it deserves to be treated as one. These aren’t quick weeknight dinners you throw together in twenty minutes while half-watching something on your phone. These are the dishes that take their time, reward your patience, and land on the table as something genuinely comforting — the kind of meal that makes the whole household slow down and actually sit together.
What follows are eight recipes worth making when the weather gives you the gift of a slow, indoor day. Some take an hour, some take three. All of them are worth every minute.
Table of Contents
- 1. Classic Chicken Noodle Soup Built From Scratch
- The Broth Is the Foundation
- Noodle Timing Is Non-Negotiable
- 2. Baked Mac and Cheese with a Golden Crust
- Building the Right Cheese Combination
- Topping and Baking for That Perfect Crust
- 3. Low-and-Slow Dutch Oven Beef Stew
- The Sear That Changes Everything
- Vegetables and Timing
- 4. Southern Chicken and Dumplings
- Making Drop Dumplings That Actually Work
- How to Know When They’re Done
- 5. French Onion Soup with a Proper Gruyère Crust
- The Caramelization Process (Don’t Rush This)
- Building the Crouton and Cheese Topping
- 6. Classic Meat Lasagna with Homemade Tomato Sauce
- Layering Strategy That Makes the Difference
- Resting Time Is Not Optional
- 7. Shepherd’s Pie with Buttery Mashed Potato Crust
- Building a Filling With Real Depth
- The Mashed Potato Layer That Makes People Go Quiet
- 8. Brown Butter Chocolate Chip Cookies
- Resting the Dough for Better Texture
- Chocolate Distribution and Baking Temperature
- Why Rainy Day Cooking Hits Different
- Wrapping Up
1. Classic Chicken Noodle Soup Built From Scratch
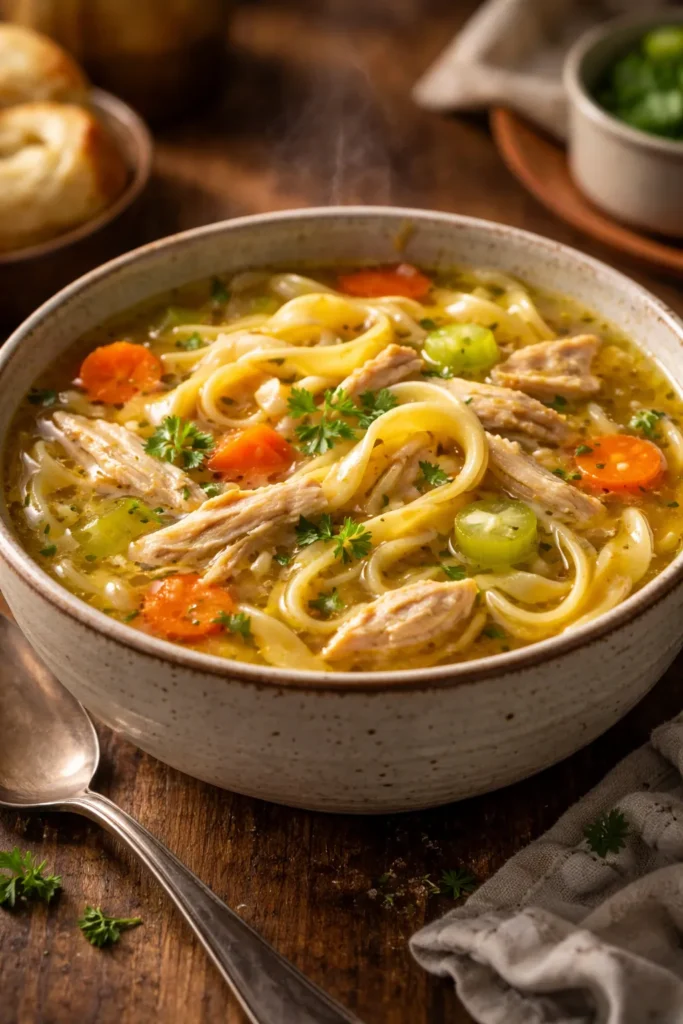
Most people have eaten chicken noodle soup from a can so many times that they’ve forgotten what the real thing tastes like. Homemade chicken noodle soup doesn’t just taste better — it tastes entirely different. The broth has depth, the chicken is tender instead of rubbery, and the noodles are cooked properly rather than soggy into oblivion.
The secret is building your broth with care. Start with a whole chicken, or at minimum bone-in, skin-on thighs and drumsticks. Bones and skin release collagen as they cook, which gives the broth that slightly silky, full-bodied texture that canned soup can’t replicate. Add aromatics from the start — a halved onion (charred briefly in a dry pan for extra depth), celery with its leaves still on, whole peppercorns, a bay leaf, and a few smashed garlic cloves. Let it all simmer uncovered for at least an hour before you even think about adding noodles.
The Broth Is the Foundation
The single biggest mistake people make with chicken noodle soup is rushing the broth. Forty-five minutes isn’t enough. An hour and a half is closer to what you want. You’re looking for a broth that’s gone from pale and thin to a rich golden color that coats the inside of your spoon lightly. Skim the foam that rises during the first fifteen minutes of simmering — that’s what makes the difference between a broth that’s clear and beautiful versus cloudy and muddy-tasting.
Once you’ve pulled the chicken out, shred it generously. Don’t dice it. Shredded chicken stays moist and integrates into the soup in a way that cubed pieces never quite manage.
Noodle Timing Is Non-Negotiable
Cook your egg noodles separately in salted boiling water and add them to individual bowls rather than the whole pot. This sounds fussy, but it matters. Noodles sitting in hot broth for any length of time soak up liquid and turn bloated. If you’re planning leftovers — and this recipe makes plenty — keeping the noodles separate means tomorrow’s soup is just as good as today’s.
What to serve alongside: A hunk of crusty sourdough or a few saltine crackers. That’s all this soup needs.
- Use a whole chicken for maximum flavor; rotisserie chicken works in a pinch but gives you less broth depth
- Add a splash of apple cider vinegar to the broth — it draws minerals from the bones and brightens the flavor subtly
- Fresh dill added at the very end, off the heat, takes this from good to memorable
- Leftovers keep for four days refrigerated; freeze the broth separately from the noodles for best results
2. Baked Mac and Cheese with a Golden Crust
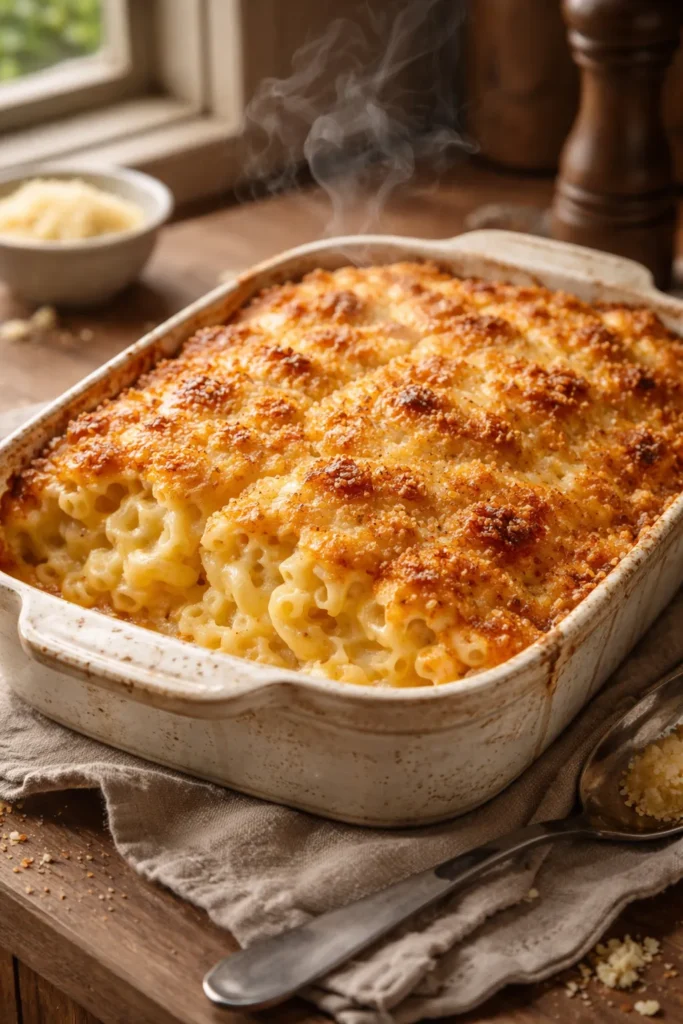
Boxed mac and cheese has its place — nobody’s arguing against that — but baked mac and cheese made from a proper cheese sauce is a completely different experience. It’s richer, more complex, and that golden, slightly crispy top layer is worth the extra thirty minutes of oven time on its own.
The cheese sauce is a béchamel at its core: butter, flour, milk, cooked together until thickened, then finished with a generous amount of cheese. Where most people go wrong is using pre-shredded cheese from a bag. Those cheese shreds are coated in anti-caking agents that prevent them from melting smoothly — your sauce ends up grainy rather than silky. Buy a block and shred it yourself. The difference is immediate and obvious.
Building the Right Cheese Combination
Sharp cheddar is the backbone. It provides the flavor that makes mac and cheese taste like mac and cheese. But sharp cheddar alone can be one-note, and it doesn’t melt as smoothly as you’d want. Combining it with a small amount of Gruyère adds nuttiness and superior meltability. If you want a bit of edge, a tablespoon or two of cream cheese stirred in at the end adds richness and stabilizes the sauce so it stays creamy even after baking.
The ratio that works: roughly two-thirds sharp cheddar, one-third Gruyère, with a teaspoon of Dijon mustard and a pinch of cayenne worked into the sauce. The mustard isn’t detectable as mustard — it just makes the cheese flavor sharper and more pronounced.
Topping and Baking for That Perfect Crust
The top layer is where baked mac and cheese either soars or disappoints. Panko breadcrumbs tossed with melted butter and spread over the dish before it goes into a 375°F oven create a crust that stays crispy rather than going soft and dense. Add a handful of extra cheddar under the breadcrumbs so you get both a crispy top and a cheese pull beneath it.
Bake uncovered for 25 to 30 minutes until the top is deep golden and the sauce is bubbling around the edges of the dish. Let it rest for ten minutes before serving — this allows the sauce to set slightly so you get defined scoops rather than a runny mess.
A rainy day move worth trying: Make a double batch and freeze half. Baked mac and cheese reheats from frozen at 350°F, covered in foil for 45 minutes then uncovered for the last ten, and tastes essentially identical to fresh.
- Pasta shape matters: cavatappi, rigatoni, or cavatelli hold sauce better than elbow macaroni
- Salt your pasta water aggressively — this is the only chance to season the pasta itself
- The cheese sauce should be slightly loose before baking; it thickens further in the oven
- For a deeper flavor, substitute a portion of the milk with evaporated milk
3. Low-and-Slow Dutch Oven Beef Stew
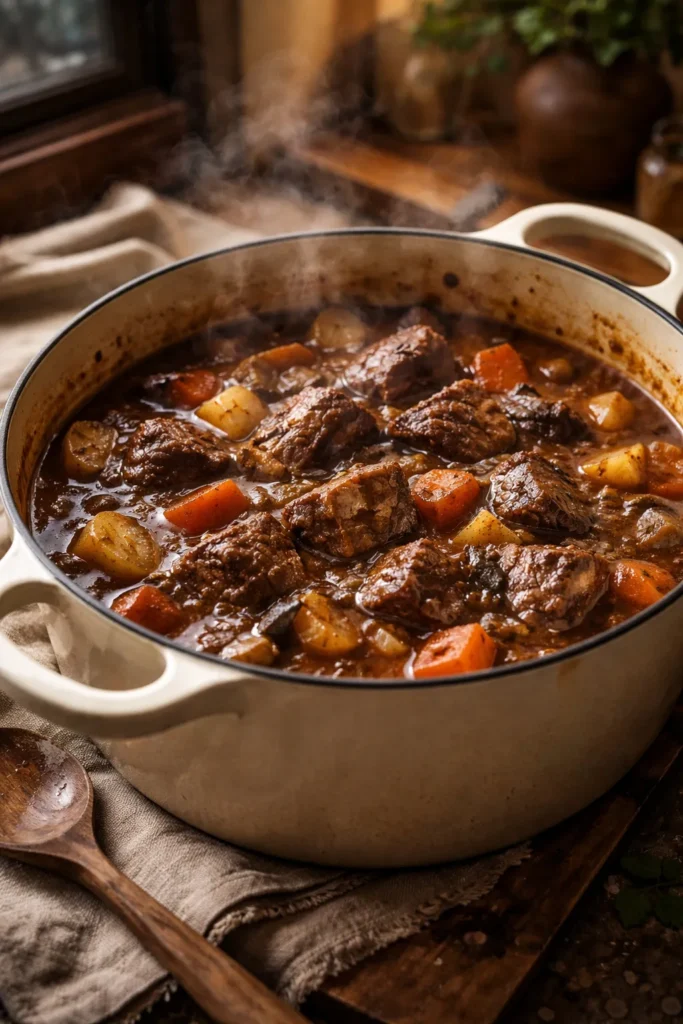
Beef stew is the dish that a rainy day was practically designed for. It asks almost nothing of you except patience — and in return it delivers some of the most satisfying food you’ll ever eat. The trick is understanding that the three-hour cook time isn’t a burden. It’s the recipe working exactly as it should.
Start with chuck roast rather than pre-cut “stew beef.” Chuck has the right ratio of fat and connective tissue, which breaks down during long, gentle cooking and turns the meat impossibly tender. Cut it yourself into two-inch chunks, which is larger than most people expect. Bigger pieces hold together through the long cook without drying out.
The Sear That Changes Everything
Don’t skip the initial sear. Pat the beef chunks dry with paper towels — moisture is the enemy of browning — then sear them in batches in a Dutch oven with a neutral oil over high heat. You’re looking for a deep, dark-brown crust on at least two sides of each piece. This isn’t about cooking the meat through; it’s about building flavor through the Maillard reaction. The fond (those browned bits stuck to the bottom of the pot) is pure flavor, and when you deglaze with a cup of red wine or beef broth, it dissolves into the liquid and becomes the backbone of your stew.
One more critical note: sear in batches and don’t crowd the pan. Overcrowding drops the temperature and causes the meat to steam rather than sear. Steamed beef doesn’t brown.
Vegetables and Timing
Root vegetables — carrots, potatoes, parsnips — go in during the last 45 minutes to an hour of cooking. If you add them at the beginning, they’ll turn completely soft and eventually dissolve into the stew. That’s not what you want. You want chunks with some texture, not mush.
Thickening the stew is simple: a tablespoon of tomato paste added with the aromatics and two tablespoons of flour stirred in after the sear provide enough body. If the stew isn’t thick enough after cooking, a quick cornstarch slurry (one tablespoon cornstarch mixed with two tablespoons cold water) stirred in at the end fixes it in minutes.
- Add a splash of Worcestershire sauce with the liquids — it deepens the savory quality of the broth considerably
- Fresh thyme sprigs and a bay leaf are non-negotiable aromatics; remove them before serving
- A small piece of orange peel added to the broth is a French technique that adds subtle brightness — remove it before serving
- Beef stew genuinely tastes better the next day once the flavors have had time to meld
4. Southern Chicken and Dumplings
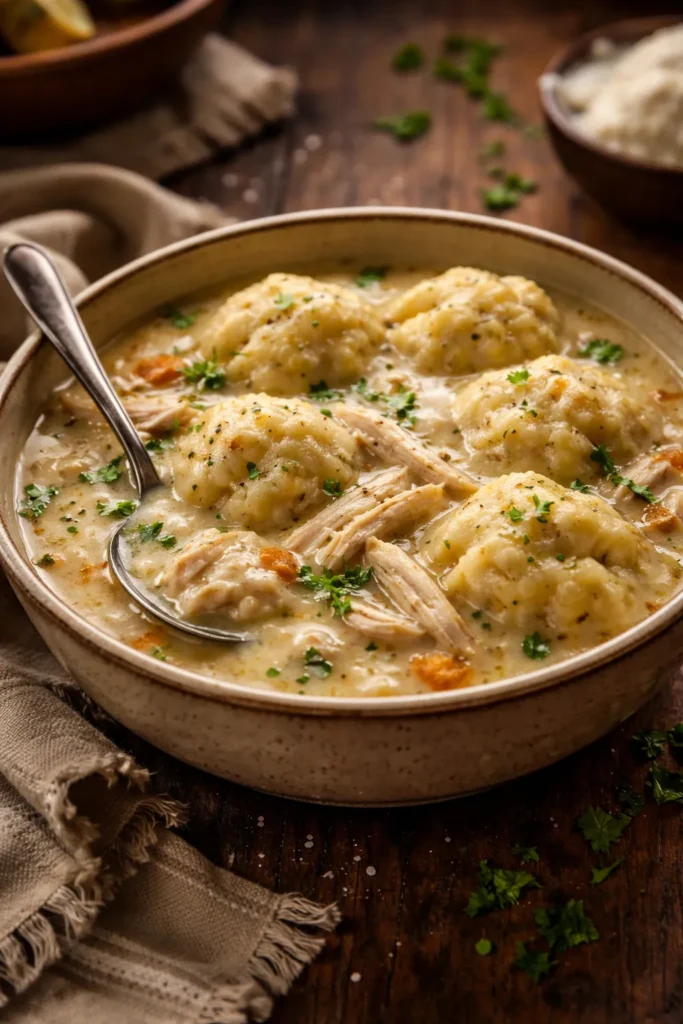
There are two schools of thought on chicken and dumplings: the kind where the dumplings are flat, rolled noodle-like strips cooked into the broth, and the kind where they’re soft, pillowy drop dumplings that float on the surface. Both are correct. Both are comforting. The version described here is the drop dumpling style — the one that’s faster to make and more forgiving for cooks of any experience level.
The base is a thick, creamy chicken stew. Start by poaching bone-in chicken pieces in broth with aromatics until the meat is tender enough to shred cleanly with two forks. Pull the chicken out, shred it, and set it aside. Skim some of the fat from the surface of the broth, then build the soup body: sautéed onion, celery, and carrot, a generous amount of butter and flour cooked together until golden, then the reserved broth whisked in until smooth and thickened. Add the chicken back in along with frozen peas and a splash of cream.
Making Drop Dumplings That Actually Work
The dumpling dough is simple: flour, baking powder, salt, cold butter cut in until crumbly, and enough milk to bring it together into a shaggy, sticky dough. Cold butter matters here — it creates steam pockets as the dumplings cook, which is what gives them their light, fluffy interior. If the butter melts into the dough before cooking, you lose that lift.
Drop the dumplings by heaping tablespoons into the simmering stew. The key word is simmering — not a rolling boil, which will knock the dumplings around and cause them to break apart. Once all the dumplings are in, clamp the lid on and resist the urge to lift it for 15 to 18 minutes. The steam cooks the dumplings from the top, and opening the lid lets that steam escape, which results in dense, undercooked dumplings.
How to Know When They’re Done
A properly cooked drop dumpling is puffed, set on the outside, and when you pull one apart with a spoon, the interior is fluffy and fully cooked through — no gummy, wet center. If the center still looks doughy, replace the lid and give it another three to five minutes.
Pro tip: A tablespoon of fresh chives or flat-leaf parsley stirred into the dumpling dough adds flavor and color that makes the finished dish look as good as it tastes.
- Don’t overwork the dumpling dough — mix just until the dry ingredients are moistened; lumpy is fine
- Use full-fat milk or buttermilk in the dumplings; low-fat versions result in a denser texture
- The stew should be quite thick before the dumplings go in; they’ll absorb liquid as they cook
- Leftovers reheat well with a small splash of additional broth to loosen the sauce
5. French Onion Soup with a Proper Gruyère Crust
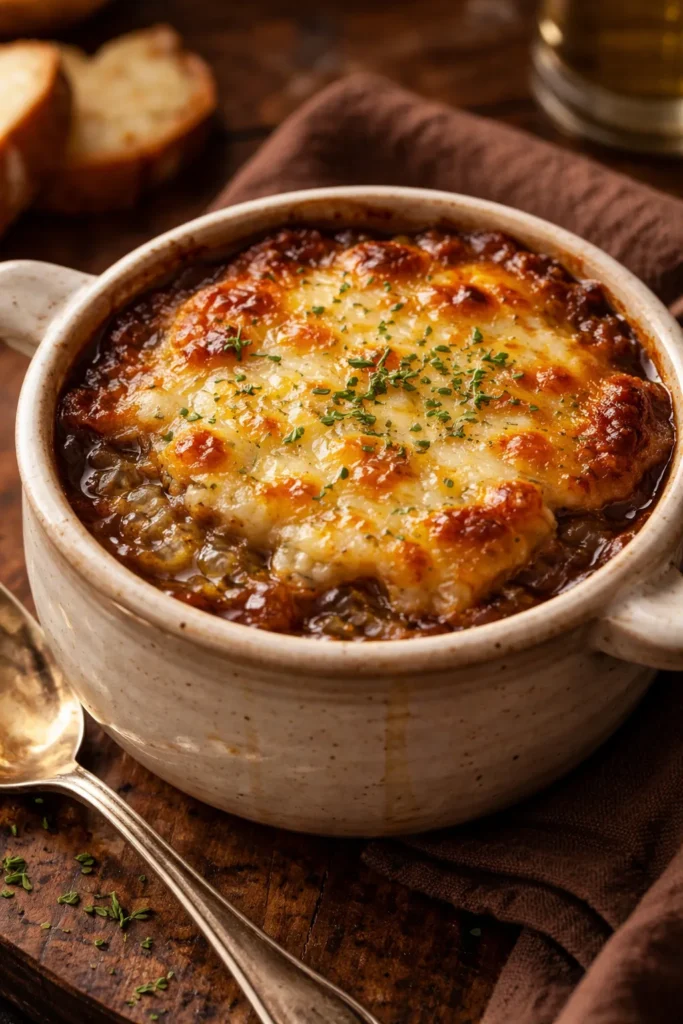
French onion soup is an exercise in patience and a masterclass in what happens when you coax incredible sweetness out of something as ordinary as an onion. This is a true rainy day recipe because it demands a dedicated chunk of time — and rewards you with something that no restaurant bowl can fully replicate.
The onions are everything. You need four to five large onions for four generous servings, which sounds like a lot until you see them shrink down to a quarter of their volume over the 45 to 60 minutes of low, slow cooking required to truly caramelize them. Not wilted. Not golden. Deeply, properly caramelized — meaning they’ve turned a rich amber-brown, collapsed into silky strands, and developed a concentrated sweetness that makes you stop and eat one with a spoon before they even make it into the pot.
The Caramelization Process (Don’t Rush This)
Use a wide, heavy-bottomed pan — a Dutch oven works perfectly. Melt a combination of butter and a small pour of olive oil over medium heat, add the sliced onions with a pinch of salt, and then step back. Stir them every few minutes to prevent scorching, but give them time. The first twenty minutes will feel like nothing is happening. Then they’ll start to soften. Around the forty-minute mark, they’ll turn golden. Push them to sixty minutes and they’ll be deeply caramelized, jammy, and extraordinary.
Deglazing with a splash of dry sherry or white wine after caramelization picks up every bit of color and flavor from the pan bottom. Add your beef broth — homemade gives you the best depth, but a good-quality store-bought broth with a few extra herbs simmered in is a workable alternative. Let it simmer together for at least twenty minutes.
Building the Crouton and Cheese Topping
Ladle the soup into oven-safe bowls. Top each with one or two slices of toasted baguette, then a generous mound of freshly shredded Gruyère — it should fully cover the surface and hang over the edges slightly. Slide the bowls under a broiler until the cheese is melted, bubbling, and spotted with golden-brown patches. This takes three to five minutes and requires your full attention.
The moment the broiler does its work, serve immediately. This soup does not wait.
- Swiss cheese works as a substitute for Gruyère, but Gruyère’s nutty flavor is noticeably superior
- A small pinch of sugar added to the onions during caramelization helps even browning without making the soup sweet
- Use dry sherry over wine if you have it — the flavor is richer and more traditional
- Oven-safe crocks or French onion soup bowls are the proper vessel; a regular ceramic bowl may crack under the broiler
6. Classic Meat Lasagna with Homemade Tomato Sauce
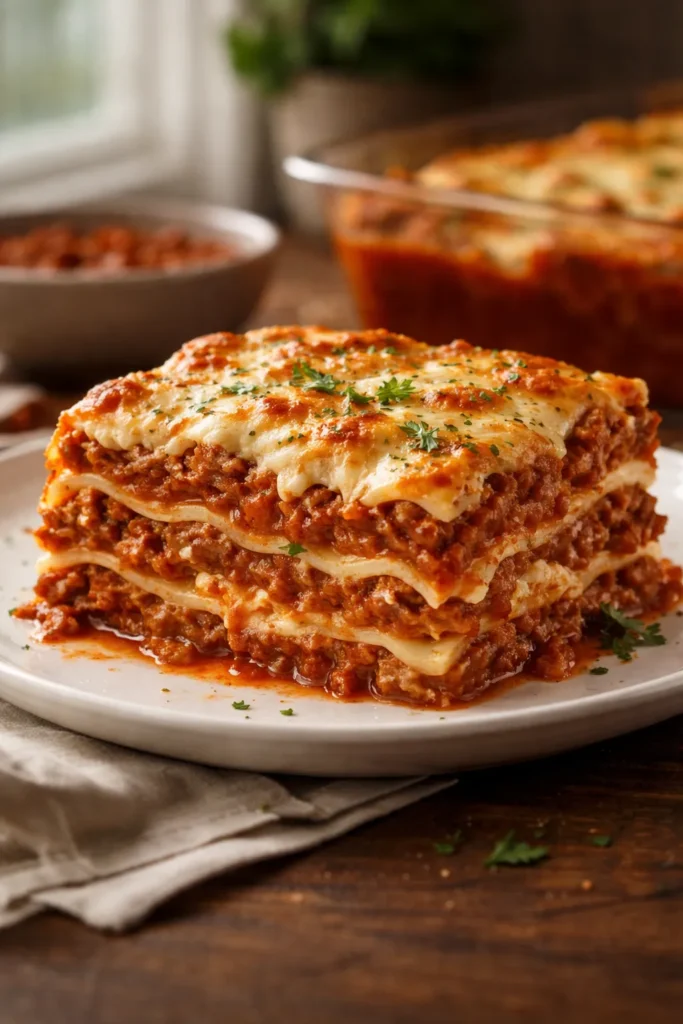
Lasagna earns its place as a rainy day project because it takes real effort — and produces something that feeds a crowd, reheats beautifully for days, and tastes like genuine love went into making it. The no-boil noodle version is fine for a weeknight, but on a proper rainy day, you have time to do this right.
The meat sauce is where the depth lives. Brown a combination of ground beef and Italian sausage (removed from its casing) together in a wide pan, breaking it up finely. The sausage carries fennel and spice that ground beef alone doesn’t have, and the combination gives the sauce a complexity that single-protein versions lack. Drain the excess fat, then add your aromatics — onion, garlic, a pinch of red pepper flakes — followed by canned crushed tomatoes, a tablespoon of tomato paste, a splash of red wine, and a small amount of sugar to balance the acidity.
Layering Strategy That Makes the Difference
The order and ratio of layers matters more than most recipes acknowledge. The bottom layer should be a thin smear of meat sauce — this prevents the noodles from sticking and drying out against the pan. Then noodles, then a generous layer of the ricotta mixture (ricotta, egg, parsley, salt, and pepper whisked together), then meat sauce, then a sprinkle of mozzarella. Repeat. The top layer should be noodles covered generously in meat sauce and a final, thick layer of mozzarella.
An important detail: your meat sauce should be on the thicker side, not runny. A watery sauce creates a soupy lasagna that doesn’t hold its shape when sliced. Cook it until it’s thick enough that a wooden spoon dragged through it leaves a trail that holds for a few seconds.
Resting Time Is Not Optional
Bake the lasagna covered with foil at 375°F for 45 minutes, then remove the foil and bake another 15 minutes until the top is bubbling and the cheese is golden in spots. Then — and this is the part that tests your patience — let it rest uncovered for a minimum of 20 minutes before cutting. A rested lasagna holds its layers. A lasagna cut immediately runs into a delicious but structureless puddle.
- A pinch of nutmeg in the ricotta mixture is a classic Italian technique that adds warmth without being identifiable
- Blanch your lasagna noodles for just two minutes less than the package suggests if using regular noodles; they’ll finish cooking in the oven
- Lasagna freezes flawlessly — wrap individual portions in plastic wrap and then foil for up to three months
- The sauce can be made two days ahead and refrigerated, which makes assembly on the day completely manageable
7. Shepherd’s Pie with Buttery Mashed Potato Crust
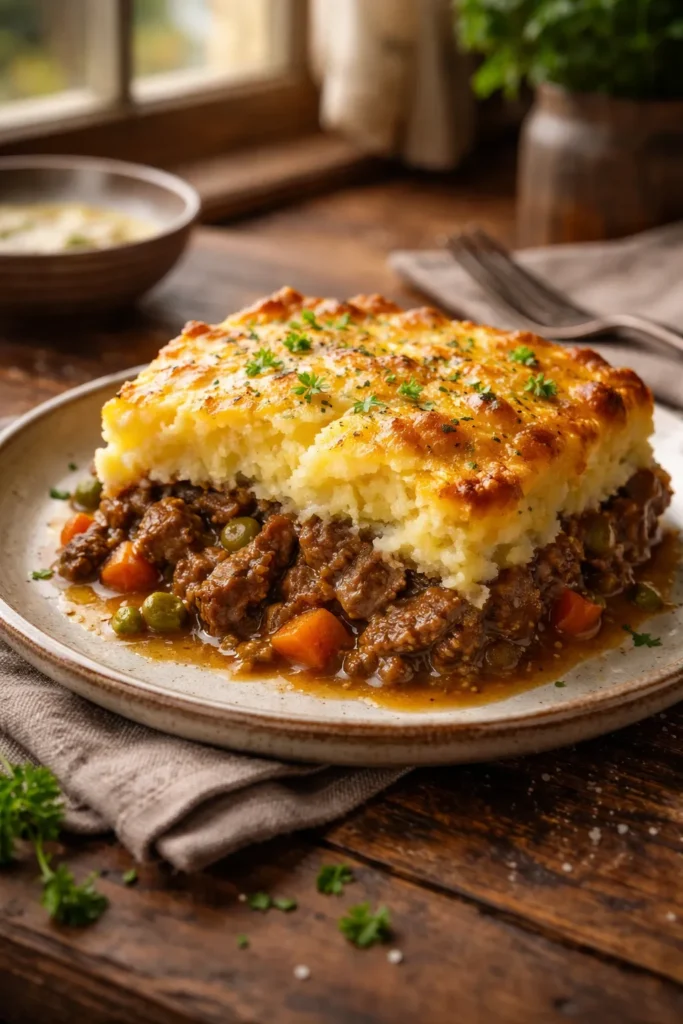
Shepherd’s pie is one of those dishes that’s been simplified into something almost unrecognizable — a box of instant potatoes over ground beef from a can. The real version, the one worth making on a rainy afternoon, is a completely different creature, and it’s not even that much more work.
Technically, shepherd’s pie is made with ground lamb, while the beef version is called cottage pie. But calling it “shepherd’s pie” has become broadly accepted regardless of protein, so use whichever you prefer. Ground lamb has a richer, slightly gamey quality that pairs beautifully with the rosemary and thyme that go into the filling. Ground beef is milder and more universally appealing. Both are right.
Building a Filling With Real Depth
The filling isn’t just browned meat with vegetables. It’s a proper braise — meat browned deeply first, then aromatics added, then a tablespoon of tomato paste cooked for a minute in the pan until it darkens slightly (this step alone adds incredible depth), then a splash of red wine or broth to deglaze, followed by more broth and Worcestershire sauce. Let it simmer uncovered until the liquid has reduced and the filling is thick enough to hold its shape when spooned into a baking dish without spreading everywhere.
Vegetables should be diced small — carrots, peas, and corn are the classics. Add the peas right at the end, off the heat, so they stay bright green rather than turning drab grey.
The Mashed Potato Layer That Makes People Go Quiet
The mashed potato crust should be aggressively seasoned and rich enough to stand on its own. Use Yukon Gold potatoes for their naturally buttery flavor and creamy texture. Boil them until completely tender, drain thoroughly, then push them through a ricer or beat them with a hand mixer (not a food processor, which makes them gluey) with generous amounts of butter, warm milk or cream, salt, and white pepper.
The potatoes go on top of the filling in swoops and peaks — use a fork to create texture on the surface rather than a smooth flat layer. Those peaks brown and crisp in the oven at 400°F for 25 to 30 minutes, and that combination of crispy peak and creamy underneath is what makes shepherd’s pie extraordinary.
- Press the filling down firmly and let it cool for ten minutes before adding the potato topping — this prevents the potatoes from sinking into the filling
- A light brush of melted butter over the potato surface before baking accelerates browning
- Fresh rosemary and thyme in the filling are noticeably better than dried; use half the amount if substituting dried
- The assembled, unbaked pie can be refrigerated overnight and baked the next day — the flavors improve substantially
8. Brown Butter Chocolate Chip Cookies

Rainy days and fresh cookies are an arrangement as natural as any in cooking. The smell of cookies baking is its own kind of weather management — it makes any indoor space feel warmer, better, more like home. These aren’t the thin, crispy, store-bought kind. These are thick, bakery-style cookies with golden, slightly crispy edges and centers that stay soft for days.
The ingredient that makes these different from every other chocolate chip cookie recipe is browned butter. Instead of using softened butter at room temperature, you melt it in a saucepan over medium heat and keep cooking it past the point of fully melted, swirling the pan occasionally, until the milk solids at the bottom turn deep golden brown and the butter smells like hazelnuts and caramel. This takes about six to eight minutes and completely transforms the cookie’s flavor profile — adding a nutty, complex depth that nobody can quite identify when they eat the cookie, but everyone notices.
Resting the Dough for Better Texture
Mix the browned butter (cooled to room temperature) with brown sugar and granulated sugar. Brown sugar is non-negotiable here — its molasses content keeps the cookies soft and adds a caramel note that white sugar alone can’t provide. Add eggs and a splash of vanilla, then the flour, baking soda, and salt.
Here’s where patience pays off again: refrigerate the dough for at least one hour, or up to 72 hours. Chilled dough spreads less during baking, which creates a thicker cookie. The resting time also allows the flour to fully hydrate and the sugars to develop further, producing a more complex flavor. Bakers who’ve tested same-day versus 48-hour-rested dough consistently describe the difference as dramatic.
Chocolate Distribution and Baking Temperature
Use a mix of chocolate chip sizes if you can — standard chips plus a few rough-chopped chunks from a chocolate bar. The chunks create irregular pockets of melted chocolate that give the cookies visual and textural interest. Press a few extra chips onto the tops of the dough balls just before they go into the oven; this makes them look professionally finished straight out of your home kitchen.
Bake at 375°F rather than the standard 350°F. The higher temperature creates better browning on the edges while the center remains underbaked-looking when you pull them from the oven. That slightly underdone center is intentional. Pull them when the edges are set and golden but the centers still look soft — they’ll continue cooking on the hot pan for several minutes after you take them out, finishing to the ideal texture.
- Sprinkle each cookie with a small pinch of flaky sea salt immediately after baking; the contrast against the chocolate is extraordinary
- Dough balls freeze perfectly — keep a bag in the freezer and bake from frozen at 375°F, adding three to four extra minutes to the bake time
- Using bread flour instead of all-purpose creates a chewier cookie with more structure
- Cookies stored at room temperature in an airtight container stay soft for up to five days; a slice of plain white bread in the container absorbs excess air and extends softness even further
Why Rainy Day Cooking Hits Different
There’s a reason certain dishes get mentally filed under “rainy day food” and never quite move out of that category. It’s partly practical — bad weather gives you the time to make things you’d normally skip — but it’s also emotional. Food and mood are more tangled together than most of us want to admit.
Warmth from a bowl of soup or a cast-iron pan of bubbling stew signals something to the brain that goes beyond simple hunger. It slows you down. It pulls you into the present moment in a way that delivery food or reheated leftovers never does. The act of cooking — the chopping, the stirring, the smell that builds gradually through a house — is part of the comfort, not just the result.
The eight recipes above cover different levels of commitment and different kinds of craving. Some days you want the twenty-minute route (chicken noodle soup once you’ve got good broth on hand). Other days you want the full afternoon project of lasagna or beef stew, something to check on every half hour while you alternate between the kitchen and the couch. Both are valid. Both are necessary.
What they share is that every single one is made from real ingredients, built with techniques that are straightforward enough for any home cook, and produces results that feel like something you made — not something you assembled. That distinction matters on a rainy day more than any other.
Wrapping Up

Start with whichever recipe fits your current pantry. Chicken noodle soup and mac and cheese require the fewest specialty ingredients. Beef stew and lasagna reward advance planning but nothing you can’t source at any grocery store.
The most useful habit you can develop for rainy-day cooking is keeping a few staples stocked specifically for these occasions: canned crushed tomatoes, dried pasta, bone-in chicken pieces in the freezer, a wedge of good Gruyère or sharp cheddar, dried herbs, and a solid bag of flour. With those things on hand, at least five of these eight recipes are within reach whenever the sky decides to cooperate.
Above all, resist the urge to rush any of them. The best rainy day food is slow food — and the rain isn’t going anywhere.

