There’s a moment at every party — you know the one. The table is set, the drinks are poured, and guests are starting to drift toward the food. Whatever you put out first sets the tone for the whole evening. The wrong choice leaves people awkwardly balancing full plates while trying to hold a conversation. The right choice? People grab a bite, don’t miss a word of the story they’re telling, and reach for another without thinking twice.
That’s the power of a well-chosen finger food. No silverware, no fuss, no interrupting the fun to sit down and eat properly. The best ones are bold enough to stand out, easy enough to eat one-handed, and crowd-friendly enough that you’re not nervously watching for allergic reactions.
Whether you’re hosting a casual game-day gathering, a birthday party, a holiday spread, or just a laid-back evening with friends, these 10 finger foods cover every base — creamy dips, crispy bites, skewers, savory pastry, and even a sweet finish. Each one has earned its place on a real party table, not just a recipe blog.
Table of Contents
- How to Build a Balanced Finger Food Spread
- Portion Planning That Actually Works
- Timing and Make-Ahead Strategy
- 1. Spinach Artichoke Dip
- Getting the Texture Right
- Make-Ahead Tips
- 2. Italian Pinwheels
- The Tight-Roll Technique
- Filling Ideas Beyond the Classic
- 3. Buffalo Chicken Meatballs
- Baked vs. Pan-Fried
- Building the Best Buffalo Sauce
- 4. Caprese Skewers with Balsamic Glaze
- The Balsamic Glaze That Makes the Difference
- Assembly Order and Visual Impact
- 5. Bacon-Wrapped Shrimp
- Preventing Soggy Bacon
- Flavor Variations Worth Trying
- 6. Loaded Potato Skins
- Building the Perfect Loaded Skin
- Make-Ahead Strategy for Potato Skins
- 7. Baked Brie with Honey and Walnuts
- The Honey-Walnut Topping
- Temperature and Timing
- 8. Spinach and Ricotta Stuffed Mushrooms
- The Filling That Works
- Baking and Serving Notes
- 9. Mini Caprese and Prosciutto Skewers
- Quick Roasted Cherry Tomatoes
- Building the Skewer
- 10. Cheesecake-Stuffed Strawberries
- Choosing and Prepping the Strawberries
- Piping, Garnishing, and Storing
- Final Thoughts
How to Build a Balanced Finger Food Spread
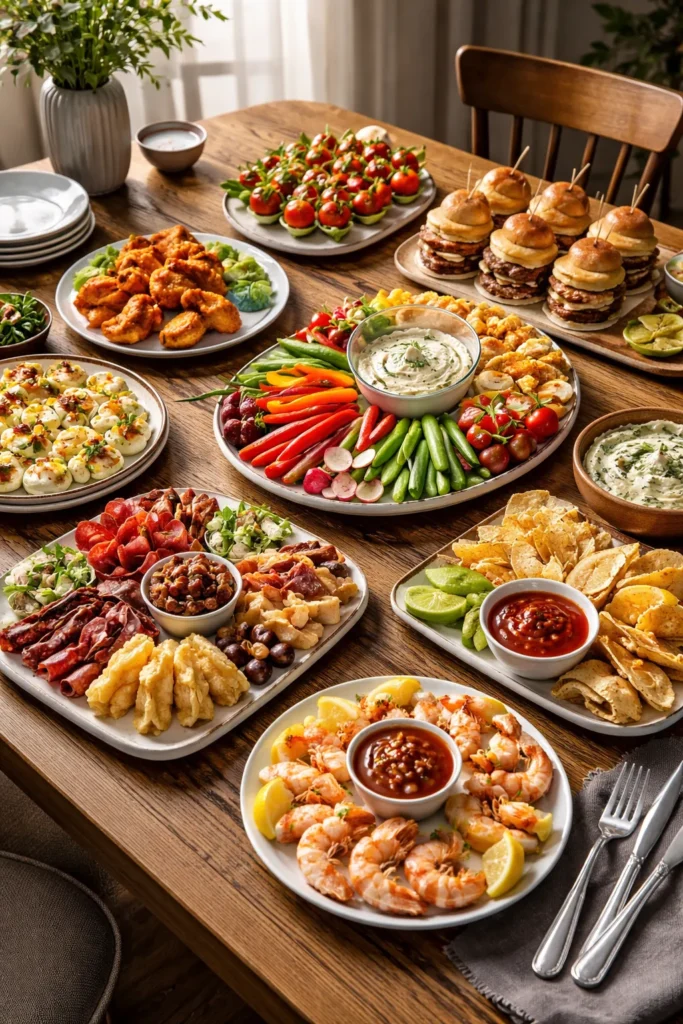
Before jumping into the recipes themselves, it’s worth thinking about variety. The best finger food tables aren’t just “a bunch of appetizers” — they’re a deliberate mix of textures, temperatures, and flavor profiles.
Aim for at least one warm item, one cold item, one protein-forward bite, one vegetable-based option, and one dip or spread. This covers the range of what people are actually hungry for, and it ensures guests with different preferences — whether they eat meat or not, whether they want something light or substantial — all find something they love.
Portion Planning That Actually Works
A common mistake is under-ordering or under-making when hosting. For a cocktail party where finger foods are the only food, aim for 8 to 10 pieces per person. If finger foods are starters before a main meal, 4 to 6 pieces per guest hits the sweet spot without spoiling anyone’s appetite.
Timing and Make-Ahead Strategy
Most of the recipes below have a make-ahead component, which is a lifesaver when you’re hosting. Prep what you can the night before — dips taste better after sitting overnight, pinwheels hold beautifully in the fridge, and skewers can be assembled hours in advance. Save the baking and heating for the last 30 minutes before guests arrive, so your food hits the table at its peak.
1. Spinach Artichoke Dip
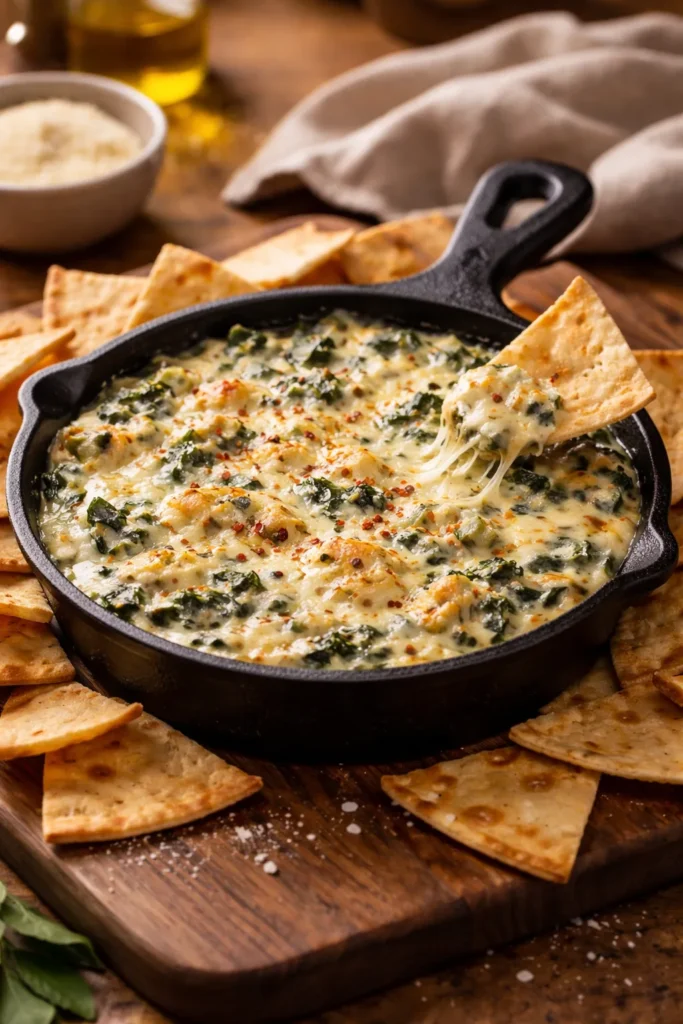
If there’s one finger food that earns unanimous approval at virtually every gathering, spinach artichoke dip is it. The combination of wilted spinach, tender artichoke hearts, and a blend of cream cheese, sour cream, and mozzarella baked until bubbling and golden is, frankly, difficult to stop eating. Served with pita chips, toasted baguette slices, or even sturdy crackers, it disappears faster than almost anything else on the table.
What makes this dip work so well for parties is that it’s warm, which gives it an immediate comfort-food appeal — and it holds beautifully in a small cast iron skillet or oven-safe dish, staying hot for a solid 30 minutes without any intervention.
Getting the Texture Right
The key to a dip that’s creamy rather than watery is squeezing as much moisture as possible out of the spinach before it goes into the mix. Whether you’re using frozen spinach (thawed) or fresh (wilted in a pan), wring it out thoroughly in a clean kitchen towel. A watery dip is the difference between a crowd-pleaser and a soggy disappointment.
Make-Ahead Tips
- Mix the filling up to 24 hours in advance and refrigerate in the baking dish
- Pull it out 20 minutes before baking to take the chill off for even cooking
- Bake at 375°F (190°C) for 25 to 30 minutes until the top is golden and the edges are bubbling
- A sprinkle of Parmesan on top in the last 5 minutes creates an irresistible golden crust
Worth knowing: Swapping half the sour cream for Greek yogurt gives you the same creamy tang with more protein — and most guests won’t notice the difference at all.
2. Italian Pinwheels
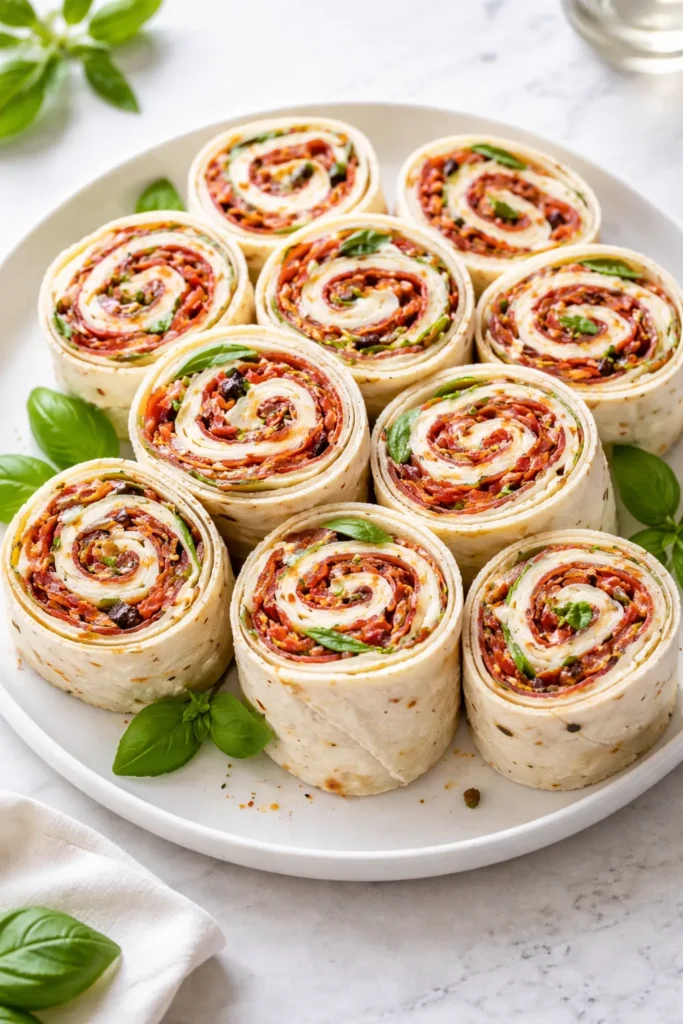
Pinwheels are the unsung hero of finger food entertaining. They look polished, they’re completely no-fuss to eat, and they pack every great Italian flavor — sun-dried tomatoes, mozzarella, basil, and cream cheese — into a tight, tidy spiral that’s easy to grab and go. Slice a tray of these and watch them vanish in under 10 minutes.
The genius of pinwheels is that they’re made entirely ahead of time. You roll them up, wrap them tightly in plastic wrap, and refrigerate for at least two hours (or overnight). When your party rolls around, you just unwrap and slice — no last-minute oven stress.
The Tight-Roll Technique
The single most important skill with pinwheels is rolling them tight. Loose rolls create a gap in the center when you slice them, which looks sloppy and means fillings fall out. Start at one edge of the tortilla and roll with consistent, firm pressure, tucking as you go. That initial tightness at the first turn sets the whole roll.
Filling Ideas Beyond the Classic
- Mediterranean: Roasted red peppers, kalamata olives, herbed cream cheese, and arugula
- Turkey and Swiss: Deli turkey, Swiss cheese, honey mustard, and thin-sliced cucumber
- BLT Style: Crispy bacon, lettuce, cream cheese, and sun-dried tomato
- Use burrito-size 10-inch tortillas — smaller sizes don’t give you enough spiral layers and the pinwheels look underwhelming once sliced
Pinwheels stay good refrigerated for up to 3 days, though the tortilla softens slightly by day two. For the best texture, slice and serve the same day you plan to eat them.
3. Buffalo Chicken Meatballs
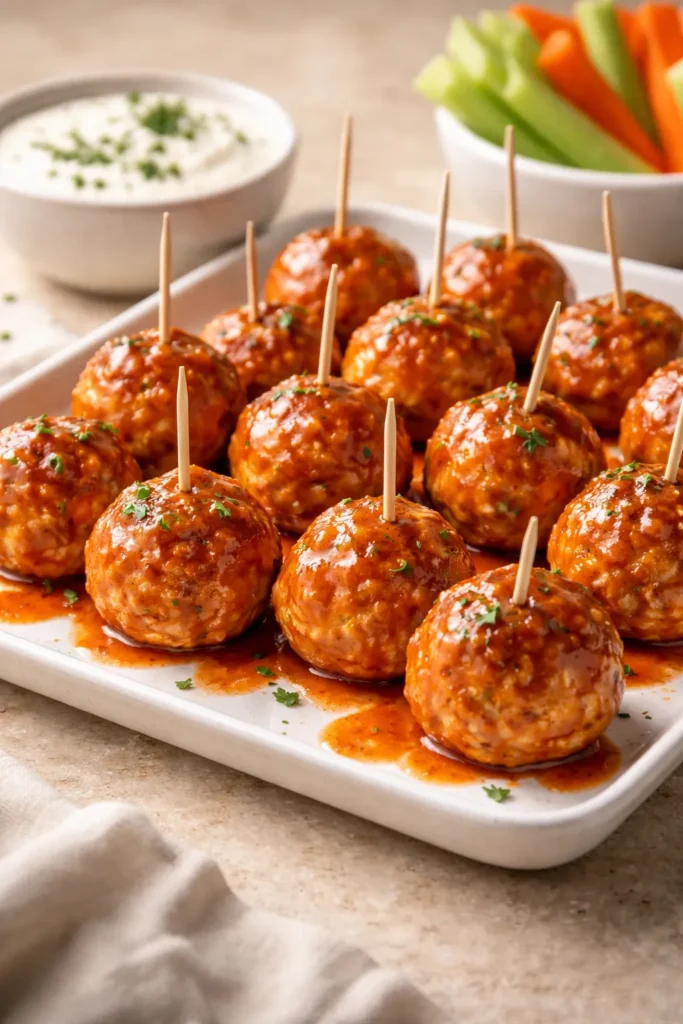
Everything people love about buffalo chicken wings — the sharp heat, the tangy sauce, the creamy blue cheese dip on the side — but with zero mess and no bones to deal with. Buffalo chicken meatballs are one of the most reliably crowd-pleasing party foods you can make, and they work equally well at a casual game-day gathering or a more dressed-up cocktail party.
Made with ground chicken, breadcrumbs, and a handful of spices, then tossed in a classic hot sauce-butter mixture, these meatballs deliver serious flavor in a two-bite package. Stick a toothpick in each one, set out a bowl of blue cheese or ranch dressing, and watch them disappear.
Baked vs. Pan-Fried
Baking is the better path for entertaining because you can make a large batch all at once. Bake at 400°F (200°C) for 18 to 20 minutes, then toss immediately in the buffalo sauce while hot so the coating clings. Pan-frying gives slightly crispier exteriors but limits your batch size and keeps you at the stove.
Building the Best Buffalo Sauce
A proper buffalo sauce is deceptively simple: 2 parts hot sauce (Frank’s RedHot is the classic) to 1 part melted unsalted butter, whisked together until smooth and glossy. That’s genuinely it. Don’t add flour or cornstarch — the butter emulsifies with the hot sauce naturally and coats the meatballs beautifully without thickening.
- Add a teaspoon of honey for a hot-honey variation
- Add half a teaspoon of garlic powder for extra depth
- Keep meatballs warm in a slow cooker on the “warm” setting throughout the party
4. Caprese Skewers with Balsamic Glaze
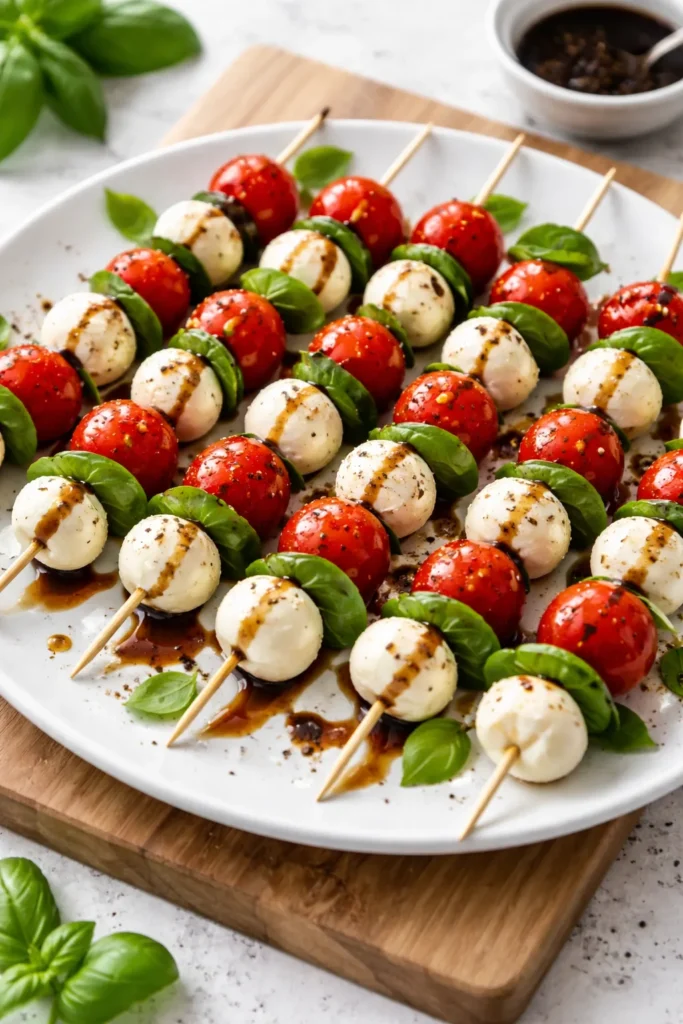
Some finger foods earn their place through sheer effort and complexity. Caprese skewers earn theirs through elegance and simplicity. Fresh mozzarella, ripe cherry tomatoes, and fragrant basil leaves — threaded onto a small wooden skewer and drizzled with a balsamic reduction — look genuinely stunning on a party table and take about 15 minutes to assemble.
They’re also one of the smartest options for mixed-dietary-needs crowds: vegetarian, gluten-free, nut-free, and crowd-friendly without any adjustments.
The Balsamic Glaze That Makes the Difference
Store-bought balsamic glaze works fine here. But if you want to make your own in about 15 minutes: pour 1 cup of good balsamic vinegar into a small saucepan over medium heat and simmer, stirring occasionally, until it reduces by half and coats the back of a spoon. It’ll thicken further as it cools. The homemade version has noticeably deeper, less sweet flavor.
Assembly Order and Visual Impact
- Thread in this order: cherry tomato → fresh basil leaf (folded) → fresh mozzarella ball — this order puts color at both ends and looks balanced
- Use bocconcini (small mozzarella balls) rather than slices for cleaner skewering
- Drizzle the glaze right before serving, not during assembly — it absorbs into the mozzarella over time and loses its visual punch
- Finish with a crack of coarse black pepper and a pinch of flaky sea salt
Pro tip: Add a small piece of ripe peach between the tomato and the mozzarella for a sweet-savory variation that genuinely surprises people.
5. Bacon-Wrapped Shrimp
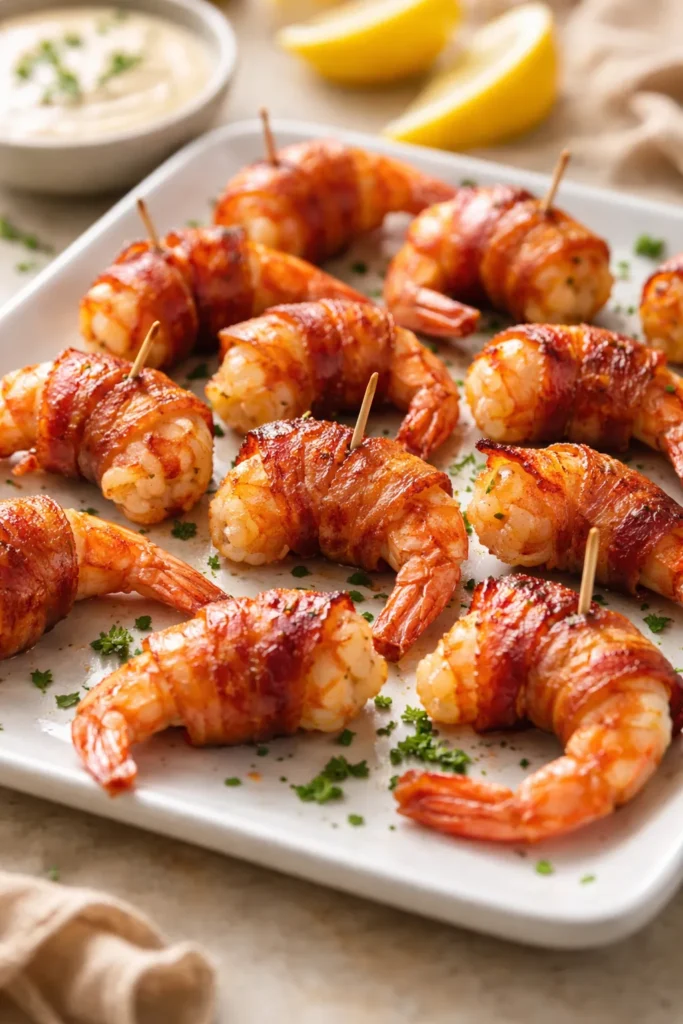
Bacon-wrapped shrimp occupy a special tier of party food: they feel indulgent, they look impressive, and they take about 10 minutes of hands-on prep. The combination of sweet, plump shrimp and smoky, crispy bacon is one of those flavor pairings that just works on an almost primal level. Leave the tails on — they act as a natural handle, making these true finger food.
The secret to perfect bacon-wrapped shrimp is choosing the right size shrimp (large or jumbo, 16/20 count) and using thin-cut bacon. Thick-cut bacon takes too long to crisp without overcooking the shrimp underneath.
Preventing Soggy Bacon
Wrap each shrimp with half a strip of thin-cut bacon, securing it with a toothpick. Before baking, place the shrimp on a wire rack set over a sheet pan — this allows air circulation so the bacon crisps on all sides rather than steaming in its own fat. Bake at 425°F (220°C) for 10 to 12 minutes, then broil for 2 minutes to finish the bacon.
Flavor Variations Worth Trying
- Brown sugar glaze: Brush with a mix of brown sugar and a pinch of cayenne in the last 4 minutes of baking for a sweet-heat finish
- Teriyaki: A quick brush of teriyaki sauce before the oven adds an umami depth that pairs beautifully with the smoky bacon
- Garlic butter: Melt 2 tablespoons butter with 2 minced garlic cloves and brush on just before serving
These are best served immediately while the bacon is still crisp. If making for a larger crowd, stagger your baking times so fresh batches keep coming out of the oven throughout the party.
6. Loaded Potato Skins

Potato skins have been a party table staple for good reason. There’s something about a crispy potato shell loaded with melted cheese, sour cream, and bacon that taps into a deep, universal comfort-food instinct. Done right — which means truly crispy skin, not soft and limp — they’re one of the most satisfying finger foods on any table.
The mistake most people make is not drying out the potato shells properly before filling them. After scooping out most of the potato flesh, brush the inside with olive oil or melted butter and bake them cut-side down for 10 minutes before adding any filling. That second bake is what creates the structural crispiness you need.
Building the Perfect Loaded Skin
The classic filling formula:
- A thin layer of sharp cheddar (or a cheddar-Gruyère blend for more complexity)
- Crumbled crispy bacon — cook it until genuinely crisp, not chewy
- A small spoonful of sour cream added after baking, not before
- Sliced green onions for freshness and color
- Optional: a few drops of hot sauce
Bake filled skins at 400°F (200°C) for 10 to 15 minutes until the cheese is fully melted and the edges of the skin are deep golden. Serve immediately.
Make-Ahead Strategy for Potato Skins
The filling can be prepped a day ahead. Bake the potatoes, scoop, and pre-bake the shells, then refrigerate. Fill and do the final bake the hour before guests arrive. This splits the work across two days without any compromise to quality.
7. Baked Brie with Honey and Walnuts
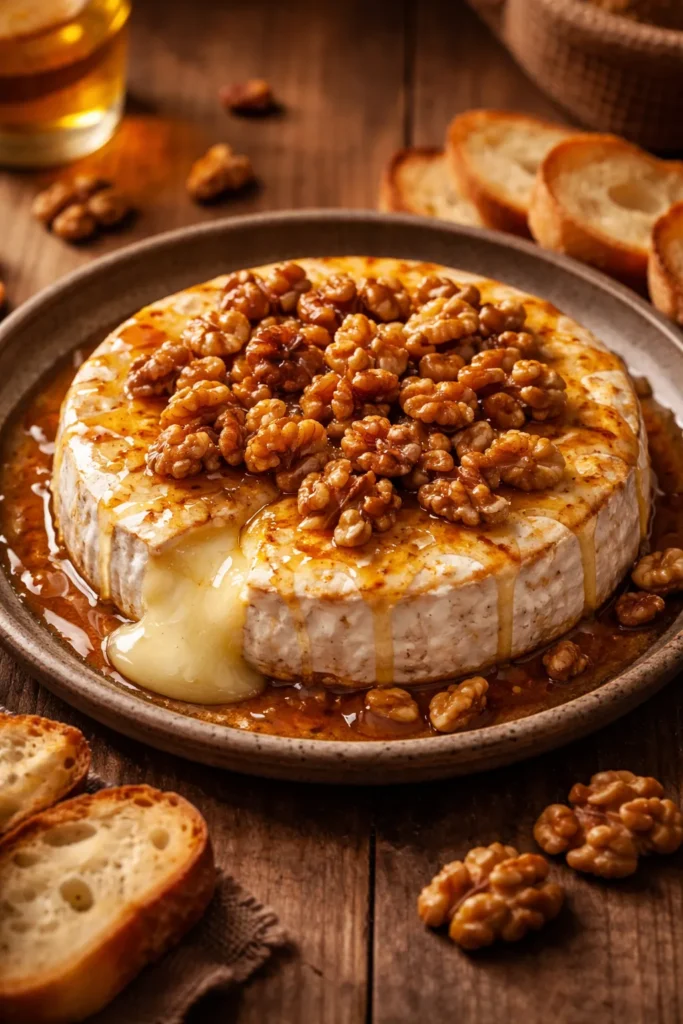
Baked brie is the kind of party food that looks like you spent hours on it when the reality is closer to 15 minutes. A wheel of brie, baked until soft and oozing, topped with warm honey and toasted walnuts, with sliced baguette or crackers for spreading — it’s a centerpiece that earns compliments before anyone even tastes it.
The key is choosing the right brie. Look for a small wheel (about 8 ounces), which bakes more evenly and is easier for guests to scoop into without it collapsing. Score the top rind lightly in a crosshatch pattern before baking — this helps heat penetrate and the honey soak in.
The Honey-Walnut Topping
Toast the walnuts first — spread them on a dry pan over medium heat and shake occasionally for 3 to 4 minutes until they smell nutty and deepen in color. Toasted walnuts have a richer, more complex flavor than raw ones and add genuine depth alongside the mild, buttery brie.
Warm 2 to 3 tablespoons of good honey (a slightly floral variety like clover or acacia works beautifully here) and pour it over the brie in the last 2 minutes of baking. The honey melts into the top and creates a glossy, caramelized finish.
Temperature and Timing
- Bake at 350°F (175°C) for 12 to 15 minutes — you want the cheese yielding and soft throughout, but not completely liquid
- Pull it from the oven and wait 3 minutes before serving so it stabilizes slightly
- Add fresh thyme sprigs and a pinch of flaky salt before it goes on the table for a finishing touch that looks and tastes deliberate
8. Spinach and Ricotta Stuffed Mushrooms
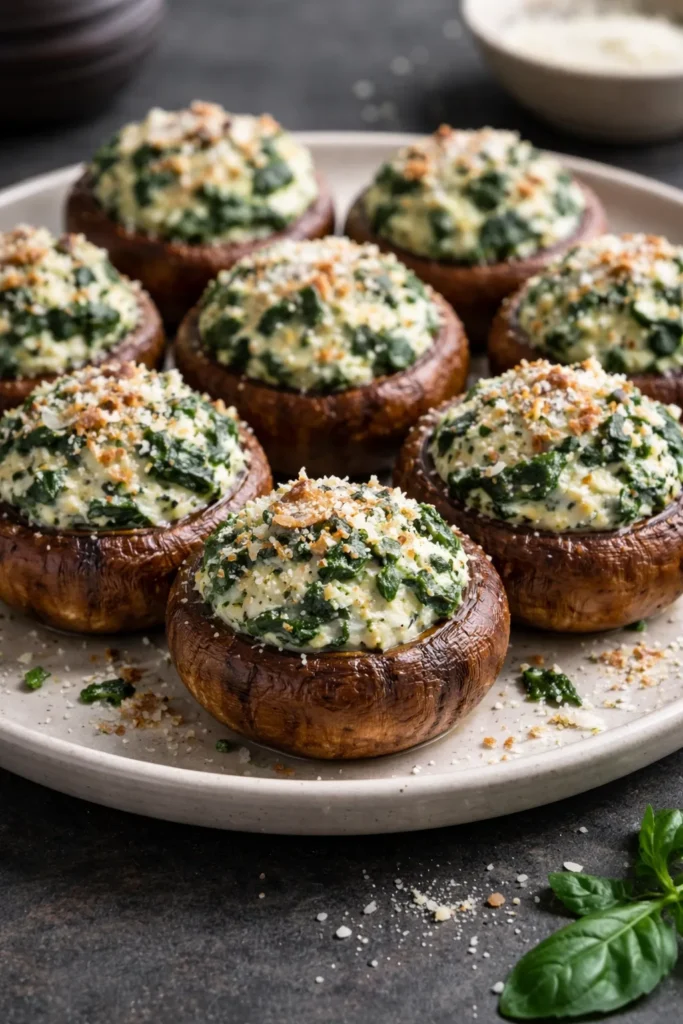
Stuffed mushrooms punch above their weight class. They look elegant, they’re genuinely delicious, and they work for meat-eaters and vegetarians alike without any modification. The combination of sautéed spinach, creamy ricotta, Parmesan, garlic, and fresh herbs packed into a roasted mushroom cap creates something that tastes far more involved than it actually is.
Use cremini mushrooms (button mushrooms are too small and white mushrooms lack flavor). Choose ones that are roughly the same size so they cook evenly. Remove the stems and hollow out a bit of the inner cap with a small spoon to create more room for filling — this is the step most recipes skip, and it’s what separates a well-stuffed mushroom from a flat, skimpy one.
The Filling That Works
For 24 mushrooms, combine:
- 1 cup ricotta, drained in a strainer for 30 minutes to remove excess moisture
- ½ cup finely grated Parmesan
- 1 cup cooked spinach, squeezed completely dry and chopped
- 2 cloves garlic, minced and sautéed briefly in olive oil
- Salt, black pepper, and a pinch of red pepper flakes
The drained ricotta is non-negotiable. Wet filling leads to waterlogged mushrooms that pool liquid all over the serving dish.
Baking and Serving Notes
- Bake at 375°F (190°C) for 20 to 25 minutes until the tops are golden and the mushrooms have released their moisture
- Let them rest on the pan for 5 minutes before moving — they firm up and hold their shape better
- A final dusting of Parmesan in the last 5 minutes creates a golden crust on top
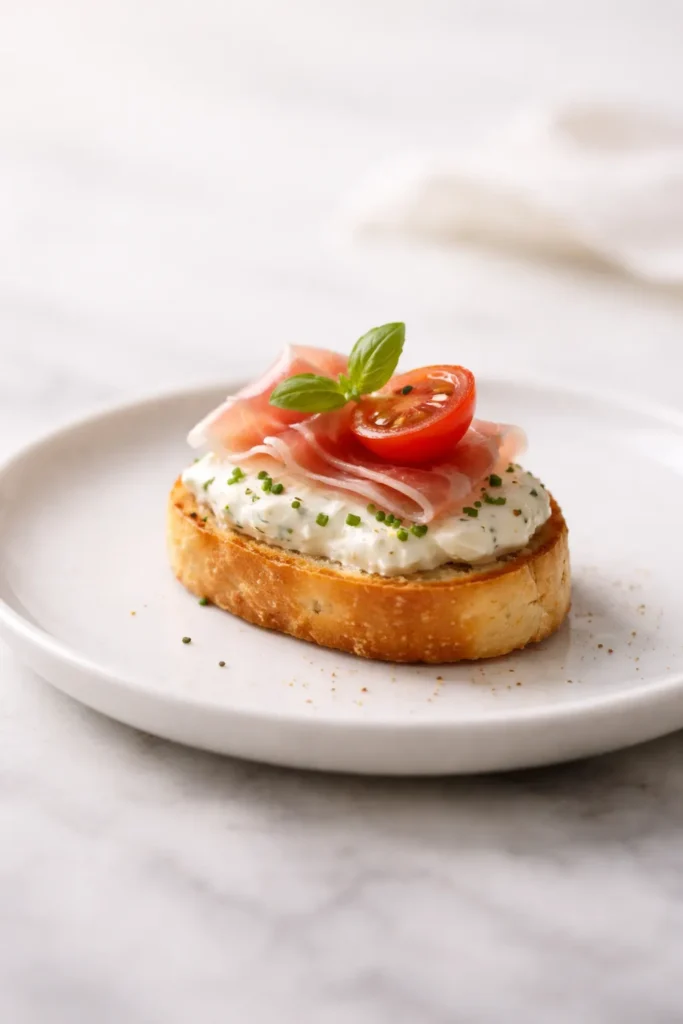
9. Mini Caprese and Prosciutto Skewers
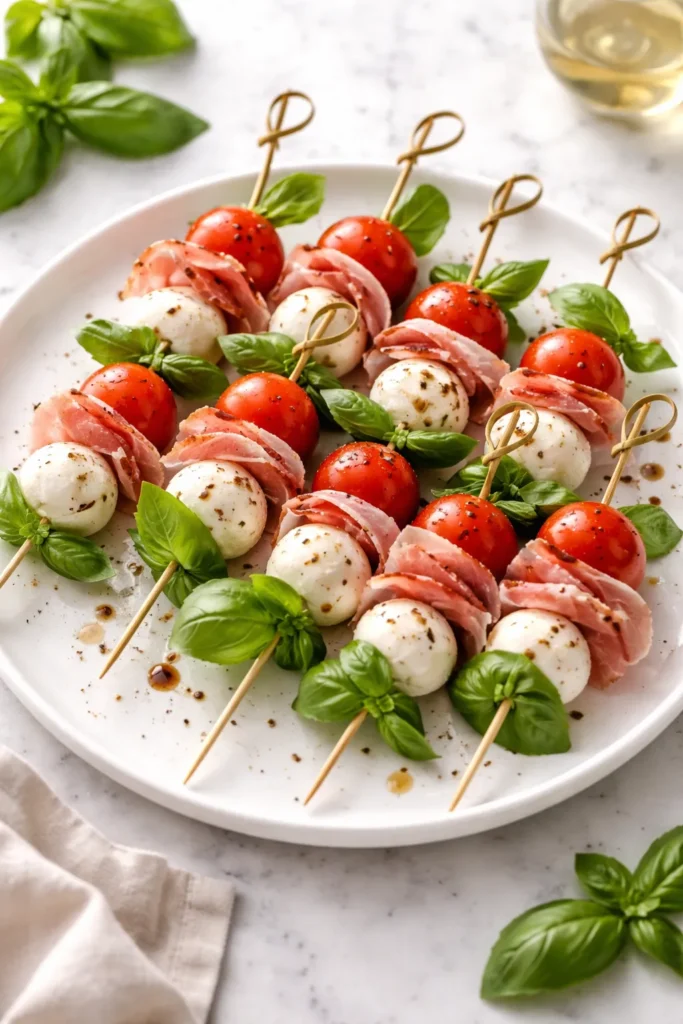
While classic caprese skewers earned a spot earlier on this list, this variation takes things in a more savory, meat-forward direction that suits different palates. Thin-sliced prosciutto di Parma folded into ribbons, paired with fresh mozzarella, a roasted cherry tomato, and a fresh basil leaf — all on a single toothpick — creates an antipasto-style bite that’s sophisticated without requiring any cooking whatsoever.
The roasted tomato is the upgrade that separates this from a basic charcuterie skewer. Roasting concentrates the tomato’s sweetness, drives off the excess water, and adds a depth of flavor that raw cherry tomatoes simply can’t match.
Quick Roasted Cherry Tomatoes
Toss a pint of cherry tomatoes in olive oil, salt, and a pinch of sugar. Roast at 400°F (200°C) for 20 to 25 minutes until they’re slightly collapsed, blistered, and jammy. Let them cool completely before using on skewers — hot tomatoes will wilt the prosciutto and the mozzarella instantly.
Building the Skewer
- Fold a thin slice of prosciutto into a small ruffled ribbon
- Thread: roasted tomato → folded prosciutto → fresh basil leaf → mozzarella ball
- Finish with a drizzle of extra-virgin olive oil and flaky sea salt just before serving
- These hold well for up to 4 hours refrigerated after assembly — cover with plastic wrap and pull out 20 minutes before serving to take the chill off the mozzarella
Pro tip: A drizzle of truffle oil instead of regular olive oil right before serving adds a restaurant-level finish that makes people stop mid-conversation to ask what they just ate.
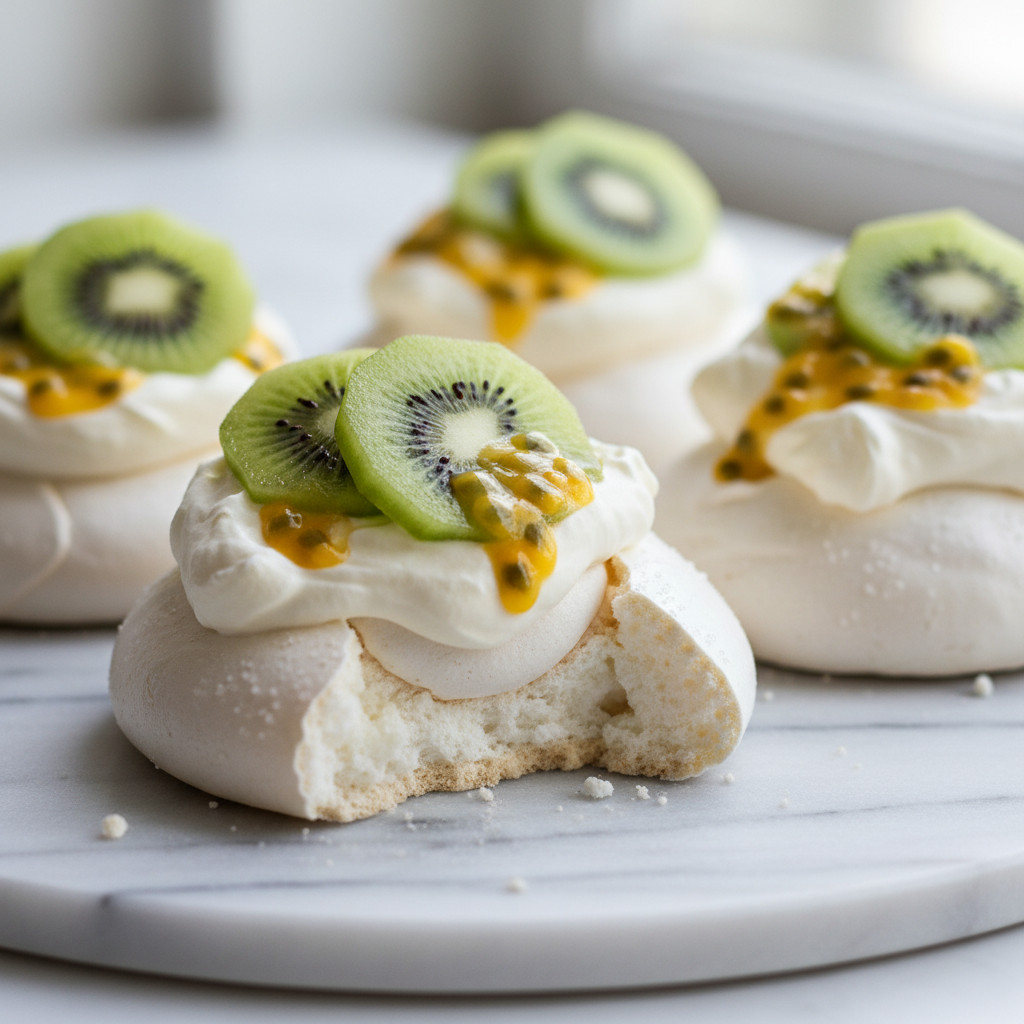
10. Cheesecake-Stuffed Strawberries
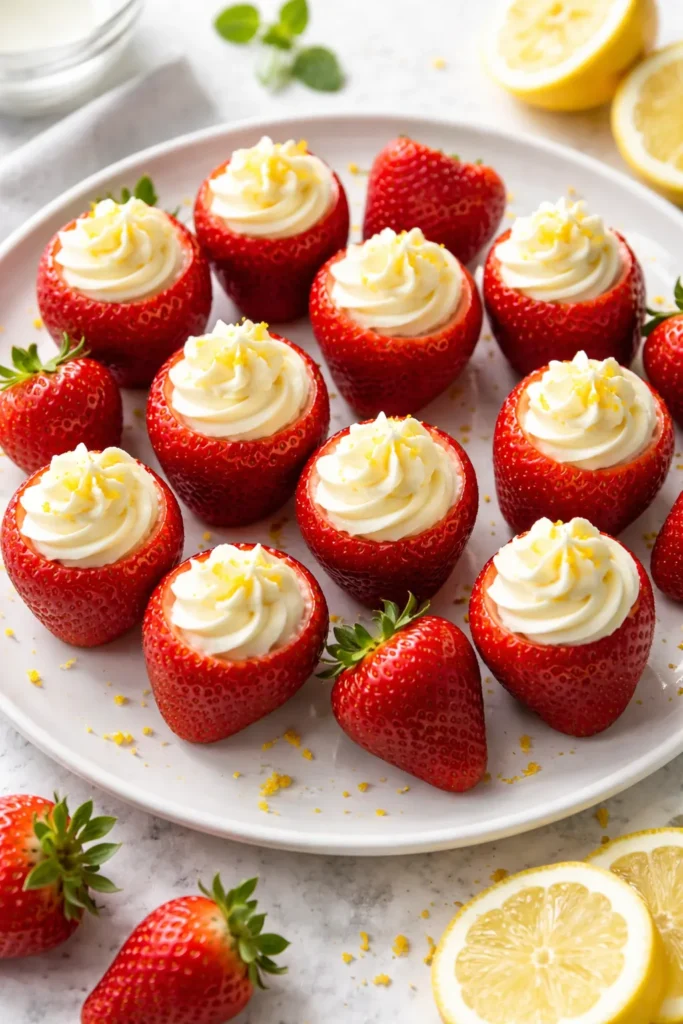
Every party table needs something sweet, and cheesecake-stuffed strawberries are the answer that requires zero oven time, holds beautifully in the fridge, and never fails to impress. Large, ripe strawberries are hollowed out and filled with a whipped cream cheese mixture — lightly sweetened, flavored with vanilla and a touch of lemon zest — then finished with a dusting of crushed graham cracker. They look stunning, taste exactly like cheesecake, and take about 20 minutes to prepare.
The filling comes together quickly: 8 ounces of full-fat cream cheese (softened to room temperature), 3 tablespoons of powdered sugar, ½ teaspoon of pure vanilla extract, and the zest of half a lemon, beaten with a hand mixer until smooth and slightly fluffy. That’s genuinely the whole filling.
Choosing and Prepping the Strawberries
Select the largest strawberries you can find — they’re easier to hollow and create a more substantial bite. Use a small sharp paring knife or a melon baller to cut a cone-shaped cavity into the top of each berry, cutting around (not through) the stem. The stem acts as a natural stand, keeping the berry upright on the serving plate.
Pat the inside of each cavity dry with a paper towel before filling — moisture is the enemy of cream cheese filling adhesion.
Piping, Garnishing, and Storing
- Transfer the cream cheese filling to a piping bag fitted with a large star tip for a clean, professional finish (a zip-lock bag with a corner snipped off works just as well)
- Pipe generously so the filling rises above the top of the strawberry
- Dip the filled tops in finely crushed graham crackers for the cheesecake finish
- Optional garnish: a tiny mint leaf, a drizzle of chocolate, or a pinch of lemon zest
- Store refrigerated, uncovered, for up to 4 hours after filling — longer than that and the graham crackers begin to soften
For a richer variation, dip the outside of each unfilled strawberry in melted dark chocolate and let it set completely before filling. The chocolate shell adds a snappy textural contrast that takes these to another level entirely.
Final Thoughts
A great finger food spread isn’t about making everything complicated — it’s about making smart choices that balance effort, flavor, and practicality. The ten options covered here do exactly that. Some require a bit of prep time, others are assembled in minutes, and several can be made a day ahead so you’re not scrambling when guests arrive.
The biggest takeaway is variety. A spread that mixes warm baked bites with cold assembled skewers, creamy dips with crispy handheld foods, and savory options with at least one sweet finish keeps guests genuinely engaged with the table rather than circling back to the same three things. When every item offers something different, a finger food spread stops being a side attraction and becomes the event itself.
Don’t overthink the presentation, either. A wooden board, a few small bowls, and some thoughtfully arranged toothpicks do more than most people realize. Put labels on anything that contains common allergens, keep refilling the most popular items so the table never looks depleted, and let the food do the entertaining.
Pick two or three recipes from this list for a smaller gathering, or scale up to five or six for a larger crowd. Either way, you won’t be left with a table full of untouched plates — these are the finger foods people actually remember.