Chocolate has a way of making everything better. There’s something almost primal about the craving — the way it hits differently than any other flavor, the way a warm, fudgy bite can shift your entire mood in seconds. Whether it’s a Tuesday night craving or a dinner party situation where you promised dessert and now you’re panicking, chocolate desserts have one enormous advantage over almost every other category: they’re far more forgiving than they look.
The recipes in this collection were chosen for exactly that reason. These aren’t delicate pastry-school showpieces that require a sugar thermometer and a degree in patience. They’re the kind of desserts a confident home cook — or a complete beginner with a whisk and a good chocolate bar — can pull off without drama. Each one delivers genuine, satisfying depth of chocolate flavor, and most of them come together with pantry staples you likely already have on hand.
What makes these recipes stand out isn’t just ease. It’s the ratio of effort to payoff. You’ll spend 10 to 30 minutes of actual hands-on time on most of these, and what comes out of the oven (or fridge, or microwave) will taste like something worth savoring. A few tips before diving in: always use the best cocoa powder and chocolate you can find within your budget, because chocolate flavor is the star here and quality matters. And resist the urge to overbake — many of these recipes are deliberately slightly underdone for maximum fudginess, and pulling them out of the oven a minute too late is the most common mistake.
Table of Contents
- Why Chocolate Quality Changes Everything in Simple Recipes
- Cocoa Powder: Dutch-Process vs. Natural
- Chocolate Bars vs. Chips
- A Word on Bittersweet vs. Milk Chocolate
- 1. Chocolate Lava Cakes for Two
- Why They Work (and What Most People Get Wrong)
- Making the Cake Batter
- Serving and Timing
- 2. Fudgy One-Bowl Brownies
- The Science of the Shiny Top
- Key Ratios
- How to Know When They’re Done
- 3. Chocolate Cobbler with Fudge Pudding Sauce
- How the Self-Saucing Effect Works
- The Basic Formula
- Serving Suggestions
- 4. No-Bake Chocolate Ganache Cups with Cookie Base
- Building the Base
- Getting the Ganache Right
- The Chilling Time Question
- 5. Swedish Kladdkaka (Gooey Chocolate Cake)
- What Makes It Different from a Regular Chocolate Cake
- The Six Ingredients
- How to Judge When It’s Done
- 6. Chocolate Truffles
- The Ganache Ratio for Truffles
- Rolling Without Melting
- Coating Options
- 7. Chocolate Mousse
- The Two-Texture Method
- A Safe and Simple Formula
- Topping and Serving
- 8. Chocolate Fondue
- Making the Fondue Base
- Dippables That Actually Work
- Fondue as a Dinner Party Strategy
- Pantry Staples That Make Chocolate Desserts Easier
- Storing, Reheating, and Making Ahead
- Final Thoughts
Why Chocolate Quality Changes Everything in Simple Recipes
Before getting into the specific recipes, it’s worth pausing on something most roundups gloss over: ingredient quality matters more in simple chocolate recipes than in complex ones.
When a recipe has 20 ingredients, one mediocre component gets buried. When a recipe has six, the chocolate carries the whole thing. This is especially true for ganache-based desserts, lava cakes, and truffles.
Cocoa Powder: Dutch-Process vs. Natural
Dutch-process cocoa is alkalized, which gives it a smoother, darker, more intensely chocolaty flavor with lower acidity. Natural cocoa is more acidic and has a sharper, fruitier chocolate note. For most of the recipes here, either works — but Dutch-process tends to produce richer-tasting results in puddings, fudgy brownies, and stovetop desserts.
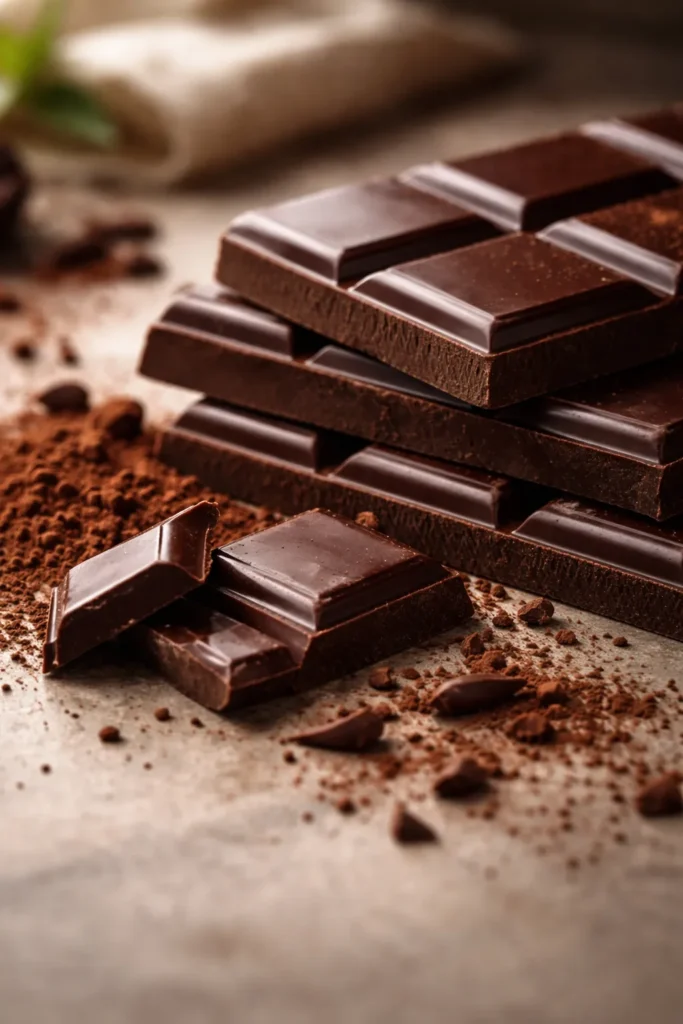
Chocolate Bars vs. Chips
Chocolate chips contain stabilizers that prevent them from melting as smoothly as a bar. For ganache, truffles, or fondue, chop a bar of good bittersweet chocolate (around 54–70% cacao) rather than reaching for a bag of chips. You’ll notice the difference immediately in texture and sheen.
A Word on Bittersweet vs. Milk Chocolate
Bittersweet chocolate (60–72% cacao) gives you complexity and depth without being cloyingly sweet. Milk chocolate is softer and sweeter but can make ganache-based desserts feel one-dimensional. For the recipes here, bittersweet is the default recommendation unless otherwise noted — it pairs beautifully with sugar already in a recipe and balances the richness of cream or butter.
1. Chocolate Lava Cakes for Two
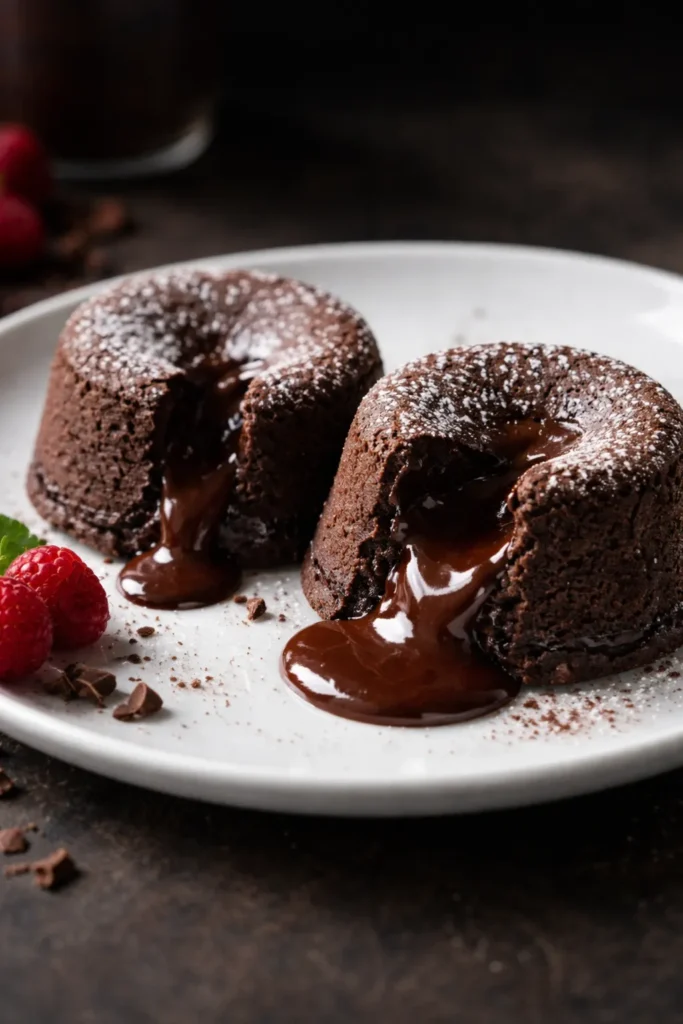
There are few desserts as reliably dramatic as a lava cake. The moment a fork breaks through that firm, slightly crackly exterior and warm molten chocolate floods the plate — that’s a moment. And the genuinely exciting thing is that lava cakes are not difficult. They’re timed correctly or they’re not, and once you understand the logic, you’ll nail them every single time.
Why They Work (and What Most People Get Wrong)
The “lava” in a lava cake isn’t raw batter — it’s a ganache center that stays soft because it’s shielded from the heat by the outer cake batter surrounding it. Some recipes skip the ganache center and simply underbake the cake, which can be inconsistent. The most reliable method uses a small frozen disk of ganache pressed into the center before baking, which guarantees a flowing center even if your oven runs slightly hot.
For a ganache center, melt 2 oz of bittersweet chocolate with 2 tablespoons of heavy cream, stir until smooth, pour into two small mounds on a parchment-lined plate, and freeze for at least 20 minutes before using.
Making the Cake Batter
The batter itself is close to a dense flourless chocolate cake: melted butter, melted chocolate, eggs, a touch of sugar, a tablespoon or two of flour, and a pinch of salt. Butter your ramekins generously (this is not the place to be stingy), dust them with cocoa powder to prevent sticking, and fill them halfway. Drop your frozen ganache disk in the center, then add more batter to cover.
Bake at 425°F (220°C) for exactly 12 to 13 minutes. The edges should look set and slightly pulling away from the ramekin sides, but the very center should still feel soft when you press it lightly. Let the cakes rest for exactly 60 seconds before inverting onto plates.
Serving and Timing
Lava cakes wait for no one — serve them immediately. A scoop of vanilla bean ice cream alongside is not optional in any meaningful sense. The contrast between hot cake and cold ice cream, with the chocolate flood pooling between them, is the entire point.
Pro tip: Assemble and fill the ramekins up to 6 hours ahead, refrigerate them unbaked, and bake directly from the fridge — just add 1 to 2 minutes to the baking time.
2. Fudgy One-Bowl Brownies
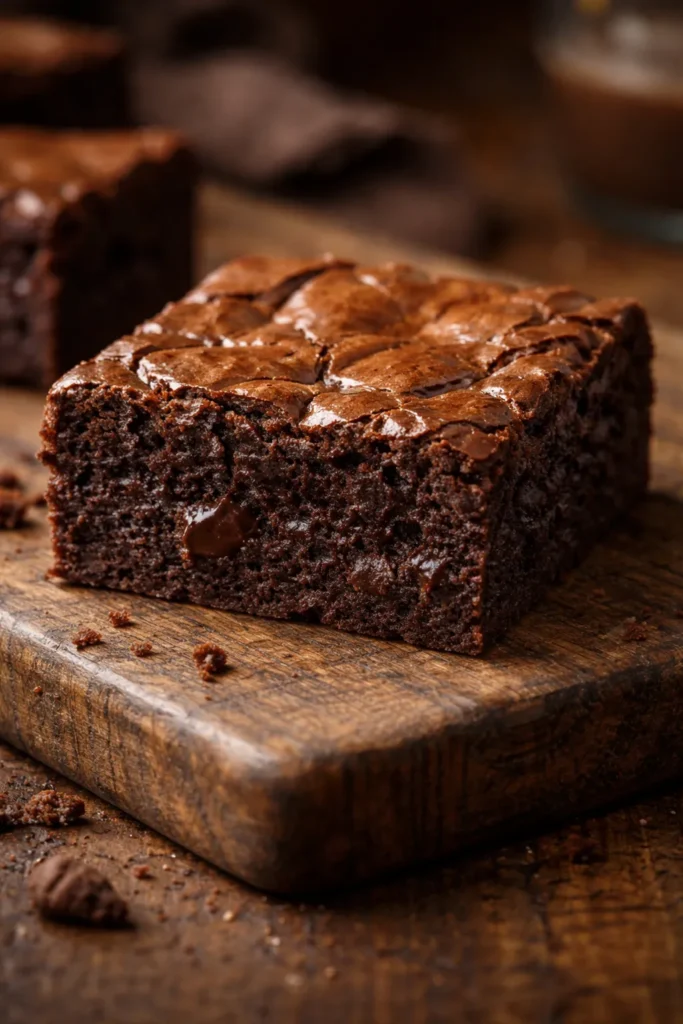
Good brownies don’t require a stand mixer, multiple bowls, or any technique more complex than stirring. The one-bowl method isn’t a shortcut — it’s actually how the best brownies are made. The key is order of operations: melt butter and chocolate together first, let the mixture cool slightly, then stir in everything else. This method produces dense, chewy, intensely chocolaty brownies with that characteristic flaky, shiny top.
The Science of the Shiny Top
That crinkled, glossy top layer isn’t decorative. It forms when the sugar and eggs are beaten together briefly before being folded into the chocolate-butter mixture — the dissolved sugar rises to the surface during baking and sets into a delicate, slightly crisp shell. If you skip the brief beating of eggs and sugar and just dump everything in at once, you lose the shiny top and get something more cake-like. Beat the eggs and sugar for about 60 seconds before adding the chocolate.
Key Ratios
The ratio of fat to flour is what separates fudgy brownies from cakey ones. Fudgy brownies have a high fat-to-flour ratio — roughly 2 sticks of butter and 8 oz of chocolate to just ½ cup of flour for an 8×8-inch pan. Cakey brownies use more flour and sometimes baking powder. For a pan that serves 9 to 12 people, the basic fudgy formula is: 8 oz bittersweet chocolate, ½ cup (1 stick) butter, 1 cup sugar, 2 large eggs, 1 teaspoon vanilla, ½ cup flour, ¼ teaspoon salt.
How to Know When They’re Done
This is the most common source of brownie failure. A toothpick inserted in the center should come out with moist crumbs, not clean. Clean toothpick = overbaked brownies. The center will look underdone when you pull them out — it continues to set as it cools. Give them at least 30 minutes in the pan before cutting.
Add flaky sea salt over the top the moment they come out of the oven. It’s a small touch that transforms a good brownie into a genuinely memorable one.
3. Chocolate Cobbler with Fudge Pudding Sauce
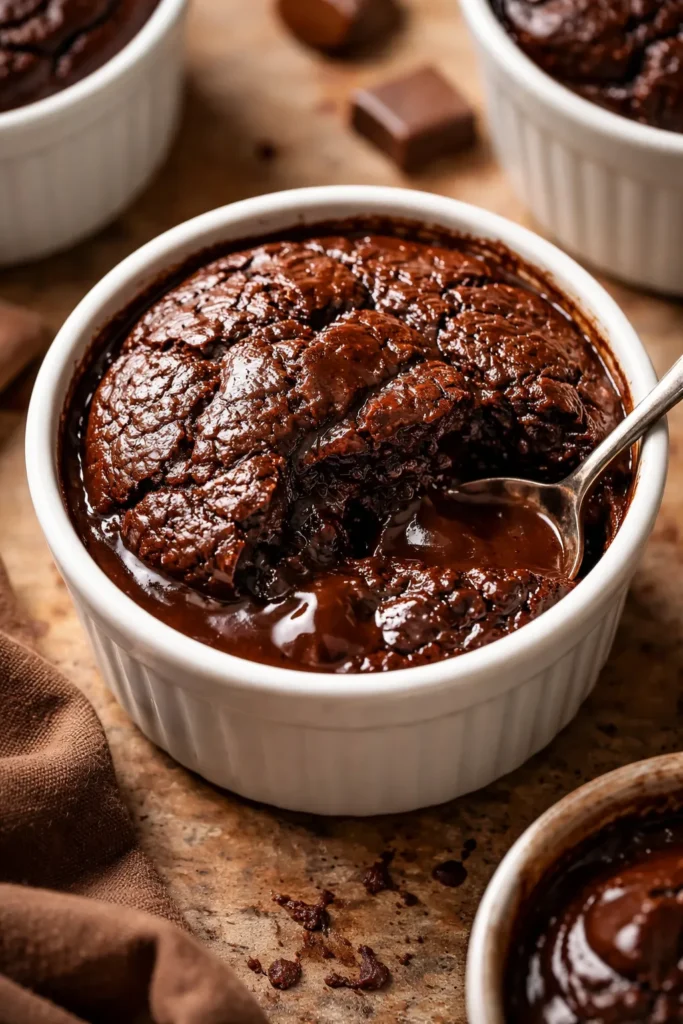
Chocolate cobbler sounds humble — and it is, in the best possible way. Born out of Depression-era resourcefulness, this dessert does something that seems almost impossible: you pour boiling water over the top of an unbaked batter, slide it into the oven, and it self-separates into a moist chocolate cake layer on top and a rich, thick pudding sauce underneath. It sounds like a magic trick. It isn’t — it’s just chemistry.
How the Self-Saucing Effect Works
The dry sugar and cocoa sprinkled over the batter before the water is added dissolve into the hot water as it sinks through the batter during baking. The batter, being denser, rises to the top and bakes into a cakey layer while the sugar-cocoa-water mixture settles to the bottom of the dish and thickens into a glossy, deeply chocolate pudding sauce.
The single most important rule: do not stir after you pour the boiling water over the top. Not even a little. The moment you stir, the layers combine and you lose the self-saucing effect entirely. Just pour it on and walk straight to the oven.
The Basic Formula
For a 1.5-quart baking dish that serves 6:
- Batter: 1 cup flour, 2 teaspoons baking powder, ½ teaspoon salt, ⅔ cup sugar, 2 tablespoons cocoa powder, 2 tablespoons melted butter, ½ cup milk, 1 teaspoon vanilla
- Topping (sprinkled, not stirred): ¼ cup sugar, ½ cup brown sugar, ¼ teaspoon salt, 2 tablespoons cocoa powder
- Then: 1 cup boiling water poured gently over the top
Bake at 350°F (175°C) for 30 minutes. Check the center — it should be set on top but the entire bottom of the dish will be liquid fudge sauce. That’s correct.
Serving Suggestions
Chocolate cobbler is served hot, spooned directly from the baking dish, fudge sauce and all. A scoop of vanilla ice cream isn’t just recommended — it’s the correct way to eat this dessert. The ice cream melts into the hot fudge sauce and becomes part of it. A splash of brewed espresso in place of the boiling water deepens the chocolate flavor without adding coffee flavor outright.
4. No-Bake Chocolate Ganache Cups with Cookie Base
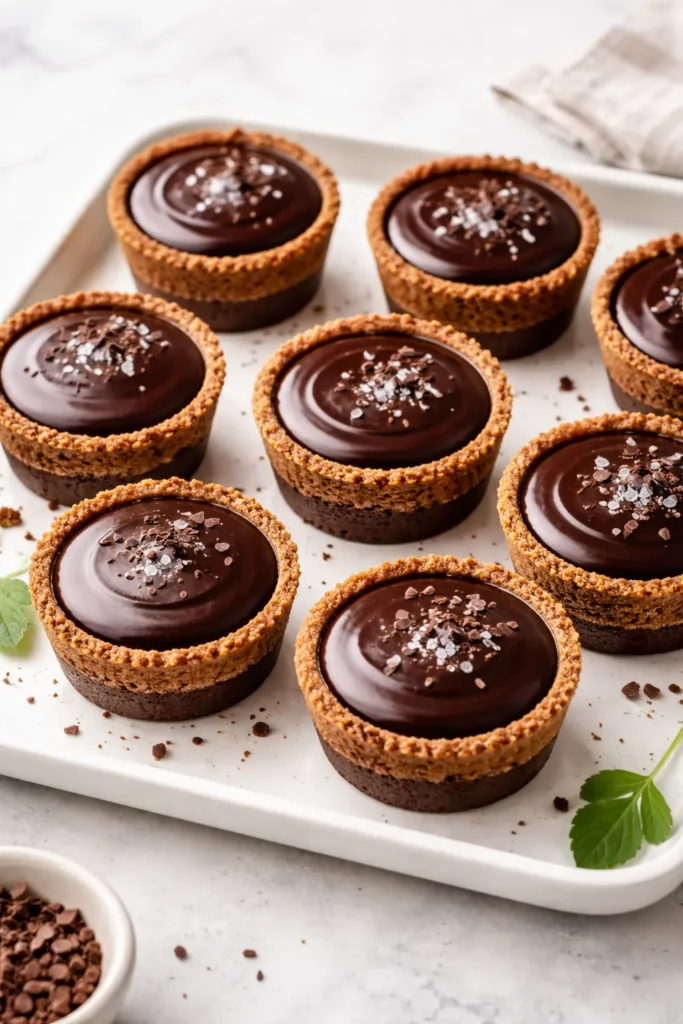
This is the dessert for people who don’t want to turn on the oven but still want something that looks genuinely impressive. The concept is simple — a buttery crushed cookie base pressed into a cup or mold, topped with poured chocolate ganache, chilled until set, finished with whipped cream. The result looks like something from a patisserie window.
Building the Base
Oreos are the standard choice here, and for good reason. The chocolate cookie and cream filling together have the right fat content to bind with melted butter and set into a firm, sliceable crust without baking. Crush 20 Oreos (filling included) into fine crumbs — a food processor gives you the most even result, but a sealed zip-lock bag and a rolling pin work just as well. Combine with 6 tablespoons of melted butter and press firmly into whatever vessel you’re using: a springform pan, mini cheesecake molds, muffin tins, or individual dessert glasses.
Getting the Ganache Right
Ganache at a 1:1 ratio of chocolate to cream (by weight) sets into a soft, spoonable texture when chilled. For a firmer ganache that slices cleanly, increase the chocolate slightly — try 14 oz chocolate to 12 oz cream. Never boil the cream. Heat it until you see the first wisps of steam and small bubbles forming at the edges, then pour it immediately over your chopped chocolate. Wait 60 seconds, then whisk from the center outward in slow, small circles until the ganache comes together into a glossy emulsion.
The Chilling Time Question
Mini dessert cups (using a muffin tin or individual glasses) need 1 to 3 hours to fully set. A full 9-inch pan needs 6 to 8 hours — overnight is ideal. Don’t rush this. Ganache that hasn’t fully set will collapse when you try to unmold it or slice it, and that’s the most common frustration with this recipe.
Add whipped cream directly before serving, not before refrigerating. Cream deflates over time, and the visual contrast of bright white cream against dark chocolate ganache is part of what makes this dessert look so striking.
5. Swedish Kladdkaka (Gooey Chocolate Cake)
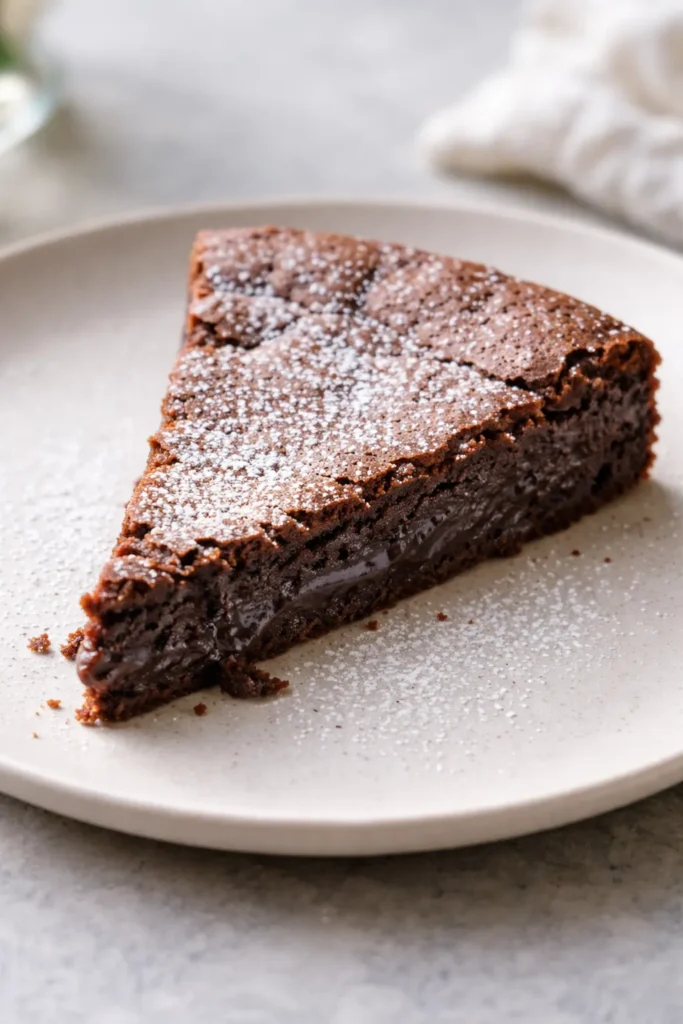
Kladdkaka is a Swedish chocolate cake that should be far more famous outside of Scandinavia than it currently is. The name translates roughly to “sticky cake,” which is an accurate if understated description. It has six ingredients, takes about 5 minutes of active prep, and produces something that sits somewhere between a fudgy brownie, a chocolate soufflé, and a lava cake — with a delicate, slightly crisp exterior and a center that’s genuinely, gloriously gooey.
What Makes It Different from a Regular Chocolate Cake
There’s no leavening in kladdkaka. No baking powder, no baking soda. The structure comes entirely from the eggs — three of them, whisked lightly before being stirred into a mixture of melted butter, cocoa powder, sugar, flour, and vanilla. The absence of leavening is deliberate: you want the cake to stay dense and collapsed in the center, not rise. If you accidentally add baking powder, you’ll get a different (and inferior) dessert.
The Six Ingredients
- 4¾ oz (135g) salted butter
- ½ cup plus 1 tablespoon unsweetened cocoa powder
- 1¾ cups granulated sugar
- 1 cup (slightly less) all-purpose flour
- 1 teaspoon vanilla extract
- 3 large eggs, lightly whisked
Melt the butter, take it off the heat, stir in the dry ingredients, then add the eggs and stir until just combined. Pour into a greased and parchment-lined 7 to 9-inch springform pan and bake at 355°F (180°C) for 20 to 25 minutes.
How to Judge When It’s Done
This is where kladdkaka tests your nerve. The cake is done when the top is set and firm to the touch, but cracks immediately when you apply gentle pressure with a finger. It will look dramatically underdone through the oven window — that’s correct. Resist the urge to give it five more minutes. If the top is firm and crackly, it’s ready, even if the center looks worryingly soft.
Let it cool completely in the pan before unmolding. Dust with cocoa powder or powdered sugar and serve with ice cream or whipped cream. Leftovers kept in the fridge taste remarkably like fudge when eaten cold — some people argue this is the best way to eat it.
6. Chocolate Truffles
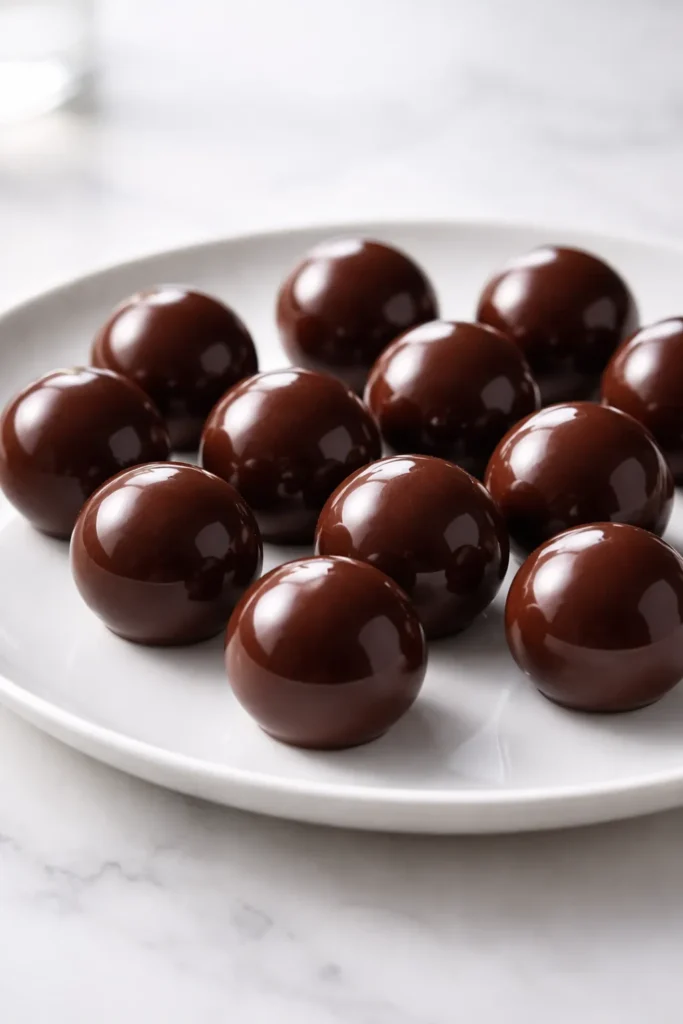
Chocolate truffles have an undeserved reputation for difficulty. They’re made from two ingredients: chocolate and cream. Everything else — the rolling, the coating, the flavoring — is optional decoration. Once you understand that a truffle is simply a firm ganache rolled into a ball, the intimidation dissolves entirely.
The Ganache Ratio for Truffles
Truffle ganache needs to be firmer than a poured ganache, which means more chocolate relative to cream. A reliable ratio is 2:1 chocolate to cream by weight — so for 8 oz of bittersweet chocolate, use 4 oz (½ cup) of heavy cream. Heat the cream, pour it over the finely chopped chocolate, wait a minute, then stir until smooth. Add a tablespoon of butter for extra gloss and a pinch of flaky salt to balance the sweetness. Chill for at least 2 hours until firm enough to scoop.
Rolling Without Melting
The enemy of clean truffles is warm hands. Work quickly, rolling each portion between your palms in under 10 seconds, then place it immediately on a cold parchment-lined tray. If the mixture starts softening and sticking to your hands, put the tray back in the fridge for 10 minutes and start again. Cold hands, cold workspace, cold tray — these three conditions make rolling truffles effortless.
Coating Options
The simplest coating is a generous roll in unsweetened cocoa powder, which gives truffles their classic dusty, matte appearance. Other options include:
- Finely chopped toasted nuts (hazelnuts and almonds are particularly good)
- Shredded coconut, lightly toasted
- Powdered sugar mixed with a pinch of cinnamon
- Tempered dark chocolate for a hard shell, though this requires more precision
Flavoring possibilities are wide. A teaspoon of bourbon or rum stirred into the ganache adds warmth. An orange zest brings brightness. A half-teaspoon of espresso powder intensifies the chocolate without tasting like coffee.
7. Chocolate Mousse

Chocolate mousse gets overcomplicated. There are versions with seven components, double boilers, and specific temperatures to hit. Those versions are excellent, but they’re not what you need on a Wednesday night when the craving strikes. A streamlined chocolate mousse — chocolate, cream, eggs, a touch of sugar — comes together in about 30 minutes and sets in the fridge while you eat dinner.
The Two-Texture Method
The key to mousse texture is folding two things together: a thick chocolate base (melted chocolate mixed with egg yolks and a little sugar) and whipped cream or stiffly beaten egg whites. The whipped element introduces the air bubbles that make mousse light rather than dense. If you fold too aggressively, you knock out the air and end up with a rich chocolate cream rather than a mousse. Fold with a large spatula in slow, deliberate strokes from the bottom of the bowl upward, and stop the moment you don’t see any more white streaks.
A Safe and Simple Formula
For 4 servings:
Melt 6 oz of bittersweet chocolate with 3 tablespoons of butter and let it cool to room temperature. Whisk 3 egg yolks with 2 tablespoons of sugar until pale, then stir into the cooled chocolate. In a separate bowl, whip 1 cup of cold heavy cream to soft peaks. Fold the whipped cream into the chocolate mixture in two additions. Spoon into serving glasses and refrigerate for at least 2 hours.
The mousse can be made up to 24 hours ahead, which makes it one of the most practical dinner party desserts in this collection.
Topping and Serving
Mousse is rich and doesn’t need much finishing. A small dollop of lightly whipped cream on top, a few fresh raspberries, and a curl of dark chocolate shaved with a vegetable peeler is genuinely all you need. The contrast of tartness from the raspberries against the richness of the mousse is one of the better flavor combinations in chocolate desserts.
8. Chocolate Fondue
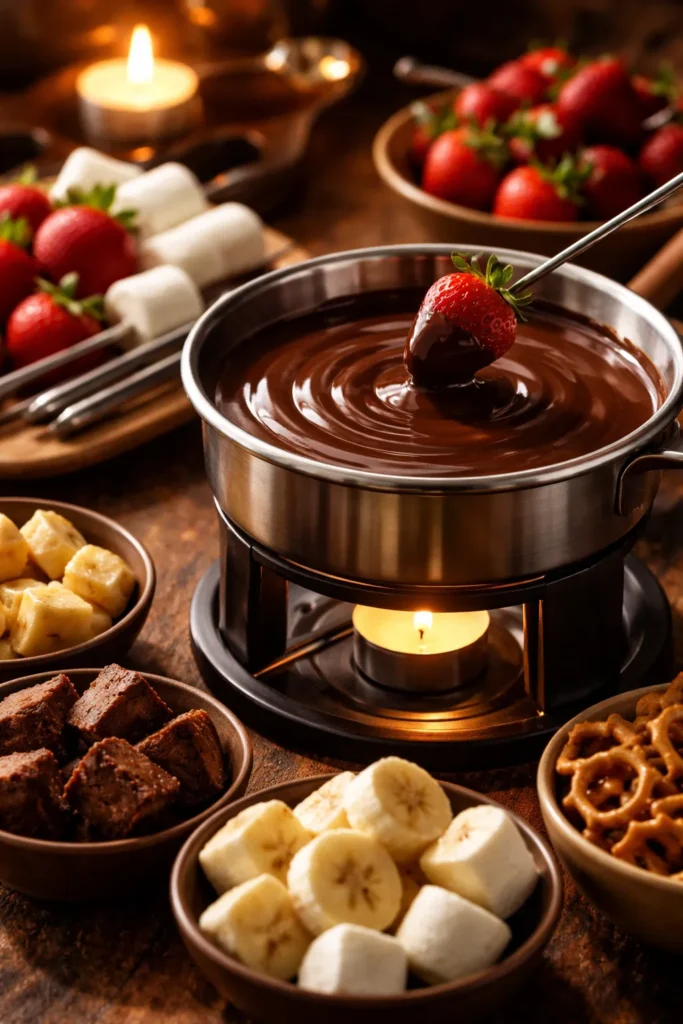
Fondue is the dessert that does the most work for the least effort. It’s interactive, it’s crowd-pleasing, it requires no baking, and the entire thing can be assembled in under 15 minutes. The chocolate component is straightforward: finely chopped bittersweet chocolate melted with warm heavy cream, stirred until glossy, kept warm over a candle or low heat. The effort goes into the accompaniments, which is where fondue becomes genuinely fun.
Making the Fondue Base
Use equal parts chocolate and cream by weight for a flowing, dippable consistency — around 8 oz of finely chopped dark chocolate to 8 oz of heavy cream. Heat the cream until steaming (not boiling), pour it over the chocolate, and stir until completely smooth. Add a tablespoon of butter for extra richness and sheen. A shot of liqueur — Grand Marnier, Frangelico, or Baileys — stirred in at the end adds a layer of complexity without overpowering the chocolate.
Don’t have a fondue pot? No problem. A heatproof bowl set over a pot of barely simmering water keeps the fondue warm throughout the meal. Alternatively, reheat briefly in a microwave in 20-second bursts if it starts to firm up.
Dippables That Actually Work
Not everything is worth dipping in chocolate fondue. These are the things that actually work:
- Strawberries — the classic for a reason; the acidity cuts through the richness perfectly
- Banana slices — dip quickly, they soften fast but taste excellent
- Cubed pound cake or brioche — absorbs chocolate beautifully, acts as a sponge
- Marshmallows — tactile and fun, crowd favorites
- Shortbread fingers or graham crackers — the crunch contrast is worthwhile
- Dried apricots — underrated; the tartness is a remarkable match for dark chocolate
Avoid watery fruit like melon or grapes — they thin the chocolate and make the pot messy. Cut everything into uniform, two-bite pieces and have skewers or long forks ready.
Fondue as a Dinner Party Strategy
Fondue works beautifully as a dessert course because guests serve themselves, which takes pressure off the host. Set everything up before the main course so it’s ready the moment you’re finished eating. The fondue stays warm and ready while the table is cleared, and it naturally extends the meal into a relaxed, convivial close.
Pantry Staples That Make Chocolate Desserts Easier
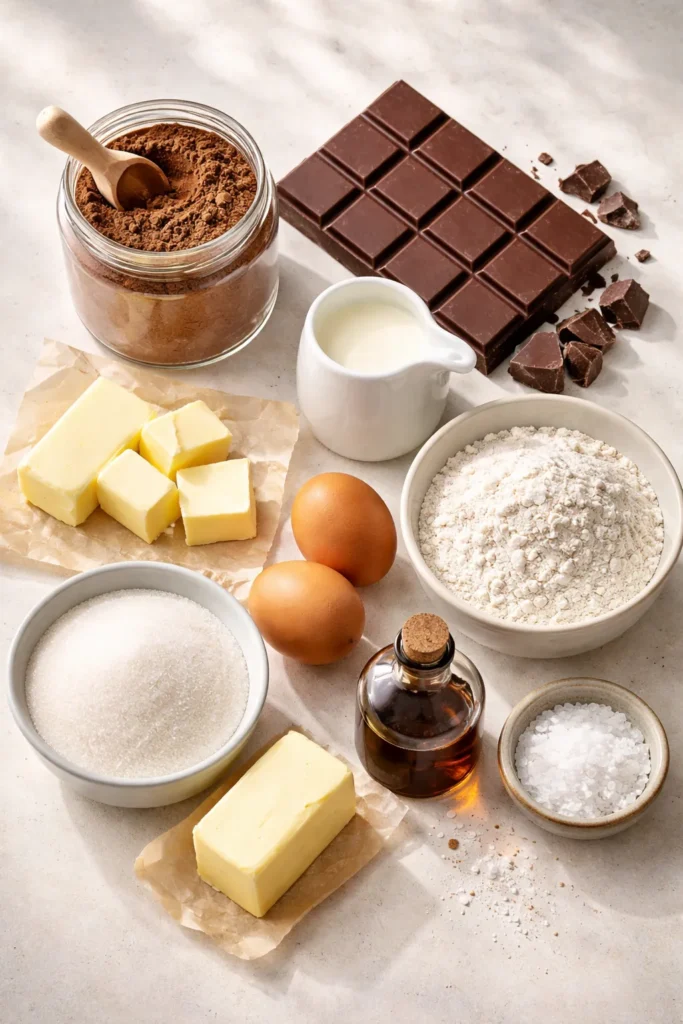
Every recipe in this collection relies on some combination of the same short ingredient list. Keeping these items stocked means a chocolate dessert is never more than 30 to 40 minutes away:
- Unsweetened cocoa powder (Dutch-process for most applications)
- Bittersweet chocolate, around 60–70% cacao, in bar form
- Heavy cream (also called heavy whipping cream; the higher fat content matters)
- Unsalted butter, or salted if that’s what you have (just adjust added salt)
- Granulated and brown sugar
- All-purpose flour
- Eggs, large
- Vanilla extract, the real kind where possible
- Flaky sea salt — this deserves its own spot on the list; a pinch over almost any chocolate dessert heightens the chocolate flavor and adds contrast
With these in your kitchen at all times, any occasion — planned or completely unexpected — is covered.
Storing, Reheating, and Making Ahead
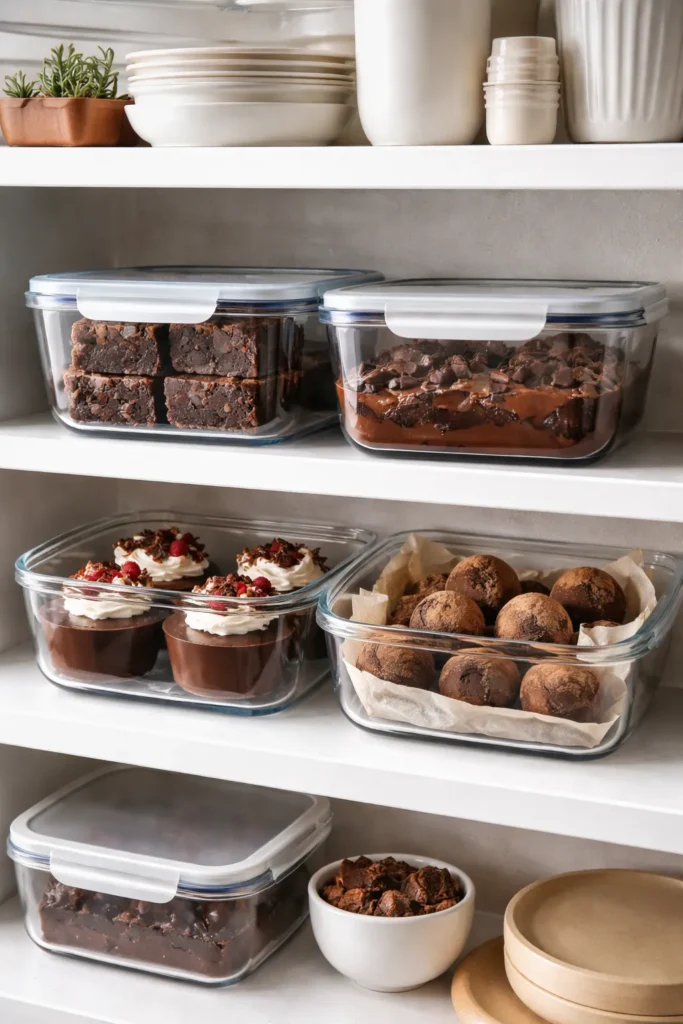
Most of these desserts store and reheat better than you’d expect, which makes them practical for planning ahead.
Brownies keep beautifully at room temperature for up to 4 days, wrapped tightly. They actually improve on day two as the fudgy texture settles. Freeze cut brownies individually wrapped in plastic for up to 3 months.
Chocolate cobbler is best eaten fresh from the oven, but leftovers keep in the fridge for up to 5 days. Reheat individual portions in the microwave for 20 to 30 seconds and the fudge sauce comes back to life.
Ganache cups store covered in the refrigerator for up to 4 days, and can be frozen (before adding whipped cream) for up to 6 weeks. Thaw overnight in the fridge.
Kladdkaka can be made a day or two ahead and kept refrigerated. Individual slices reheat in the microwave in 20 seconds, which restores the gooey center.
Chocolate mousse is best within 24 hours but holds reasonably well for up to 48 hours if covered tightly.
Truffles keep in an airtight container in the fridge for up to 2 weeks, or at room temperature for 3 to 4 days if your kitchen is cool.
Final Thoughts
The most useful thing to take away from this collection isn’t a specific recipe — it’s a shift in perspective. Chocolate desserts don’t require complexity or technique to be genuinely good. They require good chocolate, some restraint at the oven door, and the willingness to pull things out while they still look slightly underdone.
If you’re choosing where to start, the brownie and the chocolate cobbler are the most beginner-friendly and the most reliably crowd-pleasing. Truffles and ganache cups feel more impressive for guests but are no harder once you understand the logic of ganache. Kladdkaka is the one to master for sheer wow-to-effort ratio — six ingredients and 30 minutes producing something genuinely extraordinary.
Pick one, make it this week, and the next time someone asks you to bring dessert, you’ll already have your answer.