There’s something almost primal about the smell of bread baking in your own kitchen. That warm, yeasty, golden scent that drifts from the oven and fills every corner of your home — it’s the kind of thing that makes people stop what they’re doing and wander into the kitchen just to be closer to it.
Store-bought bread has its place, but anyone who’s pulled a freshly baked loaf from the oven and sliced into it while still warm knows that the two aren’t really comparable. Homemade bread is softer, more flavorful, and free from the preservatives and additives that keep commercial loaves shelf-stable for weeks. Once you understand a handful of core techniques — proofing yeast, reading dough texture, knowing when a loaf is truly done — making bread at home becomes one of the most satisfying kitchen habits you can build.
The eight recipes here cover a wide range of styles, from a classic sandwich loaf to a no-knead artisan bread that practically makes itself. Some take a couple of hours from start to finish; others reward you for your patience with a richer, more complex flavor. Every single one is designed to produce a soft, fresh loaf that you’ll actually want to eat straight from the oven.
Whether you’re baking your very first loaf or adding new varieties to a well-worn rotation, you’ll find something here worth making this week.
Table of Contents
- 1. Classic White Sandwich Bread
- Ingredients
- Step-by-Step Instructions
- Tips for This Loaf
- 2. No-Knead Artisan Bread
- Ingredients
- Step-by-Step Instructions
- Tips for This Loaf
- 3. Soft Whole Wheat Bread
- Ingredients
- Step-by-Step Instructions
- Tips for This Loaf
- 4. Cinnamon Swirl Bread
- Ingredients
- Step-by-Step Instructions
- 5. Fluffy Dinner Rolls
- Ingredients
- Step-by-Step Instructions
- Tips for This Recipe
- 6. Honey Oat Bread
- Ingredients
- Step-by-Step Instructions
- 7. Rosemary Garlic Focaccia
- Ingredients
- Step-by-Step Instructions
- Tips for This Recipe
- 8. Soft Brioche Bread
- Ingredients
- Step-by-Step Instructions
- Tips for This Loaf
- Storing and Freezing Homemade Bread
- Common Mistakes That Lead to Dense Bread
- Key Takeaways
1. Classic White Sandwich Bread
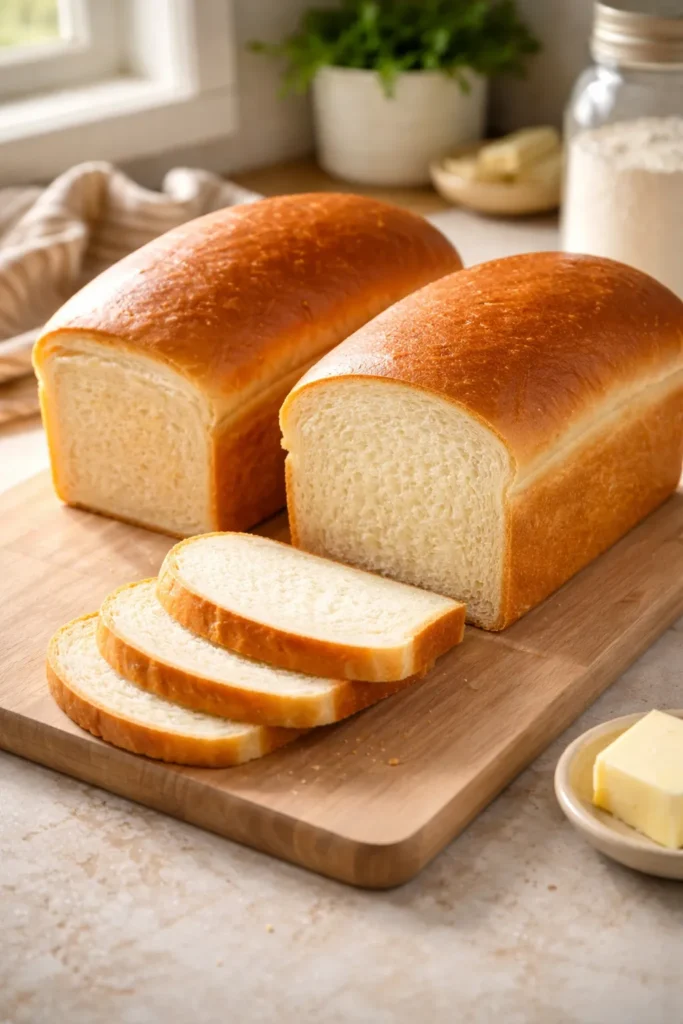
This is the bread that started countless home baking journeys, and for good reason. Soft, slightly chewy, with a thin golden crust and a fine, even crumb that holds together perfectly under a layer of peanut butter or a stack of deli meat — this is the bread that earns its place as a weekly staple. It’s made with just six pantry ingredients and produces two full loaves, so you’re always ahead of the week.
The key to getting that signature soft crumb is oil in the dough. Unlike lean artisan breads, this formula includes a small amount of neutral oil, which tenderizes the gluten structure and keeps the crumb moist for days. A little sugar feeds the yeast and contributes to a beautifully browned top crust.
Ingredients
Yield: 2 loaves | Prep Time: 15 minutes | Rise Time: 2 hours 30 minutes | Bake Time: 30 to 33 minutes | Total Time: 3 hours 15 minutes | Difficulty: Beginner — straightforward steps, no special equipment required.
- 2 cups warm water (105 to 115°F / 40 to 46°C)
- 1 tablespoon active dry yeast
- ¼ cup granulated sugar or honey (plus a pinch for proofing)
- 2 teaspoons fine salt
- 2 tablespoons neutral oil (canola or vegetable)
- 4 to 5½ cups bread flour or all-purpose flour, plus more as needed
Step-by-Step Instructions
Proof the Yeast:
- Combine the warm water, yeast, and a pinch of sugar in the bowl of a stand mixer or a large mixing bowl. Stir gently and let stand for 5 to 10 minutes, until the surface is visibly foamy and bubbly. If nothing happens after 10 minutes, your yeast is inactive — discard it and start fresh.
Make the Dough:
- Add the remaining sugar, salt, oil, and 3 cups of flour to the yeast mixture. Mix on low speed with a dough hook (or stir with a wooden spoon) until combined.
- Add another cup of flour and mix to combine. Continue adding flour ½ cup at a time, mixing after each addition, until the dough begins to pull away cleanly from the sides of the bowl. The dough should be smooth, slightly tacky, and spring back when poked lightly with a floured finger — but it should not stick aggressively to your hand.
- Knead with the dough hook on medium speed for 5 minutes, or turn the dough out onto a lightly floured surface and knead by hand for 7 to 8 minutes, until smooth and elastic.
First Rise:
- Transfer the dough to a lightly oiled large bowl and turn it once to coat all sides. Cover tightly with plastic wrap or a clean kitchen towel. Place in a warm spot and let rise until doubled in size, about 1 hour 30 minutes.
Shape and Second Rise:
- Punch the dough down firmly to release trapped air bubbles. Divide into two equal portions.
- Shape each portion into a smooth log roughly the length of your loaf pan, then place seam-side down into two greased 9×5-inch loaf pans.
- Cover loosely with lightly oiled plastic wrap. Let rise for 45 minutes to 1 hour, until the dough has crested about 1 inch above the rim of the pan.
Bake:
- Preheat the oven to 350°F (175°C) with the rack in the lower-middle position.
- Bake for 30 to 33 minutes, until the tops are deep golden brown. Tap the top of a loaf — it should sound distinctly hollow. For precision, the internal temperature should read 190 to 195°F (88 to 90°C).
- Immediately invert the loaves onto a wire cooling rack. Brush the tops with a small knob of butter while still hot. Allow to cool for at least 15 minutes before slicing.
Tips for This Loaf
Don’t add too much flour. This is the most common mistake with sandwich bread. The dough should feel slightly tacky — if it’s bone dry and stiff, the finished loaf will be dense and crumbly. Add flour conservatively, ½ cup at a time, and stop the moment the dough stops clinging to the sides of the bowl.
Brushing the hot loaves with butter right out of the oven does two things: it softens the crust so you get that pillowy exterior rather than a hard shell, and it adds an irresistible buttery aroma. Don’t skip this step.
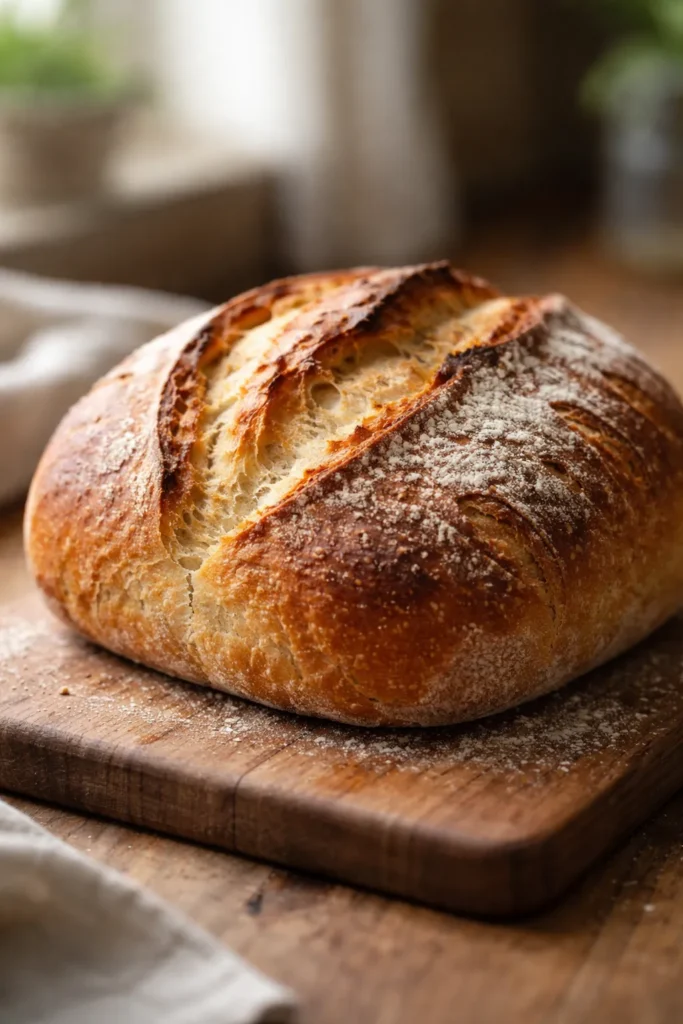
2. No-Knead Artisan Bread
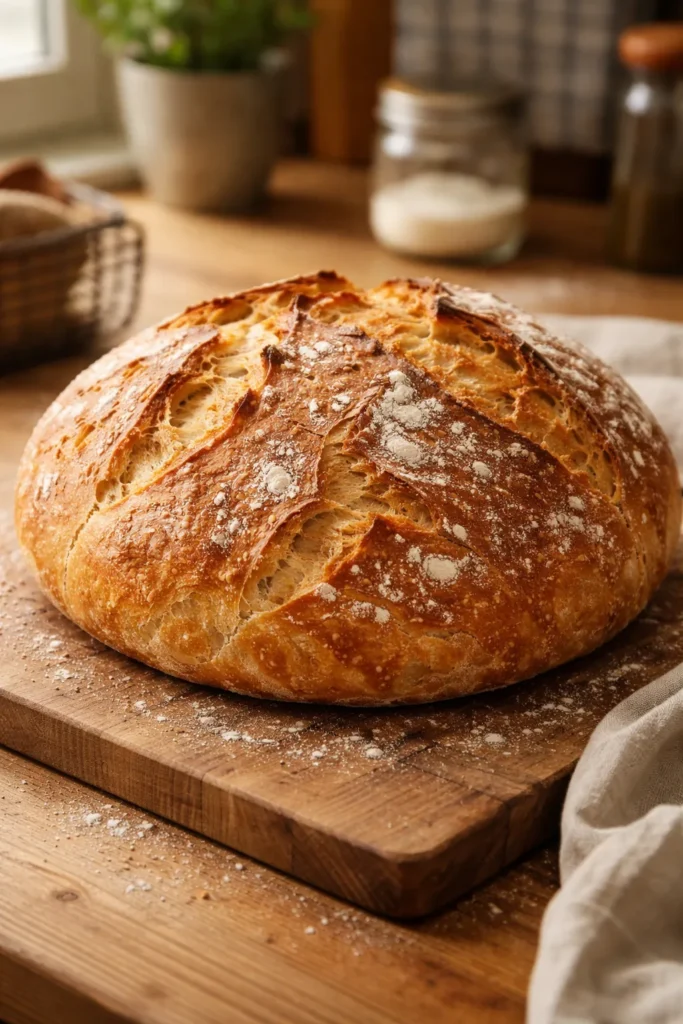
If you’ve ever been intimidated by bread baking, this is where that ends. This recipe uses just four ingredients, requires no kneading, no stand mixer, and barely any active effort — yet it produces a loaf with a thick, shatteringly crisp crust and a chewy, open crumb full of large air pockets that rival what you’d pay bakery prices for.
The secret is time. A long, slow rise — ideally 12 to 18 hours in the refrigerator — allows natural fermentation to develop flavor that you simply cannot achieve with a quick same-day bake. The dough is intentionally wet and sticky, which is what creates those big, beautiful holes inside.
Ingredients
Yield: 1 large round loaf or 2 smaller loaves | Prep Time: 5 minutes | Rise Time: 12 to 18 hours (refrigerator) | Bake Time: 40 to 45 minutes | Total Time: 13 to 19 hours (mostly hands-off) | Difficulty: Beginner — most of the work happens while you sleep.
- 3¼ cups (430g) bread flour, plus extra for shaping
- 2 teaspoons instant or rapid-rise yeast
- 2 teaspoons coarse sea salt
- 1½ cups (360ml) cool water, approximately 70°F (21°C)
- Optional: fine cornmeal for dusting the baking surface
Step-by-Step Instructions
Mix the Dough:
- In a large bowl, whisk together the bread flour, yeast, and salt until combined.
- Pour in the cool water and stir with a silicone spatula or wooden spoon until all the flour is moistened. The dough will look rough, shaggy, and very sticky — this is exactly correct. Do not add more flour at this stage.
- Cover the bowl tightly with plastic wrap and leave at room temperature for 2 to 3 hours, until the dough has roughly doubled in size and the surface appears bubbly.
Cold Ferment:
- Transfer the covered bowl to the refrigerator and chill for at least 12 hours and up to 3 days. The longer it rests, the more complex and tangy the flavor will be. Most bakers find the sweet spot at around 18 hours.
Shape and Rest:
- Remove the dough from the refrigerator. Let it sit at room temperature for 45 to 60 minutes while you preheat the oven — cold dough doesn’t rise as well in the oven.
- Preheat the oven to 475°F (246°C) and place a covered Dutch oven or cast iron pot inside while the oven heats. This is non-negotiable for a crisp crust — the preheated pot creates a steam environment that allows the bread to rise dramatically before the crust sets.
- Flour a work surface and turn the chilled dough out. Using a dough scraper or spatula, fold the edges inward 4 to 6 times to form a rough round shape. Flip the dough seam-side down onto a sheet of parchment paper and gently reshape into a round.
Score and Bake:
- Using a sharp knife or bread lame, make 3 quick shallow cuts (about ½ inch deep) across the top of the loaf. Scoring controls where the bread expands and gives it that signature bakery look.
- Carefully remove the preheated Dutch oven from the oven. Use oven mitts — the pot will be extremely hot. Use the parchment paper as a sling to lower the dough into the pot. Replace the lid.
- Bake covered for 30 minutes, then remove the lid and continue baking for 12 to 15 minutes more, until the crust is a deep, burnished brown.
- Transfer the loaf to a wire rack and cool for at least 20 minutes before cutting. The interior continues to set as it cools.
Tips for This Loaf
The wetness of this dough is a feature, not a flaw. Resisting the urge to add more flour is what produces those large, airy holes in the crumb. Work quickly when shaping so you don’t knock out too much gas.
Pro tip: If you don’t own a Dutch oven, place a metal baking dish on the bottom rack of your oven and pour in 3 cups of boiling water the moment you put the bread in. Slam the oven door fast — you’re trapping steam to mimic the Dutch oven effect.
3. Soft Whole Wheat Bread
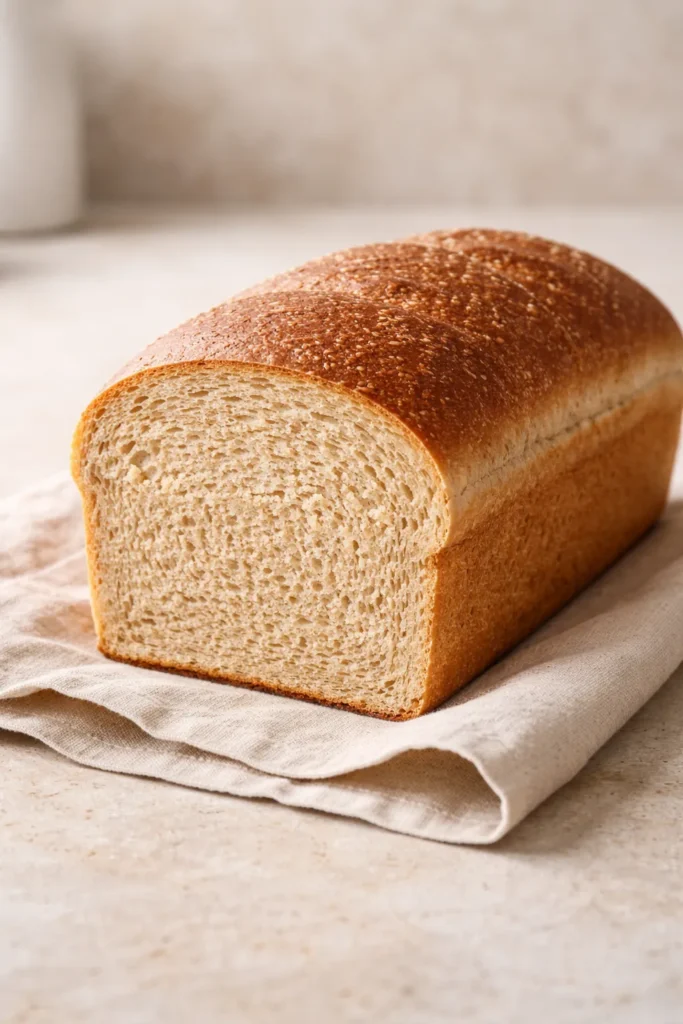
Whole wheat bread has a reputation for being dense, dry, and vaguely virtuous — the kind of loaf you eat because you feel you should, not because you want to. This recipe completely dismantles that reputation. By using a blend of whole wheat and bread flour, plus an enriched dough with honey and butter, the result is a tender, moist loaf with real depth of flavor that makes outstanding toast and sandwiches.
The ratio matters here. A 50/50 blend of whole wheat to bread flour gives you the nutty flavor and nutritional benefits of whole grain without sacrificing the soft, chewy structure that makes bread worth eating.
Ingredients
Yield: 1 large loaf | Prep Time: 20 minutes | Rise Time: 2 hours | Bake Time: 35 minutes | Total Time: 2 hours 55 minutes | Difficulty: Beginner to Intermediate — a few more steps than white bread, but very manageable.
- 1½ cups warm water (105 to 110°F)
- 2¼ teaspoons active dry yeast (1 standard packet)
- 3 tablespoons honey
- 1½ cups whole wheat flour
- 1½ cups bread flour, plus more as needed
- 1½ teaspoons fine salt
- 2 tablespoons unsalted butter, melted and cooled slightly
- 1 tablespoon neutral oil, for the bowl
Step-by-Step Instructions
- Combine the warm water, yeast, and 1 tablespoon of the honey in a large bowl. Let stand for 5 to 8 minutes until foamy.
- Add the remaining honey, both flours, salt, and melted butter. Mix with a dough hook on medium-low speed (or stir vigorously by hand) until a shaggy dough forms. If the dough feels very stiff, add water 1 tablespoon at a time.
- Knead on medium speed for 8 minutes (or 10 minutes by hand), until the dough is smooth, slightly tacky, and springs back slowly when pressed. Whole wheat dough will feel slightly denser than all-white dough — that’s normal.
- Place in a lightly oiled bowl, cover, and let rise until doubled, about 1 hour to 1 hour 15 minutes.
- Punch down the dough and turn it out onto a lightly floured surface. Flatten into a rough rectangle about 8 inches wide.
- Roll the rectangle up tightly from one short end, pinch the seam closed, and tuck in the ends. Place seam-side down in a greased 9×5-inch loaf pan.
- Cover loosely and let rise for 45 to 60 minutes, until the dough crests 1 inch above the pan’s edge.
- Preheat the oven to 375°F (190°C). Bake for 33 to 37 minutes, until the crust is deep brown and the loaf sounds hollow when tapped on the bottom. Internal temperature should reach 195°F (90°C).
- Cool on a wire rack for at least 30 minutes before slicing. Brush with butter immediately out of the oven for a soft crust.
Tips for This Loaf
Because whole wheat flour absorbs liquid more slowly than white flour, the dough may seem too wet for the first 2 to 3 minutes of kneading. Give it time before adding more flour — it will come together. Adding too much flour early is what causes dense, dry whole wheat bread.
4. Cinnamon Swirl Bread
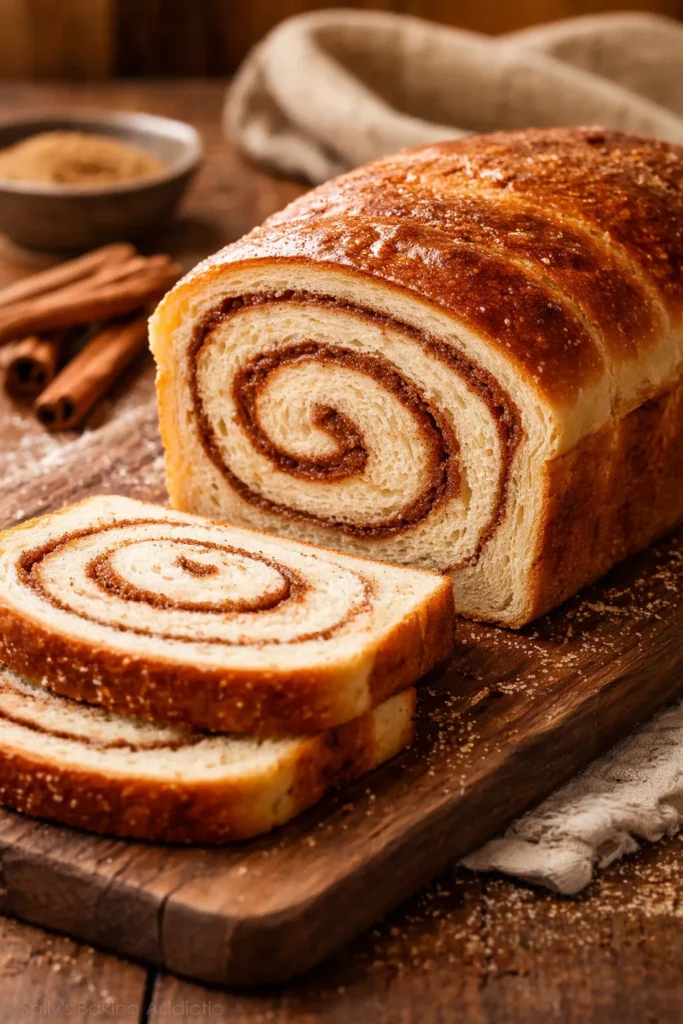
This one sits somewhere between bread and dessert, and there’s absolutely nothing wrong with that. A soft, enriched white bread dough is rolled around a generous cinnamon-sugar filling, creating those beautiful swirled slices that make breakfast feel like a celebration. It toasts with caramelized, slightly sticky edges that are worth getting up early for.
The technique that prevents the filling from separating from the dough — that frustrating gap you sometimes see in commercial versions — is pressing the filling firmly before rolling and pinching the seam very tightly.
Ingredients
Yield: 1 large loaf | Prep Time: 25 minutes | Rise Time: 2 to 2 hours 30 minutes | Bake Time: 35 minutes | Total Time: 3 hours | Difficulty: Beginner — the swirl looks impressive but the technique is straightforward.
For the Dough:
- 1 cup warm whole milk (110°F)
- 2¼ teaspoons active dry yeast
- 3 tablespoons granulated sugar
- 1 large egg, room temperature
- 3 tablespoons unsalted butter, melted
- 1 teaspoon fine salt
- 2¾ to 3 cups all-purpose flour
For the Cinnamon Filling:
- ¼ cup granulated sugar
- 2 teaspoons ground cinnamon
- 1 tablespoon unsalted butter, very soft
Step-by-Step Instructions
Make the Dough:
- Combine the warm milk, yeast, and 1 teaspoon of the sugar in a large bowl. Let stand 5 to 8 minutes until foamy.
- Add the remaining sugar, egg, melted butter, salt, and 2½ cups flour. Mix until a shaggy dough forms, then knead for 6 to 8 minutes, adding flour ¼ cup at a time until the dough is soft, smooth, and slightly sticky.
- Transfer to an oiled bowl, cover, and let rise until doubled, about 1 hour to 1 hour 15 minutes.
Shape the Swirl:
- Combine the cinnamon and sugar for the filling in a small bowl.
- Punch down the dough and roll it out on a lightly floured surface into a rectangle approximately 8 inches by 14 inches.
- Spread the softened butter evenly over the surface of the dough, leaving a ½-inch border along one long edge.
- Sprinkle the cinnamon sugar mixture evenly over the butter. Press it in firmly with your palms — this step prevents the filling from sliding out during baking.
- Starting from the long edge opposite the plain border, roll the dough up tightly into a log. Pinch the seam firmly closed with your fingers and pinch the ends to seal.
- Place seam-side down in a greased 9×5-inch loaf pan. Cover and let rise for 45 to 60 minutes.
Bake:
- Preheat oven to 350°F (175°C). Bake for 33 to 38 minutes until deep golden brown. If the top is browning too quickly, tent loosely with foil after 25 minutes.
- Cool in the pan for 10 minutes, then transfer to a wire rack. Slice when barely warm for the cleanest swirl.
5. Fluffy Dinner Rolls

Dinner rolls are the unsung heroes of the bread world. They’re quick enough to make on a weeknight, impressive enough to serve at a holiday table, and soft enough that people will reach for three before the soup even arrives. These pull-apart rolls have a pillowy, feather-light interior and a thin golden crust that tears away beautifully.
The enriched dough — made with butter, egg, and warm milk — is what gives dinner rolls their characteristic softness. This is a rich dough, and fat is your friend here.
Ingredients
Yield: 12 rolls | Prep Time: 20 minutes | Rise Time: 1 hour 45 minutes | Bake Time: 18 to 20 minutes | Total Time: 2 hours 25 minutes | Difficulty: Beginner — one of the fastest yeast bread recipes here.
- ¾ cup warm whole milk (110°F)
- ¼ cup warm water (110°F)
- 2¼ teaspoons active dry or instant yeast
- 2 tablespoons granulated sugar
- 1 large egg, room temperature
- 3 tablespoons unsalted butter, melted, plus more for brushing
- 1 teaspoon fine salt
- 2¾ to 3¼ cups all-purpose flour
Step-by-Step Instructions
- Combine the warm milk, warm water, yeast, and a pinch of sugar in a large bowl. Let stand for 5 minutes until foamy.
- Add the remaining sugar, egg, melted butter, salt, and 2½ cups flour. Mix until a soft dough comes together.
- Add flour ¼ cup at a time until the dough pulls away from the bowl but still feels very soft and slightly sticky — this dough should be softer than sandwich bread dough. Err on the side of too soft rather than too stiff for the fluffiest rolls.
- Knead for 5 to 6 minutes until smooth and elastic.
- Place in an oiled bowl, cover, and let rise until doubled, about 1 hour.
- Punch down the dough and divide into 12 equal pieces (about 65g each if you’re weighing).
- Roll each piece between your palm and the work surface into a tight, smooth ball by cupping your hand and using a circular motion — this surface tension is what gives rolls their shape and height.
- Arrange in a single layer in a greased 9×13-inch baking dish. The rolls should be close but not quite touching.
- Cover and let rise for 30 to 45 minutes until puffy and touching their neighbors.
- Preheat oven to 375°F (190°C). Bake for 18 to 20 minutes until golden on top.
- Brush immediately with melted butter the moment they come out of the oven. Serve warm directly from the pan.
Tips for This Recipe
For the softest possible rolls, don’t overbake them. Pull them when the tops are light gold, not dark brown — they’ll continue to cook from residual heat for a few minutes after you remove them from the oven. A pale roll is a soft roll; a dark roll is a tough roll.
6. Honey Oat Bread
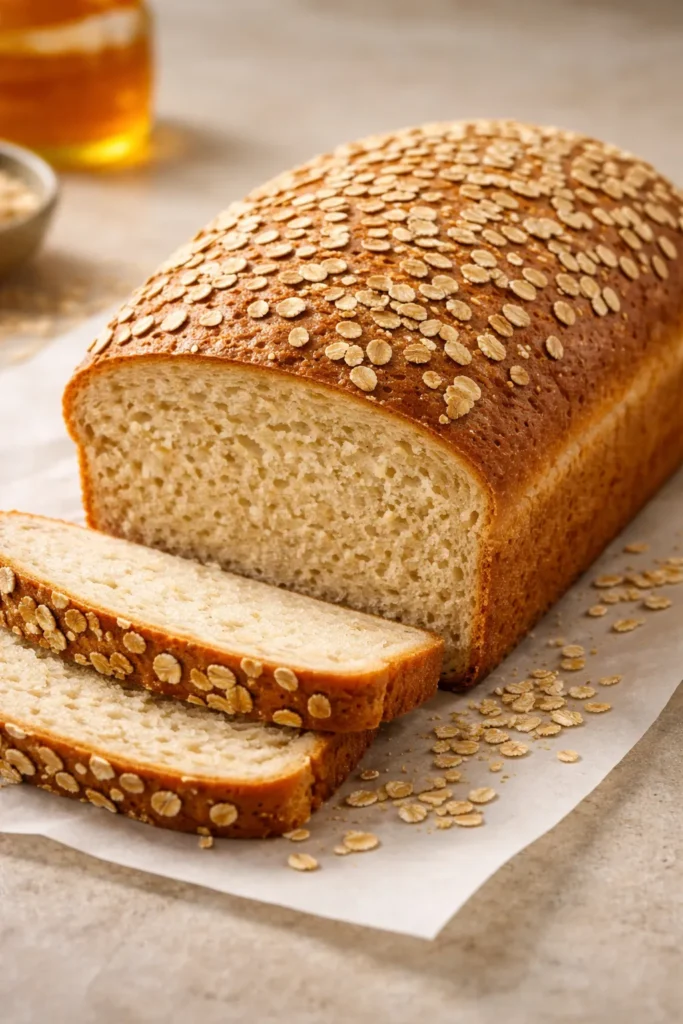
This is a bread for people who want something a step beyond plain white but aren’t ready to commit fully to whole wheat. Rolled oats give the crumb a slightly chewy, hearty texture, while honey adds a gentle sweetness that pairs beautifully with butter, cheese, or a smear of apple butter. It makes exceptional toast.
The oats are soaked briefly in boiling water before being incorporated into the dough — this step softens them so they don’t create sharp edges that cut through gluten strands, which would result in a weaker, denser loaf.
Ingredients
Yield: 1 large loaf | Prep Time: 25 minutes | Rise Time: 2 hours | Bake Time: 35 minutes | Total Time: 3 hours | Difficulty: Beginner to Intermediate.
- 1 cup boiling water
- ½ cup old-fashioned rolled oats, plus extra for topping
- 2 tablespoons unsalted butter
- ¼ cup honey
- 1½ teaspoons fine salt
- ½ cup warm water (110°F)
- 2¼ teaspoons active dry yeast
- 2½ to 3 cups bread flour
Step-by-Step Instructions
- Pour the boiling water over the oats and butter in a large bowl. Stir in the honey and salt. Let the mixture cool to lukewarm, about 20 to 25 minutes. Do not rush this step — adding yeast to hot water will kill it.
- Once the oat mixture has cooled, combine the warm water and yeast in a small bowl. Let stand for 5 minutes until foamy, then stir into the oat mixture.
- Add 2 cups of bread flour and stir until a shaggy dough forms. Continue adding flour ¼ cup at a time until the dough comes together into a soft, slightly sticky mass.
- Knead for 8 to 10 minutes by hand on a lightly floured surface, or 6 minutes with a stand mixer. The dough won’t be as smooth as an all-white dough due to the oat texture — that’s fine.
- Place in an oiled bowl, cover, and let rise until doubled, about 1 hour to 1 hour 15 minutes.
- Punch down and shape into a log. Place in a greased 9×5-inch loaf pan.
- Brush the top with a little water or beaten egg, then scatter a handful of dry oats over the surface and press very gently so they adhere.
- Cover and let rise for 45 minutes to 1 hour.
- Preheat oven to 375°F (190°C). Bake for 33 to 38 minutes until golden brown and hollow-sounding when tapped. Internal temperature should reach 195°F (90°C).
- Cool on a wire rack for at least 20 minutes before slicing.
7. Rosemary Garlic Focaccia

Focaccia is bread for people who want maximum flavor with minimal fuss. The dough is wetter and slacker than standard bread dough, olive oil is involved at nearly every stage, and the characteristic dimples pressed into the surface trap pools of herb-infused oil that bake into crisp, golden pockets of pure pleasure.
This version uses fresh rosemary and thinly sliced garlic pressed into the surface before baking. The garlic caramelizes in the oven and loses its sharpness entirely, becoming sweet and nutty — completely different from raw garlic, and absolutely addictive.
Ingredients
Yield: One 9×13-inch pan (serves 8 to 10) | Prep Time: 20 minutes | Rise Time: 1 hour 45 minutes to overnight | Bake Time: 22 to 25 minutes | Total Time: 2 hours 30 minutes (or longer for overnight cold rise) | Difficulty: Beginner — forgiving dough, no shaping skills needed.
- 2¼ teaspoons instant yeast
- 1½ cups warm water (110°F)
- 2 teaspoons honey
- 3 cups bread flour
- 1½ teaspoons fine salt
- 6 tablespoons good-quality extra-virgin olive oil, divided
- 3 to 4 garlic cloves, thinly sliced
- 2 tablespoons fresh rosemary leaves, roughly chopped
- ½ teaspoon flaky sea salt, for finishing
Step-by-Step Instructions
- Combine the warm water, yeast, and honey in a large bowl. Stir and let stand 5 minutes until foamy.
- Add the flour, fine salt, and 2 tablespoons of the olive oil. Mix until a sticky, shaggy dough comes together. This is a wetter dough than most — do not add more flour.
- Cover and let rise at room temperature for 1 hour, until roughly doubled and full of bubbles.
- Pour 2 tablespoons of olive oil into a 9×13-inch baking pan, coating the bottom and sides generously. Transfer the dough to the pan and turn it to coat in the oil.
- Using your fingertips, gently stretch the dough toward the corners and edges of the pan. It will resist and spring back — that’s fine. Let it rest for 10 minutes, then stretch again. Repeat until the dough reaches the corners of the pan.
- Cover and let rest for 30 to 45 minutes, until noticeably puffy.
- Preheat oven to 450°F (230°C).
- Drizzle the remaining 2 tablespoons of olive oil over the surface. With oiled fingertips, press deep dimples all over the dough — press firmly enough that the dimples don’t fill back in completely.
- Scatter the sliced garlic and chopped rosemary across the surface, pressing them gently into the dimples. Sprinkle with flaky sea salt.
- Bake for 22 to 25 minutes until the surface is deep golden and the bottom is crisp — lift a corner with a spatula to check.
- Transfer to a wire rack and cool for at least 10 minutes before cutting. Drizzle with a little extra olive oil just before serving if you like.
Tips for This Recipe
The quality of your olive oil makes a measurable difference in focaccia because it’s used in such quantity. A grassy, peppery extra-virgin oil transforms this from good to genuinely memorable. This is not the place for the bottle that’s been sitting in your cabinet for two years.
For an even more complex flavor, let the dough complete its first rise in the refrigerator overnight. The following day, proceed from step 4. The focaccia will be more flavorful, slightly chewier, and have a beautifully layered, almost sourdough-adjacent taste.
8. Soft Brioche Bread
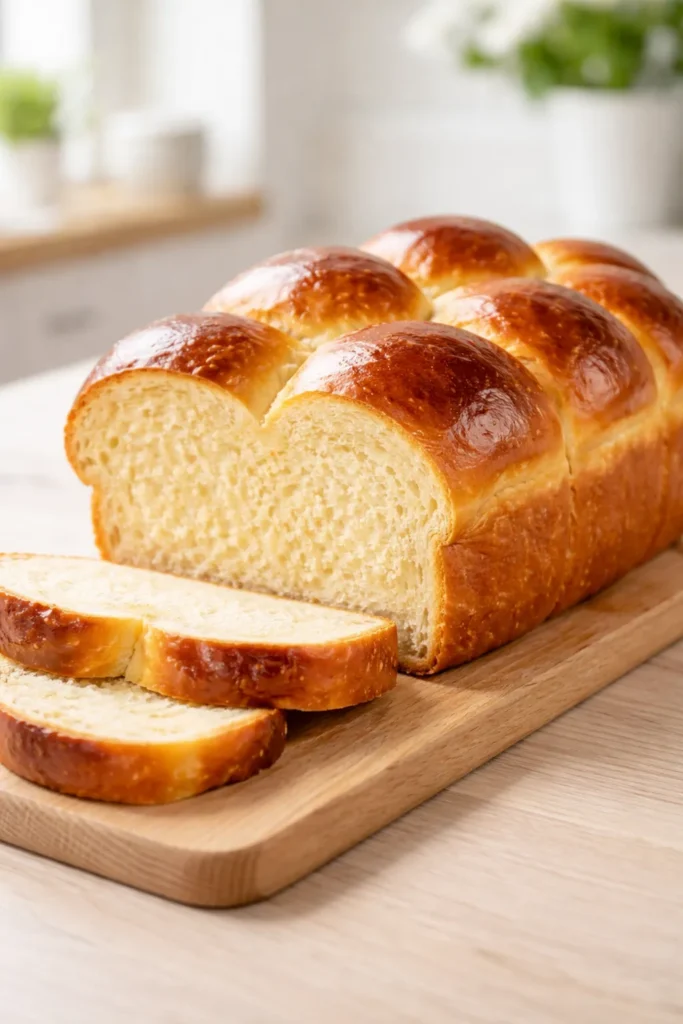
Brioche is French enriched bread at its most indulgent — loaded with eggs and butter, with a crumb so tender it barely registers any chew at all. It’s golden throughout, slightly sweet, and rich in a way that puts it closer to a fine pastry than a workhorse sandwich loaf. Slice it thick for French toast and you’ll understand immediately why this bread has inspired such devotion for centuries.
The challenge with brioche is the butter incorporation. It must be added slowly, at room temperature, allowing the dough to fully absorb each addition before you add more. It’s a test of patience, but the result is a silky, glossy dough unlike any other.
Ingredients
Yield: 1 standard loaf or 12 individual buns | Prep Time: 30 minutes | Chill Time: 4 hours or overnight (mandatory) | Bake Time: 30 to 35 minutes | Total Time: 5 to 12 hours (mostly chilling) | Difficulty: Intermediate — the butter incorporation technique takes attention, but it’s very learnable.
- ¼ cup warm whole milk (110°F)
- 2¼ teaspoons active dry yeast
- 2 tablespoons granulated sugar, divided
- 3 large eggs, room temperature
- 2 cups all-purpose flour, plus more as needed
- ½ teaspoon fine salt
- ½ cup (1 stick / 113g) unsalted butter, cut into ½-inch cubes, at room temperature
For the egg wash:
- 1 egg yolk
- 1 tablespoon whole milk
Step-by-Step Instructions
Make the Dough:
- Combine the warm milk, yeast, and 1 teaspoon of the sugar. Let stand 5 to 8 minutes until foamy.
- In the bowl of a stand mixer fitted with the dough hook, combine the yeast mixture, eggs, remaining sugar, flour, and salt. Mix on medium speed for 5 minutes until a smooth, cohesive dough forms.
Incorporate the Butter:
- With the mixer running on medium-low speed, add the butter cubes one or two at a time, allowing each addition to be fully absorbed before adding more. This process takes 10 to 15 minutes — do not rush it. The dough will look rough and chunky as you add butter, then suddenly come back together smooth and glossy. That transformation is your cue that it’s working.
- Once all the butter is incorporated, increase the mixer to medium speed and knead for 5 more minutes until the dough is very smooth, shiny, and pulls away from the sides of the bowl cleanly. It will still feel very soft and slightly sticky — that’s correct.
Chill the Dough:
- Cover the bowl tightly and refrigerate for at least 4 hours or overnight. The cold firms up the butter and makes the soft dough manageable to shape. Do not skip this step — the dough is too soft to shape at room temperature.
Shape and Final Rise:
- Remove the chilled dough from the refrigerator. Turn it out onto a lightly floured surface. Divide into 3 equal portions and shape each into a smooth ball.
- Place the three balls side by side in a greased 9×5-inch loaf pan. Cover loosely and let rise at room temperature for 2 to 3 hours until very puffy and roughly doubled. Cold dough takes longer to rise — be patient.
Egg Wash and Bake:
- Preheat the oven to 350°F (175°C). Whisk together the egg yolk and milk for the egg wash.
- Brush the surface of the risen dough gently with the egg wash — this gives brioche its signature deep amber, lacquered crust.
- Bake for 30 to 35 minutes until the top is a rich golden brown and the internal temperature reaches 190°F (88°C). If the top browns too quickly, tent loosely with foil after 20 minutes.
- Cool in the pan for 10 minutes, then transfer to a wire rack. Allow to cool for at least 30 minutes before slicing — brioche slices most cleanly when it has fully cooled.
Tips for This Loaf
Brioche French toast is arguably the best use for day-old slices. Cut them 1 inch thick, soak in a custard of eggs, milk, vanilla, and a pinch of cinnamon for 30 seconds per side, and cook in foaming butter over medium heat until caramelized and golden. Day-old brioche absorbs the custard without falling apart in the way fresh bread tends to.
Store any leftover loaf wrapped tightly at room temperature for up to 3 days, or freeze individual slices between sheets of parchment paper for up to 2 months.
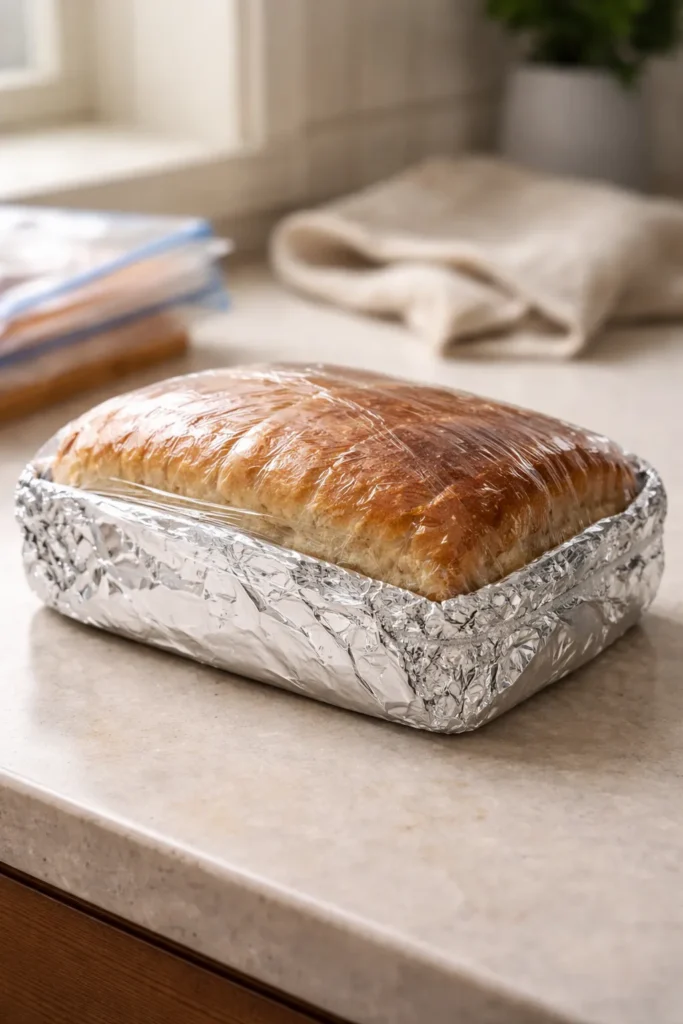
Storing and Freezing Homemade Bread
No matter which recipe you bake from this list, storage is worth thinking through carefully. Homemade bread — with no added preservatives — behaves differently from commercial loaves, and knowing how to store it properly means you’ll never waste a slice.
At room temperature, most homemade loaves stay fresh for 2 to 3 days when stored in an airtight bag or container. After that, the bread is still perfectly good for toast, croutons, French toast, or bread pudding — it just won’t be at its best for eating fresh.
Avoid the refrigerator for storage if you plan to eat the bread within a few days. Cold air actually accelerates staling in bread, drawing moisture from the crumb and leaving it dry and mealy. The fridge is the worst place for a fresh loaf unless you’ve already cut into an enriched bread like brioche, which benefits from the cooler temperature.
Freezing is where homemade bread truly shines. Every recipe here freezes with excellent results. Allow the loaf to cool completely — this is non-negotiable, as freezing a warm loaf traps steam that becomes ice crystals and ruins the texture — then wrap tightly in plastic wrap followed by a layer of aluminum foil. Frozen bread keeps well for up to 3 months. Thaw at room temperature on the counter for 2 to 3 hours, or reheat slices directly from frozen in a 350°F oven for 8 to 10 minutes.
You can also freeze most of these doughs before baking — after shaping but before the final rise. Wrap the shaped loaves tightly, freeze until solid, then thaw overnight in the refrigerator before allowing them to complete their final rise and baking as directed.
Common Mistakes That Lead to Dense Bread

Even experienced bakers run into dense loaves occasionally, and the causes are almost always the same. Understanding them means you can troubleshoot before it happens rather than after.
Dead or old yeast is the leading cause of bread that won’t rise. Yeast has a shelf life, and even sealed packets lose potency over time, especially if stored in a warm pantry. Keep yeast in the refrigerator and always proof it in warm water before using — if it doesn’t foam within 10 minutes, replace it.
Water that’s too hot kills yeast on contact. Anything above 120°F (49°C) will damage yeast cells; above 140°F (60°C) will eliminate them entirely. Aim for water that feels pleasantly warm on your wrist — not hot, not cold. A kitchen thermometer eliminates the guesswork.
Too much flour is arguably the most common beginner error. It’s instinctive to keep adding flour until the dough stops sticking to your hands, but this produces a stiff, tight dough that doesn’t rise properly and bakes into a dry, dense crumb. All of these recipes produce doughs that should feel slightly tacky — trust the recipe, not your instinct to add more flour.
Under-proofing — not allowing the dough to rise long enough — results in a tight crumb and a loaf that’s dense throughout. The dough must genuinely double in size during the first rise. Use a photo taken at the start as a reference point, or mark the side of your bowl with tape.
Key Takeaways
Every bread recipe on this list comes back to the same principles: fresh yeast, proper water temperature, dough that’s soft rather than stiff, and enough patience to let the rises complete fully. Get those four elements right and you’ll have a genuinely difficult time making a bad loaf.
Start with the classic white sandwich bread if you want a straightforward, forgiving introduction to yeast baking. Move to the no-knead artisan bread if you want dramatic results with almost no hands-on effort. Work your way to the brioche when you’re ready to spend a little more time for something truly special.
What makes homemade bread worth the effort isn’t just the flavor — though that’s reason enough. It’s the knowledge of exactly what went into it, the satisfaction of a skill practiced and developed, and the fact that a warm loaf of bread, sliced and buttered, is one of the most generous things you can set on a table for the people you cook for.