Baking a cake from scratch is one thing. Making it look good is an entirely different challenge — and if you’ve ever stared at a freshly frosted cake that somehow ended up looking like a lumpy beige helmet, you’re not alone.
The gap between a cake that tastes incredible and a cake that looks incredible used to feel enormous. Professional decorators spend years mastering piping techniques, sugar sculpting, and fondant work that can leave beginners feeling completely shut out. But here’s what nobody tells you when you’re starting out: the most impressive-looking cakes aren’t always the most technically demanding. Knowing which techniques give you the biggest visual payoff for the least amount of effort is the real skill — and that’s something you can absolutely learn.
The 8 ideas below are specifically chosen because they work even when your frosting isn’t perfectly smooth, your layers aren’t completely level, and your piping bag has never left its packaging. Each one uses tools and ingredients you can find at any grocery store, and every single one can transform a basic frosted cake into something you’d be proud to set on a table.
Table of Contents
- Essential Tools You Actually Need Before You Start
- The Gear That Separates Okay Results From Great Ones
- Why Frosting Choice Matters More Than You Think
- 1. The Sprinkle Press Technique
- Choosing the Right Sprinkles for the Look You Want
- Getting Full Coverage Without Bare Spots
- 2. The Fresh Fruit Arrangement
- Making Fruit Look Glossy and Professional
- Safety and Timing Rules for Fresh Fruit
- 3. The Kit Kat Wrap
- Filling the Top With Something Showstopping
- Variations That Go Beyond the Classic
- 4. Rustic Buttercream Textures With a Spoon or Spatula
- Three Textures You Can Create Without Any Special Tools
- Why Imperfection Actually Works in Your Favor
- 5. The Chocolate Ganache Drip
- The Chill-First Rule That Beginners Always Skip
- Applying the Drip Without Making a Mess
- 6. Candy and Cookie Toppings
- Building Height for Visual Drama
- Cookies as Cake Decoration
- 7. Powdered Sugar and Stencil Dusting
- Using Stencils for a Bakery-Quality Finish
- Beyond Bundt Cakes: Where This Technique Shines
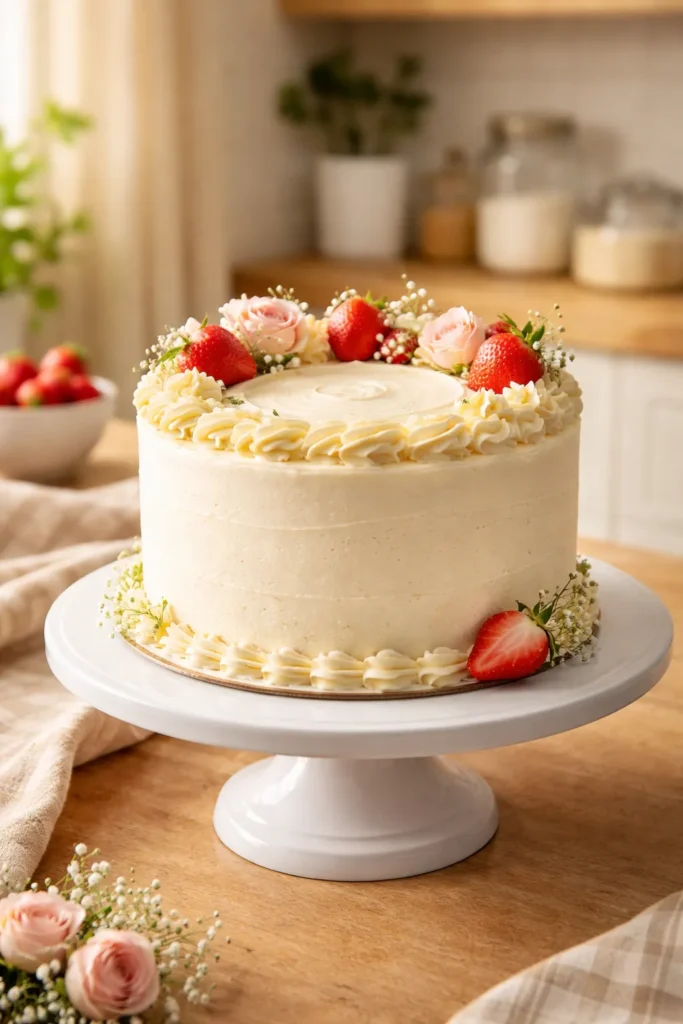
- 8. Fresh Flowers on Cake
- Flowers That Are Commonly Safe to Use
- Attaching Flowers Without Them Touching the Cake Directly
- Building a Flower Arrangement on Top of a Cake
- The Crumb Coat: The Step That Makes Every Technique Work Better
- How to Apply a Crumb Coat Correctly
- Why Chilling Between Coats Is Non-Negotiable
- Final Thoughts
Essential Tools You Actually Need Before You Start
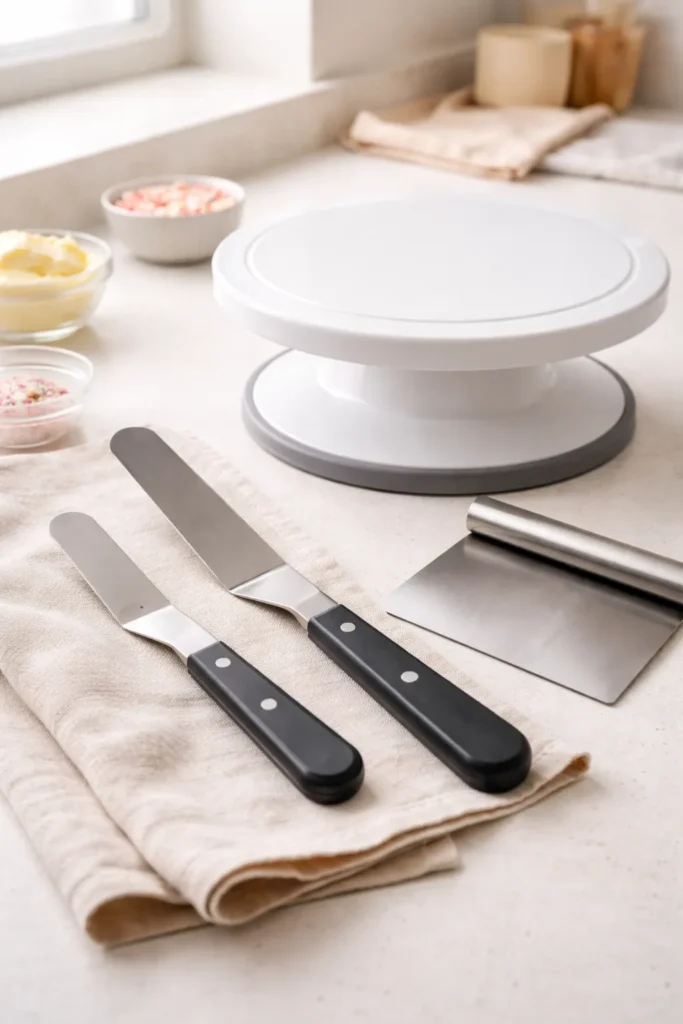
Before touching any decorating idea on this list, a handful of tools will make everything significantly easier. You don’t need a professional kit — but skipping these basics is why so many beginner cakes end up looking messier than they should.
An offset spatula is the single most useful tool you can own. Unlike a straight butter knife, the angled blade lets you spread frosting smoothly without dragging your knuckles through the wet icing. A small offset spatula (around 4 inches) handles detail work, while a larger one (around 9 inches) covers sides and tops with fewer strokes.
A turntable — or even a simple lazy Susan from a kitchen cabinet — changes everything. Being able to rotate your cake while you work means you can apply frosting and decorations in one smooth, continuous motion instead of awkwardly walking around the table and losing your angle.
The Gear That Separates Okay Results From Great Ones
A bench scraper gives you clean, flat sides on a frosted cake. Hold it against the side of the rotating cake at a 90-degree angle and the excess buttercream comes right off in one clean pass. Pair this with a piping bag (or even a large zip-lock bag with one corner cut off) and you have everything you need for most of the techniques on this list.
One thing worth mentioning before you start: always let your cake cool completely before frosting or decorating — ideally at least 2 hours at room temperature, or 30 minutes in the fridge after that. Warm cake causes frosting to slide, melt, and absorb into the crumb, making everything ten times harder than it needs to be.
Why Frosting Choice Matters More Than You Think
Stiff American buttercream (made with butter and powdered sugar) is the most forgiving frosting for beginners. It holds its shape, doesn’t slide, and can be chilled when things start getting messy. Swiss meringue buttercream is silkier but more temperature-sensitive. Whipped cream works beautifully for fruit-topped cakes but needs to stay cold. For most of the decorating ideas below, a standard American buttercream is your best starting point.
1. The Sprinkle Press Technique
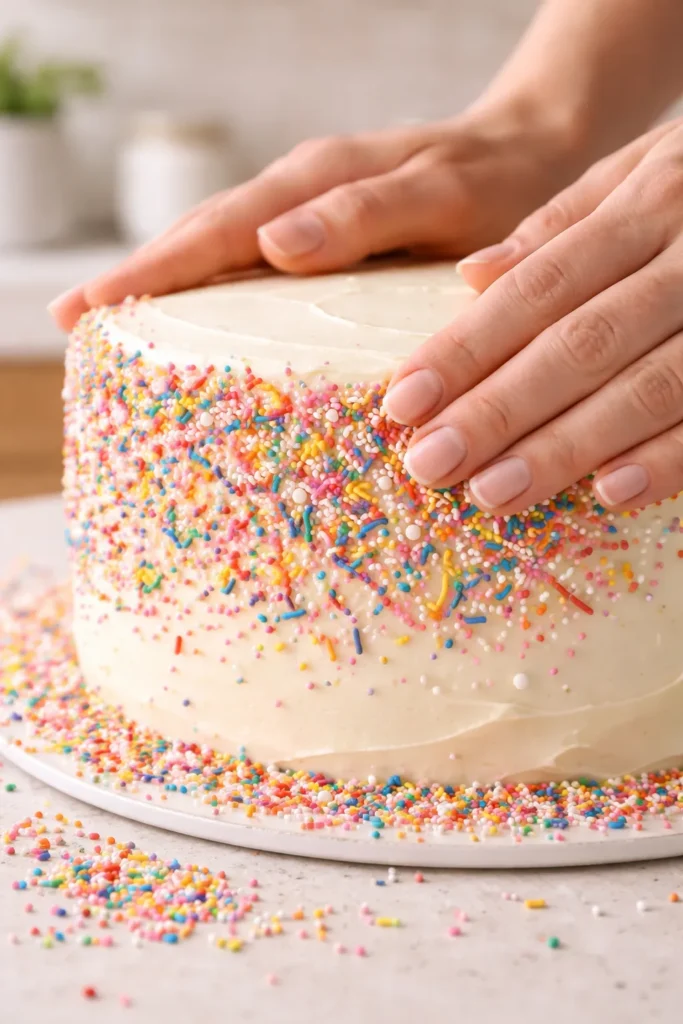
Sprinkles are the easiest decoration in existence, but there’s a right way and a wrong way to use them. Shaking them haphazardly over a cake from above gives you a patchy, uneven result. Pressing them directly into the sides of the cake — while the frosting is still slightly tacky — gives you a fully coated, bakery-quality finish that covers every imperfection underneath.
Apply a rough crumb coat of buttercream first (more on that later), chill the cake for 15-20 minutes, then add a second thin layer of frosting. While the outer coat is still soft, cup a handful of sprinkles in your clean, dry hand and press them gently against the bottom third of the cake, working your way up in sections. Let the excess fall onto a baking sheet underneath — you can scoop those up and reuse them.
Choosing the Right Sprinkles for the Look You Want
Jimmies (the long, soft, rod-shaped sprinkles) press into frosting most easily and give a classic, festive look. Nonpareils (the tiny round balls) create a more delicate, almost sparkly effect. Sanding sugar gives a glittery shimmer that reads as elegant rather than childish — great for adult birthday cakes or shower cakes. Sequin sprinkles (flat, disc-shaped) reflect light beautifully and pair well with a monochromatic cake design.
Getting Full Coverage Without Bare Spots
The trick to even coverage is working in sections rather than trying to coat the whole cake at once. After pressing sprinkles onto the lower third, rotate the cake and repeat. Once the sides are covered, gently press a handful across the top, nudging them toward any thin spots with your fingertip.
Once you’re done, press a sheet of parchment paper lightly against the entire cake surface and rub gently — this pushes any loose sprinkles firmly into the frosting and creates a smooth, polished finish. Chill the cake for at least 20 minutes before moving or cutting. The end result looks like you spent hours on it.
Pro tip: Mix two or three sprinkle types together before you start. A blend of white jimmies, silver nonpareils, and a few holographic sequins looks coordinated and professional without any extra effort.
2. The Fresh Fruit Arrangement
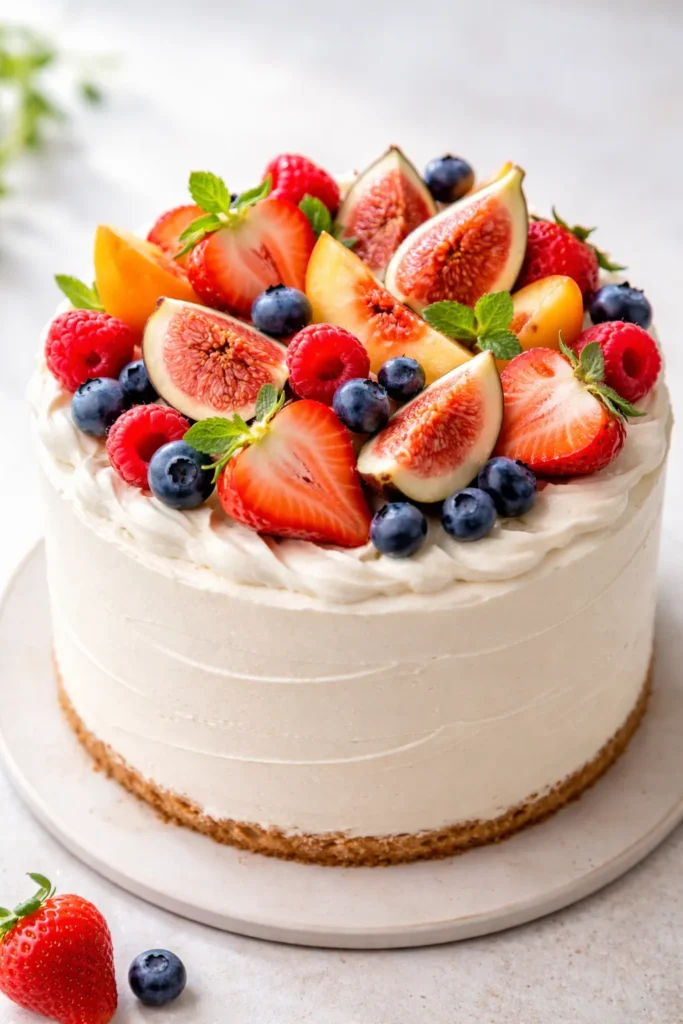
Fresh fruit might be the most underestimated cake decoration that exists. A generous pile of mixed berries on top of a frosted cake looks lush, colorful, and expensive — and it takes about four minutes to arrange.
The key is treating the fruit like a floral arrangement rather than just dumping it on top. Start with your largest fruit first — halved strawberries, sliced figs, or whole peaches cut into wedges — and place those in the spots where you want the most visual weight. Then fill in the gaps with smaller berries: blueberries, raspberries, blackberries, currants. The layering creates depth that a flat, single-fruit arrangement can’t achieve.
Making Fruit Look Glossy and Professional
One of the biggest differences between a homemade fruit cake and a patisserie-quality one is the gloss on the fruit. Brushing fruit lightly with warmed apricot jam (strained and thinned with a splash of water) or plain corn syrup gives each piece a beautiful, jewel-like shine that photographs dramatically well. Apply it with a small pastry brush right before serving.
If you want to go a step further, a light misting of edible gold or silver spray over the finished fruit arrangement adds shimmer that makes even the most casual cake look occasion-worthy.
Safety and Timing Rules for Fresh Fruit
Wash and completely dry all fruit before placing it on the cake. Even a small amount of moisture can make frosting weep and cause the fruit to bleed color into the white buttercream beneath it. Pat each piece dry with paper towels and let them air-dry on a clean kitchen towel for 10-15 minutes before arranging.
Fruit-decorated cakes should be assembled as close to serving time as possible — ideally no more than 2-3 hours in advance — because cut fruit releases moisture as it sits. If you need to prep ahead, store the frosted cake in the fridge and arrange the fruit topping an hour before guests arrive.
3. The Kit Kat Wrap
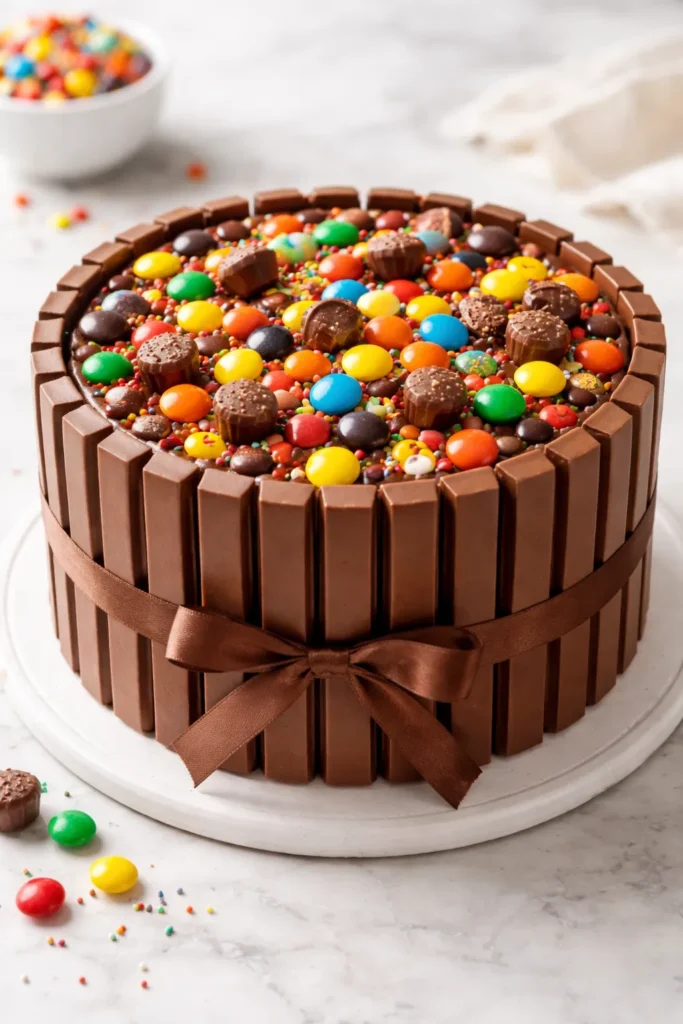
If there is one technique designed specifically for people who struggle with smooth frosting, it’s the Kit Kat wrap. The entire premise is brilliant: cover the sides of a roughly frosted cake in vertical Kit Kat bars, and suddenly none of the lumps, crumbs, or uneven patches underneath matter even slightly.
Apply a generous coat of buttercream to the sides and top of the cake — it doesn’t need to be smooth, just reasonably even. Then take full-size Kit Kat bars, break them into individual fingers, and press them vertically against the side of the cake one by one, working your way around. The frosting acts as glue. Once the perimeter is complete, tie a ribbon around the outside if you want a cleaner look (though it’s honestly impressive without it).
Filling the Top With Something Showstopping
The top of the Kit Kat cake is where the fun really starts. Because the sides are already handled, you can fill the center generously with mini M&Ms, Skittles, Maltesers, gummy bears, or any candy that suits the occasion. Pour them in until they’re level with the top of the bars. When guests see the reveal — chocolate walls with a colorful candy fill — it’s the kind of cake moment people take photos of.
Variations That Go Beyond the Classic
White chocolate Kit Kats wrapped around a vanilla cake with white and pastel sprinkles on top makes a beautiful baby shower or Easter version. Dark chocolate Kit Kats against a chocolate cake with a mountain of fresh raspberries on top feels sophisticated rather than playful. You can even use Pocky sticks instead of Kit Kats for a thinner, more elegant variation.
Worth knowing: One standard-size bag of Kit Kat minis or a combination of full-size bars usually covers a 6-inch round cake. For an 8-inch cake, plan on having a few extra bars on hand — running short halfway around is frustrating.
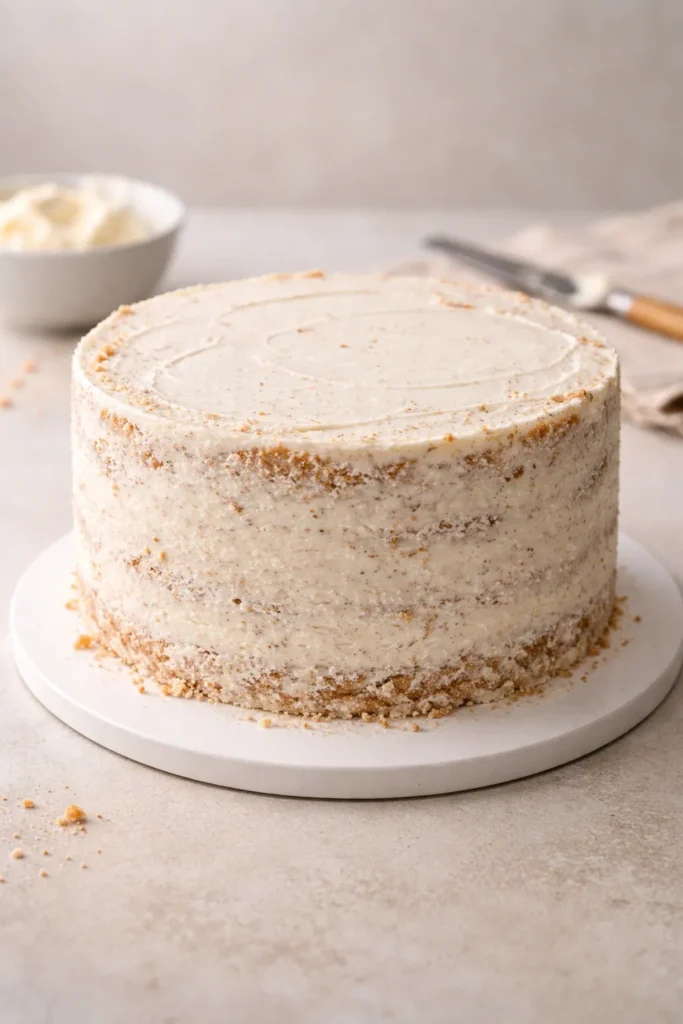
4. Rustic Buttercream Textures With a Spoon or Spatula
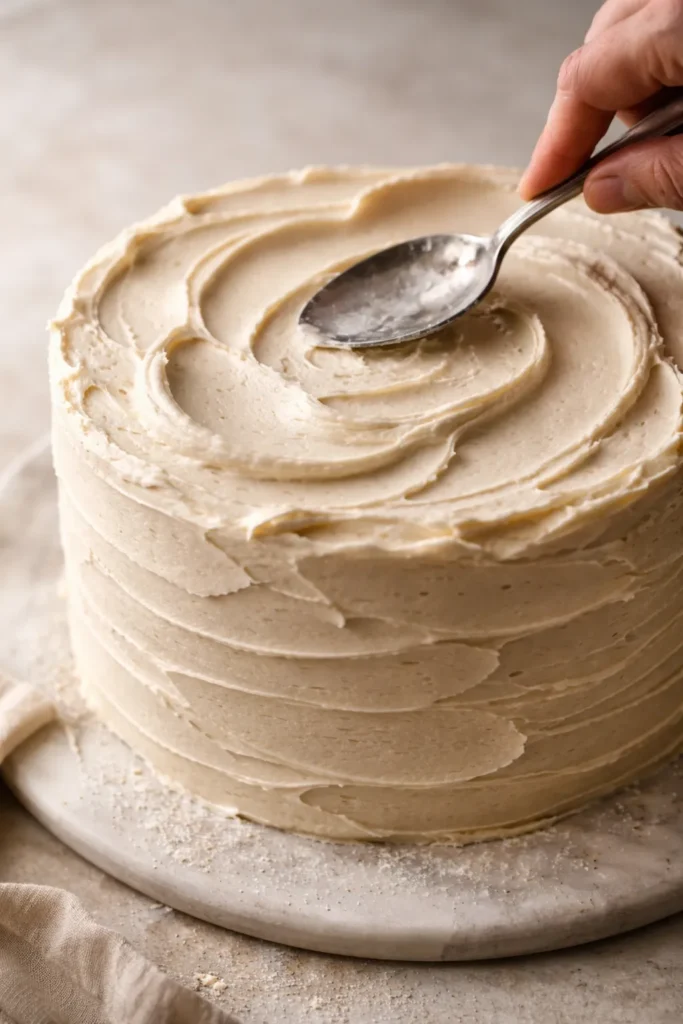
Smooth, sharp-edged buttercream takes practice. Rustic, textured buttercream takes none — and it’s arguably more charming. The offset spatula or even the back of a simple kitchen spoon becomes your tool for creating a finish that looks intentionally artful rather than accidentally messy.
Once your cake is frosted with a full coat of buttercream, use the back of a large spoon to create swooping, curved divots across the surface. Press the spoon lightly into the frosting, rotate it in a small arc, and lift. Repeat across the entire top and down the sides in overlapping motions. The result looks like the frosting was applied by hand with care — because it was.
Three Textures You Can Create Without Any Special Tools
The horizontal ridged look: Hold a fork (or the tines of a large comb) against the side of the cake as you rotate it on a turntable. The tines drag through the frosting and leave clean, evenly spaced horizontal lines that look graphic and intentional.
The rustic swoop: Use the back of a spoon in curved, sweeping motions across the top of the cake. No two swoops should be identical. This creates an organic, almost painterly surface that photographs beautifully.
The palette knife smear: Load a small amount of contrasting-colored buttercream onto the tip of your offset spatula and drag it in a single bold stroke across the white base frosting. Repeat with a few more strokes in varying directions. This creates a watercolor-style effect that requires zero artistic skill but looks like it does.
Why Imperfection Actually Works in Your Favor
The rustic texture style is genuinely more forgiving than any smooth-sided technique because variation is the point. Beginner bakers often spend enormous amounts of time trying to achieve flat, flawless sides — and feel defeated when they can’t. Choosing a textured approach turns the inevitable irregularity of hand-applied frosting into the actual design. Embrace it.
5. The Chocolate Ganache Drip
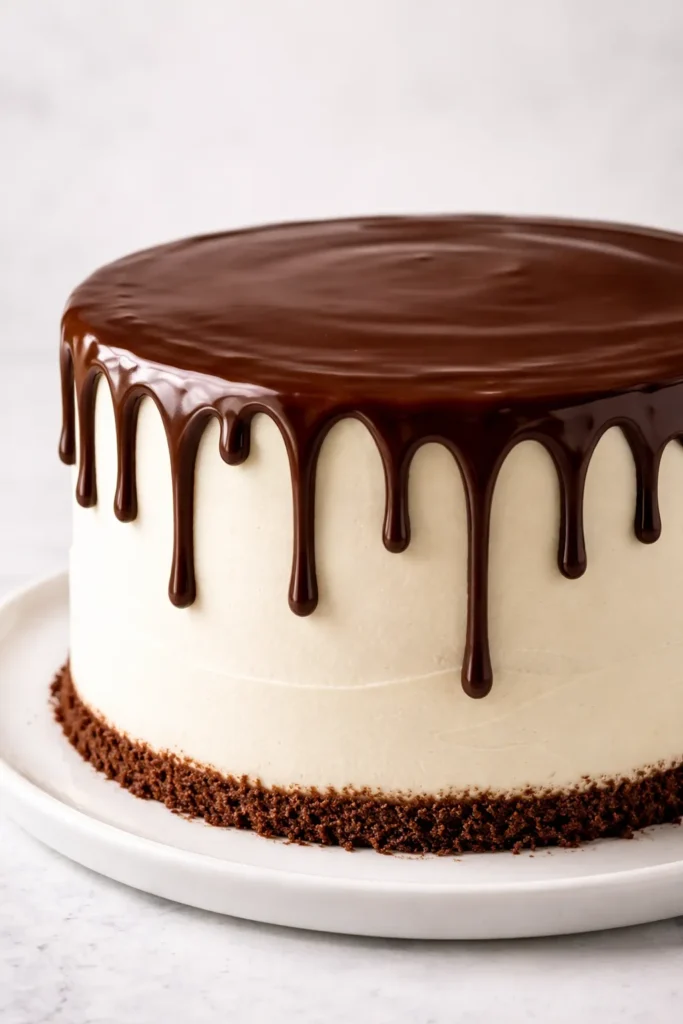
A ganache drip makes any cake look polished and professional, and the technique itself is far more accessible than it looks in photos. The entire effect comes down to controlling the temperature of the ganache and the temperature of the cake — get both right, and the drip practically does itself.
Basic chocolate ganache is just two ingredients: heavy cream and chocolate. Heat 120ml (½ cup) of heavy cream until it’s just beginning to simmer, then pour it over 120g (4oz) of finely chopped dark or semi-sweet chocolate. Let it sit for 2 minutes without stirring, then gently whisk from the center outward until smooth and glossy. Let it cool to roughly body temperature — around 90°F (32°C) — before applying. If it’s too warm, it runs all the way down and pools at the base. If it’s too cold, it sets immediately and looks thick and blobby.
The Chill-First Rule That Beginners Always Skip
Your cake must be cold before the drip goes on — not just room temperature, but genuinely chilled. Spend at least 30 minutes in the fridge after your final coat of frosting before you even think about the ganache. A cold cake sets the drip faster, giving you more control over how far each drip travels down the side.
Applying the Drip Without Making a Mess
Pour the cooled ganache into a squeeze bottle for the most control. Starting at the edge of the cake, squeeze a small amount and let gravity pull it over the side, then move around the perimeter, creating drips of varying lengths. Some should reach about halfway down the side, others a little shorter or longer — identical drips look mechanical and unnatural.
Once the perimeter drips are done, pour a small pool of ganache onto the center of the top and spread it outward with an offset spatula until it meets the drips on all sides. Let it set for 10-15 minutes before adding any toppings. A drip cake with a pile of fresh fruit, a ring of candy, or a few chocolate truffles on top is one of the most impressive-looking cakes a beginner can make.
6. Candy and Cookie Toppings
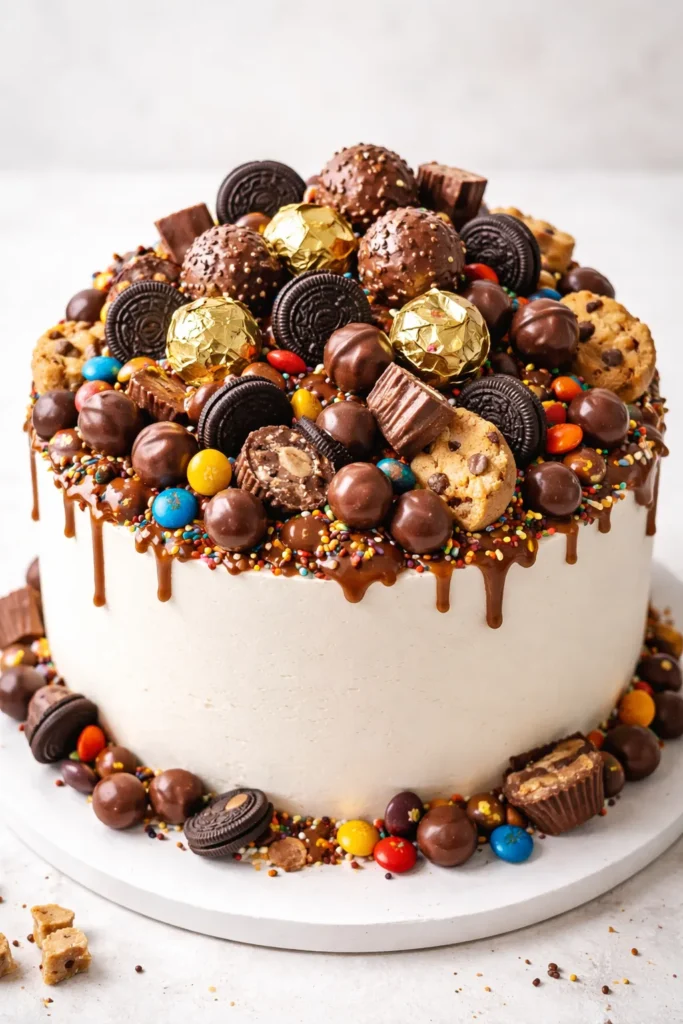
Loading the top of a cake with candy, cookies, or a combination of both is one of the fastest routes to a cake that looks wildly indulgent. The visual impact of a generously piled candy topping is immediate — it reads as celebratory, abundant, and fun without requiring any technical skill.
The secret to making a candy-topped cake look deliberate rather than thrown-together is abundance and grouping. A few scattered candies look sad. A densely packed mound of mixed candies looks intentional. Group similar candies together in clusters — a pile of Maltesers here, a few Ferrero Rocher there, a row of mini Oreos along one edge — rather than mixing everything randomly.
Building Height for Visual Drama
Flat candy arrangements disappear in photos and look underwhelming in person. Build upward by starting with larger pieces as your base layer and stacking smaller candies on top. A ring of full-size Oreos around the outer edge with a mountain of M&Ms in the center and a few chocolate-covered pretzels stacked vertically gives the arrangement height, texture, and variety.
If you’ve added a ganache drip to the sides, placing candy toppings while the drip is still slightly tacky means the candy adheres without sliding. The combination of chocolate drip sides and a loaded candy top is one of the most reliably crowd-pleasing cakes you can make.
Cookies as Cake Decoration
Cookies deserve their own mention here. Crushed Oreos pressed around the sides of a chocolate cake create a crumb coating that’s both a texture element and a decoration. Whole Oreos standing upright around the perimeter of the top look deliberate and polished. Graham cracker crumbs applied to the outside of a cream cheese-frosted cake create a warm, toasted look that suits autumn celebrations or s’mores-themed parties beautifully.
Pro tip: If you’re adding soft cookies or brownies to the top, the cake is best served within 24 hours of assembly. The moisture from the frosting softens the cookies over time, which affects both texture and appearance.
7. Powdered Sugar and Stencil Dusting
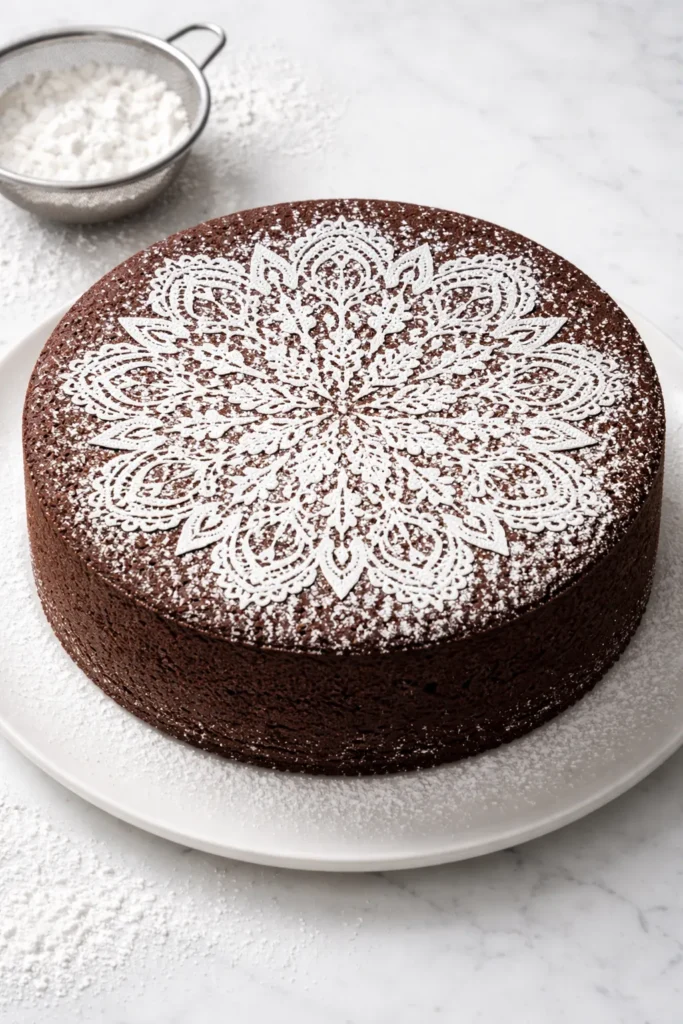
Powdered sugar dusting is one of the oldest cake finishing techniques around — and it’s stood the test of time for good reason. A light, even dusting of confectioners’ sugar over a dark chocolate cake or a bundt creates an instantly elegant finish that requires nothing more than a fine-mesh sieve and a light wrist.
The simplest version is a plain dusting: hold a fine-mesh strainer over the cooled cake, add 2-3 tablespoons of powdered sugar, and tap gently as you move the strainer across the surface. The key is keeping the sieve moving so you don’t create a thick white pile in one spot. A thin, even layer looks sophisticated; a clumpy uneven coat looks accidental.
Using Stencils for a Bakery-Quality Finish
Laying a paper doily or a stencil on top of the cake before dusting takes this technique from simple to genuinely impressive. Place the doily flat against the surface of the cake — don’t press hard, just rest it there — then dust generously over it. Carefully lift the doily straight up without shifting it sideways, and you’re left with a clean, lace-like pattern in powdered sugar.
The same approach works with cocoa powder dusted over a light-colored cake. You can even use both: dust powdered sugar over a stencil on a chocolate cake, then remove the stencil and lightly dust cocoa at the edges for contrast.
Beyond Bundt Cakes: Where This Technique Shines
Stencil dusting works on any flat or slightly domed surface — a single-layer round cake, a sheet cake, a pound cake. It also works with edible luster dust (a metallic powder available at cake supply stores) for a gold or silver shimmer effect that looks like serious bakery craft. Brush luster dust over the raised parts of a fondant-covered cake, or dust it over still-tacky frosting for a subtle metallic glow.
The one place this technique doesn’t work well: on top of fruit-decorated cakes or anything with a lot of surface moisture. The sugar dissolves quickly on wet surfaces, so apply it just before serving rather than in advance.
8. Fresh Flowers on Cake
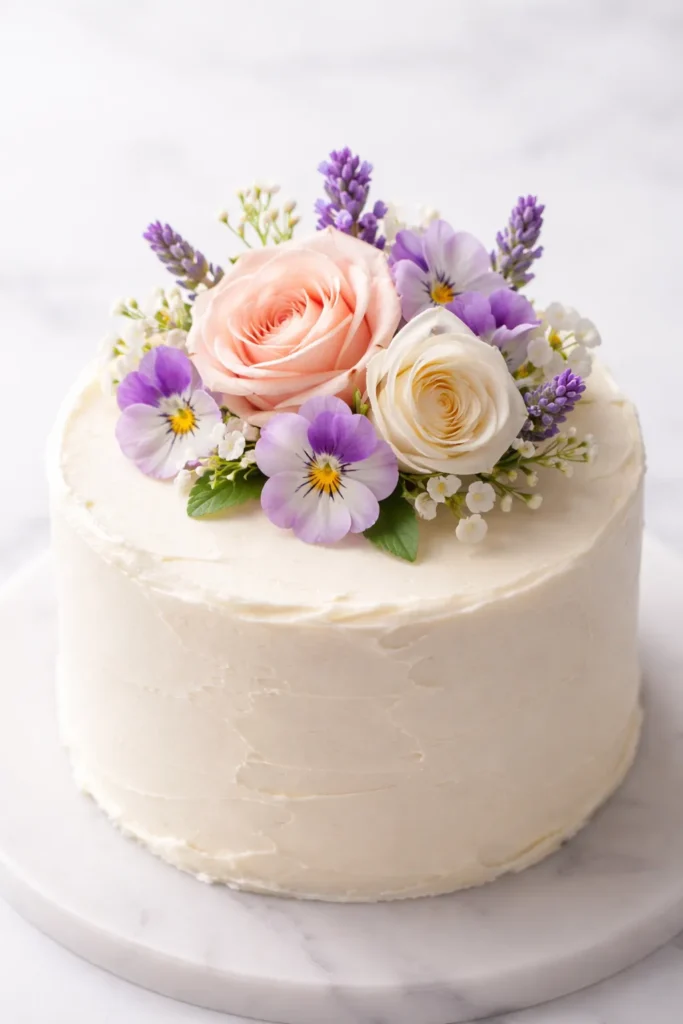
There’s a reason florists and pastry chefs have been collaborating for centuries — flowers make cakes look extraordinary with almost no effort. A handful of the right blooms placed on top of a simply frosted cake elevates it to wedding-tier presentation immediately.
The most important rule with fresh flowers on cake is safety first. Not all flowers are food-safe. Many commercially grown flowers are treated with pesticides that you absolutely do not want near edible food. Others are naturally toxic regardless of pesticide use — baby’s breath is one of the most common examples, and it appears on cakes all over social media despite being mildly toxic. Before placing any fresh flower on a cake, confirm it’s both food-safe and pesticide-free.
Flowers That Are Commonly Safe to Use
Roses, lavender, pansies, chamomile, hibiscus, and marigolds are among the flowers most commonly used on cakes because they’re edible and widely recognized as safe when grown without pesticides. Source them from organic growers or dedicated cake-supply florists rather than standard flower shops, where pesticide use is common.
Attaching Flowers Without Them Touching the Cake Directly
Flower stems should never go directly into the cake. The stems can release compounds into the cake as they sit, and any moisture from the stem can affect the surrounding frosting. The standard method is to insert the stem into a food-safe plastic straw first, then push the straw into the cake. This creates a clean barrier between the stem and the interior of the cake.
For flowers you want to rest on the surface rather than insert vertically, cut a small square of parchment paper and place it beneath the flower, between the bloom and the frosting. This prevents any stem contact with the frosting while keeping the flower stable.
Building a Flower Arrangement on Top of a Cake
Placing flowers in a cluster slightly off-center — rather than dead center — looks more dynamic and less stiff. Mix blooms of different sizes: a few larger roses or ranunculus as anchors, smaller flowers like chamomile or tiny spray roses to fill gaps, and a few sprigs of greenery like eucalyptus or rosemary for texture. The asymmetry is what makes the arrangement look organic and professional rather than arranged.
Insider note: Faux flowers made from silk or resin are an excellent alternative if you’re concerned about sourcing pesticide-free fresh blooms. They don’t wilt, they’re unambiguously food-safe (since they won’t touch the cake if you use straws), and the quality available has improved to the point where the difference is barely noticeable in photos.
The Crumb Coat: The Step That Makes Every Technique Work Better
No matter which of the 8 decorating ideas above you choose, every single one will look better if you apply a proper crumb coat first. This step is the single biggest thing separating cakes that look messy from cakes that look intentional — and it takes less than 10 minutes.
A crumb coat is a thin, rough layer of frosting applied over the entire cake before the final coat or decorations go on. Its job is to trap loose crumbs against the cake surface so they don’t tear up through your final frosting layer. The crumb coat doesn’t need to be smooth or pretty. You’re just sealing the crumbs in.
How to Apply a Crumb Coat Correctly
Use an offset spatula to spread a thin layer of buttercream over the top of the cake first, then work down the sides. The layer should be thin enough that you can almost see the cake beneath it — this is not the final coat. Once the whole cake is covered, place it in the refrigerator for 15-20 minutes until the crumb coat firms up completely.
When you take the cake back out, the surface should feel firm and set to the touch. Now your final frosting layer goes on over a stable base, and any decoration you add — whether that’s a ganache drip, pressed sprinkles, or fresh fruit — will adhere cleanly without dragging up crumbs.
Why Chilling Between Coats Is Non-Negotiable
Frosting applied over a soft, uncured crumb coat tends to tear and drag. Chilling firms the first layer into a solid foundation that the second layer grips without disturbing. If you’re working in a warm kitchen, you may need to chill the cake twice — once after the crumb coat, and once more after the final frosting coat before adding decorations.
Take the extra 20 minutes. Every professional cake decorator chills between coats. It’s not optional once you understand why it works.
Final Thoughts
The biggest barrier between most beginners and a cake they’re genuinely proud of isn’t skill — it’s knowing which techniques to reach for. Smooth, piped fondant work takes years to master. Sprinkle pressing, a ganache drip, a fruit arrangement, or a Kit Kat wrap take about 20 minutes and no prior experience.
Start with one technique from this list on your next cake — don’t combine everything at once. Master the crumb coat first, then layer in one decoration at a time. You’ll get a feel for how your frosting behaves, how your specific kitchen temperature affects ganache, and which textures you enjoy working with most. That experiential knowledge builds faster than any tutorial can teach.
The other thing worth holding onto: a cake that looks homemade and made with care is rarely judged against bakery standards by the people eating it. What they remember is that someone made it for them. Every technique on this list gives you the tools to make that cake something they’ll actually remember.