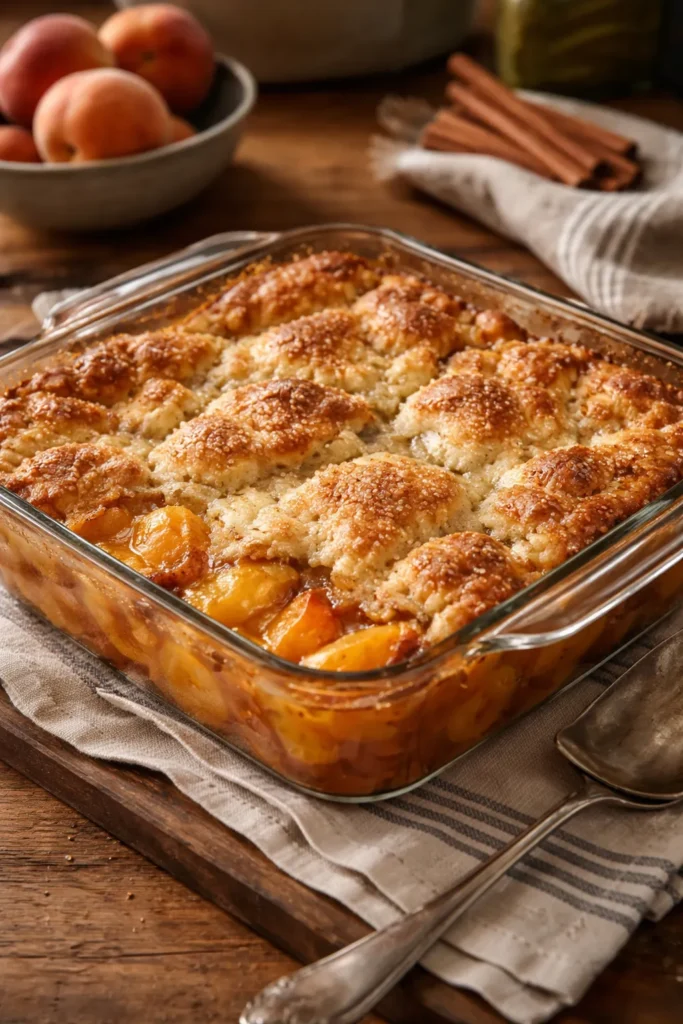
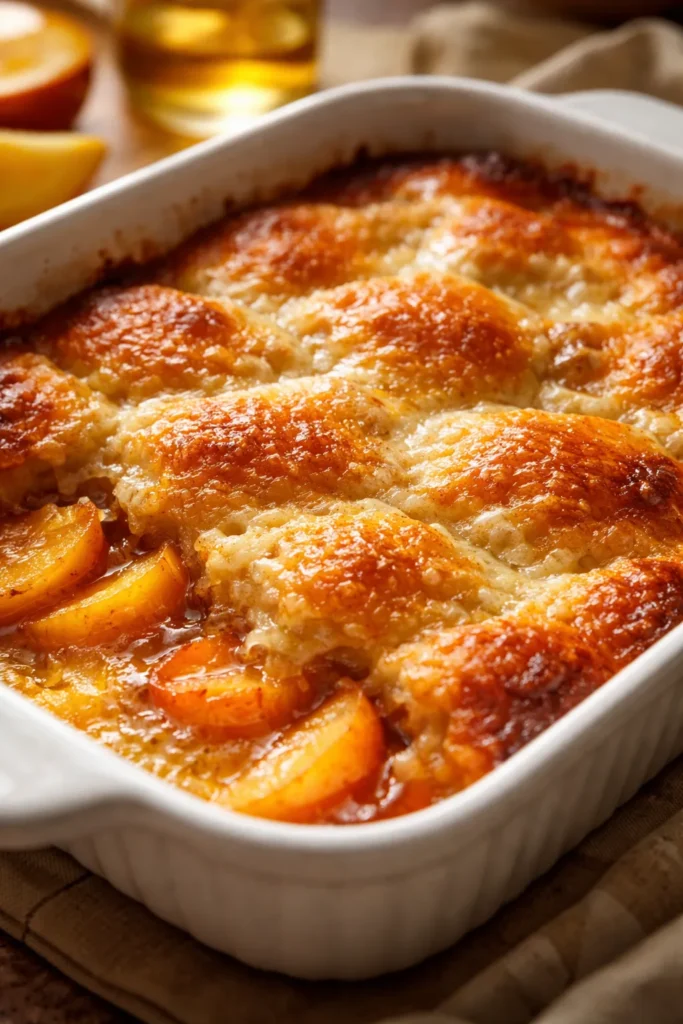
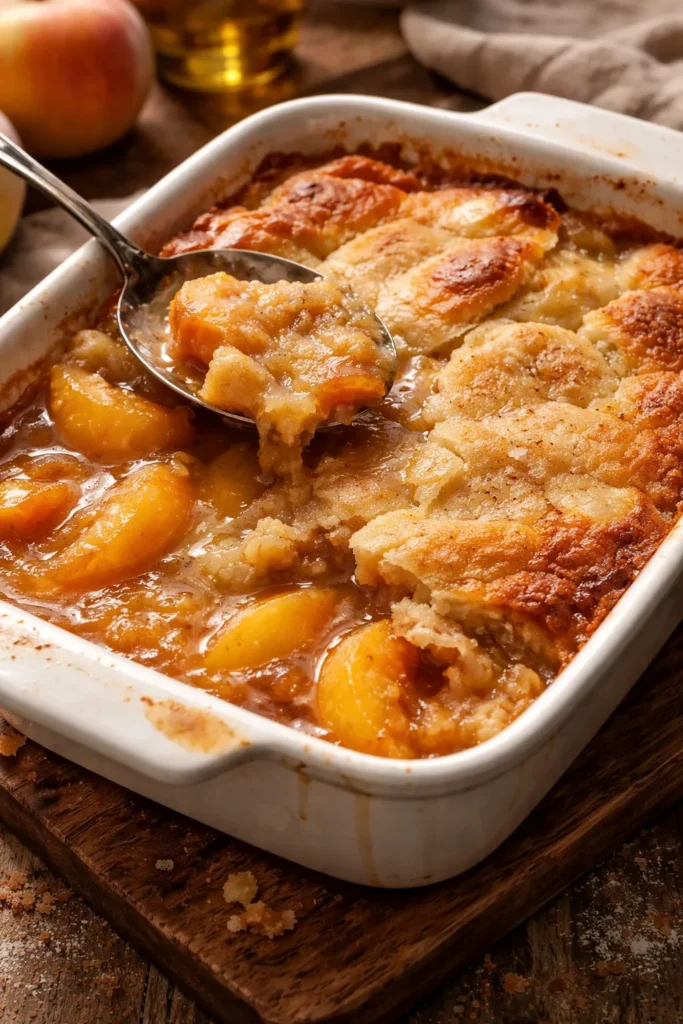
There’s something almost spiritual about pulling a warm peach cobbler from the oven—the way the buttery crust has turned golden and crispy on the edges while the peach filling bubbles gently underneath, releasing that intoxicating fragrance of cinnamon and caramelized fruit. This isn’t fancy cooking. It’s honest, straightforward comfort food that tastes like someone who genuinely cares spent time in the kitchen thinking about feeding you something delicious. The best part? A truly simple homemade peach cobbler from scratch takes less than 10 minutes to assemble, and the ingredient list reads like a shopping trip you could do half-asleep.
What makes homemade peach cobbler so appealing is its sheer reliability. Unlike some desserts that demand precision, finicky timing, or ingredients you can’t pronounce, peach cobbler works with what you have. Fresh peaches at their peak? Perfect. A couple of cans from your pantry because it’s January? Also perfect. Frozen peaches you grabbed on sale last month? Absolutely works. The recipe doesn’t judge. It rewards your effort with a dessert that tastes infinitely better than anything boxed or frozen, yet requires almost no baking experience to pull off successfully.
I’ve made this recipe dozens of times—for family dinners, potlucks, impromptu desserts when friends dropped by, and quiet weeknight treats when I wanted something warm and comforting but didn’t have the energy for anything complicated. Every single time, people ask for the recipe. And every single time, I’m amazed at how simple it actually is, because the results taste like you’ve spent the whole afternoon in the kitchen. This isn’t a secret—it’s just butter, flour, sugar, and peaches doing exactly what they’re supposed to do.
Table of Contents
- Why Homemade Peach Cobbler Is Worth Making
- The History and Appeal of Peach Cobbler
- Choosing Your Peaches: Fresh vs Canned vs Frozen
- The Secret to a Perfect Buttery Topping
- Ingredients for Simple Homemade Peach Cobbler
- Step-by-Step Instructions for Making Homemade Peach Cobbler
- Expert Tips for Success Every Time
- Common Mistakes That Ruin Peach Cobbler
- Delicious Variations to Try
- Storage, Freezing, and Reheating
- Serving Suggestions and Pairings
- Final Thoughts
Why Homemade Peach Cobbler Is Worth Making
Store-bought desserts and mixes have their place, but homemade peach cobbler tastes noticeably different—richer, more deeply flavored, and with a texture that’s neither quite cake nor quite pudding, but something perfectly in between. That’s because you’re controlling every ingredient, the freshness of each component, and exactly how long everything spends in the oven.
The cobbler you make from scratch has a buttery tenderness that comes from real butter melting in a hot baking dish and creating those crispy, caramelized edges. It’s a textural element that store versions simply can’t replicate because they’re designed for transport and shelf stability, not for maximum deliciousness. When you make it at home, you’re not optimizing for shipping—you’re optimizing for the moment it comes out of your oven and into a bowl at your table.
There’s also an economical angle worth noting. This recipe uses pantry staples you probably already have and an affordable fruit component, whether fresh or canned. You’re not paying for packaging, branding, or distribution. You’re paying for actual ingredients, which means the cost per serving is genuinely low—sometimes under a dollar. That’s meaningful if you’re feeding a family or hosting on a budget.
Beyond the practical reasons, there’s something authentically satisfying about serving something you made yourself. People taste the care differently when they know it came from your kitchen. A homemade peach cobbler signals that you showed up for them, even if the recipe itself is beautifully, deceptively simple.
The History and Appeal of Peach Cobbler
Peach cobbler is deeply rooted in Southern American cuisine, where it evolved from British cobbler traditions that arrived with early settlers. The British version was savory—a meat pie with a thick, uneven biscuit topping that resembled cobblestones. American cooks adapted the concept by filling these cobblers with fruit instead, transforming the entire concept into a beloved dessert.
What made peach cobbler so prevalent in the South was accessibility combined with abundance. Peaches grow beautifully in the climate, and during their season, they arrive in such quantity that preserving and cooking with them becomes a practical necessity. The cobbler format made sense because it was quick, didn’t require rolling pastry (which saved time and mess), and could showcase the fruit without competing with it. A simple batter topping lets the peaches sing.
The dish carries cultural weight in Southern and Appalachian communities. Family recipes get passed down with the kind of care usually reserved for important documents. Grandmothers protect their “peach cobbler secrets” even though the recipe is inevitably simple—the secrets are really about understanding how butter browns, when to stop stirring, and trusting the process. Each family version is slightly different, yet recognizably the same dish.
What’s fascinating is how the recipe has remained relatively unchanged for generations, even as cooking equipment and ingredients have modernized. You can find recipes from the 1950s, 1980s, and today that are nearly identical. That consistency is a quiet vote of confidence—this formula works because it has worked, and it will continue to work because the fundamentals are sound.
Choosing Your Peaches: Fresh vs Canned vs Frozen
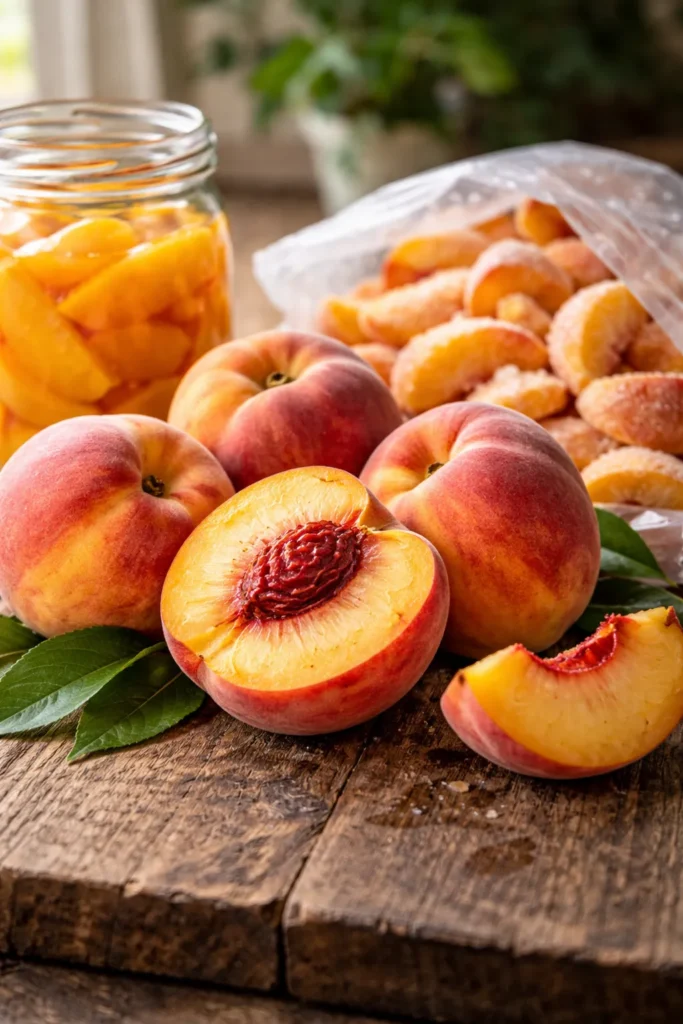
Fresh peaches are ideal during peach season, typically from late spring through early fall, depending on your region. Look for peaches with a golden hue near the stem, fruit that yields slightly to gentle pressure, and a sweet, fragrant smell. These sensory cues tell you the peach is ripe and ready. Avoid anything rock-hard (it won’t have developed sweetness yet) or anything mushy (it’s past its prime). A perfectly ripe fresh peach will make your cobbler taste noticeably brighter, with complex sweetness and deeper flavor complexity.
Frozen peaches are an underrated option that work beautifully in cobbler. They’re typically picked at peak ripeness and frozen within hours, which means they’ve captured maximum flavor and sweetness at the exact moment they’re best. Unlike some fruits where freezing causes problems, peaches destined for cooking actually improve slightly because the ice crystals help break down the flesh, making them release their juices more easily during baking. Just thaw them gently and drain away excess liquid before using.
Canned peaches in heavy syrup are your convenience option, and they’re genuinely good. The syrup is actually part of the formula—it’s sweetness built in that becomes part of your filling. If you choose canned, you’ll use the fruit and a portion of that syrup right in the cobbler. The main thing to remember is that canned peaches are already sweetened, so you might reduce your sugar slightly if you want to avoid overwhelming sweetness. They work best when well-drained, though you’ll keep some of the juice for moisture.
The choice really depends on timing and availability. Can’t access fresh peaches? Don’t hesitate with canned or frozen. The cobbler will be delicious. Professional and home bakers alike use whichever peaches they can access, and the results are consistently wonderful. What matters more is using peaches that were actually picked ripe rather than sourcing a particular type.
The Secret to a Perfect Buttery Topping
The magic of cobbler sits entirely in the topping—a simple batter that’s thin enough to pour but thick enough to cook into something with structure. It’s not a biscuit dough that you cut and place. It’s not a cake batter. It lives in this specific middle ground where the batter pours over the melted butter and somehow bakes into a golden, crispy-edged, cake-like crust that rises around the fruit.
The first secret is using real butter, melted into your baking dish before the batter and peaches go in. That melted butter does several things: it creates a base that browns beautifully as it heats, it distributes through part of the batter as it bakes creating those coveted crispy edges, and it adds a subtle savory richness that makes the sweetness feel more balanced. Margarine or oil won’t achieve the same effect because butter has milk solids that brown and develop flavor, creating depth that other fats can’t replicate.
The second secret is restraint—you don’t stir once you’ve layered everything. This matters more than it seems. When you layer the batter over melted butter without stirring, the butter stays concentrated around the edges where it can brown. As the cobbler bakes, the batter rises through the fruit, creating these beautiful pockets of golden crust throughout. If you mix everything together, you’re distributing the butter evenly, which prevents those crispy, caramelized edges that make cobbler special.
The third secret is getting the batter consistency just right. It should be thin—pourable, like pancake batter—but not watery. Too thick and it won’t flow around the fruit. Too thin and it’ll sink completely into the peaches without creating any structure. The sweetness also matters. You’re looking for distinct sweetness from the fruit and sweetness from the batter itself, which together create that recognizable peach cobbler flavor. Most of the sugar goes into the batter, with the peaches providing additional sweetness from their natural sugars.
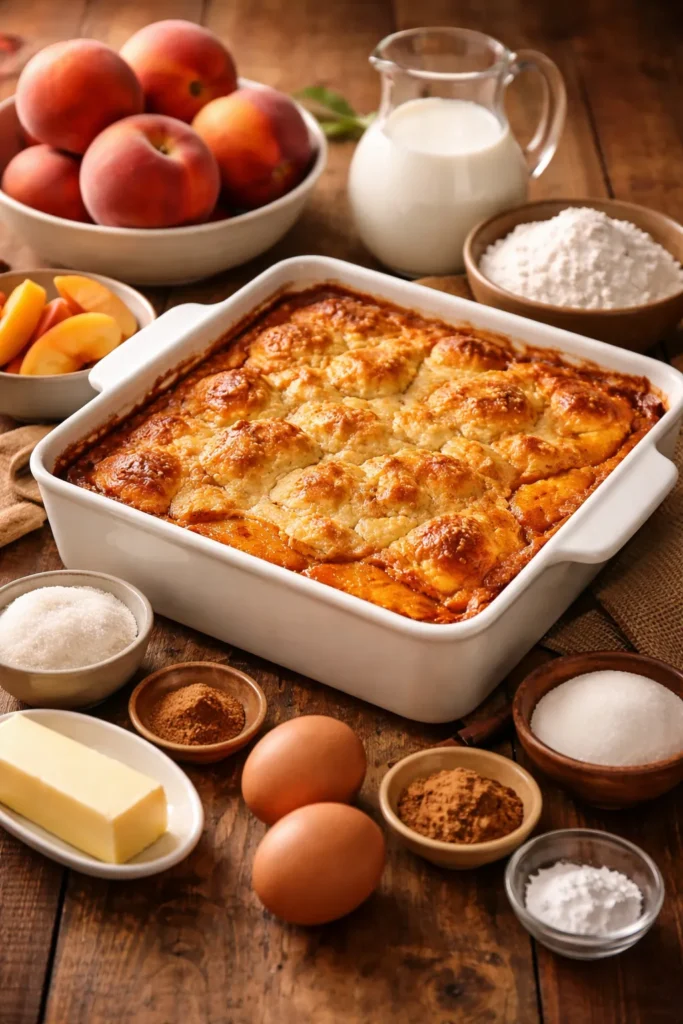
Ingredients for Simple Homemade Peach Cobbler
For the Cobbler:
- ½ cup (113 grams) unsalted butter, melted, plus an extra tablespoon for the baking dish if needed
- 1 cup (120 grams) all-purpose flour, spooned and leveled (not scooped)
- 1 cup (200 grams) granulated white sugar
- 2 teaspoons (8 grams) baking powder
- ¼ teaspoon (1 gram) fine sea salt
- 1 cup (240 milliliters) whole milk, at room temperature
- ½ teaspoon pure vanilla extract, optional but recommended
- 4 cups (about 600-700 grams) fresh peaches, peeled and sliced; or frozen peaches, thawed and drained; or two 15-ounce cans sliced peaches in syrup, drained (reserving juice from one can)
For Serving:
- 2 teaspoons (6 grams) ground cinnamon, for topping (optional)
- Pinch of nutmeg, optional
- Vanilla ice cream or whipped cream, for serving
Yield: Serves 6 to 8 people, makes one 9×9-inch cobbler
Prep Time: 10 minutes (if using canned or frozen peaches; add 5-10 minutes if peeling fresh peaches)
Cook Time: 40 to 45 minutes
Total Time: 50 to 55 minutes
Difficulty: Beginner — This recipe requires no special equipment beyond a standard baking dish, and the mixing process is straightforward. Even if you’ve never baked before, you can succeed with this recipe.
Step-by-Step Instructions for Making Homemade Peach Cobbler
Prepare Your Pan and Oven:
-
Preheat your oven to 350°F (175°C) and position the oven rack in the center. This temperature is low enough that everything bakes evenly without the edges burning, but hot enough to create browning on the crust.
-
Pour the ½ cup of melted butter directly into a 9×9-inch glass baking dish (or a slightly larger rectangular dish if you prefer), swirling it to coat the bottom and lower sides. Place the dish in the preheating oven while you prepare the remaining ingredients. You want the butter to be hot and beginning to brown by the time you add the batter—this takes about 5 minutes. Do not skip this step. Cold or room-temperature butter won’t create those crispy, caramelized edges that make the cobbler special.
Make the Cobbler Batter:
-
In a large mixing bowl, whisk together the flour, sugar, baking powder, and salt until completely combined and no lumps of baking powder remain. The baking powder needs to be distributed evenly throughout the flour mixture so the batter rises uniformly.
-
Pour the milk and vanilla extract (if using) into the dry ingredients and whisk until just combined. The batter should be smooth and pourable, with the consistency of thin pancake batter. It’s completely normal if it looks thin—that’s exactly what you want. Do not overmix. Stop whisking the moment everything is combined. Overmixing develops gluten and can make the finished cobbler tough.
-
Carefully remove the hot baking dish with the melted butter from the oven using an oven mitt. Pour the batter directly over the hot melted butter. Do not stir. This is crucial. The batter will sit on top of the butter, and that’s exactly right. As it bakes, it will start to rise and interact with the butter, but stirring now prevents the browning that you want.
Add the Peaches:
-
If you’re using fresh peaches, wash them, peel away the skin (using either a vegetable peeler or the blanch-and-shock method described in the tips section below), and slice them into thin wedges, discarding the pit. You should have about 4 cups of sliced peaches. If using frozen peaches, allow them to thaw completely and then drain away as much liquid as possible—excess liquid will make the cobbler soggy. If using canned peaches, drain them thoroughly, reserving about ¼ cup of the syrup from one can.
-
Gently spoon the peaches (along with that reserved peach syrup if using canned) over the batter layer. Do not stir. It might look odd—the peaches sitting on top of unbaked batter—but resist the urge to mix. The liquid from the peaches and the batter will meld together as everything bakes, but keeping them in layers initially is what creates the ideal texture in the finished cobbler.
-
If desired, sprinkle the cinnamon and nutmeg generously over the top of the peaches. This is entirely optional, but these warm spices pair beautifully with peaches and create a more complex flavor.
Bake and Cool:
-
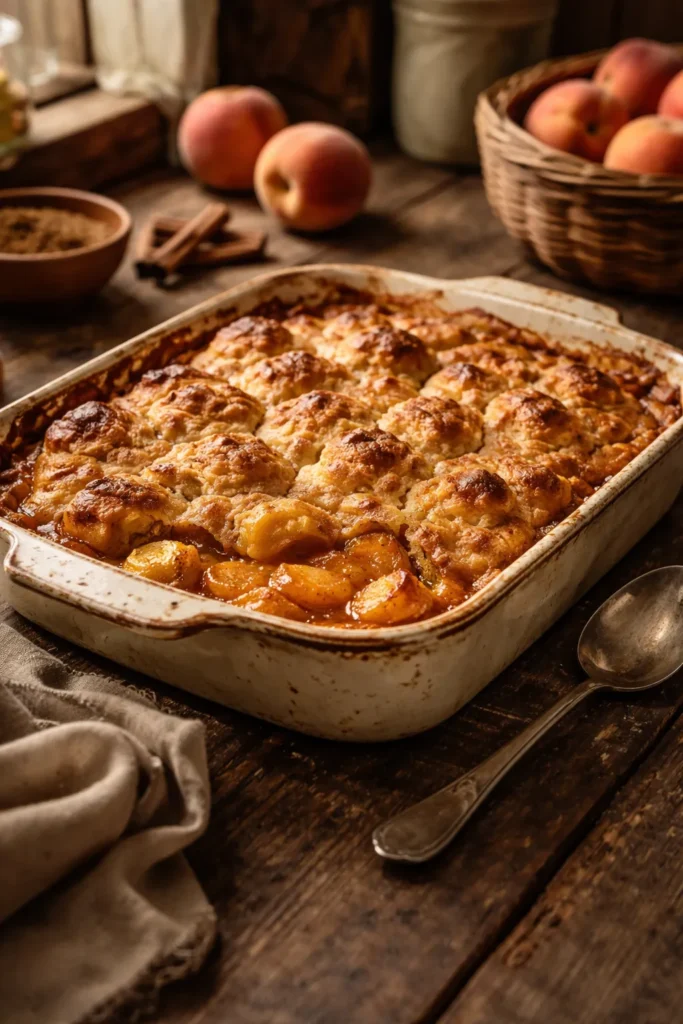
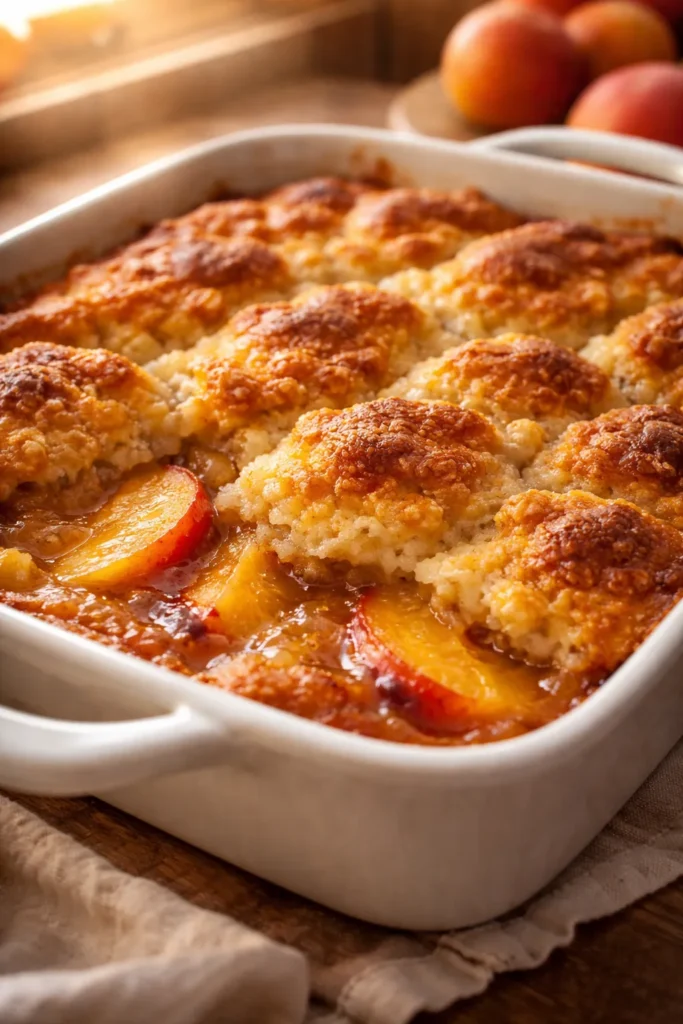
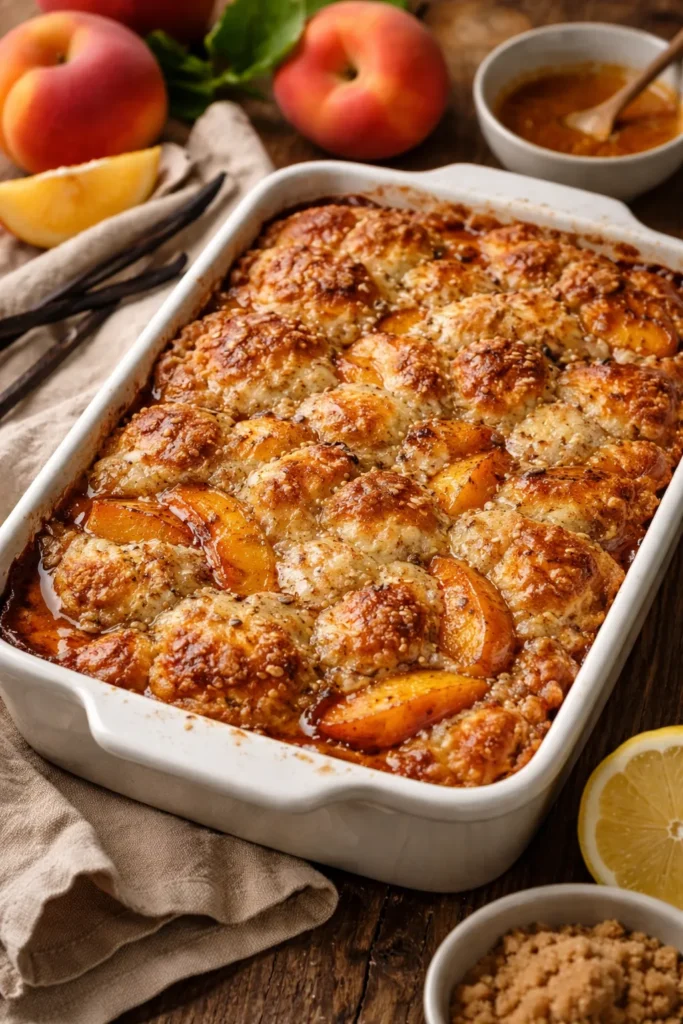
Return the baking dish to the oven and bake for 40 to 45 minutes, until the top is golden brown and the edges are crispy and lightly caramelized. You’ll know it’s done when you see the batter has risen around the fruit and turned golden, and the filling bubbles gently around the edges. If the top is browning too quickly but the interior doesn’t seem done, tent it loosely with foil and continue baking.
-
Remove the cobbler from the oven and allow it to rest for at least 5 minutes before serving. This resting time allows the filling to set slightly and makes serving much cleaner. Never cut or serve the cobbler while it’s actively bubbling from the oven. It’s too hot to eat and the filling is still too liquid.
-
Scoop the warm cobbler into serving bowls and serve immediately with a generous scoop of vanilla ice cream or a dollop of fresh whipped cream. The heat from the cobbler will slightly melt the ice cream, creating an absolutely perfect combination of temperatures and textures.
Expert Tips for Success Every Time
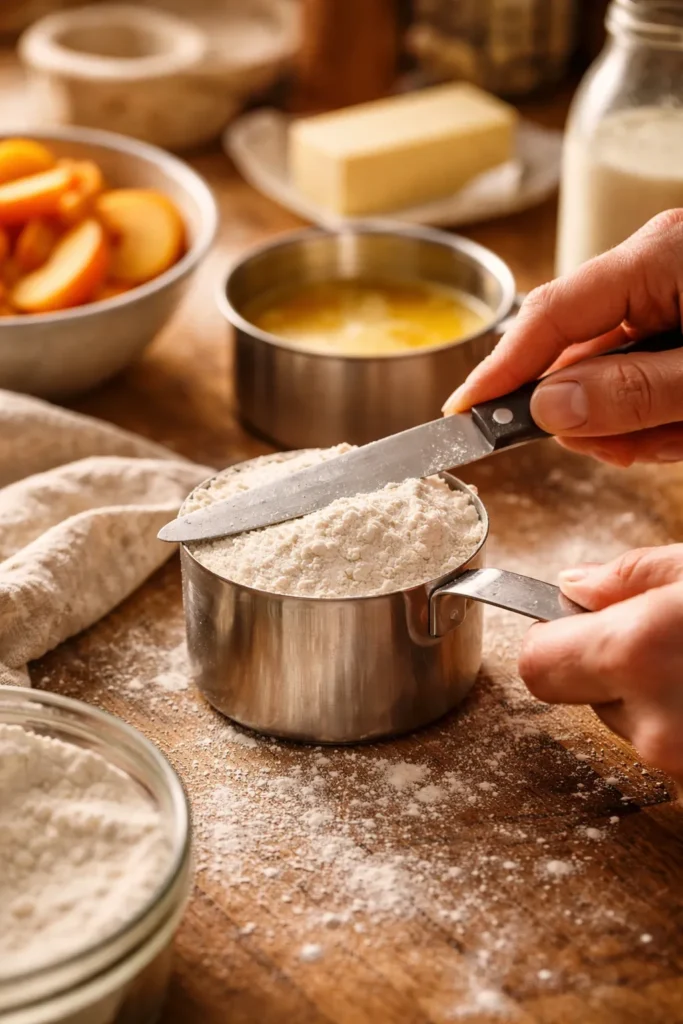
Use the Right Flour: Measure your flour correctly by spooning it into a measuring cup and leveling it with a knife, rather than scooping directly from the bag. Scooping compacts the flour, which means you’ll end up with more than the recipe calls for, resulting in a drier cobbler. If you only have access to pre-scooped or packed flour, add an extra tablespoon of milk to compensate.
Don’t Skip the Butter Melting Step: The butter needs to be in the dish and hot while the oven preheats. This is where the magic happens—that butter browns slightly and creates the foundation for the crispy crust. If your butter is cold when you add the batter, it won’t brown properly, and the crust won’t develop the same golden, caramelized edges.
Keep Peach Juice Under Control: If you’re using fresh peaches that are particularly juicy, you might end up with more liquid than you want. Fresh peaches release juice as they sit, so if you’ve sliced them and they’ve been sitting in a bowl for more than a few minutes, drain away some of that juice before adding them to the cobbler. The filling should be moist but not swimming in liquid, or the bottom of the cobbler will be soggy.
Room Temperature Milk Matters: Cold milk will lower the temperature of your batter and can affect how evenly it bakes. Let your milk sit out for 10 minutes before using it, or run the carton under warm water for a few seconds. This small detail helps everything bake uniformly.
Trust the “Don’t Stir” Rule: I know it feels wrong to layer the batter on butter without mixing and then add peaches on top without stirring. It looks incomplete. But this is literally what makes peach cobbler work. The components interact as they bake, and they do so in a way that creates better texture and browning when you leave them in layers.
Use Your Oven Light: About halfway through baking, glance through the oven window without opening the door. You’re looking for the batter to have risen around the fruit and for the top to be turning golden. If it looks like it’s browning too quickly, tent it loosely with aluminum foil. If it looks pale, it needs more time.
Let It Rest: Five minutes might seem short, but it’s the difference between a runny cobbler and one with some structure. During that resting time, the starch in the batter continues to set, and the filling stops actively bubbling. You’ll have a much better eating experience.
Common Mistakes That Ruin Peach Cobbler
Stirring the Layers Together: This is by far the most common mistake, and it’s usually made with good intentions. People want to make sure everything’s evenly distributed or they’re worried the batter looks weird. But stirring together the melted butter and batter prevents proper browning and creates a cobbler that’s cake-like throughout rather than having that crispy, caramelized exterior. Resist the urge.
Using Cold Ingredients: Cold milk, cold butter straight from the fridge (if you’re melting it yourself), cold peaches from the freezer without allowing them to come to room temperature—all of this slows down even baking. Room-temperature ingredients bake more uniformly and create better texture. This is especially important for the milk and the peaches.
Adding Too Much Liquid: If you use the entire syrup from two cans of peaches, or if you don’t drain frozen peaches thoroughly, you’ll end up with a cobbler that’s more like cobbler soup. It might taste fine, but the texture will be off. Drain your fruit, reserve just a little bit of peach juice, and you’ll have a properly textured result.
Overmixing the Batter: This develops gluten in the flour, which makes the crust tough and dense rather than tender. Mix just until the wet and dry ingredients are combined. A few streaks of unmixed flour are fine.
Skipping the Spoon-and-Level Flour Method: This is genuinely the difference between success and moderate success. Measuring flour incorrectly is the number one reason baked goods turn out dry or dense. If you don’t have the ability to use the spoon-and-level method, weigh the flour instead (1 cup equals about 120 grams).
Baking at the Wrong Temperature: If your oven is too hot, the outside bakes before the inside is cooked through. If it’s too cool, everything takes longer and doesn’t brown properly. Use an oven thermometer to verify your oven is actually at 350°F. Many home ovens are off by 10-25 degrees.
Not Allowing the Cobbler to Cool: Cutting into hot cobbler results in everything collapsing and creating a mess on the plate. That 5-minute rest allows everything to set up. Your presentation will be infinitely better, and it’ll actually be cool enough to eat comfortably.
Delicious Variations to Try
Spiced Peach Cobbler: Add ½ teaspoon ground ginger, ¼ teaspoon nutmeg, and a pinch of ground clove to the batter. These warm spices create a deeper, more complex flavor that’s especially lovely in autumn months.
Brown Butter Peach Cobbler: Instead of melting butter and pouring it into the dish, melt it in a small saucepan over medium-low heat and let it cook for a few minutes until the milk solids brown and smell toasty. This browned butter adds a subtle nutty depth that elevates the whole cobbler. Pour it hot into your baking dish and proceed as normal.
Vanilla Bean Peach Cobbler: Instead of ½ teaspoon vanilla extract, split a vanilla bean lengthwise, scrape out the seeds, and add both the seeds and the pod to your milk before mixing the batter. Let it sit for a few minutes so the flavor infuses into the milk, then remove the pod and use the milk to make the batter. The tiny black vanilla seeds are visible throughout the cobbler and the flavor is more luxurious.
Peach and Berry Cobbler: Replace 1 cup of the peaches with fresh blueberries, raspberries, or blackberries. The tartness of the berries balances the sweetness of the peaches beautifully.
Citrus Peach Cobbler: Add the zest of one lemon to the batter and a tablespoon of fresh lemon juice to the peaches. The acidity brightens everything and prevents the cobbler from feeling too heavy or sweet.
Lower-Sugar Peach Cobbler: Replace the sugar in the batter with a baking-friendly sugar substitute, using the quantity recommended by the manufacturer. The cobbler will still taste delicious—you’re just reducing the overall sweetness. The peaches provide natural sweetness that’s more than adequate.
Gluten-Free Peach Cobbler: Swap the all-purpose flour for a 1:1 gluten-free baking flour blend that includes xanthan gum. Some highly-regarded options include King Arthur Baking Company’s Measure for Measure or Cup4Cup. Use the same quantity and follow the recipe exactly as written.
Storage, Freezing, and Reheating
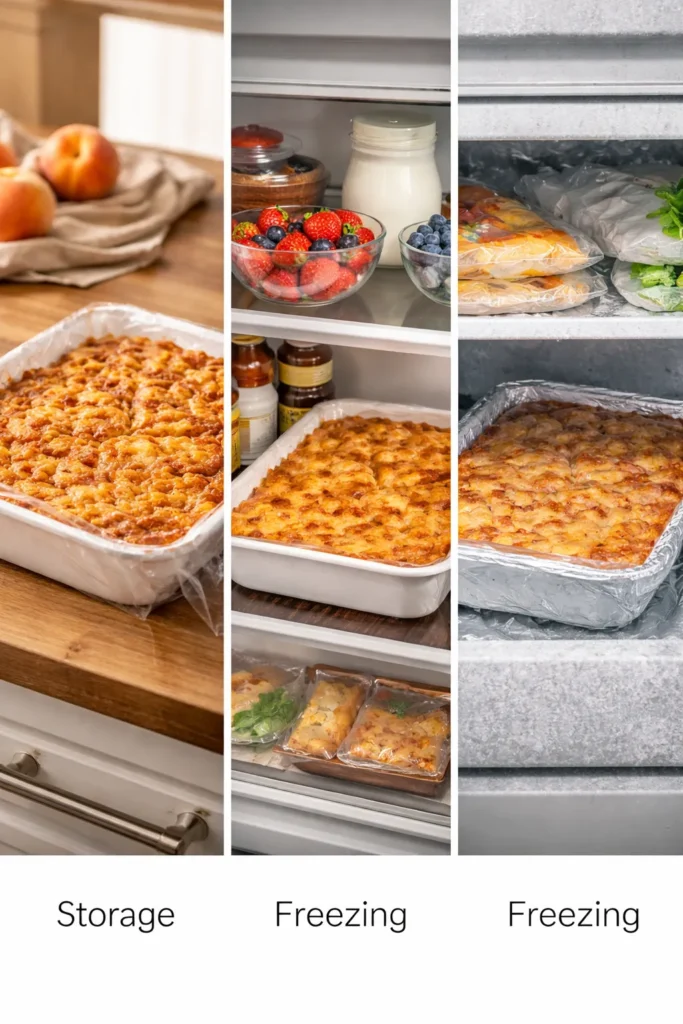
Room Temperature Storage: Peach cobbler can safely sit at room temperature for up to two days without requiring refrigeration. Cover it loosely with foil or plastic wrap to prevent it from drying out. This makes it perfect for serving at parties or potlucks—you can assemble it at home, bake it, let it cool, and transport it without worrying about temperature control.
Refrigerator Storage: Covered and refrigerated, leftover peach cobbler will keep for up to four days. The crust will soften slightly over time as it absorbs moisture from the filling, but it still tastes delicious. The flavors actually deepen after a day, so day-two cobbler is often even better than fresh.
Freezing for Later: Peach cobbler freezes beautifully if you prepare it correctly. Allow the baked cobbler to cool completely to room temperature, then cover the baking dish tightly with plastic wrap, followed by a layer of aluminum foil. Label it with the date and freeze for up to three months. The crust will be softer after thawing than it was fresh, but the flavor remains excellent.
Thawing: Remove the cobbler from the freezer and allow it to thaw in the refrigerator overnight. Don’t skip this step—thawing at room temperature can create condensation that makes the crust soggy.
Reheating: To reheat refrigerated or thawed cobbler, preheat your oven to 325°F. Cover the dish loosely with foil (to prevent the top from browning too much) and warm it for 15 to 20 minutes, until it’s heated through and bubbling gently around the edges. Alternatively, you can reheat individual servings in the microwave in 30-second intervals until warm, though the texture won’t be quite as good as oven reheating.
Make-Ahead Option: You can also prepare the unbaked cobbler—mixing the batter, adding it to the buttered dish, and topping it with peaches—up to 12 hours in advance. Cover it tightly and refrigerate. When you’re ready to bake, just pop it directly from the fridge into a preheated 350°F oven, adding about 5 extra minutes to the baking time since everything starts cold.
Serving Suggestions and Pairings
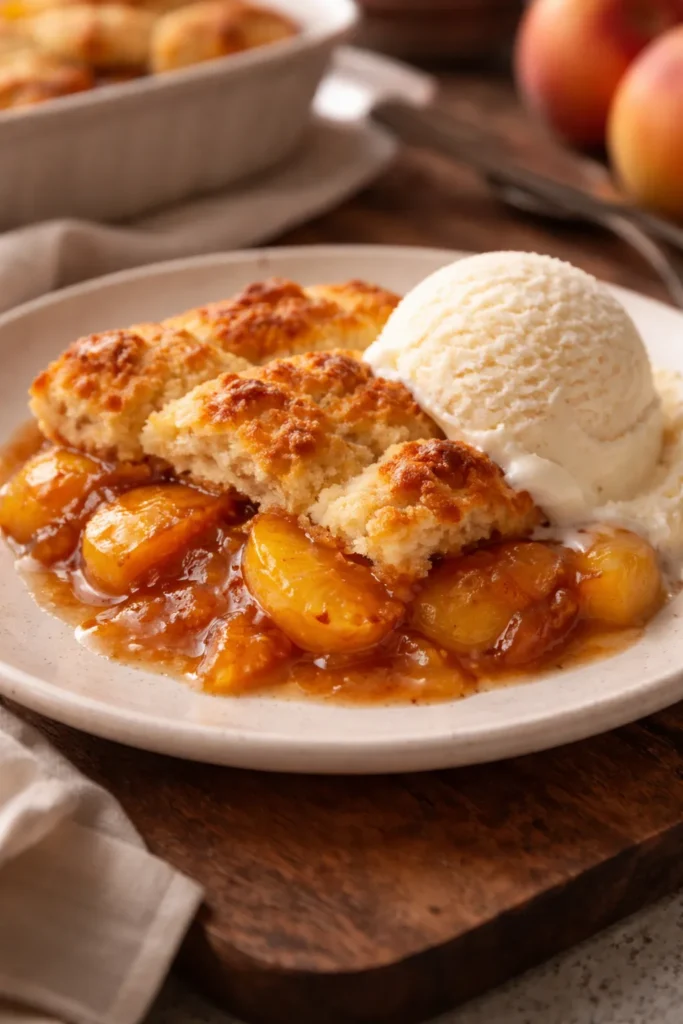
With Vanilla Ice Cream: This is the classic pairing, and there’s a reason it’s endured—the warmth of the cobbler melts the ice cream just enough to create this perfect combination of hot and cold, creamy and textured. Vanilla ice cream’s subtle flavor lets the peaches shine without competition.
With Whipped Cream: Fresh whipped cream is lighter than ice cream and lets the cobbler itself be the star. Whip heavy cream with a tablespoon of sugar and ½ teaspoon vanilla extract until it forms soft peaks. Serve a generous dollop on warm cobbler.
With Buttermilk Biscuits: Some people serve cobbler with a biscuit on the side, turning it into a more substantial dessert. A warm, buttery buttermilk biscuit pairs remarkably well with peach cobbler.
With Custard or Crème Anglaise: For a more elegant presentation, drizzle warm cobbler with store-bought or homemade vanilla custard. It’s decadent without being heavy.
As a Breakfast Option: Yes, really. Leftover cobbler makes an unexpectedly excellent breakfast when warmed and served with a cup of coffee. It’s not health food, but it’s comforting in a way that few other breakfasts can be.
Paired with Summer Beverages: Serve cobbler alongside sweetened iced tea, lemonade, or a light white wine like Riesling or Pinot Grigio. The acidity in these drinks cuts through the richness of the cobbler.
As Part of a Dessert Spread: Peach cobbler fits beautifully into a spread that includes other desserts—it’s not overly fussy, so it complements simpler items like cookies or brownies without competing.
For Entertaining: Because it can be made ahead, served at room temperature or reheated, and improved by a day of sitting, peach cobbler is genuinely one of the best desserts to make when you’re hosting. It requires no last-minute finesse and never disappoints.
Final Thoughts
Making homemade peach cobbler from scratch isn’t about proving anything or impressing people with your baking prowess. It’s about the simple satisfaction of turning a handful of basic ingredients into something genuinely delicious that people will actually want to eat. The fact that it takes less than 10 minutes to assemble shouldn’t make you doubt its worthiness as a dessert—if anything, it’s a testament to how elegant a truly simple formula can be.
The beauty of this recipe is its reliability. You’ll make it the same way every time and get consistent, wonderful results. There’s no guesswork, no mysterious steps where something might fail. You melt butter, mix batter, layer peaches, and bake. That’s it. The magic comes not from complexity but from understanding a few core principles: real butter browns better, melted butter creates crispy edges, not stirring preserves those edges, and simple ingredients don’t need to be complicated to taste exceptional.
Keep this recipe close. Write it on a card in your kitchen, bookmark it on your phone, commit it to memory. You’ll make it on lazy summer afternoons when peaches are cheap and abundant. You’ll make it on winter nights when you need something warm and comforting. You’ll make it for potlucks, family dinners, and impromptu gatherings. Every single time, it will be delicious, and every single time, someone will ask you for the recipe. That’s not just a dessert—that’s a kitchen staple.