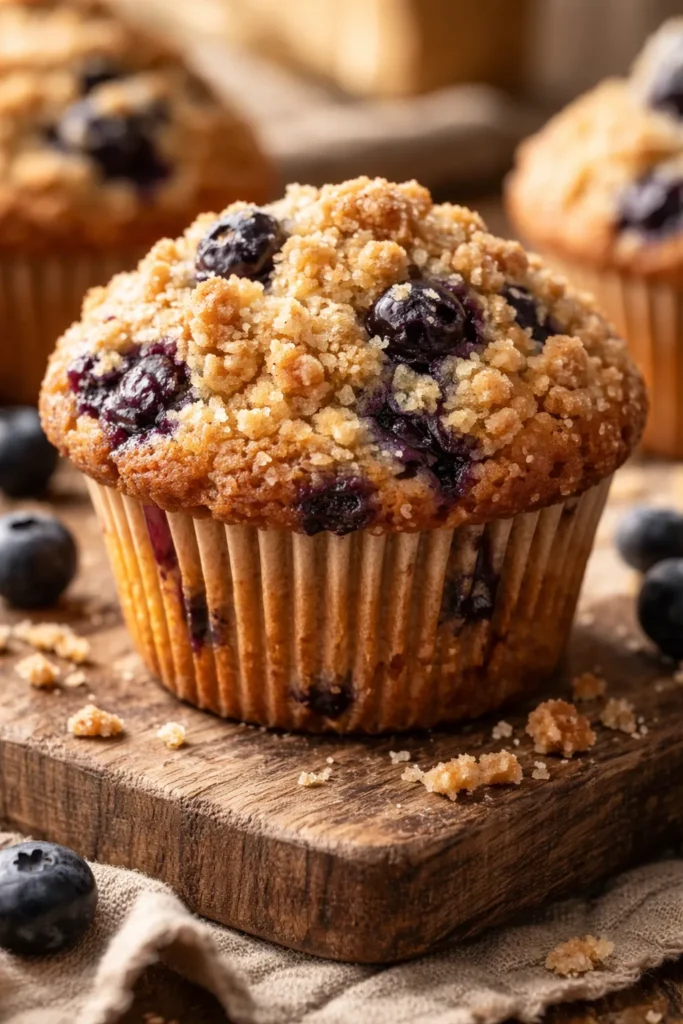
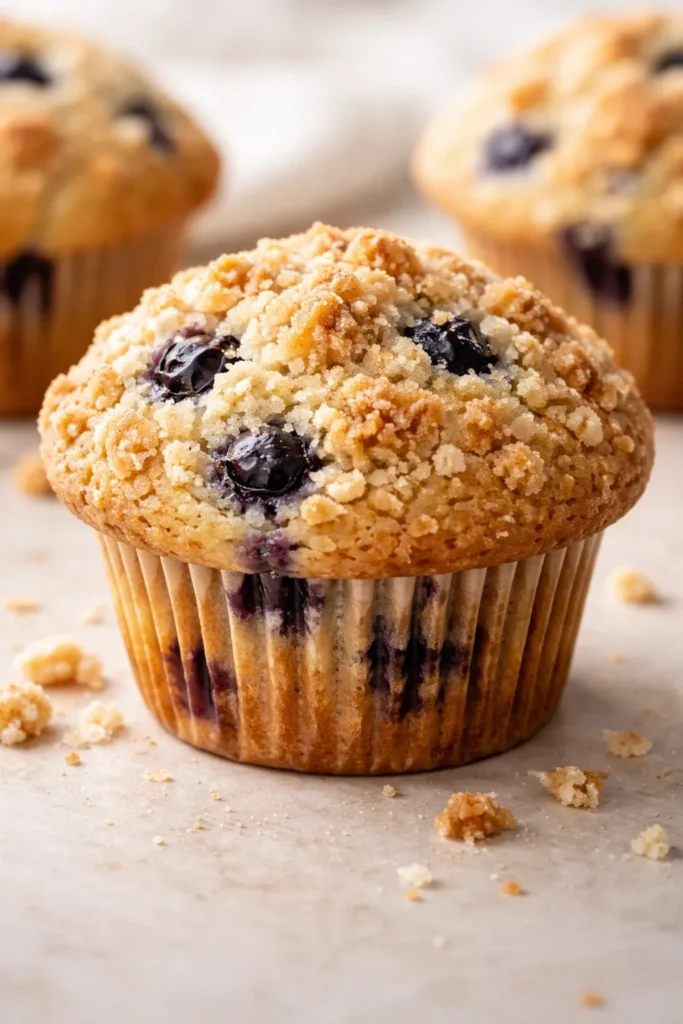
There’s something magical about biting into a warm blueberry muffin that tastes like it came straight from an artisan bakery—golden on the outside, impossibly moist on the inside, and crowned with a buttery crumble that crunches between your teeth. The thing is, you don’t need a bakery kitchen to achieve this. With the right technique and a few crucial tricks, you can create bakery-quality blueberry crumble muffins in your own home that’ll have everyone asking where you bought them. The reality is that most people’s homemade muffins fall short because they’re missing one or two key elements: the correct oven temperature sequence, the right proportion of wet to dry ingredients, or simply understanding how to prevent those blueberries from sinking to the bottom of the pan.
I’ve tested dozens of blueberry muffin recipes, and the difference between a mediocre muffin and one that tastes professionally made often comes down to understanding the science behind what you’re doing. When you learn why each step matters—from creaming butter and sugar to that critical high-heat burst at the beginning of baking—suddenly you’re not just following instructions. You’re actually baking with confidence and intention. These muffins represent everything I love about breakfast baking: they’re approachable enough for beginners, yet they deliver results that feel indulgent and special. Whether you’re serving them warm with a slather of honey butter on a lazy morning or packing them into a gift box for neighbors, these muffins have a way of making moments feel a little more memorable.
The beauty of this particular recipe is that it doesn’t demand special equipment or hard-to-find ingredients. If you have a muffin pan, some basic pantry staples, and access to fresh or frozen blueberries, you’re ready to make something exceptional. The baker’s dozen yield (13 muffins) means you’ll have plenty to enjoy over several days or to share. More importantly, I’m going to walk you through every detail so nothing is left to guesswork. You’ll understand exactly what’s happening at each stage and how to troubleshoot if something doesn’t go quite right.
Table of Contents
- Why These Muffins Stand Out From Store-Bought
- The Secret to Bakery-Style Domed Muffin Tops
- Fresh vs Frozen Blueberries: What Really Works
- Understanding the Crumble Topping Magic
- The High-Heat Baking Trick Bakeries Use
- Making the Perfect Muffin Batter
- Creating the Crumble Topping
- Ingredients for Bakery-Style Blueberry Crumble Muffins
- Step-by-Step Instructions for Perfect Blueberry Crumble Muffins
- Common Muffin Mistakes to Avoid
- Storage and Make-Ahead Tips
- Flavor Variations Worth Trying
- Serving Suggestions and Pairings
- Why Mastering These Muffins Matters
Why These Muffins Stand Out From Store-Bought
The difference between a bakery-style muffin and an ordinary one comes down to several factors working in harmony. Store-bought muffins often rely heavily on preservatives and stabilizers to maintain their texture over days or weeks, which means they can sometimes taste a bit flat or artificial. When you make them at home, everything is fresher—your butter, your eggs, your blueberries—which immediately translates to superior flavor and texture.
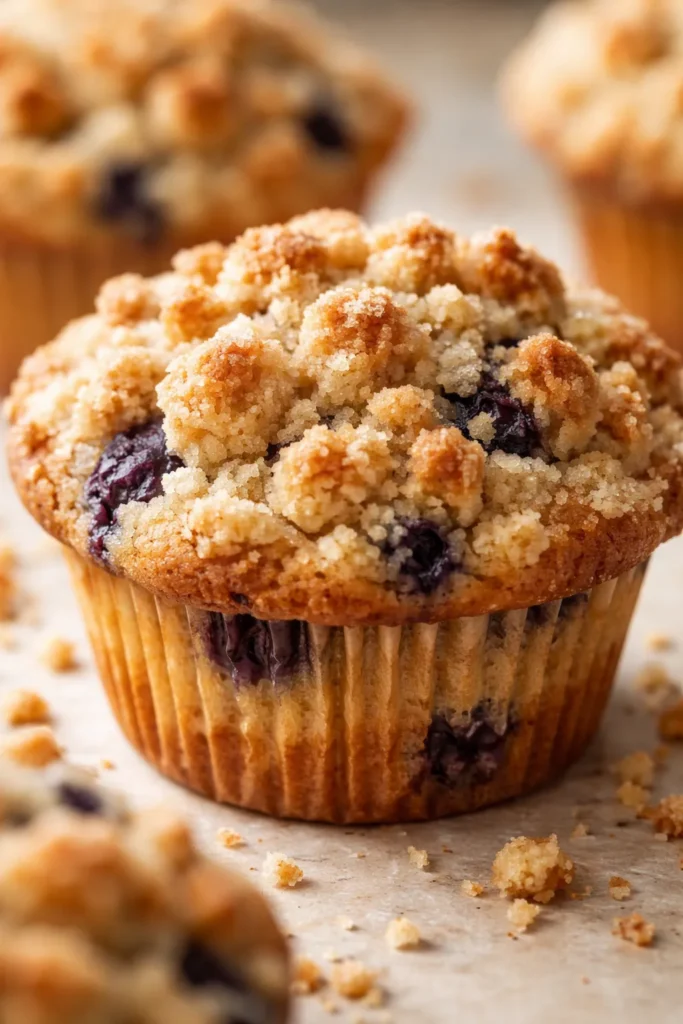
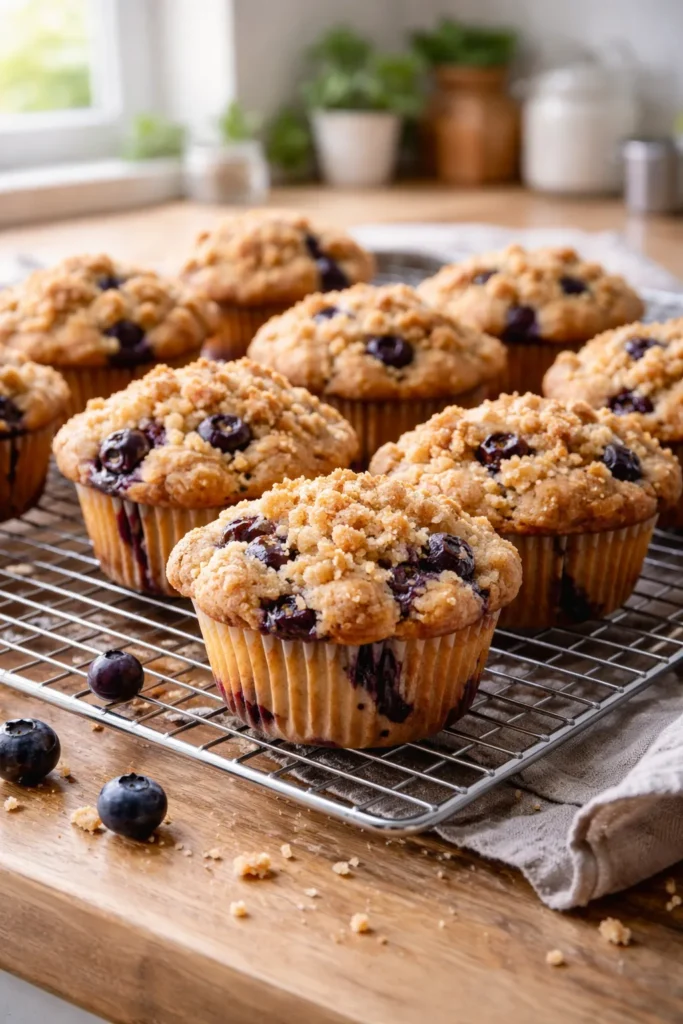
A true bakery-style muffin has a distinctive characteristic: a gloriously domed top that rises proudly above the muffin tin liner. This isn’t just about aesthetics, though they certainly look more professional. That tall top happens because of a specific baking technique (which we’ll cover in detail) that creates the perfect structure. The interior should be tender and moist without being gummy, and every bite should deliver juicy pockets of blueberry flavor rather than having all the berries sink to the bottom. The crumble topping adds essential textural contrast—a sweet, crunchy bite that plays beautifully against the soft, buttery cake beneath.
The secret to achieving this at home isn’t complicated, but it does require understanding a few principles. The batter itself needs to be thick enough to support the blueberries while staying moist through the baking process. Sour cream and buttermilk are your friends here because they add richness and moisture while tenderizing the crumb. The fat content matters too—butter and oil work together to create the ideal texture that’s neither dense nor dry.
The Secret to Bakery-Style Domed Muffin Tops
The distinctive tall, domed muffin top that bakeries are famous for isn’t actually magic—it’s science, and it’s completely reproducible in your home oven. The trick involves a two-temperature baking method that seems counterintuitive at first but makes perfect sense once you understand what’s happening.
Most home bakers bake their muffins at one consistent temperature, typically somewhere between 350°F and 400°F for the entire baking time. That’s the first mistake. Professional bakeries often use a higher initial temperature to give the batter a quick jolt of heat, which causes it to rise rapidly and set the structure of that beautiful dome. Once that structure is established, the temperature is lowered so the insides can bake through without the outside becoming too brown or dry.
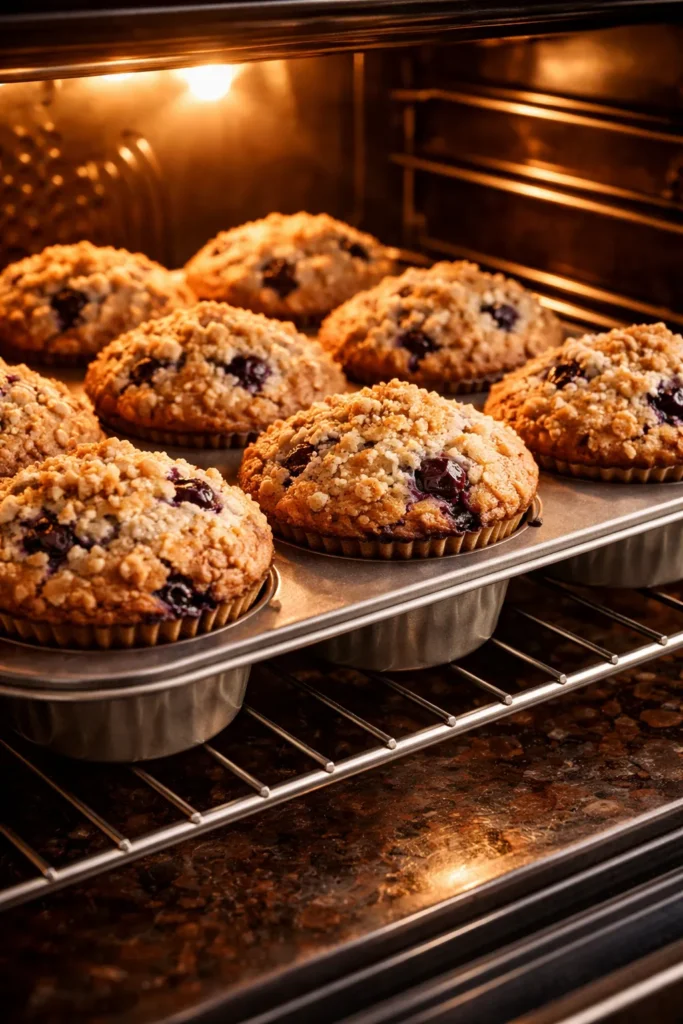
Here’s exactly how it works: You start by preheating your oven to 400°F. Once the muffin liners are filled with batter and topped with the crumble, they go directly into that hot oven for exactly 10 minutes. This initial burst of intense heat causes the matter to expand quickly, creating that signature rise. Critically, do not open the oven door during these first 10 minutes—the heat loss will deflate your muffins before that structure has a chance to set properly. After those 10 minutes, without opening the door, you’ll reduce the oven temperature to 350°F and continue baking for another 10 to 15 minutes until they’re fully cooked through.
The result is a muffin with that prized tall top and a perfectly baked interior. The outside will be set and golden before the inside finishes cooking, which means you get a tender crumb throughout without any raw, doughy centers. This is the same technique that professional bakers rely on, and it’s the single biggest factor that separates these muffins from regular ones.
Fresh vs Frozen Blueberries: What Really Works
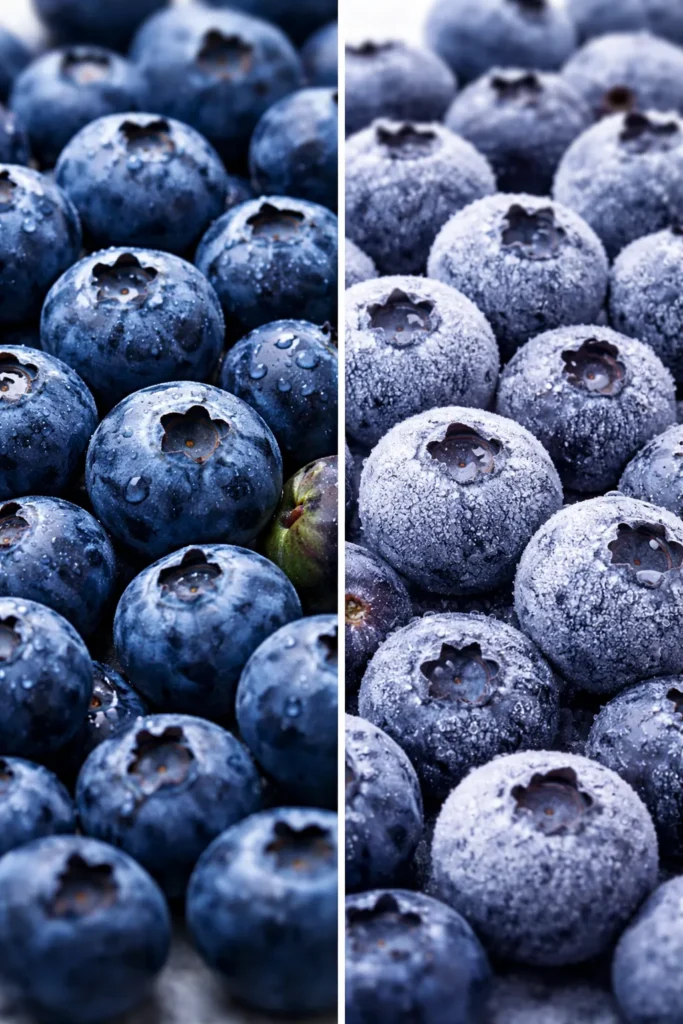
The blueberry question comes up every single time someone talks about muffin baking, so let’s settle it once and for all: both fresh and frozen blueberries work beautifully in this recipe, and the choice is really about what you have on hand rather than what’s “better.”
Fresh blueberries are wonderful because they bring bright, fresh flavor and a delicate texture when baked. However, they’re only seasonally abundant and affordable for part of the year, and they can sometimes be expensive. They also have a tendency to sink to the bottom of the pan if you’re not careful, which means you might bite into a muffin that’s missing blueberries entirely in some spots. Frozen blueberries, on the other hand, are available year-round and often more affordable. Here’s the crucial part: never thaw frozen blueberries before adding them to your batter. Thawed berries will bleed their color into the batter, turning it purple, and they’ll release too much moisture, making the batter wet and heavy.
The secret to using frozen blueberries successfully is to add them straight from the freezer, still solid. When they’re frozen, they hold their shape and color during baking, and they release their juices more slowly and evenly throughout the batter. You’ll still get those gorgeous pockets of intense blueberry flavor in every bite, and the texture will be nearly identical to muffins made with fresh berries. Some bakers swear that frozen blueberries actually distribute more evenly through the batter because they don’t soften as quickly, which means they don’t sink as easily.
If you’re using either type of blueberry, a helpful trick is to toss them lightly with a tablespoon of flour before folding them into the batter. This coating helps them suspend more evenly throughout the cake, preventing all of them from settling to the bottom. It’s a small step that makes a noticeable difference in the final product.
Understanding the Crumble Topping Magic
The crumble topping is what elevates these muffins from delicious to absolutely irresistible. It’s not complicated—just flour, sugar, and butter combined in the right proportions—but there are a few details that make the difference between a topping that stays crispy and one that sinks into the muffin or becomes soggy.
The key to an ideal crumble is understanding how butter works in different forms. For the muffin batter itself, you’ll use melted butter because it mixes seamlessly into the wet ingredients and creates a tender crumb. For the crumble topping, you want cold or just-melted butter, which creates those desirable clumps and chunks that stay on the surface and bake up crunchy. When you combine cold butter with flour and sugar using a fork, you’re essentially breaking the butter into tiny pieces that remain distinct and create texture when baked.
The proportions matter too. Too much butter and the crumble becomes greasy and slides around on top of the muffins. Too little and it becomes more like cinnamon sugar dust rather than a proper streusel. The recipe calls for approximately equal weights of flour and sugar to create sweetness and substance, with about three-quarters as much butter by weight, which yields that perfect crumbly texture. If your crumble seems too dry when you’re mixing it, you haven’t distributed the butter enough—keep working it with the fork until small, pea-sized crumbs form throughout.
One trick that bakers use is to chill the crumble topping before baking if you have time. A brief stay in the refrigerator or freezer helps the butter stay cold and distinct, which means the topping will hold its texture better during baking and won’t sink into the muffin as much. However, this is optional—the muffins will still turn out wonderfully even if you go straight from mixing to baking.
The High-Heat Baking Trick Bakeries Use
Understanding why professional bakeries use a two-temperature baking method helps you appreciate what’s happening in your own oven. When muffin batter hits a very hot oven, several things happen almost simultaneously. The exterior of the muffin sets quickly because of the intense heat. The proteins in the eggs coagulate, the flour starches gelatinize, and the sugar in the batter caramelizes slightly, creating that desirable golden-brown color. Meanwhile, the moisture and heat from the center of the muffin are still trying to reach the surface, creating steam that causes the batter to rise.
If you kept the oven at that high temperature for the entire baking time, the outside would brown too much or even burn before the inside finished cooking. That’s why the temperature drop is essential. Once the structure is set and the top is browned, you lower the heat to allow the insides to bake gently without any further darkening of the outside. The muffins continue to rise slightly during the second phase, but more gradually, and they finish cooking through evenly.
This technique also affects the crumble topping. That initial high heat helps the crumble set quickly so it doesn’t sink too far into the muffin batter before the cake has time to firm up. The lower second temperature ensures the crumble toasts to golden brown without becoming dark and burnt. It’s this orchestration of temperature and time that creates professional-level results at home.
The timing is quite forgiving too. If your oven runs hot, you might need only 9 minutes at the higher temperature. If it runs cool, you might need 11 or 12. Similarly, the second bake could take anywhere from 10 to 18 minutes depending on the actual temperature of your oven and how full your muffin cups are. The important indicators are watching for the tops to spring back when you gently press them with a fingertip and seeing the edges turn a light golden brown.
Making the Perfect Muffin Batter
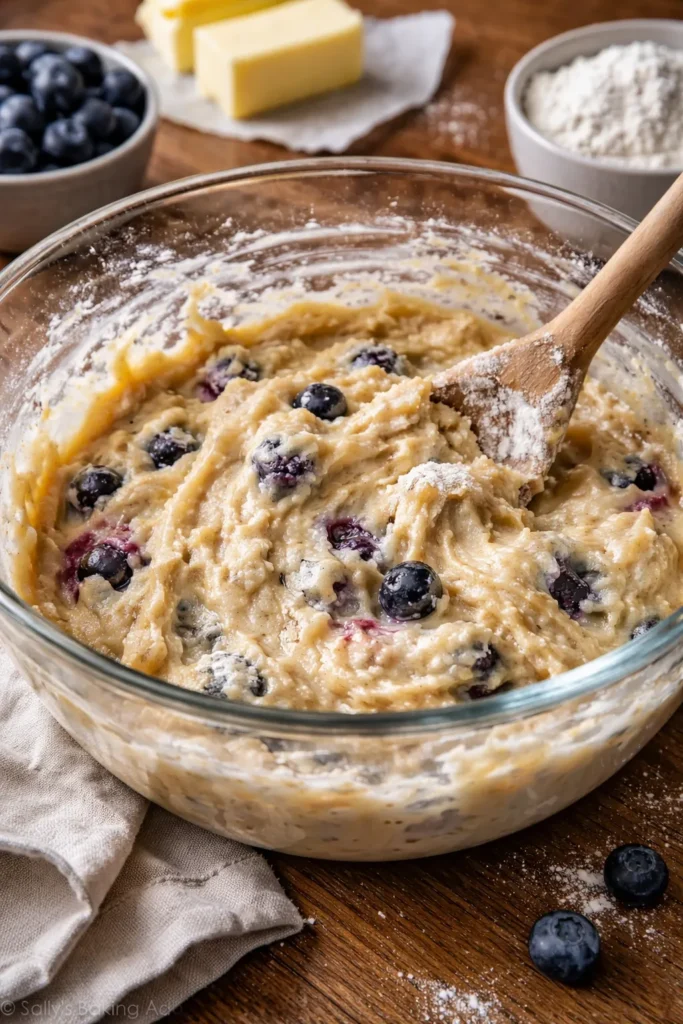
The muffin batter is where everything comes together, and getting the consistency right is crucial. The batter should be quite thick—thicker than pancake batter but not as stiff as cookie dough. When you scoop it into the muffin liners, it should hold its shape and come to the top of the liner without running down the sides.
To achieve this consistency, you need to understand how the ingredients work together. The dry ingredients—flour, baking powder, baking soda, and salt—provide structure. All-purpose flour is perfect for muffins because it has enough protein to create a tender crumb without making the muffin tough. Baking powder is your primary leavening agent, and baking soda helps too (baking soda is often included in recipes with buttermilk or sour cream because the acidity of those ingredients activates it). Don’t skip the salt—it’s not just for flavor, it enhances everything and balances the sweetness.
The wet ingredients—buttermilk, sugar, melted butter, eggs, sour cream, oil, and vanilla—need to be at room temperature for the best results. Cold ingredients won’t combine smoothly with the dry ingredients, and they’ll affect the overall texture of the batter. Sour cream is the secret weapon here; it adds incredible moisture and creates the most tender, cakey texture imaginable. If you don’t have sour cream, Greek yogurt works well as a substitute.
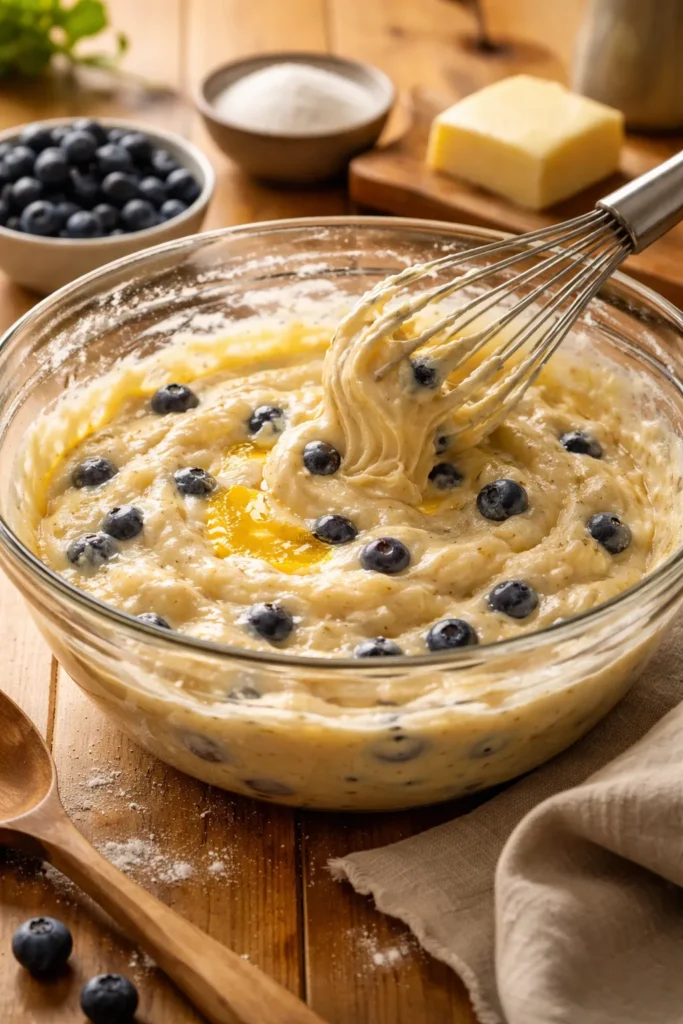
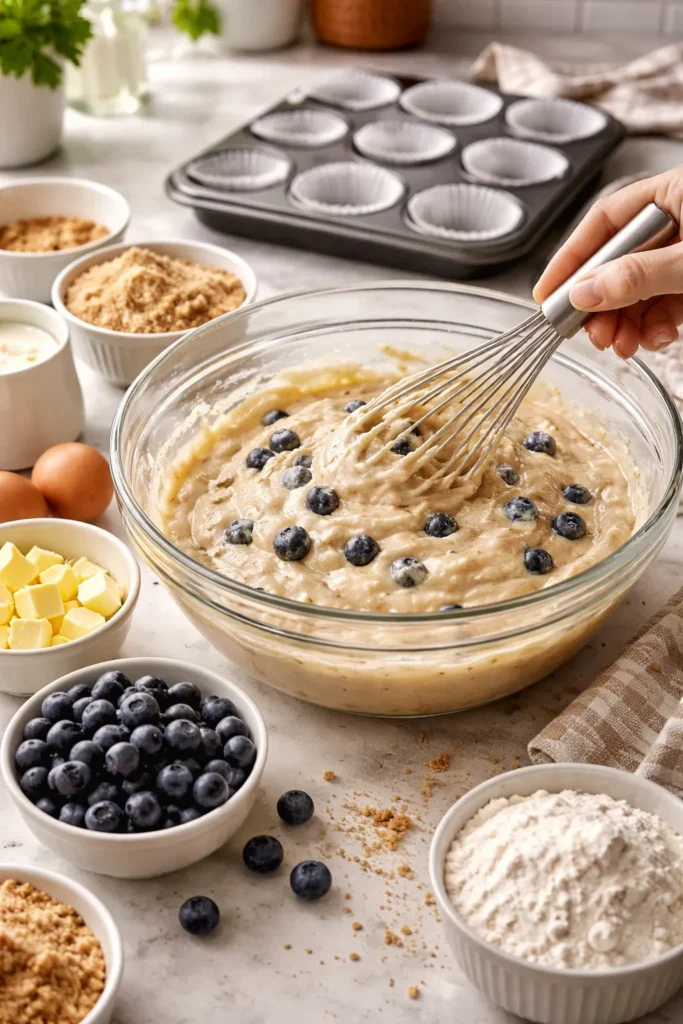
The most important rule for muffin batter is this: do not overmix. Overmixing develops the gluten in the flour, which creates tough, rubbery muffins. Mix the wet and dry ingredients together only until they’re just combined, stopping while some flour streaks are still visible. It’s okay if the batter looks slightly lumpy. When you fold in the blueberries, be equally gentle—fold just until they’re distributed throughout, taking care not to break them up or turn the entire batter purple. This is one place where a rubber spatula is your best friend because it allows you to fold gently without creating unnecessary agitation.
Creating the Crumble Topping
The crumble topping deserves its own section because getting it right is what transforms a good muffin into a great one. Unlike more complex toppings or frostings, a crumble is refreshingly simple—just four ingredients combined in a specific way.
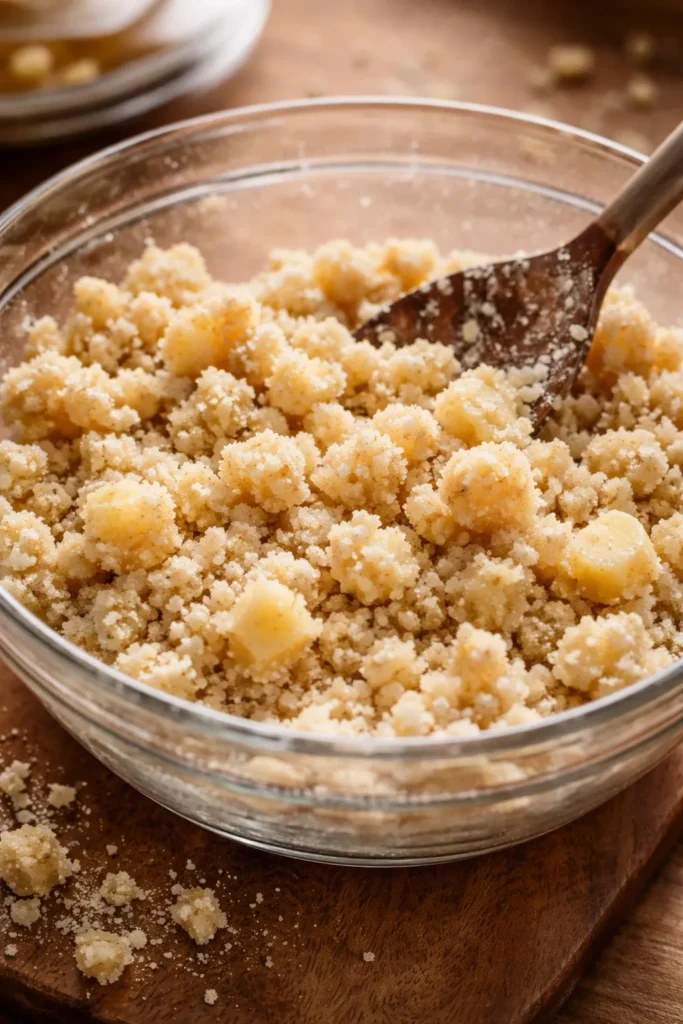
You’ll start with all-purpose flour and granulated sugar in a small bowl. The ratio should be roughly one part sugar to one part flour by weight (or about half a cup of each). Add melted butter—about three-quarters as much as the flour and sugar combined. Using a fork, stir everything together until the mixture becomes crumbly and clumpy, with pea-sized pieces of butter distributed throughout. It should look like wet sand or coarse breadcrumbs, not uniform or paste-like.
If your crumble is too dry and powdery, you haven’t incorporated enough butter. Keep mixing with the fork, making sure to work it thoroughly through the flour mixture. If it’s too wet or pasty, you’ve added too much butter—there’s not much you can do about this except proceed (it’ll still taste good, though it might not have quite as much crunch). You want those distinct butter pieces to remain visible and separate, which is what creates the texture when baked.
Some recipes add cinnamon to the crumble, which adds a subtle warmth that complements blueberries beautifully. Others keep it simple with just the sweet, buttery flavor. Both approaches work perfectly. If you want to add cinnamon, just sprinkle about a quarter teaspoon into the crumble mixture and combine it well. You could also add a tiny pinch of salt to enhance the flavors, though this is entirely optional since the butter you’re using might already be salted.
Once your crumble is mixed, you can use it immediately or cover and refrigerate it for up to a few days. Some bakers like to chill it briefly before baking because the cold butter holds better during baking, creating a crunchier texture. However, this isn’t essential—the muffins will be delicious either way.
Yield: Makes 13 large muffins
Prep Time: 20 minutes
Cook Time: 25 minutes (10 minutes at high heat + 15 minutes at lower heat)
Total Time: 45 minutes active + cooling time
Difficulty: Beginner to Intermediate — The steps are straightforward and require only basic equipment, but success depends on understanding the two-temperature baking technique and not overmixing the batter. First-time muffin bakers will absolutely succeed with careful attention to these details.
Ingredients for Bakery-Style Blueberry Crumble Muffins
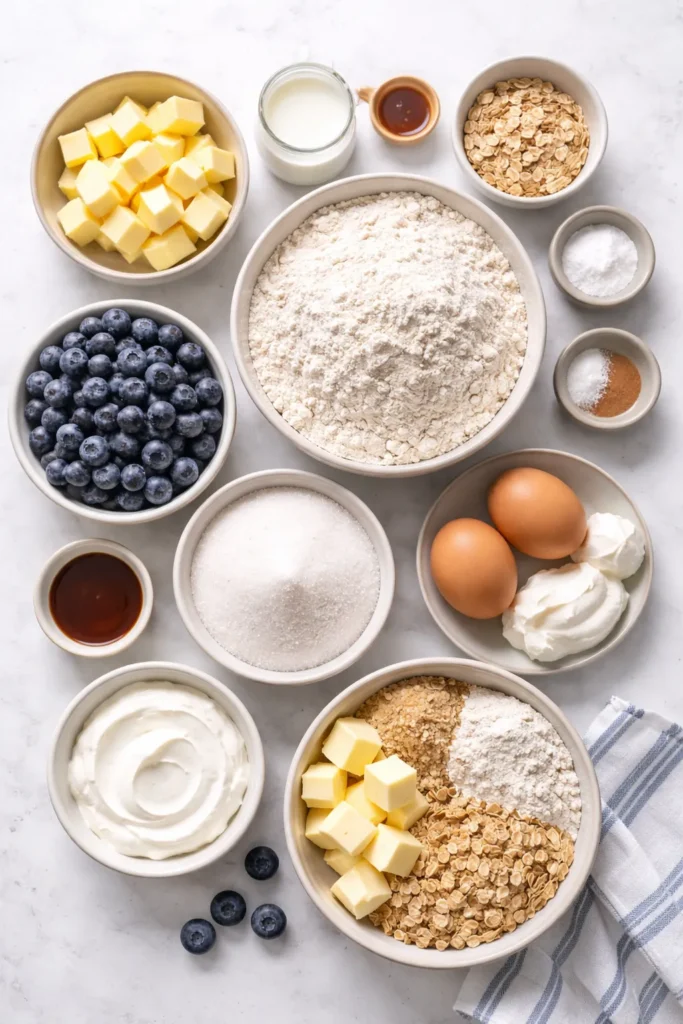
For the Muffin Batter:
- 3 cups all-purpose flour (measured by spooning into the cup and leveling with a knife, not scooping directly)
- 2½ teaspoons baking powder
- ½ teaspoon baking soda
- ½ teaspoon fine sea salt
- 1¼ cups buttermilk, at room temperature
- 1¼ cups granulated sugar
- ½ cup unsalted butter, melted and slightly cooled
- 2 large eggs, at room temperature
- ⅓ cup sour cream, at room temperature
- ⅓ cup vegetable oil
- 1 tablespoon vanilla extract or vanilla bean paste
- 2 cups fresh blueberries (or frozen blueberries straight from the freezer—do not thaw)
For the Crumble Topping:
- ½ cup all-purpose flour
- ½ cup granulated sugar
- 4 tablespoons unsalted or salted butter, melted and slightly cooled
- ¼ teaspoon ground cinnamon (optional but recommended)
- Pinch of fine sea salt (optional)
Step-by-Step Instructions for Perfect Blueberry Crumble Muffins
Preparation:
-
Preheat your oven to 400°F (200°C) and position a rack in the center. Line a standard 12-cup muffin pan with paper liners, or use a 13-cup pan if you have one. Paper liners are recommended because they help you identify when the muffins are done (you can see the browning on the sides) and they make removal easier. If you don’t have liners, grease the muffin cups generously with softened butter or cooking spray.
-
Measure all of your ingredients and have them at room temperature. This is the single most important step for success. Room-temperature ingredients combine smoothly and evenly, creating a uniform batter with optimal texture. Cold butter, eggs, or dairy will clump and create a lumpy batter that bakes unevenly. If you forgot to bring items to room temperature, you can quickly warm eggs by sitting them in a bowl of warm (not hot) water for a few minutes, and you can rest other items on the counter for 15 to 20 minutes.
Make the Crumble Topping:
-
In a small bowl, combine the flour, sugar, cinnamon (if using), and salt for the crumble. Whisk together briefly to incorporate everything evenly.
-
Pour in the melted and cooled butter. Using a fork, stir and break the butter into the flour mixture until crumbly clumps form throughout. The texture should resemble wet sand or coarse breadcrumbs, with visible pea-sized pieces of butter distributed evenly. If the mixture looks too dry and powdery, keep stirring—you may need to work the fork through it several more times to fully incorporate the butter. Cover this mixture and set it aside or refrigerate until you’re ready to top the muffins.
Make the Batter:
-
In a large mixing bowl, whisk together the flour, baking powder, baking soda, and salt. Make sure these dry ingredients are evenly distributed—use a whisk to break up any clumps of baking powder or baking soda that might be hiding. Set this bowl aside.
-
In another large mixing bowl, whisk together the buttermilk, sugar, melted butter, eggs, sour cream, oil, and vanilla extract until well combined. Whisk for about 30 seconds to ensure the sugar is dissolving and everything is smooth. Don’t worry if the mixture looks slightly curdled or lumpy at this stage—this is completely normal when combining dairy products with oil and butter. Everything will come together once you combine it with the dry ingredients.
-
Pour the wet ingredients into the bowl with the dry ingredients. Using a rubber spatula or wooden spoon, fold the mixtures together until just combined. Stop when you can still see a few streaks of flour in the batter—do not mix until completely smooth. Overmixing develops gluten, which creates tough, dense muffins. This is the single most important instruction for tender, bakery-quality muffins.
-
Add the blueberries to the batter and gently fold them in using your spatula. Use minimal mixing motions—just enough to distribute them throughout the batter. If using frozen blueberries, add them straight from the freezer without thawing. Stir just until the berries are evenly scattered. Stop as soon as they’re distributed because excessive stirring will break the berries and turn the batter purple.
Fill and Top:
-
Using an ice cream scoop (a 3-tablespoon scoop works perfectly), divide the batter evenly among the muffin liners. Fill each liner so the batter comes to just above the rim—muffins should be slightly overfilled to create those tall, bakery-style domes. If you don’t have a scoop, use a spoon and divide the batter as evenly as possible.
-
Remove the crumble topping from the refrigerator and break it up gently with your fingers if it’s been chilled and has compacted. Sprinkle approximately 2 tablespoons (about 20 grams) of the crumble topping onto each muffin, dividing it evenly among all of them. The topping should cover most of the batter surface and can pile up slightly. Don’t worry if some of it seems to sink into the batter—it will redistribute and set beautifully as the muffins bake.
The Critical Two-Temperature Bake:
-
Place the filled muffin pan in the center of the preheated 400°F oven and bake for exactly 10 minutes. This is crucial: do not open the oven door during these 10 minutes. The intense initial heat is causing the batter to rise and the structure to set. Opening the door will cause heat loss and deflate the muffins before that structure is established.
-
After exactly 10 minutes, without opening the oven door, reduce the oven temperature to 350°F (175°C). The muffins will stay in the oven while you make this adjustment. Bake for an additional 10 to 15 minutes, until the tops spring back when you gently press them with your fingertip and the edges are light golden brown. A toothpick inserted in the center of one of the middle muffins should come out clean or with a few moist crumbs attached—not with wet batter clinging to it.
-
Remove the muffin pan from the oven and set it on a wire cooling rack. Allow the muffins to cool in the pan for 5 to 8 minutes—this time allows them to firm up enough to handle without falling apart. They’ll still be warm, which is perfect.
-
Carefully remove the muffins from the pan by grasping the paper liner and gently pulling straight up. Transfer them to a wire cooling rack and allow them to cool completely—at least 30 minutes, though they’re absolutely delicious eaten warm if you can wait that long.
Common Muffin Mistakes to Avoid
Even with the best intentions, a few missteps can derail an otherwise perfect batch of muffins. Understanding what goes wrong—and why—helps you avoid these pitfalls on your next bake.
Overmixing the batter is the most common mistake. The longer you mix, the more you develop gluten, and the tougher the muffins become. It’s completely normal to see flour streaks in the batter when you combine the wet and dry ingredients. Stop mixing as soon as everything is roughly combined. The batter should look slightly lumpy and shaggy, not smooth and uniform.
Using cold ingredients is another frequent culprit. Cold eggs, buttermilk, or butter won’t combine smoothly with the rest of the batter, creating lumps and an uneven texture. Room-temperature ingredients mix beautifully and create a smooth, uniform batter that bakes evenly. If you’re in a hurry, you can quickly warm eggs by sitting them in warm water for a few minutes, and you can let other ingredients sit on the counter for 15 minutes while you prepare your pans and preheat the oven.
Opening the oven door too early interrupts the critical rising phase. That first 10 minutes at high heat is when the muffins achieve their height and set their structure. Every time you open the door, you lose heat and deflate the muffins slightly. Practice patience during those first 10 minutes—the muffins are working hard to rise!
Overfilling the liners might seem like a good idea (more muffin!), but extremely overfilled cups can cause batter to spill over onto the oven floor and prevent the muffins from rising properly. Fill to just above the rim, not so much that the batter spills over.
Using oil instead of butter for the crumble creates a topping that’s too wet and won’t crisp up properly. Melted butter is the right choice because it creates distinct pieces when combined with flour and sugar, whereas oil just coats the particles. This is one place where butter really matters.
Adding thawed frozen blueberries causes them to bleed their color into the batter, turning it purple and compromising the flavor. Frozen berries should go straight from freezer to batter without thawing. The heat of baking will thaw them gently and evenly throughout the cake.
Not measuring flour correctly is surprisingly common and can throw off your entire recipe. Don’t scoop the measuring cup directly into the flour bag—this packs the flour and you end up with far too much. Instead, fluff the flour with a fork, spoon it gently into your measuring cup, and level it with a knife. Better yet, if you have a kitchen scale, use it. Flour should weigh about 120 grams per cup, and baking becomes much more reliable with weight measurements.
Storage and Make-Ahead Tips
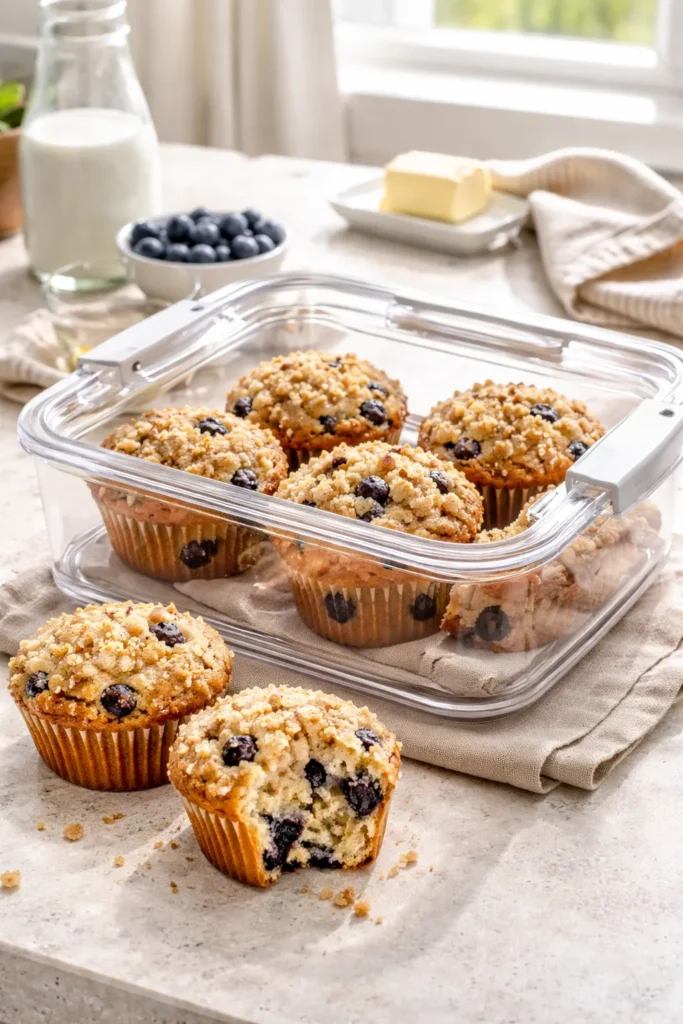
These muffins are wonderful fresh from the oven, but they’re equally delicious hours or even days later. The texture actually improves slightly after a day because the moisture redistributes through the crumb, making them even more tender.
Room temperature storage: Place completely cooled muffins in an airtight container with a piece of paper towel or a slice of bread on top to absorb any excess moisture. They’ll stay fresh at room temperature for up to 4 days. The paper towel or bread prevents the muffins from drying out while absorbing any condensation that might form.
Refrigerator storage: While not necessary, you can store muffins in the refrigerator for up to a week. This is useful if your kitchen is very warm and humid. Bring them to room temperature or warm them briefly before eating.
Freezing: These muffins freeze beautifully for up to 2 to 3 months. Once completely cooled, wrap each muffin individually in plastic wrap, then place them all in a freezer-safe bag or airtight container. When you want to eat one, thaw at room temperature for about an hour, or warm a thawed muffin in a 300°F oven for 5 to 8 minutes until heated through. You can also microwave a frozen muffin for about 45 seconds to a minute, though the oven method produces better texture.
Make-ahead batter: You can prepare the muffin batter up to a day ahead and refrigerate it in an airtight container. When you’re ready to bake, prepare your pans and crumble topping, scoop the cold batter into the liners, top with crumble, and bake. Cold batter will take a few extra minutes to bake (perhaps 2 to 3 additional minutes in the second phase), so watch the muffins carefully.
Freezing batter: While less common, you can also freeze unbaked batter in lined muffin cups. Scoop the batter into prepared liners, top with crumble, cover with plastic wrap, and freeze. When ready to bake, don’t thaw—just place the frozen pan directly into the preheated 400°F oven and bake for an additional 5 to 8 minutes longer (so approximately 15 minutes at 400°F, then reduce to 350°F for 15 to 20 minutes). This method works best if you freeze the muffins within a few hours of making the batter.
Flavor Variations Worth Trying
The basic recipe is perfection as is, but there’s wonderful room for creativity. Each variation below has been tested and tastes absolutely delicious.
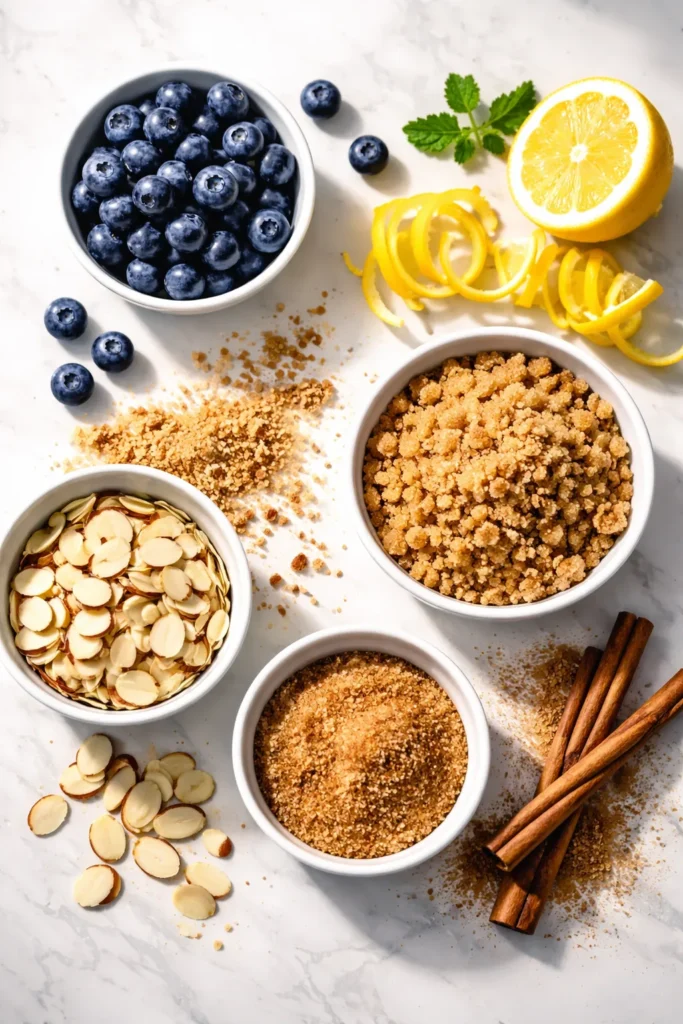
Lemon blueberry muffins: Add 1 to 2 tablespoons of fresh lemon zest to the wet ingredients. The brightness of lemon pairs beautifully with blueberry and adds sophisticated flavor. You can also add 1 tablespoon of fresh lemon juice if you want additional tang. Some bakers like to finish these with a simple lemon glaze drizzled over the cooled muffins (mix powdered sugar with fresh lemon juice until drizzle-consistency).
Almond blueberry muffins: Replace ¼ cup of the flour with almond flour, and add ½ teaspoon of almond extract to the wet ingredients. This creates a more delicate, sophisticated flavor. You could also top the muffins with sliced almonds mixed into the crumble topping.
Brown sugar crumble variation: Replace half the granulated sugar in the crumble with packed brown sugar. This adds deeper, more caramel-like notes to the topping and complements the blueberries wonderfully.
Cinnamon sugar twist: Instead of a plain crumble, make a cinnamon-sugar version by mixing the flour, sugar, and a full teaspoon of cinnamon together. This creates a spiced variation that feels warm and cozy, especially wonderful during cooler months.
Other berry variations: Raspberries, blackberries, or a mixture of berries work beautifully in place of blueberries. Use the same quantity and follow the same instructions—don’t thaw frozen berries before adding them.
Cornmeal variation: Replace ½ cup of all-purpose flour with cornmeal for a slightly grainier texture and a subtle corn flavor that’s especially pleasant with fresh blueberries.
Sourdough variation: If you keep sourdough starter, you can replace ⅓ cup of the buttermilk with fed sourdough starter. This adds subtle tang and depth of flavor.
Serving Suggestions and Pairings
These muffins are wonderful on their own, but they’re magical when paired thoughtfully with complementary flavors and beverages.
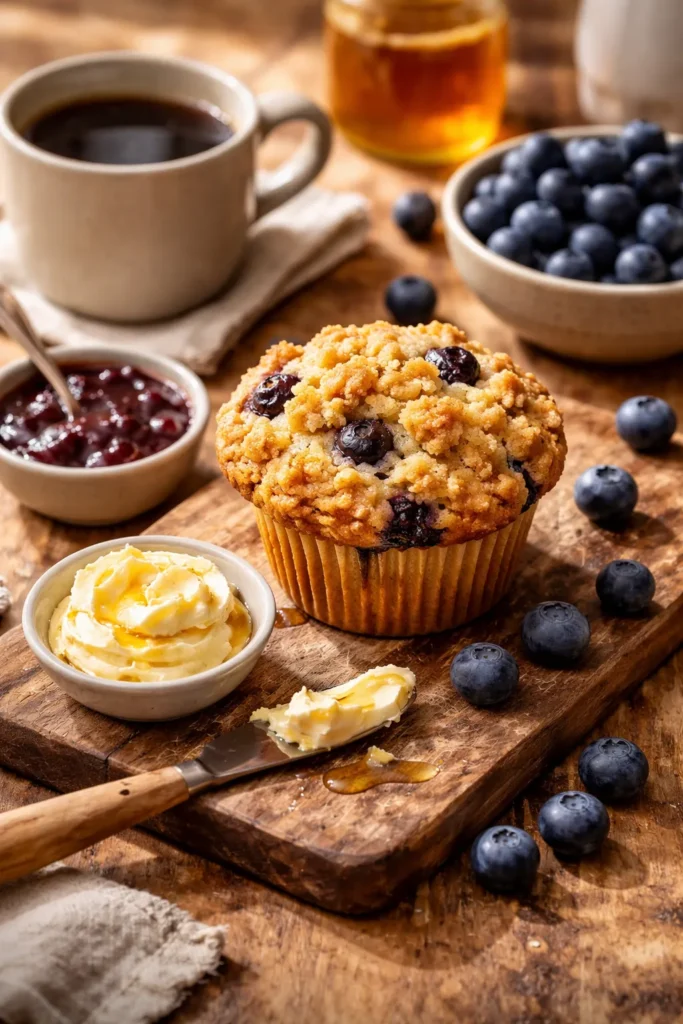
Classic pairing: Serve a warm muffin with a generous spread of honey butter (soften butter and whisk with honey until light and fluffy). The rich, slightly sticky honey butter adds incredible decadence to the tender crumb. Alternatively, a simple smear of salted butter is equally wonderful, allowing the blueberry and vanilla flavors to shine.
Coffee and breakfast pairing: These muffins are the perfect accompaniment to morning coffee. The slight sweetness and fruity notes complement both black coffee and milk-based coffee drinks beautifully. Serve alongside scrambled eggs, thick-cut bacon, or sausage for a complete breakfast spread.
Brunch presentation: For a special brunch, arrange the cooled muffins on a wooden board or cake stand alongside fresh berries, a selection of jams, and whipped butter. The visual presentation feels bakery-quality, and guests can choose their own toppings.
Tea pairing: These muffins are elegant enough to serve with afternoon tea. Their subtle sweetness works with both black and herbal teas, and the blueberry flavor complements floral notes in chamomile or lavender teas beautifully.
Flavor accents: A sprinkle of coarse sugar on top of the crumble just before baking adds visual appeal and an extra crunchy element. Some people enjoy a light dusting of cinnamon sugar on the warm muffin. A squeeze of fresh lemon juice over a cooled muffin brings brightness to the blueberry flavor.
Gift packaging: These muffins are wonderful gifts. Cool completely, then arrange them in a pretty box lined with parchment or tissue paper. They make excellent presents for neighbors, coworkers, or friends—they say “I made something special, just for you” in a way that’s genuinely appreciated.
Storing for picnics or traveling: Wrapped individually in parchment or plastic wrap, these muffins travel beautifully. They maintain their quality for several hours at room temperature, making them perfect for picnics, road trips, or packed lunches.
Why Mastering These Muffins Matters
Learning to bake bakery-quality muffins at home is about so much more than just having a good breakfast. It’s about understanding the fundamental principles of how batter works, how heat transforms ingredients, and how small details create remarkable results. Once you master this recipe, you have the foundation to create beautiful muffins in virtually any flavor combination you can imagine.
The techniques you’ve learned here—the importance of room-temperature ingredients, the two-temperature baking method, the art of not overmixing, the magic of understanding ingredient ratios—these translate to all kinds of baking projects. You’ll approach other recipes with more confidence and understanding. You’ll recognize when something might not work and be able to troubleshoot and adapt.
Most importantly, there’s genuine joy in pulling a tray of golden, domed blueberry muffins from your oven and knowing that you created something bakery-quality in your own kitchen. It’s a small accomplishment, but it’s a real one. And the first time someone bites into one and says “you made these?”—with genuine surprise and delight—you’ll understand exactly why mastering this recipe is worth the effort.