There’s something magical about pulling a golden-brown cobbler from the oven, its edges bubbling with fruit juices and its top gleaming with a buttery crust. But here’s the truth that most home bakers discover only after making a few cobblers: the topping is everything. The fruit might be the star, but the topping is what transforms a simple baked fruit dish into an irresistible dessert that has people asking for seconds before they’ve even finished their first bite.
Fruit cobblers are one of the most forgiving desserts you can make—they skip the finicky pie crust rolling, skip the precision of layer cakes, and deliver genuine homemade comfort with minimal fuss. What makes them so versatile is that almost any fruit works in the filling: fresh berries, peaches, apples, plums, cherries, or even a combination of whatever’s in season. The real magic, though, happens on top. A cobbler topping can be airy and delicate, dense and cakey, crispy and streusel-like, or buttery and biscuit-tender—and each version offers a completely different eating experience.
The beauty of mastering cobbler toppings is that once you understand the basic techniques, you can put together an impressive homemade dessert from pantry staples in less than an hour. Whether you’re baking for a family dinner, bringing a dish to a potluck, or impressing guests with a last-minute dessert, having a reliable topping method in your back pocket means you’re never more than a few minutes away from warm cobbler with vanilla ice cream.
Let’s explore five of the most reliable, easiest, and most delicious cobbler toppings that work beautifully with virtually any fruit you choose to bake with.
Table of Contents
- 1. Classic Buttermilk Biscuit Topping
- Why This Topping Works Every Time
- How to Drop It on Your Fruit
- 2. Easy Cake-Like Drop Topping
- The Technique That Makes It Work
- Why Home Bakers Love This Method
- 3. Buttery Streusel or Crumb Topping
- The Science of Streusel Crunch
- When to Choose Streusel Over Other Toppings
- 4. Quick Self-Rising Flour Topping
- The Critical Technique for Success
- Why This Method Works with Any Fruit
- 5. Simple Cake Mix Topping
- The Honest Truth About Cake Mix Cobblers
- How to Choose the Right Topping for Your Fruit
- Tips for Perfect Cobbler Topping Every Time
- Storing and Reheating Cobblers with Different Toppings
- Common Mistakes When Making Cobbler Toppings
- Cobbler Topping Variations and Flavor Swaps
- Final Thoughts
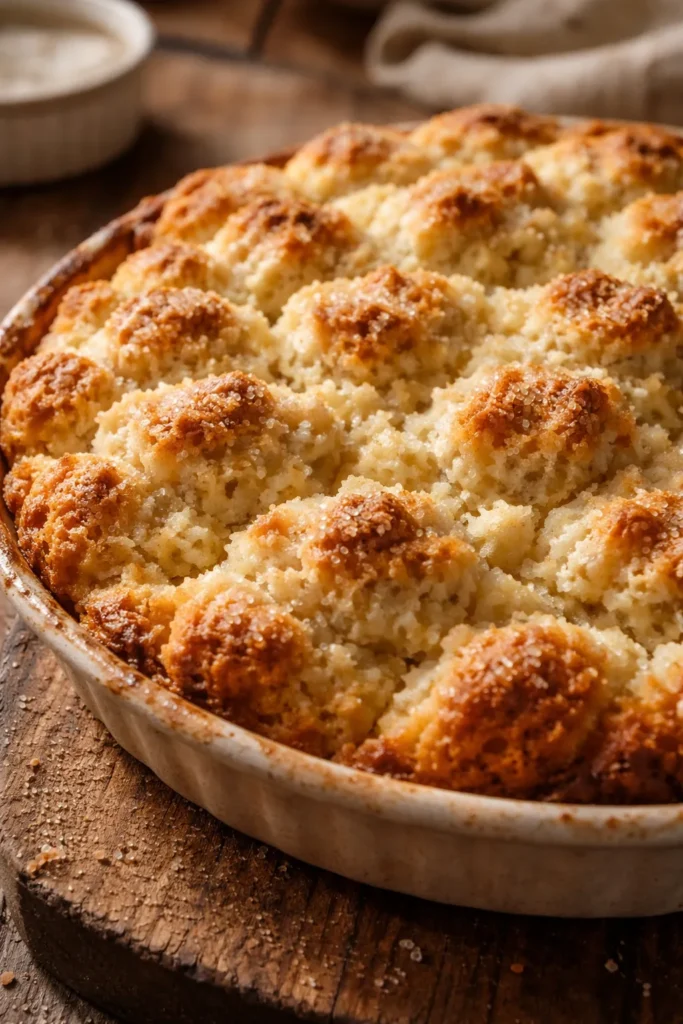
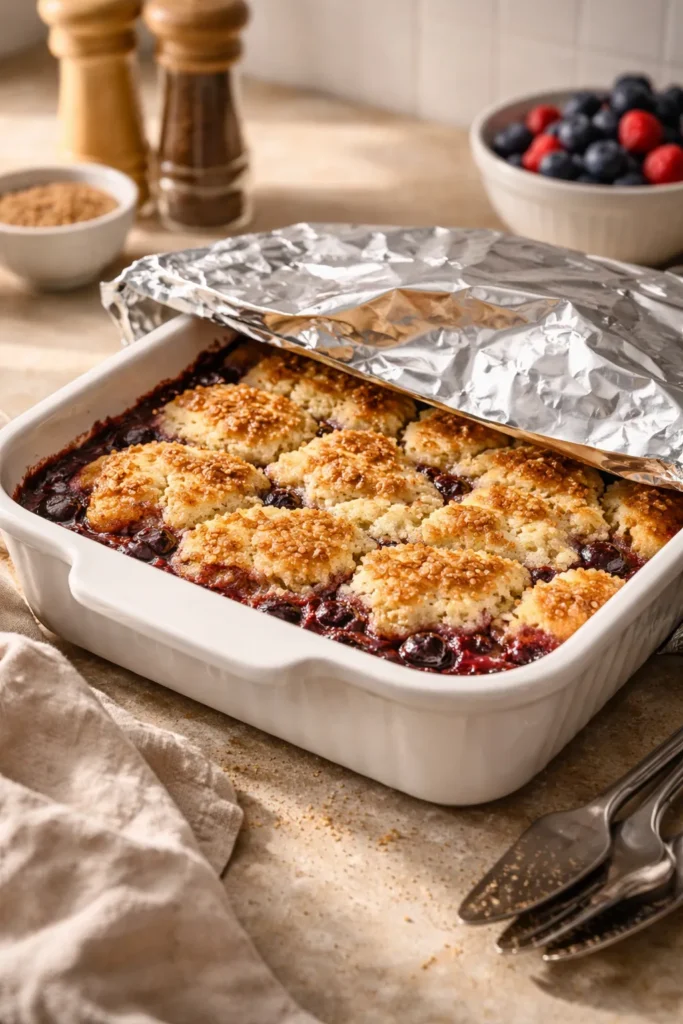
1. Classic Buttermilk Biscuit Topping
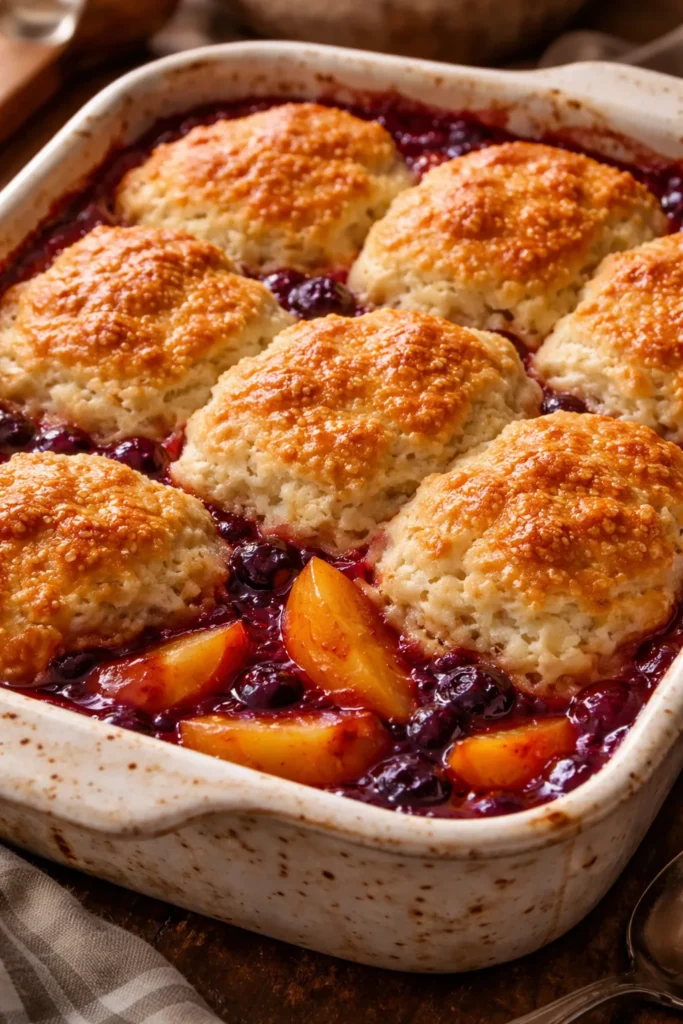
The buttermilk biscuit topping is what most people imagine when they think of traditional cobbler—those golden, tender, slightly flaky pockets that look like actual cobblestones scattered across the fruit filling. This is the topping that earns cobbler its name, and it’s more forgiving than you might expect.
The secret to an exceptional buttermilk biscuit topping starts with understanding the role of cold butter. When you cut cold butter into the flour mixture, those small, pea-sized pieces of butter create pockets that steam during baking, producing a tender, airy crumb with a delicate flakiness. The buttermilk adds richness and slight tang while also providing the liquid needed to bring the dough together without overworking it. As the experts at King Arthur Baking note, the buttermilk creates an ultra-rich biscuit—this is why authentic cobbler tastes so much better than versions made with regular milk.
For the Topping:
- 1½ cups (188g) all-purpose flour, spooned and leveled
- ⅓ cup (65g) granulated sugar
- 1½ teaspoons baking powder
- ¼ teaspoon fine sea salt
- 6 tablespoons (85g) cold unsalted butter, cubed
- ½ cup (120ml) cold buttermilk
The technique matters just as much as the ingredients. In a large bowl, whisk together your dry ingredients—flour, sugar, baking powder, and salt. Using a pastry cutter, two forks, or even your fingertips, work the cold butter into the flour mixture until it resembles coarse meal with pea-sized crumbs distributed throughout. This step should take only a couple of minutes; don’t overthink it.
Pour in the cold buttermilk and stir gently with a fork or wooden spoon until the dough just comes together. Here’s the crucial part: stop mixing as soon as you no longer see dry flour. Overmixing develops gluten and creates a tough, dense biscuit instead of a tender one. The dough will be slightly shaggy and moist, and that’s exactly what you want.
Why This Topping Works Every Time
The buttermilk biscuit method works across all fruit types because the dough’s flavor is subtle enough not to compete with delicate fruits like berries, yet substantial enough to stand up to juicy stone fruits like peaches or plums. The biscuit structure absorbs some of the fruit juices while still maintaining its own tender texture, creating a beautiful balance.
How to Drop It on Your Fruit
Rather than rolling out the dough and cutting precise shapes, the easier approach is to simply take handfuls of dough, gently flatten each section between your palms, and place them directly on top of your fruit filling. Leave some gaps—these gaps let steam escape and allow fruit juices to bubble up around the biscuits, creating that gorgeous golden-brown color and the characteristic cobblestone look. Cover roughly 70-80% of the fruit; you don’t need to seal the entire surface.
For extra shine and crunch, brush the biscuit tops with an additional tablespoon of buttermilk and sprinkle coarse sugar over the entire surface. Bake at 350°F (177°C) for 45-55 minutes, until the biscuits are deep golden brown and a toothpick inserted into one of the thicker biscuit sections comes out clean.
2. Easy Cake-Like Drop Topping

If you want all the homemade appeal of a cobbler without the slight fussiness of making traditional biscuit dough, the cake-like drop topping is your answer. This method combines a batter that’s somewhere between a pancake batter and a soft cake dough, which you simply spoon directly over your fruit filling. It bakes up soft and tender with a golden exterior, delivering cobbler comfort with minimal technique.
This topping is beloved by bakers because it genuinely cannot fail. There’s no cutting butter into flour, no worrying about overworking gluten, and no precision required. You make a simple batter, drop it on fruit, and let the oven do the rest.
For the Topping:
- 1¼ cups (175g) all-purpose flour
- ⅓ cup (66g) granulated sugar
- 2 teaspoons baking powder
- ½ teaspoon ground cinnamon (optional but recommended)
- ¼ teaspoon fine sea salt
- 1 large egg, room temperature
- ¼ cup (60ml) buttermilk or regular milk, cold
- 6 tablespoons (90g) unsalted butter, melted and cooled slightly
- ½ teaspoon pure vanilla extract
Whisk together all the dry ingredients in a bowl—flour, sugar, baking powder, cinnamon, and salt. In a separate bowl, whisk together the egg, milk, melted butter, and vanilla until completely smooth. Pour the wet ingredients into the dry ingredients and stir gently until just combined. The batter should be slightly thick but pourable, like a soft cake batter.
The Technique That Makes It Work
Spread your prepared fruit filling evenly into your baking dish, then drop the batter by spoonfuls directly onto the fruit. Don’t spread it smooth—let those irregular spoonfuls create an appealing, rustic surface. Some fruit will show through, some batter will mound up, and that’s exactly the look you want. As it bakes, the batter will spread slightly and create a beautiful, uneven golden-brown surface with peaks and valleys.
Bake at 375°F (190°C) for 40-45 minutes, until the cobbler top is deep golden brown and the fruit juices are visibly bubbling at the edges. The topping will be soft when you first remove it from the oven, but it firms up as it cools, developing a slightly crisp exterior while staying tender inside.
Why Home Bakers Love This Method
This topping works beautifully because the egg provides structure and tenderness, while the melted butter creates a soft, almost cake-like crumb. The cinnamon adds warmth without overpowering, and because there’s no cold butter to manage, there are no temperature considerations to worry about. This topping is particularly forgiving with frozen fruit—it doesn’t matter if the fruit is still partially frozen when you start baking, because the batter will still rise properly and bake through.
3. Buttery Streusel or Crumb Topping
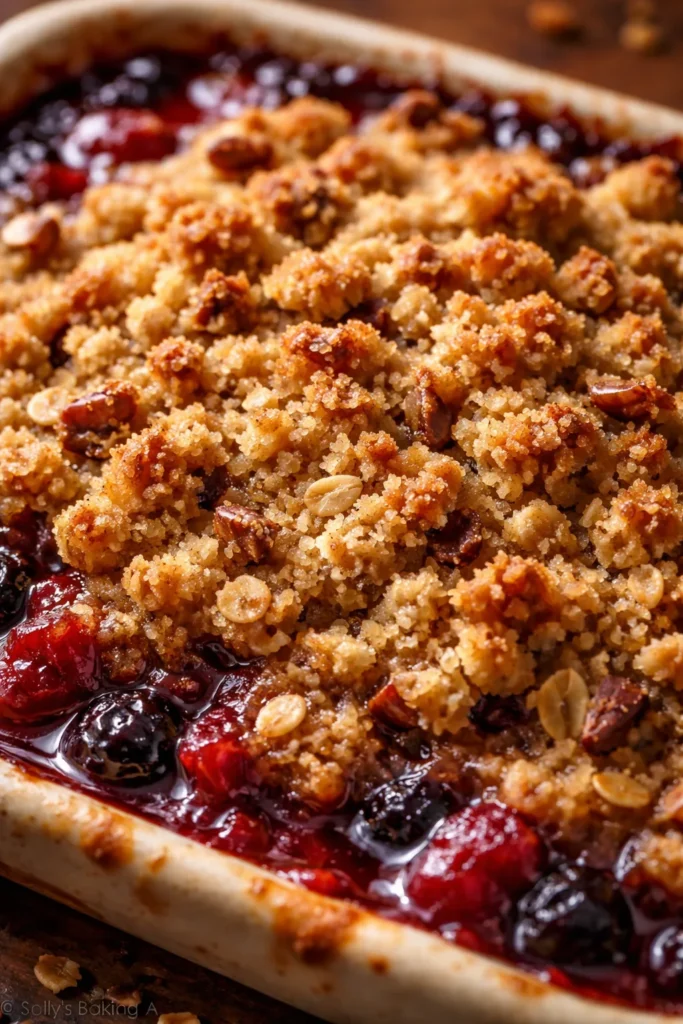
For those who love crunch and don’t mind a topping that breaks away from the traditional cobbler definition, a buttery streusel topping delivers an entirely different eating experience. This topping is crispy, crunchy, and full of caramelized butter flavor, making it perfect for fruit cobblers where you want maximum textural contrast against soft, juicy fruit.
A streusel topping combines flour, sugar, butter, and often oats into a coarse, sandy mixture that stays crumbly rather than setting into a unified crust. When baked, the butter melts and browns slightly, the sugar caramelizes at the edges, and the topping turns golden and delightfully crunchy.
For the Topping:
- ¾ cup (95g) all-purpose flour
- ½ cup (100g) granulated sugar (or light brown sugar for deeper flavor)
- ½ cup (48g) old-fashioned rolled oats (optional; you can use all flour if preferred)
- ½ teaspoon ground cinnamon
- Pinch of fine sea salt
- 6 tablespoons (85g) cold unsalted butter, cubed
- ¼ cup (28g) chopped pecans or sliced almonds (optional but recommended)
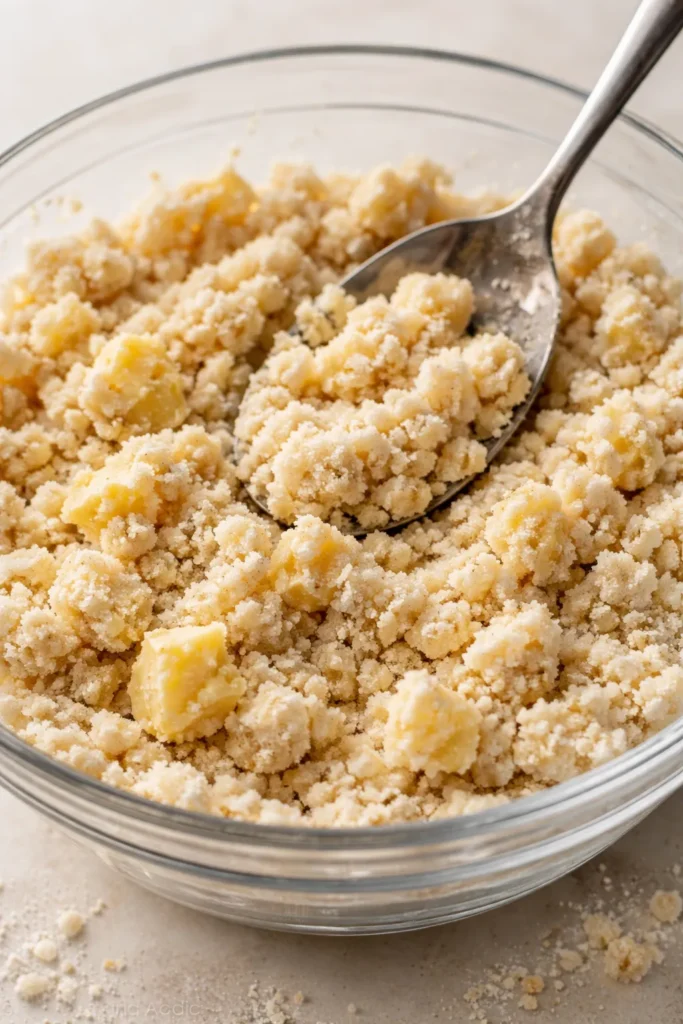
In a bowl, mix together the flour, sugar, oats (if using), cinnamon, and salt. Cut the cold butter into small cubes and add to the flour mixture. Using a pastry cutter or your fingertips, work the butter into the flour until the mixture resembles coarse sand or breadcrumbs. Don’t overwork this—you want distinct crumbs, not a smooth paste.
Stir in your chopped nuts if you’re using them. Spread this mixture evenly over your prepared fruit filling, pressing down very gently. Don’t pack it tightly; a loose, crumbly topping will bake up crunchier than one that’s been pressed firmly.
The Science of Streusel Crunch
The reason streusel stays crispy rather than becoming soggy involves moisture management. Because the topping isn’t a solid cake or biscuit, the steam from the fruit and oven can escape more easily, and the fruit juices can bubble around the crumbs rather than soaking through them. The butter in the topping melts and coats the flour particles, which helps them stay separate and crispy even as they brown.
Bake at 350°F (175°C) for 40-50 minutes, until the fruit is bubbling at the edges and the streusel topping is deeply golden brown. The streusel will firm up significantly as it cools, becoming incredibly crunchy.
When to Choose Streusel Over Other Toppings
Streusel works particularly well with berries, because the bright tartness of berries pairs beautifully with the sweet crunch of caramelized streusel. It’s also excellent for softer fruits like peaches or plums, where the contrast between soft fruit and crunchy topping creates a really satisfying eating experience. If you’re serving cobbler to people who love crunch and texture, this is your go-to option.
4. Quick Self-Rising Flour Topping
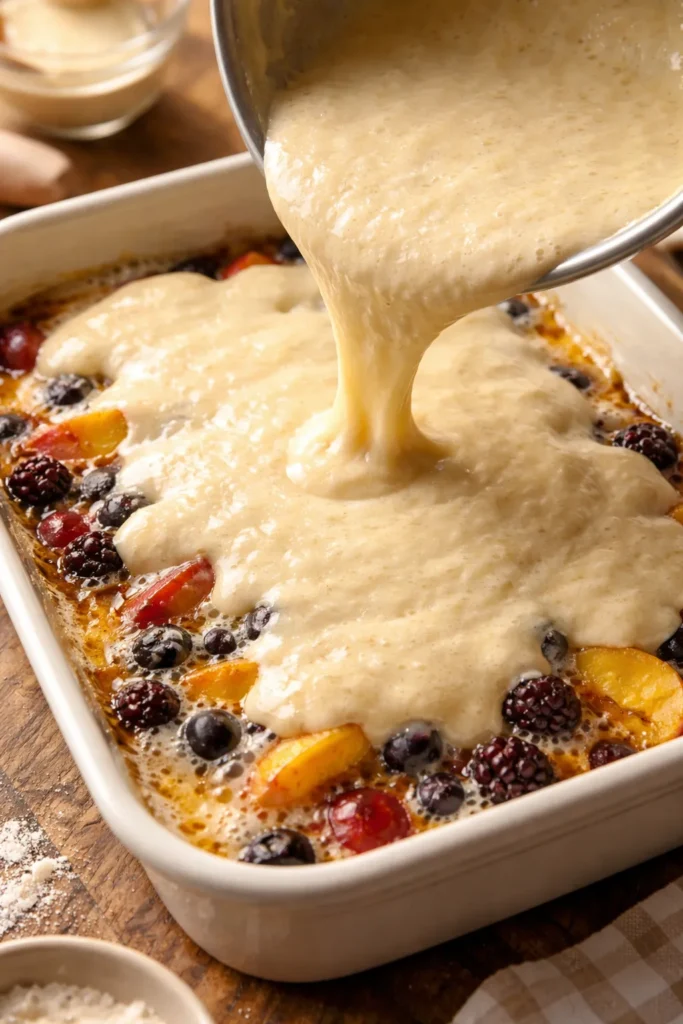
The self-rising flour topping is the workhorse of Southern cobbler making—it’s fast, it’s foolproof, and it requires almost no technique beyond stirring a few ingredients together. This method takes advantage of self-rising flour (which already contains baking powder and salt), making it the closest thing to a true one-bowl cobbler topping.
Many traditional Southern cobblers use this method because it delivers results in under an hour, making it perfect for weeknight desserts or last-minute gatherings. The topping bakes up soft and tender, with a delicate crust that browns beautifully.
For the Topping:
- 1 cup (125g) self-rising flour
- ¾ cup (150g) granulated sugar
- ¾ cup (180ml) whole milk or buttermilk
- 4 tablespoons (57g) unsalted butter, melted
- ½ teaspoon pure vanilla extract (optional)
Whisk together the self-rising flour and sugar in a bowl. Pour in the milk and melted butter, then stir until you have a thin, pourable batter—thinner than pancake batter, more like crêpe batter. Add vanilla if you’re using it.
The Critical Technique for Success
Pour this batter directly into your baking dish over the melted butter, before you add the fruit. This is the key difference from other methods. Spread the batter to an even layer, then spoon or pour your prepared fruit filling on top of the batter. Do not stir them together. This is not a mistake in the instructions—as the cobbler bakes, the batter rises up around the fruit, creating a beautiful cake-like topping underneath and all around the fruit filling.
Bake at 350°F (175°C) for 45-60 minutes, until the top is golden brown and a toothpick inserted into the cake portion comes out clean. The edges will be darker and crispier, while the center stays soft.
Why This Method Works with Any Fruit
The beauty of this method is that because the batter surrounds the fruit (rather than sitting on top of it), there’s less risk of the fruit making the topping soggy. The batter acts as a insulating layer, baking into a tender cake that frames the fruit beautifully. Whether you’re using fresh, frozen, or even canned fruit, this method delivers consistent results.
Important note: Make sure you’re using true self-rising flour, which contains baking powder and salt already mixed in. If you use all-purpose flour, the cobbler won’t rise properly and will be dense.
5. Simple Cake Mix Topping
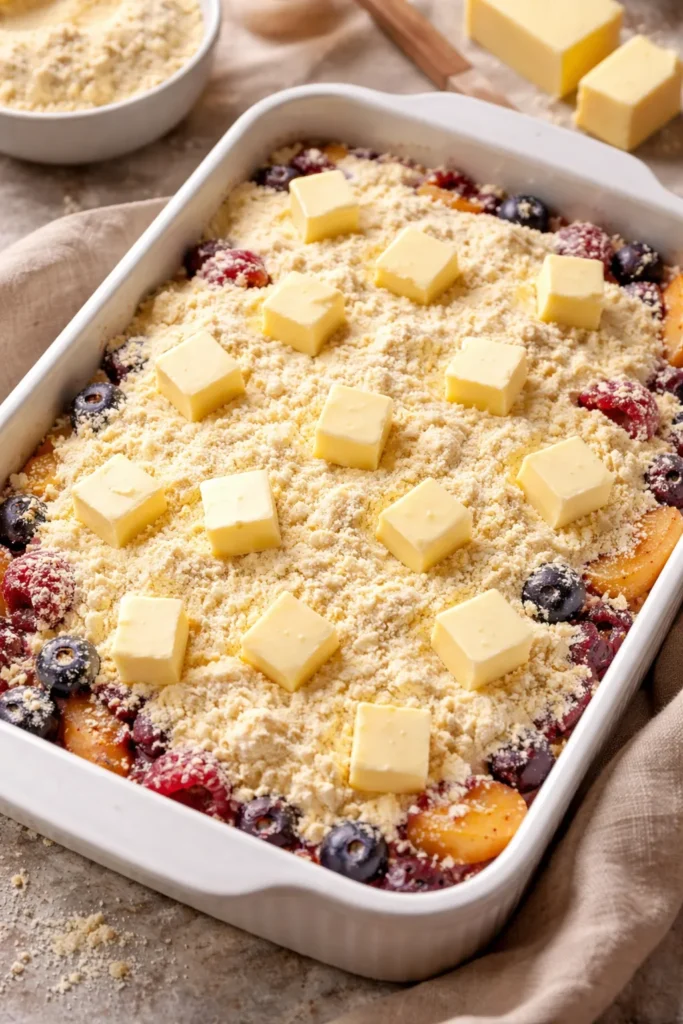
For the ultimate in convenience without sacrificing homemade taste, the cake mix topping is hard to beat. This method uses a boxed cake mix (usually yellow or vanilla) combined with cold butter to create a crumbly, golden topping that bakes into something remarkably delicious. While it might not be the most “from-scratch” option, it’s absolutely valid, and many home bakers swear by it for weeknight desserts.
The reason cake mix works so well is that it already contains emulsifiers, flavorings, and the right balance of dry ingredients to create good texture. When you combine it with cold butter, you essentially create a streusel-like topping that bakes up crispy and rich.
For the Topping:
- 1 box (15.25 ounces) yellow or vanilla cake mix, dry (do not prepare according to package directions)
- ¾ cup (170g) cold unsalted butter, diced into small cubes
- Optional: ¼ teaspoon ground cinnamon or ½ teaspoon vanilla extract mixed into the dry mix
Simply spread your fruit filling evenly into your prepared baking dish. Sprinkle the dry cake mix evenly over the fruit. Then distribute the diced cold butter evenly over the entire surface of the cake mix. Do not stir or mix anything together.
Bake at 350°F (175°C) for 50-60 minutes, until the top is deeply golden brown and the fruit is bubbling visibly at the edges. As it bakes, the cold butter melts and creates a crumbly, streusel-like texture, while the cake mix bakes into a golden, slightly crispy layer.
The Honest Truth About Cake Mix Cobblers
These cobblers are genuinely good, and there’s no shame in using them. The result tastes homemade, the texture is pleasant, and you can have dessert on the table in about an hour with minimal effort. Cake mix cobblers are particularly popular for feeding a crowd because they’re forgiving with both ingredient amounts and baking time variations, and people are always impressed by how good they taste.
This method also works beautifully with canned or frozen fruit—just spread it directly into the dish without draining (for canned fruit, you can drain it slightly if there’s excessive liquid, but some juice is beneficial). The moisture from the fruit and the butter create a moist topping that’s tender rather than dry.
How to Choose the Right Topping for Your Fruit
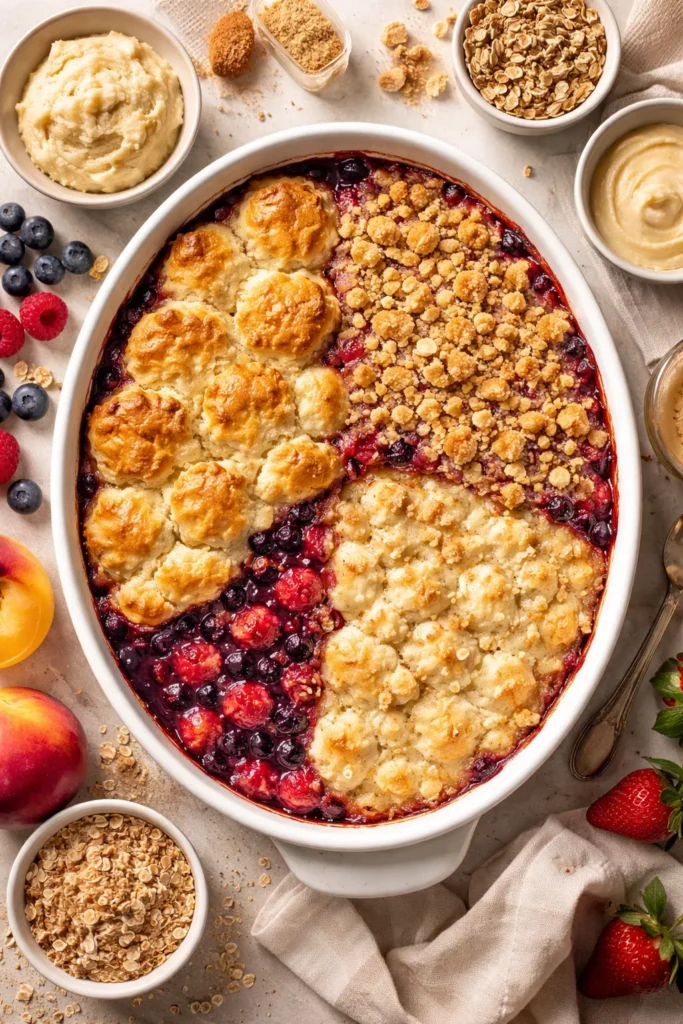
Each cobbler topping brings something different to the table, and choosing the right one depends on your fruit, your mood, and how much time you want to invest.
The buttermilk biscuit topping is your best choice when you want maximum homemade appeal and have about twenty minutes to make the topping. It pairs beautifully with all fruit but especially shines with berries and stone fruits. Use this when you’re serving guests or want that classic cobblestone appearance.
The cake-like drop topping is perfect for busy weeknights or when you want a foolproof method that never fails. It works equally well with delicate berries and hearty apples, and the minimal technique means less can go wrong. Choose this when you want homemade results without thinking too hard.
The streusel topping is your answer when you love texture and crunch. It works best with fruit that won’t create excessive moisture (so it’s ideal for berries, apples, and pears rather than super-juicy peaches). Use this when you want the dessert to feel special and different.
The self-rising flour topping is the Southern staple—choose it when you have self-rising flour on hand and want the simplest possible method that still feels entirely homemade. It’s especially good with canned or frozen fruit because the batter protects the topping from becoming soggy.
The cake mix topping is your convenience option, and it’s perfect for potlucks, casual family dinners, or when you’re baking with kids. Choose this when you want maximum ease and don’t have time to measure or mix multiple components.
Tips for Perfect Cobbler Topping Every Time
Success with cobbler toppings starts with understanding that every topping has specific needs, but they all share some universal principles.
Keep your butter cold when you’re making traditional biscuit, crumb, or streusel toppings. Cold butter creates pockets and layers that give you the desirable tender, flaky texture. If your kitchen is very warm, chill your flour and bowls as well. This small step makes a massive difference in the final texture.
Don’t overmix. Whether you’re making biscuit dough or a cake batter, stop mixing as soon as you don’t see dry flour anymore. Overmixing develops gluten, which creates toughness instead of tenderness. When biscuit dough or cake batter looks slightly uneven, that’s the perfect stopping point.
Make sure your fruit is spread evenly. An uneven fruit layer means some parts of your topping will bake directly over thick, juicy fruit while other parts have barely any fruit beneath them. This creates uneven browning and inconsistent texture. Take thirty seconds to spread your fruit into a relatively even layer before adding the topping.
Use room temperature fruit when possible. If you’re using fresh fruit, there’s no need to chill it. Room-temperature fruit releases juices more readily, which means a more flavorful filling. If you’re using frozen fruit, you don’t need to thaw it—just use it straight from the freezer.
Bake at the right temperature. Most cobblers bake best at 350°F (175°C), but some toppings (like the cake-like drop topping) prefer 375°F (190°C). Follow the specific temperature given for your chosen topping. The right temperature ensures the fruit cooks through while the topping bakes until golden without burning.
Check for doneness properly. For biscuit and cake-like toppings, insert a toothpick into the thickest part of the topping (not into fruit). It should come out clean or with just a few moist crumbs. For streusel toppings, the fruit should be visibly bubbling at the edges, and the streusel itself should be deeply golden. Don’t rely on color alone—the topping can look done before the fruit is fully cooked.
Cool briefly before serving. Cobblers are best served warm, not piping hot from the oven. Let it cool for 5-15 minutes (depending on the topping thickness) so the filling sets slightly and becomes easier to serve. Toothpick test: insert a toothpick into the fruit; it should pass through relatively easily, indicating the fruit is soft and cooked through.
Storing and Reheating Cobblers with Different Toppings
A finished cobbler keeps beautifully when stored properly, and different toppings have slightly different storage needs.
For buttermilk biscuit cobblers, cover loosely with foil or plastic wrap after cooling completely, and store at room temperature for up to one day or in the refrigerator for up to five days. The biscuits will soften slightly as they absorb moisture from the filling, which many people actually prefer. Reheat covered at 350°F (175°C) for 15-20 minutes until warm.
Cake-like drop topping cobblers store beautifully because the dense topping doesn’t dry out quickly. Cover and refrigerate for up to five days. The cake portion actually improves slightly as it absorbs fruit juices overnight. Reheat the same way as biscuit cobblers.
Streusel topping cobblers are trickier because the streusel loses its crunch if exposed to moisture from the filling. Store covered in the refrigerator for up to four days. The streusel won’t stay crispy, so if crunch is important to you, consider making a fresh streusel topping and sprinkling it over reheated cobbler just before serving.
Self-rising flour topping cobblers store well for up to five days in the refrigerator, covered. The cake portion is forgiving and reheats beautifully.
Cake mix topping cobblers keep for up to five days in the refrigerator. The topping maintains decent texture even after reheating, making these cobblers excellent for make-ahead baking.
For all cobblers, microwave individual portions for 30-60 seconds for quick reheating, or reheat the entire cobbler covered in the oven at 325°F (165°C) for 15-20 minutes. Cover with foil if it’s browning too quickly.
Common Mistakes When Making Cobbler Toppings
Even experienced bakers occasionally make missteps with cobblers. Knowing what to avoid saves frustration.
Using butter that’s too warm is the most common mistake in biscuit and streusel toppings. Warm butter combines with flour instead of creating distinct pockets, resulting in a dense, cake-like topping instead of a tender, flaky one. Always use cold butter straight from the refrigerator.
Overmixing the dough or batter comes second. The desire to create a smooth, uniform texture is natural, but it’s the enemy of tender cobbler toppings. Mix just until combined, then stop. Lumps in your batter or dough are fine—they actually indicate you’ve stopped at the right time.
Not properly distributing the topping creates uneven baking. Whether you’re dropping biscuits or streusel, spread it relatively evenly across the fruit. If one area has a thick cluster while another is bare fruit, they’ll bake differently.
Adding too much liquid to berry fillings results in a soggy, syrupy bottom layer and a topping that sits in liquid rather than on fruit. Berries release lots of juice naturally; you usually don’t need to add extra sugar or liquid.
Using pre-thawed frozen fruit causes excess moisture issues. Frozen fruit releases too much liquid as it thaws, creating a soupy filling. Use frozen fruit straight from the freezer—it will thaw as it bakes and release juices more gradually.
Baking at too low a temperature means the topping won’t brown properly and may not cook through before the fruit breaks down. Use the exact temperature specified for your chosen topping.
Cobbler Topping Variations and Flavor Swaps
Once you’ve mastered the basic techniques, these variations expand your options without requiring new skills.
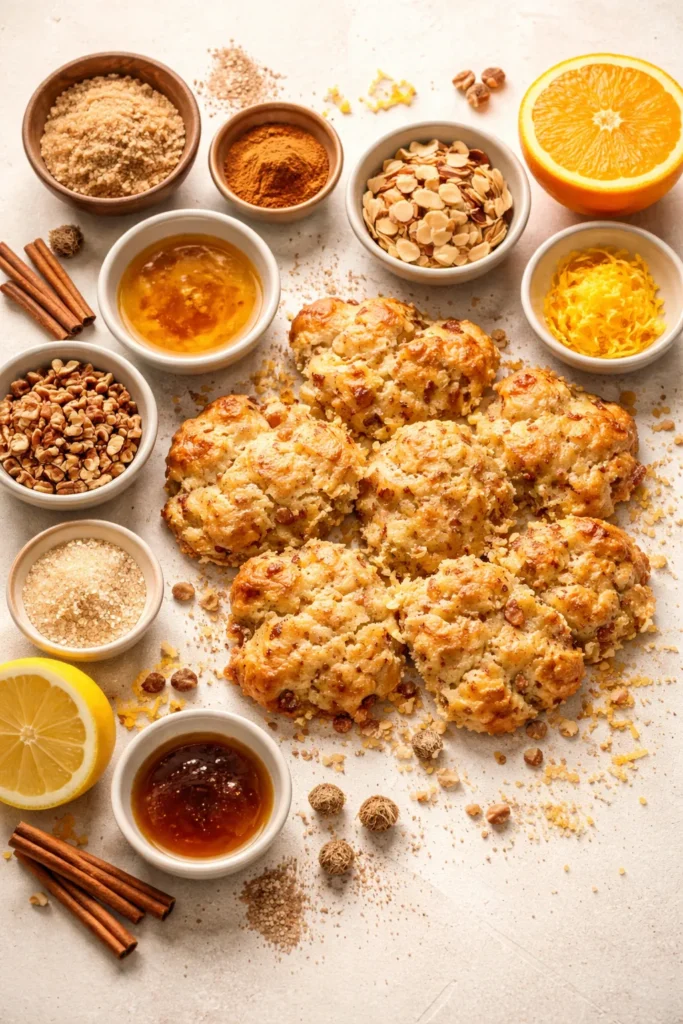
Spiced toppings: Add ground cinnamon, nutmeg, or cardamom to any topping recipe. Start with ½ to 1 teaspoon total spices per topping batch. Spiced toppings are especially delicious with apple, peach, pear, and plum cobblers.
Citrus-flavored toppings: Mix in lemon or orange zest to biscuit, cake, or streusel toppings. The brightness pairs beautifully with berries or stone fruit. Use about 1-2 tablespoons of zest per batch.
Almond or vanilla extract: Replace or supplement vanilla extract with almond extract (use ½ the amount, as it’s more intense) in cake-like toppings. This adds sophisticated flavor without requiring additional ingredients.
Brown butter toppings: Melt your butter, cook it gently in a saucepan over medium heat for 5-8 minutes until it turns golden and smells nutty, then cool it before using. Brown butter adds a sophisticated depth to any topping.
Nutty toppings: Stir chopped pecans, walnuts, or sliced almonds into streusel mixtures, or fold them into biscuit dough. Use about ¼ cup chopped nuts per standard topping batch.
Sugar variations: Use brown sugar instead of granulated in any topping for deeper molasses flavor. Light brown sugar is a subtle swap; dark brown creates more pronounced flavor.
Final Thoughts
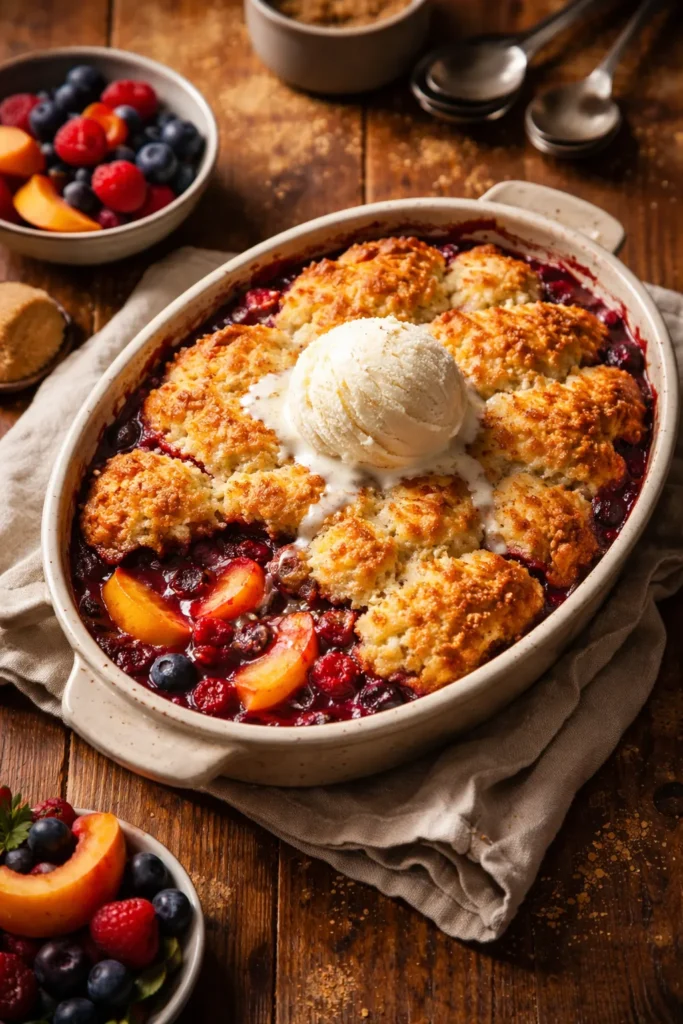
The beauty of cobbler lies in its simplicity and forgiveness. You’re not trying to achieve architectural precision like with layer cakes, or the exact flakiness demands of pie crust. You’re simply creating a warm, comforting dessert where good fruit and a flavorful topping come together under heat.
Pick your preferred topping method based on your time, your skill comfort level, and the eating experience you want. Bake with fruit that’s in season or whatever you have on hand. Serve it warm with ice cream or whipped cream, and let the casual elegance of homemade cobbler speak for itself. Whether you choose the traditional biscuit route, the foolproof cake batter method, the crunchy streusel approach, the Southern self-rising flour technique, or the convenient cake mix option, you’re going to end up with something genuinely delicious. The real secret to cobbler success isn’t finding the perfect topping recipe—it’s simply choosing one and committing to making it. Everything else follows naturally from there.