There’s a myth that canned peaches can never taste as good as fresh ones in dessert. But here’s the truth: canned peaches often taste better in a cobbler than mediocre fresh peaches, especially when you know exactly how to handle them. A cobbler made with canned peaches can absolutely taste like it came from a farmers market, bursting with bright peach flavor and that jammy, complex sweetness that makes people ask for seconds. The difference isn’t in the fruit itself—it’s in the technique, the spices, and understanding what makes canned peaches shine.
Canned peaches are actually picked at peak ripeness and preserved immediately, which locks in their flavor at an ideal moment. Unlike fresh peaches that lose sweetness and complexity as they sit in your kitchen for days, canned peaches maintain a consistent, genuine peach taste. The real advantage is that you can access great-tasting peach cobbler any time of year, not just during a brief window when fresh peaches are actually good. This recipe will show you exactly how to take those canned peaches and transform them into a cobbler so delicious that nobody will ever guess they came from a can.
Table of Contents
- Why Canned Peaches Can Actually Taste Better Than Fresh
- Choosing the Right Canned Peaches for Maximum Flavor
- The Secret to Brilliant Peach Flavor in a Cobbler
- Building Depth with the Right Spices and Seasonings
- The Perfect Biscuit Topping That Stays Crisp
- Yield, Prep Time, and Difficulty
- For the Peach Filling:
- For the Biscuit Topping:
- Preparing the Filling and Baking the Peaches:
- Making and Adding the Biscuit Topping:
- Final Bake:
- Pro Tips for Restaurant-Quality Results
- Troubleshooting Common Cobbler Problems
- Variations and Flavor Twists
- Storage and Make-Ahead Strategies
- Serving Suggestions and Pairings
- Final Thoughts
Why Canned Peaches Can Actually Taste Better Than Fresh
Fresh isn’t always better when it comes to fruit. Let’s be honest—a pale, mealy fresh peach that traveled across the country tastes significantly worse than a perfectly ripe peach that’s been canned within hours of picking. When peaches are canned, they’re harvested at their absolute peak ripeness, then processed immediately. That means the flavor is locked in at the exact moment it’s most vibrant.
The other advantage is consistency. You know exactly what you’re getting every time you open a can. Fresh peaches vary wildly depending on the season, the growing conditions, where they came from, and how long they’ve been sitting in storage. Some farmers markets have exceptional peaches; others sell fruit that tastes like watery mush. With canned peaches, you eliminate that gamble entirely.
A great canned peach cobbler also tastes fresher because you’re controlling every layer of flavor. With fresh peaches, you’re often working with limited sweetness and need to compensate with extra sugar. With canned peaches, you start with a fruit that already has depth, then you build on that foundation with bright spices, citrus, and vanilla. That’s how you get a cobbler that tastes fresh, complex, and genuinely delicious.
Choosing the Right Canned Peaches for Maximum Flavor
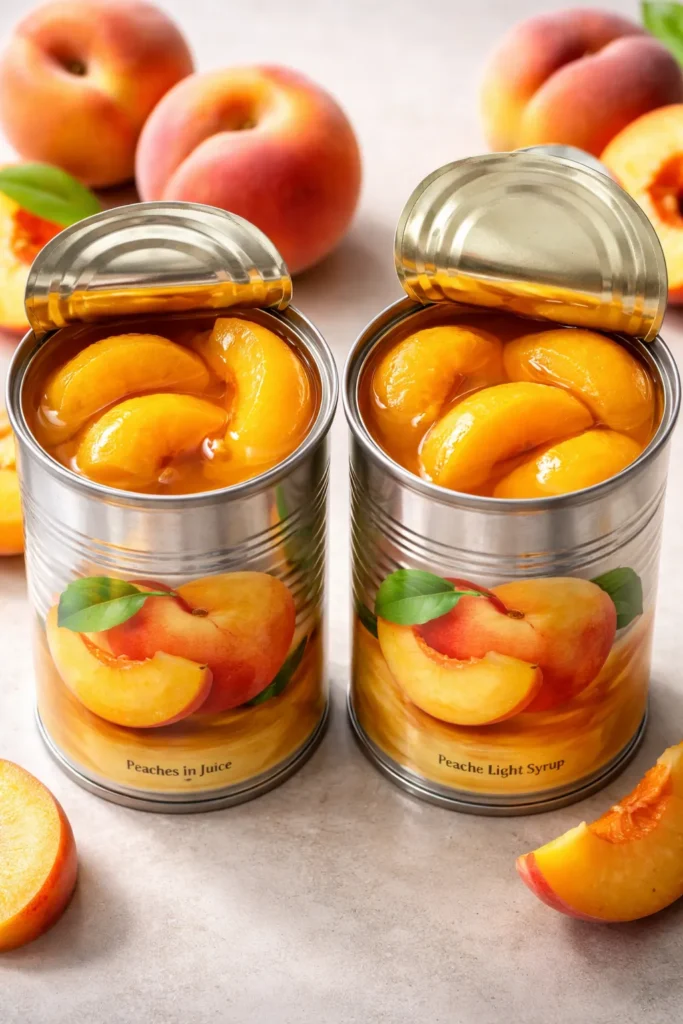
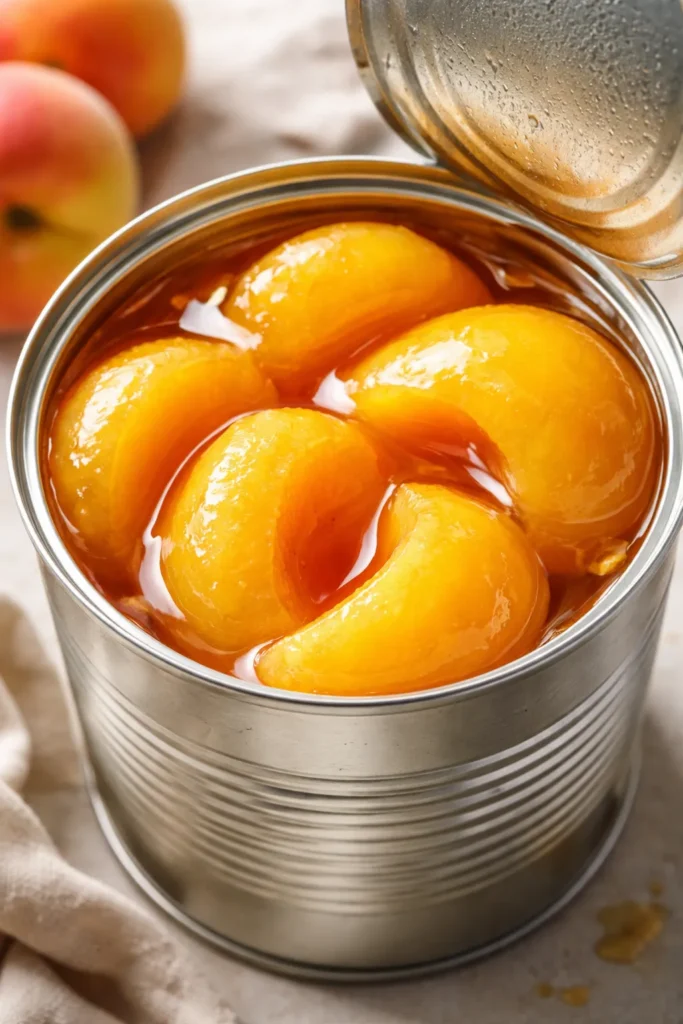
Not all canned peaches are created equal, and this choice matters more than you might think. The packing liquid makes an enormous difference in the final cobbler. Peaches packed in heavy syrup are already quite sweet and sometimes contain high fructose corn syrup, which adds a one-note sweetness rather than nuanced flavor. Instead, look for peaches packed in their own juice or light syrup—this gives you better control over the cobbler’s sweetness and allows the actual peach flavor to shine through.
Check the ingredient list carefully. Ideally, it should say something like “peaches, water, sugar, and maybe citric acid.” If the label lists multiple sweeteners or additives, that’s a sign the brand is trying to compensate for lower-quality fruit. Quality canned peach brands taste noticeably fresher and have better texture because they don’t skimp on processing care.
Size matters too, though maybe not in the way you’d expect. Smaller, individual slices tend to blend together into more of a sauce, which works beautifully in a cobbler because it creates that jammy filling. Larger chunks or halves are better if you want distinct peach pieces throughout, but they don’t distribute flavor as evenly. For this recipe, look for canned sliced peaches rather than halves—slices are ideal for achieving that homemade, fresh-tasting texture.
The Secret to Brilliant Peach Flavor in a Cobbler
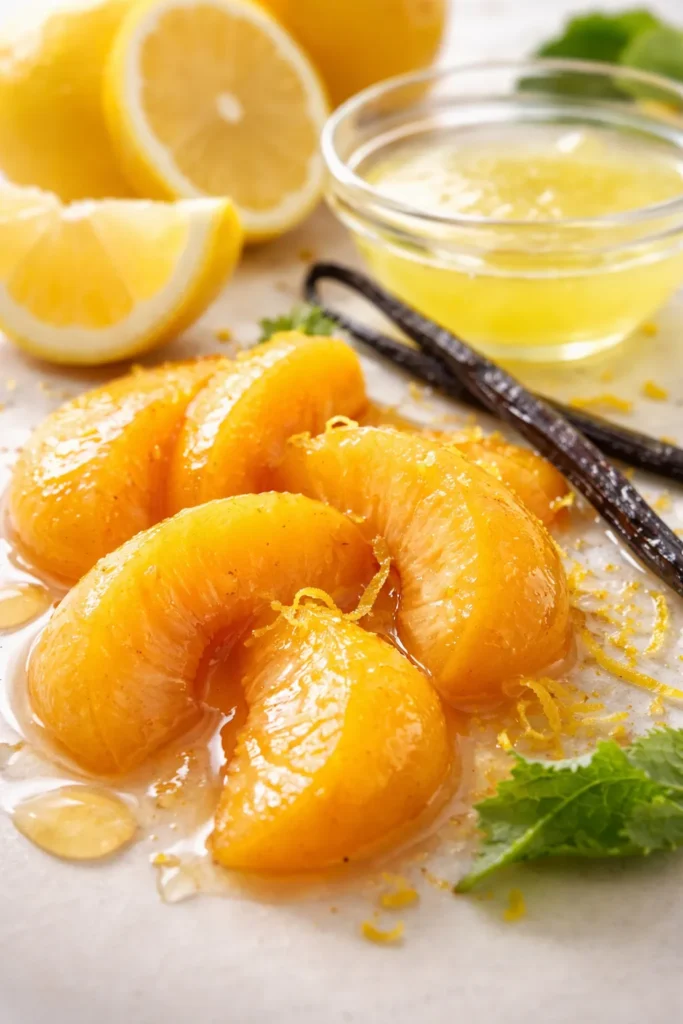
Here’s what separates a mediocre canned peach cobbler from an incredible one: you have to wake up the peaches by adding brightness and depth. Canned peaches benefit enormously from a hit of fresh acid—lemon juice is perfect for this. About one to two tablespoons of fresh lemon juice per can adds a subtle tartness that makes the peach flavor pop and feel fresher. The acid doesn’t taste lemony; it makes the peach taste more like itself.
Vanilla extract adds complexity and roundness that makes canned peaches taste less “canned” and more like a genuine, well-rounded dessert fruit. Use real vanilla extract, not artificial, and add about half to one teaspoon per can. You’ll notice the peaches taste warmer and more sophisticated immediately.
Citrus zest—either lemon or orange—is the final secret weapon. Just a teaspoon or two of zest (make sure it’s finely minced so it doesn’t overpower) adds brightness and aroma that reminds your brain of fresh fruit. It’s psychological, but it works beautifully. The combination of fresh juice, vanilla, and zest makes canned peaches taste like they could have come straight from the orchard.
Building Depth with the Right Spices and Seasonings
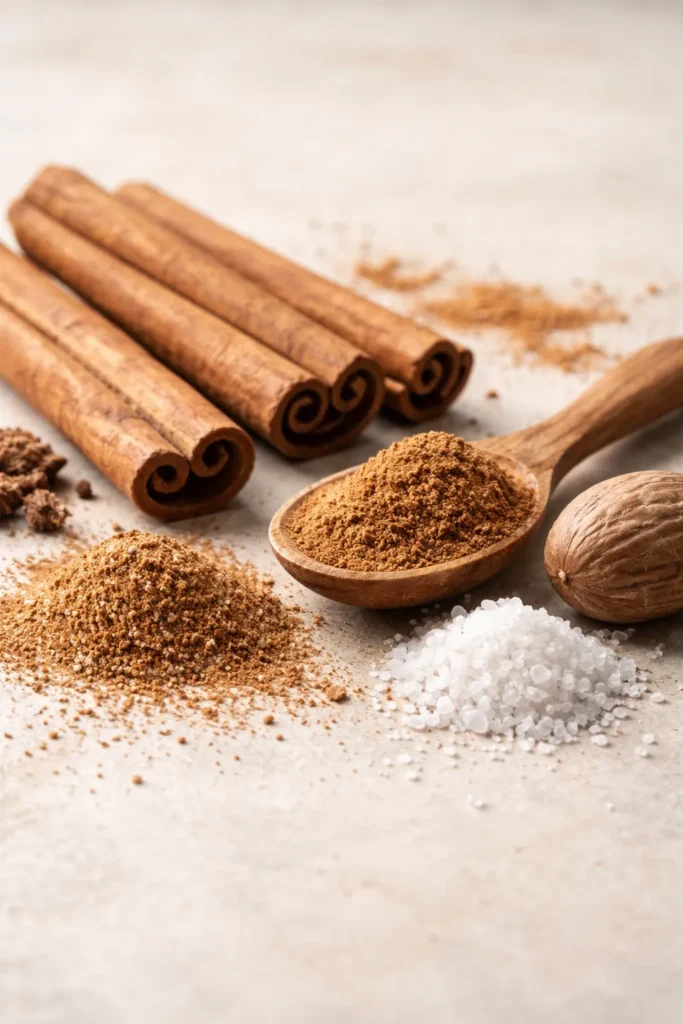
Cinnamon and nutmeg are the classic peach cobbler spices, and they’re classics for a reason. But here’s the key: you need to be generous with them. Don’t sprinkle timidly—use at least one full teaspoon of cinnamon per cobbler. Nutmeg should be about half that amount, maybe a quarter teaspoon, because it has a stronger flavor. These warm spices add a cozy depth that makes canned peaches taste more complex and fresh-picked.
If you want to get more creative, a tiny pinch of clove or allspice adds almost-invisible warmth that makes people say “I can’t quite place it, but it’s delicious.” You’re not looking for spice that people can identify; you’re looking for subtle warmth that enhances the peach flavor. Start with just an eighth of a teaspoon if you’re experimenting—these strong spices can easily become overpowering.
A small pinch of salt in the filling seems counterintuitive, but it’s absolutely necessary. Salt brightens fruit flavors and balances sweetness. Without salt, the cobbler can taste flat and one-dimensional. Just use about a quarter teaspoon to a half teaspoon depending on your pan size. You’re not making it taste salty; you’re making it taste more like itself.
The Perfect Biscuit Topping That Stays Crisp
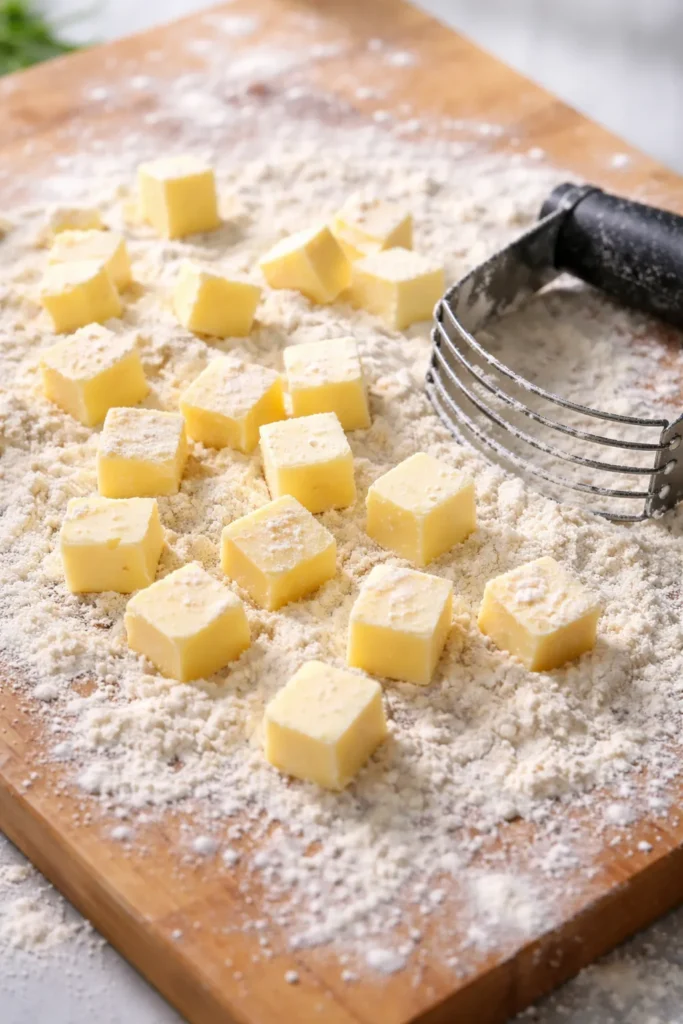
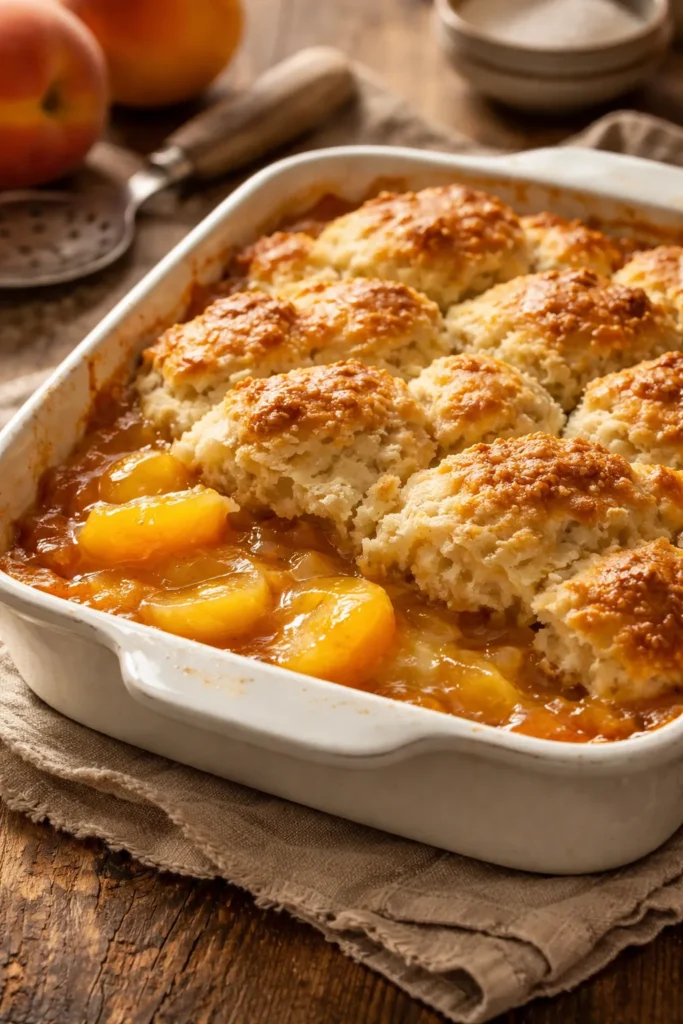
A good cobbler topping is what separates cobbler from crisp or crumble or any other fruit dessert. The topping should be tender, slightly flaky, with crispy edges and a soft interior. It needs to be substantial enough to balance the juicy fruit filling but light enough that it doesn’t feel heavy or cake-like.
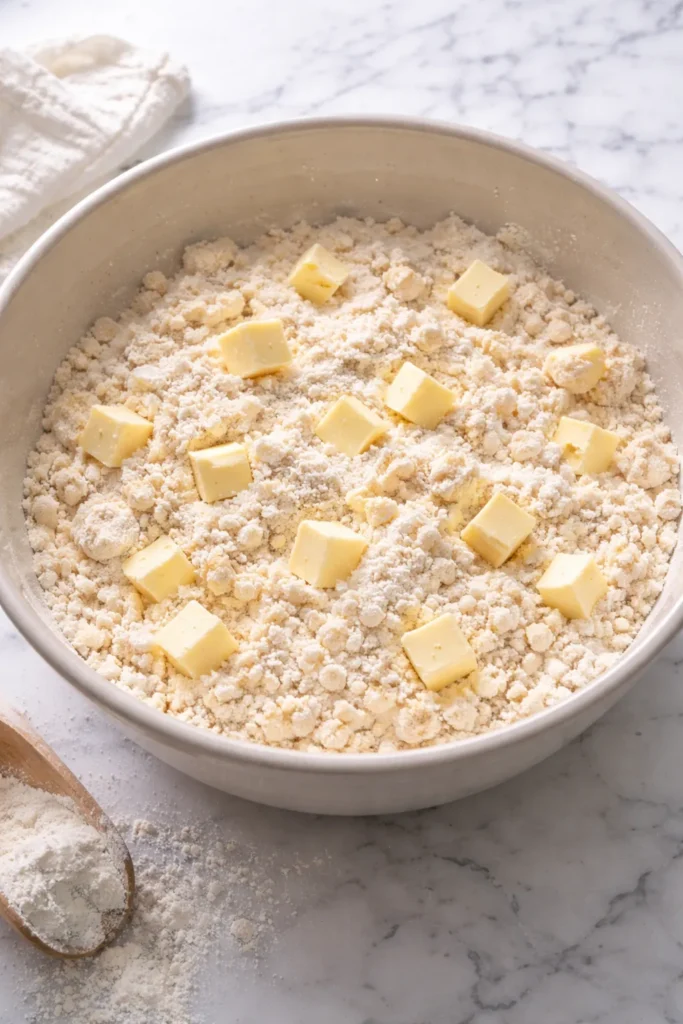
The secret is cold butter. This cannot be stressed enough. Your butter needs to be cold—ideally pulled straight from the refrigerator moments before you use it. Cut it into small cubes, then work it into your dry ingredients using your fingertips or a pastry cutter. You want pea-sized pieces of butter distributed throughout the flour mixture. These little pockets of cold butter create steam in the oven, which makes the topping rise and become light and flaky.
Don’t overwork the topping. Mix just until the flour looks shaggy and crumbly, then add your milk and stir only until the dough barely comes together. Overmixing develops gluten, which makes the topping tough and dense instead of tender and light. You want it slightly under-mixed rather than over-mixed.
Yield, Prep Time, and Difficulty
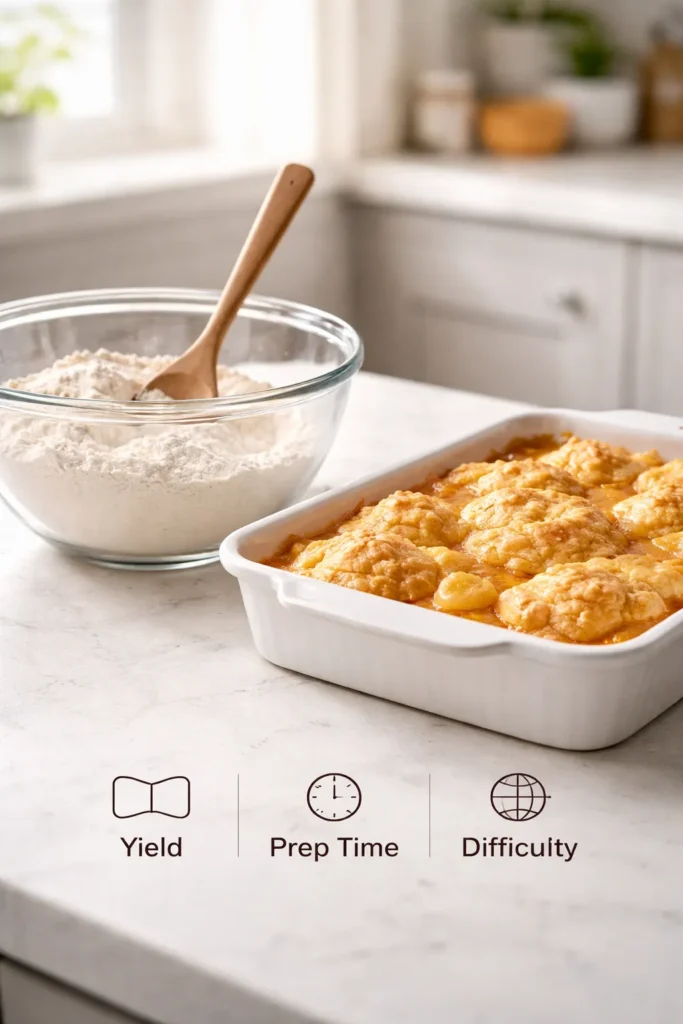
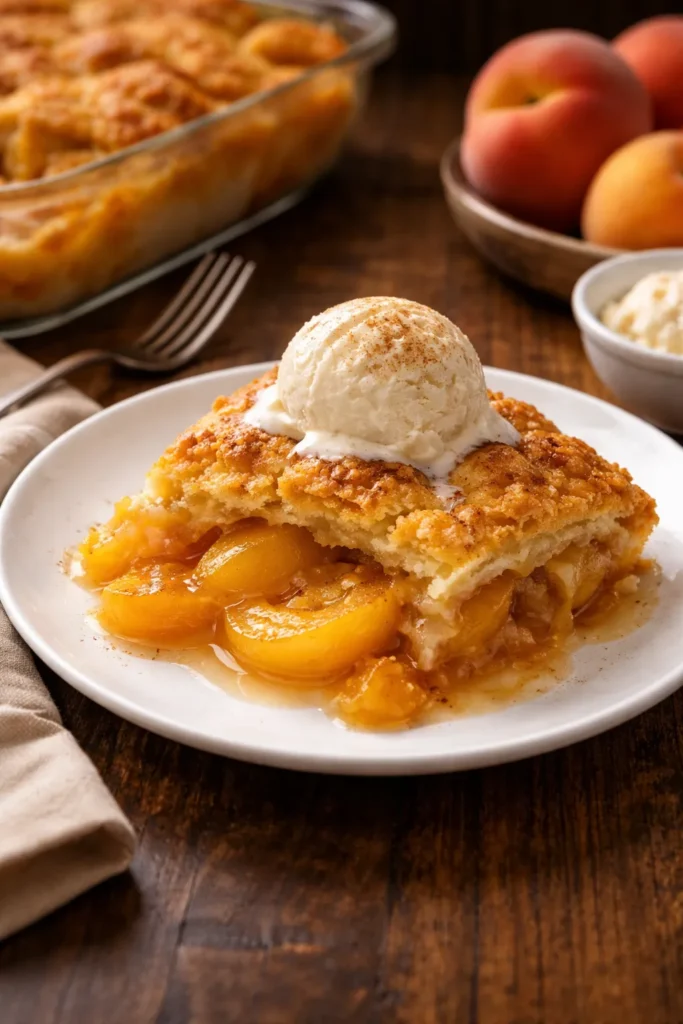
Yield: Serves 6 to 8 people | Makes one 9×13-inch cobbler
Prep Time: 15 minutes (hands-on assembly only)
Cook Time: 50 minutes (including initial peach bake and final biscuit bake)
Total Time: 65 minutes active
Difficulty: Beginner—no special equipment needed, straightforward steps, and very forgiving. Even if your topping looks rough, it will bake beautifully.
For the Peach Filling:

- 3 (15-ounce) cans sliced peaches in juice or light syrup, with about 1 cup of the juice reserved
- ¾ cup granulated sugar (reduce this to ½ cup if using peaches in heavy syrup)
- ¼ cup light brown sugar, packed
- ¼ cup all-purpose flour
- 1½ teaspoons ground cinnamon
- ½ teaspoon ground nutmeg
- ¼ teaspoon fine sea salt
- 2 tablespoons fresh lemon juice (bottled works, but fresh is noticeably better)
- 1 teaspoon fresh lemon zest or orange zest, finely minced
- 1 teaspoon pure vanilla extract
- 2 tablespoons unsalted butter, melted
For the Biscuit Topping:
- 2 cups all-purpose flour (spooned and leveled, not scooped)
- 1 cup granulated sugar
- 2½ teaspoons baking powder
- ½ teaspoon fine sea salt
- ¾ cup (1½ sticks) cold unsalted butter, cut into small cubes
- ¾ cup whole milk, cold
- 1 teaspoon pure vanilla extract
Preparing the Filling and Baking the Peaches:
Step 1: Preheat your oven to 350°F (175°C) and position a rack in the center. This temperature allows the filling to cook gently without the topping browning too quickly.
Step 2: Drain the canned peaches, reserving about 1 cup of the juice. Discard the rest or save for another use. You want the peaches themselves separated from most of their liquid so you can control the consistency of your filling.
Step 3: In a large mixing bowl, whisk together the granulated sugar, brown sugar, flour, cinnamon, nutmeg, and salt until completely combined. The flour will help thicken the peach juices as they cook, creating a syrupy filling rather than a watery one.
Step 4: Add the lemon juice, lemon or orange zest, vanilla extract, and melted butter to the sugar mixture, stirring until smooth and well combined.
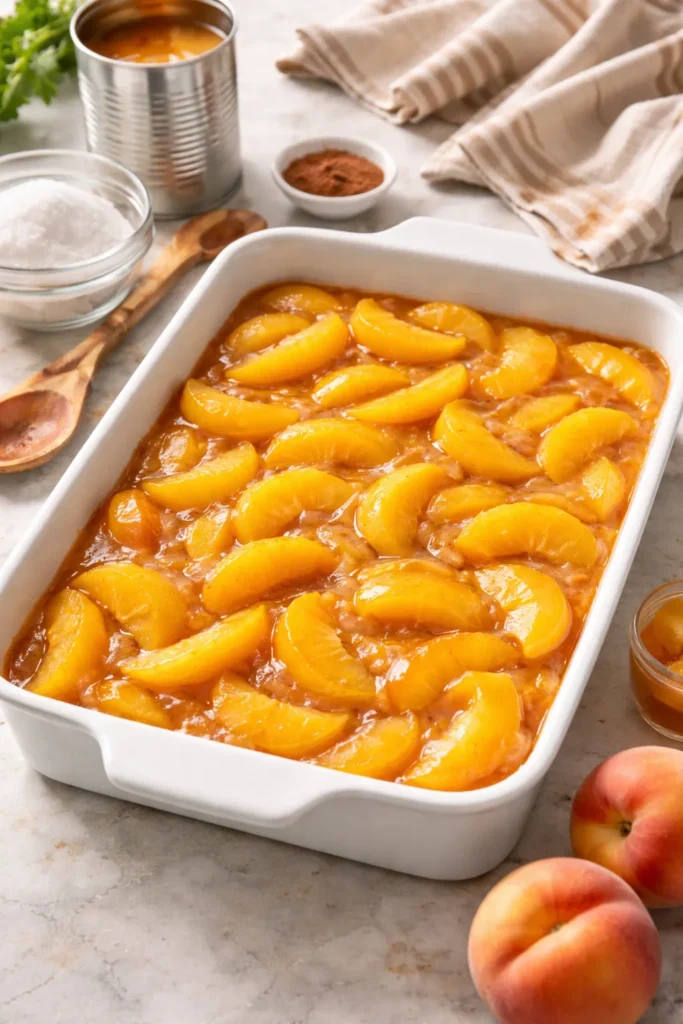
Step 5: Gently fold the drained peaches into the sugar mixture using a rubber spatula, being careful not to mash them. You want the peaches to stay in slices rather than break down into chunks.
Step 6: Pour the peach mixture into a 9×13-inch baking dish (glass or ceramic works best; metal pans can sometimes cause the edges to brown too quickly). Spread it into an even layer.
Step 7: Bake the peaches alone for 15 minutes. This initial bake allows the filling to heat through and the peach juices to start releasing. Do not skip this step—baking the peaches first ensures they’re hot when you add the topping, which helps the biscuit cook evenly and prevents sogginess.
Making and Adding the Biscuit Topping:
Step 8: While the peaches are baking, make the biscuit topping. In a medium bowl, whisk together the flour, sugar, baking powder, and salt until evenly distributed.
Step 9: Add the cold butter cubes to the flour mixture. Using two forks, a pastry cutter, or your fingertips, work the cold butter into the flour until the mixture resembles coarse breadcrumbs with pea-sized pieces of butter throughout. Don’t rush this step—the cold butter is what creates the tender, flaky texture. If your fingers are warm, dampen them slightly with cold water to keep the butter cold.
Step 10: In a small bowl or measuring cup, whisk together the cold milk and vanilla extract.
Step 11: Make a well in the center of the dry ingredients and pour in the milk mixture. Using a fork, stir gently until the dough is just barely combined. Stop as soon as you don’t see dry flour—overmixing develops gluten and makes tough biscuits. The dough should look shaggy and crumbly, not smooth and cohesive.
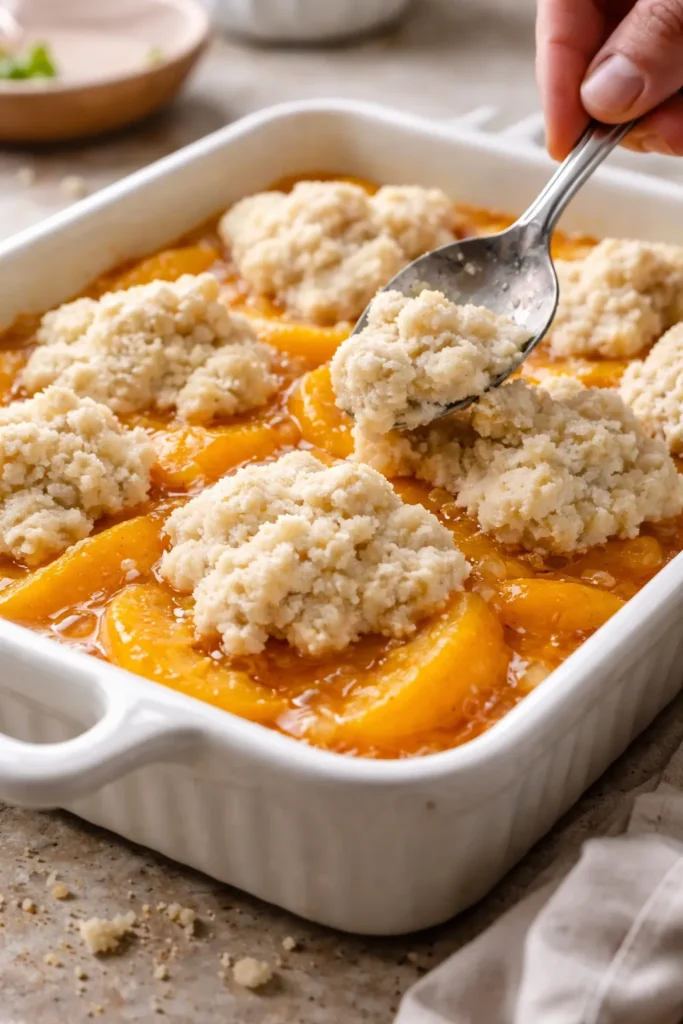
Step 12: Remove the peaches from the oven. They will be hot—be very careful. Immediately drop spoonfuls of the biscuit topping over the hot peaches, leaving some small gaps around the edges. You don’t need to spread it evenly; rustic cobbler looks more charming anyway. The gaps allow steam to escape and keep the topping from becoming soggy.
Final Bake:

Step 13: Place the cobbler back in the 350°F oven and bake for 35 to 40 minutes, until the biscuit topping is golden brown and you can see the peach filling bubbling slightly around the edges. The filling bubbling at the edges is essential—it tells you the internal temperature is hot enough to set the filling and cook the topping completely.
Step 14: If the topping is browning too quickly before the peaches are done bubbling, loosely tent a piece of aluminum foil over the cobbler. The foil will slow the browning while letting the interior finish cooking.
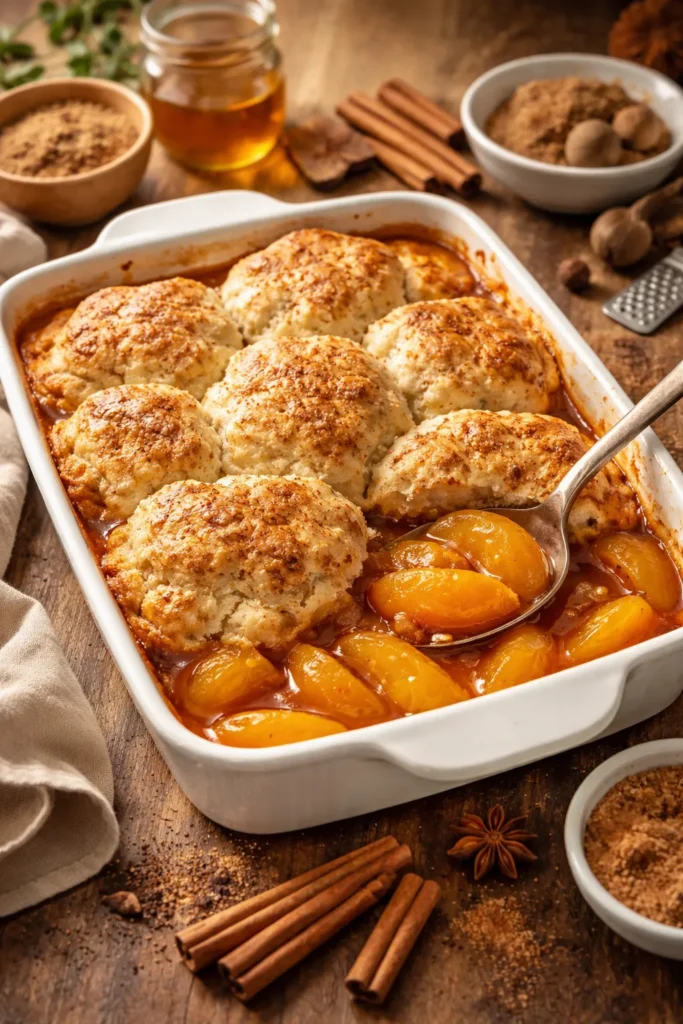
Step 15: Remove the cobbler from the oven and let it rest for 5 to 10 minutes before serving. This resting time allows the filling to set slightly so it’s less likely to run everywhere when you scoop it.
Pro Tips for Restaurant-Quality Results
The difference between a good cobbler and an exceptional one often comes down to small details that only experienced bakers know. First, don’t drain all the peach juice—you need that liquid to create the filling’s saucy texture. But don’t keep all of it either; about one cup of juice for a 9×13 pan is perfect. Too much juice and your cobbler becomes soup; too little and it becomes dry.
Toast your spices very gently in a dry pan for about 30 seconds before adding them to the filling. This tiny step awakens the spices’ flavor compounds and makes them taste fresher and more vibrant. You’ll notice the cinnamon and nutmeg smell noticeably stronger, which translates to better flavor in the finished cobbler.
Use a sheet pan underneath your cobbler while it bakes. The peach juices will bubble over (this is completely normal), and a sheet pan catches the mess and prevents the oven from getting sticky. Place the cobbler on the sheet pan before it goes in the oven, not after—transferring a hot dish is dangerous.
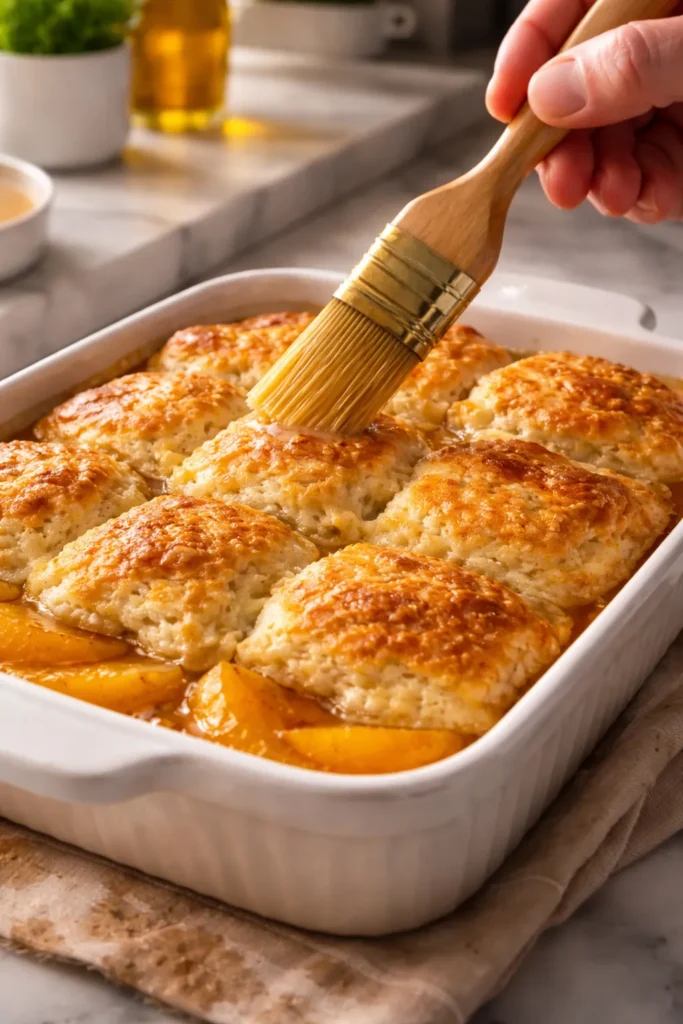
If you want maximum crispness on the biscuit topping, brush the topping very lightly with melted butter or a beaten egg wash before baking. This creates a golden, crispy exterior that stays crispy longer. It’s completely optional but makes a visible difference.
Troubleshooting Common Cobbler Problems
If your cobbler comes out too wet and soupy, the most likely culprit is too much juice. You probably kept more than one cup of peach liquid. Next time, drain the peaches more thoroughly. You can also thicken the filling by mixing one tablespoon of cornstarch with two tablespoons of cold water, stirring it into the peaches, and letting them sit for five minutes before adding the topping. This creates a thicker filling without changing the flavor.
If your biscuit topping is tough or dense instead of light and tender, you almost certainly overmixed the dough. Stop mixing the moment you don’t see dry flour anymore. The dough should look rough and lumpy, not smooth. Also make sure your butter is actually cold—room-temperature butter produces tough, heavy biscuits.
If the bottom of the topping is soggy, your filling probably wasn’t hot enough when you added the topping, or you didn’t bake long enough for the internal temperature to rise. Always bake the peaches for at least 15 minutes first, and make sure you see the filling bubbling at the edges before removing it from the oven. A toothpick inserted through the thickest part of the biscuit should come out dry or with just a few moist crumbs, not wet.
Variations and Flavor Twists
You can absolutely dress up this recipe once you’ve mastered the basic version. Try adding a tablespoon of bourbon or brandy to the filling—it adds sophistication without making the cobbler taste alcoholic. The alcohol cooks off, leaving only the complex flavor.
For a different spice profile, try replacing half the cinnamon with ground ginger and a tiny pinch of cardamom. This creates a warmer, more exotic taste that still feels familiar. Or experiment with almond extract—use just half a teaspoon mixed with the vanilla for a subtle, sophisticated note.
You can substitute some of the granulated sugar with turbinado or demerara sugar for extra crunch on the biscuit topping. The larger crystals don’t dissolve completely and create little crunchy bits that contrast beautifully with the tender biscuit interior.
If you want a richer topping, substitute ¼ cup of the milk with heavy cream. This creates a slightly more tender, more luxurious biscuit. Or add two tablespoons of chopped nuts (pecans or almonds work beautifully) to the topping mixture before adding the milk.
Storage and Make-Ahead Strategies
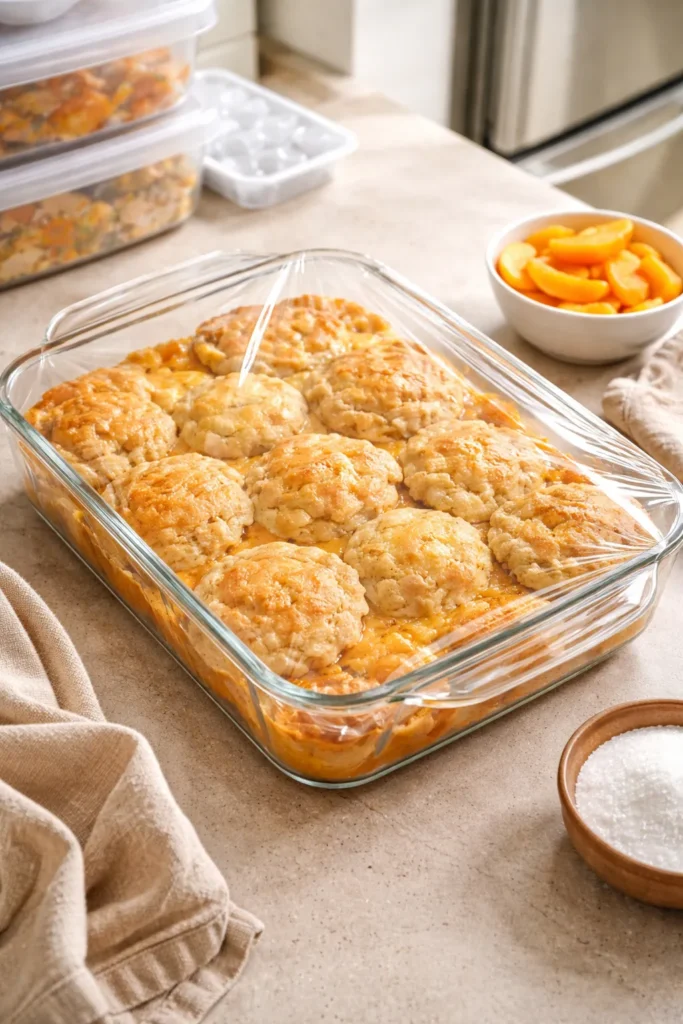
Peach cobbler keeps well in the refrigerator for up to four days when stored covered. The peach filling actually improves slightly on the second day as the flavors continue to meld. The biscuit topping stays crisp for about 24 hours, then gradually softens—which is still delicious, just not quite as crunchy. If you want to maintain maximum crispness, store the topping and filling separately and only assemble them a few hours before serving.
You can make this cobbler completely ahead of time up to 24 hours in advance. Assemble it in the baking dish, cover tightly with plastic wrap, and refrigerate. When you’re ready to bake, remove it from the fridge while you preheat the oven. The cobbler will take about five to ten extra minutes to bake since it’s going in cold, so start checking for doneness at about 40 minutes.
For longer storage, let the cobbler cool completely, wrap it tightly with plastic wrap and then aluminum foil, and freeze for up to three months. Thaw it overnight in the refrigerator before reheating. To reheat, cover it loosely with foil and warm it in a 325°F oven for about 20 minutes, or until heated through. If you want to crisp up the topping, remove the foil for the last few minutes of reheating.
Individual portions can be frozen too. Once the cobbler has cooled completely, scoop portions into freezer-safe containers or wrap them tightly, and freeze for up to two months. Reheat individual portions in the microwave in 30-second increments until warm, or in a 350°F oven for about 15 minutes.
Serving Suggestions and Pairings
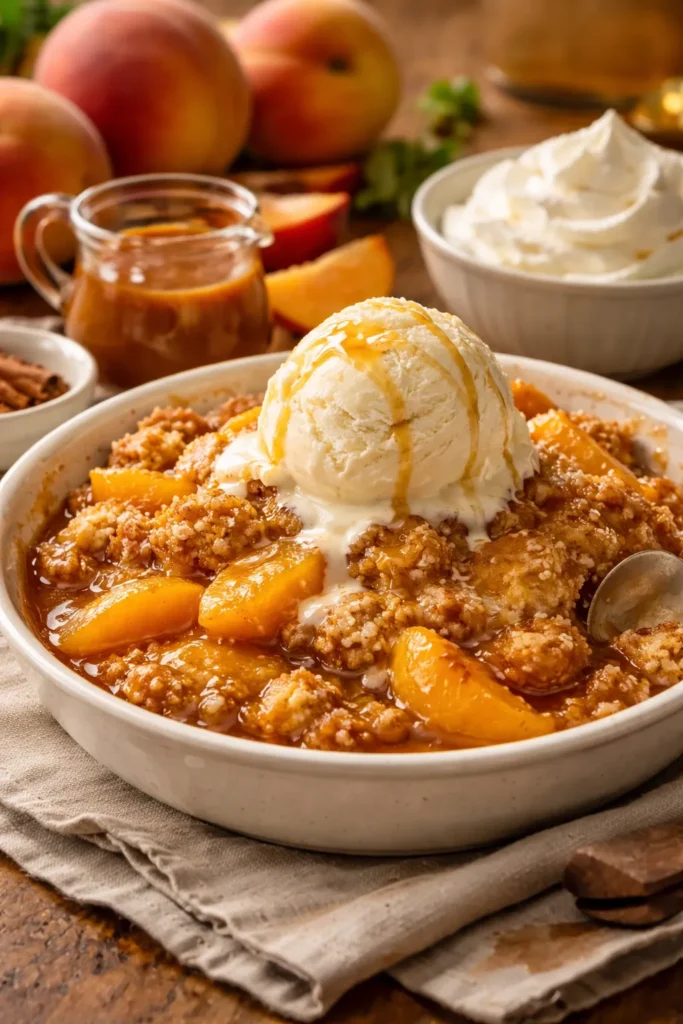
The classic pairing—warm peach cobbler with a generous scoop of vanilla ice cream—exists for good reason. The cold creaminess against the warm, spiced peaches is genuinely perfect. But don’t stop there. Whipped cream is another excellent option, especially if you use heavy cream and whip it yourself with a touch of vanilla and sugar.
For something richer, serve the cobbler with a dollop of crème fraîche, which adds tanginess that brightens the sweet peaches. Or try Greek yogurt mixed with a little honey—the tanginess cuts through the richness beautifully while adding creaminess.
A drizzle of caramel sauce over the top, either homemade or store-bought, adds luxury and deepens the peach flavor. You could also make a brown butter sauce by melting butter, cooking it until it turns golden and nutty, and drizzling it over warm cobbler.
Serve the cobbler as a dessert on its own, but don’t sleep on it as a breakfast or brunch dish. A bowl of peach cobbler with yogurt and granola is genuinely delicious and feels special enough for weekend entertaining.
Final Thoughts
Making a canned peach cobbler that tastes genuinely fresh is entirely possible—more than possible, really. It’s the kind of dessert that tastes better than you’d expect given the ingredient list, feels homemade and impressive, but requires only basic baking skills. The trick is respecting each component: choosing quality canned peaches, adding brightness with citrus and vanilla, building warmth with generous spices, and making a topping that’s tender and crisp rather than heavy and dense.
The best part is that you can make this cobbler any time you want, regardless of season. No waiting for fresh peaches, no disappointing farmers market trips, no mealy fruit that looked good but tastes like nothing. A great canned peach cobbler is reliable, delicious, and honestly, more consistent than most fresh peach cobblers you’ll ever make.