When the grill is hot and the sun is shining, there’s nothing quite like gathering around a table full of good food and good people. But here’s the thing—while everyone’s focused on the burgers, ribs, and sides, you can be the star of the show by bringing a dessert that makes people’s eyes light up. The right BBQ dessert hits differently on a warm summer evening. It needs to balance the heavy, savory flavors that came before it, feel refreshing without being overly complicated, and actually hold up during transport and outdoor heat. That’s a taller order than it might seem.
The best summer BBQ desserts aren’t always about being fancy or labor-intensive. They’re about knowing what works—what tastes incredible, what people will actually eat, and what you can pull off without turning your kitchen into a disaster zone or spending hours in front of the oven when the weather is perfect outside. Over the years, certain desserts have proven themselves time and again at cookouts and outdoor gatherings. They’ve earned their spots not through complexity but through pure crowd-pleasing appeal. Whether you’re a confident baker, someone who prefers no-bake options, or you fall somewhere in between, you’ll find a dessert here that feels right for your next gathering.
This guide walks you through 15 of the most reliable, most beloved, and most practical desserts for summer barbecues. Each one has been tested across countless gatherings and consistently wins approval from people of all ages and preferences. Some are classics that have been around forever, while others put a fun twist on traditional treats. What they all have in common is this: they’re absolutely worth the space you’ll save for them after the main course.
Table of Contents
- 1. No-Bake Cheesecake Jars
- Why It’s the Ultimate Make-Ahead Option
- Creative Layering Ideas
- 2. S’mores Brownies
- What Makes the Topping Work
- Transportation and Storage Tips
- 3. Grilled Pineapple with Mascarpone and Hazelnuts
- How Grilling Transforms the Fruit
- Serving and Flavor Pairing
- 4. Classic Lemon Bars
- Achieving the Perfect Balance of Flavors
- Making Them Ahead and Transport
- 5. Strawberry Shortcake
- Building Layers for Maximum Flavor
- Easy Individual Serving Options
- 6. Peach Cobbler
- Choosing and Preparing Peaches
- The Topping That Makes It Magic
- 7. Chocolate Chip Cookies
- The Science of Chewiness
- Transport and Make-Ahead Strategy
- 8. Fruit Pizza
- Creating a Foundation That Works
- Topping with Fresh Fruit
- 9. Homemade Blueberry Pie
- Getting the Filling Right
- Crust Considerations
- 10. Brownie Ice Cream Sandwiches
- Building the Perfect Sandwich
- Make-Ahead and Freezing
- 11. Key Lime Pie
- No-Bake vs. Baked Versions
- Transport and Serving Tips
- 12. Berry Trifle
- Building the Layers
- Make-Ahead Strategy
- 13. Banana Pudding
- The Secret to Proper Assembly
- Topping Options and Transport
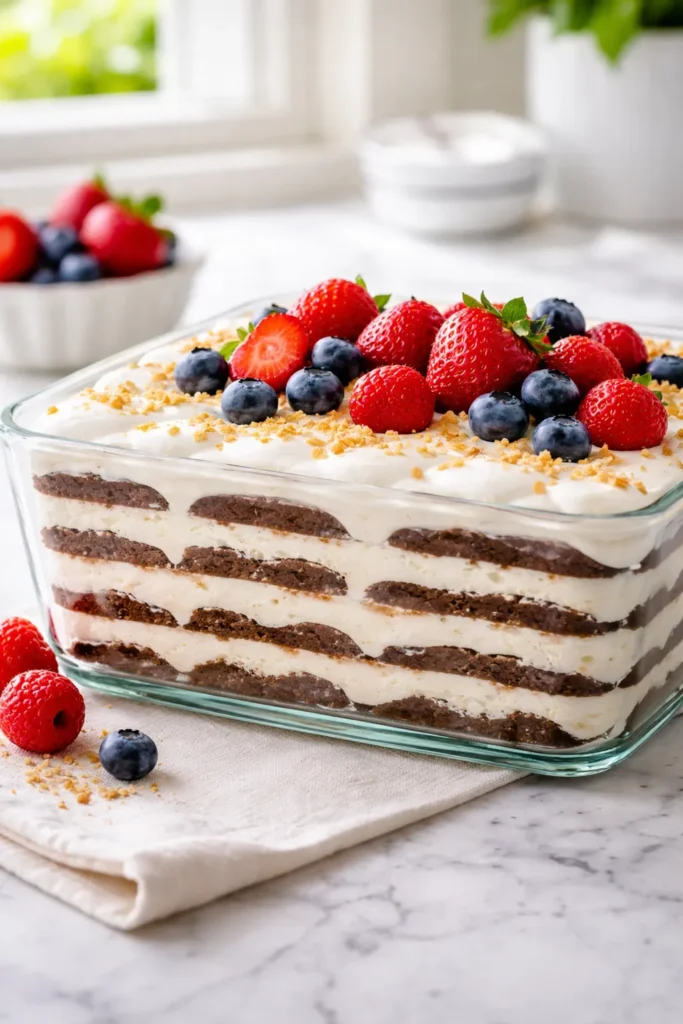
- 14. No-Bake Icebox Cake
- Choosing Your Layers
- Assembly and Storage
- 15. Grilled Desserts (S’mores, Pineapple, or Fruit in Foil)
- The Fun Factor of Grilled Desserts
- Timing and Safety
- Final Thoughts
1. No-Bake Cheesecake Jars
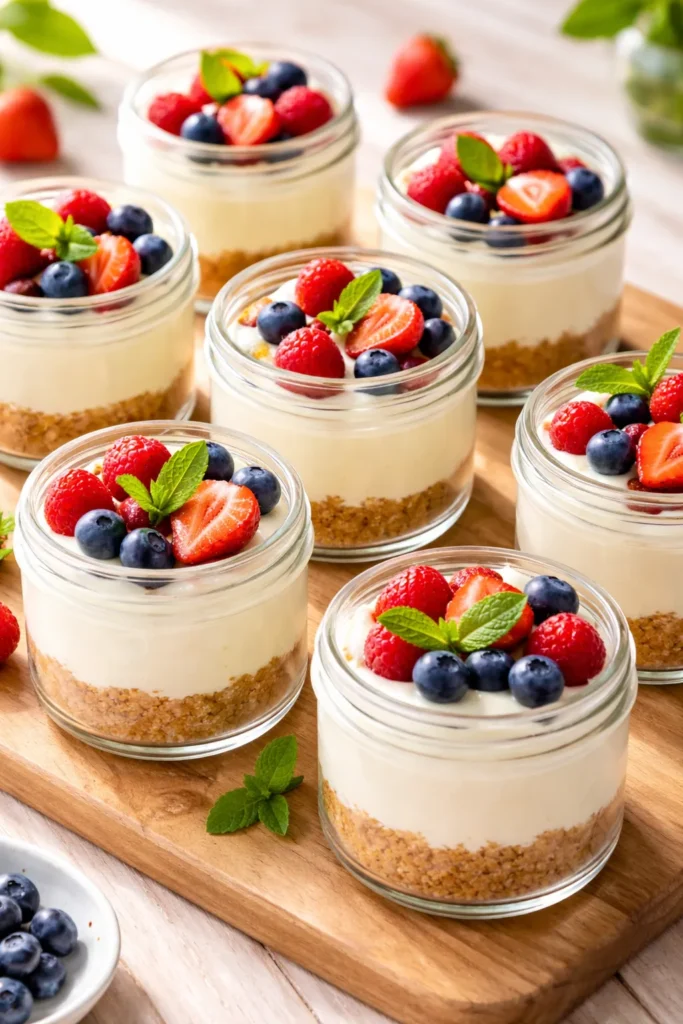
These individual servings of creamy, dreamy goodness have become the unofficial mascot of summer cookouts, and it’s easy to see why. Each person gets their own jar, which means no cutting, no serving drama, and guests can customize their own toppings if you set out a few options. The beauty of this dessert is that it requires zero oven time and comes together in about 30 minutes with just a handful of ingredients.
Why It’s the Ultimate Make-Ahead Option
These jars are made entirely in advance and actually improve with chilling. You can assemble them the night before your cookout, which takes enormous pressure off on the day itself. The cream cheese filling sets up perfectly in the fridge, the graham cracker crust stays crisp even after a few hours, and you literally just grab them from the cooler as you’re leaving. No last-minute stress, no sweating in the kitchen while guests arrive. They’re the definition of stress-free entertaining, which means you can actually enjoy your own party.
Creative Layering Ideas
Start with crushed graham crackers mixed with a little melted butter pressed into the bottom of each jar. Then add a layer of cream cheese filling made from softened cream cheese, powdered sugar, and vanilla. The real fun happens with toppings—pile on fresh berries, a swirl of chocolate sauce, fruit preserves, crushed cookies, caramel drizzle, or even a sprinkle of edible glitter. You can make five jars exactly identical, or you can make each one different based on what fresh fruit or toppings you have on hand.
Pro tip: Use mason jars with tight-fitting lids so they’re easy to transport and your guests can take them home afterward (or just eat straight from the jar with a spoon if they want).
2. S’mores Brownies
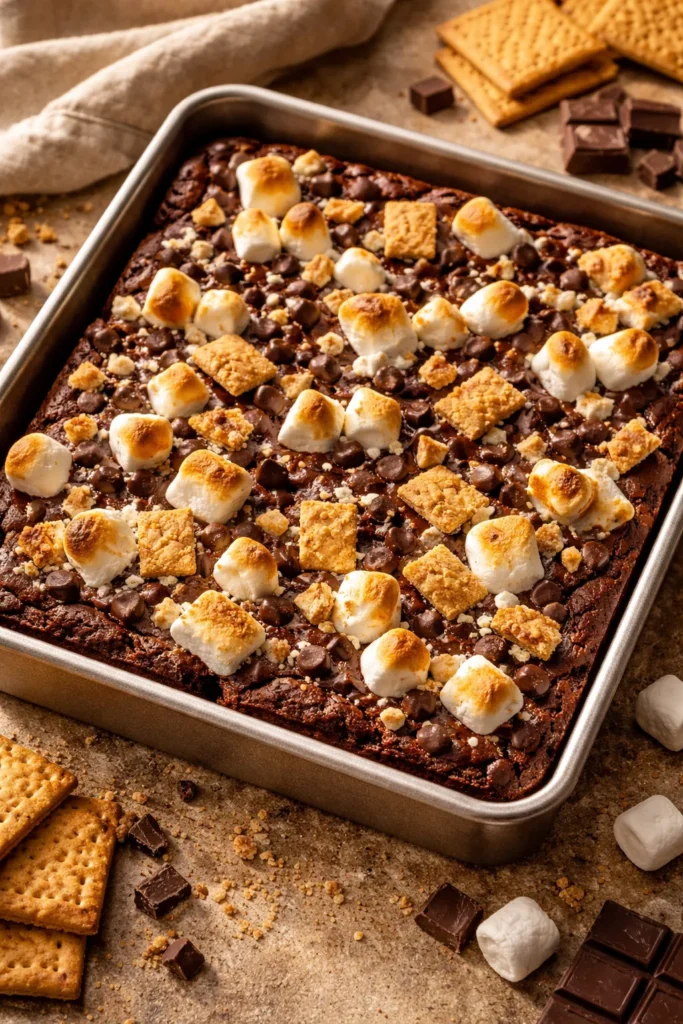
Here’s where we take everyone’s favorite campfire treat and make it even better. S’mores brownies combine the gooey marshmallow and chocolate magic of classic s’mores with the rich, fudgy satisfaction of a brownie. You get the best of both worlds—no campfire required. These are substantial enough to feel like a real dessert but still have that nostalgic s’mores charm that makes people smile when they bite into one.
What Makes the Topping Work
The secret to truly great s’mores brownies is the order of toppings and the timing of baking. You start with a rich brownie base, then about five minutes before the brownies are done baking, you top them with broken pieces of graham cracker, chocolate chips, and marshmallows. The marshmallows toast slightly in the oven, getting soft and gooey while maintaining their shape just enough. Some people prefer to torch the marshmallow topping after baking for extra char and drama, which is absolutely valid. Either way, you’re layering flavors and textures in a way that feels intentional and elevated.
Transportation and Storage Tips
Bake these brownies in a disposable aluminum pan, cover tightly with plastic wrap and then foil, and you can transport them to the BBQ without worrying about anything shifting or breaking apart. They’re sturdy enough to travel well and hold up beautifully even in warm weather. You can cut them into squares at home before you go, or bring the whole pan and cut them there—either works. They taste good at room temperature but are honestly even better slightly warm, so consider timing your arrival to serve them while they’re still holding a little warmth from earlier in the day.
Worth knowing: These brownies are incredibly forgiving. If you don’t have marshmallows, add extra chocolate. If you want to go completely over the top, drizzle melted chocolate over the finished brownies.
3. Grilled Pineapple with Mascarpone and Hazelnuts

This is the dessert that makes people stop mid-conversation and ask what you’re serving. Grilled pineapple is almost shockingly simple, yet it feels elegant and sophisticated in a way that catches everyone off guard. The grill caramelizes the natural sugars in the fruit, intensifying its tropical sweetness, while creating beautiful char marks that make each slice look intentional and considered. Topping it with creamy mascarpone, a drizzle of honey, and toasted hazelnuts elevates it from simple to restaurant-quality.
How Grilling Transforms the Fruit
When pineapple hits a hot grill, the exterior develops a light char while the inside becomes softer and juicier. The heat concentrates the fruit’s natural sweetness without any added sugar—it’s all about what’s already there, just amplified. Cut your pineapple into thick rings or spears, brush lightly with melted butter or coconut oil, and sprinkle with brown sugar and a pinch of cinnamon if you want extra flavor. Grill over medium heat for about 3-5 minutes per side until you get those gorgeous grill marks.
Serving and Flavor Pairing
Serve the warm pineapple on a platter with a generous dollop of mascarpone cheese, a generous drizzle of honey, and a scattering of roughly chopped toasted hazelnuts. The warm fruit against the cool, creamy mascarpone is textural perfection, and the hazelnuts add a sophisticated crunch. Some people like to add a sprinkle of sea salt on top, which honestly takes it to another level. You can prepare all the components ahead of time and assemble just before serving, so you’re not stuck doing anything time-consuming when guests are ready for dessert.
4. Classic Lemon Bars
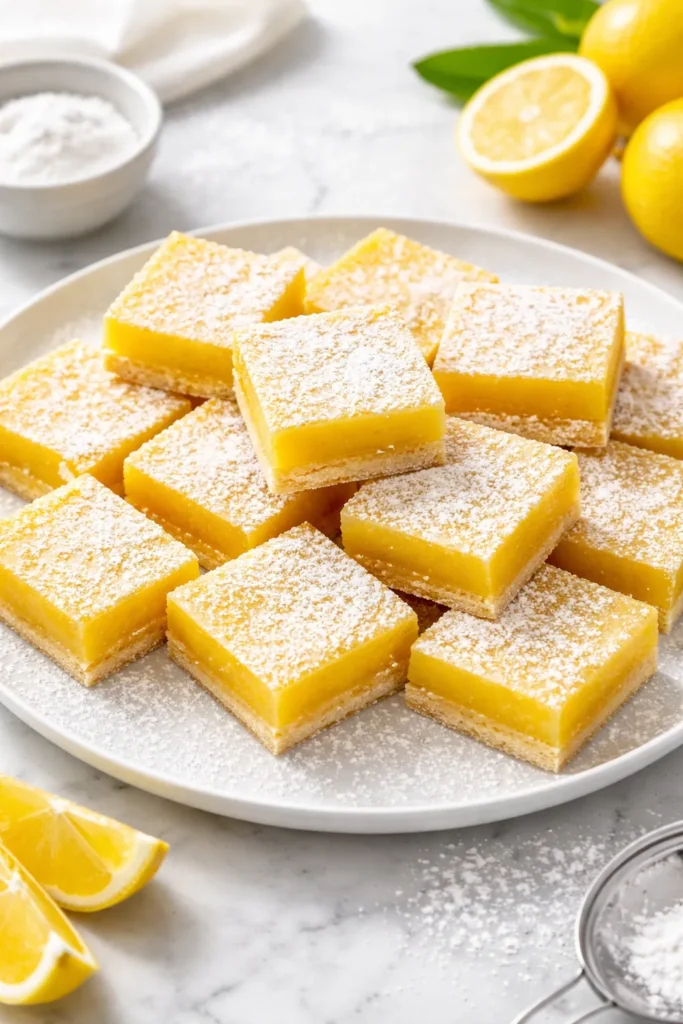
There’s a reason lemon bars show up at almost every summer gathering—they’re the Goldilocks of BBQ desserts. They’re not too heavy, not too light, not too sweet, and not too tart. They’re transportable, they hold up well in warm weather, and they deliver bright, refreshing citrus flavor that actually complements a full meal rather than overwhelming the palate. A good lemon bar has a thick, buttery shortbread base, a tangy-sweet filling, and a dusting of powdered sugar that catches the light when you bite into it.
Achieving the Perfect Balance of Flavors
The magic in lemon bars is the balance between sweetness and tartness. You need enough sugar so they don’t make your jaw clench, but enough lemon juice and zest so they taste like actual lemon, not just sweet custard. Using fresh lemon juice rather than bottled makes a noticeable difference—the flavor is brighter and more natural. Some recipes add cornstarch or instant tapioca to the filling to help it set up firmly, which prevents the bars from being gooey or difficult to transport. If your filling doesn’t set properly, your bars will be runny when you cut them, so don’t skip that step.
Making Them Ahead and Transport
Bake these in a 9×13-inch pan, cool them completely, then cut into squares. Store them in an airtight container at room temperature for up to three days, or wrap individually in parchment paper and bring them in a sturdy container. They’re one of the most forgiving desserts to transport because they’re not fragile, they don’t require cooling, and they’re self-contained. You can cut them at home and have them ready to grab on your way out the door.
Pro tip: For extra tartness and brightness, add a teaspoon of lemon zest to the powdered sugar you’re dusting on top after baking.
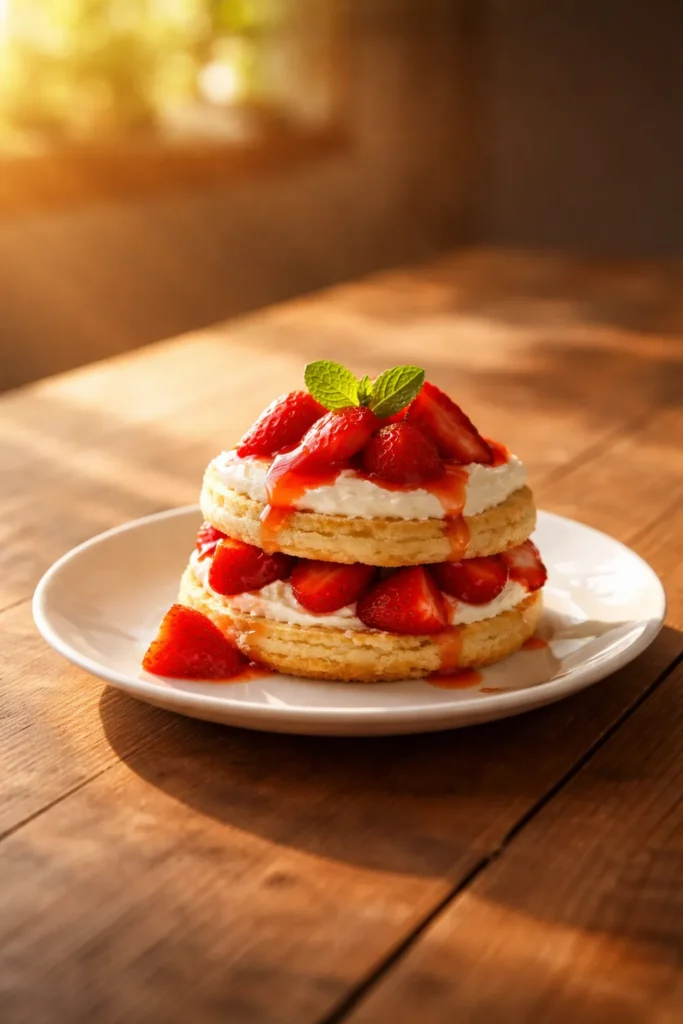
5. Strawberry Shortcake
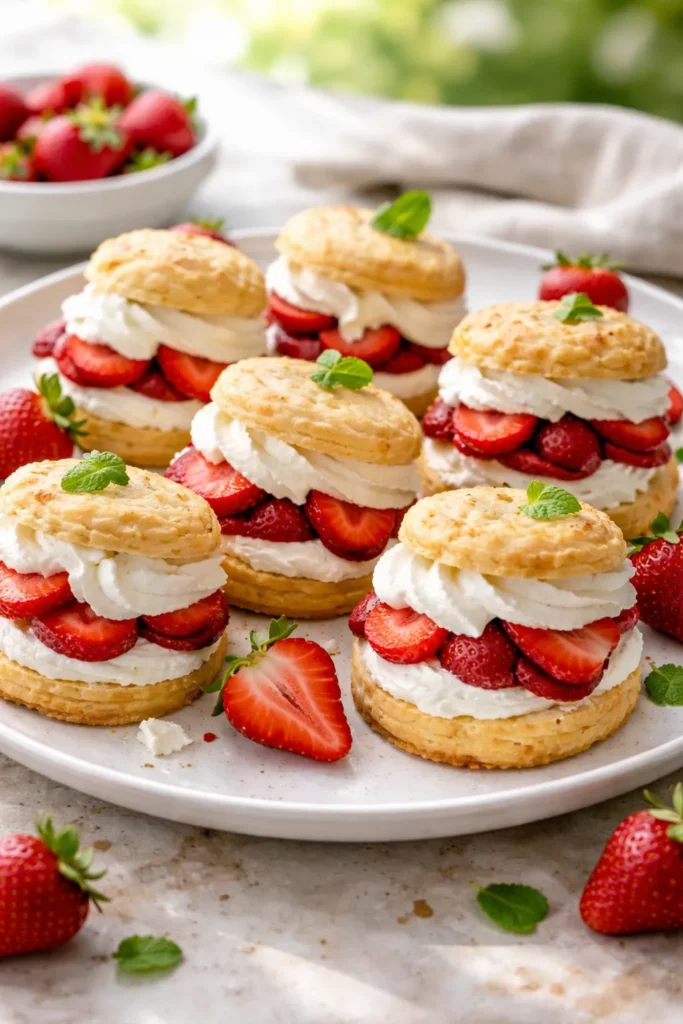
Strawberry shortcake is summer incarnate in dessert form. The soft, tender cake soaks up the juices from fresh strawberries, the whipped cream adds cloudlike texture, and the whole thing feels light and refreshing even though it’s genuinely satisfying. What makes strawberry shortcake special at a BBQ is that you can make it portable and handheld without losing any of the appeal—in fact, individual servings often feel fancier than one big cake.
Building Layers for Maximum Flavor
A proper strawberry shortcake starts with fresh strawberries macerated in sugar for at least an hour—this draws out their juice and creates a natural syrup that soaks into the cake. The cake itself should be tender and sturdy enough to hold up to moisture without becoming mushy. Some bakers prefer a classic sponge cake, others use a slightly denser butter cake that holds up better to the berry juice. The whipped cream should be freshly whipped and lightly sweetened, never grainy or over-beaten. Layer cake, berries with their juice, whipped cream, and repeat. The moisture from the strawberries makes each bite juicy and flavorful.
Easy Individual Serving Options
Instead of a traditional layered cake, you can make individual shortcake servings by baking smaller cakes, creating shortcake “biscuits,” or even using store-bought pound cake as your base layer. Layer each component into clear cups or jars and let guests see the pretty layers. This approach makes them easier to serve at the BBQ and eliminates the need for plates, forks, and serving utensils. Everything is self-contained and mess-free.
Insider note: If you want fresh strawberries but they’re not quite as sweet as you’d like, a tiny squeeze of balsamic vinegar actually enhances their flavor without making them taste vinegary.
6. Peach Cobbler
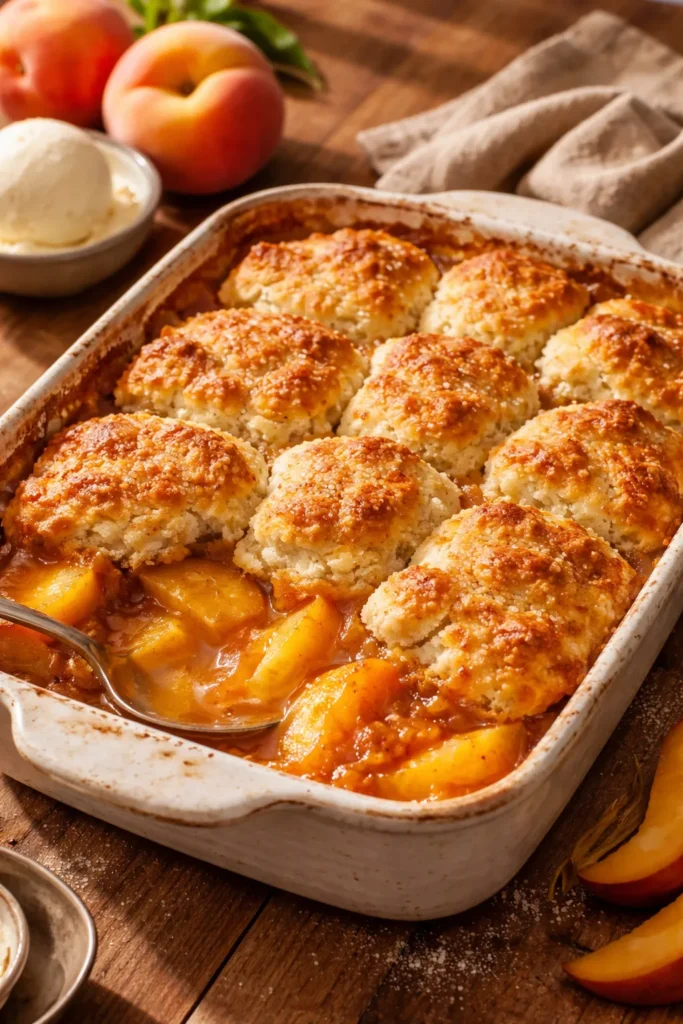
When peaches are at their peak, a warm peach cobbler is practically mandatory. This is a dessert that feels like it took hours to make even though the hands-on time is minimal. The soft, slightly tart peaches bubble up under a tender, biscuit-like topping that’s buttery and just slightly sweet. There’s something deeply comforting about it, especially when you can serve it warm with a scoop of vanilla ice cream melting into the top.
Choosing and Preparing Peaches
Fresh peaches are ideal, but frozen peaches work beautifully too—sometimes they’re even better because they’re picked at peak ripeness and frozen immediately. You want peaches that are ripe enough to be flavorful but not so ripe they fall apart when you cut them. Peel them, slice them, and toss with a little sugar, lemon juice, and maybe some warm spices like cinnamon or nutmeg. Some people add a thickener like cornstarch to prevent the filling from being too watery, while others prefer the cobbler to be a bit juicy. Both approaches work; it’s a matter of preference.
The Topping That Makes It Magic
The cobbler topping is essentially biscuit dough—flour, butter, baking powder, salt, and milk mixed together quickly until just combined, then dropped by spoonfuls over the fruit. It bakes in the oven and puffs up into tender, golden biscuits that soak up some of the peach juice while maintaining their structure. The contrast between the soft, juicy fruit and the tender, slightly crunchy topping is why people keep coming back for more.
Quick fact: You can make a peach cobbler with nearly any stone fruit—swap in nectarines, plums, or a combination. The basic technique stays the same, just adjust the sugar and spices to complement the fruit you’re using.
7. Chocolate Chip Cookies
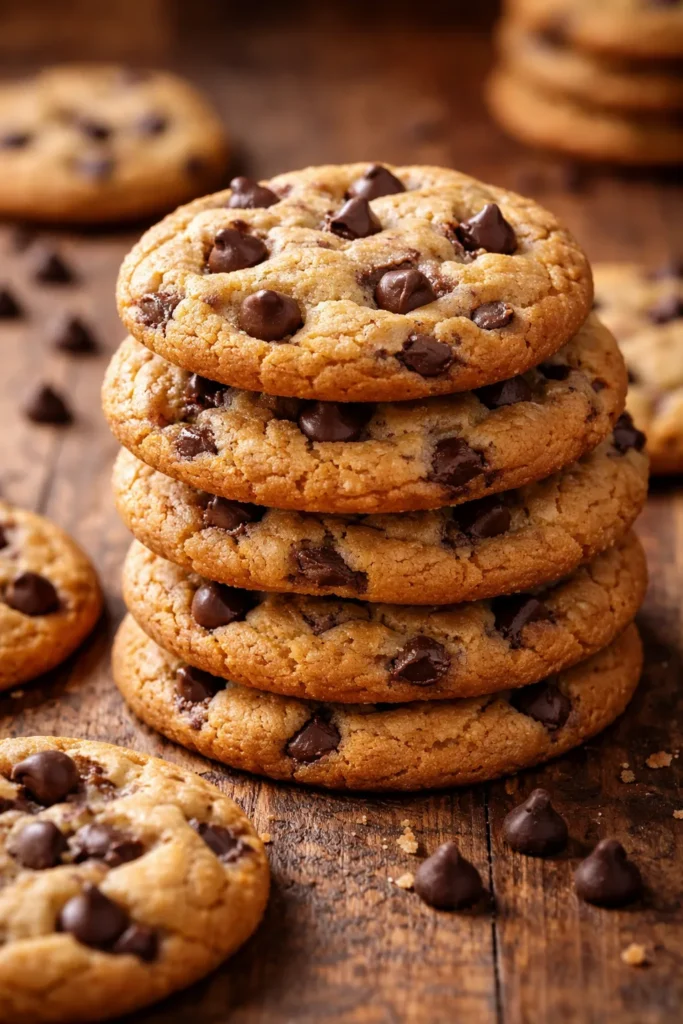
Sometimes simple is best, and homemade chocolate chip cookies are the epitome of simple done right. There’s no pretense, no fancy technique, just good butter, brown sugar, chocolate, and the kind of warm cookie satisfaction that transcends age. The difference between a forgettable cookie and one that people ask for the recipe for comes down to a few specific choices: using more brown sugar than white sugar (for chewiness), not overbaking (so they stay soft), and using good quality chocolate rather than cheap chocolate chips.
The Science of Chewiness
Recipes that promise chewy cookies typically include an extra egg yolk for richness and moisture, melted butter instead of softened butter (for a denser, chewier texture), and sometimes a touch of cornstarch to prevent the cookies from spreading too thin. Under-baking is crucial—your cookies should look almost underdone when you pull them from the oven. They’ll set up as they cool, and you’ll end up with that perfect combination of crispy edges and a soft, chewy center that holds its shape without being cake-like.
Transport and Make-Ahead Strategy
Bake these cookies a day or two before your BBQ and store them in an airtight container. They hold up beautifully, they don’t require any special cooling or storage conditions, and they’re the ultimate no-stress dessert. You can throw them in a bag as you’re walking out the door. Some people even prefer day-old cookies because the flavors have mellowed and the texture is more uniform.
Pro tip: If you want to bring slightly warm cookies, bake them the morning of your BBQ and transport them wrapped in foil. They’ll hold residual warmth and taste like you just pulled them from the oven.
8. Fruit Pizza
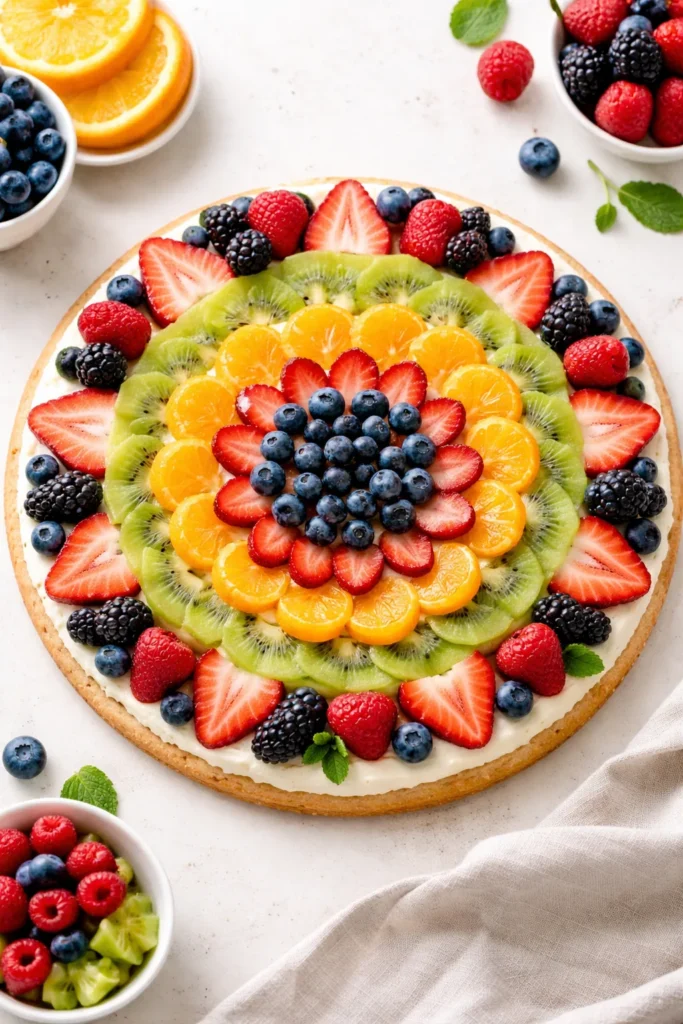
Fruit pizza might be the most visually impressive dessert you can bring to a BBQ, and here’s the shocking part—it’s easier to make than it looks. You start with a sweet cookie crust (essentially a giant sugar cookie baked in a pizza pan or on a sheet), spread it with a layer of cream cheese frosting, and then arrange fresh fruit on top in whatever pattern strikes your fancy. The combination of the buttery, slightly crunchy crust, the rich cream cheese topping, and the bright, fresh fruit is genuinely hard to beat.
Creating a Foundation That Works
The cookie crust should be sturdy enough to hold toppings without breaking apart but tender enough to be pleasant to eat. You can use your favorite sugar cookie dough recipe, or you can make a simple dough with butter, sugar, eggs, vanilla, flour, and baking powder. The crust bakes first until it’s golden, then it cools completely before you add any toppings. This prevents the frosting from melting and the fruit from releasing too much juice too quickly.
Topping with Fresh Fruit
The cream cheese frosting is simple—just softened cream cheese whipped with powdered sugar and vanilla. Spread it all the way to the edges of the cooled crust to create a seal that prevents the fruit juices from making the crust soggy. Then come the fun part: arranging fruit however you like. Berries, sliced kiwi, mandarin orange segments, grapes, sliced apples, even edible flowers if you’re feeling fancy. You can arrange it in concentric circles, create a pattern, or just distribute colors evenly. It should look like something you’d see at a bakery, but you made it.
Worth knowing: Arrange your fruit just a few hours before serving to keep it fresh-looking. If it sits too long, berries will weep and apples might brown slightly.
9. Homemade Blueberry Pie
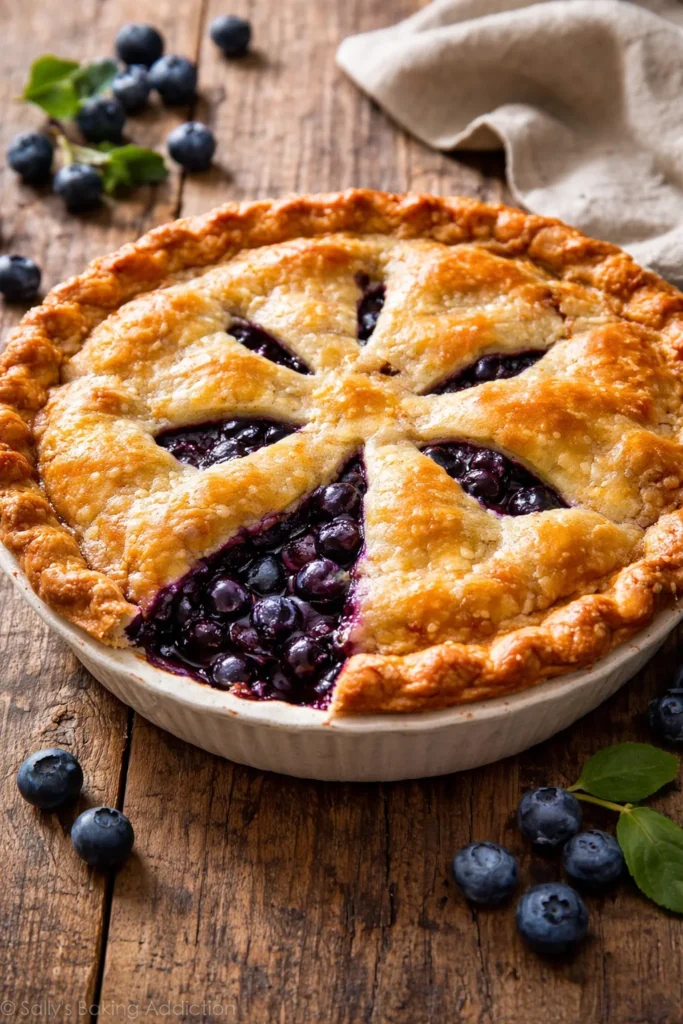
A proper blueberry pie is peak summer elegance. Fresh, ripe blueberries are such a treat that they deserve to be the star of dessert, not buried in some elaborate preparation. The pie is straightforward—a flaky, buttery crust filled with juicy berries bound together with a thickener so it slices cleanly but still tastes fresh and juicy. The flavors are pure and simple, which is exactly what summer fruit deserves.
Getting the Filling Right
The key to a perfect blueberry pie filling is using the right thickener and the right amount. Too little and your pie is soupy; too much and it tastes starchy. Cornstarch and instant tapioca both work well—they thicken the filling while remaining relatively invisible. Some people prefer tapioca because it doesn’t cloud the filling, keeping the vibrant color of the blueberries visible. Toss your berries gently with the thickener, a little sugar, lemon juice (which brightens the berry flavor), and maybe a pinch of nutmeg. Let the mixture sit for a few minutes so the juices release slightly before pouring into your crust.
Crust Considerations
A good pie crust is essential—it should be flaky, tender, and buttery. You can make it from scratch if you’re comfortable with pie dough, or you can use a high-quality store-bought crust without anyone thinking less of you. If you’re making it from scratch, keep everything cold, handle the dough as little as possible, and don’t skip the rest period in the fridge before rolling. A lattice top isn’t strictly necessary, but many people love how it looks. A simple whole crust with decorative edges and a few vents for steam to escape works beautifully too.
Quick fact: A pie baked in a deep-dish or disposable aluminum pan is easier to transport to a BBQ than a traditional pie tin. The disposable pan means you don’t have to worry about getting it home.
10. Brownie Ice Cream Sandwiches
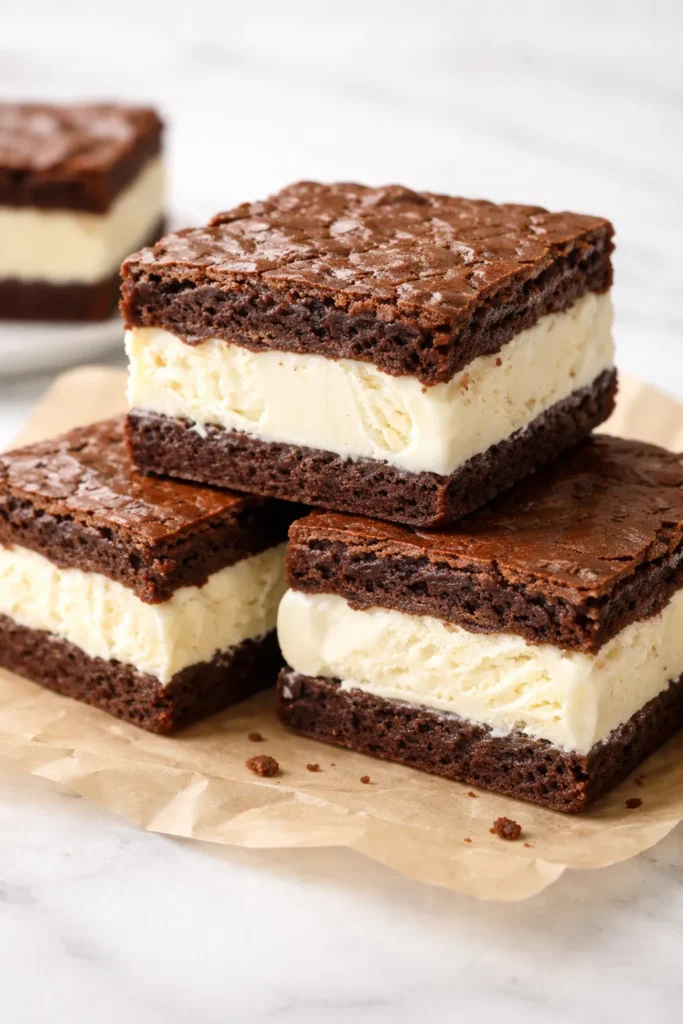
Brownie ice cream sandwiches are the ultimate handheld summer dessert. You get the intense chocolate satisfaction of a brownie combined with the cooling relief of ice cream, all in a portable package that doesn’t require plates, forks, or napkins (okay, you’ll probably want napkins). These are perfect for people who want something substantial but still refreshing on a warm day.
Building the Perfect Sandwich
Start with a dense, fudgy brownie—these should be thick enough that they don’t break when you sandwich them around ice cream, but not so thick that they’re hard to eat. Bake your brownies in the usual way, let them cool completely, then cut them into pairs. Soften your ice cream slightly (just a minute or two on the counter, not full meltdown), scoop it between two brownie squares, and press gently so the ice cream spreads slightly but doesn’t squeeze out the sides. If you want to get fancy, roll the edges in sprinkles, mini chocolate chips, crushed cookies, or chopped nuts.
Make-Ahead and Freezing
Assemble these a day ahead and freeze them on a baking sheet before transferring to an airtight container. They hold up beautifully in a cooler with ice packs and stay frozen for several hours even on a warm day. The brownie shell insulates the ice cream somewhat, so they melt slower than a regular ice cream bar. When you serve them, let them sit out for just a minute or two so the brownies aren’t tooth-shatteringly hard.
Insider note: If you’re transporting these to a BBQ, pack them in an insulated cooler bag with extra ice packs. Keep them as cold as possible until it’s time to serve.
11. Key Lime Pie
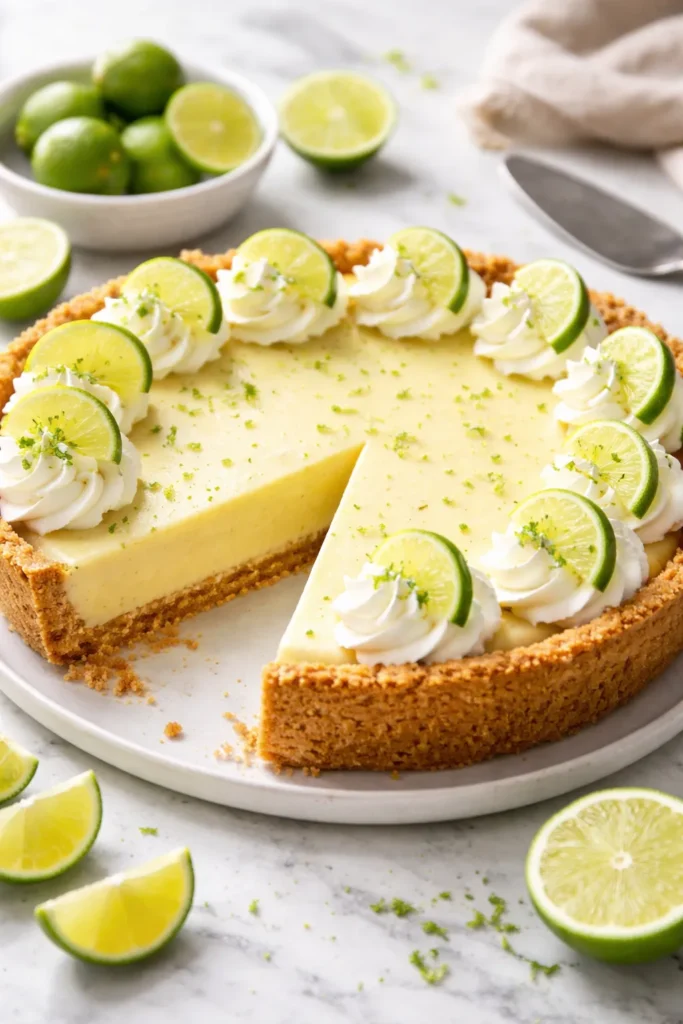
Key lime pie is the ultimate tropical escape disguised as dessert. The tartness of the key lime juice cuts beautifully through the richness of the condensed milk and cream, creating a perfectly balanced filling that tastes bright and refreshing rather than heavy. A buttery graham cracker crust provides textural contrast, and a dollop of whipped cream on top is practically mandatory. The whole thing feels elegant and special but comes together with surprising ease.
No-Bake vs. Baked Versions
There are two main approaches to key lime pie: you can bake it (traditionally in a pie shell with sweetened condensed milk, egg yolks, and lime juice), or you can make a no-bake version with whipped cream folded into the filling. Both are delicious. The baked version has a slightly firmer texture and a more intense filling, while the no-bake version is lighter and airier. For a BBQ, either works—just make sure it’s thoroughly chilled before you transport it.
Transport and Serving Tips
Key lime pie is almost always better the next day after the flavors have had time to meld, so making it a day ahead is actually ideal. Transport it in the pie dish covered with plastic wrap, in a well-packed cooler with ice packs. Slice it with a sharp knife dipped in hot water (wipe between cuts), top each slice with fresh whipped cream and a tiny bit of lime zest, and watch people’s faces light up with the first bite.
Pro tip: If you can’t find key limes (which are small, round, and more tart than regular limes), regular lime juice works fine. You might need slightly less because it can be less acidic, so taste as you go.
12. Berry Trifle
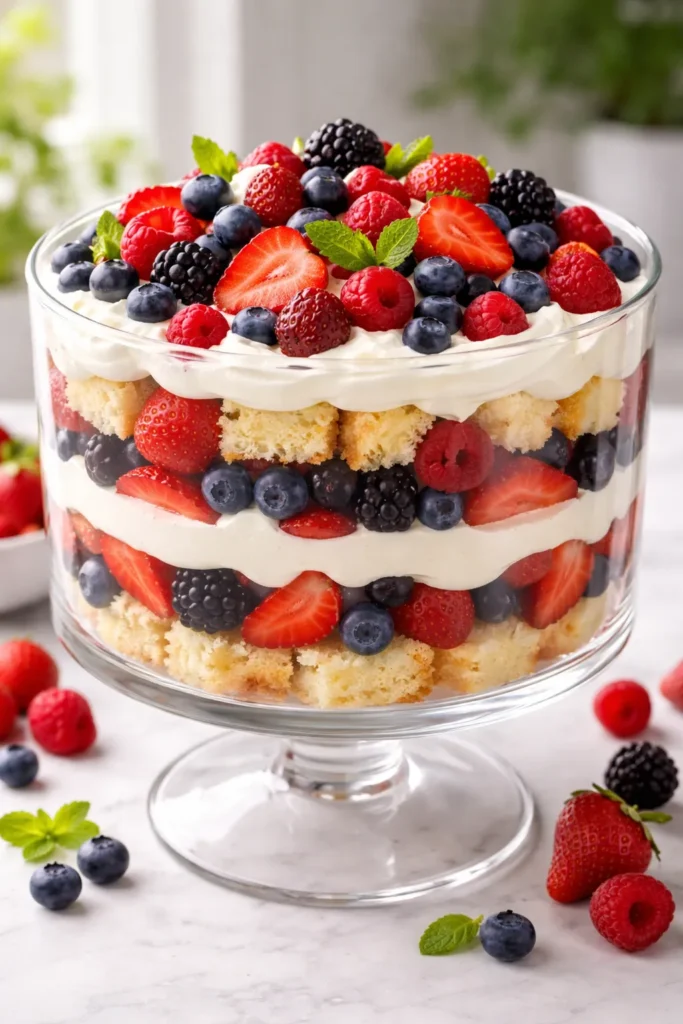
A berry trifle is one of those desserts that looks incredibly impressive but actually just involves layering. You stack tender cake, fresh berries, a creamy filling (like whipped cream, pudding, or custard), and repeat until you reach the top of a glass bowl or individual cups. The result is a stunning presentation where all the beautiful layers are visible, and every spoonful gets a bit of everything. It’s elegant, it’s delicious, and guests genuinely think you spent hours on it.
Building the Layers
Start with cubed or torn pieces of tender cake—pound cake, angel food cake, or sponge cake all work well. Layer it with fresh berries (blueberries, raspberries, strawberries, or a mix), then add a creamy element like freshly whipped cream or a simple vanilla pudding. Add a touch of liqueur like coffee liqueur, berry liqueur, or even just a splash of fruit juice to brighten the flavors. Then repeat until your bowl is full. The key is making sure the layers are distinct and visible, which looks beautiful and tastes good.
Make-Ahead Strategy
You can assemble a trifle completely a few hours ahead, which is fantastic for a BBQ. Cover it with plastic wrap and refrigerate until you’re ready to serve. Individual trifles in clear cups or jars are even easier—you can assemble them, cover them, and guests can grab one as needed. The moisture from the berries and cream softens the cake as it sits, so the texture actually improves as time passes.
Quick fact: If you want to make your trifle even more special, macerate the berries in a little sugar and lemon juice for an hour before assembling. This draws out their juice and creates a syrup that soaks into the cake.
13. Banana Pudding
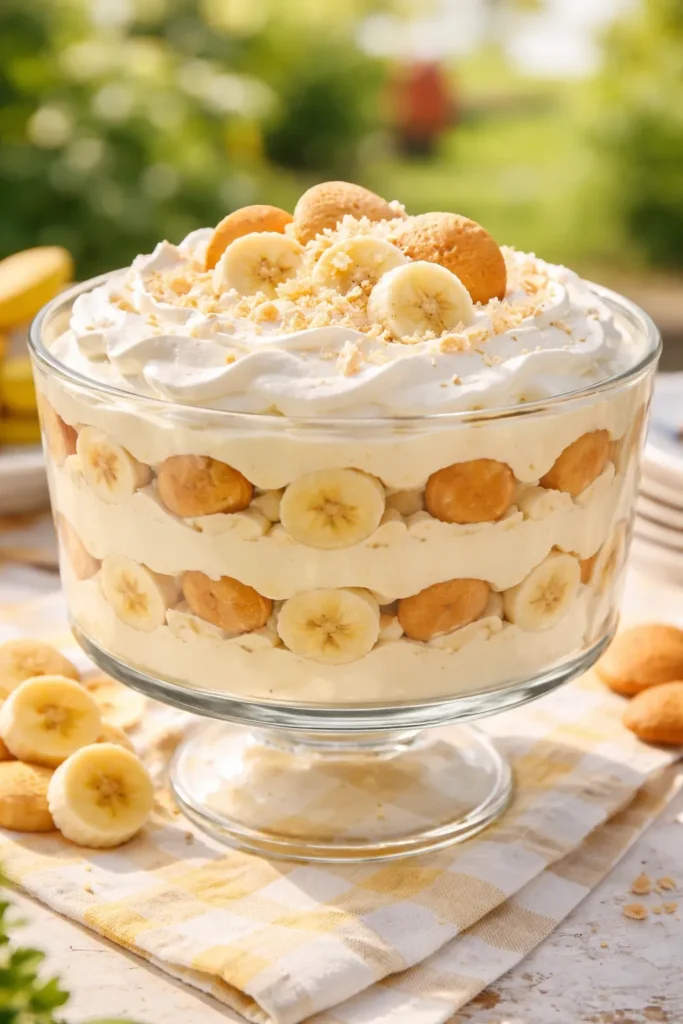
Banana pudding is a Southern classic that has moved well beyond its traditional region. The combination of fresh banana slices, creamy vanilla pudding, soft vanilla wafers, and sometimes a meringue or whipped cream topping is comfort in a bowl. It’s light enough to be refreshing but substantial enough to feel like a real dessert. The texture contrast between the soft wafers, creamy pudding, and fresh banana is genuinely addictive.
The Secret to Proper Assembly
Good banana pudding starts with quality ingredients—real vanilla extract rather than imitation, good vanilla pudding (homemade is best, but high-quality instant works), and fresh bananas sliced just before assembly. Layer vanilla wafers on the bottom of your serving dish, top with a layer of pudding, then banana slices, then more wafers, more pudding, more bananas. The moisture from the pudding softens the wafers as they sit, which is exactly what you want. The final layer should be pudding so the bananas on top stay fresh-looking.
Topping Options and Transport
You can top banana pudding with freshly whipped cream, or you can go traditional with a meringue topping that’s lightly browned under the broiler. Some people add crushed vanilla wafers on top for crunch. All of these work beautifully. For transport, assemble it in a shallow baking dish, cover tightly with plastic wrap, and keep it cool in a cooler until serving.
Worth knowing: If you’re worried about the bananas browning before you serve the pudding, slice them just before you leave for the BBQ and toss them lightly in lemon juice. This prevents oxidation and keeps them looking fresh.
14. No-Bake Icebox Cake
An icebox cake might be the easiest show-stopper in existence. You literally just stack soft cookies with whipped cream, refrigerate overnight, and serve. The moisture from the cream softens the cookies as they sit, creating a cake-like texture without any actual baking. You get all the satisfaction of eating cake but with zero effort and zero oven time. For a summer BBQ when you don’t want to heat up your kitchen, this is genuinely perfect.
Choosing Your Layers
Traditional icebox cakes use chocolate wafer cookies, but you can use graham crackers, vanilla wafers, or any tender cookie. Layer cookies with lightly sweetened whipped cream (or you can make a mocha whipped cream if you want chocolate flavor). Some recipes fold a little cocoa powder or instant coffee into the whipped cream to boost the chocolate flavor. Make sure you have enough cream to coat each cookie layer and seal the sides—this prevents the finished cake from drying out.
Assembly and Storage
Layer your cookies and cream in a loaf pan, a rectangular baking dish, or just stack them on a plate—it doesn’t really matter. Cover the whole thing with plastic wrap and refrigerate overnight (or for at least 6 hours). The longer it sits, the more the cookies soften and the more cake-like the texture becomes. You can make this up to three days ahead, which makes it perfect for a BBQ where you want everything prepped in advance.
Pro tip: If you want the cake to look fancy, you can dust the top with cocoa powder or shaved chocolate just before serving. It takes 30 seconds and looks intentional.
15. Grilled Desserts (S’mores, Pineapple, or Fruit in Foil)

If you’re already firing up the grill, why not use it for grilled desserts too? S’mores obviously work (toast your marshmallows right over the fire or grill), grilled pineapple is phenomenal (we covered that earlier), and you can wrap fruit in foil with a little butter, cinnamon, and brown sugar and let it cook gently at the edge of the grill. Stone fruits like peaches, plums, or apricots work beautifully, as do apples. The heat caramelizes the fruit’s natural sugars and creates a warm, spiced, juicy dessert that feels indulgent without being heavy.
The Fun Factor of Grilled Desserts
There’s something genuinely fun about grilling dessert. People gather around, they toast marshmallows, they watch the pineapple caramelize. It’s interactive and memorable in a way that a plated dessert, no matter how good, just isn’t. If your BBQ has space and your grill can handle it, grilled desserts are absolutely worth doing.
Timing and Safety
The beauty of grilled desserts is that you don’t have to commit to a specific time—you can grill them as you’re finishing the main course or during the transition to dessert. Just make sure your grill grates are clean and not too hot (medium heat is usually right). Have all your toppings and assembly items ready to go so you can move quickly.
Final Thoughts
Choosing the right BBQ dessert means thinking about the weather, the crowd, how much advance prep you want to do, and what genuinely excites you. The best dessert you can bring is one you’re happy to make, because that enthusiasm shows in the final product. Whether you go with something no-bake that requires zero oven time, a grilled fruit option that uses the grill that’s already running, or a classic baked treat that you prepped a day ahead, the desserts on this list are all proven winners.
The dessert that gets requested most often, that people claim tastes better than anything they can make at home, and that turns you into the person everyone wants to invite to their next gathering isn’t necessarily the most complicated one. It’s the one that’s executed well, that shows up looking beautiful, and that tastes as good as it promises. These 15 options deliver on all counts. Pick one, make it with care, and watch how quickly it disappears from the dessert table.