There’s something almost sacred about homemade apple pie—the way it fills your kitchen with warm spice and buttery-sweet aromas, the sound of a fork cutting through crisp golden crust into tender apples, that first bite when everything comes together perfectly. If you’ve ever felt intimidated by the prospect of baking pie from scratch, let me tell you: a honey crisp apple pie is actually the perfect place to start. These particular apples are forgiving, flavorful, and genuinely foolproof, and when you pair them with a buttery homemade crust and the right technique, you end up with something that tastes like you spent all day in the kitchen when, really, most of the work is straightforward and meditative.
This guide will walk you through every single step, from selecting your ingredients to knowing exactly when your pie is done baking. You’ll learn the techniques that separate a truly exceptional apple pie from one that’s merely okay—the small decisions that prevent a soggy bottom crust, the strategies that keep your crust flaky and golden, and the tricks that turn good apples into an incredible filling.
Table of Contents
- Why Honeycrisp Apples Are the Ideal Choice
- The Foundation: Understanding Your Pie Crust
- Selecting Your Equipment
- Making Your Own Pie Dough Versus Using Prepared Options
- The Art of Preparing Your Apples
- Building Your Filling: The Science of Thickening
- Ingredients
- Instructions
- Pro Tips for Success
- Common Mistakes to Avoid
- Storage and Make-Ahead Options
- Serving Suggestions and Pairings
- Variations You Can Try
- Final Thoughts
Why Honeycrisp Apples Are the Ideal Choice
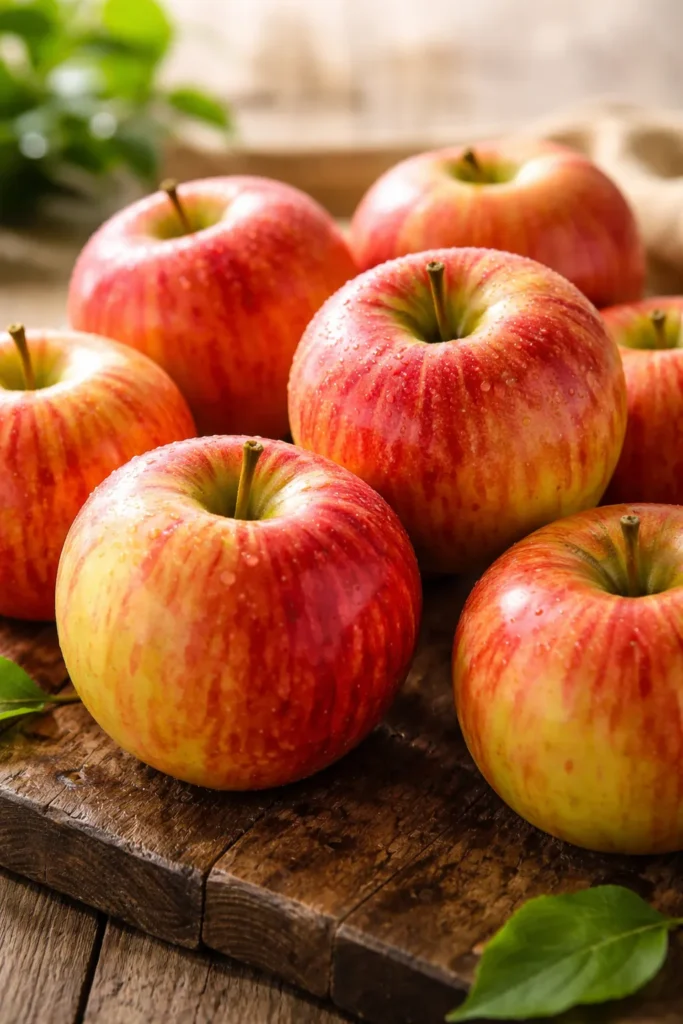
Honeycrisp apples have become the gold standard for apple pie, and there’s genuinely good reason for that. Unlike softer apple varieties that turn to applesauce when baked, honeycrisps hold their shape beautifully while still releasing enough juice to create a glossy, properly textured filling. They strike an ideal balance between crisp and juicy, and their natural flavor profile sits perfectly between sweet and tart—which means you don’t need to use excessive amounts of sugar to make the pie taste great.
The texture matters more than people realize. When you bite into a slice of pie made with honeycrisps, you get actual apple texture in every bite, not a mushy paste. This is because these apples have a firm cellular structure that resists breaking down during the baking process. They’re also naturally sweet, so you can actually taste the apple itself rather than just sugar and spice.
If honeycrisps aren’t available at your market, several alternatives work beautifully. Granny Smith apples are excellent if you prefer a tangier pie, though you may want to use them in combination with a sweeter variety like Golden Delicious. Braeburn apples deliver a similar texture to honeycrisps with slightly more tartness. Pink Lady apples offer wonderful complexity with notes of both sweet and tart. The key is choosing apples that are firm and won’t dissolve during baking.
The Foundation: Understanding Your Pie Crust
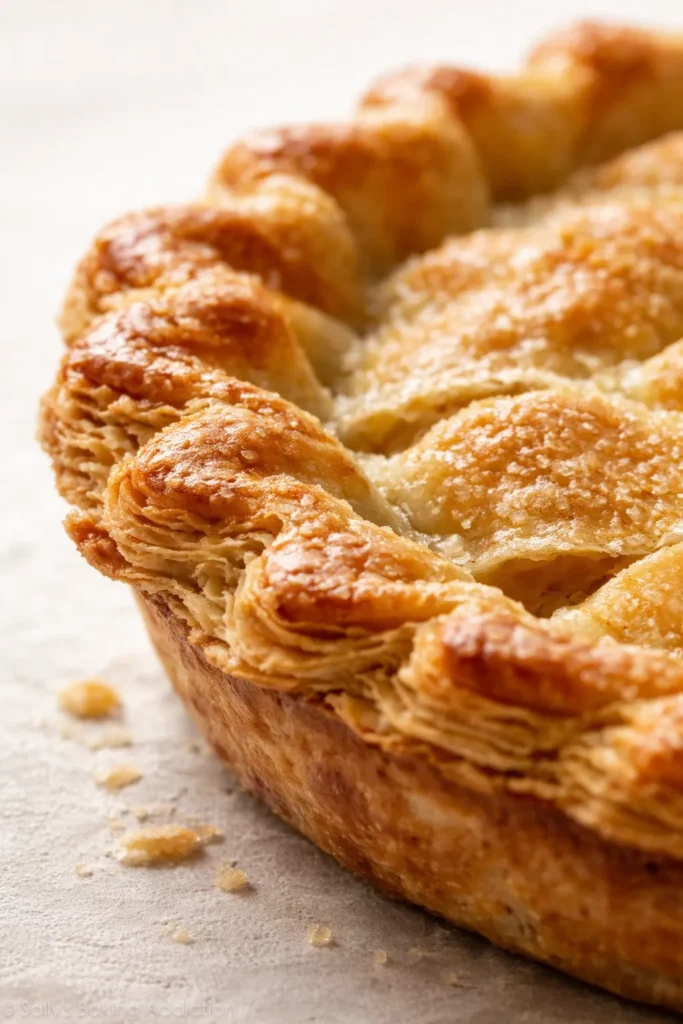
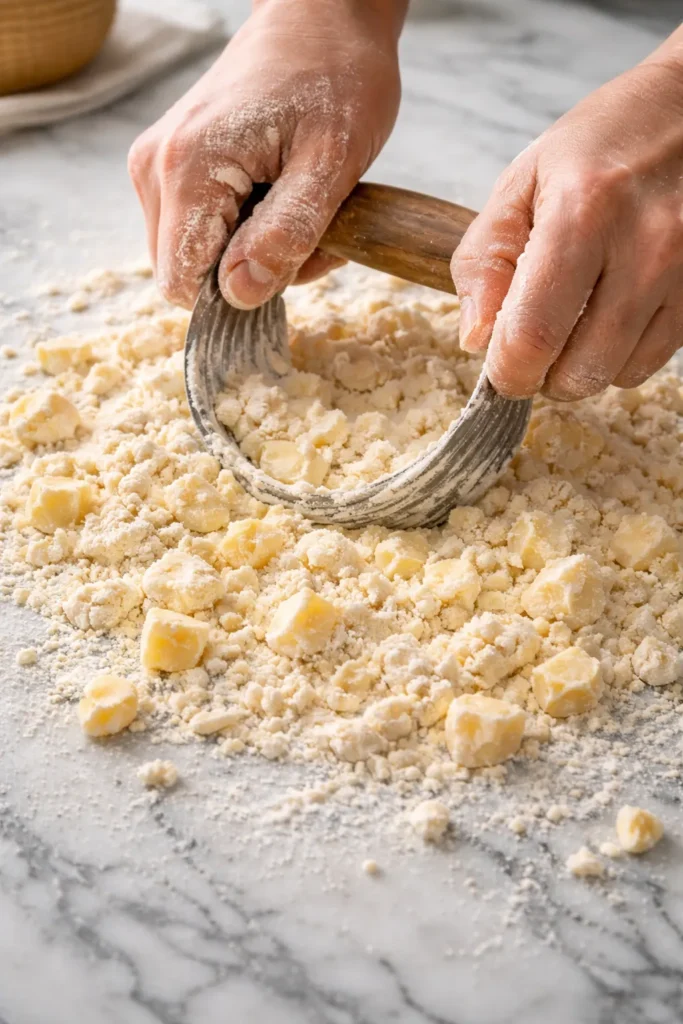
The crust is genuinely the difference between a memorable pie and a forgettable one. A flaky, buttery crust requires understanding one fundamental principle: you need cold butter distributed throughout cold flour, and you want to handle the dough as little as possible. When you keep everything cold and work quickly, the butter stays in distinct little pieces that melt separately during baking, creating steam pockets that become those beautiful, tender flaky layers.
This is why so many pie bakers swear by making crust by hand rather than using a food processor. A food processor works quickly and efficiently, but sometimes too quickly—the butter gets too warm and blends with the flour too thoroughly, resulting in a crust that’s dense rather than flaky. Working with your fingertips, using a pastry cutter, or even a cheese grater gives you more control and the ability to stop at exactly the right moment.
The water you add is crucial too, and it’s honestly one of the most overlooked variables. You want ice-cold water, and you want to add just enough to bring the dough together without making it wet. The dough should look shaggy and rough at first—almost like it won’t hold together. But as you knead it gently a few times, it comes together into a cohesive mass. If you add too much water, you’ll end up with dough that’s more like biscuit dough. If you add too little, the crust will crack when you roll it out.
Selecting Your Equipment
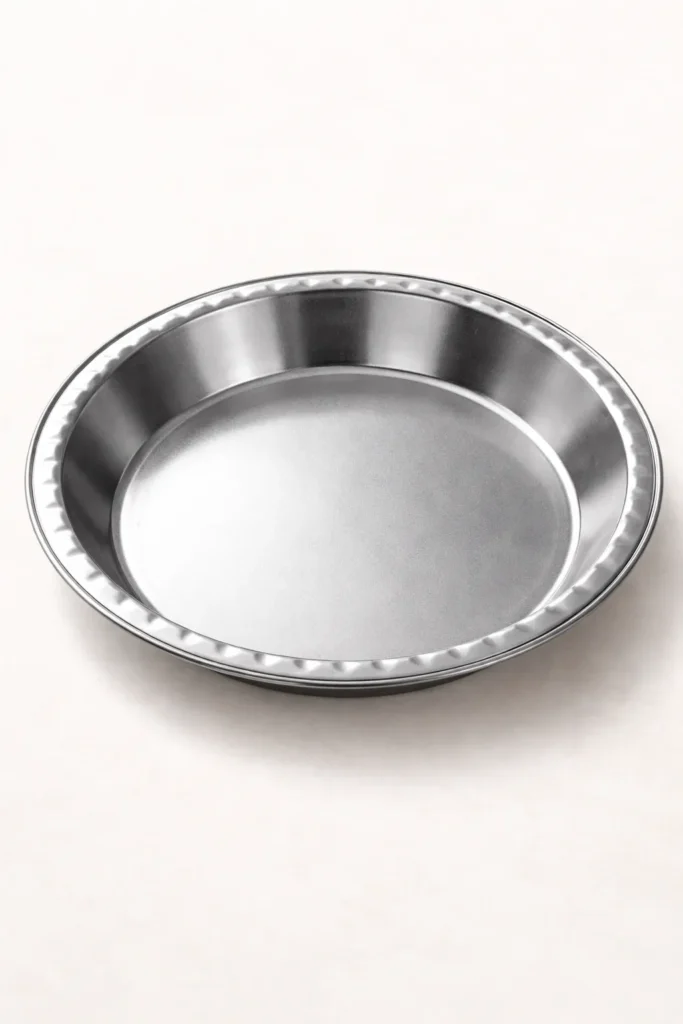
Your pie pan matters more than you might think. Many bakers prefer metal pie pans over glass because metal conducts heat more efficiently, resulting in a crisper bottom crust. If you use a glass pie dish (which absolutely works and looks beautiful), keep in mind that glass holds heat longer, so you might need to reduce your baking temperature by 25 degrees Fahrenheit and add a few extra minutes to the baking time.
A 9-inch pie pan that’s at least 1.5 inches deep gives you plenty of room for a generous filling. Shallow pie pans look pretty but force you to use fewer apples, resulting in a less impressive filling-to-crust ratio. Deep-dish pans are wonderful if you’re an apple pie enthusiast—they hold about 25% more filling than standard pans.
You’ll also want a good rolling pin (a French rolling pin without handles is lighter and easier to control), a pastry brush for egg wash, a reliable oven thermometer (most home ovens are off by 15-25 degrees, which matters for baking), and a baking sheet to place under your pie during baking. That baking sheet is a game-changer—it catches any drips and, more importantly, helps the bottom crust bake evenly.
Making Your Own Pie Dough Versus Using Prepared Options

Homemade pie dough takes about fifteen minutes of actual hands-on work, though you need to plan ahead for chilling time. The flavor difference between homemade and store-bought is genuinely noticeable—homemade crust tastes buttery and slightly salty, with a delicate flakiness that packaged dough simply can’t match.
That said, life happens. Refrigerated pie crusts from brands like Pillsbury work surprisingly well and will still produce a respectable pie. They’re already partially hydrated and formulated for ease of use. If you go this route, pull them from the refrigerator about ten minutes before rolling so they’re pliable but still cold. You can still achieve decent flakiness with store-bought dough—it just won’t have that special homemade quality.
The compromise approach that many experienced bakers use is making the dough from scratch and freezing it in discs. You can prepare your dough during a relaxed weekend hour, wrap it well, and freeze it for up to three months. When you want to bake a pie, you simply thaw the dough in the refrigerator overnight. This gives you homemade quality without time pressure.
The Art of Preparing Your Apples
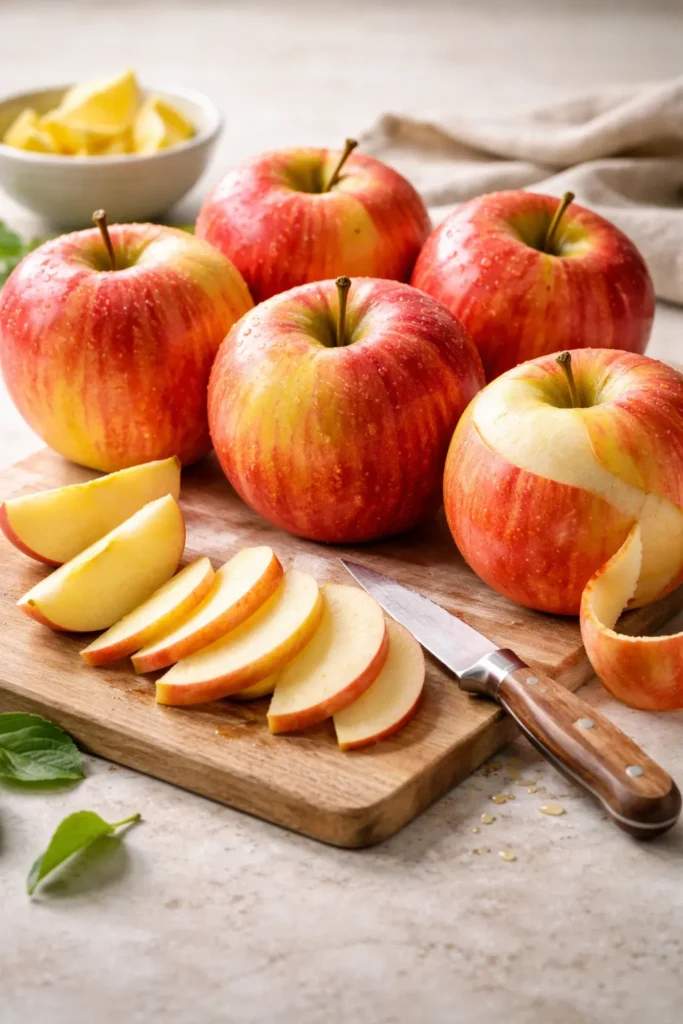
How you prepare your apples sets the tone for your entire pie. Start by choosing apples that are firm and fragrant—not bruised, not overly soft, and definitely not mealy. Smell them if possible; good apples have a pleasant apple scent, which is a reliable indicator of flavor.
Thin, uniform slices are essential. This isn’t just about aesthetics; it’s about ensuring even cooking. Apples that are 1/4 inch thick will bake through in the time it takes for the crust to brown and the filling to thicken. Thicker slices might still be slightly firm in the center while the crust is already golden. You can use a sharp knife, a mandoline (if you’re careful), or an apple slicer for consistency.
Peeling apples is a matter of preference. Many traditional recipes peel every apple, which gives you a cleaner-looking pie with smooth texture throughout. Some bakers leave the skin on for added fiber and rustic appeal—the skin softens during baking and becomes completely unobtrusive. Use a vegetable peeler and work from stem end to blossom end for the easiest, most efficient peeling.
After slicing, place your apples in a large bowl immediately. If you have time, you can toss them with a bit of lemon juice as you go—this prevents oxidation and adds subtle brightness to the flavor.
Building Your Filling: The Science of Thickening
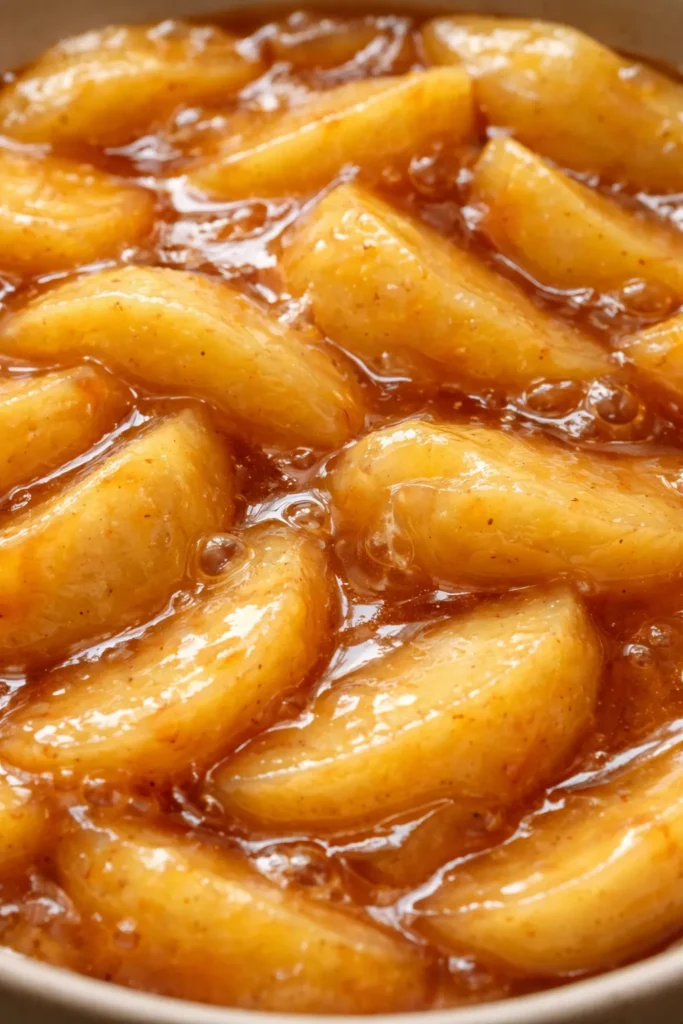
The apple filling is where many home bakers struggle. You want a filling that’s glossy, sliceable, and holds together when you plate it—not soupy and loose, but also not so thick it tastes starchy or grainy.
The thickening agent you choose matters. Cornstarch is the most common choice and works reliably, but tapioca flour is increasingly popular because it creates a glossier, more delicate texture. Cornstarch can sometimes create that slightly gritty mouthfeel if you use too much. All-purpose flour also works, though you typically need a bit more of it and it creates a slightly less transparent filling.
The basic formula for a 9-inch pie with honeycrisp apples is about 3-4 tablespoons of thickener for approximately 8 cups of sliced apples (6-7 large apples). But here’s the important part: honeycrisp apples release a considerable amount of liquid as they bake, so you actually need less thickener than you might think. Softer apples like Red Delicious release even more juice, which is why they’re not ideal for pie—you’d end up with a starchy, thick filling instead of that glossy juice that makes pie special.
Sugar is the other key component, and here’s where personal preference comes in. Most traditional recipes use between half a cup and three-quarters of a cup of sugar for this amount of apples. Honeycrisps are already sweet, so you can comfortably use the lower end—around half a cup of granulated sugar mixed with a couple of tablespoons of brown sugar if you want complexity. Brown sugar adds subtle molasses notes that round out the spice flavors beautifully.
The spices are where you create the signature apple pie taste. Cinnamon is non-negotiable, but nutmeg is equally important—it adds warmth and depth that pure cinnamon alone can’t deliver. A quarter teaspoon of nutmeg in a 9-inch pie is your baseline. Some bakers add a pinch of allspice or cardamom, which adds complexity without being obvious. You can also incorporate ginger (fresh grated or ground), cloves (use sparingly—they’re potent), or even a tiny pinch of cayenne pepper, which brightens all the other spices without adding heat.
Acid is the final, often-overlooked element. Lemon juice or lemon zest adds brightness and makes the spices pop. It also helps balance the sweetness so the pie doesn’t become cloying. About 1-2 tablespoons of fresh lemon juice is the sweet spot for a standard 9-inch pie.
Yield: 1 (9-inch) pie | Serves 8
Prep Time: 30 minutes (including apple slicing)
Cook Time: 50-55 minutes
Total Time: 1 hour 20 minutes (plus 3-4 hours cooling)
Difficulty: Intermediate — Working with pie dough requires some care and practice, but the steps are straightforward and the technique becomes easier with experience.
Ingredients
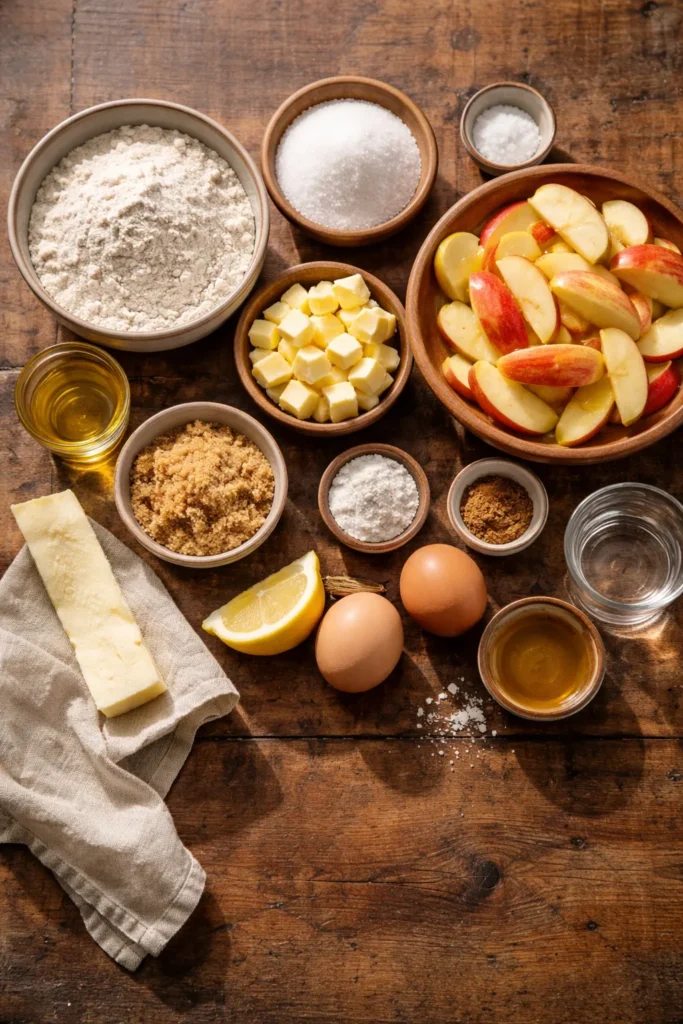
For the Pie Crust (makes enough for top and bottom of one 9-inch pie):
- 2½ cups all-purpose flour
- 1 tablespoon granulated sugar
- 1 teaspoon kosher salt
- 1 cup (2 sticks) cold unsalted butter, cut into small cubes
- 6-8 tablespoons ice-cold water, added a little at a time
For the Apple Filling:
- 6-7 large honeycrisp apples (about 8 cups sliced), peeled, cored, and sliced ¼ inch thick
- ½ cup granulated sugar
- 2 tablespoons light brown sugar
- 3 tablespoons tapioca flour (or cornstarch, or all-purpose flour)
- 1½ teaspoons ground cinnamon
- ¼ teaspoon ground nutmeg
- ⅛ teaspoon fine sea salt
- 1-2 tablespoons fresh lemon juice
- 1 tablespoon unsalted butter, cut into small pats (for dotting the filling)
For Assembly and Baking:
- 1 large egg, beaten (for egg wash)
- 1 tablespoon water
- 1 tablespoon coarse sugar for topping (optional but recommended)
- Flour for dusting your work surface
Instructions
Make the Pie Dough:
-
In a large bowl, whisk together the flour, sugar, and salt until evenly combined. This ensures the salt distributes evenly throughout the dough.
-
Add the cold butter cubes to the flour mixture. Using your fingertips, a pastry cutter, or a cheese grater, work the butter into the flour until the mixture resembles coarse breadcrumbs with pea-sized pieces of butter still visible throughout. This texture is critical—you’re aiming for distinct butter pieces that will create flaky layers as they melt during baking. The process should take about 3-4 minutes.
-
Add 6 tablespoons of ice-cold water and stir gently with a fork until the dough just begins to come together. If the mixture still looks too dry and crumbly, add the remaining water 1 tablespoon at a time, mixing gently after each addition. The dough should look shaggy and rough at this point—it will seem like it won’t hold together, but that’s exactly right.
-
Turn the dough out onto a lightly floured work surface and gently knead it just 2-3 times, folding it over itself, until it comes together into a cohesive mass. Do not overwork the dough—you want visible flecks of butter throughout, not a smooth, uniform dough.
-
Divide the dough into two equal pieces and shape each into a flat disc about 1 inch thick. Wrap each disc tightly in plastic wrap and refrigerate for at least 2 hours, or preferably overnight. The dough can also be frozen for up to 3 months; thaw in the refrigerator overnight before rolling.
Prepare the Apple Filling:
-
While the dough chills, peel, core, and slice your honeycrisp apples into ¼-inch-thick slices. As you slice, place the apples in a large bowl.
-
In a separate small bowl, whisk together the granulated sugar, brown sugar, tapioca flour, cinnamon, nutmeg, and salt until well combined. This pre-mixing ensures the spices distribute evenly throughout the filling.
-
Pour the sugar mixture over the apple slices and gently toss until every slice is evenly coated. The apples should glisten with the sugar-spice mixture.
-
Drizzle the lemon juice over the apples and toss gently once more to distribute it throughout. Do not skip the lemon juice—it brightens all the flavors and prevents the filling from tasting one-dimensional. Set the filling aside while you work with the dough. The apples will begin releasing their juices, which is exactly what you want.
Assemble the Pie:
-
Preheat your oven to 425°F (220°C). Place a large rimmed baking sheet on the center rack of your oven to preheat it. This sheet will catch any drips and help the bottom crust bake evenly and crisply.
-
Remove one disc of dough from the refrigerator and let it sit at room temperature for 5 minutes to soften just slightly—this makes rolling easier without warming the dough too much.
-
On a lightly floured surface, roll the dough disc into a circle about 13 inches in diameter, roughly ⅛ inch thick. Rotate the dough a quarter turn every few rolls to maintain an even thickness and prevent sticking. If the edges crack, simply pinch them back together—the dough is very forgiving.
-
Carefully transfer the rolled dough to your 9-inch pie pan by wrapping it around your rolling pin and unrolling it over the pan. Gently fit the dough into the bottom and up the sides of the pan, being careful not to stretch it (it will shrink as it bakes). Trim the overhang to about ½ inch all around. Do not crimp the edges yet—you’ll do that after adding the top crust.
-
Remove the pie shell from the refrigerator and place it in the freezer for at least 15 minutes while you roll out the top crust. A chilled shell holds its shape better during baking.
-
Pour the apple filling (including all the juices that have accumulated) into the chilled pie shell, mounding the apples slightly toward the center. Dot the top of the filling with the small pats of butter—this enriches the filling and prevents the juices from bubbling over the edge.
-
Remove the second dough disc from the refrigerator and roll it out to a 13-inch circle, about ⅛ inch thick. Transfer it to the pie by wrapping it around your rolling pin and unrolling it over the filling. Trim the overhang to ½ inch all around.
-
Fold the edge of the top crust under the edge of the bottom crust, creating a raised rim all around the pie. Using your thumb and forefinger, crimp the edge by pushing your thumb down from outside while simultaneously squeezing gently with your fingers from inside, creating a wave-like pattern all the way around. This not only looks beautiful but also seals the two crusts together and creates a structural edge that keeps filling from leaking.
-
Cut four or five small slits (about ½ inch long) in the top crust with a sharp knife, spacing them evenly. These vents allow steam to escape during baking, which prevents the filling from building up excessive pressure and splitting the crust in unattractive places.
-
In a small bowl, whisk together the beaten egg and 1 tablespoon water to create an egg wash. Brush this mixture lightly over the entire top crust—this creates that gorgeous golden-brown finish you see in bakery pies. Sprinkle the coarse sugar evenly over the top. This sugar will caramelize slightly during baking and add a subtle sparkle and slight crunch to the finished crust.
Bake the Pie:
-
Place the assembled pie on the preheated baking sheet in the oven. Bake at 425°F (220°C) for 20 minutes, until the crust just begins to turn light golden brown.
-
Reduce the oven temperature to 375°F (190°C) and continue baking for 30-35 minutes longer, until the crust is deep golden brown and you can see the apple filling bubbling slightly through the vents. The filling should bubble gently, not dramatically—this indicates the apples are tender and the flour thickener has activated properly.
-
If the crust edges begin browning too quickly (before the filling is done), loosely cover just the edges with aluminum foil for the remaining baking time. This prevents the delicate edges from burning while the rest of the pie finishes cooking.
-
Remove the pie from the oven and place it on a wire cooling rack. This is the hard part: allow the pie to cool completely at room temperature for at least 3-4 hours before slicing. This cooling time is absolutely essential. As the pie cools, the filling continues to thicken and set. If you slice it too soon, the filling will run and you’ll end up with a beautiful slice that falls apart on the plate. Patience here makes the difference between a mediocre presentation and a stunning one.
-
If you need to serve the pie warm, you can cut it after 2 hours, understanding that the filling will be softer and may not hold together as neatly. The pie actually tastes wonderful either warm or at room temperature.
Pro Tips for Success
The bottom crust is traditionally the trickiest part of pie baking, and most failures come from sogginess rather than anything else. Your absolute best defense is baking the pie on a preheated baking sheet or pizza stone. This simple technique transfers heat directly to the bottom of the crust, causing it to bake evenly and crisply. It’s such a reliable strategy that many experienced bakers never make pie any other way.
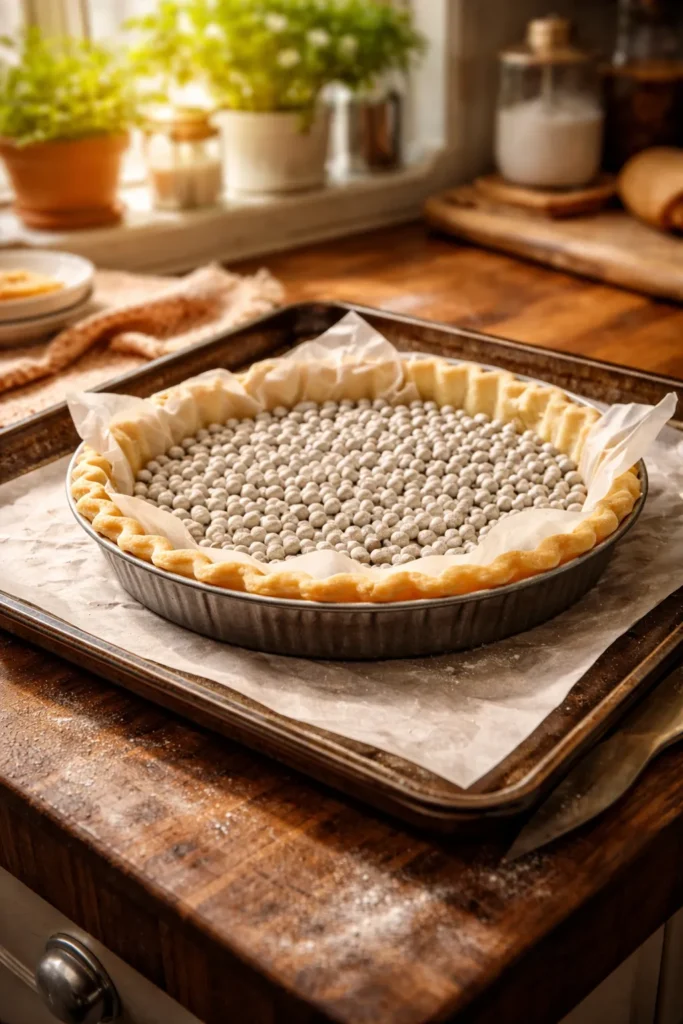
Some bakers also swear by blind baking the bottom crust—prebaking the shell for 10-12 minutes before adding the filling. This creates a sturdy, pre-set crust that resists moisture better. If you try this approach, prick the bottom with a fork, line it with parchment paper, fill it with pie weights or dried beans, and bake at 400°F until the edges are just beginning to brown. Remove the weights and parchment, then add your filling and proceed with the recipe.
Temperature matters more than time. Your oven might bake faster or slower than indicated here—use your eyes and nose as guides, not just a timer. The crust should be deep golden brown, not pale, and you should see bubbling filling at the vents. If your crust is browning quickly but the filling isn’t bubbling yet, lower the temperature slightly and continue baking.
Keep your crust cold. This cannot be overstated. Every time you finish handling your dough before baking, pop it back in the freezer for 15 minutes if you have time. Cold dough holds its shape better, doesn’t shrink as much, and bakes up flakier.
The quality of your apples matters more than any technique. Firm, flavorful apples with good natural sugar content will produce a superior pie regardless of your method. Mealy, soft, or old apples will never produce a great result, no matter how skilled you are.
Common Mistakes to Avoid
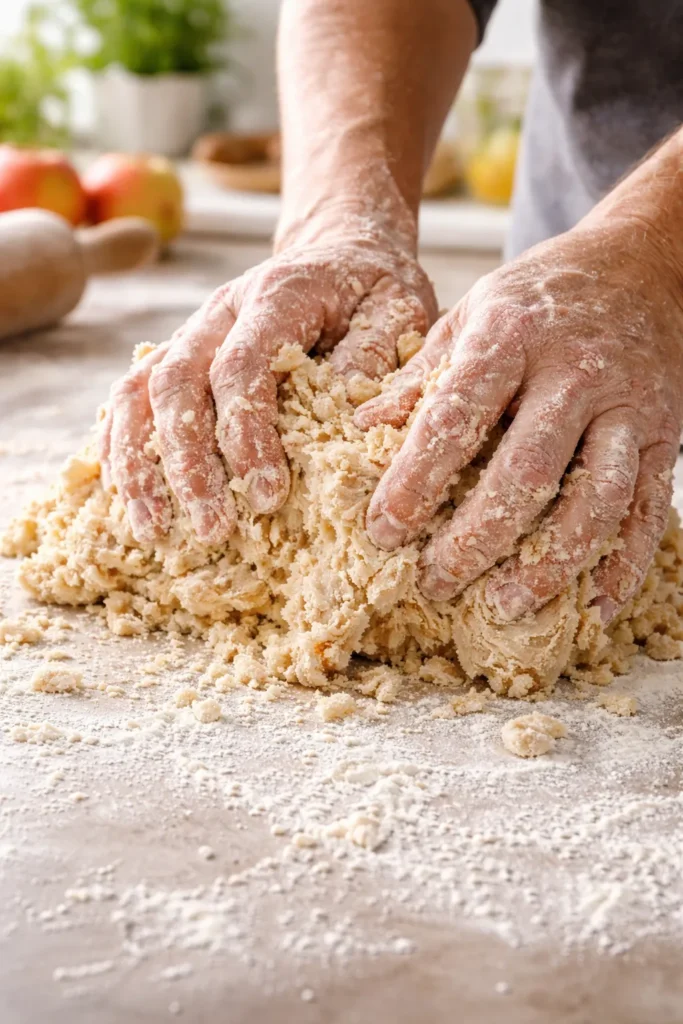
Over-handling the dough is the most common mistake that leads to tough, dense crust. Every time you touch pie dough, you develop gluten strands, which makes the crust more prone to toughness. Knead it just until it comes together, work quickly when rolling, and handle it as little as possible between mixing and baking.
Using warm butter is another guaranteed path to disappointment. If your kitchen is warm or you’ve been working for a while, put your butter back in the freezer for a few minutes. Cold butter is non-negotiable for flaky crust.
Not enough thickener sounds like it would be a lesser sin than too much, but actually, a runny pie is worse than a slightly thick one. Honeycrisp apples release substantial liquid, and you genuinely need that 3-4 tablespoons of thickener (depending on which thickener you use) to achieve the right consistency. Underfilled pies collapse when you slice them.
Cutting into the pie while it’s still warm looks beautiful but falls apart tragically on the plate. Those last few hours of cooling are when the filling sets from the residual heat and transforms into something sliceable. It’s truly worth the wait.
Skipping the egg wash makes your pie look homemade in a humble way, but it won’t have that professional-bakery golden sheen. Even just brushing the top with milk (if you don’t want to use egg) makes a visible difference.
Storage and Make-Ahead Options
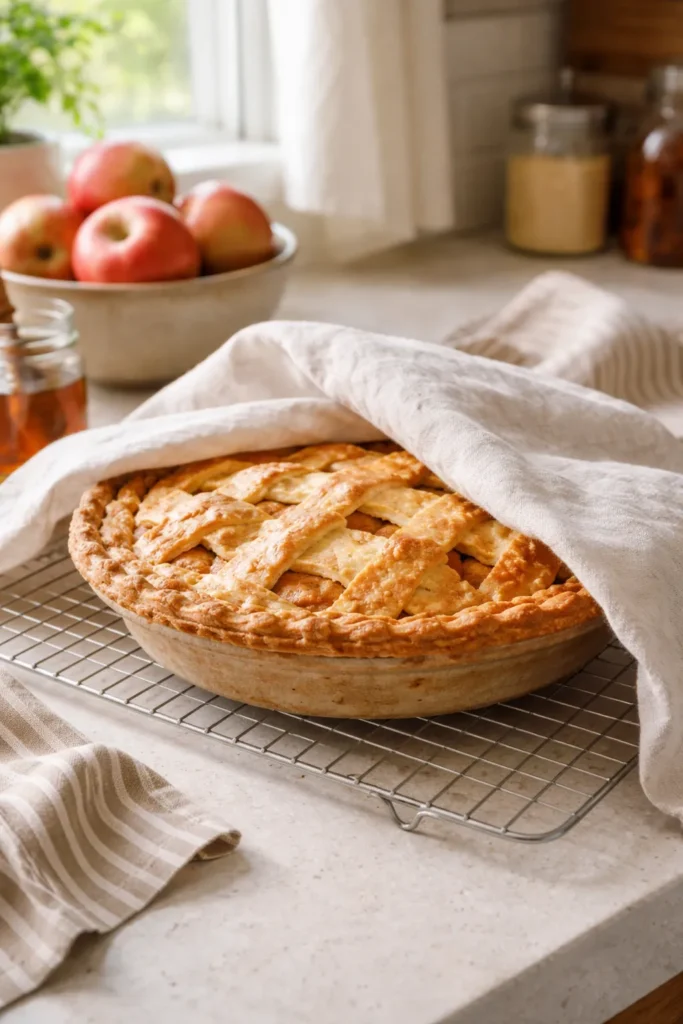
A fully baked apple pie keeps beautifully at room temperature for up to two days, loosely covered with a clean kitchen towel (not plastic wrap, which traps steam and makes the crust soggy). After that, cover it loosely and refrigerate for another 2-3 days. The pie actually tastes great served cold—the filling becomes more custard-like in texture, and it’s wonderful with ice cream.
For longer storage, freeze the completely cooled pie. Wrap it tightly with plastic wrap, then cover that with aluminum foil. It will keep for up to three months in the freezer. To reheat, thaw it in the refrigerator overnight, then warm it in a 350°F oven, loosely covered with foil, for about 20 minutes until it’s heated through.
You can also freeze the pie before baking—assemble the entire pie, cover it well, and freeze it unbaked for up to two weeks. When you’re ready to bake, place the frozen pie directly into a preheated 425°F oven and add 15-20 minutes to the baking time. There’s no need to thaw it first. Many bakers actually prefer unbaked frozen pies because the crust stays flakier and the filling seems to bake more evenly.
Making the pie dough several days in advance and storing it in the refrigerator is also reliable—the dough actually improves slightly as it rests, because the flour continues to hydrate and the gluten relaxes. Just wrap it well and keep it for up to three days.
Serving Suggestions and Pairings
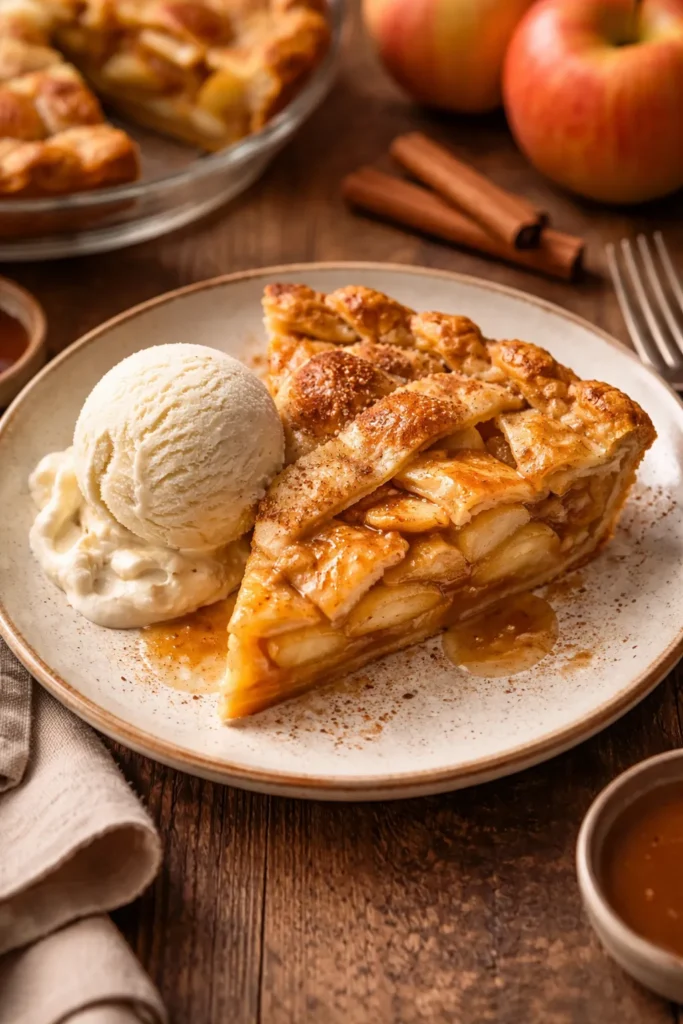
The classic pairing—vanilla ice cream melting into warm pie—exists for a reason. The cold sweetness contrasts beautifully with the warm spices and apple filling. If you want something different, try a scoop of salted caramel ice cream or brown butter ice cream, which echo the deeper flavors in the pie’s spicing.
Whipped cream is another beautiful option, especially if you lightly sweeten it with a tablespoon or two of sugar and add a pinch of cinnamon or vanilla. The cool, airy texture provides contrast without the heaviness of ice cream.
For serving, use a sharp, thin-bladed knife dipped in hot water (wipe it dry between cuts) for the cleanest slices. If you’re serving the pie warm, a pie server makes lifting slices easier than a regular knife.
A sharp cheddar cheese alongside apple pie might sound unconventional, but it’s a traditional pairing that works surprisingly well—the tangy, salty cheese complements the sweet filling and spices beautifully. Many bakeries and diners serve a thin slice of cheddar on warm apple pie.
Variations You Can Try
Honey Sweetening: Instead of using all granulated sugar, try replacing half the sugar with honey (liquid or crystallized). This adds subtle complexity and makes the filling slightly more tender. Use about ¼ cup honey plus ¼ cup sugar, whisked together. Honey causes slightly faster browning, so watch your crust carefully.
Brown Sugar Filling: For a more caramel-like pie, use mostly brown sugar instead of granulated—about ½ cup packed brown sugar with just 2 tablespoons of granulated sugar. This creates a filling with molasses notes and a slightly darker color.
Mixed Apple Varieties: Try using a combination of honeycrisp and granny smith apples for complexity. The tartness of the granny smiths balances the sweetness of the honeycrisps, creating a more interesting flavor profile. Use about 4 large honeycrisps and 2-3 large granny smiths.
Spice Variations: Experiment with warming spices beyond the standard cinnamon and nutmeg. A small pinch of cardamom (use sparingly—it’s potent) adds exotic warmth. Ground ginger (1/2 teaspoon) adds brightness. Allspice (1/4 teaspoon) adds complexity. A tiny pinch of cayenne pepper (just 1/8 teaspoon) makes all the other spices pop without adding heat.
Caramel Drizzle: After the pie cools, drizzle salted caramel sauce over the top in thin lines. This adds a professional-looking finish and deepens the dessert’s appeal.
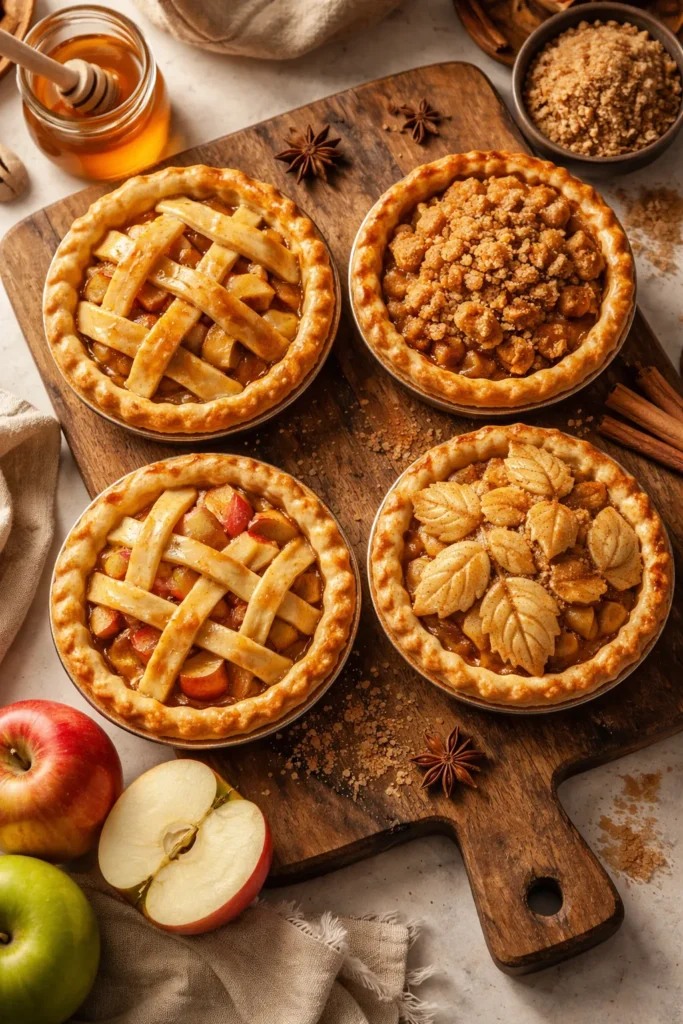
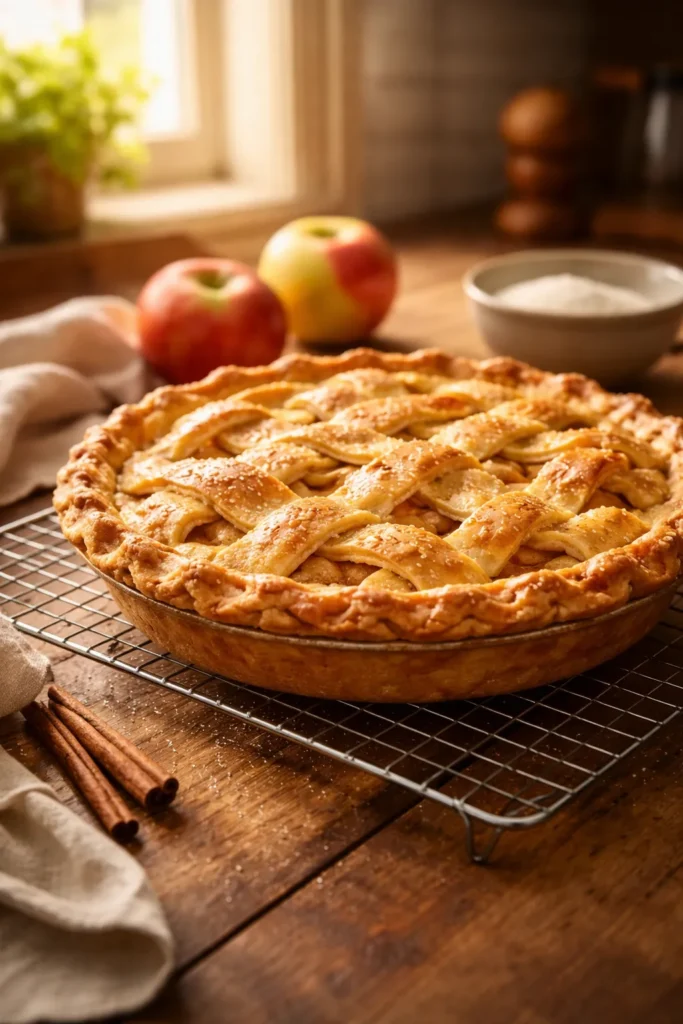
Lattice Crust: Instead of a solid top crust, cut the dough into thin strips and weave them over the filling in a crosshatch pattern. This is more visually impressive and allows you to see the beautiful filling through the crust.
Crumb Topping: Skip the top crust entirely and instead make a crumb topping with ½ cup oats, ½ cup flour, ½ cup cold butter, ⅓ cup brown sugar, and a pinch of salt. Mix until it looks like coarse breadcrumbs and spread it over the filling before baking. This creates a pie that’s part crisp, part pie—wonderful texture variation.
Apple Cider Reduction: For intense apple flavor, simmer 1 cup of apple cider (the juice, not the spiced drink) in a saucepan over medium heat for about 10 minutes until it reduces to about ¼ cup of syrup. Substitute this syrup for some of the sugar in your filling for concentrated apple flavor.
Final Thoughts
Baking an apple pie from scratch is genuinely one of the most rewarding kitchen projects you can undertake. It requires care and attention, certainly, but it’s not actually difficult—it’s a series of straightforward steps that become easier and more intuitive each time you bake a pie. The real secret to success is simply honoring the process: keeping things cold, not rushing the cooling time, and understanding that the small details—the size of your butter pieces, the thickness of your apple slices, the brush of egg wash—accumulate into something remarkable.
Your first pie might not be perfect. Maybe the crust cracks slightly when you move it, or the filling bubbles over the edge a bit, or you have to wait an extra thirty minutes for it to cool properly. None of that matters. What matters is that your kitchen will smell incredible, and you’ll have created something delicious with your own hands—something far superior to what you could buy at any bakery because it’s exactly the way you made it, with apples you chose and spices you selected and butter you worked with your own fingers.
The wonderful thing about mastering apple pie is that once you understand the principles—how to work pie dough, how to balance flavors in a filling, how to judge doneness by visual and olfactory cues—you can apply that knowledge to endless variations. Cherry pie, peach pie, berry pies, cream pies, savory hand pies—they all follow similar logic. Apple pie is truly the gateway to confident pie baking.
So give yourself permission to take your time with this. Make the dough ahead. Slice your apples slowly. Read through the instructions before you start. And then, on a weekend afternoon or evening when you’re not rushed, pull out a mixing bowl and some butter and honeycrisp apples, and experience the quiet joy of making something genuinely special.