Heavy whipping cream is one of those magical ingredients that transforms simple pantry staples into restaurant-quality desserts. Whether you’re looking for an impressive finish to a dinner party or a quick treat to satisfy an unexpected craving, desserts made with heavy whipping cream deliver that luxurious, creamy texture that makes people come back for seconds. The beautiful part? Many of the best heavy whipping cream desserts require minimal baking—or no oven time at all. You’re looking at quick assembly, straightforward techniques, and results that taste like they came from a professional pastry kitchen.
The magic happens because heavy whipping cream contains enough fat (at least 36% butterfat) to whip into clouds of airy texture while still maintaining enough richness to feel genuinely indulgent. When you whip heavy cream with sugar and fold it into other ingredients—melted chocolate, fresh fruit, crushed cookies, coffee-soaked mascarpone—you get desserts that are light yet decadent, simple yet sophisticated. These aren’t recipes that demand special equipment, culinary training, or hours of your time. They demand confidence, fresh ingredients, and the willingness to create something genuinely delicious in your own kitchen.
The five desserts in this collection represent different occasions and flavor profiles, but they all share one thing in common: they showcase heavy whipping cream as the star ingredient. Some are no-bake wonders perfect for warm days when you don’t want to heat up the kitchen. Others are baked cakes that get their signature tenderness and moisture from cream rather than butter. All of them are tested, reliable recipes that will impress anyone lucky enough to eat them—and most importantly, they’re all easy enough that you’ll actually make them again and again.
Table of Contents
1. Silky Dark Chocolate Mousse
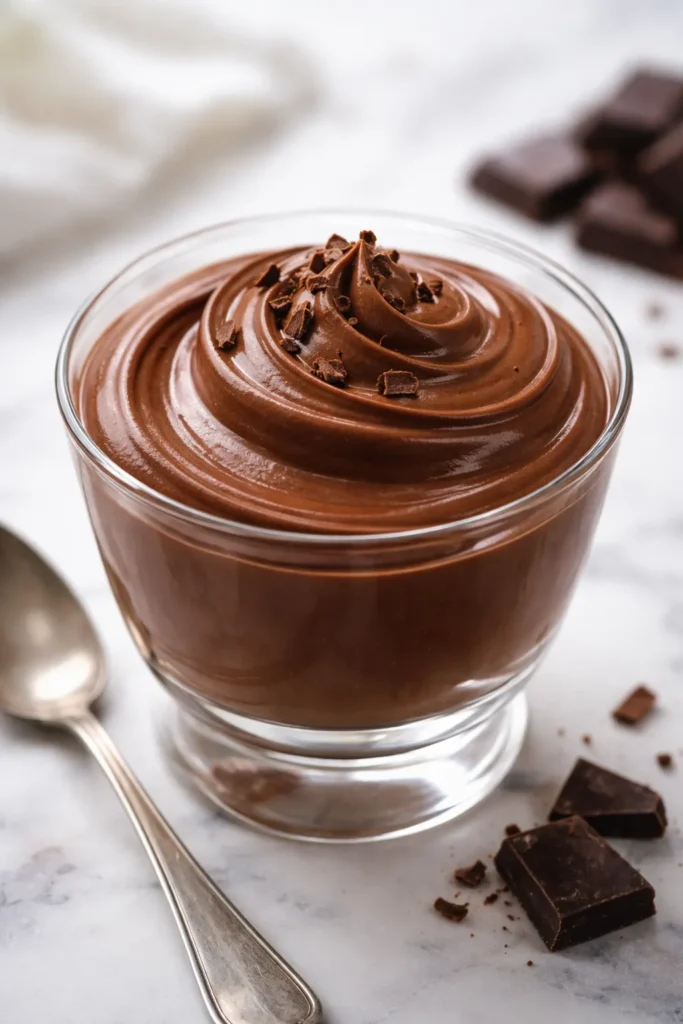
This is the mousse that changed how I think about dessert simplicity. Dark chocolate mousse doesn’t need eggs, doesn’t need a double boiler, and doesn’t need to be scary. It needs exactly two ingredients—heavy whipping cream and quality chocolate—plus about ten minutes of your time. The result is so dense with chocolate flavor and so impossibly light that people always assume you spent hours on it.
The secret is melting your chocolate properly with a portion of the cream, then folding it gently into whipped cream that’s been beaten to stiff peaks. You’re not combining ingredients the way you would in a custard or a mousse that uses eggs; you’re creating a stable foam by trapping air in fat. That’s why it matters that you use heavy whipping cream and not regular whipping cream—the higher fat content is what gives you the structure to hold all those air bubbles and create that signature mousse texture.
Yield: Serves 4 | Prep Time: 10 minutes | Chill Time: 3 hours | Total Time: 3 hours 10 minutes | Difficulty: Beginner — melting chocolate and whipping cream are two techniques you’ve likely done before.
For the Mousse:
- 2 cups heavy whipping cream, divided (1½ cups will be whipped, ½ cup will be melted with chocolate)
- 1 cup semi-sweet chocolate chips (or chopped dark chocolate for deeper flavor)
For Serving and Optional Toppings:
- Fresh whipped cream for topping (½ cup heavy cream + 3 tablespoons powdered sugar, whipped to soft peaks)
- Cocoa powder for dusting
- Fresh raspberries or strawberries
- Shaved dark chocolate
Make the Chocolate Base:
-
Place a metal or glass mixing bowl and the beaters from an electric mixer in the freezer for at least 15 minutes. A chilled bowl keeps cream cold while you whip it, which gives you stiffer peaks and more stable volume.
-
In a microwave-safe bowl, combine ½ cup of the heavy cream with the chocolate chips. Microwave on 50% power (not full power—this prevents the chocolate from seizing or becoming grainy) for 2 minutes, stirring halfway through. If the chocolate isn’t fully melted, add 30 seconds and stir again. You want a smooth, glossy mixture.
-
Set the melted chocolate aside at room temperature to cool for about 5 minutes. The chocolate cannot be hot when you fold it into the whipped cream, or the heat will deflate the whipped cream and ruin the airy texture. It should be barely warm to the touch.
Whip the Cream:
- Pour the remaining 1½ cups of heavy cream into the chilled bowl. Using the electric mixer on high speed, beat the cream until it forms stiff peaks. This will take about 3 to 5 minutes depending on your mixer. Stiff peaks mean when you lift the beaters, the cream forms points that stand straight up without curling over at the tips.
Combine and Chill:
-
Add the cooled chocolate to the whipped cream. Using a rubber spatula, gently fold the chocolate into the cream with slow, deliberate strokes. Fold from the bottom of the bowl up and over, rotating the bowl a quarter turn with each fold, until no streaks of chocolate remain. This folding technique keeps the mousse light and airy instead of making it dense and heavy.
-
Divide the mousse evenly among four serving glasses or ramekins. Cover each with plastic wrap and refrigerate for at least 3 hours. Don’t skip this chilling time—the mousse needs time to set and become firm enough to have that signature spoonable texture. You can refrigerate it for up to 2 days.
-
Just before serving, top each mousse with a generous dollop of fresh whipped cream, a light dusting of cocoa powder, and fresh berries if you have them. The contrast between the cold, rich mousse and the light, sweet whipped cream topping is what makes this dessert sing.
Mousse Tips and Tricks:
Make sure your cream is actually heavy whipping cream (at least 36% fat), not regular whipping cream (which is only 30-35% fat). The extra fat content matters for achieving stiff peaks. Always start with a cold bowl and cold beaters—this is genuinely important, not just a suggestion. Warm equipment softens the cream and makes it nearly impossible to whip properly.
Melt your chocolate on 50% power, not full power. Full-power microwaving can cause the chocolate to scorch and separate. If you don’t have a microwave, you can use a double boiler—just make sure the bowl doesn’t touch the water and the bottom of the bowl stays dry.
If your mousse seems grainy after folding, you likely had chocolate that was too hot. It happens. Next time, let it cool a bit longer. If your mousse seems too soft after chilling, you either undermixed the chocolate (tiny flecks of chocolate trapped in the whipped cream can break down the structure), or you used cream with less fat content than it should have. Check your cream’s label—it should say at least 36% butterfat.
Storage and Make-Ahead:
This mousse keeps in the refrigerator, covered with plastic wrap, for up to 3 days. The flavor actually deepens slightly after a day, making it a perfect make-ahead dessert for dinner parties. You can refrigerate the mousse immediately after combining—no additional setting time needed beyond the 3-hour chill. Just hold off on adding toppings until you’re ready to serve.
You can also freeze this mousse for up to 2 months. Spoon it into freezer-safe containers, cover tightly with plastic wrap, and freeze. When you’re ready to eat it, thaw it in the refrigerator overnight. The texture will be slightly firmer than freshly made mousse, but it will still be creamy and delicious.
2. Italian Tiramisu Mousse in Glasses
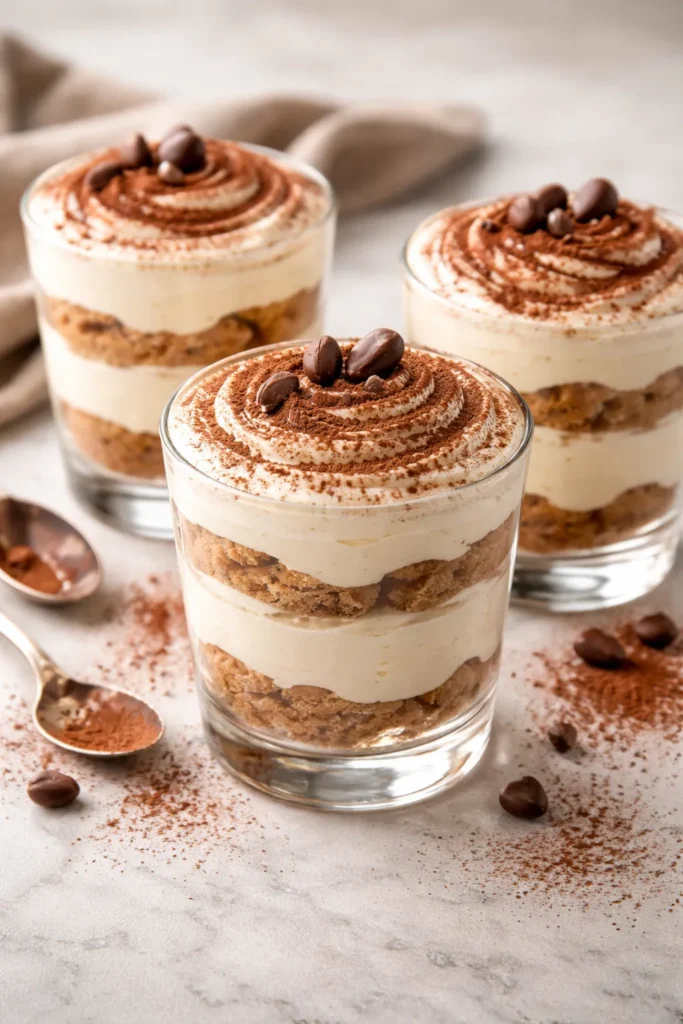
Tiramisu is traditionally a layered dessert with delicate ladyfinger cookies soaked in coffee, but this version distills tiramisu down to its very best element: the mousse. There’s no hunting for hard-to-find ladyfinger cookies, no dealing with soggy layers, just pure, unadulterated tiramisu cream in every spoonful. Rich mascarpone (or cream cheese, if you can’t find mascarpone), strong coffee, whipped cream, and cocoa powder—these are the elements people actually dream about with tiramisu, and this mousse delivers all of them without the fuss.
The beauty of this preparation is that it looks genuinely impressive—layered in a glass with cocoa and chocolate shavings—but it comes together in fewer than 20 minutes of actual work. It’s the kind of dessert that makes people think you’re an advanced baker when really you just assembled a few components thoughtfully.
Yield: Serves 4 | Prep Time: 20 minutes | Chill Time: 2 hours (optional but recommended) | Total Time: 20 minutes active + 2 hours chilling | Difficulty: Beginner — no cooking required, just mixing and folding.
For the Coffee Component:
- 1½ teaspoons instant espresso powder (or instant coffee powder)
- ¼ cup hot water
For the Mousse:
- 1 cup heavy whipping cream, cold
- 8 ounces mascarpone cheese, at room temperature (or cream cheese if mascarpone is unavailable)
- 1½ cups powdered sugar, sifted
- 1 teaspoon pure vanilla extract
- Additional heavy whipping cream for whipping (1 cup)
For Assembly and Topping:
- 1 tablespoon unsweetened cocoa powder
- 1 ounce semi-sweet baking chocolate (for shaving)
- Optional: additional powdered sugar for dusting
Brew the Coffee:
- Combine the instant espresso powder with ¼ cup of hot water and stir until fully dissolved. Set aside to cool to room temperature. The espresso should be deep brown and aromatic. Do not skip cooling the coffee—adding hot liquid to the cream will cause it to separate and the mousse will become grainy instead of smooth.
Make the Mascarpone Cream:
-
In a large mixing bowl, combine the mascarpone cheese, sifted powdered sugar, and vanilla extract. Using an electric mixer on low to medium speed, beat until completely smooth—about 1 to 2 minutes. Mascarpone can get grainy if overmixed, so stop as soon as everything is combined and you don’t see any lumps of cheese.
-
Once the espresso has cooled, add 1 tablespoon of the cooled coffee to the mascarpone mixture. Mix on low speed just until combined. Taste the mixture. If you want a stronger coffee flavor, add more espresso, 1 tablespoon at a time, until it tastes right to you. Tiramisu should taste like coffee with a cream backdrop, not sweet cream with a hint of coffee.
Whip and Fold:
-
In a separate, chilled bowl, pour the 1 cup of cold heavy whipping cream. Using an electric mixer on medium-high speed, beat the cream until soft peaks form—this takes about 2 to 3 minutes. At soft peaks, the cream holds a shape but the peaks curl over slightly at the tip when you lift the beaters.
-
Gently fold the whipped cream into the mascarpone mixture in two additions. Use a rubber spatula and fold slowly and deliberately from the bottom of the bowl up and over. Rotate the bowl a quarter turn and repeat until no white streaks of cream remain visible. This folding keeps the mousse light and airy.
Assemble in Glasses:
-
Divide about one-third of the tiramisu mousse among four serving glasses or ramekins. Divide it evenly so each glass gets the same amount. Use the back of a spoon to gently spread it into an even layer on the bottom of each glass.
-
Lightly dust each layer with a tiny pinch of unsweetened cocoa powder. Not enough to make it bitter (you want just a whisper of cocoa), but enough to add that authentic tiramisu flavor and visual appeal.
-
Divide the remaining mousse equally among the four glasses, spooning it on top of the cocoa layer and spreading it gently into an even layer. You now have two layers of mousse with cocoa in between.
-
Using a microplane grater or a fine box grater, grate the semi-sweet chocolate directly over the top of each mousse. This gives you beautiful, delicate chocolate shavings instead of a bitter cocoa dusting. Serve immediately or refrigerate for up to 2 hours.
Tiramisu Mousse Tips:
Instant espresso powder is not the same as instant coffee powder—espresso is more concentrated and will give you deeper coffee flavor. If you only have instant coffee, use slightly less because it’s milder. Always use mascarpone at room temperature. Cold mascarpone is difficult to mix smoothly and can result in a grainy texture. Leave it on the counter for about 30 minutes before using.
If you can’t find mascarpone, you can substitute with cream cheese, though the flavor will be slightly less rich and slightly more tangy. If using cream cheese, add an extra ½ teaspoon of vanilla to balance the tanginess.
The coffee must be completely cooled before adding it to the mousse. This is non-negotiable—hot liquid will break down the structure of the mascarpone and whipped cream and turn your mousse grainy.
Storage and Make-Ahead:
This mousse is actually better when made a few hours ahead. Cover the glasses with plastic wrap and refrigerate for up to 2 hours, or even overnight. The flavors meld and deepen, and the texture becomes firmer and more spoonable. You can make the mascarpone mixture and the whipped cream up to 4 hours ahead, but keep them separate in the refrigerator. Fold them together and assemble in glasses no more than 3 hours before serving.
This mousse does not freeze well because the texture becomes grainy when thawed. Keep it refrigerated and enjoy within 2 days.
3. Berry Whipped Cream Parfait with Boozy Fruit Sauce
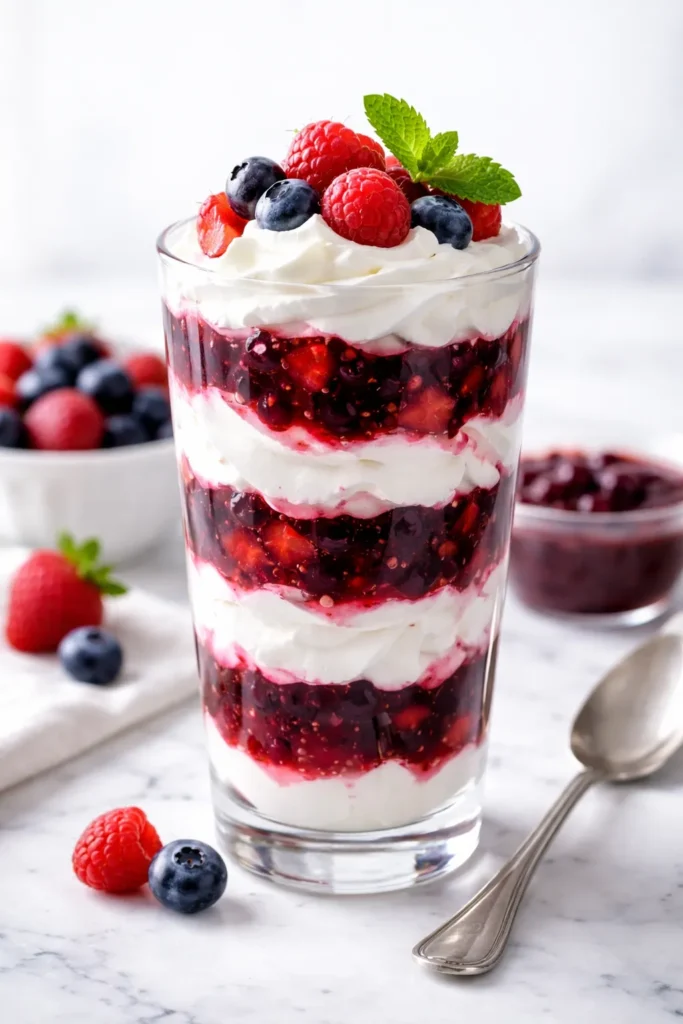
This is elegance in its simplest form: layers of fresh whipped cream, crushed berries cooked down into a glossy sauce, and minimal effort on your part. The whipped cream is genuinely fluffy and light, the fruit sauce is intensely flavored, and together they create a dessert that feels special enough for company but is easy enough to throw together on a Tuesday night. Unlike some mousse-based desserts, this one highlights the pure, unadulterated flavor of cream and fruit.
The fruit sauce is the real star here. You’re cooking down fresh (or frozen) berries with just a touch of sugar and lemon juice until the berries break down and their juices thicken into something syrupy and concentrated. It’s the kind of sauce that goes equally well on pancakes, waffles, ice cream, or yogurt, so you’ll want to make extra and keep it on hand.
Yield: Serves 4 | Prep Time: 15 minutes | Cook Time: 5-7 minutes (for sauce) | Chill Time: 30 minutes (sauce must cool) | Total Time: 25-30 minutes active + 30 minutes cooling | Difficulty: Beginner — the only stovetop work is simmering berries.
For the Fruit Sauce:
- 2 cups fresh blueberries, raspberries, or blackberries (or a mixture)
- 2 tablespoons granulated sugar
- 1 tablespoon fresh lemon juice
- 2 tablespoons water
- Optional: 1 tablespoon cornstarch mixed with 2 tablespoons cold water (if using frozen berries or if you want extra-thick sauce)
For the Whipped Cream:
- ¾ cup heavy whipping cream, cold
- 2 tablespoons powdered sugar
- 1 teaspoon vanilla extract
For Serving:
- Fresh whole berries for topping
- Optional: crushed vanilla wafers or shortbread cookies for texture contrast
- Optional: fresh mint leaves for garnish
Make the Fruit Sauce:
-
In a small saucepan over medium heat, combine the fresh berries, granulated sugar, lemon juice, and water. Stir gently to combine. Once the mixture starts to heat, the berries will begin to soften and release their juices.
-
Continue cooking, stirring occasionally, for 5 to 7 minutes. You’re looking for the berries to break down significantly—they should be noticeably softer and the liquid should look darker and more syrupy. The sauce should be bubbling gently at the edges. If your sauce seems too thin after 7 minutes, make a quick slurry with cornstarch and cold water (1 tablespoon cornstarch mixed with 2 tablespoons cold water), stir it into the sauce, and cook for another minute until thickened. If the sauce seems too thick, simply add water 1 tablespoon at a time while simmering.
-
Transfer the fruit sauce to a small bowl and set it in a larger bowl filled with ice water. Stir occasionally for about 5 to 10 minutes until the sauce is completely cold. This rapid cooling is important—it stops the cooking process and prevents the fruit from breaking down further. Do not skip this step or proceed with warm sauce; the warmth will melt the whipped cream and ruin the texture of your parfait.
Make the Whipped Cream:
- In a chilled mixing bowl, combine the cold heavy whipping cream, powdered sugar, and vanilla extract. Using an electric mixer on high speed, beat the mixture for about 2 to 3 minutes until soft peaks form. At soft peaks, the whipped cream holds a shape but the peaks curl slightly at the tip when you lift the beaters. Don’t overbeat, or you’ll end up with whipped cream that’s too stiff or even starts to separate into butter.
Assemble the Parfaits:
-
Divide about one-third of the whipped cream evenly among four serving glasses (use 6 to 8-ounce dessert bowls or wine glasses). Spoon it into the bottom of each glass and gently spread it into an even layer.
-
Spoon about one-third of the fruit sauce evenly over the whipped cream in each glass. The sauce will sink slightly into the cream and create a beautiful marbled effect.
-
Divide the remaining whipped cream among the four glasses, creating a second layer of cream. Spread it gently.
-
Top each parfait with the remaining fruit sauce, spooning it over the top. Garnish with fresh whole berries, a few crushed cookies if you’d like texture contrast, and a small mint leaf if you have it. Serve immediately or refrigerate for up to 2 hours.
Berry Parfait Tips:
Use whatever berries you have—fresh blueberries and raspberries are exceptional, but blackberries, strawberries, and even marionberries work beautifully. If using strawberries, hull them first, then slice them before cooking. If using frozen berries, there’s no need to thaw them first. Simply add them directly to the pan, but know that you may need to add the cornstarch slurry because frozen berries release more liquid as they thaw.
Lemon juice is essential in this recipe, not optional. Even a tiny squeeze of lemon brightens the fruit flavor and prevents the sauce from tasting one-dimensional and flat. You can use lime juice instead if you prefer.
The fruit sauce keeps in a covered container in the refrigerator for up to one week. You’ll find yourself using it on everything—breakfast pancakes, ice cream, plain yogurt, or eaten straight from a spoon when you’re standing at the fridge at 11 p.m.
Storage and Make-Ahead:
The fruit sauce can be made up to one week ahead and stored in the refrigerator. The whipped cream is best made fresh, but you can whip it up to 4 hours ahead if you cover it and refrigerate it. However, the whipped cream will continue to get denser as it sits, so aim to assemble the parfaits no more than 2 hours before serving for the best texture.
The assembled parfaits will keep in the refrigerator, covered with plastic wrap, for up to 4 hours. After that, the whipped cream will start to break down from the moisture in the fruit sauce. Don’t freeze this dessert—the whipped cream will separate and become grainy when thawed.
4. Dense and Tender Whipped Cream Pound Cake
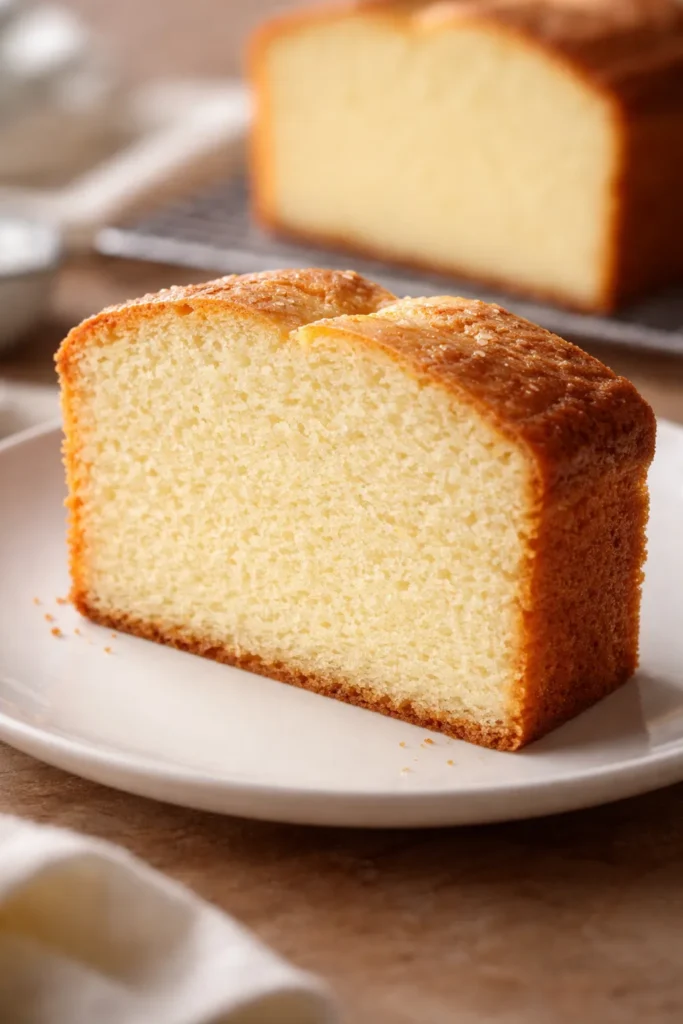
Pound cake made with heavy whipping cream instead of butter sounds like it shouldn’t work—but it does, and spectacularly. The butterfat in the cream provides all the richness you’d get from butter, while the liquid content makes the crumb incredibly tender and moist. This cake is crusty on the outside, impossibly soft inside, and genuinely foolproof. It keeps for days, actually improves on the second day, and tastes exactly like the kind of cake your grandmother would have made if she had unlimited time and patience.
This is a no-frills, straightforward pound cake with nothing to hide behind. No chocolate, no fruit, no fancy flavoring. Just butter flavor, a delicate sweetness, and that tender crumb that makes you want to eat slice after slice. Serve it with fresh berries, whipped cream, grilled peaches, or nothing at all.
Yield: Makes one 10-inch cake, serves 12 | Prep Time: 20 minutes | Bake Time: 1 hour 15-25 minutes | Cool Time: 25 minutes in pan + additional time on wire rack | Total Time: Approximately 2 hours | Difficulty: Intermediate — requires careful creaming of ingredients and attention to baking time, but the technique is straightforward.
Cake Ingredients:
- 3 cups granulated sugar
- 1 cup (2 sticks) unsalted butter, at room temperature
- 6 large eggs, at room temperature
- 3 cups all-purpose flour, sifted (or measured by the scoop-and-sweep method)
- 1 cup heavy whipping cream (NOT whipped—use the liquid cream straight from the carton)
- 1 tablespoon pure vanilla extract
- ¼ teaspoon fine sea salt (if using unsalted butter; omit if using salted butter)
Optional Topping:
- Confectioners’ sugar for dusting once cooled
- Fresh whipped cream
- Sliced fresh fruit (berries, peaches, or sliced strawberries)
Prepare Your Pan and Preheat:
-
Preheat the oven to 325°F (163°C) and position the rack in the center. This lower temperature is intentional—it allows the thick batter to bake evenly without the outside getting too dark before the inside cooks through.
-
Spray a 10-inch tube pan or Bundt pan generously with non-stick baking spray, making sure to coat every crevice. If you’re using a two-piece tube pan, wrap the outside seam with aluminum foil to prevent any batter from leaking out during baking.
Cream the Butter and Sugar:
-
In the bowl of a stand mixer fitted with the paddle attachment, beat the softened butter on medium speed for 1 to 2 minutes until it’s completely smooth and creamy. You want the butter to be soft enough that your finger sinks into it easily, but not so soft that it’s oily.
-
Add the sugar to the butter and beat on medium speed for 3 to 5 minutes. You’re looking for the mixture to become noticeably lighter in color—almost pale beige—and fluffy in texture. This creaming process incorporates tiny air bubbles into the butter, which helps the cake rise. The mixture should increase in volume and look almost like whipped peanut butter.
Add the Eggs:
- Add the eggs one at a time, beating for about 30 seconds after each addition and scraping down the sides of the bowl with a rubber spatula after you add the second and fourth eggs. By the time you’ve added all six eggs, the mixture may look slightly curdled or separated—this is completely normal and will come together once you add the flour and cream.
Combine Wet and Dry Ingredients:
-
In a separate bowl, whisk together the sifted flour and salt (if using unsalted butter). Set aside.
-
With the mixer on low speed, add the flour mixture and heavy cream in alternating additions, beginning and ending with flour. The pattern is: flour — cream — flour — cream — flour. Add about one-third of the flour, then about one-half of the cream, then another one-third of the flour, then the remaining cream, and finally the last one-third of the flour. After each addition, mix on low speed just until you don’t see dry flour streaks. Do not overmix at this stage—overmixing develops the gluten in the flour, which will make the finished cake tough and dense in a bad way.
-
Add the vanilla extract and mix on low speed for about 15 seconds until it’s incorporated.
Bake:
-
Pour the batter into the prepared pan and use an offset spatula or the back of a spoon to spread it into an even layer. The batter will be thick, which is correct. This is a dense cake and the batter reflects that.
-
Bake for 1 hour 15 minutes to 1 hour 25 minutes, depending on your oven. The cake is done when a long wooden skewer or cake tester inserted into the very center comes out clean or with just a few dry crumbs—no wet batter. The top will be golden brown and the cake will have pulled away slightly from the sides of the pan. Don’t be tempted to remove the cake at 1 hour just because it looks golden—the center needs the full time to set.
Cool:
-
Remove the cake from the oven and set the pan on a wire cooling rack. Let the cake cool in the pan for 20 to 25 minutes. It needs to set enough to turn out without falling apart, but if you wait too long it will stick to the pan.
-
Turn the cake out onto the wire rack to cool completely—this will take at least 1 to 2 hours. Never frost or slice a warm cake. The crumb will be fragile and you’ll end up with a crumbly mess instead of clean slices.
-
Once completely cool, dust the top lightly with confectioners’ sugar if you’d like. Serve with fresh whipped cream and berries, or simply with a cup of coffee.
Pound Cake Tips:
The difference between a great pound cake and a mediocre one is usually the creaming step. Don’t rush it. Your butter and sugar should look almost fluffy and pale when you’re done. If you’re using a hand mixer instead of a stand mixer, this step will take longer—maybe 7 to 10 minutes instead of 3 to 5.
Always use room-temperature eggs. Cold eggs won’t incorporate smoothly into the batter, and you’ll end up with a grainy, uneven cake. Set your eggs out about 30 minutes before you start baking.
Use heavy whipping cream from the carton, not whipped cream. The liquid cream is what you need here.
Don’t sift your flour unless you have a sifter—the scooping motion of measuring cups can compact flour and throw off your ratios. Instead, spoon flour into your measuring cup and sweep the top level with a knife. Or, better yet, weigh your flour if you have a kitchen scale. Pound cake is very sensitive to flour amounts.
Storage and Make-Ahead:
This pound cake keeps in an airtight container on the counter for 3 to 4 days. It actually tastes better on day two, when the crumb has set completely and the flavor has had time to develop. You can also wrap the completely cooled cake (or individual slices) in plastic wrap and then aluminum foil and freeze for up to 3 months. Thaw at room temperature for about 2 hours.
5. No-Bake Cookies and Cream Mousse Parfaits
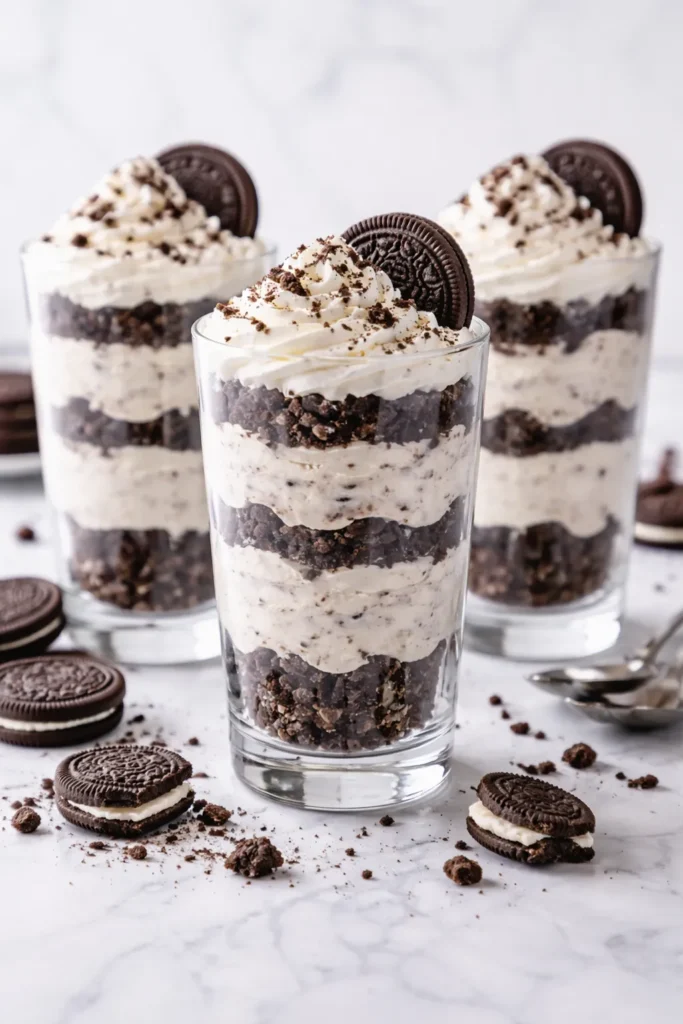
This is the dessert that appeals to everyone—the chocolate-cookie lovers, the cream lovers, the people who always want dessert but claim they don’t have time to bake. Cookies and cream mousse is nothing more than whipped cream folded with crushed Oreo cookies, but the result is pure indulgence. It’s creamy, it’s crunchy, it tastes like dessert from a fancy ice cream shop, and it requires exactly zero baking. Most of your work is actually just crushing cookies, which is satisfying and can be done by pretty much anyone in your household (I’m looking at you, kids).
The genius of serving this as a parfait—layered in a glass with more crushed cookies at the bottom and whipped cream on top—is that it looks restaurant-quality even though you assembled it in about five minutes. It’s the kind of dessert that makes people underestimate how easy you are to impress in the kitchen.
Yield: Serves 4 | Prep Time: 15 minutes | Chill Time: Optional (but 30 minutes improves texture) | Total Time: 15 minutes active + 30 minutes chilling | Difficulty: Beginner — no cooking, just mixing and folding.
Mousse Ingredients:
- 36 Oreo cookies (one standard 14.3-ounce package), cream filling and all
- ¾ cup heavy whipping cream, cold
- 2 tablespoons powdered sugar
- 1 teaspoon pure vanilla extract
For Assembly:
- Additional whipped topping or fresh whipped cream (optional)
- Extra crushed cookies for topping
Prepare the Cookies:
-
Open each Oreo cookie and scrape out the cream filling with your thumb, setting the cream filling aside in a small bowl. You’ll have a bowl of cream filling and a pile of cookie wafers. (Save 4 whole cookie halves for garnishing the tops of the parfaits.)
-
Place the remaining cookie wafers (after removing the cream) in a large ziplock bag. Seal it closed and crush the cookies into small pieces using a rolling pin, your hands, or the bottom of a heavy pot. You want pieces ranging from fine crumbs to quarter-sized chunks—some variety in size makes for better texture. This should take about 2 to 3 minutes of crushing. You’ll have about 2 to 2½ cups of crushed cookies.
Make the Mousse:
-
In a mixing bowl, combine the cream filling, cold heavy whipping cream, powdered sugar, and vanilla extract. Using an electric mixer on medium speed, beat until the mixture is smooth and fluffy—about 2 to 3 minutes. You want soft peaks, not stiff peaks. The texture should be whipped and airy but still spoon-able.
-
Gently fold in the crushed cookies (reserve about ¼ cup of the finest crumbs for topping) using a rubber spatula. Fold until the cookies are evenly distributed throughout the cream, taking care not to overmix, which can break down the air you just incorporated and make the mousse dense.
Assemble the Parfaits:
-
Divide about one-third of the crushed cookies evenly among four serving glasses or ramekins. Sprinkle the crumbs into the bottom of each glass to create an even layer about ½ inch thick.
-
Divide the mousse evenly among the four glasses, spooning it on top of the cookie layer. Use about three-quarters of the mousse, leaving some for a top layer.
-
Top each mousse layer with a small dollop of the remaining mousse or fresh whipped cream. Sprinkle with the reserved fine cookie crumbs and place one of the reserved Oreo cookie halves on top of each parfait.
-
Refrigerate for at least 30 minutes, or up to 4 hours, before serving. The longer it chills, the more the cookies will soften slightly and meld with the mousse, creating a more cohesive texture. But even served immediately, it’s delicious.
Cookies and Cream Tips:
You can use regular Oreos or Double Stuf Oreos—both work equally well. If you prefer a more cookies-and-cream flavor, crush more cookies and fold in additional pieces. If you prefer a creamier, less cookie-heavy mousse, use fewer crushed cookies.
Some people like to whip the heavy cream separately and fold it into the cookie-cream mixture. If you prefer that method, here’s how: whip ¾ cup of cold heavy cream with 1 tablespoon powdered sugar until soft peaks form. In a separate bowl, mix the cookie filling with ½ teaspoon vanilla. Fold the whipped cream into the cookie filling, then fold in the crushed cookies. The result is slightly fluffier.
If you want a richer, less sweet version, you can reduce the powdered sugar to 1 tablespoon or omit it entirely—the cookies and cream filling provide plenty of sweetness.
Storage and Make-Ahead:
These parfaits keep in the refrigerator, covered with plastic wrap, for up to 3 days. The cookies will soften slightly as they absorb moisture from the mousse, but they won’t disappear entirely—there’s always a pleasant texture contrast. You can assemble them up to 4 hours ahead of serving. Hold off on adding the cookie garnish on top until just before serving so it stays crispy.
Don’t freeze these parfaits. Freezing causes the whipped cream to separate and become grainy when thawed.
Final Thoughts

These five desserts represent something genuinely important: the idea that restaurant-quality food doesn’t require restaurant-level skill or time investment. Heavy whipping cream is the ingredient that makes this possible. Its high fat content transforms it into something that can be whipped into clouds, folded into mousses, baked into cakes, and combined with fruit to create textures and flavors that seem far more complicated than they actually are.
The mousse recipes deliver sophistication in under 15 minutes of active work. The pound cake gives you something classic and reliable that’s actually easier to execute than you’d expect. The parfait shows you that layering simple components creates visual appeal and flavor complexity without fuss. Every single one of these desserts is worth making again, and not just for special occasions—these are weeknight desserts, casual dinner-party desserts, and “I want something decadent but don’t want to spend two hours in the kitchen” desserts.
Start with whichever one speaks to you first. Make it, taste it, and then move on to the next. By the time you’ve worked through all five, you’ll have the confidence to create variations, adjust flavors to your preference, and maybe even invent your own heavy cream dessert. That’s when the real fun begins.