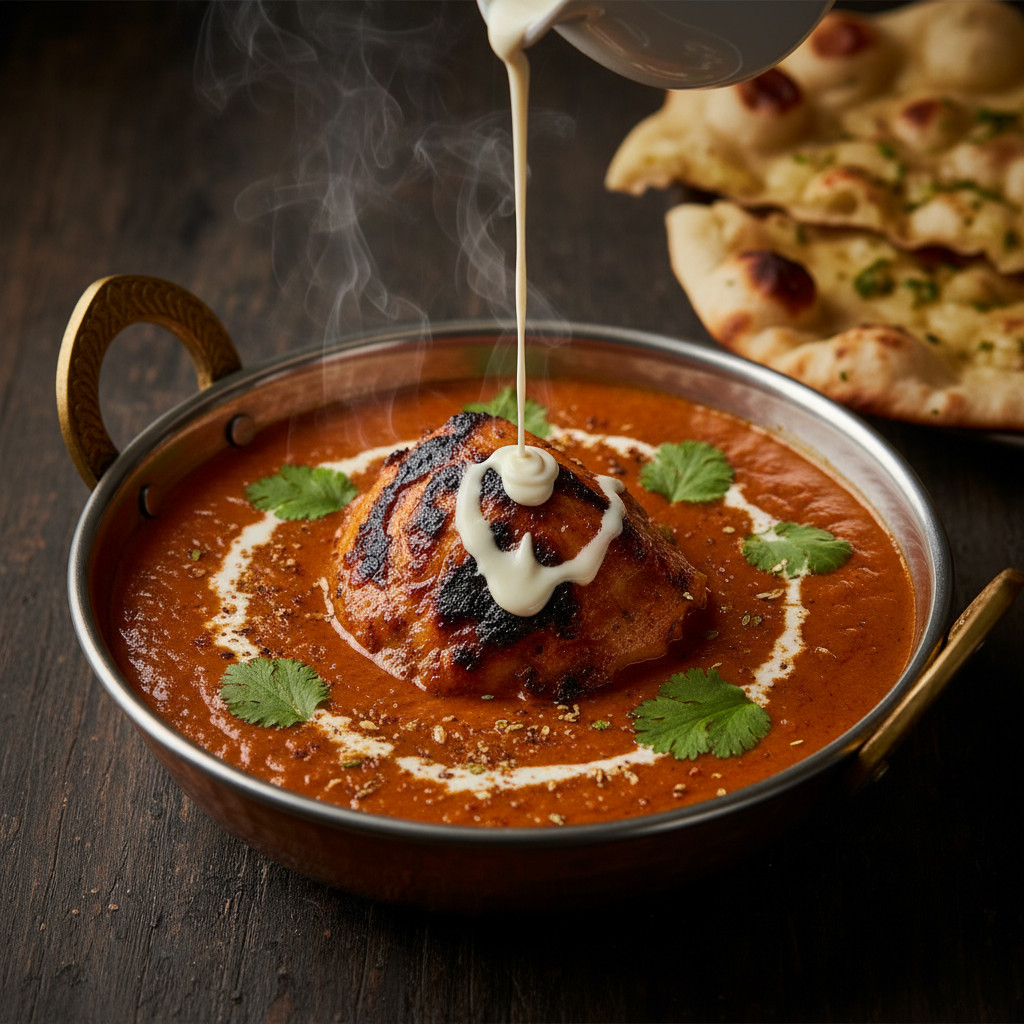
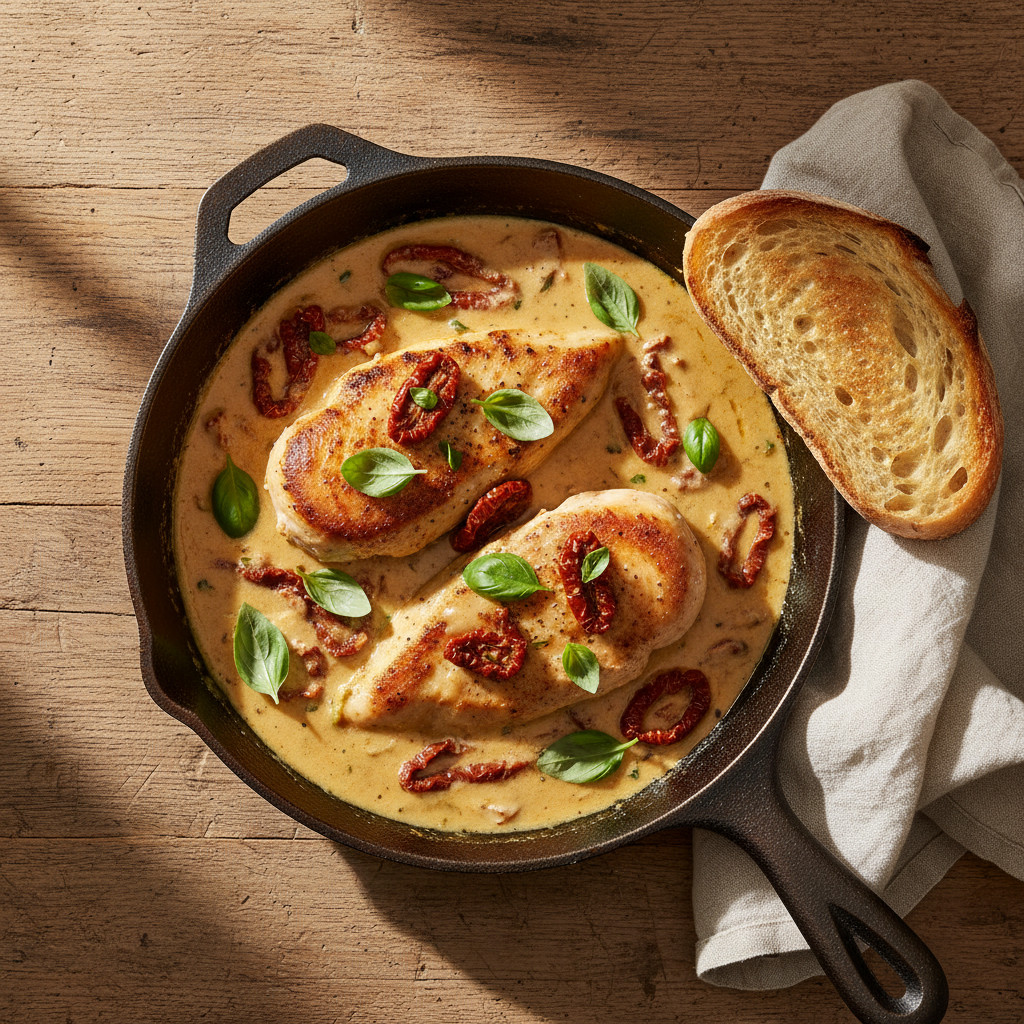
There’s something utterly magical about the combination of tender, juicy chicken bathed in a creamy, tangy sun-dried tomato sauce. This dish transforms simple ingredients into a restaurant-quality meal that looks impressive yet remains surprisingly easy to execute. Whether you’re cooking for a weeknight family dinner or entertaining guests who deserve something special, this sun-dried tomato chicken recipe delivers on every front. The rich, concentrated flavor of sun-dried tomatoes paired with aromatic garlic, fresh herbs, and silky cream creates a sauce so delicious you’ll want to soak up every last drop with crusty bread. Best of all, this foolproof method ensures your chicken stays perfectly juicy and never dry, making it accessible even for novice cooks while sophisticated enough to satisfy experienced home chefs.
Table of Contents
- Why Sun Dried Tomato Chicken Deserves a Spot in Your Recipe Collection
- Understanding the Key Ingredients That Make This Dish Shine
- The Star Ingredient: Sun Dried Tomatoes
- Choosing the Right Chicken Cuts
- Supporting Cast: Herbs, Garlic, and Cream
- The Foolproof Method: Step-by-Step Instructions
- Preparing Your Ingredients for Success
- Searing the Chicken to Golden Perfection
- Building the Sun Dried Tomato Sauce
- Bringing It All Together
- Pro Tips for Achieving Maximum Juiciness Every Time
- Common Mistakes to Avoid
- Serving Suggestions and Pairing Ideas
- Storage and Meal Prep Strategies
- Variations to Customize Your Dish
- Final Words
Why Sun Dried Tomato Chicken Deserves a Spot in Your Recipe Collection
This section explores the compelling reasons why this particular chicken recipe has earned its place as a modern classic in home kitchens worldwide, combining ease of preparation with exceptional results.
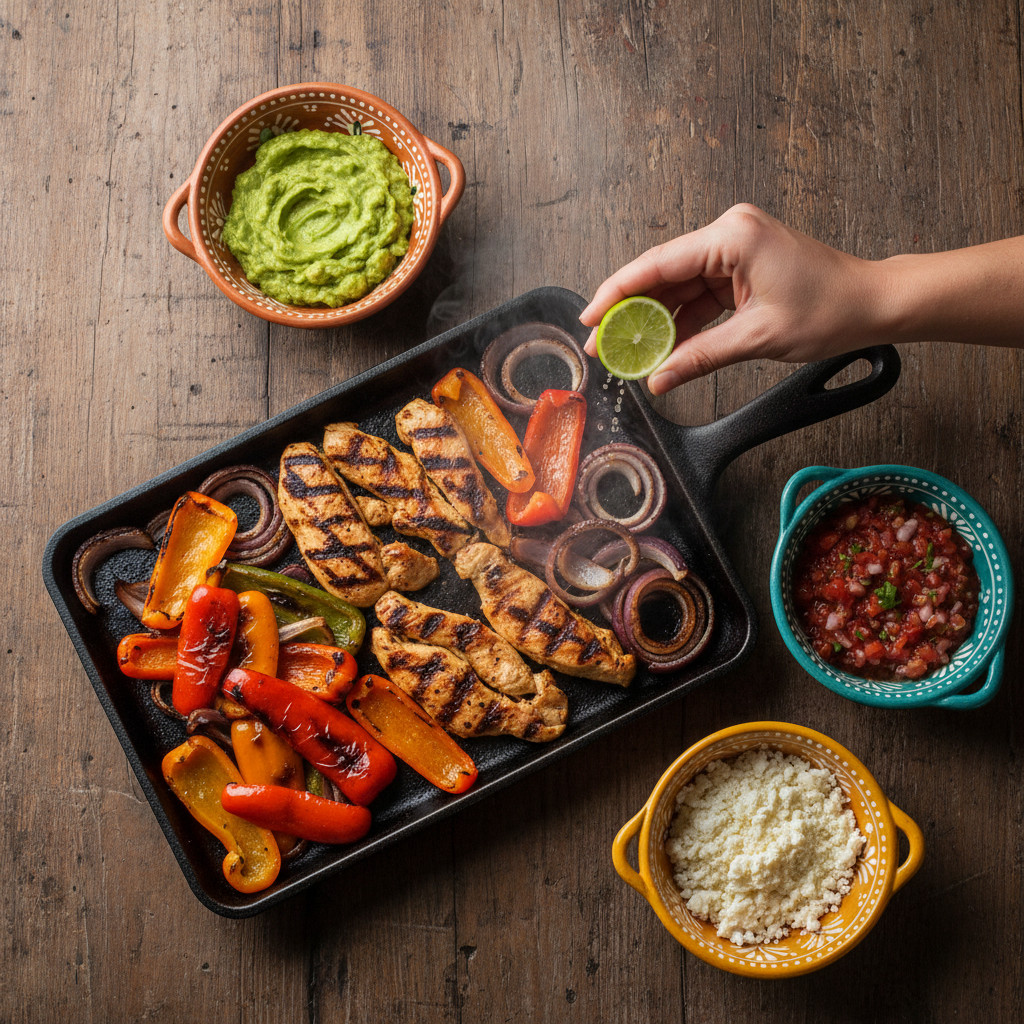
Sun-dried tomato chicken has rapidly become a beloved staple for good reason. This dish masterfully balances simplicity with sophistication, requiring minimal hands-on time while delivering complex, layered flavors that taste like you’ve spent hours in the kitchen. The beauty of this recipe lies in its versatility and reliability—it works equally well for busy Tuesday evenings when you need dinner on the table quickly, and for Saturday date nights when you want to impress without stress. Unlike many chicken recipes that can turn out bland or dry, the sun-dried tomatoes infuse the dish with an intense umami-rich flavor that penetrates the meat, while the creamy sauce keeps everything moist and luxurious. The visual appeal cannot be overstated either; the vibrant red tomatoes suspended in golden cream sauce create an Instagram-worthy presentation that makes your cooking skills appear far more advanced than the actual effort required.
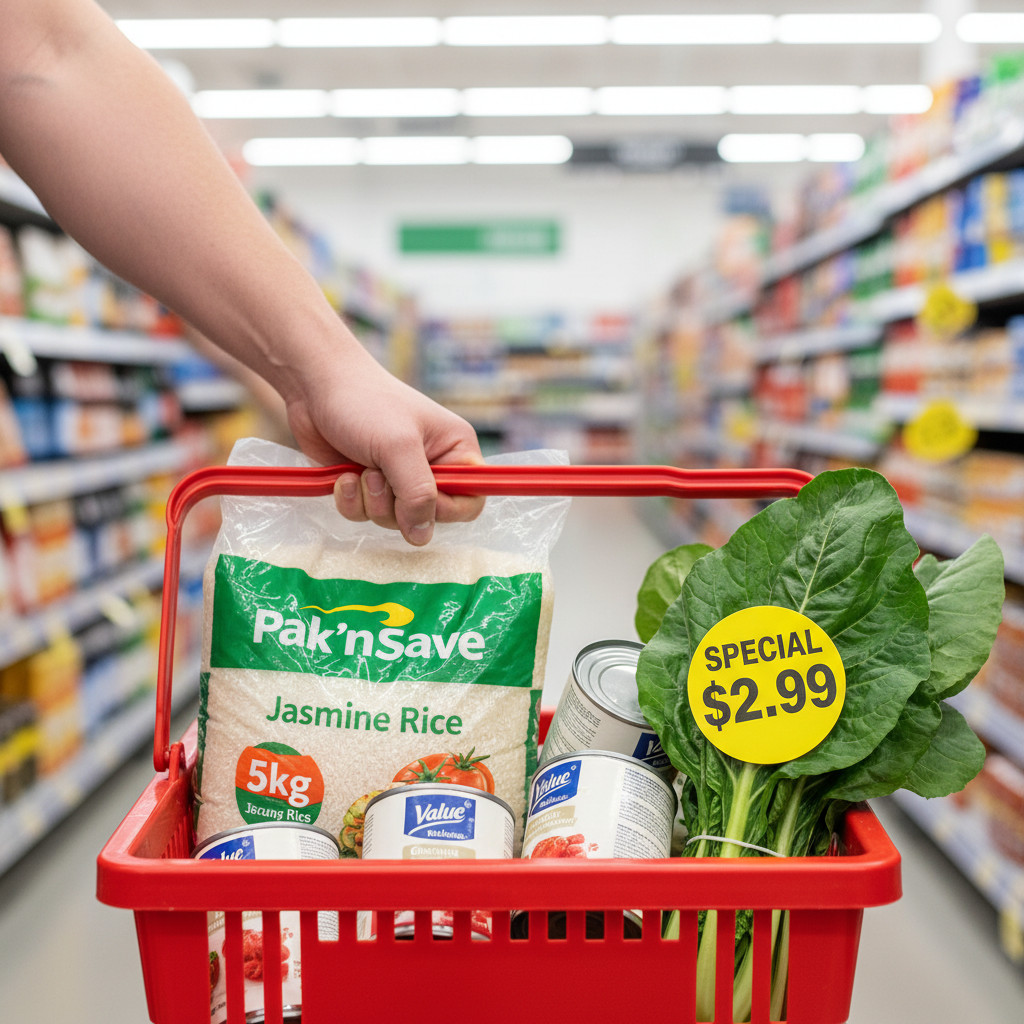
From a practical standpoint, this recipe checks all the boxes for modern home cooking. It’s a one-pan wonder that minimizes cleanup—always a winning feature after a long day. The ingredients are widely available at any grocery store, yet the combination feels special and unexpected. Sun-dried tomatoes bring a concentrated burst of summer flavor available year-round, making this dish seasonal-proof. The recipe also scales beautifully whether you’re cooking for two or feeding a crowd, and it reheats exceptionally well, making it ideal for meal prep enthusiasts. Additionally, this dish naturally lends itself to customization, allowing you to adjust the flavors based on dietary preferences or what’s available in your pantry.
The nutritional profile adds another compelling reason to embrace this recipe. Chicken provides lean protein essential for muscle maintenance and satiety, while sun-dried tomatoes contribute lycopene, vitamin C, and antioxidants. When prepared with mindful portions of cream and balanced with plenty of vegetables or whole grains on the side, this becomes a well-rounded meal that nourishes both body and soul. The garlic and herbs add not just flavor but also anti-inflammatory and immune-supporting compounds, transforming what could be an indulgent dish into something that actually contributes to your wellness goals.
Understanding the Key Ingredients That Make This Dish Shine
Before diving into the cooking process, let’s examine the essential components that transform this from ordinary chicken to an extraordinary culinary experience worth repeating regularly.
The Star Ingredient: Sun Dried Tomatoes
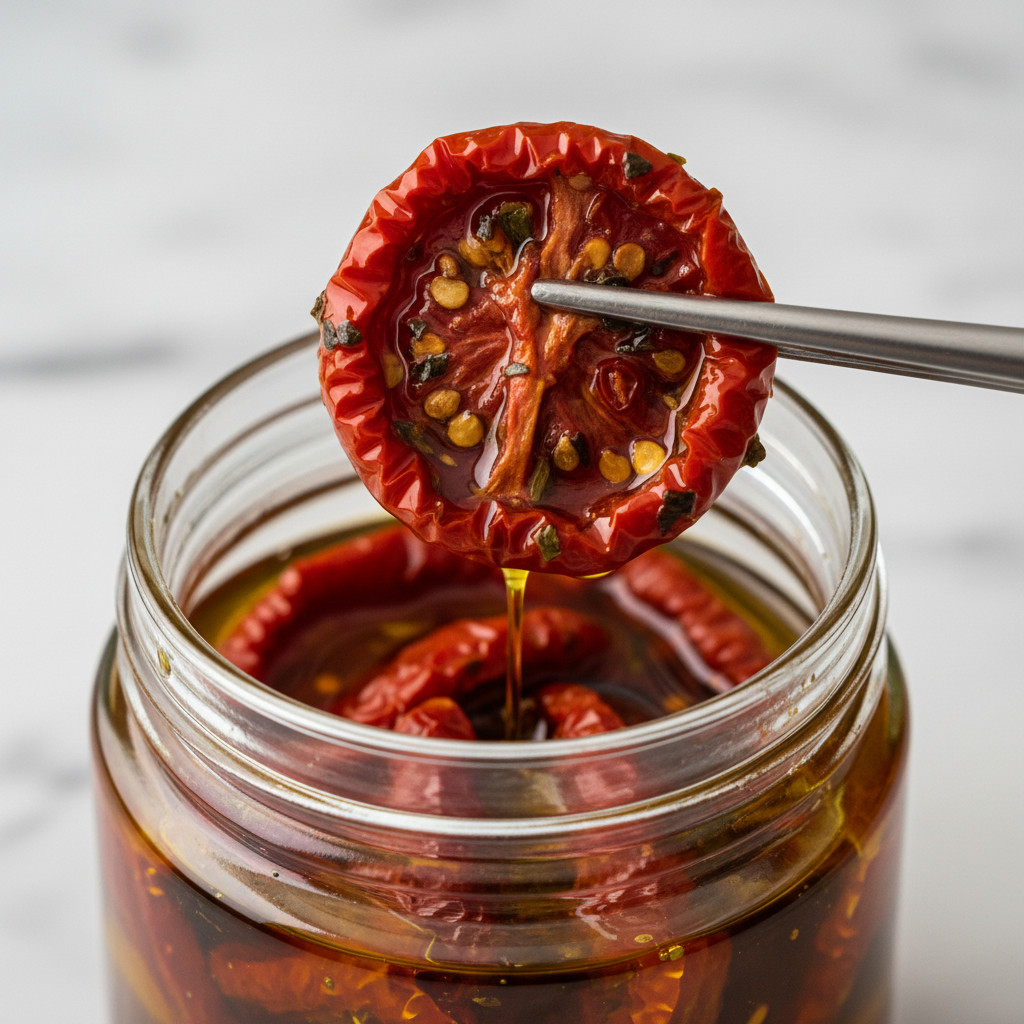
Sun-dried tomatoes serve as the flavor foundation of this entire dish, so understanding their characteristics and varieties ensures you select the best option. These intensely flavored gems are exactly what their name suggests—tomatoes that have been dried to remove most of their water content, concentrating their natural sugars, acidity, and umami compounds into small, potent packages. You’ll typically find two varieties at the grocery store: those packed in oil and those sold dry in packages. For this recipe, oil-packed sun-dried tomatoes are strongly recommended because they’re already rehydrated, tender, and seasoned with herbs and garlic that enhance your sauce. The oil they’re packed in becomes an asset too—it carries fat-soluble tomato flavors that can be incorporated directly into your cooking, adding an extra dimension to the dish.
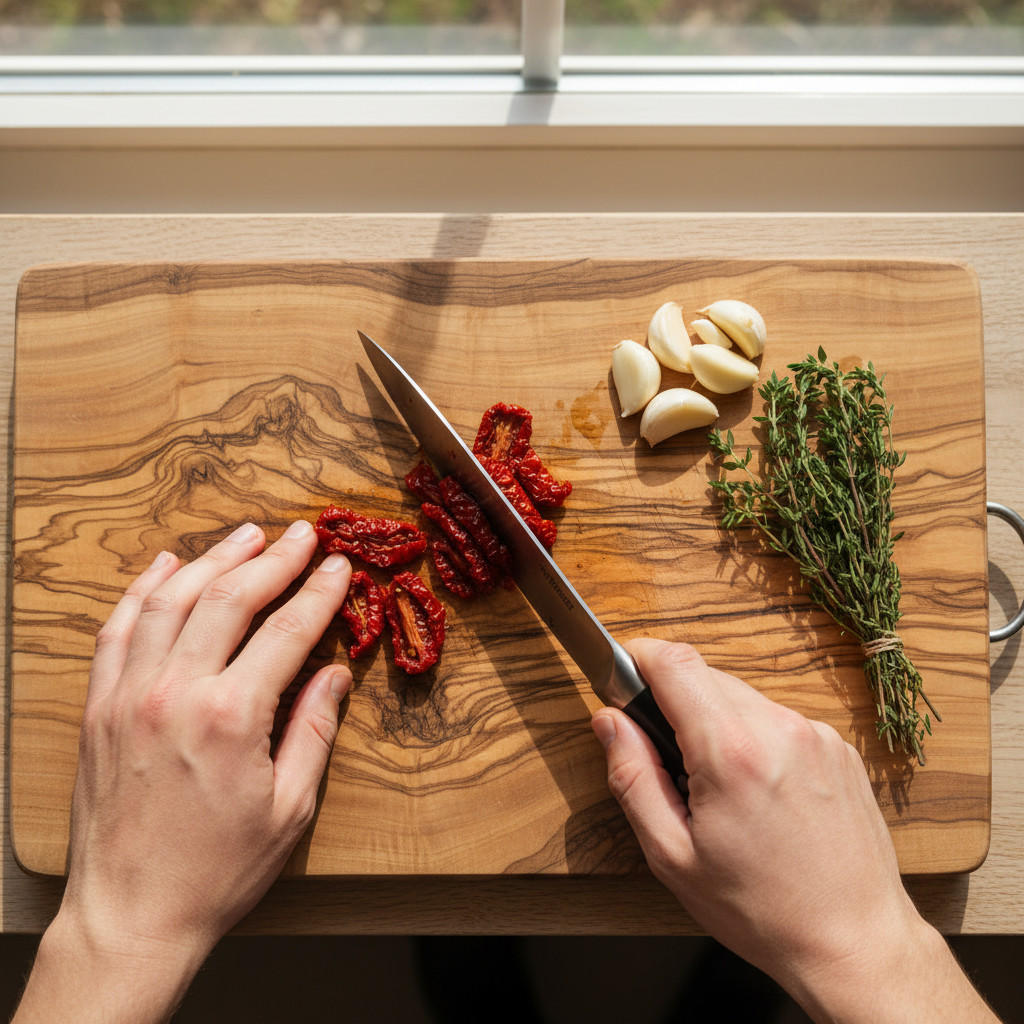
When selecting sun-dried tomatoes, look for plump, pliable pieces with a deep red color rather than brown or overly dark specimens, which may be over-dried or old. High-quality sun-dried tomatoes should have a sweet-tart balance with a slight chewiness, not a leathery texture. If you can only find the dry-packed variety, don’t worry—simply reconstitute them by soaking in hot water for about fifteen to twenty minutes until softened, then drain and proceed with the recipe. Some cooks prefer to chop the sun-dried tomatoes into smaller pieces for even distribution throughout the sauce, while others like larger chunks that provide concentrated bursts of flavor. Consider your personal preference and adjust accordingly, but aim for pieces roughly the size of a nickel for optimal texture and distribution.
The flavor profile of sun-dried tomatoes brings a unique complexity that fresh tomatoes simply cannot match. The drying process caramelizes the natural sugars while intensifying the glutamates that give tomatoes their savory depth. This creates a sweet-tangy-umami trinity that forms the backbone of your sauce. Unlike fresh tomatoes that can make sauces watery and dilute other flavors, sun-dried tomatoes contribute richness without excess moisture, allowing the cream sauce to maintain its luxurious body while infusing it with concentrated tomato essence.
Choosing the Right Chicken Cuts
The type of chicken cut you select dramatically impacts both the cooking process and the final texture of your dish, making this decision more important than many home cooks realize. Boneless, skinless chicken breasts are the most popular choice for this recipe because they cook relatively quickly, provide a neutral canvas for the bold sauce, and offer the lean protein many people prefer. However, chicken breasts present a challenge—they’re notorious for drying out if even slightly overcooked, which is why the foolproof method outlined later becomes so crucial. When purchasing chicken breasts, look for pieces that are similar in thickness to ensure even cooking. If your breasts are particularly thick (more than one inch at the thickest point), consider butterflying them or pounding them to an even three-quarter-inch thickness using a meat mallet. This simple step makes an enormous difference in achieving uniform doneness.
Chicken thighs represent an excellent alternative that many professional chefs actually prefer for their superior flavor and forgiving nature. The darker meat contains more intramuscular fat and connective tissue, which means it stays juicy and tender even if you accidentally cook it a few minutes longer than ideal. Boneless, skinless chicken thighs work beautifully in this recipe and require minimal adjustment to the cooking time. If you enjoy crispy skin, consider using bone-in, skin-on thighs—just increase the cooking time and start them skin-side down to render the fat and crisp the skin before flipping. The bones also contribute additional flavor to the sauce, creating an even richer final dish.
For those seeking a middle ground, chicken tenderloins or chicken cutlets offer another option. These thinner cuts cook very quickly, making them perfect for busy weeknights when every minute counts. Just be vigilant about timing since they can go from perfectly done to overdone in less than a minute. Regardless of which cut you choose, always select chicken that’s fresh rather than previously frozen when possible, as fresh chicken retains moisture better and develops a superior sear. Check that the meat appears pink with no gray or off-color patches, has a fresh smell without any sour or ammonia odors, and feels firm to the touch rather than slimy.
Supporting Cast: Herbs, Garlic, and Cream
While sun-dried tomatoes and chicken take center stage, the supporting ingredients work together to create harmony and depth that elevates the entire dish. Fresh garlic stands as the aromatic foundation—four to six cloves minced finely infuse the sauce with pungent, slightly sweet notes that complement the tomatoes beautifully. Fresh garlic behaves differently than dried or powdered versions, releasing complex sulfur compounds when chopped and heated that create layers of flavor impossible to replicate with substitutes. When mincing garlic for this recipe, avoid crushing it too far in advance, as the flavor compounds begin degrading immediately upon cell damage. For best results, mince your garlic just before adding it to the pan.
Heavy cream provides the luxurious texture and richness that transforms this from a simple sauté into a sauce-driven masterpiece. The fat content in heavy cream (typically thirty-six to forty percent) allows it to reduce and thicken without curdling, creating a silky sauce that coats the chicken and clings to pasta or rice. Some recipes call for half-and-half or milk as lighter alternatives, but these lower-fat options lack the stability and body that heavy cream provides. If you’re concerned about richness, use the full-fat cream but serve smaller portions alongside plenty of vegetables rather than compromising the sauce quality with a thinner dairy product. For those avoiding dairy, full-fat coconut cream makes an acceptable substitute that provides similar body, though it will impart a subtle coconut flavor.
The herb selection brings brightness and aromatic complexity that cuts through the richness. Fresh basil works particularly well with the Italian-inspired flavor profile, adding a sweet, slightly peppery note that pairs naturally with tomatoes. Italian parsley contributes a clean, slightly bitter element that provides balance, while fresh thyme or oregano can add earthy, savory undertones. Dried herbs work in a pinch, but remember they’re more concentrated—use about one-third the amount of dried herbs compared to fresh. Additionally, a splash of white wine or chicken broth helps deglaze the pan after searing the chicken, capturing all those flavorful brown bits and adding acidity or savory depth to the sauce foundation.
The Foolproof Method: Step-by-Step Instructions
This section breaks down the cooking process into manageable steps that guarantee success, even if you’re relatively new to cooking or have struggled with dry chicken in the past.
Preparing Your Ingredients for Success
1. Properly preparing your chicken and ingredients before you turn on the heat sets the foundation for foolproof results. Begin by removing your chicken from the refrigerator about fifteen to twenty minutes before cooking. This brief tempering period allows the meat to come closer to room temperature, which promotes more even cooking throughout. While the chicken sits, pat it completely dry using paper towels—this step is absolutely critical for achieving a proper sear. Any surface moisture creates steam when the chicken hits the hot pan, preventing the Maillard reaction (the chemical process that creates that gorgeous golden-brown crust) and causing the meat to stick. Once dried, season both sides generously with salt and freshly ground black pepper. Don’t be shy with seasoning—much of it will stay on the exterior rather than penetrating the meat, so you need a visible coating. Some cooks also add a light dusting of garlic powder or Italian seasoning at this stage for extra flavor dimension.
While the chicken tempers, prepare all your other ingredients and measure them out in small bowls or ramekins. This French cooking technique called “mise en place” (everything in its place) prevents the panic of searching for ingredients while your chicken burns or your garlic turns bitter in a hot pan. Drain your sun-dried tomatoes if using oil-packed, reserving about two tablespoons of the flavorful oil for cooking. Chop the tomatoes to your preferred size and set aside. Mince your garlic—remember, fresh is best—and have it ready near the stove. Measure out your heavy cream, about one cup for four chicken breasts, and have your herbs cleaned and chopped. If you’re planning to deglaze with wine, measure out about one-third cup of dry white wine such as Sauvignon Blanc or Pinot Grigio.
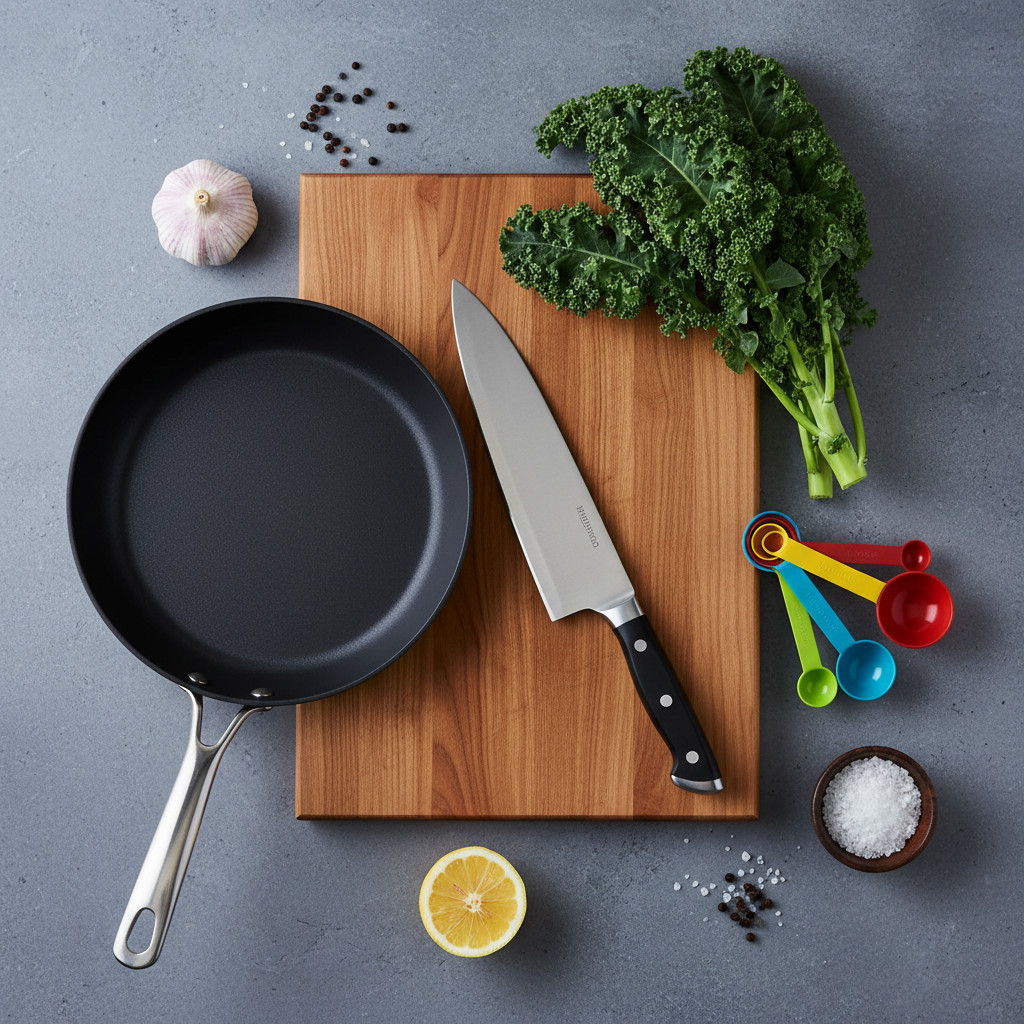
This preparation phase also includes gathering your equipment. You’ll need a large, heavy-bottomed skillet—cast iron or stainless steel work excellently, though nonstick can be used if that’s what you have. A skillet that’s ten to twelve inches in diameter provides enough surface area to cook the chicken without crowding, which would trap steam and prevent proper browning. Have a plate ready for resting the chicken after searing, along with aluminum foil to tent over it. Keep tongs or a spatula nearby for flipping, and consider having a meat thermometer on hand to take the guesswork out of doneness.
Searing the Chicken to Golden Perfection
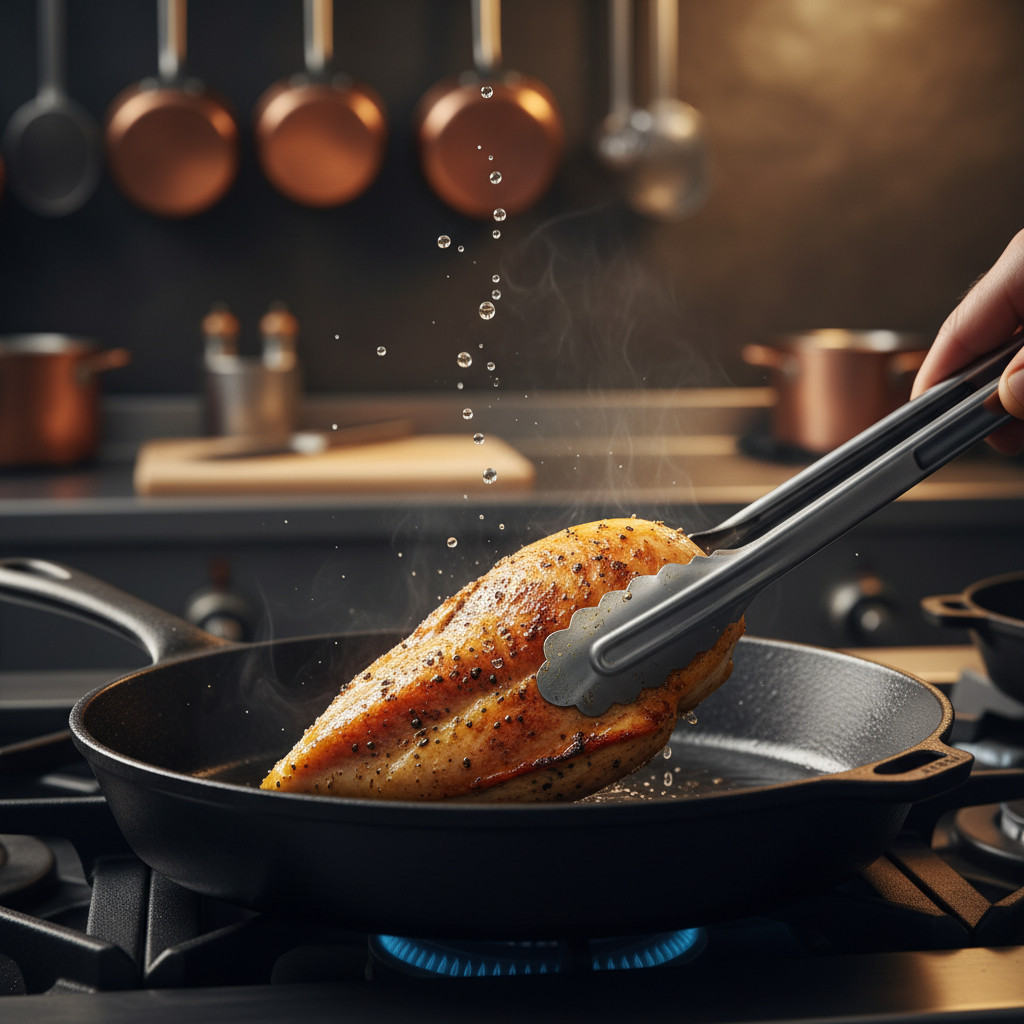
2. Mastering the art of searing creates a flavorful crust while locking in moisture, setting your dish apart from bland, steamed chicken. Heat your skillet over medium-high heat and add about one to two tablespoons of oil—the reserved oil from sun-dried tomatoes works beautifully here, or use olive oil or a neutral oil with a high smoke point. The pan is ready when a drop of water sizzles and immediately evaporates upon contact. Carefully lay your chicken pieces in the pan, making sure not to overcrowd—leave at least half an inch between pieces. If necessary, work in batches rather than cramming everything in at once. Overcrowding drops the pan temperature dramatically, causing the chicken to release moisture and steam rather than sear.
Here comes the hardest part for many home cooks—resisting the urge to move, flip, or peek at the chicken too soon. Once the chicken hits the pan, leave it completely undisturbed for four to five minutes. This uninterrupted contact with the hot surface allows proteins on the chicken’s exterior to denature and form that desirable golden-brown crust. You’ll know the chicken is ready to flip when it releases easily from the pan with minimal resistance. If it’s sticking stubbornly, it’s not ready—give it another minute. Trying to force a flip tears the meat and leaves your beautiful crust stuck to the pan rather than adorning your chicken.
After the first side achieves a deep golden color with crispy edges, flip each piece and cook the second side for an additional four to five minutes. The timing depends on the thickness of your chicken—thinner pieces need less time while thicker cuts require more. The goal at this stage isn’t to cook the chicken completely through, as it will finish cooking in the sauce. Instead, you’re aiming for a gorgeous exterior and an internal temperature of about one hundred fifty degrees Fahrenheit. The chicken will appear opaque around the edges but may still show some pink in the very center—this is perfect. Once both sides are beautifully browned, transfer the chicken to your prepared plate and tent loosely with foil. The carryover cooking and the time spent simmering in sauce will bring it to the safe internal temperature of one hundred sixty-five degrees Fahrenheit.
Building the Sun Dried Tomato Sauce
3. Creating a restaurant-quality sauce requires understanding the sequence of adding ingredients and developing layers of flavor through proper technique. After removing your chicken, look at your pan—those brown bits stuck to the bottom (called fond) represent concentrated flavor that would be a crime to waste. If your pan looks dry, add another half-tablespoon of oil or butter. Reduce the heat to medium and add your minced garlic, stirring constantly with a wooden spoon or spatula. Garlic cooks very quickly and turns from fragrant and golden to burnt and bitter in mere seconds, so watch it carefully. As soon as it becomes aromatic and just starts to take on the slightest golden color—usually thirty to sixty seconds—it’s time for the next step.
If using wine or broth for deglazing, add it now in one smooth pour. The liquid will immediately start bubbling vigorously, and this is when you spring into action with your spoon, scraping up all those flavorful brown bits from the pan bottom. This deglazing process not only captures flavor but also prevents burning and creates the base for your sauce. Let the wine simmer for about two minutes, reducing by roughly half. The alcohol will cook off during this time, leaving behind a subtle acidity that brightens the dish without any harsh alcoholic taste. If you prefer to skip the alcohol, use chicken broth instead or simply move directly to adding the cream—the dish will still be delicious, just slightly less complex.
Next comes the sun-dried tomatoes and cream. Add your chopped sun-dried tomatoes to the pan, stirring them into the garlic and reduced wine. Then pour in the heavy cream, using your spoon to combine everything into a cohesive sauce. At this point, you can also add dried herbs if using—about one teaspoon of Italian seasoning or half a teaspoon each of dried basil and oregano work wonderfully. Season the sauce with a pinch of salt and black pepper, keeping in mind that the sun-dried tomatoes bring saltiness and the sauce will reduce and concentrate. Let the mixture come to a gentle simmer, then reduce the heat to medium-low and allow it to bubble gently for about three to four minutes. The sauce will gradually thicken as the cream reduces slightly and the flavors meld together. If your sauce seems too thick, thin it with a splash of chicken broth or the pasta cooking water if you’re serving this over noodles. If it’s too thin, let it simmer a bit longer until it reaches your desired consistency—it should coat the back of a spoon but still be pourable.
Bringing It All Together
4. The final assembly stage ensures the chicken finishes cooking perfectly while absorbing the flavors of the sauce for maximum impact. Once your sauce has thickened to the right consistency and tastes well-balanced, it’s time to nestle the chicken back into the pan. Return each piece to the skillet, positioning them in a single layer if possible, and spoon some of the creamy sun-dried tomato sauce over the top. The chicken will finish cooking gently in this flavorful bath, absorbing the sauce’s essence while contributing its own juices that further enrich the mixture. This braising-style finishing method is the secret to keeping chicken breasts juicy—the humid environment and moderate heat prevent the exterior from drying out while the interior reaches the target temperature.
Allow the chicken to simmer gently in the sauce for about five to seven minutes, depending on the thickness. For extra-thick breasts, you might need up to ten minutes, while thin cutlets may only require three to four. The surest way to determine doneness is using an instant-read meat thermometer inserted into the thickest part of the chicken. You’re looking for an internal temperature of one hundred sixty-five degrees Fahrenheit—the USDA-recommended safe temperature for poultry. At this temperature, any potential pathogens are eliminated while the meat remains juicy rather than dry and chalky. If you don’t have a thermometer, cut into the thickest part of one piece with a sharp knife; the meat should be opaque throughout with clear juices running out, not pink liquid.
During these final minutes, add your fresh herbs for a burst of bright, aromatic flavor. Tear or chop fresh basil leaves and stir them into the sauce, or sprinkle fresh parsley over the top. Fresh herbs added at the end retain their vibrant color and essential oils better than if cooked for extended periods. Taste the sauce one final time and adjust the seasoning if needed—this is your last opportunity to perfect the flavor balance. If the sauce tastes flat, it likely needs more salt. If it’s too rich, a squeeze of fresh lemon juice adds brightness that cuts through the cream. If you want more depth, consider stirring in a tablespoon of grated Parmesan cheese or a pinch of red pepper flakes for subtle heat.
Pro Tips for Achieving Maximum Juiciness Every Time
This section reveals the insider techniques and subtle adjustments that separate good chicken from exceptional chicken that practically melts in your mouth.
Don’t skip the brining step for next-level moisture retention. While the basic recipe produces juicy chicken, taking thirty minutes to brine your chicken breasts transforms them from good to extraordinary. A simple brine of four cups of water mixed with one-quarter cup of salt (dissolve the salt completely) infuses the meat with moisture and seasons it throughout rather than just on the surface. Submerge your chicken in this solution and refrigerate for thirty minutes to two hours—no longer, or the texture becomes mealy. The salt in the brine causes the muscle proteins to unwind and form a matrix that traps water molecules, meaning the chicken starts with more moisture and retains it better during cooking. After brining, rinse the chicken under cold water and pat it thoroughly dry before seasoning and cooking. The difference in juiciness and flavor penetration is remarkable and well worth the minimal extra effort.
Invest in a reliable instant-read thermometer to eliminate guesswork and prevent overcooking. Even experienced cooks struggle to judge chicken doneness by touch or appearance alone, especially with the varying thicknesses and sizes of commercial chicken breasts. An instant-read thermometer costing fifteen to thirty dollars removes all uncertainty and pays for itself by preventing dry, overcooked chicken and potential food safety issues from undercooked poultry. Insert the probe into the thickest part of the chicken breast, making sure it doesn’t touch bone if using bone-in cuts. Pull the chicken from heat when it reaches one hundred sixty to one hundred sixty-two degrees Fahrenheit—remember that carryover cooking will bring the temperature up another three to five degrees as it rests. This precision prevents the common mistake of cooking chicken to one hundred seventy-five or one hundred eighty degrees, where the proteins have contracted so tightly that they’ve squeezed out most of their moisture, resulting in that dry, sawdust-like texture we’ve all experienced.
Let the chicken rest after cooking to allow juices to redistribute throughout the meat. This principle applies to all proteins but is especially important for lean chicken breast. When meat cooks, heat drives moisture toward the center as the exterior proteins contract. If you cut into chicken immediately after removing it from heat, those collected juices spill out onto the cutting board rather than staying in the meat. Allowing the chicken to rest for five minutes gives the proteins time to relax slightly and the juices to redistribute more evenly throughout, resulting in noticeably moister meat when you finally cut into it. During the resting period, tent the chicken loosely with aluminum foil to maintain warmth without trapping so much steam that the skin or crust becomes soggy.
Consider butterflying or pounding chicken breasts to ensure even thickness throughout. Commercial chicken breasts have an unfortunate shape—thick at one end and tapered thin at the other—which makes even cooking nearly impossible. The thin end dries out and overcooks while you wait for the thick portion to reach safe temperature. Eliminate this problem by butterflying thick breasts horizontally (slicing through the side to open like a book) or using a meat mallet to pound them to uniform three-quarter-inch thickness. Place the chicken between two sheets of plastic wrap or inside a gallon-size zip-top bag to prevent splatter, then use firm, even strokes with the flat side of the mallet to gently pound from the center outward. This technique takes less than a minute per breast and guarantees that every portion cooks at the same rate, eliminating guesswork and dry spots.
Common Mistakes to Avoid
Learning what not to do proves just as valuable as mastering proper technique, helping you sidestep the pitfalls that derail otherwise promising dishes.
Cooking chicken straight from the refrigerator ranks among the most frequent errors home cooks make. Cold chicken placed in a hot pan creates a problematic temperature gradient—by the time the cold interior reaches safe temperature, the exterior has spent so long cooking that it becomes dry and tough. This issue intensifies with thicker cuts. Taking the simple step of removing chicken from the refrigerator fifteen to twenty minutes before cooking allows the chill to dissipate slightly, promoting more even cooking from exterior to interior. The chicken doesn’t need to reach true room temperature, which would take over an hour and raise food safety concerns; just removing the deep refrigerator chill makes a measurable difference in the final texture.
Using too much heat ranks as another common culprit behind dry, unevenly cooked chicken. Many home cooks assume that higher heat means faster cooking and better browning, but excessively high heat causes the exterior to brown or even burn before the interior cooks through. For chicken, medium-high heat during the initial sear followed by medium or medium-low heat for sauce building and finishing provides the optimal balance. If you notice your garlic browning almost instantly when added to the pan, or if the cream sauce breaks and looks curdled, your heat is too high. Remember that residual heat in a heavy pan continues cooking even after you reduce the burner, so anticipate slightly and adjust proactively rather than reactively.
Neglecting to properly dry the chicken before cooking prevents the development of that gorgeous golden crust. Surface moisture is the enemy of the Maillard reaction—the chemical process responsible for browning and the hundreds of complex flavor compounds it creates. Wet chicken steams rather than sears, and it tends to stick to the pan as the proteins bond with the metal surface. The solution is simple but essential: use paper towels to thoroughly pat every surface of the chicken until it feels dry to the touch. This takes perhaps thirty seconds of effort but makes the difference between pale, steamed chicken and beautifully caramelized meat with restaurant-quality appearance and flavor.
Moving the chicken too soon or too frequently disrupts crust formation and causes sticking. When chicken first contacts the hot pan, proteins on the surface begin to denature and temporarily bond with the metal. As the Maillard reaction progresses and a proper crust forms, those bonds release naturally and the chicken lifts away easily. Home cooks who impatiently try to flip or move chicken after just a minute or two find it stubbornly stuck, tear the meat trying to force it, and end up with ragged, poorly browned chicken. Cultivate patience and trust the process—if the chicken isn’t releasing with gentle pressure, it’s simply not ready. Give it another minute and try again. Proper crust formation takes a full four to five minutes of undisturbed contact for average-thickness breasts.
Skimping on sauce ingredients or using low-fat substitutions undermines the dish’s essential character. This recipe showcases a luxurious creamy sauce as a core component, not an afterthought or optional garnish. Using half-and-half or milk instead of heavy cream produces a thin, less flavorful sauce that may curdle when simmered. Similarly, using too few sun-dried tomatoes leaves you with a bland cream sauce that happens to have a few tomato pieces rather than the deeply flavored, sun-dried tomato-forward sauce that defines the dish. Follow the ingredient quantities as specified, at least for your first attempt, before making adjustments based on personal preference.
Serving Suggestions and Pairing Ideas
Understanding how to present and accompany this dish maximizes its impact and creates a complete, satisfying meal that delights all the senses.
The creamy, richly flavored sauce practically begs for a vehicle to soak up every drop, making your choice of accompaniment important to the overall meal experience. Pasta represents the most classic pairing—the Italian-inspired flavor profile aligns perfectly with linguine, fettuccine, penne, or rigatoni. Cook your pasta according to package directions but pull it from the water one minute before the suggested time, then transfer it directly to the sauce pan (without rinsing) along with a splash of pasta cooking water. Let the pasta finish cooking in the sauce for that final minute, stirring frequently. This technique allows the pasta to absorb the sauce and creates a silky, cohesive dish where the sauce clings to every strand or tube. The starchy pasta water helps the sauce emulsify and creates better adhesion between sauce and noodles.
Rice and grains offer excellent alternatives that provide a neutral base for the assertive sauce. Fluffy white rice, nutty brown rice, fragrant basmati, or even wild rice blend all work beautifully. For something more nutritious and interesting, consider creamy polenta, which provides a soft, luxurious texture that complements the sauce, or farro and quinoa for chewy, protein-rich options that add substance. Cauliflower rice appeals to low-carb and keto followers, providing a vegetable-forward base that allows the chicken and sauce to shine while keeping the meal lighter.
Crusty bread deserves special mention as an essential accompaniment in my opinion—have a warm baguette, ciabatta, or sourdough loaf sliced and ready at the table. The pleasure of sopping up that last bit of creamy tomato sauce with a piece of crusty, chewy bread borders on transcendent. Garlic bread takes this even further, though some might argue it’s garlic overkill given the garlic already in the sauce. I say more garlic is rarely a problem.
Vegetable sides provide important balance to cut through the richness and add nutritional value. Simple roasted vegetables—asparagus, broccoli, Brussels sprouts, or green beans—dressed with nothing more than olive oil, salt, and pepper let the main dish shine while adding color and fiber. A bright, acidic side salad with mixed greens, cucumber, red onion, and a lemony vinaigrette provides refreshing contrast to the creamy, savory chicken. Sautéed spinach or Swiss chard with garlic integrates seamlessly with the Italian theme while contributing iron and vitamins.
Wine pairing elevates the meal to special occasion status if you’re so inclined. The cream sauce and rich tomato flavors call for a wine with good acidity to cut through the fat while complementing the tomato and herb notes. A crisp, unoaked Chardonnay provides sufficient body to stand up to the cream while offering citrus and apple notes that refresh the palate. Pinot Grigio or Sauvignon Blanc offer lighter, more acidic options that work especially well if you’ve added extra lemon juice or included white wine in the sauce. For red wine lovers, a light-bodied, low-tannin option like Pinot Noir won’t overwhelm the dish while providing berry notes that complement the sun-dried tomatoes. Avoid heavy, tannic reds like Cabernet Sauvignon, which clash with both the cream and the chicken’s delicate flavor.
Storage and Meal Prep Strategies
Maximizing this recipe’s utility includes understanding how to properly store leftovers and incorporate the dish into meal planning routines for efficient, delicious weeknight dinners.
Proper storage techniques preserve quality and ensure food safety for enjoying leftovers. Allow the chicken to cool to room temperature before storing, but don’t leave it out for more than two hours (one hour if the room temperature exceeds ninety degrees Fahrenheit). Transfer the chicken and sauce to an airtight container—glass containers with secure lids work particularly well as they don’t absorb odors or stains from the tomato. Stored properly in the refrigerator, the sun-dried tomato chicken maintains optimal quality for three to four days. The sauce may thicken considerably as it chills due to the fat solidifying; this is normal and nothing to worry about. When reheating, add a splash of chicken broth, cream, or water to return the sauce to its original consistency.
Reheating methods significantly impact the texture of leftover chicken. The microwave offers convenience but tends to dry out chicken and create rubbery, unevenly heated results. If you must use the microwave, transfer a portion to a microwave-safe dish, add a tablespoon of water or broth, cover loosely, and heat in thirty-second intervals at seventy percent power, stirring between sessions. This gentle approach prevents overcooking. The stovetop provides better results—place the chicken and sauce in a pan over medium-low heat, add a splash of liquid to loosen the sauce, and warm gently with the lid on, turning the chicken occasionally. This takes about six to eight minutes but preserves the texture beautifully. The oven also works well for larger quantities: arrange chicken in a baking dish, spoon sauce over top, cover with foil, and heat at three hundred fifty degrees Fahrenheit for about fifteen to twenty minutes until warmed through.
Freezing extends storage to two to three months, making this dish excellent for batch cooking and future meal planning. The sauce freezes reasonably well, though cream sauces can sometimes separate slightly upon thawing. To minimize this, slightly undercook the chicken if you know you’ll be freezing it, and freeze in portion-sized containers for convenient defrosting. When ready to eat, thaw overnight in the refrigerator rather than at room temperature or in the microwave, which can create food safety issues and texture problems. Reheat gently on the stovetop, whisking the sauce as it warms to re-emulsify if needed. A splash of fresh cream stirred in during reheating can refresh the sauce and restore its silky texture.
Meal prep applications make this recipe a weeknight warrior. Consider preparing a double batch on Sunday, portioning into individual containers with your chosen starch and vegetables, and enjoying effortless, restaurant-quality lunches or dinners throughout the week. The chicken can also be prepared through the searing stage, cooled, and refrigerated, with the sauce made fresh when you’re ready to eat—this takes only about fifteen minutes and provides the closest experience to freshly made. Alternatively, marinate the chicken with some of the sun-dried tomato oil, garlic, and herbs, then store in the refrigerator for up to twenty-four hours. When dinnertime arrives, simply cook the marinated chicken and make the sauce, cutting active cooking time while enhancing flavor through the extended marinating period.
Variations to Customize Your Dish
Mastering the basic recipe opens doors to countless variations that keep the dish interesting and accommodate different dietary needs, preferences, and available ingredients.
Protein variations allow you to adapt the recipe to what’s available or preferred. While chicken breasts are classic, chicken thighs provide richer flavor and more forgiving cooking characteristics as discussed earlier. Bone-in, skin-on thighs deliver maximum flavor and crispy skin textured contrast but require longer cooking time—about thirty-five to forty minutes in a three hundred seventy-five degree oven after searing. Pork chops, either boneless or bone-in, adapt beautifully to this preparation method and cooking time, offering a pleasant alternative to chicken. Firm white fish like halibut, cod, or mahi-mahi can be substituted for a lighter, more delicate version—reduce cooking time significantly as fish cooks much faster than chicken and sear gently to prevent the tender flesh from falling apart. Shrimp makes another excellent quick-cooking protein option that feels elegant and cooks in mere minutes, perfect for time-crunched evenings.
Dairy-free and lighter adaptations broaden the recipe’s appeal without sacrificing too much of the characteristic richness. Full-fat coconut milk or coconut cream stands as the best dairy substitute, providing similar body and richness to heavy cream while adding a subtle tropical note that surprisingly complements the sun-dried tomatoes. Cashew cream—made by blending soaked raw cashews with water until silky smooth—creates a neutral, rich sauce that mimics dairy cream remarkably well. For a lighter version that isn’t necessarily dairy-free, replace half the cream with chicken broth or use a combination of Greek yogurt and cream, though be careful with yogurt as it can curdle if boiled. Adding more sun-dried tomatoes, garlic, and herbs compensates for any richness lost by using lighter dairy options.
Vegetable additions transform this into a more complete one-pan meal that increases nutritional value and reduces the need for separate side dishes. Spinach represents the easiest addition—simply stir several large handfuls of fresh baby spinach into the finished sauce and let it wilt for about two minutes. The spinach adds vitamins, minerals, and beautiful green color without altering the flavor profile significantly. Cherry tomatoes provide fresh tomato contrast to the concentrated dried ones—add halved cherry tomatoes along with the sauce ingredients and let them soften and burst slightly as everything simmers together. Mushrooms contribute meaty texture and earthy umami—slice cremini, baby bellas, or shiitake mushrooms and sauté them along with the garlic before building the sauce. Artichoke hearts, kale, roasted red peppers, and zucchini all integrate seamlessly into this forgiving recipe.
Spice and flavor profile adjustments personalize the dish to your taste preferences. For heat lovers, add red pepper flakes along with the garlic, or stir in a diced jalapeño or serrano pepper for fresh spicy notes. Smoked paprika contributes subtle smokiness that adds depth, while sun-dried tomato pesto can be stirred in for more concentrated tomato flavor. Lemon zest and juice brighten the sauce and cut through richness—add the zest with the sauce and finish with a squeeze of fresh juice just before serving. Fresh or dried oregano increases the Italian character, while tarragon provides a sophisticated French twist. Balsamic vinegar—just a tablespoon—adds sweet-tart complexity that amplifies the tomato notes beautifully. Parmesan cheese stirred into the sauce or shaved over the top as garnish contributes savory, nutty notes and additional richness that cheese lovers will appreciate.
Final Words
Sun-dried tomato chicken stands as one of those rare recipes that delivers impressive results from straightforward techniques and accessible ingredients. By understanding the key components—properly prepared chicken, quality sun-dried tomatoes, and a well-balanced cream sauce—and following the foolproof method outlined above, you’ll consistently produce juicy, flavorful chicken that rivals restaurant quality. The versatility of this dish cannot be overstated; it adapts to weeknight meals and special occasions with equal grace, accommodates various dietary modifications without losing its essential character, and pairs beautifully with countless sides and accompaniments.
The techniques you’ve learned here extend far beyond this single recipe. Properly tempering and drying protein before cooking, achieving a perfect sear through patience and proper heat, building sauce layers for complexity, and finishing cooking in liquid for moisture retention—these fundamental skills elevate all your cooking endeavors. The confidence gained from mastering this dish empowers you to experiment with the variations suggested and even create your own personalized versions.
Remember that cooking is as much about the experience and enjoyment as the final product. The aroma of garlic and sun-dried tomatoes filling your kitchen, the satisfaction of achieving that perfect golden crust, the pleasure of sharing something delicious you’ve created—these aspects nourish us beyond mere nutrition. Whether you’re cooking for yourself, your family, or guests you want to impress, this sun-dried tomato chicken recipe provides the perfect vehicle for creating memorable meals and meaningful moments around the table. Start with the basic recipe to build your skills and understanding, then let your creativity guide you through endless variations that keep this dish perpetually fresh and exciting in your regular rotation.