Table of Contents
- 10 Secrets to Successful Container Gardening Vegetables And Fruit
- Why Container Gardening Has Become a Game-Changer for Home Growers
- Space Efficiency and Accessibility
- Control Over Growing Conditions
- Secret #1 – Choose the Right Container Size for Maximum Growth
- Size Guidelines for Different Vegetables and Fruits
- Material Considerations
- Secret #2 – Master the Art of Proper Drainage
- Why Drainage Matters
- How to Create Optimal Drainage
- Secret #3 – Use High-Quality Potting Mix, Not Garden Soil
- Components of Ideal Potting Mix
- Creating Your Own Blend
- Secret #4 – Select Compact and Container-Friendly Varieties
- Best Vegetables for Containers
- Fruit Trees and Berries That Thrive in Pots
- Secret #5 – Position Your Containers for Optimal Sunlight
- Understanding Light Requirements
- Seasonal Adjustments
- Secret #6 – Establish a Consistent Watering Routine
- Signs of Overwatering vs. Underwatering
- Watering Techniques and Tools
- Secret #7 – Feed Your Plants with the Right Nutrients
- Types of Fertilizers for Container Plants
- Feeding Schedule
- Secret #8 – Embrace Vertical Growing and Space Optimization
- Trellising and Support Systems
- Companion Planting in Containers
- Secret #9 – Protect Your Container Garden from Pests and Diseases
- Common Container Garden Pests
- Organic Prevention Methods
- Secret #10 – Know When and How to Harvest for Best Results
- Harvesting Guidelines for Common Container Crops
- Extending Your Growing Season
- Essential Tools and Supplies for Container Gardening Success
- Common Mistakes to Avoid in Container Vegetable and Fruit Gardening
- Final Thoughts: Your Container Garden Awaits
10 Secrets to Successful Container Gardening Vegetables And Fruit
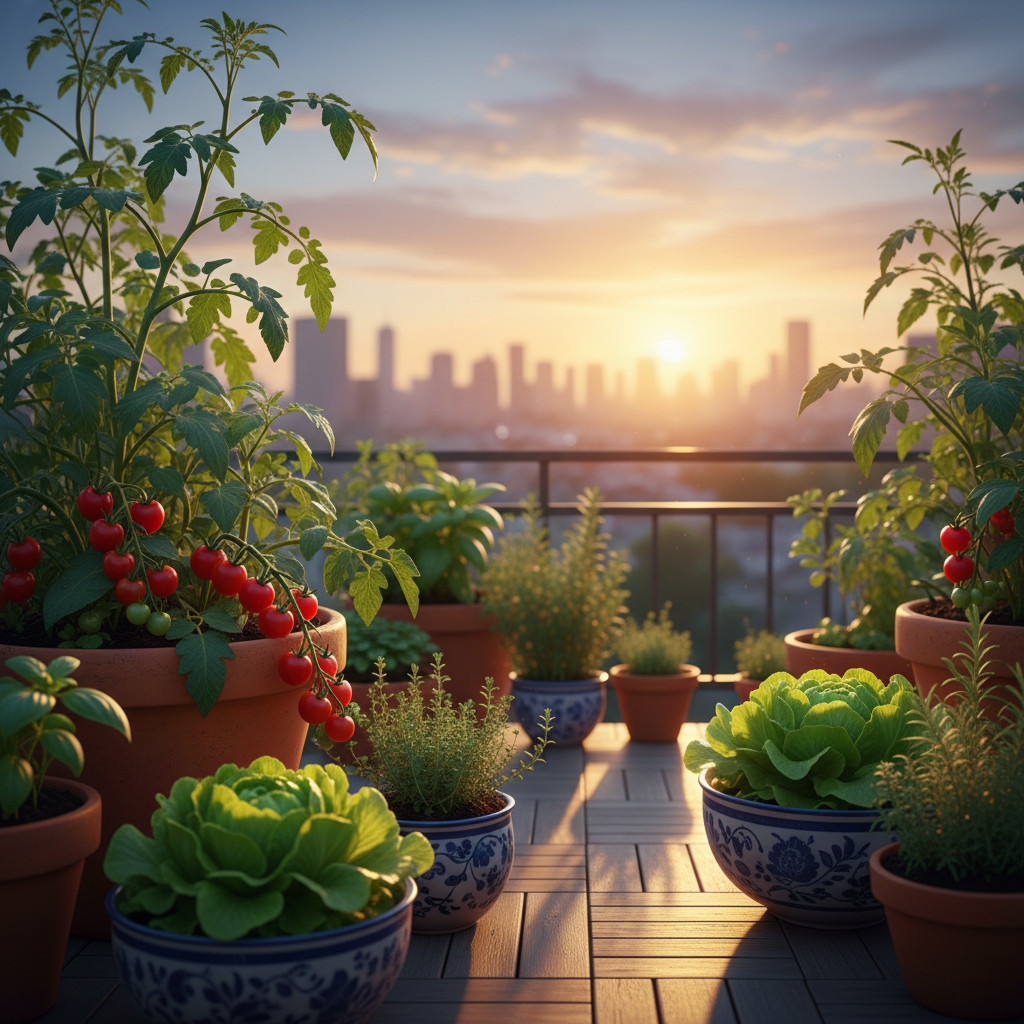
Imagine stepping onto your balcony, patio, or small backyard and picking fresh, sun-ripened tomatoes, crisp lettuce, or sweet strawberries that you grew yourself. This isn’t just a dream reserved for those with sprawling gardens and acres of land—it’s entirely achievable through the art of container gardening. Whether you live in a compact urban apartment, have limited mobility, or simply want more control over your growing conditions, container gardening offers an incredibly rewarding path to homegrown produce.
The beauty of growing vegetables and fruit in containers lies in its accessibility and flexibility. You don’t need extensive gardening experience or expensive equipment to get started. What you do need is the right knowledge—those insider secrets that transform struggling potted plants into thriving, productive gardens bursting with fresh harvests. Container gardening has exploded in popularity, with millions of people discovering that they can cultivate impressive edible gardens in surprisingly small spaces.
In this comprehensive guide, you’ll discover ten proven secrets that experienced container gardeners use to maximize their yields and grow healthy, delicious vegetables and fruit. From selecting the perfect containers to mastering watering techniques and understanding the nutritional needs of your plants, these strategies will set you up for success regardless of your experience level. Get ready to transform your available space into a productive edible oasis that provides fresh, nutritious produce throughout the growing season.
Why Container Gardening Has Become a Game-Changer for Home Growers
Container gardening has revolutionized how people approach growing their own food, breaking down traditional barriers that once made vegetable and fruit cultivation seem impossible for many. This growing method offers unparalleled flexibility and control that traditional in-ground gardening simply cannot match.
Space Efficiency and Accessibility
One of the most compelling advantages of container gardening is its remarkable space efficiency. Containers can be positioned on balconies, rooftops, patios, driveways, and even windowsills, transforming previously unusable spaces into productive growing areas. For urban dwellers and those with limited outdoor space, this opens up possibilities that were previously unimaginable. A single sunny corner can yield pounds of fresh tomatoes, peppers, and herbs throughout the season.
Beyond space considerations, container gardening offers exceptional accessibility for individuals with physical limitations. Raised containers eliminate the need for bending and kneeling, making gardening accessible to seniors, people with back problems, and those with mobility challenges. Containers can be placed at comfortable working heights, and wheeled plant stands allow for easy repositioning when needed.
Control Over Growing Conditions
Container gardening provides gardeners with unprecedented control over their plants’ growing environment. Unlike in-ground gardens where you’re at the mercy of existing soil conditions, containers allow you to create the perfect growing medium for each specific crop. You can customize soil composition, pH levels, and drainage characteristics to match exactly what your plants need.
This control extends to managing pests, diseases, and environmental factors. Containers can be moved to optimize sun exposure throughout the day or protect plants from extreme weather conditions. If pest problems arise, affected containers can be isolated to prevent spread. This level of management flexibility makes container gardening particularly appealing for those seeking organic growing methods.
Secret #1 – Choose the Right Container Size for Maximum Growth
The foundation of successful container gardening begins with selecting appropriately sized containers that give your plants room to develop healthy root systems and reach their full productive potential.
Container size directly impacts plant health, water retention, nutrient availability, and ultimately, your harvest yields. Many beginning container gardeners make the mistake of choosing containers that are too small, leading to stunted growth, stressed plants, and disappointing harvests. Understanding the relationship between container size and plant needs is essential for success.
Size Guidelines for Different Vegetables and Fruits
Different crops have vastly different root system requirements, and matching container size to plant needs is crucial for optimal growth. Here are research-backed guidelines for common container vegetables and fruits:
Small containers (1-3 gallons) work well for:
- Lettuce, spinach, and salad greens
- Radishes and green onions
- Fresh herbs like basil, cilantro, and parsley
- Small hot peppers
Medium containers (5-10 gallons) are ideal for:
- Bush beans and peas
- Eggplant and bell peppers
- Swiss chard and kale
- Compact tomato varieties
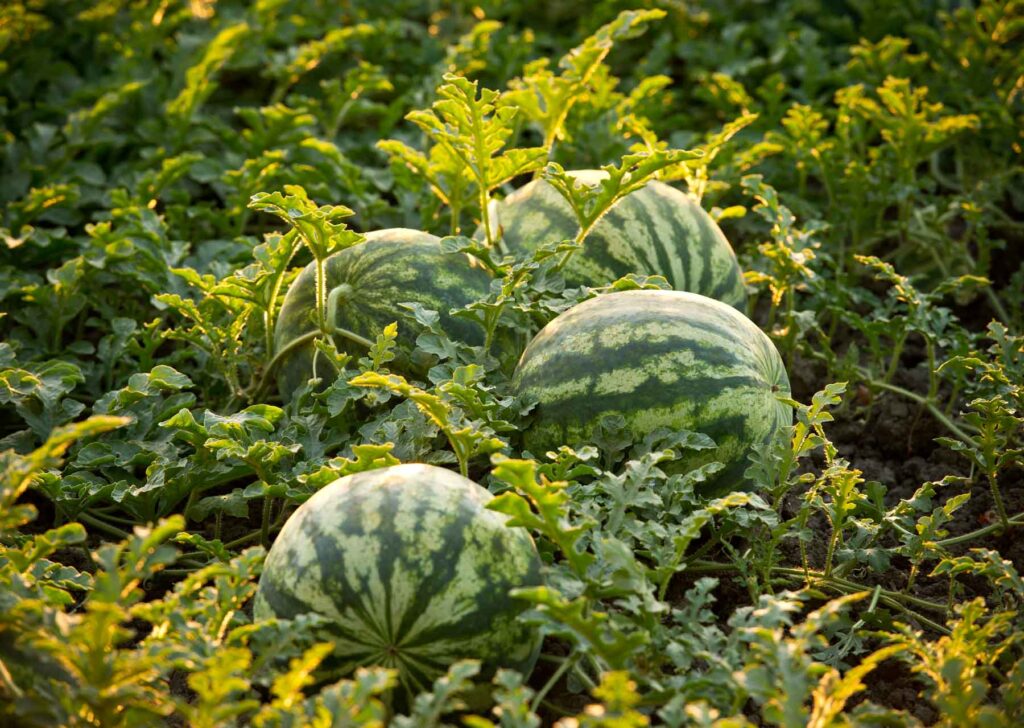
Large containers (15-25+ gallons) are necessary for:
- Indeterminate tomatoes
- Zucchini and summer squash
- Potatoes and sweet potatoes
- Dwarf fruit trees and berry bushes
When in doubt, always err on the side of larger containers. Bigger containers provide more stable moisture levels, better temperature regulation for roots, and more nutrients for plant uptake. A tomato plant in a 20-gallon container will consistently outperform the same variety planted in a 5-gallon bucket.
Material Considerations
Container material affects everything from water retention to root temperature, so choosing wisely matters significantly. Plastic containers are lightweight, affordable, and retain moisture well, making them excellent for hot climates where frequent watering becomes challenging. However, dark-colored plastic can absorb heat and potentially damage roots during intense summer weather.
Terra cotta and ceramic pots offer excellent aesthetics and allow roots to breathe through their porous walls. However, they dry out faster than plastic and can crack during freeze-thaw cycles, making them less suitable for year-round outdoor use in cold climates. Fabric grow bags have gained tremendous popularity due to their air-pruning capabilities, which promote healthier root development and prevent root circling. They’re also lightweight, collapsible for storage, and provide excellent drainage.
Secret #2 – Master the Art of Proper Drainage
Without adequate drainage, even the healthiest plants will struggle and eventually succumb to root rot, making proper drainage systems absolutely non-negotiable for container gardening success.
Drainage might seem like a simple concept, but it’s one of the most frequently overlooked aspects of container gardening. Water must be able to flow freely through your containers to prevent waterlogging, oxygen deprivation, and the deadly conditions that promote root disease.
Why Drainage Matters
Plant roots require both water and oxygen to function properly. When soil becomes waterlogged, air spaces fill with water, suffocating roots and creating anaerobic conditions where harmful bacteria and fungi thrive. Root rot can develop within days of overwatering in poorly drained containers, and once established, it’s extremely difficult to reverse.
Proper drainage ensures that excess water flows out while maintaining adequate moisture levels for plant uptake. This balance promotes healthy root development, efficient nutrient absorption, and robust plant growth. Without it, you’ll notice yellowing leaves, wilting despite wet soil, and eventually plant death.
How to Create Optimal Drainage
Creating effective drainage requires attention to several key elements working together:
-
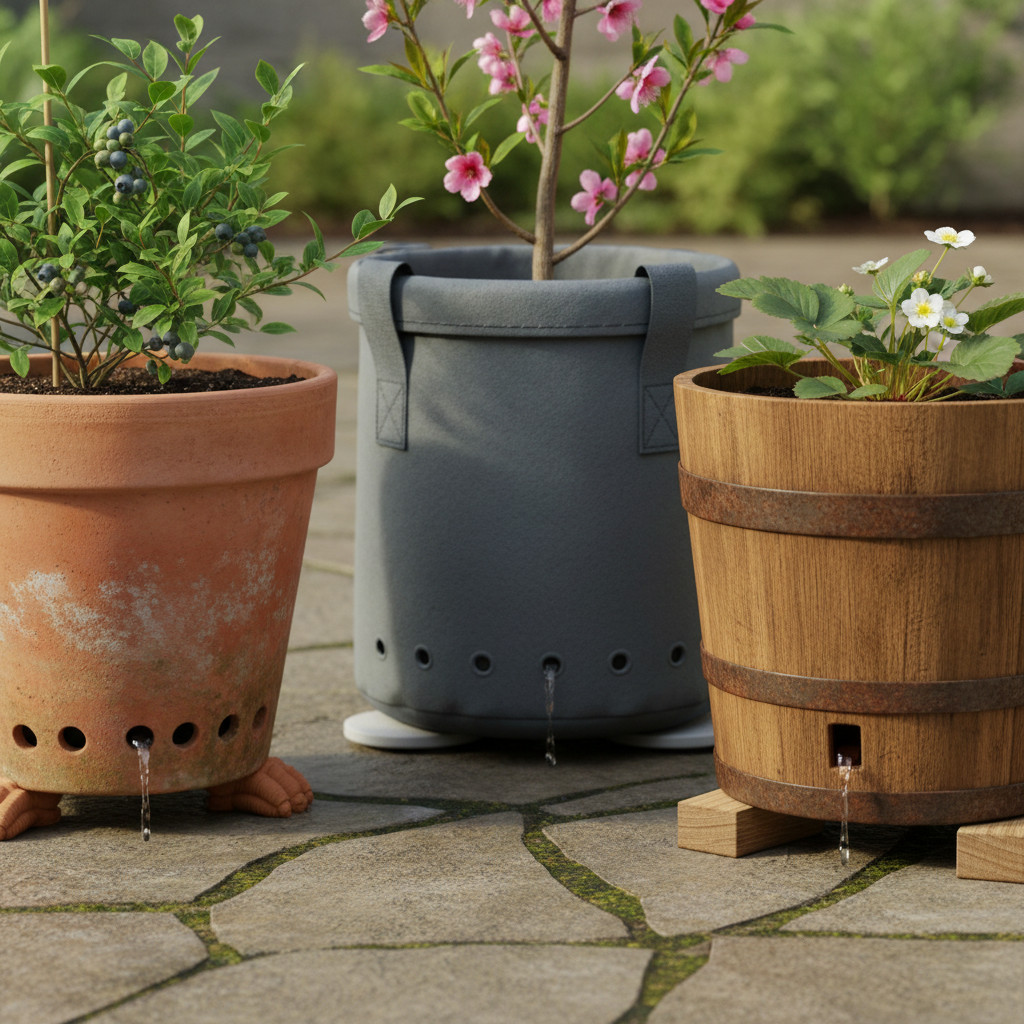
Adequate drainage holes: Every container needs multiple drainage holes in the bottom. For a standard 5-gallon container, aim for at least 4-6 holes that are ½ inch in diameter. Larger containers need proportionally more holes. If your container lacks sufficient drainage, drill additional holes before planting.
-
Elevated positioning: Place containers on pot feet, bricks, or plant stands to ensure water can flow freely from drainage holes. Containers sitting directly on flat surfaces can seal against the ground, preventing proper drainage and leading to waterlogged conditions.
-
Skip the gravel myth: Contrary to popular belief, placing gravel or rocks at the bottom of containers doesn’t improve drainage—it actually creates a perched water table that keeps roots wetter. Instead, fill containers entirely with quality potting mix and ensure adequate drainage holes exist.
-
Consider self-watering systems: For gardeners who struggle with consistent watering, self-watering containers with built-in reservoirs provide steady moisture while preventing overwatering through their wicking systems.
Secret #3 – Use High-Quality Potting Mix, Not Garden Soil
The growing medium you choose makes or breaks your container garden—using the right potting mix creates the foundation for healthy root development, proper drainage, and optimal nutrient availability.
One of the most critical mistakes new container gardeners make is filling their pots with soil dug from their yard. Garden soil, no matter how rich it appears, compacts severely in containers, destroying drainage and air circulation while potentially introducing pests, diseases, and weed seeds to your plants.
Components of Ideal Potting Mix
Quality potting mixes are engineered specifically for container growing conditions and typically contain several key components that work together to support plant health:
Peat moss or coconut coir forms the base of most potting mixes, providing excellent water retention while maintaining a light, fluffy texture that roots can easily penetrate. Coconut coir has gained popularity as a more sustainable alternative to peat moss, offering similar properties with better initial wettability.
Perlite and vermiculite are expanded volcanic minerals that improve drainage and aeration while helping retain some moisture. Perlite, those white “styrofoam-like” particles, is particularly valuable for preventing compaction and ensuring adequate oxygen reaches roots.
Compost or composted bark adds organic matter that slowly releases nutrients and supports beneficial microbial life. High-quality potting mixes often include aged compost that won’t continue breaking down and depleting nitrogen from your plants.
Starter fertilizers in many commercial mixes provide initial nutrition, though you’ll need to supplement with regular feeding as the season progresses since container plants quickly deplete available nutrients.
Creating Your Own Blend
While commercial potting mixes work excellently for most situations, experienced gardeners often create custom blends tailored to specific crops:
A basic DIY potting mix recipe combines:
- 40% peat moss or coconut coir
- 30% high-quality compost
- 30% perlite or vermiculite
- Optional: slow-release organic fertilizer according to package directions
For heavy-feeding vegetables like tomatoes, peppers, and squash, increase the compost percentage and add additional organic fertilizer. For herbs and plants preferring leaner conditions, reduce compost and increase perlite for faster drainage.
Always moisten your potting mix before filling containers—dry peat-based mixes can be difficult to wet initially and may repel water until thoroughly saturated. Mix your medium with water until it feels like a wrung-out sponge before planting.
Secret #4 – Select Compact and Container-Friendly Varieties
Choosing vegetable and fruit varieties specifically bred for container growing dramatically increases your success rate and ensures plants perform their best within space constraints.
Plant breeders have developed numerous compact, dwarf, and bush-type varieties specifically designed for container cultivation. These varieties produce full-sized, flavorful fruits and vegetables on plants that remain manageable in pots, maximizing your harvest potential in limited space.
Best Vegetables for Containers
Tomatoes represent perhaps the most popular container vegetable, and dozens of excellent varieties exist for pot culture. Look for determinate or dwarf indeterminate types like ‘Tumbling Tom,’ ‘Tiny Tim,’ ‘Patio Princess,’ or the award-winning ‘Bushsteak.’ These plants stay compact while producing abundant harvests of delicious tomatoes throughout the season.
Peppers naturally adapt well to container growing, with both sweet and hot varieties thriving in pots. ‘Lunchbox’ peppers, ‘Mini Belle,’ and compact jalapeño varieties excel in 5-gallon containers, producing prolifically from summer through fall.
Lettuce and salad greens are ideal container crops, maturing quickly and requiring minimal root space. Plant successive crops every two weeks for continuous harvests, and consider mixing varieties for colorful, nutritious salad blends.
Bush beans like ‘Mascotte’ and ‘Bush Blue Lake’ produce abundantly without requiring the trellising that pole varieties need, making them perfect for container culture.
Fruit Trees and Berries That Thrive in Pots
Container fruit growing has expanded dramatically with the development of genetic dwarf and patio-sized fruit trees that produce full-sized fruit on compact plants:
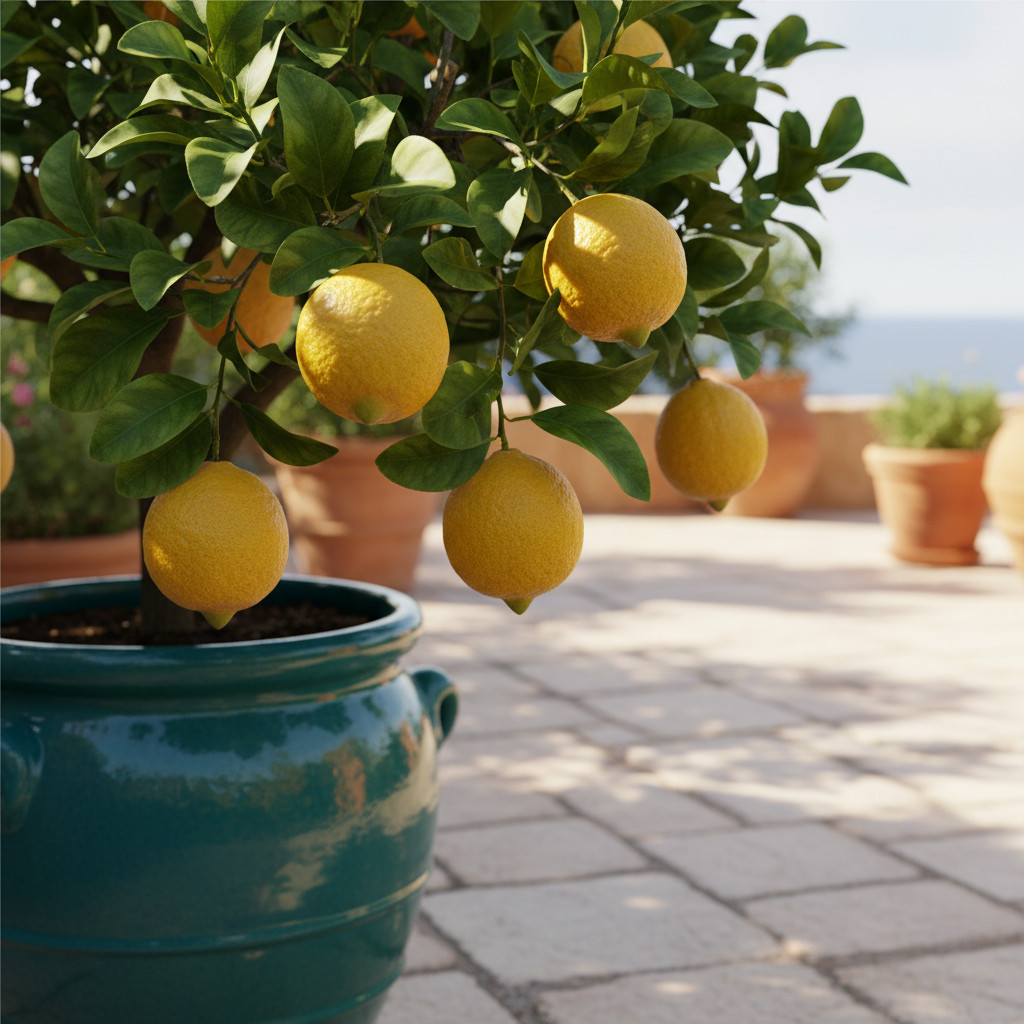
Dwarf citrus trees including Meyer lemons, Calamondin oranges, and Key limes make excellent container specimens for patios and even indoor growing in bright locations. Most stay under 6 feet tall while producing abundant, flavorful fruit.
Strawberries are perhaps the easiest fruit for container culture, thriving in hanging baskets, window boxes, or specialized strawberry towers. Day-neutral varieties like ‘Albion’ and ‘Seascape’ produce fruit continuously from spring through fall.
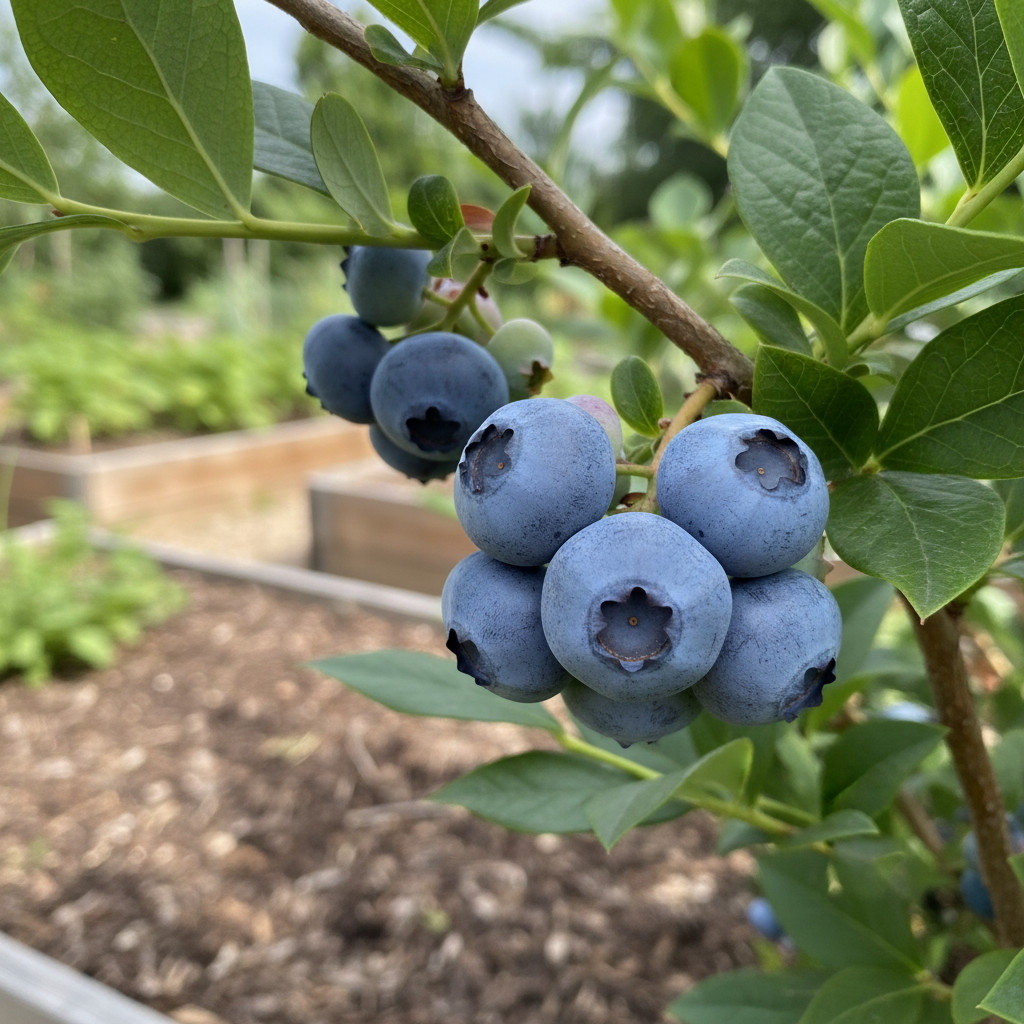
Blueberries perform surprisingly well in containers, with compact varieties like ‘Top Hat’ and ‘Northsky’ producing sweet berries while staying under 2 feet tall. Use acidic potting mix formulated for azaleas to meet their specific pH requirements.
Fig trees adapt remarkably well to container culture, with varieties like ‘Little Ruby’ and ‘Petite Negra’ producing sweet figs while remaining compact enough for balcony growing.
Secret #5 – Position Your Containers for Optimal Sunlight
Proper light exposure is non-negotiable for productive vegetable and fruit growing—understanding your plants’ sunlight requirements and positioning containers accordingly determines harvest success.
Most fruiting vegetables and fruit-bearing plants require significant direct sunlight to produce abundant harvests. Without adequate light, plants become leggy, weak, and produce few if any fruits. Understanding light requirements and optimizing container placement accordingly is essential for productive growing.
Understanding Light Requirements
Different crops have varying light needs, and matching plants to available light conditions prevents frustration and maximizes success:
Full sun crops (6-8+ hours direct sunlight) include:
- Tomatoes, peppers, and eggplant
- Squash, cucumbers, and melons
- All fruit trees and berry bushes
- Beans and corn
Partial sun crops (4-6 hours direct sunlight) include:
- Lettuce, spinach, and salad greens
- Herbs like parsley, cilantro, and chives
- Root vegetables like carrots, beets, and radishes
- Broccoli, cauliflower, and cabbage
Understanding your available light is the first step. Observe your growing space throughout the day, noting when direct sunlight reaches different areas and how long it persists. South-facing locations typically receive the most consistent light in the Northern Hemisphere, while east-facing spots provide gentle morning sun that’s particularly beneficial during hot summers.
Seasonal Adjustments
One major advantage of container gardening is the ability to move plants as light conditions change throughout the season. The sun’s angle shifts dramatically between summer and winter, and shadows from buildings, trees, and structures change accordingly.
During spring and early summer, position containers to capture maximum morning and midday sun while protecting plants from intense late afternoon heat in hot climates. As trees leaf out, previously sunny spots may become shaded, requiring repositioning.
In mid-summer, some shade during the hottest afternoon hours can actually benefit plants by reducing heat stress and water loss. Consider moving heat-sensitive crops like lettuce to locations receiving morning sun but afternoon shade to extend their production.
Autumn adjustments often involve moving containers to capture increasingly scarce direct sunlight as the sun’s angle lowers. This helps extend the growing season for warm-season crops and ensures cool-season vegetables receive adequate light for continued growth.
Secret #6 – Establish a Consistent Watering Routine
Container plants depend entirely on you for moisture, making consistent, appropriate watering one of the most important skills to develop for successful container vegetable and fruit gardening.
Unlike in-ground plants that can send roots deep into surrounding soil seeking moisture, container plants are completely dependent on the water you provide. The limited soil volume in containers dries out much faster than garden beds, especially during hot, windy weather or when plants reach full size.
Signs of Overwatering vs. Underwatering
Learning to read your plants’ signals helps you adjust watering practices before serious damage occurs:
Signs of underwatering include:
- Wilting leaves that perk up after watering
- Dry, cracked soil pulling away from container edges
- Slow growth and premature flowering
- Crispy, brown leaf edges
- Fruit that cracks or has blossom end rot
Signs of overwatering include:
- Yellowing leaves, especially lower leaves
- Wilting despite moist soil (root rot)
- Fungus gnats or mold on soil surface
- Mushy, dark roots when checked
- General plant decline without obvious cause
The most reliable method for determining water needs is the finger test—insert your finger 2-3 inches into the soil. If it feels dry at that depth, water thoroughly. If still moist, wait and check again the next day.
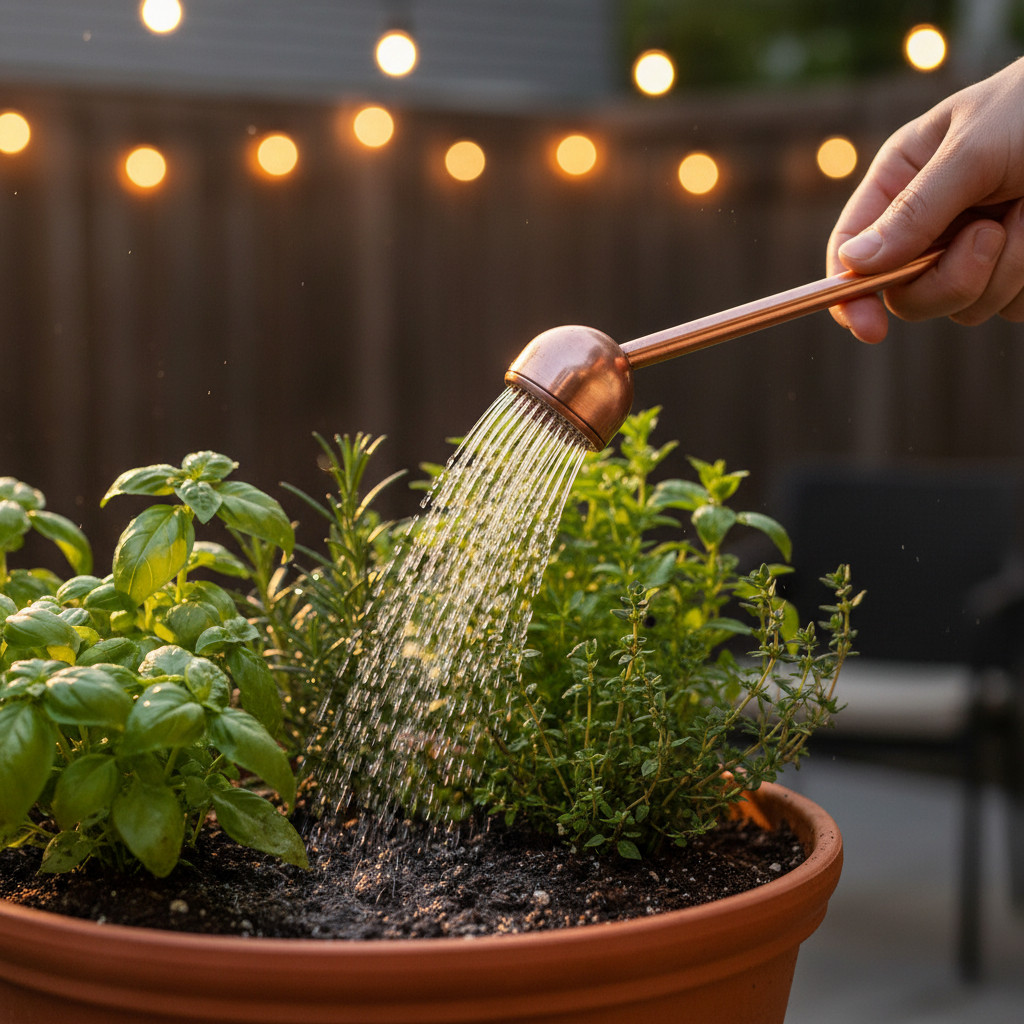
Watering Techniques and Tools
Proper watering technique matters as much as frequency. When you water, water deeply until liquid flows freely from drainage holes. This ensures the entire root zone receives moisture and encourages roots to grow downward rather than concentrating near the surface.
Morning watering is generally preferable, giving plants ample moisture throughout the day while allowing foliage to dry before evening, reducing disease risk. Avoid wetting leaves when possible, especially for disease-prone crops like tomatoes.
Consider investing in helpful watering tools:
- Watering wands with soft-spray heads allow gentle, targeted watering without disturbing soil
- Drip irrigation systems provide consistent, automated watering ideal for busy gardeners
- Self-watering containers maintain steady moisture levels through reservoir systems
- Moisture meters remove guesswork from watering decisions
Secret #7 – Feed Your Plants with the Right Nutrients
Container plants are entirely dependent on supplemental feeding because frequent watering rapidly depletes nutrients from the limited soil volume, making proper fertilization essential for productive harvests.
The same qualities that make container potting mixes excellent for drainage and root growth—their light, porous nature—also mean they don’t hold nutrients the way garden soil does. Regular feeding throughout the growing season keeps plants healthy and productive.
Types of Fertilizers for Container Plants
Understanding fertilizer options helps you choose the right approach for your gardening style:
Liquid fertilizers provide immediately available nutrients and allow precise control over feeding schedules. Products like fish emulsion, liquid seaweed, and water-soluble synthetic fertilizers work quickly but require regular application—typically every 1-2 weeks during active growth.
Slow-release granular fertilizers break down gradually over weeks or months, providing steady nutrition with less frequent application. These are excellent for busy gardeners and help prevent the feast-or-famine nutrient cycles that stress plants.
Organic options including compost tea, worm castings, and organic fertilizer blends feed plants while supporting beneficial soil microbes. While they typically work more slowly than synthetic options, they promote long-term soil health and produce exceptional-tasting harvests.
Feeding Schedule
Different crops have different nutritional needs throughout their growth cycles:
Heavy feeders like tomatoes, peppers, squash, and corn require consistent, abundant nutrition. Begin feeding 2-3 weeks after transplanting and continue regularly throughout the season. Fruiting plants particularly benefit from fertilizers higher in phosphorus and potassium once flowering begins.
Moderate feeders including lettuce, beans, and most root vegetables need regular but less intensive feeding. A balanced fertilizer applied every 2-3 weeks typically provides adequate nutrition.
Light feeders like herbs and some legumes may actually perform better with minimal fertilization—excessive nitrogen produces lush foliage at the expense of flavor concentration and fruit production.
Watch for nutrient deficiency signs:
- Yellow leaves with green veins often indicate iron or magnesium deficiency
- Purple-tinged foliage suggests phosphorus shortage
- Brown leaf edges may signal potassium deficiency
- Pale, stunted growth typically indicates nitrogen shortage
Secret #8 – Embrace Vertical Growing and Space Optimization
Maximizing your container garden’s productivity often means growing up rather than out, using vertical space through trellising and strategic plant support to dramatically increase yields in limited areas.
Vertical growing techniques allow you to cultivate vining crops that would otherwise spread across the ground, while simultaneously improving air circulation, reducing disease pressure, and making harvesting easier.
Trellising and Support Systems
Different crops require different support approaches:
Tomatoes benefit enormously from sturdy support systems. Indeterminate varieties can grow 8 feet tall or more and require robust staking or caging. Tomato cages, stake-and-tie systems, or the Florida weave method all work effectively. Install supports at planting time to avoid disturbing roots later.
Climbing vegetables like pole beans, peas, and cucumbers need something to climb. Simple solutions include bamboo tripods inserted into containers, vertical string trellises attached to walls or fences, or decorative obelisks that add visual interest while supporting productive vines.
Vining fruits including small melons and compact squash varieties can be trained vertically using sturdy trellises and slings made from old t-shirts or mesh bags to support developing fruit. Growing these crops vertically improves air circulation and keeps fruit clean and easier to monitor.
Companion Planting in Containers
Strategic plant combinations maximize space while providing mutual benefits:
Vertical-and-ground combinations pair tall, trellised crops with low-growing companions. Classic combinations include:
- Pole beans or peas with lettuce at the base
- Tomatoes underplanted with basil and low-growing flowers
- Cucumbers on a trellis with radishes and green onions below
Succession planting ensures continuous harvests by planting quick-maturing crops like radishes and lettuce among longer-season vegetables, harvesting the fast crops before the main plants need the space.
Consider beneficial relationships—basil grown near tomatoes is thought to improve flavor and may help repel certain pests. Marigolds throughout your container garden can deter aphids and other common pests while adding cheerful color.
Secret #9 – Protect Your Container Garden from Pests and Diseases
Even container gardens face pest and disease challenges, but the controlled environment of container growing provides unique advantages for prevention and management when problems arise.
The good news is that container gardens typically experience fewer pest and disease problems than in-ground gardens. The isolation from ground-borne pathogens, ability to use clean potting mix, and ease of inspection make container gardening inherently lower-risk.
Common Container Garden Pests
Despite the advantages, several pests commonly affect container vegetables and fruits:
Aphids are small, soft-bodied insects that cluster on new growth, sucking plant sap and potentially spreading diseases. They reproduce rapidly and can overwhelm plants if not controlled early. Check undersides of leaves regularly, especially on tomatoes, peppers, and brassicas.
Spider mites thrive in hot, dry conditions and appear as tiny dots moving on leaf undersides. Heavy infestations cause stippled, bronzed leaves and can seriously damage plants. Regular misting and adequate humidity help prevent outbreaks.
Whiteflies are small, white-winged insects that flutter up when disturbed. Like aphids, they feed on plant sap and can transmit viral diseases. Yellow sticky traps help monitor and reduce populations.
Caterpillars, including tomato hornworms and cabbage worms, can devastate plants quickly. Regular inspection and hand-picking provide effective organic control.
Organic Prevention Methods
Prevention remains the best pest management strategy:
-
Start with healthy plants and inspect all new additions carefully before introducing them to your garden. Quarantine new plants for a few days if possible to ensure they’re pest-free.
-
Practice good sanitation by removing dead leaves, fallen fruit, and debris that can harbor pests and diseases. Clean containers thoroughly between seasons.
-
Encourage beneficial insects like ladybugs, lacewings, and parasitic wasps by planting small-flowered herbs and avoiding broad-spectrum insecticides that kill helpers along with pests.
-
Use organic controls when needed, including insecticidal soap, neem oil, and Bacillus thuringiensis (Bt) for caterpillars. These target specific pests while minimizing harm to beneficial organisms.
-
Rotate crops between containers each season to prevent buildup of crop-specific pathogens in the soil.
Secret #10 – Know When and How to Harvest for Best Results
Harvesting at the right time and using proper techniques maximizes flavor, extends production, and ensures you enjoy the full rewards of your container gardening efforts.
Proper harvesting is the culmination of all your gardening work, yet many gardeners don’t realize that harvest timing and technique significantly impact both produce quality and continued plant productivity.
Harvesting Guidelines for Common Container Crops
Different vegetables and fruits have different indicators of peak ripeness:
Tomatoes reach peak flavor when fully colored and slightly soft to gentle pressure. However, they can be harvested at the first blush of color and ripened indoors if pest or weather issues threaten. Regular harvesting encourages continued production throughout the season.
Peppers can be harvested at any size once they reach usable dimensions. Green peppers are simply unripe versions of colored varieties—allowing peppers to fully color increases sweetness and vitamin content but reduces total yield since plants put energy into ripening rather than producing new fruit.
Leafy greens should be harvested using the cut-and-come-again method—remove outer leaves while leaving the center growing point intact for continued production. Morning harvest provides the crispest, most hydrated leaves.
Beans and peas require frequent harvesting—every 2-3 days during peak production—to keep plants productive. Allowing pods to mature and dry signals plants to stop flowering.
Strawberries should be picked when fully colored, including the area around the stem. Harvest in the morning after dew has dried, and eat or refrigerate immediately for best quality.
Extending Your Growing Season
Container gardening offers unique opportunities to extend productive harvests beyond normal season limits:
Spring extension: Start seeds indoors earlier and move containers outdoors on warm days while bringing them in during cold nights. Wall-o-water protectors and other season extension tools work well with containers.
Fall extension: As temperatures drop, move containers to protected locations near buildings that radiate warmth. Cover plants with floating row cover during frost warnings. Many cool-season crops actually improve in flavor after light frosts.
Indoor overwintering: Herbs, dwarf citrus, and other container plants can move indoors to sunny windows for continued production through winter months.
Essential Tools and Supplies for Container Gardening Success
Having the right tools on hand makes container gardening more efficient and enjoyable while helping you provide optimal care for your plants.
You don’t need an extensive collection of expensive tools to succeed with container gardening, but certain items make the work easier and more effective:
Must-have tools include:
- Quality hand trowel for planting and soil work
- Watering can or hose with adjustable spray nozzle
- Pruning shears for harvesting and plant maintenance
- Moisture meter or reliable sense of soil moisture
- Plant labels and permanent marker for identification
Helpful additions include:
- Wheeled plant dollies for moving heavy containers
- Drip irrigation timer for automated watering
- Spray bottle for foliar feeding and pest treatment
- pH test kit for monitoring soil acidity
- Grow lights for starting seeds or supplementing indoor growing
Common Mistakes to Avoid in Container Vegetable and Fruit Gardening
Learning from others’ mistakes accelerates your journey to container gardening success and helps you avoid frustrating setbacks.
Even experienced gardeners occasionally make mistakes, but awareness helps you sidestep common pitfalls:
-
Underestimating water needs: Container plants need more frequent watering than in-ground gardens, especially during hot weather when daily or twice-daily watering may be necessary.
-
Choosing containers without drainage: Never use containers without drainage holes, regardless of how attractive they are. Drill holes if necessary.
-
Planting too densely: Resist the temptation to crowd multiple plants into containers. Overcrowding leads to competition for resources and reduced yields for all plants.
-
Neglecting fertilization: Container plants depend entirely on you for nutrition. Establish and follow a regular feeding schedule.
-
Ignoring light requirements: Placing sun-loving vegetables in shady locations guarantees disappointment. Honestly assess your available light before selecting crops.
Final Thoughts: Your Container Garden Awaits
Container gardening vegetables and fruit represents one of the most accessible, rewarding, and flexible approaches to growing your own food. Whether you have a sunny balcony, small patio, or simply want more control over your growing conditions, the ten secrets outlined in this guide provide everything you need to succeed.
Start by selecting appropriately sized containers with excellent drainage, filling them with quality potting mix rather than garden soil. Choose compact, container-friendly varieties suited to your available light, and establish consistent watering and feeding routines that keep plants healthy and productive. Embrace vertical growing to maximize space, stay vigilant against pests and diseases, and harvest regularly to enjoy the freshest possible produce while encouraging continued production.
Remember that every gardener’s journey includes some failures along with successes—this is part of learning. Each season brings new opportunities to refine your techniques and expand your container garden ambitions. The fresh, flavorful vegetables and fruits you’ll harvest make every effort worthwhile, and the satisfaction of growing your own food is immeasurable.
Your container gardening adventure begins with a single pot and a single plant. Start today, apply these secrets consistently, and prepare to enjoy bountiful harvests of homegrown vegetables and fruit from even the smallest spaces. Happy growing!

![How Long Does An Apple Tree Take To Bear Fruit? [ANSWERED]](https://fruitonix.com/wp-content/uploads/2023/06/Screenshot-2023-06-02-12.52.12-AM.png)