Table of Contents
- Easiest One Bowl Chocolate Cake For Beginners
- Why One-Bowl Chocolate Cakes Actually Work
- What Makes This Recipe Perfect For Beginners
- Essential Ingredients You’ll Need
- Equipment Required
- Understanding The Science Behind The Cake
- Step-By-Step Instructions
- Common Beginner Mistakes & How To Avoid Them
- Troubleshooting Tips For Perfect Results
- Delicious Variations To Try
- Frosting Options That Work Best
- Storing Your Cake Properly
- Serving Suggestions & Pairing Ideas
- Final Thoughts
Easiest One Bowl Chocolate Cake For Beginners
When you’re staring at a blank recipe card and wondering if you can actually pull off baking a chocolate cake from scratch, this is the one you need. I’m talking about a genuine, from-scratch chocolate cake that comes together in a single mixing bowl, requires zero fancy equipment, and produces results that taste like you’ve been baking for years. The best part? You genuinely cannot mess this up.
I’ve watched nervous first-time bakers make this cake in my kitchen while we chat over coffee—no stand mixer, no sifter, no special techniques. They whisk everything by hand, pop it in the oven, and thirty minutes later, they’re pulling out a moist, fudgy, deeply chocolatey cake that gets actual gasps of surprise when people taste it. That’s when they realize baking isn’t some mysterious skill reserved for professionals. It’s just following straightforward steps with ingredients that probably already sit in your pantry.
This recipe has become the one I reach for when I’ve forgotten to plan ahead, when someone unexpected stops by and deserves cake, when I need to prove to myself that I can still do this without overthinking it. It’s reliable, forgiving, and somehow always delivers a cake that tastes far better than it should, given how little effort went into making it. Let me walk you through exactly why this works, what makes it so beginner-friendly, and how to nail it on your first try.
Why One-Bowl Chocolate Cakes Actually Work
The beauty of a one-bowl cake lies in how it breaks the rules of traditional baking. Classic layer cakes demand creaming cold butter with sugar, folding in ingredients carefully, and respecting a strict mixing order. Those rules exist for good reasons when you’re building structure and creating specific textures. But one-bowl cakes operate on completely different chemistry.
Instead of relying on the air pockets you trap by creaming butter and sugar, these cakes use liquid—specifically hot water or hot coffee—as the leavening agent. When that hot liquid hits the batter, it activates the baking soda instantly, creating lift and texture throughout the entire mixture. This means you don’t need to fuss with precise mixing techniques or worry about deflating delicate air bubbles.
The oil in the batter (rather than solid butter) also changes the game. Oil stays fluid, which means the cake stays moist for days without drying out. Solid fats like butter get absorbed differently during baking, but oil coats the flour particles and slows moisture evaporation. This is why one-bowl cakes have that signature fudgy, almost brownie-like texture that feels indulgent.
The cocoa powder itself contributes both flavor and structure. When you whisk cocoa powder with hot water or coffee, the liquid blooms the cocoa—essentially waking up its full depth of flavor. You’re not just adding a dry ingredient and hoping it distributes evenly. You’re actively creating a chocolate-rich liquid that infuses the entire batter.
What Makes This Recipe Perfect For Beginners
Beginners worry about mixing overmuch and toughening the cake, about measuring ingredients incorrectly, about timing in the oven, about whether the cake is actually done. This recipe eliminates almost every one of those concerns through its elegant simplicity.
First, overmixing is nearly impossible to achieve. You’re just whisking dry ingredients together, then adding wet ingredients and stirring until combined. There’s no creaming butter, no careful folding, no precise beating on specific speed settings. A hand whisk works just fine, meaning you need zero electrical equipment. Mix by hand for two minutes if you want, and the cake will still turn out perfectly.
Second, the ingredient list reads like a pantry inventory rather than a chef’s shopping list. You need all-purpose flour (not special cake flour), white sugar, unsweetened cocoa powder, baking powder, baking soda, salt, eggs, milk, oil, and vanilla. If you bake even occasionally, you already own these things. There are no finicky components like buttermilk that some home cooks don’t keep on hand, no unusual substitutions needed.
Third, the batter itself gives you confidence. When you add the hot water to the dry mixture, the batter will look thin and runny. This surprises most beginners, and they worry they’ve made a terrible mistake. Every single one of those worried bakers has pulled a perfect cake out of the oven thirty minutes later. That thin batter is supposed to be that way. It’s not a sign something went wrong—it’s proof the recipe is working exactly as designed.
Essential Ingredients You’ll Need
Understanding each ingredient’s role builds confidence in why the recipe works the way it does.
All-purpose flour provides structure and binds all the ingredients together. You don’t need cake flour, which has less protein and creates a different crumb structure. All-purpose flour gives you a slightly denser, more forgiving crumb that beginners actually prefer—it’s less delicate and less likely to crumble apart when you cut into it. The key to measuring flour correctly is spooning it into your measuring cup and leveling it with a knife, rather than scooping the cup directly into the bag. Scooping compacts the flour and gives you too much, which is the single most common reason beginner cakes turn out dry.
Granulated white sugar sweetens the cake while also drawing moisture into the crumb structure, keeping it tender and moist throughout storage. The sugar doesn’t just taste good—it’s a crucial structural ingredient. Don’t reduce the sugar amount, even if you want a less-sweet cake. The water-binding properties of that sugar are what prevent the cake from drying out.
Unsweetened cocoa powder is where all the chocolate flavor lives. Buy the best quality you can afford and store it in an airtight container in a cool, dark place. The difference between grocery store cocoa powder and a slightly nicer brand is genuinely noticeable in the final cake. Dutch-process cocoa powder (darker and more sophisticated) works beautifully here, as does natural cocoa powder (slightly more acidic).
Baking powder and baking soda are your leavening agents. Baking powder works independently, while baking soda needs acid (from the cocoa and the hot water) to activate. Together, they create the rise and crumb structure. Don’t skip either one, and don’t substitute one for the other—they’re not interchangeable.
Salt heightens chocolate flavor by balancing sweetness. It seems counterintuitive, but salt makes the chocolate taste more chocolatey, not salty. Use kosher salt if you have it (it’s less dense than table salt), but regular table salt works fine too.
Eggs bind all the wet and dry ingredients together while adding structure. Room-temperature eggs combine more smoothly with the other ingredients than cold eggs straight from the refrigerator. If you forget to take them out ahead of time, place them in a bowl of warm (not hot) water for five minutes.
Oil creates moisture and tenderness. Vegetable oil, canola oil, or light olive oil all work identically here. The flavor is neutral, which means it doesn’t interfere with the chocolate. Don’t use strongly flavored oils like toasted sesame or extra-virgin olive oil—they’ll compete with the chocolate flavor.
Milk adds richness and helps dissolve the cocoa. Whole milk creates a slightly richer cake than skim milk, though either works. If you only have buttermilk on hand, it works beautifully too and adds a subtle tang that enhances chocolate flavor.
Vanilla extract should be pure vanilla, not imitation. This is one place where the quality difference is genuinely noticeable, and it costs only slightly more. Vanilla deepens and rounds out the chocolate flavor in ways that seem almost magical.
Boiling water is the secret weapon. Hot liquid blooms the cocoa and activates the leavening agents instantly, which means the cake begins rising before it even hits the oven. The heat also accelerates the cooking process, which is why this cake bakes so quickly. Some recipes use hot coffee instead, which intensifies the chocolate flavor without making the cake taste like coffee.
Equipment Required
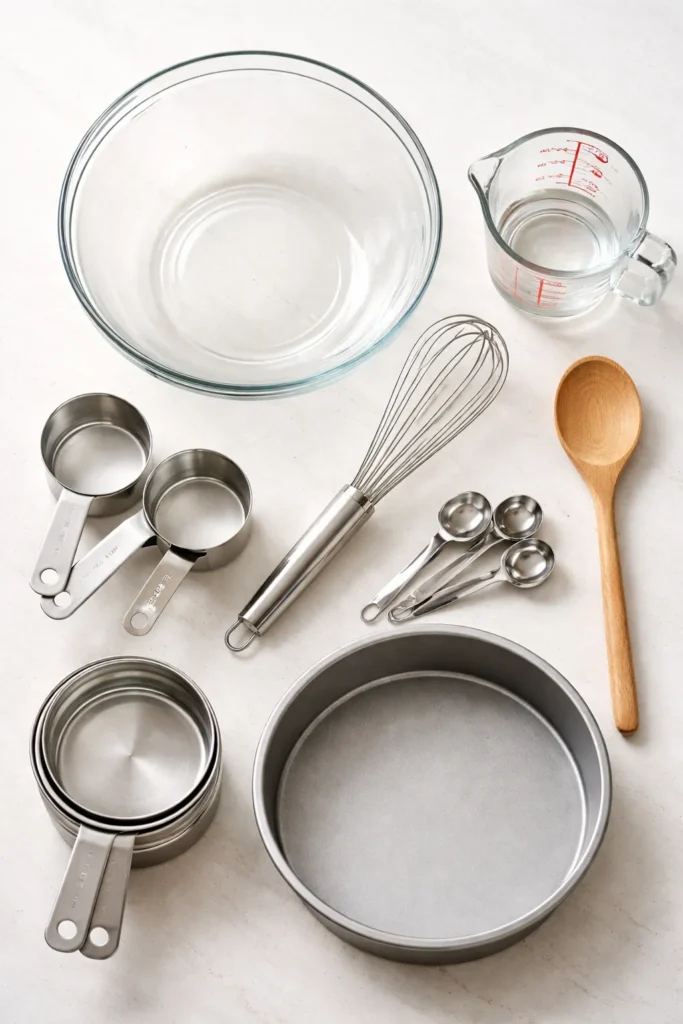
The minimalist equipment list is part of what makes this recipe genuinely beginner-friendly. You need one large mixing bowl, one whisk, a measuring cup for liquids, measuring spoons, dry ingredient measuring cups, a wooden spoon or spatula, and a 9-inch round cake pan (or an 8-inch square or 9×13-inch rectangular pan—all work perfectly).
A hand mixer is optional but genuinely helpful. It’s not required, but if you own one, using it for two minutes to whisk the wet ingredients into the dry mixture cuts the physical effort by half. You’ll still get the same perfect result. If you don’t own a hand mixer, a balloon whisk and some elbow grease work just as well.
A toothpick or wooden skewer is your doneness tester. Insert it into the very center of the cake during the final minutes of baking. If it comes out clean or with just a few fudgy crumbs clinging to it, the cake is done. If wet batter coats the entire pick, the cake needs more time.
Parchment paper makes removing the cake from the pan effortless, but it’s not essential. Thoroughly greasing and flouring the pan works fine. Some bakers prefer spraying with nonstick baking spray, which coats more evenly than buttering by hand.
Understanding The Science Behind The Cake
The hot water is doing something almost magical. When hot liquid hits the cocoa powder and flour, several things happen simultaneously. The cocoa blooms, releasing its full flavor potential. The starch in the flour begins to gelatinize. The baking soda activates instantly. This is why the batter is intentionally thin—all that liquid is necessary for the chemical reactions that create the final texture.
As the cake bakes, the batter transforms from a thin, runny mixture into a tender crumb. The flour sets, the sugar caramelizes slightly, proteins from the egg cook and bind everything together. The oil keeps everything moist because it doesn’t get absorbed the way butter does. What emerges from the oven is denser than a traditional butter cake but more tender than a brownie—it’s the ideal middle ground for people who find regular layer cakes too delicate and fragile.
The baking process is where the real magic happens. Thirty minutes in a 350°F oven is remarkably fast for a cake, and that speed is intentional. The hot liquid preheats the interior, so the edges don’t overcook while you’re waiting for the center to bake through. There’s a tight window—pull it out even five minutes too early and the center stays gooey; leave it five minutes too long and the edges start drying out. This is why checking with a toothpick is essential, even if you’ve made this cake before. Different ovens vary, and every pan conducts heat slightly differently.
Step-By-Step Instructions
Prepare Your Pan and Preheat:
-
Preheat your oven to 350°F (175°C) and position the rack in the lower-middle position of the oven—this ensures even baking from both top and bottom.
-
Grease a 9-inch round cake pan (or your chosen pan size) with a light coating of softened butter, then dust it lightly with flour, tapping out any excess. Alternatively, spray with nonstick baking spray or line the bottom with a round of parchment paper. Do not skip this step—nothing is worse than a cake that sticks to the pan. Set the prepared pan aside.
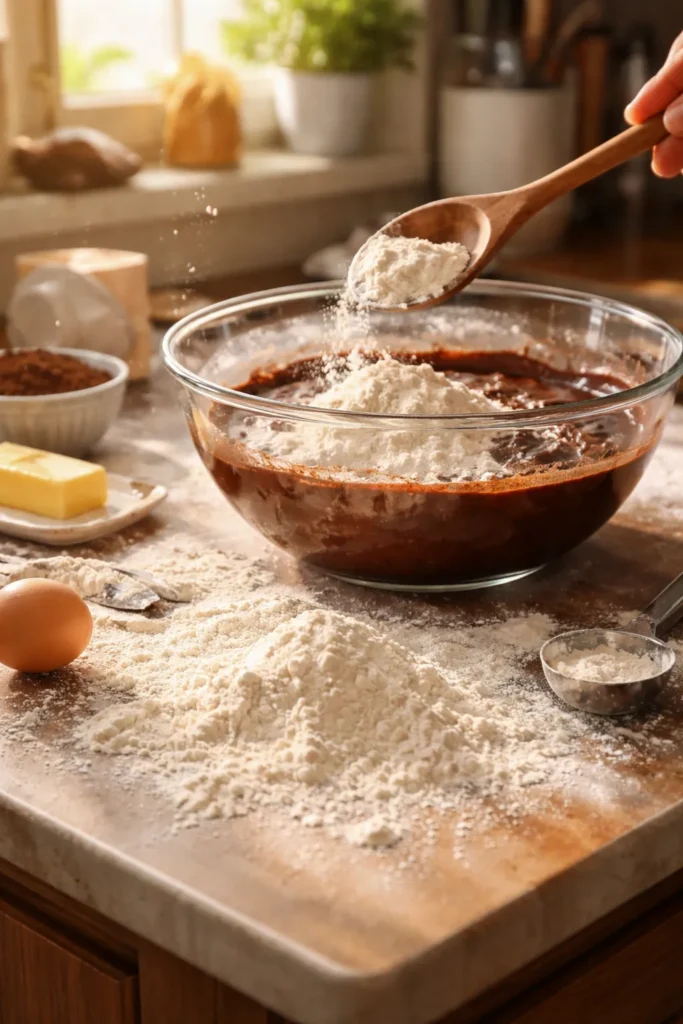
Mix Your Dry Ingredients:
- In a large mixing bowl, whisk together the flour, sugar, cocoa powder, baking powder, baking soda, and salt until everything is evenly distributed. You should see no lumps of cocoa powder and no streaks of dry ingredients. This usually takes about one minute of whisking. Set the bowl aside.
Combine Your Wet Ingredients:
- In a separate bowl or measuring cup, whisk together the eggs, milk, oil, and vanilla extract until fully combined and smooth. Room-temperature eggs combine more easily, but cold eggs work fine too—just whisk a bit longer. The mixture should look homogeneous and light.
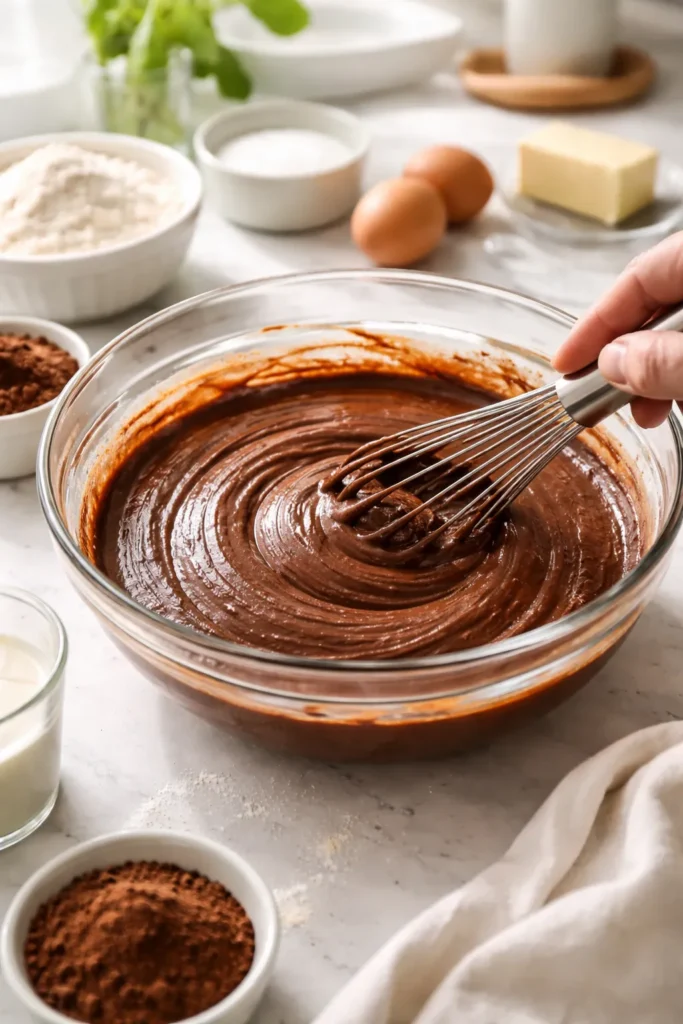
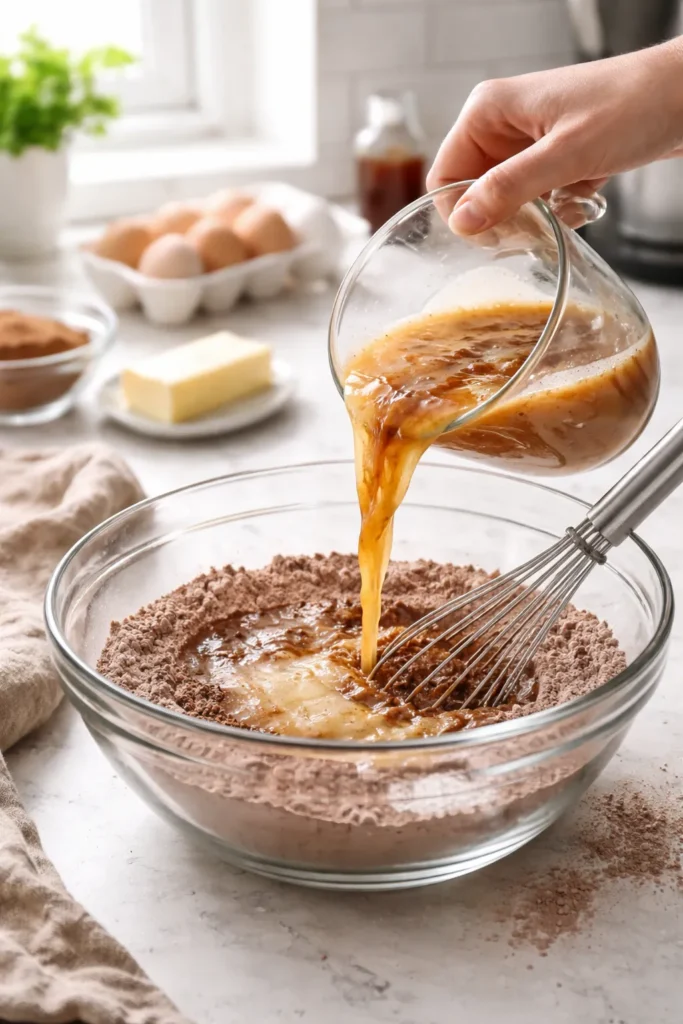
Bring It All Together:
- Pour the wet ingredient mixture into the bowl with the dry ingredients and stir gently with a whisk or a wooden spoon until just combined. Stir slowly and deliberately—you’re not trying to beat air into the batter, just incorporate the wet into the dry until no dry flour streaks remain. This usually takes about thirty seconds to one minute of stirring. The batter will be thick and somewhat pasty at this point.
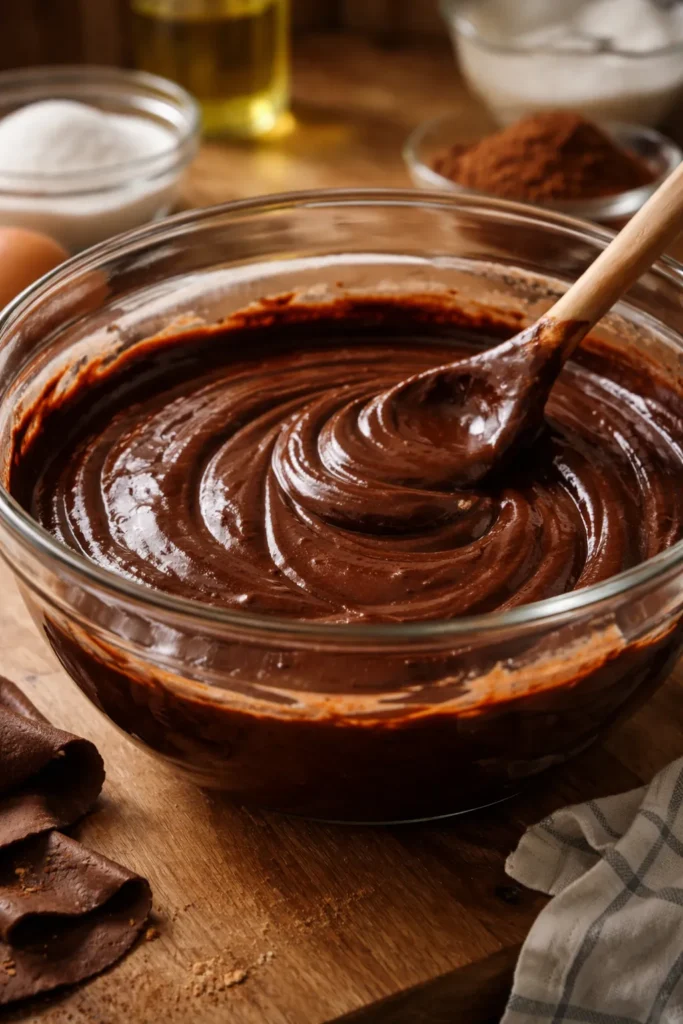
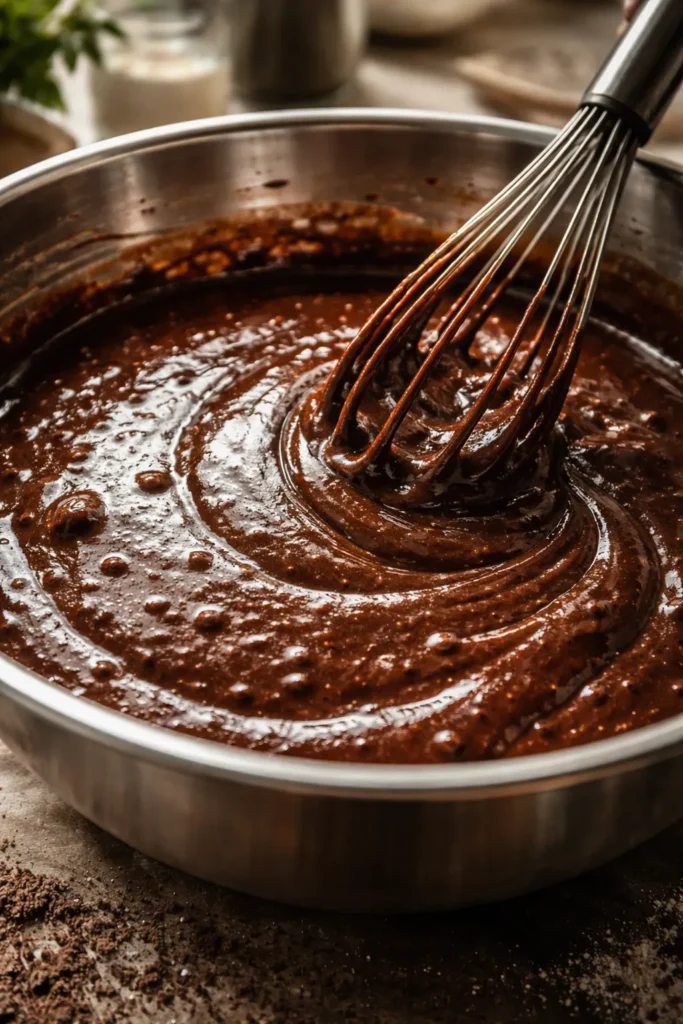
Add the Hot Water:
- Slowly pour the boiling water into the batter while whisking constantly. Do not dump it all in at once. Add it gradually in two or three additions, whisking well after each addition to minimize lumps from forming. The batter will transform from thick to thin and runny—this is exactly right. Keep whisking until everything is smooth and evenly combined. The batter should now look like a thin chocolate soup. This step takes about one minute.
Bake:
-
Pour the batter into your prepared pan and spread it into an even layer with a spatula or the back of a spoon. Tap the pan gently against the counter two or three times to release any large air bubbles. Place the pan in the preheated oven on the lower-middle rack.
-
Bake for 30 to 35 minutes, until a toothpick inserted into the very center comes out clean or with just a few fudgy crumbs clinging to it. Do not pull it out the moment a toothpick comes clean—you want just a tiny bit of fudge left, which keeps the cake incredibly moist. If it feels gooey, bake for another two to three minutes and test again.
-
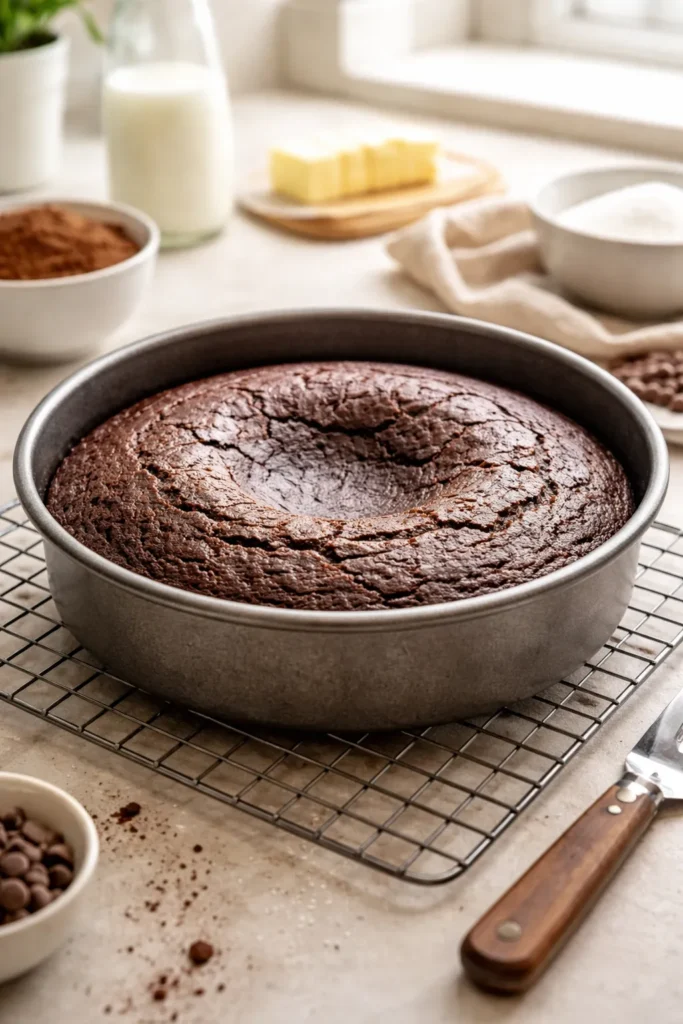
Remove the cake from the oven and set the pan on a wire cooling rack. Allow it to cool in the pan for ten minutes—this resting time helps the crumb set and makes it less fragile.
Cool and Remove from Pan:
- After ten minutes, run a thin knife around the edges of the cake to loosen it from the sides of the pan. Place a wire cooling rack on top of the pan and carefully invert it so the cake slides onto the rack. If it doesn’t release easily, gently tap the pan and try again. Never force the cake—patience here prevents damage. Allow the cake to cool completely on the rack before frosting or serving. Complete cooling takes about one to two hours, depending on room temperature.
Yield: 8 to 10 servings (one 9-inch round cake)
Prep Time: 15 minutes (hands-on active preparation)
Cook Time: 30 to 35 minutes (baking only)
Total Time: 45 to 50 minutes active, plus 1 to 2 hours cooling
Difficulty: Beginner — This recipe requires no special equipment, uses only basic pantry ingredients, and the steps are straightforward enough that even someone baking for the first time will succeed.
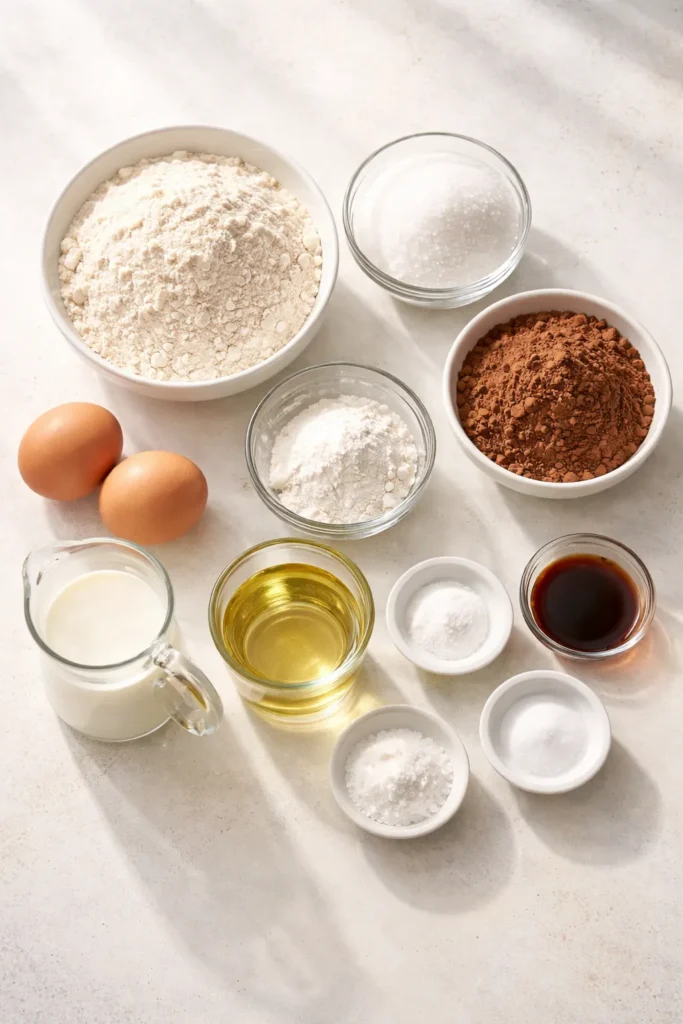
For the Cake:
- 1¾ cups all-purpose flour (measured by spooning and leveling)
- 1¾ cups granulated white sugar
- ¾ cup unsweetened cocoa powder (natural or Dutch-process)
- 1½ teaspoons baking powder
- 1½ teaspoons baking soda
- ½ teaspoon kosher salt (use ¼ teaspoon if using table salt)
- 2 large eggs, ideally at room temperature
- 1 cup whole milk (or buttermilk, or even almond milk if needed)
- ½ cup vegetable oil, canola oil, or light olive oil
- 2 teaspoons pure vanilla extract
- 1 cup boiling water (or hot brewed coffee to intensify chocolate flavor)
Optional for Serving:
- Your favorite chocolate frosting or buttercream
- Powdered sugar for dusting
- Fresh whipped cream
- Chocolate shavings
Prepare Your Pan and Preheat:
-
Preheat your oven to 350°F (175°C) and position the rack in the lower-middle position of the oven—this ensures even baking from both top and bottom.
-
Grease a 9-inch round cake pan with a light coating of softened butter, then dust it lightly with flour, tapping out any excess. Alternatively, spray with nonstick baking spray or line the bottom with parchment paper. Set aside.
Mix Your Dry Ingredients:
- In a large mixing bowl, whisk together the flour, sugar, cocoa powder, baking powder, baking soda, and salt until everything is evenly distributed and you see no lumps of cocoa powder. This takes about one minute of whisking. Set aside.
Combine Your Wet Ingredients:
- In a separate bowl or measuring cup, whisk together the eggs, milk, oil, and vanilla extract until fully combined and smooth. The mixture should look homogeneous and light.
Bring Wet and Dry Together:
- Pour the wet ingredient mixture into the bowl with the dry ingredients and stir gently with a whisk or wooden spoon until just combined. Stir slowly—you’re not beating air in, just incorporating the wet into the dry until no dry flour streaks remain. This takes about thirty seconds to one minute.
Add the Hot Water:
- Slowly pour the boiling water into the batter while whisking constantly. Do not dump it all in at once. Add it gradually in two or three additions, whisking well after each addition to prevent lumps. The batter will transform from thick to thin and runny—this is exactly right and what creates the moist texture. Keep whisking until everything is smooth and evenly combined. This step takes about one minute.
Pour and Bake:
-
Pour the batter into your prepared pan and spread it into an even layer with a spatula. Tap the pan gently against the counter two or three times to release large air bubbles.
-
Bake for 30 to 35 minutes, until a toothpick inserted into the very center comes out clean or with just a few fudgy crumbs clinging to it. Do not overbake—you want the tiniest hint of fudge remaining, which keeps the cake moist.
Cool:
-
Remove the cake from the oven and set the pan on a wire cooling rack. Allow it to cool in the pan for ten minutes.
-
After ten minutes, run a thin knife around the edges of the cake to loosen it from the sides of the pan. Place a wire cooling rack on top of the pan and carefully invert it so the cake slides onto the rack. Allow the cake to cool completely on the rack (about one to two hours) before frosting or serving.
Common Beginner Mistakes & How To Avoid Them
Measuring flour incorrectly is the most common beginner mistake, and it’s easily fixed. If you scoop your measuring cup directly into the flour bag and press down, you’ll compact the flour and end up with about 20% more flour than the recipe calls for. This creates a dry, dense cake that tastes chalky. Instead, use a spoon to fluff the flour in the bag, scoop it into your measuring cup, and level the top with a knife. Even better, if you have a kitchen scale, weigh your flour (240 grams for 1¾ cups). Beginners who use scales almost never have problems with dense cakes.
Panicking about the thin batter stops many first-time bakers before they even get to the oven. After you add the hot water, the batter will look alarmingly thin—like chocolate soup. This is not a mistake. This is how the batter is supposed to look. The thin consistency is what creates the moist, fudgy texture. Every single person who’s ever been surprised by how thin this batter gets pulls a perfect cake out of the oven thirty minutes later.
Overbaking is the second most common mistake. This cake comes together quickly, which means it can overcook in a hurry. The window between perfectly done and slightly overdone is about five minutes. Set your timer for the minimum baking time stated in the recipe (30 minutes), then check with a toothpick. If it comes out with liquid batter coating it, bake for two more minutes and check again. You want a toothpick that comes out clean with just a few fudgy crumbs—not completely clean, but not wet either.
Not cooling the pan properly before inverting creates cakes that stick or crumble. Wait the full ten minutes in the pan. This gives the crumb time to set enough that it won’t fall apart when you flip it. If you’re scared the cake will stick to the pan, that’s the sign you didn’t grease it thoroughly enough. A thick coating of softened butter (not melted butter) that covers every corner of the pan, followed by a light dusting of flour, prevents sticking far more effectively than relying on parchment alone.
Using cold eggs makes the batter harder to mix and can create small lumps that don’t fully incorporate. Room-temperature eggs are genuinely easier to work with. If you forget to take them out ahead of time, place them in a bowl of warm water for five minutes.
Troubleshooting Tips For Perfect Results
The cake sinks in the middle. This happens when the cake is overbaked or when the oven temperature is slightly off. If the edges are cooked but the very center is still gooey, your oven might be running hot. Lower the temperature by 25°F next time. If the entire cake seems underbaked even though the toothpick came out clean, trust the toothpick—it’s right. The cake will firm up as it cools.
The cake is dry. This almost always means too much flour. Measure flour correctly by spooning and leveling, or use a scale. The second culprit is overbaking. Pull the cake out as soon as a toothpick comes out clean with a few fudgy crumbs—don’t wait for it to be completely clean.
The cake sticks to the pan. This means either the pan wasn’t greased thoroughly enough, or you’re not waiting the full ten minutes before inverting. Grease the pan generously with softened butter, making sure to coat every corner and the sides. If the cake still sticks, run a thin knife around the edges and be patient with the inversion—slow and gentle beats rushing.
The top cracks. Cracks on top are purely cosmetic and happen when the cake finishes baking too quickly (oven too hot) or when it’s been overbaked. Cracking doesn’t affect taste or texture—it’s just a visual thing. A layer of frosting covers it completely, and honestly, a cracked cake looks homemade and loved.
The cake tastes too sweet. You can’t really reduce the sugar without changing the cake’s structure and moisture content. Instead, pair it with unsweetened whipped cream, a tangy frosting, or serve it alongside coffee or tea. The sugar balance is actually why this cake works—reduce it and the cake dries out noticeably.
Delicious Variations To Try
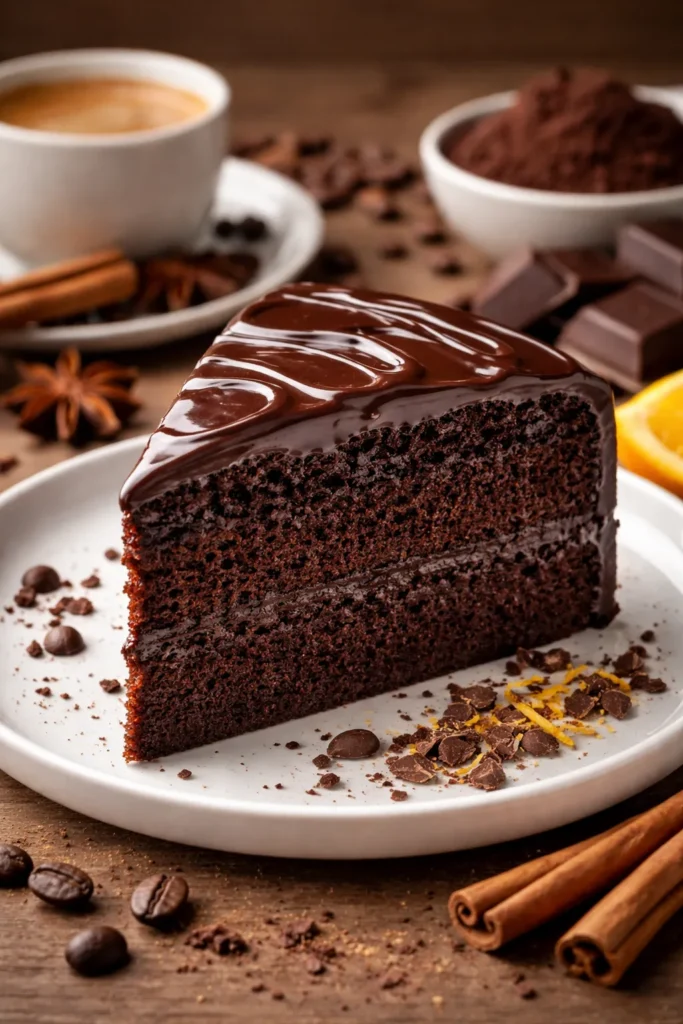
Once you’ve nailed the basic recipe, playing with variations builds confidence and keeps the recipe interesting. A mocha version uses hot coffee instead of hot water, which deepens the chocolate flavor without making the cake taste like coffee. The cocoa and coffee are partners in chocolate cakes—coffee highlights and intensifies chocolate flavor without being noticeable on its own.
A darker chocolate version uses dark cocoa powder (like Hershey’s Special Dark) or even adds a tablespoon of instant espresso powder to the dry ingredients. The cocoa powder quality genuinely matters here. Splurge on a better brand, and the difference is noticeable.
Spiced chocolate comes from adding a quarter teaspoon of ground cinnamon, a tiny pinch of cayenne pepper, and a quarter teaspoon of ground ginger to the dry ingredients. These warm spices echo the complexity of good chocolate and create a more sophisticated flavor without being identifiably “spiced.”
Chocolate with orange zest brightens the heavy chocolate flavor. Add the zest of one orange to the wet ingredients, which infuses the entire cake with subtle citrus. This combination is genuinely sophisticated and seems like you spent hours working on it.
Minty chocolate comes from using a half teaspoon of peppermint extract instead of some of the vanilla extract. The mint doesn’t overpower—it just adds a whisper of coolness that makes the chocolate taste richer.
Chocolate cupcakes use the identical batter. Divide it between a muffin tin and bake for 15 to 18 minutes instead of 30 to 35. You’ll get 18 to 24 cupcakes depending on pan size. They bake faster than the cake because they’re smaller, so watch them carefully.
A larger cake doubles perfectly. Make two 9-inch cakes using a double batch of batter and stack them together with frosting in between, or use a 9×13-inch rectangular pan and increase baking time to 40 to 45 minutes.
Frosting Options That Work Best
The simplest finishing touch is powdered sugar dusted over the cooled cake. It looks beautiful and adds sweetness without requiring any additional work. If you want frosting, you have several options that pair beautifully with this cake.
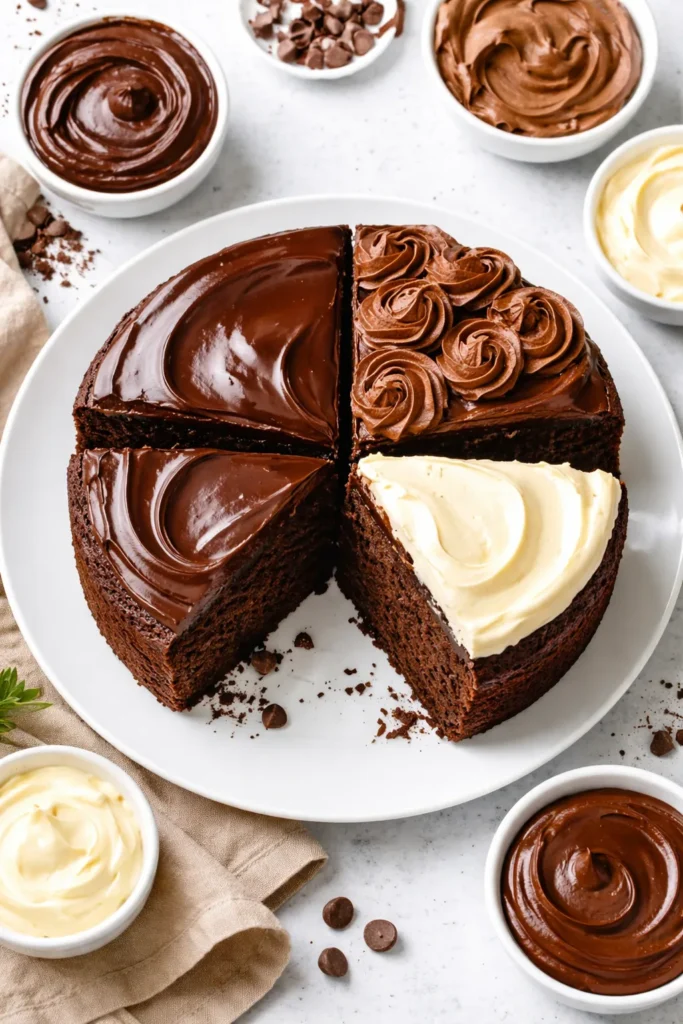
A chocolate buttercream frosting is the most obvious choice. Beat softened butter with powdered sugar, then add melted chocolate and a splash of milk to reach a spreadable consistency. Chocolate and chocolate is always right.
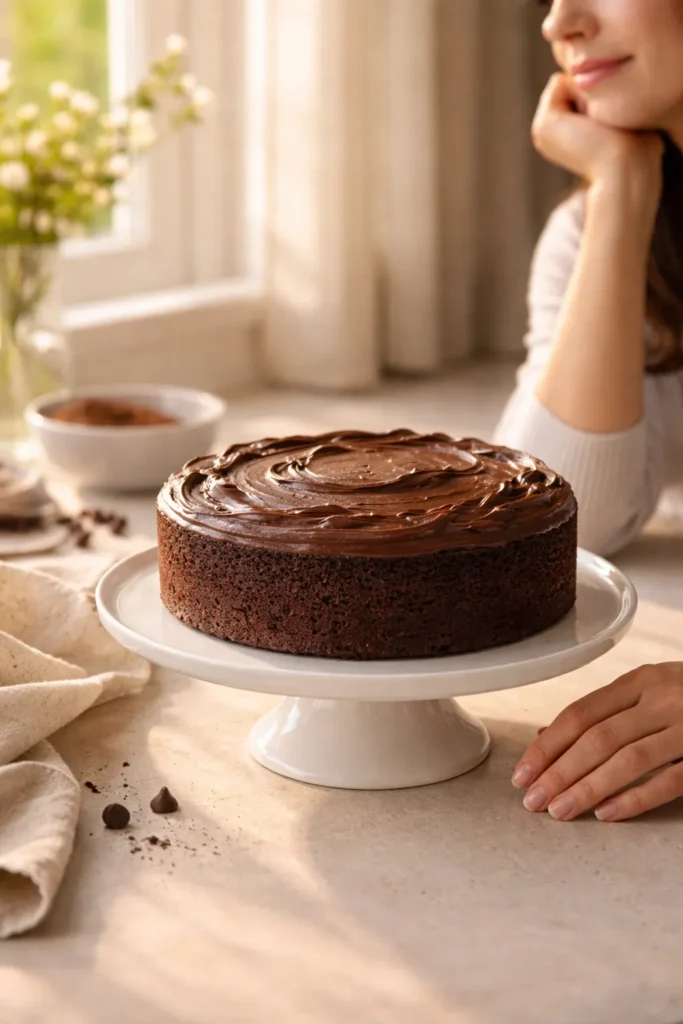
A chocolate ganache is even simpler—just melt chocolate with heavy cream in a one-to-one ratio. Spread it over the still-warm cake, where it sets to a glossy, fudgy layer. The contrast between soft cake and shiny ganache is stunning.
Vanilla buttercream provides a lighter contrast to the rich chocolate cake. The vanilla sweetness balances the cocoa’s depth perfectly. This pairing feels classic and effortless.
Cream cheese frosting adds tang and sophistication. The mild acidity cuts through the richness and creates a more complex flavor profile. This is what you choose when you want to impress people.
Whipped cream dusted with cocoa powder is the lightest option. It’s cloud-like against dense chocolate cake, and you can make it minutes before serving. Whipped cream is what you choose when you want the cake itself to shine rather than competing with frosting.
Storing Your Cake Properly
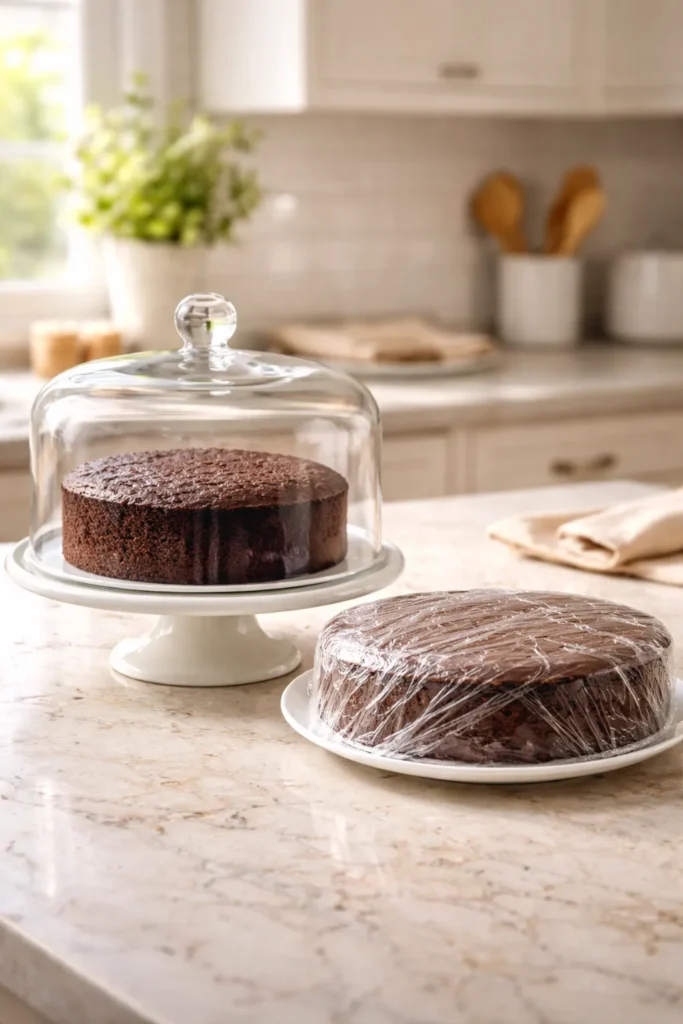
An unfrosted cake keeps at room temperature on a cake stand or covered with an airtight cake dome for up to four days. The moisture in this cake means it actually stays tender longer than most cakes—it won’t dry out quickly. If you live somewhere very warm or dry, refrigerate it after two days.
A frosted cake keeps at room temperature for up to three days if the frosting is buttercream-based (which is shelf-stable at room temperature). If you use cream cheese frosting, refrigerate the cake within two hours and store it for up to five days. Bring refrigerated cake to room temperature before serving—cold cake tastes less flavorful and the texture is denser.
Freezing works beautifully. Allow the unfrosted cake layers to cool completely, then wrap each layer tightly in plastic wrap, followed by aluminum foil. Place in an airtight container and freeze for up to three months. Thaw in the refrigerator overnight with wrapping intact—this prevents condensation from making the cake soggy. Once thawed, frost and serve. You can also freeze frosted cake, though the frosting sometimes develops a slightly grainy texture after thawing.
A baked but unfrosted cake keeps longer than a frosted one, so if you’re baking ahead for an event, make the cake a day or two early and frost it the day of serving for the best presentation and texture.
Serving Suggestions & Pairing Ideas
A simple slice with coffee is honestly the best way to eat this cake. The richness pairs beautifully with coffee’s bitterness. This is everyday dessert at its finest—no fussiness required.
Cake and ice cream is timeless for a reason. Vanilla ice cream is obvious, but chocolate ice cream intensifies the experience, and salted caramel ice cream adds complexity. The cold ice cream against warm cake (served slightly warm if you can manage it) is textural heaven.
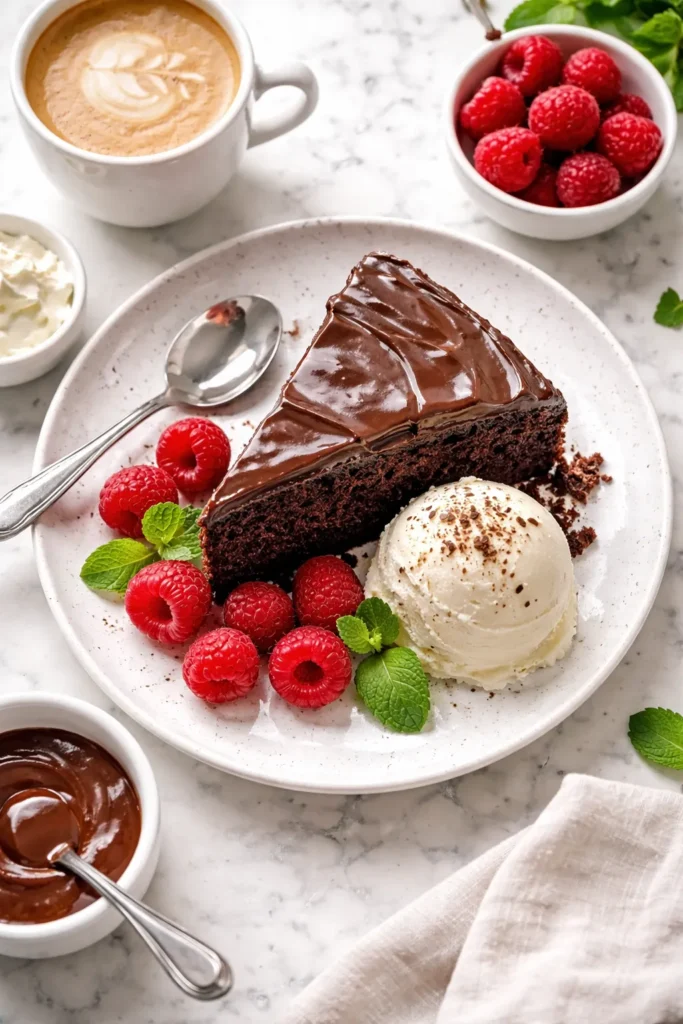
Plated elegantly with a scoop of vanilla ice cream, a drizzle of chocolate sauce, and fresh raspberries becomes an impressive dinner party dessert. The tartness of raspberries cuts through richness beautifully. A dusting of powdered sugar and a sprig of fresh mint complete the picture.
With fresh whipped cream and berries transforms the simple cake into something brighter and lighter. Strawberries and raspberries both work beautifully. The fruit’s acidity balances the chocolate’s richness.
Cake crumbles and parfaits are what you make with a broken cake. Layer crumbles with whipped cream, frosting, and fruit in a glass, and suddenly imperfection becomes elegant. No one needs to know the cake didn’t release cleanly from the pan.
For celebration occasions, dress it up with fresh flowers (organic, non-sprayed varieties), candles, or special serving plates. This cake is humble enough to work for Tuesday night dessert and refined enough to grace a birthday celebration.
Final Thoughts
This cake recipe exists to prove one simple truth: baking from scratch is genuinely easier than you think. There are no mysteries here, no special techniques that take years to master, no equipment you don’t already own. There’s just a mixing bowl, a whisk, some basic ingredients, and thirty minutes.
Every cake you bake teaches you something. This one teaches you that thin batters aren’t scary, that simple recipes can taste complex and indulgent, and that the difference between store-bought cake and homemade cake is absolutely worth the minimal effort. It teaches you that you’re capable of creating something genuinely delicious.
The first time you pull this cake from the oven, you’ll feel that small spark of pride that comes from making something with your own hands. The second time, you’ll feel confident enough to adjust it—maybe try coffee instead of water, or add cinnamon. By the fifth time, you’ll be making it by memory without consulting the recipe.
That’s when you know you’ve truly learned to bake. Not through complicated techniques or fancy equipment, but through making the same simple recipe over and over until your hands know exactly what to do. This cake is the beginning of that journey.