The difference between a cake that leaves you disappointed and one that earns raves often comes down to a single quality: moisture. A truly moist cake isn’t just soft—it’s tender, delicious, and stays that way for days. The tragedy is that achieving this isn’t complicated. It’s actually the result of understanding a few core principles and executing them consistently.
Most home bakers have been there. You pull a seemingly perfect cake from the oven, frost it beautifully, slice into it with anticipation, and find yourself biting into something disappointingly dry. The frustration is real. But here’s the thing: that cake didn’t fail by accident. It failed because of one (or several) specific, preventable mistakes that happen earlier in the process. The good news? Once you know what those mistakes are, you’ll never bake a dry cake again.
This isn’t about fancy techniques or expensive ingredients. It’s about understanding how the fundamentals of baking work together. When you nail these basics, moisture virtually takes care of itself. Let’s walk through exactly how to bake the kind of cake that makes people close their eyes when they take a bite.
Table of Contents
- Choose Ingredients That Lock in Moisture
- Use Cake Flour for a Tender Crumb
- Measure Your Ingredients with Precision
- Keep Your Ingredients at Room Temperature
- Prevent Overbaking at All Costs
- Choose the Right Pans
- Mix Your Batter Correctly
- Use Fresh Leavening Agents
- Brush Simple Syrup on Warm Cake
- Cool and Store Your Cake Properly
- Test Your Results and Troubleshoot
- Master Your Specific Oven
- The Bottom Line
Choose Ingredients That Lock in Moisture
The very first step toward a moist cake happens before you even turn on the oven. Your ingredient choices determine whether moisture will even have a chance to survive the baking process.
Start with buttermilk instead of regular milk. This is one of the single most impactful swaps you can make, and it’s backed by actual chemistry. Buttermilk’s acidity breaks down gluten strands, resulting in a more tender crumb that retains water better. Beyond texture, that slight tang complements the sweetness of your cake, creating balance rather than cloying flatness. The cultured milk in buttermilk is genuinely different from regular milk—don’t try to substitute it with vinegar-spiked regular milk, which creates a completely different chemical reaction.
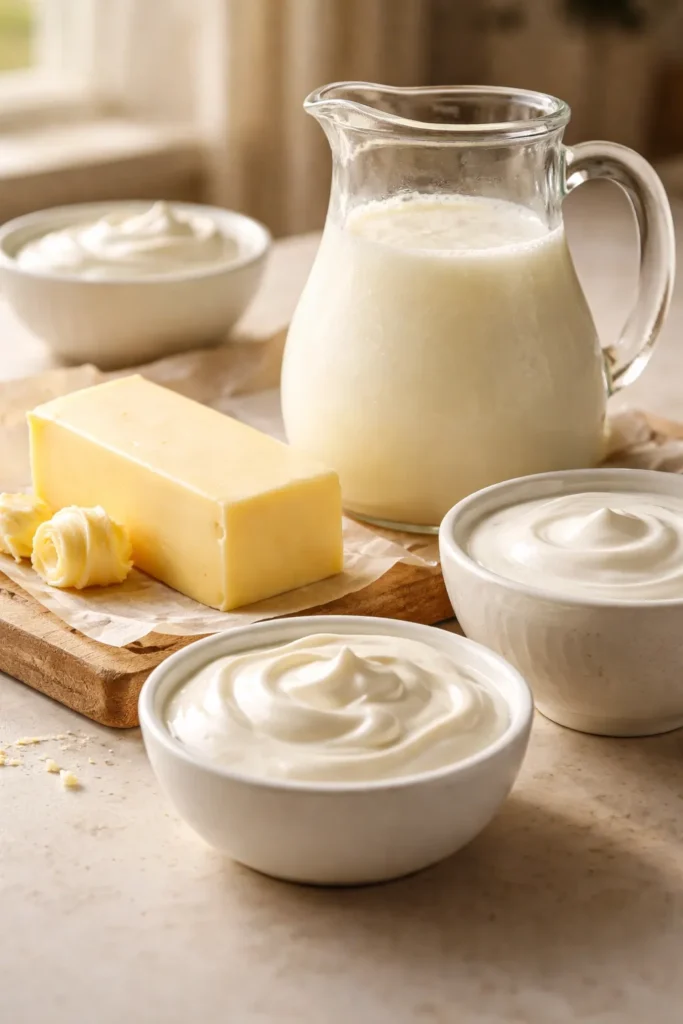
When the recipe calls for liquid, always use full-fat dairy. Skim milk lacks the fat that gives cakes their luxurious mouthfeel. Whole milk, heavy cream, sour cream, and yogurt all contribute richness and moisture. If a recipe calls for buttermilk specifically, don’t swap it for something else thinking it won’t matter—it will.
Real butter matters immensely if your recipe calls for it. Margarine has a higher water content and won’t give you the same tender crumb. That said, butter alone doesn’t create the moistest cake. Oil stays liquid at room temperature, keeping your cake soft even after it cools or goes in the refrigerator. Many professional bakers use a combination of both—butter for flavor, oil for moisture. This is one of the biggest secrets you’ll learn, and it works because oil is 100% fat while butter is only about 80% fat with 20% water.
Don’t substitute sugar substitutes for granulated sugar. Real sugar does far more than sweeten—it traps water in your cake, helps it brown, and contributes to the right crumb structure. Liquid sweeteners like honey or maple syrup behave completely differently in the batter and will throw off your results.
Use Cake Flour for a Tender Crumb
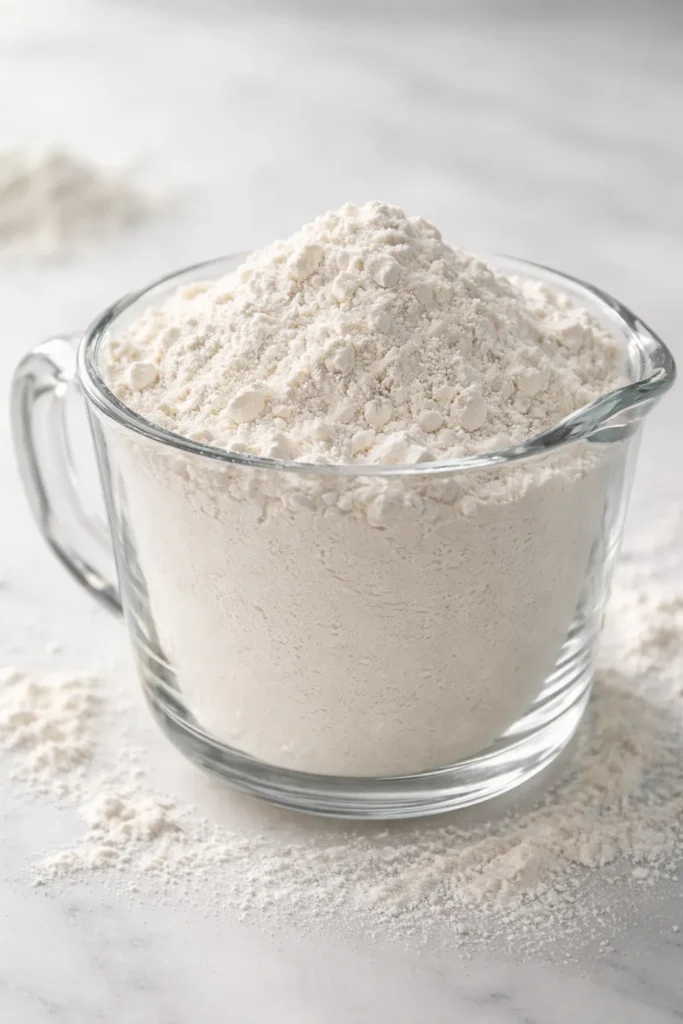
The flour you choose directly impacts how tender your cake will be. All-purpose flour contains more protein than cake flour, which means more gluten develops during mixing. More gluten equals a tougher cake—and tough cakes feel dry, even when they’re not.
Cake flour is milled into a superfine consistency and contains less protein, typically 7-9% compared to all-purpose flour’s 10-12%. This matters because less protein means less gluten development, which means a softer, more delicate crumb. When you bite into a cake made with cake flour, it practically dissolves on your tongue.
That said, cake flour isn’t a universal solution. Chocolate cakes already contain cocoa powder, which is itself a soft ingredient. Using cake flour in a chocolate cake can actually make it too delicate and crumbly. Carrot cakes and banana cakes contain moisture from fruits and vegetables, so they need the structure that all-purpose flour provides. But for vanilla cakes, white cakes, yellow cakes, and red velvet cakes—anywhere you want pure tenderness—cake flour is your secret weapon.
If you don’t have cake flour on hand, you can make a substitute. For every cup of all-purpose flour, replace 2 tablespoons with cornstarch. This lowers the protein content and mimics what cake flour does. It’s not perfect, but it works in a pinch.
The brand matters less than you’d think, but look for reputable options like Swans Down or Softasilk. Store your cake flour in an airtight container away from heat and light, and it’ll stay fresh for months.
Measure Your Ingredients with Precision
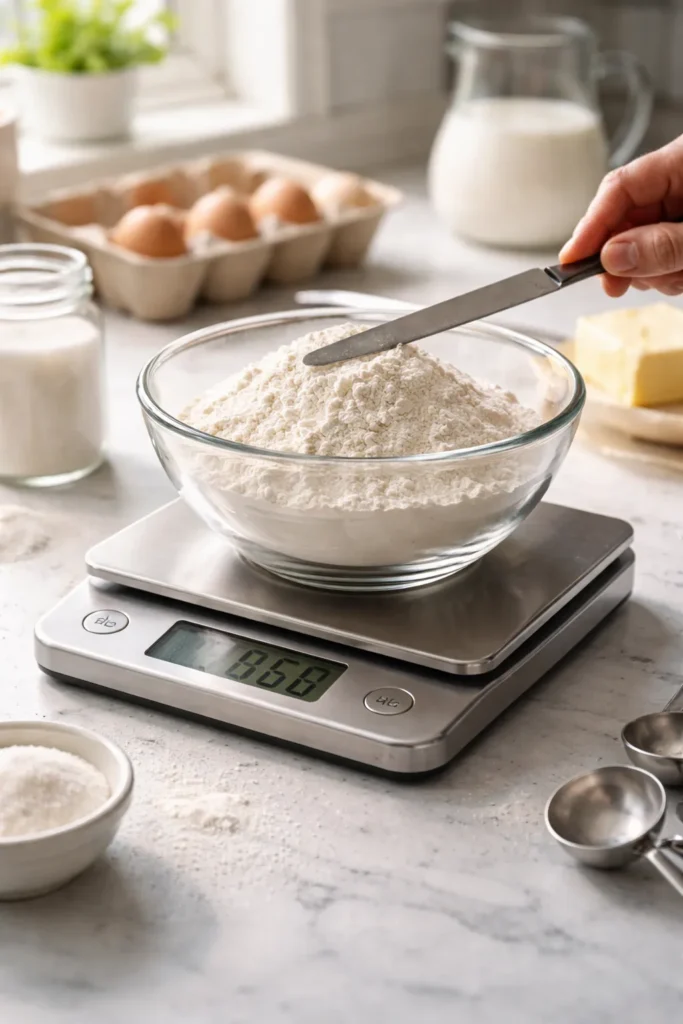
Here’s where a lot of home bakers go wrong, and they don’t even realize it. Baking is a science, not an art. The proportions have to be right, and that starts with accurate measuring.
Too much flour is one of the most common culprits behind dry cakes. When you scoop flour directly from the bag and level it off in your measuring cup, you’re often getting 20-30% more flour than you should. That extra flour absorbs moisture meant for your cake, leaving it dense and dry. The correct way to measure flour is to fluff it in the bag, spoon it lightly into a measuring cup, and level it with a knife—never scoop directly from the bag.
Better yet, invest in a kitchen scale. Weighing your ingredients takes the guesswork completely out of baking. One cup of flour always weighs about 120 grams, one cup of sugar always weighs about 200 grams. No more wondering if you’ve packed it down too much. This is especially important if you’re baking regularly or making the same recipe multiple times—consistency becomes automatic.
Use dry measuring cups for flour, sugar, and other dry ingredients. Use liquid measuring cups (the ones with a spout) for milk, oil, buttermilk, and other liquids. There’s a reason they’re designed differently—it matters.
Don’t eyeball measurements or substitute “a pinch of this” for “a tablespoon of that.” Baking forgives very little improvisation. Follow the recipe exactly the first time. Once you’ve made it successfully, then you can experiment with tweaks.
Keep Your Ingredients at Room Temperature
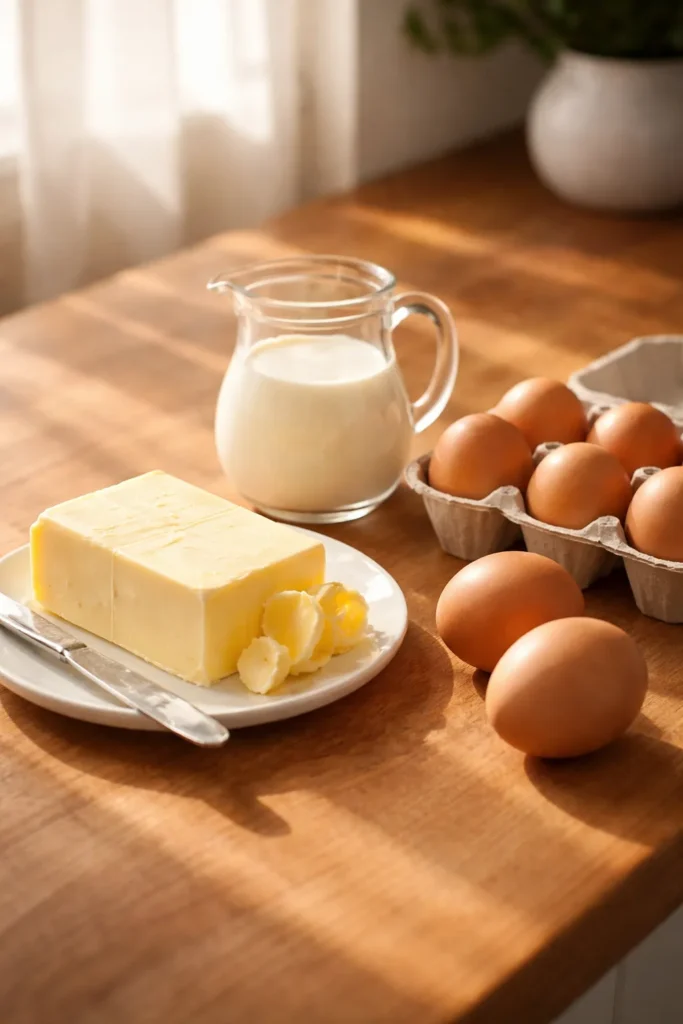
Cold ingredients don’t blend well together. Cold butter won’t cream properly with sugar, cold eggs won’t incorporate smoothly, and cold milk can shock your batter. All of this leads to an emulsion that doesn’t form correctly, which means air doesn’t get trapped evenly, which means your cake won’t rise properly and will end up dense.
Take your butter, eggs, and dairy out of the refrigerator 30-60 minutes before you start baking. It seems like a small step, but it makes a tangible difference. Room temperature ingredients blend together more smoothly, incorporating air more effectively and creating a better-aerated batter.
If you’re short on time, place cold eggs in a bowl of warm (not hot) water for 5 minutes. For milk or other liquids, a quick 30-second microwave burst takes the chill off. Just avoid actually warming these ingredients—you don’t want partially cooked eggs or hot milk. The goal is room temperature, not warm.
This applies to every ingredient the recipe specifies—if it says room temperature, honor that. It’s not a suggestion; it’s a requirement for the cake to work as designed.
Prevent Overbaking at All Costs
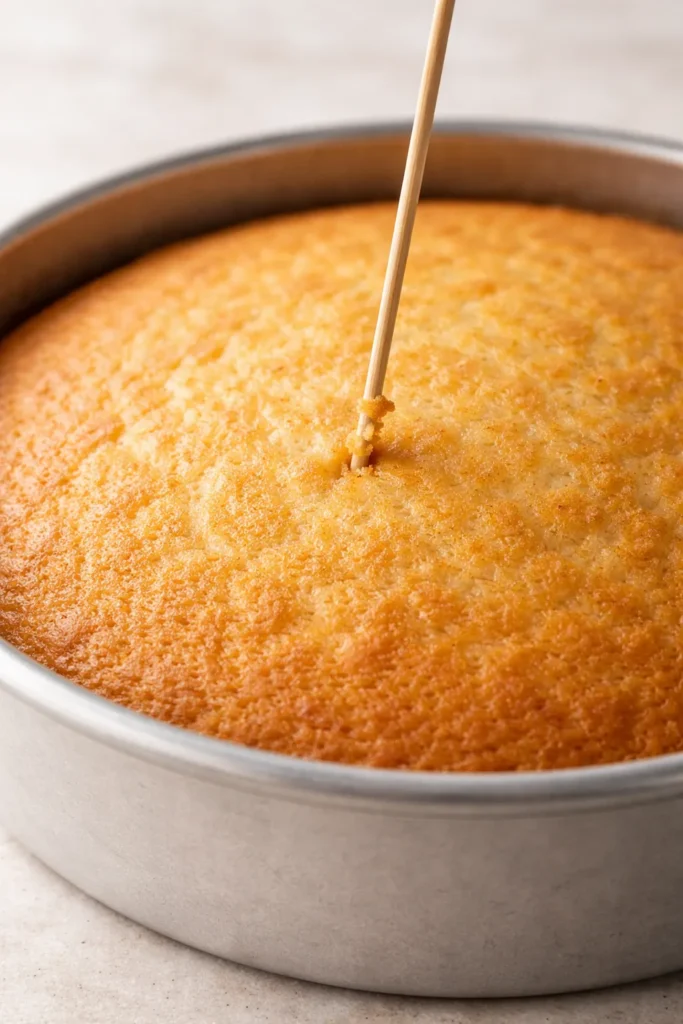
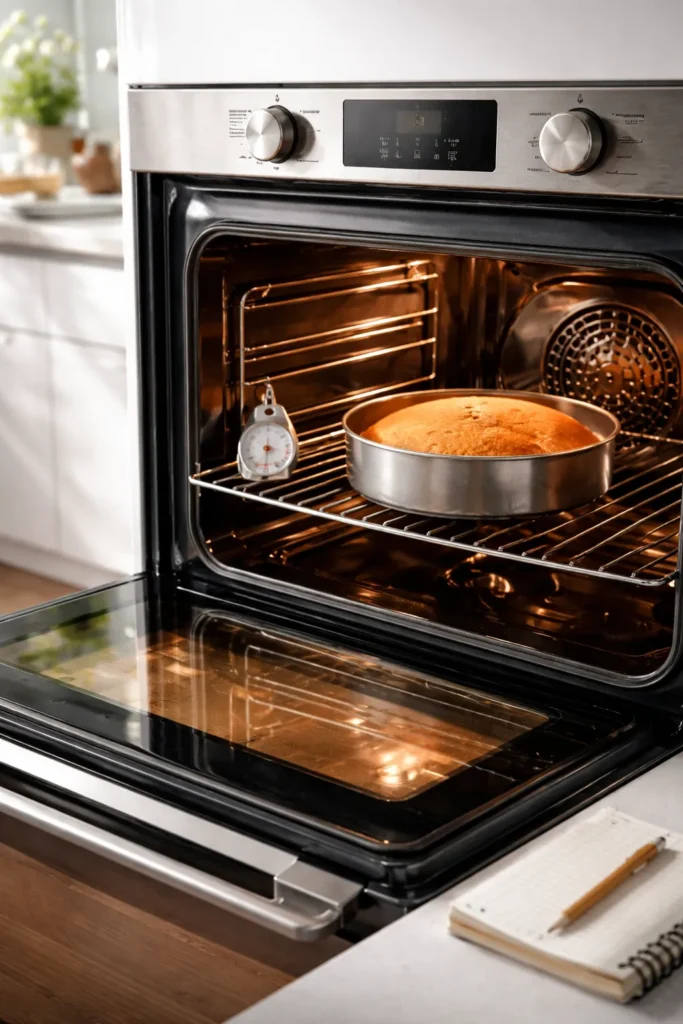
Even the best batter turns dry if you bake it too long. This is non-negotiable: overbaking is the number-one way to ruin a moist cake. The issue is that most recipe times are just guidelines—your oven is unique, and it may bake faster or slower than the recipe assumes.
Start by making sure your oven is accurately calibrated. Many home ovens run 10-25 degrees off from what the dial says. Buy an inexpensive oven thermometer and hang it inside your oven. When you preheat to 350°F, actually check what temperature it reaches. If it’s running hot, you’ll know to reduce the temperature accordingly.
Position your cake pans on the middle rack of the oven, where heat circulates most evenly. Cakes baked too high can brown on top before the center finishes. Cakes baked too low can brown too much on the bottom.
Here’s the critical part: start checking for doneness a few minutes before the recipe says the cake should be done. Insert a toothpick or thin skewer into the very center of the cake. Pull it out immediately—if it has a few moist crumbs clinging to it, the cake is done. If it comes out completely clean, your cake might be getting close to overbaking. If wet batter is still sticking, it needs more time. But here’s the key: the cake continues to bake from residual heat even after you remove it from the oven, so you want to pull it slightly underbaked rather than perfectly baked.
Different cakes need different temperatures. Denser cakes like pound cakes might bake at 325°F for longer. Lighter cakes might go at 350°F. Cupcakes often start at 350°F but can be turned down after they rise. Know your cake and adjust accordingly.
Choose the Right Pans
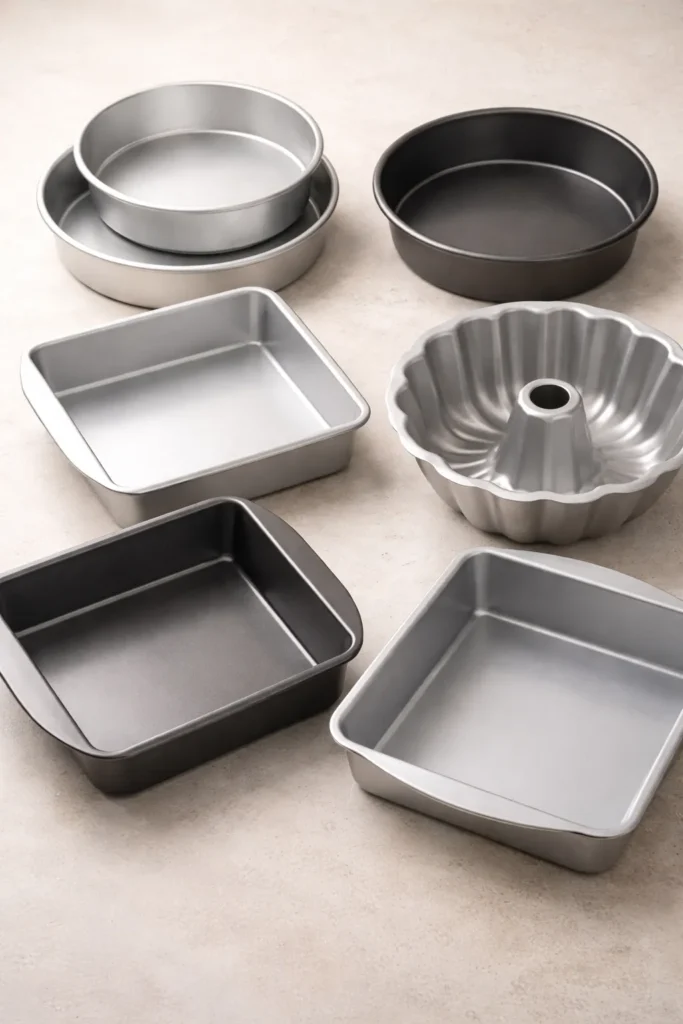
The type of pan you use affects how your cake bakes more than you might realize. Metal pans conduct heat much better than glass, resulting in more even baking. Light-colored aluminum pans are ideal because they conduct heat evenly without over-browning the edges. Dark or nonstick pans absorb heat more aggressively, which can cause thick, crispy, overly brown edges.
If you must use a dark pan, reduce the oven temperature by 25°F. This slows the browning process and gives the center time to bake through without the edges drying out.
Pan size matters significantly. A cake that should be baked in an 8-inch round pan will bake differently if you use a 9-inch pan—the batter spreads thinner and bakes faster. Always use the pan size specified in the recipe. If you need more cake, make the full recipe twice rather than trying to cram double the batter into one pan.
Always grease your pans with butter or baking spray and line the bottoms with parchment paper. This double layer of protection ensures easy release and prevents sticking. Grease the parchment too if you’re being thorough.
Mix Your Batter Correctly
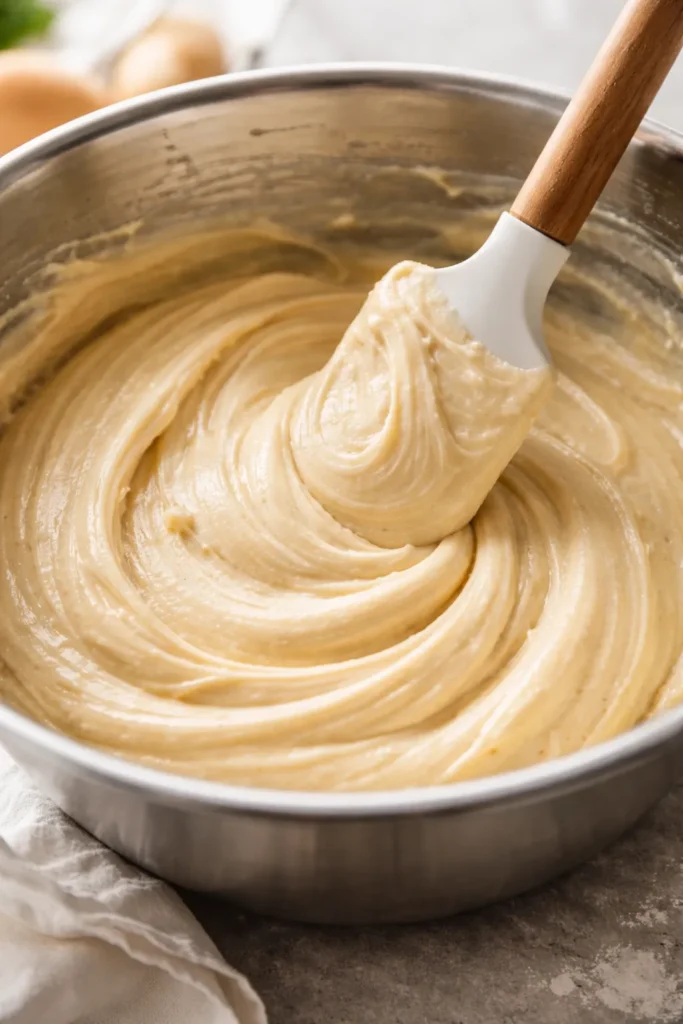
How you mix your batter is just as important as what goes into it. Overmixing is the enemy—it develops excessive gluten, which makes the cake tough and dense. But undermixing leaves ingredients unevenly distributed, which causes uneven baking and weird textures.
The solution is to follow the recipe’s mixing instructions exactly. If it says to cream butter and sugar for 3 minutes, set a timer and do exactly that—not longer. If it says to add flour and milk alternately, don’t skip that step or combine them. There’s a reason every step is there.
Mix on low speed after adding flour. Once the flour hits the wet ingredients, you’re one second away from overdeveloped gluten. Mix just until the dry ingredients disappear into the batter—you’ll see a few white streaks, and then you stop. This isn’t the time for a smooth, homogeneous batter. Leaving a few streaks of flour is the right approach.
Use a stand mixer with the paddle attachment rather than the whisk. The whisk incorporates too much air for most cakes. The paddle gently blends ingredients while incorporating just enough air for proper rise.
Different mixing methods accomplish different things. The reverse creaming method—where you coat flour in fat before adding liquid—creates an exceptionally tender, velvety crumb. The classic creaming method—beating butter and sugar together to incorporate air—gives you lift and a slightly lighter texture. Know which method your recipe uses and execute it correctly.
Use Fresh Leavening Agents
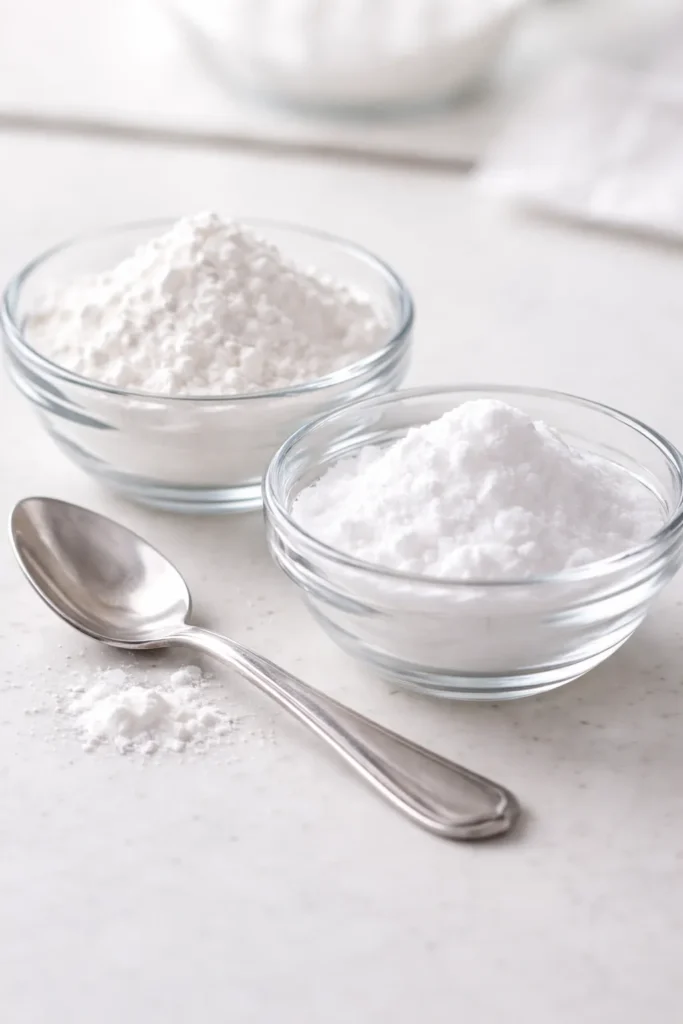
Baking powder and baking soda have expiration dates, and they matter. These ingredients lose potency over time. A weak leavening agent won’t give your cake proper rise, which results in a dense, heavy crumb that feels dry even when it isn’t.
Check the date on your baking powder and baking soda every time you pull them out. If you haven’t opened them in six months, chances are good they’re past their prime. These are inexpensive enough that replacing them annually is the right move.
And never, ever substitute one for the other. Baking powder and baking soda are chemically different. Baking soda requires an acidic ingredient (like buttermilk) to activate. Baking powder already contains acid and works on its own. If your recipe calls for baking soda and you use baking powder instead (or vice versa), your cake won’t rise properly.
Brush Simple Syrup on Warm Cake
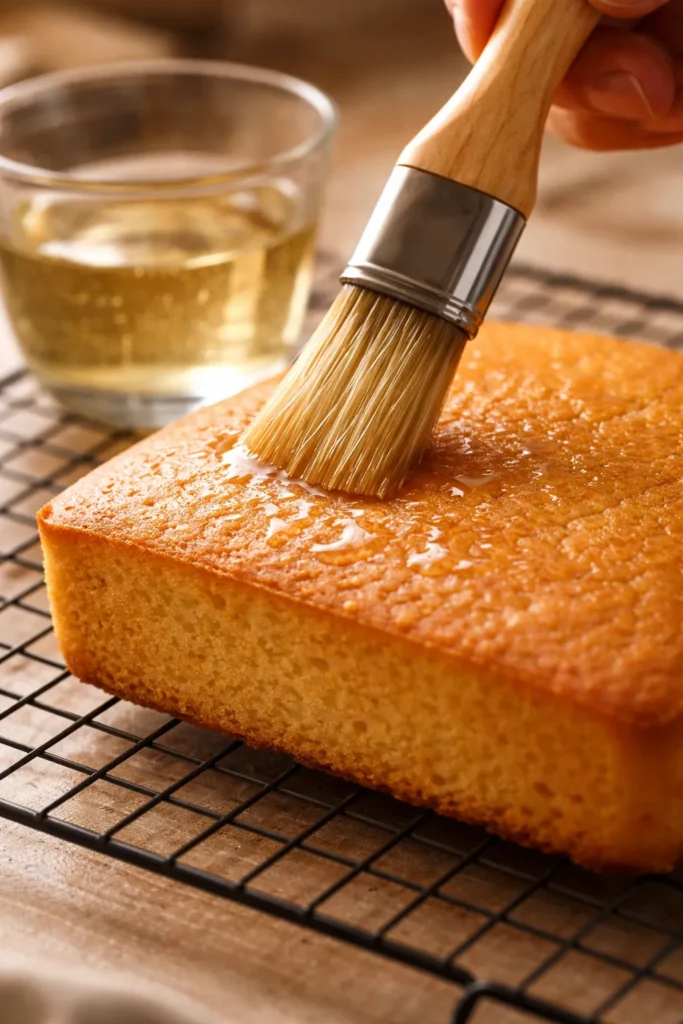
If you’ve nailed everything above, your cake should already be moist. But professional bakers have one more trick: simple syrup brushed on the cake after it comes out of the oven. This is an extra insurance policy that keeps your cake moist throughout storage and beyond.
Simple syrup is ridiculously easy to make. Combine equal parts granulated sugar and water—say, half a cup each. Heat it in the microwave or on the stove, stirring occasionally, until the sugar completely dissolves. Let it cool completely.
Once your cake has cooled for 10-15 minutes in its pan but is still warm, lightly brush a thin layer of simple syrup over the top. Use a soft-bristled pastry brush and don’t oversaturate—you want the syrup to seep in and add moisture, not turn the cake soggy. You can also pierce the top lightly with a fork before brushing to help the syrup penetrate.
For flavored versions, infuse the simple syrup. A lemon cake might get lemon juice and zest stirred into the syrup. A chocolate cake might get a tablespoon of cocoa powder. This adds moisture plus a flavor boost.
Store leftover simple syrup in an airtight container in the refrigerator for up to two weeks. It’s perfect for sweetening iced tea or cocktails, so nothing goes to waste.
Cool and Store Your Cake Properly
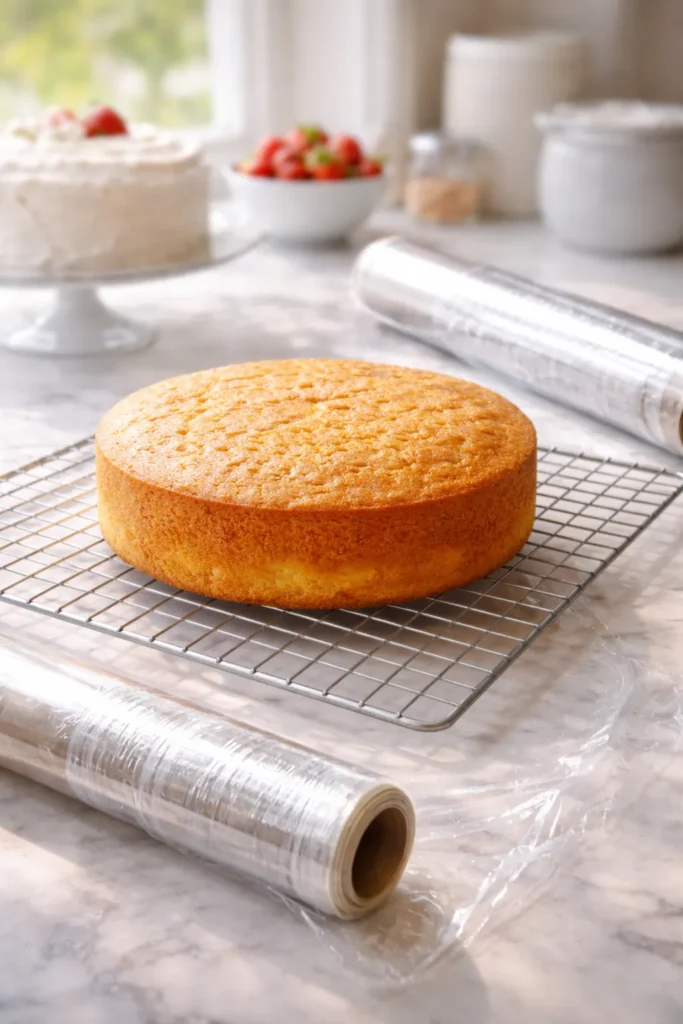
How you handle your cake after baking directly affects how moist it stays. Let your cake cool in its pan for 10-15 minutes after you take it out of the oven—this allows the structure to set enough that it won’t fall apart when you turn it out. Then turn it onto a wire rack to cool completely. The wire rack lets air circulate underneath, preventing steam from making the bottom soggy.
Never frost a warm cake. Warm cakes have steam rising off them, and frosting that steam turns the outside soggy. Wait until the cake is completely cool to room temperature before frosting. This usually takes at least an hour.
If you’re not serving the cake immediately, storage method matters. Wrap cooled, unfrosted cake layers tightly in plastic wrap, then wrap again in aluminum foil. Store them at room temperature for up to 2 days. For longer storage, freeze them. Frozen cake layers actually stay moister than refrigerated ones because the freezing process locks in moisture—the steam rises, hits the plastic wrap, and has nowhere to go, so it condenses back into the cake.
Frozen cake layers keep for up to 3 months. Thaw them while still wrapped at room temperature for several hours or overnight. The wrap prevents condensation from forming on the surface of the cake during thawing.
Keep frosted cakes covered in a cake carrier or box rather than exposed on a plate. Exposure to air dries them out quickly. If you must refrigerate a frosted cake, cover it well and use it within 3-4 days.
Test Your Results and Troubleshoot
Even with perfect technique, sometimes things go wrong. Understanding what caused the problem helps you fix it next time.
If your cake came out dry, the culprit was likely one of these: too much flour from incorrect measuring, overbaking, using low-fat dairy instead of full-fat, or not enough fat in the recipe. Review which of those applies and adjust accordingly.
If your cake sank in the middle, you either underbaked it, opened the oven door too early (letting heat escape), or overmixed the batter. Next time, wait until the cake is mostly done before peeking, and be gentler with your mixing.
If your cake has large air pockets, you probably had too much air incorporated into the batter. Tap your filled pans firmly on the counter before baking to release trapped air bubbles. You can also gently press down on the top of the baked cake with a towel immediately after removing it from the oven to collapse oversized air pockets.
Each cake teaches you something. Keep mental notes about how long your oven actually takes, which recipes consistently deliver moist results, and which techniques work best for your baking style.
Master Your Specific Oven
Here’s something most home bakers don’t think about: your oven is unique. Even two ovens of the same model bake differently. Learning your oven is one of the fastest ways to guarantee consistent results.
The first time you make a recipe, check on the cake at the earliest possible time the recipe suggests. Is it browning too fast? Your oven might run hot. Is it barely baking at the recommended time? Your oven might run cool. Taking mental notes helps you predict what will happen next time.
Keep a notebook near your oven if you bake regularly. Write down recipes you’ve made, how long they actually took, what adjustments you made, and whether the result was what you wanted. This becomes your personal guide to baking success.
An oven thermometer should be a standard tool in your kitchen, right next to your measuring cups. It costs less than $10 and removes the guesswork about whether your oven is actually at the temperature you think it is.
The Bottom Line
Baking a moist cake isn’t mysterious or complicated. It’s the result of understanding how each ingredient and technique contributes to moisture, then executing those techniques consistently. Use the right ingredients—buttermilk, full-fat dairy, a combination of butter and oil. Measure accurately, avoid overmixing, don’t overbake. Let your cake cool properly and store it well.
Most importantly, remember that baking is learnable. Every cake you bake teaches you something. Start with a trusted recipe, apply these principles, and watch how dramatically your results improve. The difference between a dry cake and a moist one often comes down to just one or two small changes—changes that take zero extra skill, just intention and attention. That’s genuinely good news for anyone who’s ever pulled a disappointing cake from the oven. You’ve got this.