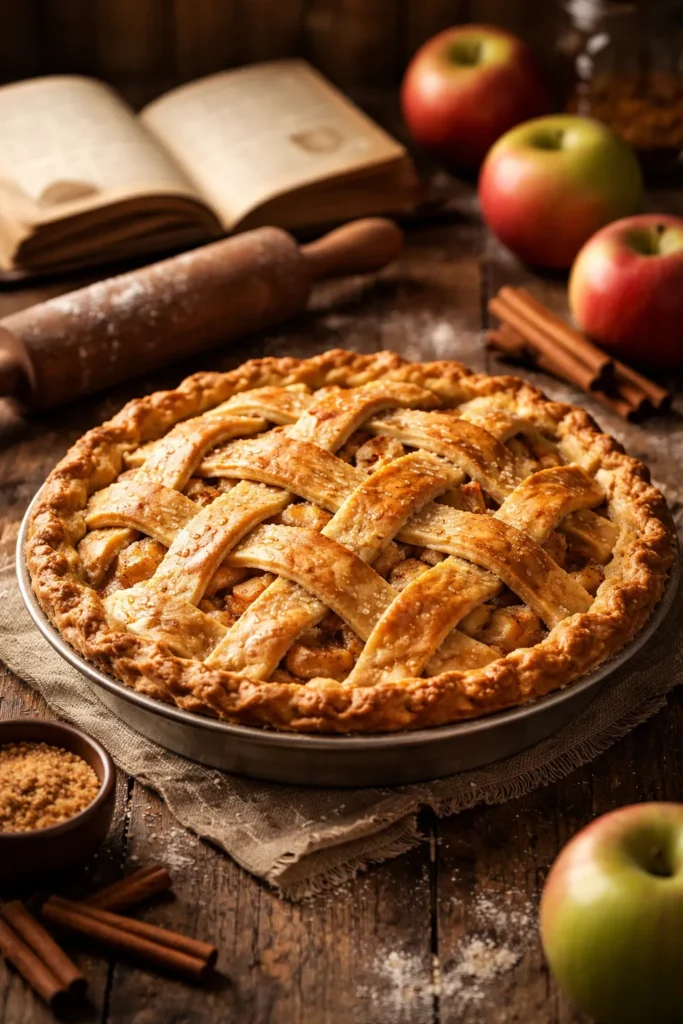
There’s something almost magical about the smell of apple pie baking in the oven—that combination of cinnamon, nutmeg, and caramelizing apples that fills your home with warmth and comfort. Yet for many home bakers, achieving that perfect pie with a flaky crust, properly cooked apples, and a filling that’s neither soupy nor dry feels mysterious and unpredictable. The good news is that baking apple pie doesn’t require special skills or expensive ingredients. It requires understanding the fundamentals: choosing the right apples, building a reliable crust, mastering the filling, and knowing the exact temperatures and timing that transform raw ingredients into something truly spectacular.
This guide walks you through every step of creating apple pie that you’ll be proud to serve at your table. Whether you’re baking for a holiday gathering, a casual family dinner, or simply because you’re craving a slice of homemade dessert, you’ll find everything you need to succeed—including insider tips from experienced bakers, solutions to the most common problems, and variations to make the recipe your own.
Table of Contents
- The History and Soul of Apple Pie
- Why the Right Apples Make All the Difference
- Understanding Your Equipment
- Building a Flaky, Trustworthy Pie Crust
- Preparing Your Ingredients with Precision
- Serving and Timing Information
- Apple Pie Ingredients
- Why These Specific Ingredients Matter
- The Complete Step-by-Step Instructions
- Common Mistakes and How to Prevent Them
- Storage, Make-Ahead, and Reheating Options
- Serving Suggestions and Pairings
- Variations and Adaptations
- Final Thoughts
The History and Soul of Apple Pie
Apple pie holds a unique place in American food culture. It’s been a beloved dessert for centuries, with recipes appearing in cookbooks going back generations. What makes apple pie so enduring isn’t just its delicious flavor—it’s the way it represents home, tradition, and the simple pleasure of baking something meaningful from scratch.
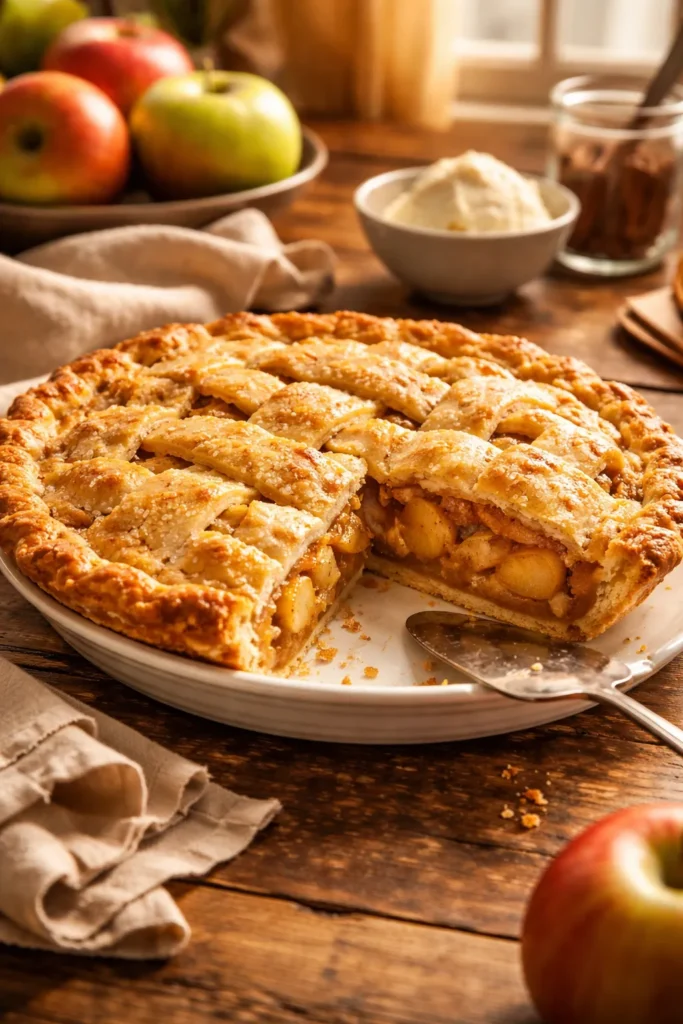
The beauty of apple pie lies in its elegant simplicity. You need just a handful of ingredients: apples, sugar, spices, and butter for a crust. Yet when these basics come together properly, they create something infinitely greater than their individual parts. A slice of perfect apple pie has distinct textures and temperatures in every bite—a crispy, flaky crust that shatters slightly when you cut into it; tender, juicy apples that have absorbed warming spices; and a filling that’s thick enough to hold its shape but still flows gently onto your plate.
The challenge that many bakers face isn’t lack of effort—it’s lack of understanding about why certain techniques matter. Does it really make a difference whether you chill the dough? Is there a reason some recipes say to avoid certain apple varieties? Should you worry if the filling looks watery before baking? The answer to each is yes, and understanding the science behind these details transforms you from someone following a recipe to someone who can troubleshoot problems and adapt techniques to your preferences.
Why the Right Apples Make All the Difference
Walk through the produce section during apple season, and you’ll encounter dozens of varieties. Most of them will taste pleasant eaten raw, but not all of them will bake into pie successfully. The difference comes down to three characteristics: tartness, firmness, and how much the apples break down when heated.
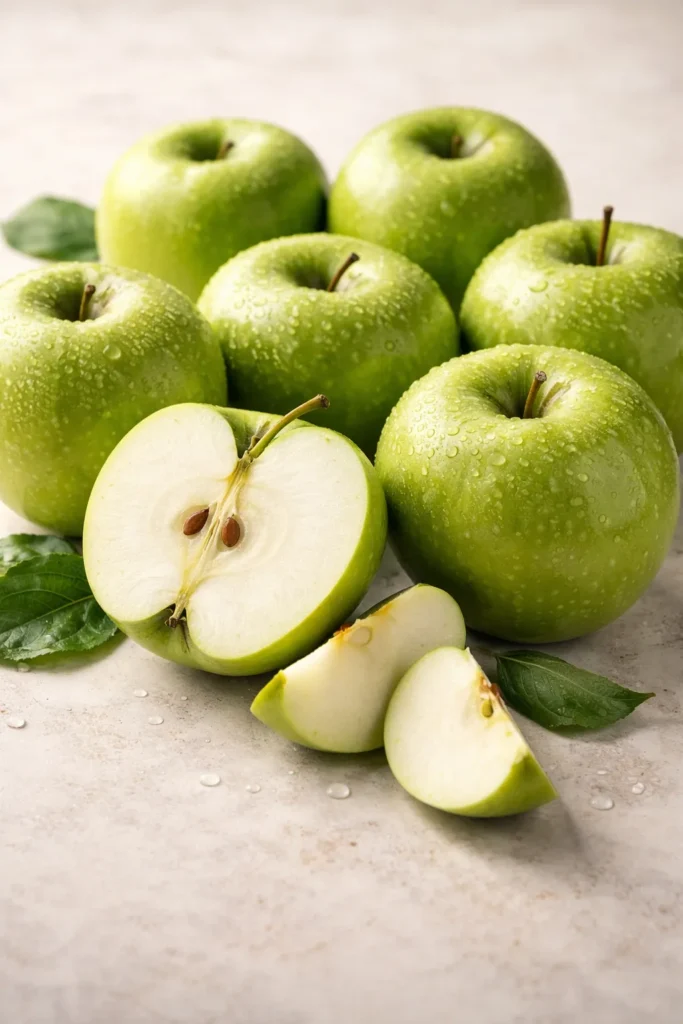
Granny Smith apples remain the gold standard for pie baking. They’re tart enough to balance the sweetness of sugar without becoming overwhelmingly sour, and their firm flesh holds its shape during the long bake. When you bite into a slice of pie made with Granny Smiths, you get distinct pieces of apple rather than an applesauce-like consistency. They’re available year-round at most grocery stores, which makes them reliable regardless of the season.
Honeycrisp apples work beautifully as a secondary apple or in combination with Granny Smiths. They bring a slightly sweeter flavor profile and satisfy the crunch factor in a filling—many bakers appreciate the textural variety they add. However, they’re softer than Granny Smiths, so they benefit from being paired with firmer apples to prevent the pie from becoming overly mushy.
Gala, Golden Delicious, and Jonagold apples all have merit in pie. Galas offer mild sweetness and good texture. Golden Delicious bring a natural sweetness and softer consistency if you prefer a more cohesive filling. Jonagold provides that sweet-tart balance some bakers prefer. The key is understanding that each variety contributes something different to your final pie.
Red Delicious apples should be avoided. Despite their popularity for fresh eating, they become mealy and mushy when baked. They lack the tartness needed to cut through the richness of pie, and they tend to disappear into the filling rather than maintaining distinct pieces.
For the best results, many experienced bakers use a combination of apples. A blend of Granny Smith with Honeycrisp, or Granny Smith with Golden Delicious, gives you both structure (from the firm apples) and complexity (from the sweeter varieties). Aim for about 6 to 8 medium-sized apples to yield the 6 to 8 cups of sliced apples most recipes require.
Understanding Your Equipment

The right tools don’t guarantee success, but they certainly make the process easier and more reliable. A 9-inch glass pie plate is the standard for a reason. Glass allows heat to conduct evenly, and you can see the bottom crust as it bakes to ensure it’s browning properly and not burning. Avoid shiny metal pans, which can cause excessive browning, and disposable aluminum plates, which conduct heat unevenly and often result in either undercooked or overcooked crusts.
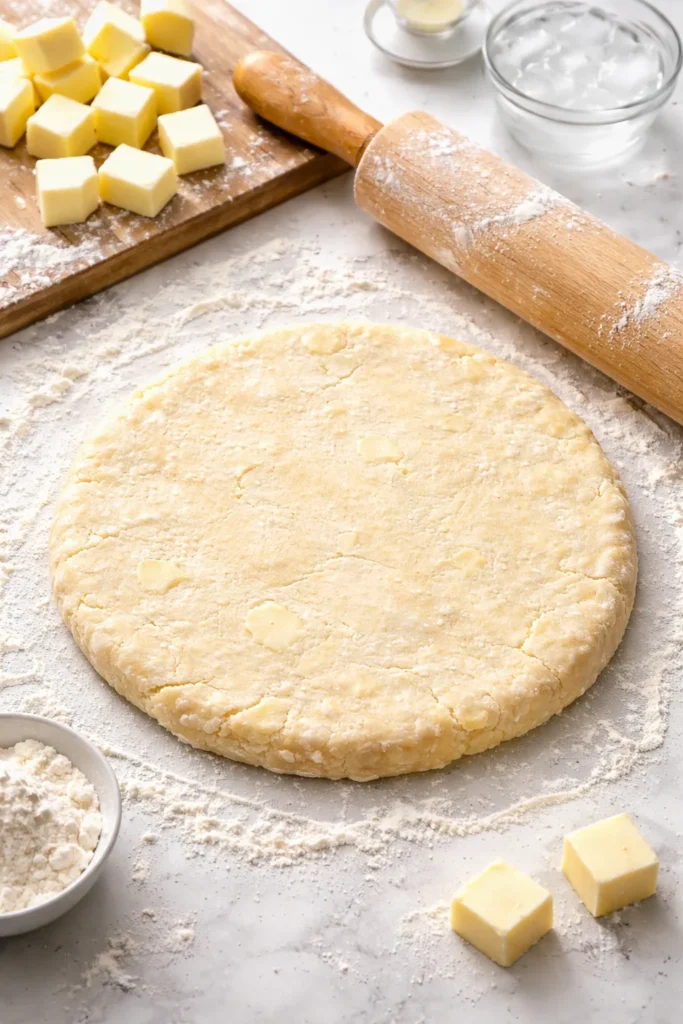
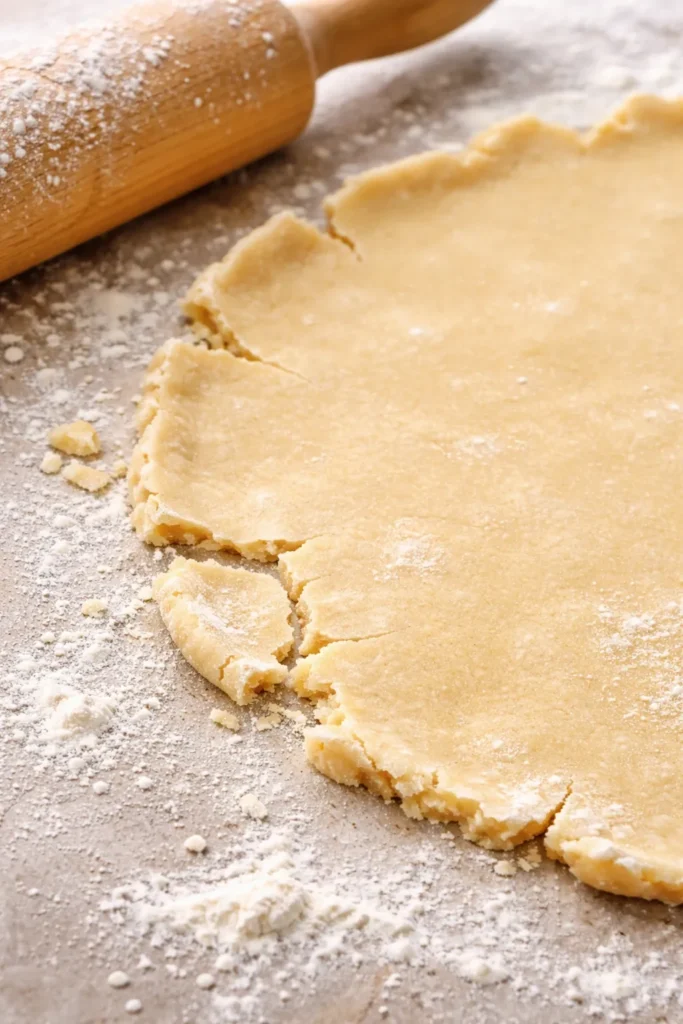
A quality rolling pin makes working with pie dough more efficient and enjoyable. Whether you prefer a traditional wooden pin, a marble one, or a ball-bearing pin, the goal is to roll dough to an even thickness—about ⅛ inch thick—without creating thin spots that tear or thick spots that don’t bake through.
A sharp chef’s knife or paring knife is essential for peeling and slicing apples efficiently. A dull knife will slip off the apple skin, potentially damaging your hand. Some bakers prefer a vegetable peeler for removing the skin without removing too much flesh—a valid choice that requires practice to master.
Parchment paper simplifies rolling dough. Place dough between two sheets and roll without flouring; the parchment prevents sticking while letting you see whether you’ve reached the proper thickness. When rolling is complete, simply peel away one sheet of parchment, flip the dough into your pie plate, and peel away the second sheet.
A pie shield or aluminum foil prevents over-browning during baking. A pie shield is a metal ring that covers just the edge of the pie, while foil strips wrapped around the rim work equally well. The distinction matters more than you might think—protecting edges in the first half of baking prevents them from burning while the center of the crust and the filling continue cooking.
A cooling rack is often overlooked but genuinely important. It allows air to circulate beneath the pie as it cools, preventing the bottom crust from becoming soggy as steam escapes. A cooling rack typically costs just a few dollars and will serve you for decades.
Building a Flaky, Trustworthy Pie Crust
The crust is where many home bakers lose confidence. They’ve heard stories of cracked doughs, tough crusts, or doughs that won’t hold shape. In reality, pie dough is remarkably forgiving once you understand its basic mechanics.
Pie crust succeeds because of fat—specifically, how butter or shortening distributes throughout the dough. When you cut cold butter into flour, you create tiny pockets of fat throughout the mixture. During baking, these pockets create steam, which causes the dough to puff and separate into flaky layers. The moment you let the dough warm up too much—whether from overmixing or sitting at room temperature too long—the fat begins to blend into the flour, and you lose those flaky pockets.
All-butter doughs produce the most flavorful crusts. They’re more finicky than doughs made with shortening, but the flavor difference is significant. The key is keeping everything cold—use cold butter, work quickly, and chill the dough thoroughly before rolling.
All-shortening doughs are more forgiving because shortening has a higher melting point than butter, giving you more time to work. They’ll never be quite as flavorful as an all-butter crust, but they’re easier for beginners.
Combination doughs mixing butter and shortening offer a middle ground—better flavor than shortening alone, but more forgiving than pure butter.
The traditional method is to cut cold butter into a flour and salt mixture until it resembles coarse breadcrumbs. Some pieces of butter should remain visible—these are what create the flaky layers. Add ice water a few tablespoons at a time, mixing gently with a fork until the dough just barely holds together. The dough should be shaggy and rough, not smooth. Wrap it in plastic, flatten it into a disk, and refrigerate for at least one hour. Many bakers refrigerate overnight, which is perfectly fine.
If you prefer not to make dough from scratch, high-quality refrigerated pie crusts work admirably. They’re specifically formulated to be forgiving and reliable. Let them come to room temperature for 10 to 15 minutes before unrolling—if they’re too cold, they’ll crack; if they’re too warm, they’ll stick and tear.
Preparing Your Ingredients with Precision
Wash and thoroughly dry your apples. Any moisture on the surface will dilute your filling and potentially make the crust soggy. Pat them dry with a clean kitchen towel before proceeding.
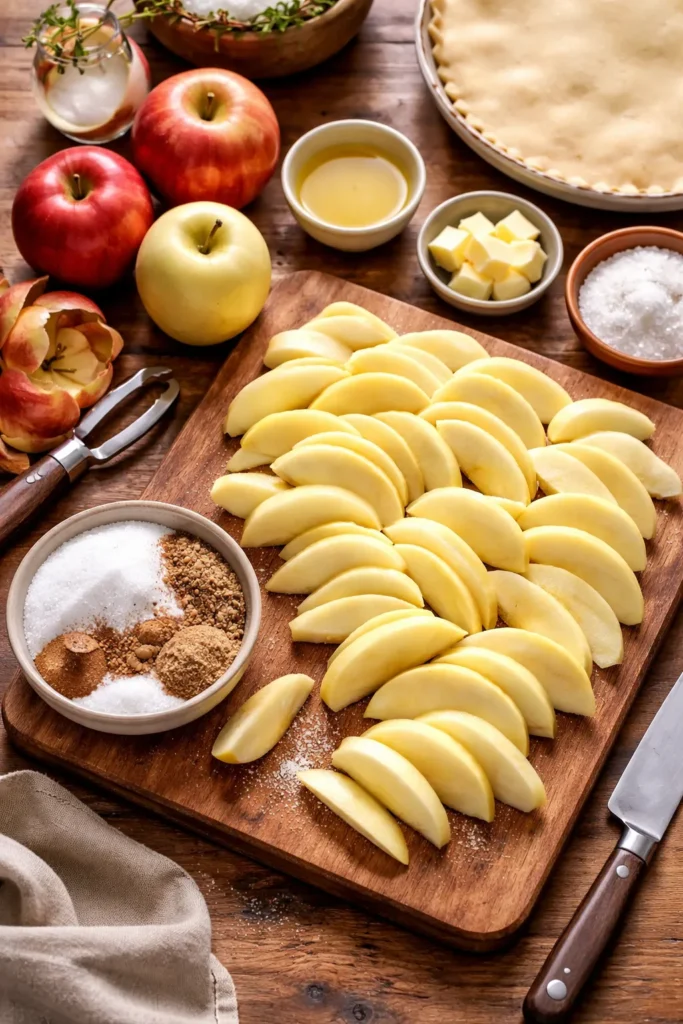
Peel the apples efficiently. Using a vegetable peeler, start at the stem end and circle around to the blossom end, removing all the skin without taking too much flesh. If you prefer, you can peel with a sharp paring knife, though this takes practice to avoid removing excess fruit.
Slice apples uniformly. Cut each apple into quarters, remove the core, and then cut into slices about ¼ inch thick. Uniform thickness is important because it ensures even cooking—thin slices will fall apart while thick slices remain crunchy. Aim for roughly 6 to 8 cups of sliced apples total.
Prepare your dry ingredients ahead of time. Mix together sugar, flour, cinnamon, nutmeg, and salt in a small bowl. This prevents clumping of spices and ensures they’re evenly distributed throughout the filling. Some bakers add a pinch of ground ginger or cardamom—experiment to find your preference.
Have everything else ready before you begin. Chill your pie crusts. Prepare your pie plate. Set out your rolling surface. This mise en place approach means you’re not scrambling for equipment while your dough warms or your apples oxidize.
Serving and Timing Information
Yield: One 9-inch pie, serving 8
Prep Time: 30 minutes (if using refrigerated crusts; add 1 hour if making dough from scratch)
Chill/Rest Time: 1 hour minimum (if making dough from scratch)
Bake Time: 50-55 minutes
Cool Time: 2-3 hours (pie must cool completely before slicing)
Total Time: Approximately 3-4 hours from start to eating
Difficulty: Intermediate — The process is straightforward, but success requires attention to detail, proper ingredient temperature management, and patience during cooling. If you’re using store-bought crusts, the difficulty drops to Beginner-Intermediate.
Apple Pie Ingredients
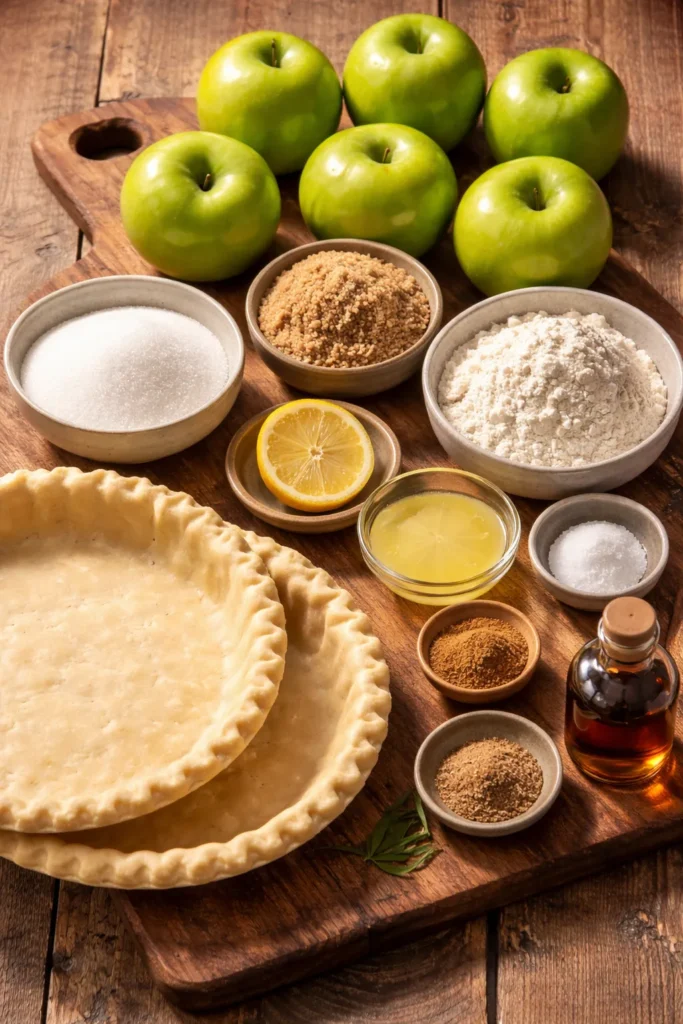
For the Filling:
- 6 to 8 medium Granny Smith apples (about 2 pounds total), peeled, cored, and sliced into ¼-inch-thick slices
- ¾ cup granulated white sugar
- ¼ cup light brown sugar (loosely packed)
- 2 tablespoons all-purpose flour (this thickens the filling and prevents excess moisture; use only 1½ tablespoons if you prefer a looser, more juice-forward filling)
- ¾ teaspoon ground cinnamon
- ⅛ teaspoon ground nutmeg
- Pinch of fine sea salt
- 1 tablespoon fresh lemon juice
- ½ teaspoon vanilla extract (optional, but adds subtle depth)
For the Crust:
- 2 unbaked 9-inch pie crusts (homemade or refrigerated store-bought)
- 1 tablespoon water (for egg wash, if desired)
- ½ teaspoon coarse sanding sugar (optional, for sprinkling on top before baking—creates a subtle sparkle and slight crunch)
For Assembly and Baking:
- 2 tablespoons unsalted butter (for dotting the filling, optional but adds richness)
- Aluminum foil or a pie shield (for protecting edges from over-browning)
Why These Specific Ingredients Matter
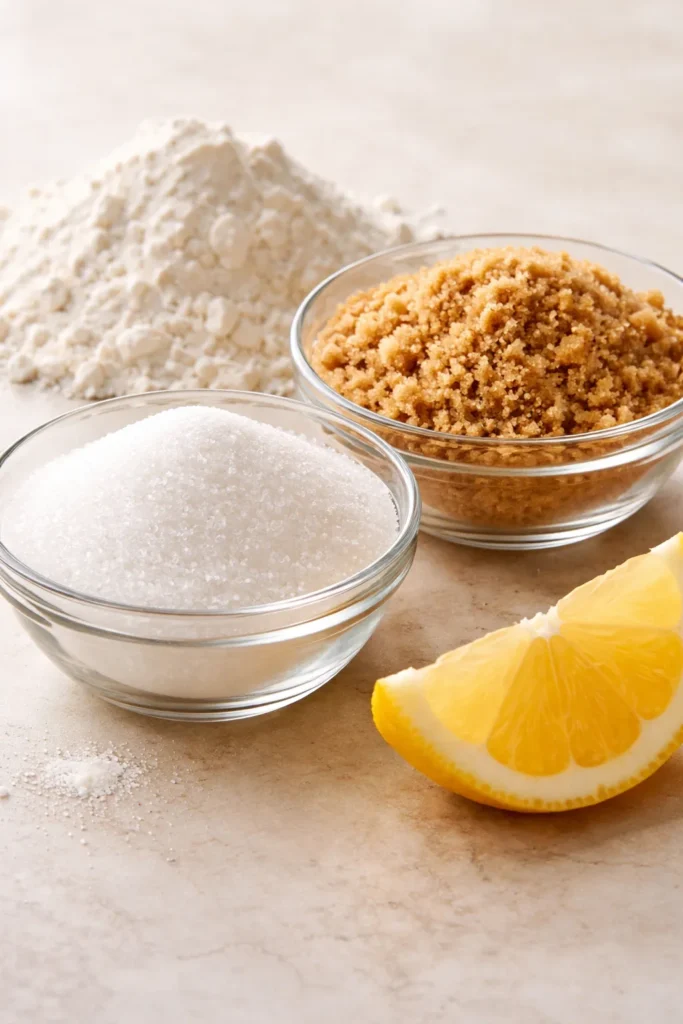
The combination of granulated sugar and brown sugar is intentional. Granulated sugar provides sweetness and structure to the filling; brown sugar adds caramel notes and slight molasses flavor. Together, they’re more interesting than either alone. If you prefer a filling that’s less sweet, you can reduce the total sugar to ½ cup, though the filling won’t set quite as firmly.
Flour thickens the filling as the pie bakes. It absorbs the liquid released by the apples and creates a sauce-like consistency that holds the fruit together without making it mushy. If you don’t thicken the filling adequately, you’ll end up with a very juicy pie that slumps when you slice it. Too much thickener creates a gluey texture. The amount specified here works for most apple varieties and preferences.
Lemon juice serves a critical function beyond flavor. Its acidity brightens the filling and prevents oxidation (browning) of the apples. It also helps balance the sweetness. Vanilla extract is optional but adds a subtle complexity that elevates the pie from good to memorable.
Butter dotted over the filling isn’t essential, but it adds richness and helps bind flavors. Many traditional pie recipes include this step, and it takes just 30 seconds. Skip it if you’re watching fat intake, or double it if you want extra richness.
The Complete Step-by-Step Instructions
Prepare Your Workspace and Preheat:
-
Remove your pie crusts from the refrigerator if using homemade dough. If the dough was chilled for longer than 2 hours, let it sit at room temperature for 10 to 15 minutes until it’s just pliable enough to roll without cracking. The dough should be cold but not frozen solid—if it’s too hard, it will crack as you roll; if it’s too warm, it will stick and tear.
-
Position your oven racks so one is in the center-lower third and one is in the very bottom. Place a large piece of heavy-duty aluminum foil on the lowest rack to catch any drips from the pie. Preheat your oven to 425°F (220°C). This higher initial temperature creates a crisp bottom crust before the filling releases too much moisture.
-
Line your workspace with parchment paper or a silicone baking mat. Have your rolling pin, pie plate, and all filling ingredients nearby.
Prepare the Apples:
-
Wash and thoroughly dry your apples. Peel using a vegetable peeler or sharp paring knife, removing skin but leaving as much flesh as possible. Cut each apple in half, then quarters, removing the core. Slice each quarter into ¼-inch-thick slices, rotating the apple as you work to maintain uniform thickness.
-
In a large mixing bowl, combine the sliced apples with both sugars, flour, cinnamon, nutmeg, salt, and lemon juice. Gently toss everything together until the apples are evenly coated. You want to distribute the sugar and spices thoroughly, but avoid aggressive mixing, which can break down the apples. The mixture should look slightly wet at this point—this is normal and expected. You’ll see liquid pooling at the bottom of the bowl; this is released apple juice, which will thicken during baking.
-
If you’re using unsalted butter, cut it into small cubes (about ¼ inch) and set aside. You’ll scatter these over the filling just before adding the top crust.
Assemble the Pie:
-
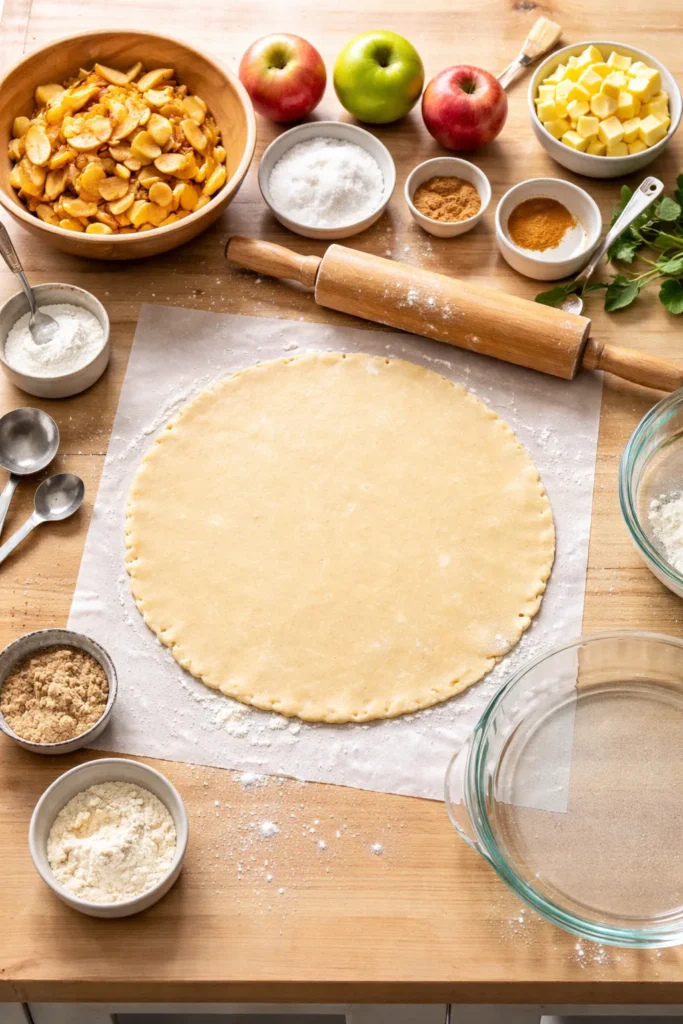
If using homemade dough, place one disk on your parchment-lined workspace. Using a rolling pin, roll from the center outward in all directions, rotating the dough a quarter turn after each few rolls. Your goal is a circle approximately 12 inches in diameter and ⅛ inch thick. It’s okay if the edges are slightly rough or uneven—you’ll trim them after placing the dough in the pie plate.
-
If using refrigerated crusts, simply unroll according to package directions. They’re typically already cut to the right size.
-
Carefully transfer the crust to your pie plate. If you rolled on parchment, you can flip the parchment and crust together into the plate, then peel away the parchment. Alternatively, fold the dough in quarters, transfer it to the plate, then unfold. Press the dough gently but firmly into the bottom and up the sides of the plate, working out any air pockets. Let excess dough hang over the edges for now—you’ll trim it after adding the top crust.
-
Spoon the apple mixture into the crust-lined plate, discarding any excess liquid that’s pooled at the bottom of the mixing bowl. This is critical—extra liquid is the enemy of a crispy bottom crust. Arrange the apple slices as evenly as possible in a single, slightly mounded layer.
-
Scatter the butter cubes over the filling if you’re using them.
-
Roll out the second crust to the same dimensions as the first. Carefully center it over the filling. You should have some overhang on all sides.
-
Trim the excess dough from around the edges, leaving about 1 inch extending beyond the pie plate all around. Fold this overhang under itself, creating a thick rim that sits on the edge of the plate. Press firmly to seal the top and bottom crusts together—this creates a seal that helps contain moisture during baking.
-
Using your thumb and forefinger (or a fork, if you prefer), create a fluted or crimped edge around the perimeter of the pie. This is both decorative and functional—the crimped edge helps seal the pie and looks beautiful when baked.
-
Using a sharp paring knife, cut 4 to 6 slits or small shapes (diamonds, hearts, etc.) in the top crust. These vents allow steam to escape during baking, preventing pressure from building up inside the pie and potentially bursting the crust.
-
Optional: For a shiny, golden crust, brush the top with an egg wash. Whisk together one egg with 1 tablespoon water, then brush this mixture lightly over the entire top surface of the pie (avoiding the filling that’s visible through the vents). Sprinkle with coarse sanding sugar if desired. This creates a subtle crunch and sparkle.
Bake the Pie:
-
Place the pie on a large baking sheet. This catches any drips and makes moving the pie in and out of the oven much easier. Transfer to the center-lower oven rack.
-
Bake at 425°F for 20 minutes. During this time, the crust will begin to set and brown, and the filling will start releasing moisture and beginning to cook.
-
After 20 minutes, carefully remove the pie and drape strips of aluminum foil (about 2 to 3 inches wide) around the crust edges, or place a pie shield over the edges. Be careful—the plate and filling are hot. The foil protects the edges from over-browning while the center of the crust and the filling continue cooking.
-
Return the pie to the oven and reduce the temperature to 375°F (190°C). Continue baking for 30 to 35 minutes longer. The pie is finished when the crust is deep golden brown and you can see the filling bubbling gently through the vents or around the edges of the pie. A toothpick inserted through a vent should slide through an apple slice with slight resistance—you want them tender but not falling apart.
-
Remove the pie from the oven and place it on a cooling rack. Resist the temptation to cut into it immediately. The filling needs time to set as it cools. If you cut too early, the filling will flow onto your plate like applesauce, and the pie will look less impressive than it actually tastes.
Cool and Rest:
-
Allow the pie to cool on the rack at room temperature for a minimum of 2 hours, ideally 3 hours. During this time, the filling will thicken significantly, and the crust will set completely, making the pie much easier to slice cleanly.
-
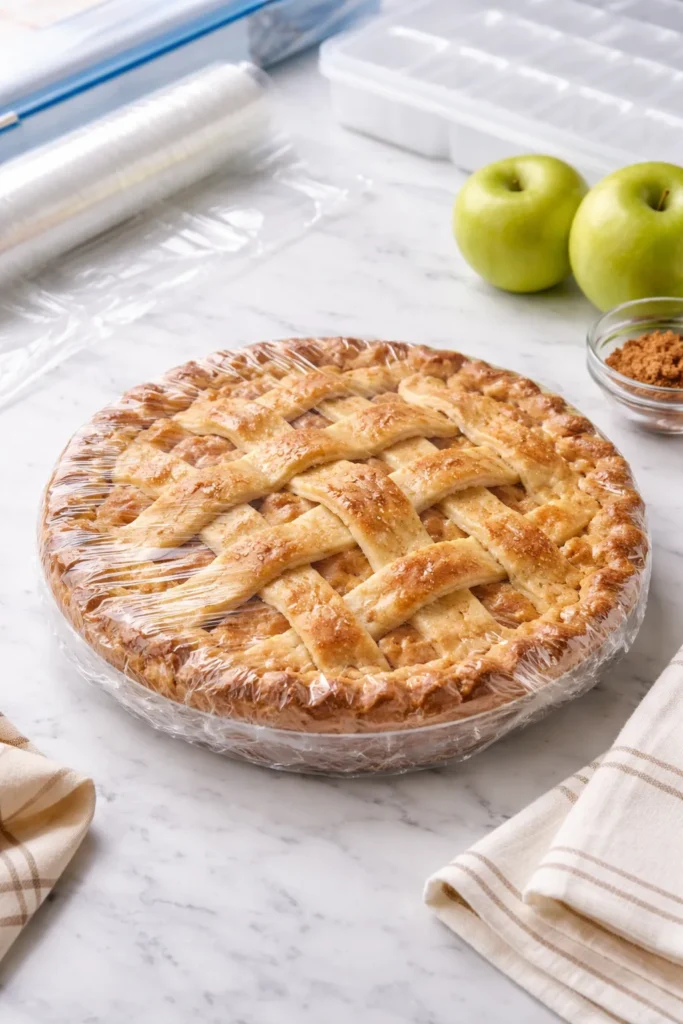
If you want to serve it warm rather than at room temperature, you can slice into it after 2 hours. If you want to serve it completely cooled, let it rest at least 3 hours or even overnight (wrapped loosely in plastic wrap once it’s fully cooled).
Common Mistakes and How to Prevent Them
Soggy Bottom Crust is the most frequent complaint from home bakers. The solution involves multiple factors working together: using a glass pie plate (which conducts heat better than metal), placing the pie on a lower oven rack initially to ensure the bottom bakes properly, avoiding excessive juice in the filling by discarding the pooled liquid before adding it to the crust, and using an adequate amount of thickener (flour) in the filling. If you find your bottoms consistently soggy, try brushing the crust with a thin layer of beaten egg white before adding the filling—this creates a moisture barrier. Alternatively, you can blind-bake the bottom crust for 10 minutes (pre-bake it with weights before adding filling), though this isn’t necessary if you follow the other tips.
Crust that Cracks or Tears During Rolling usually means the dough is too cold and brittle. Remove it from the fridge and let it sit at room temperature for 10 to 15 minutes to warm slightly—it should be cold but pliable. If cracks do develop while rolling, patch them with scraps of dough pressed gently into place. These patches will seal during baking and won’t be noticeable in the finished pie.
Edges that Burn Before the Filling Cooks happens when you bake at a single temperature for the entire time. The solution is the two-temperature approach described above: start at 425°F to set the crust, then drop to 375°F for the remainder of baking. Protecting the edges with foil is equally important.
Filling that’s Runny Even After Cooling indicates inadequate thickening. Make sure you’re using the full amount of flour specified—don’t reduce it thinking you want a juicier pie. The flour needs to absorb the moisture released by the apples. If your pie is still too wet, you can increase the flour by ½ tablespoon next time.
Apples that Are Mushy or Disappear into the Filling comes from using the wrong apple varieties. Stick with Granny Smiths as your primary apple—they’re firm enough to hold their shape. If you want to use other varieties for flavor complexity, pair them with Granny Smiths in a roughly 2:1 ratio (two parts Granny Smith to one part other variety).
Crust that’s Tough Rather than Flaky typically comes from overmixing the dough, which develops gluten and makes it dense. Mix just until the dough comes together—it should be shaggy and slightly rough, not smooth. Avoid the temptation to knead or work the dough extensively.
Filling that Spills Over During Baking is annoying but avoidable. Make sure you’re not overfilling the pie plate. The filling should mound slightly above the rim of the plate, but if it’s heaping excessively, remove some apples. The foil on the lower rack will catch any drips that do escape.
Storage, Make-Ahead, and Reheating Options
Apple pie keeps well, which makes it an excellent dessert for advance preparation.
At Room Temperature: Cover the cooled pie loosely with plastic wrap or aluminum foil. It will keep at room temperature for up to 2 days. This is appropriate if you’re serving it the day you bake it or the next day.
In the Refrigerator: If the pie has been sitting out for a couple of days, move it to the refrigerator, where it will keep for an additional 2 to 3 days, for a total shelf life of up to 5 days from baking. Refrigeration preserves freshness but can slightly firm the texture of the apples.
In the Freezer: Both baked and unbaked pies freeze beautifully for up to 4 months. For baked pie, cool it completely, then wrap it tightly in plastic wrap, then aluminum foil. (Don’t freeze the pie in a glass plate—the extreme temperature change can cause the glass to crack. Instead, remove the cooled pie from the plate by gently tipping it to the side and sliding it out, wrap it, and freeze it. When you want to eat it, place it back in a pie plate before reheating.) For unbaked pie, assemble it completely, freeze it uncovered until solid, then wrap it tightly. When ready to bake, you don’t need to thaw it—simply place it directly in a preheated 425°F oven and bake for 20 minutes, then reduce heat to 375°F and continue baking for 40 to 45 minutes (it will take slightly longer than a fresh pie).
Reheating: If you’ve refrigerated or frozen the pie and want to serve it warm, reheat it in a 350°F oven for 20 to 30 minutes, loosely covered with foil to prevent over-browning. Alternatively, microwave individual slices at 50% power for 1 to 2 minutes.
Make-Ahead Strategy: You can prepare the filling up to 8 hours ahead of time and refrigerate it, covered. Assemble the pie no more than 2 hours before baking, as the apples can oxidize (turn brown) if exposed to air for too long. Alternatively, make the dough up to 3 days ahead, wrap it tightly, and refrigerate. On baking day, let it come to room temperature for 10 to 15 minutes, then roll and assemble as usual.
Serving Suggestions and Pairings
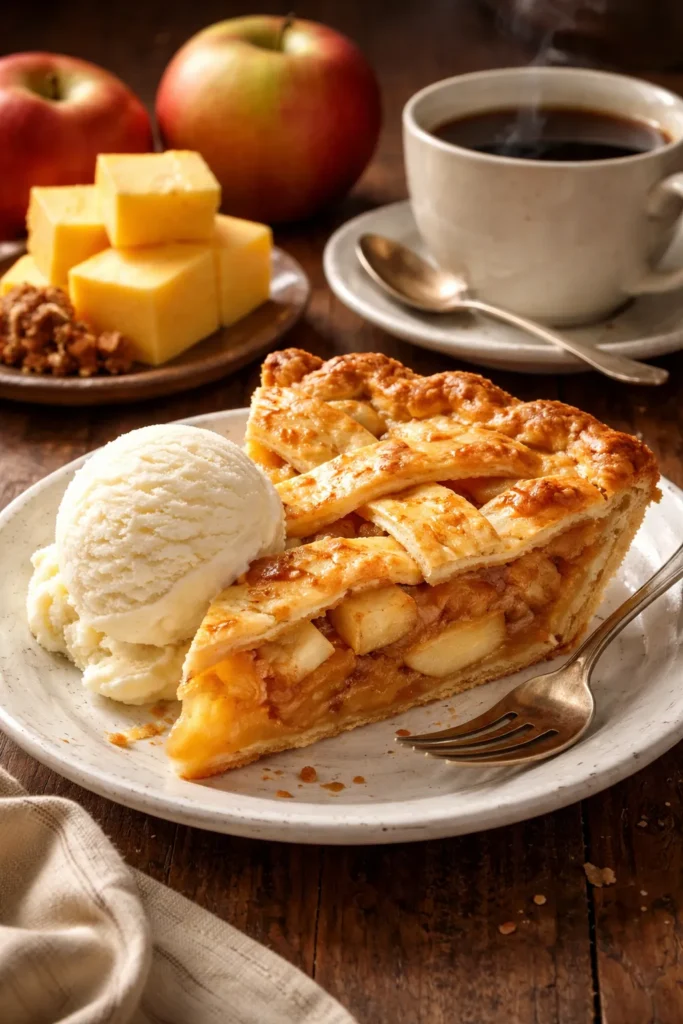
The classic pairing is vanilla ice cream served à la mode—a scoop of cold, creamy vanilla melting slightly into the warm spiced apples. If you want to elevate this, try cinnamon ice cream, brown butter ice cream, or salted caramel ice cream for more complexity.
Whipped cream offers a lighter option. Make it fresh by whipping heavy cream with a touch of sugar and vanilla, or simply dollop store-bought whipped cream on warm slices.
Sharpness and richness complement apple pie beautifully. A sliver of sharp cheddar cheese placed on top of a slice or melted onto a warm slice seems unusual until you taste it—the salty, savory element creates an incredible contrast to the sweet, spiced apples. Many regional traditions in America feature apple pie and cheese, and it’s worth trying.
A drizzle of caramel sauce adds sweetness and richness. For extra sophistication, sprinkle fleur de sel (flaky sea salt) over the caramel to enhance the flavors.
Crushed nuts—pecans, walnuts, almonds, or pistachios—add textural contrast. Toast them lightly in a dry skillet for a minute or two before crushing to intensify their flavor.
Coffee or tea pairs wonderfully as a beverage. Spiced black tea, apple cinnamon herbal tea, or a simple cup of coffee all complement pie beautifully.
For a more substantial dessert, serve pie with a scoop of ice cream and a splash of bourbon or whiskey for adults.
Variations and Adaptations
Mixed-Apple Pie: Use a combination of 4 Granny Smiths and 3 Honeycrisps (or 4 Granny Smiths and 3 Golden Delicious) for complexity. The Honeycrisps or Golden Delicious add sweetness while the Granny Smiths provide tartness and structure.
Spiced Apple Pie: Add ¼ teaspoon ground cloves, ⅛ teaspoon ground allspice, and ⅛ teaspoon ground ginger to your filling for deeper, warmer spice notes.
Vanilla-Bean Apple Pie: Split a vanilla bean lengthwise, scrape out the seeds, and add them directly to your filling. Use vanilla extract as well for extra depth.
Brown Butter Apple Pie: Instead of adding cold butter cubes, melt 3 tablespoons butter in a small saucepan over medium heat. Swirl occasionally until the butter turns golden brown with a nutty aroma (this takes about 5 minutes). Let it cool to room temperature, then drizzle it over the filling before adding the top crust.
Apple-Bourbon Pie: Add 2 tablespoons bourbon or whiskey to the filling along with the lemon juice. The alcohol will largely evaporate during baking, leaving only subtle depth and complexity.
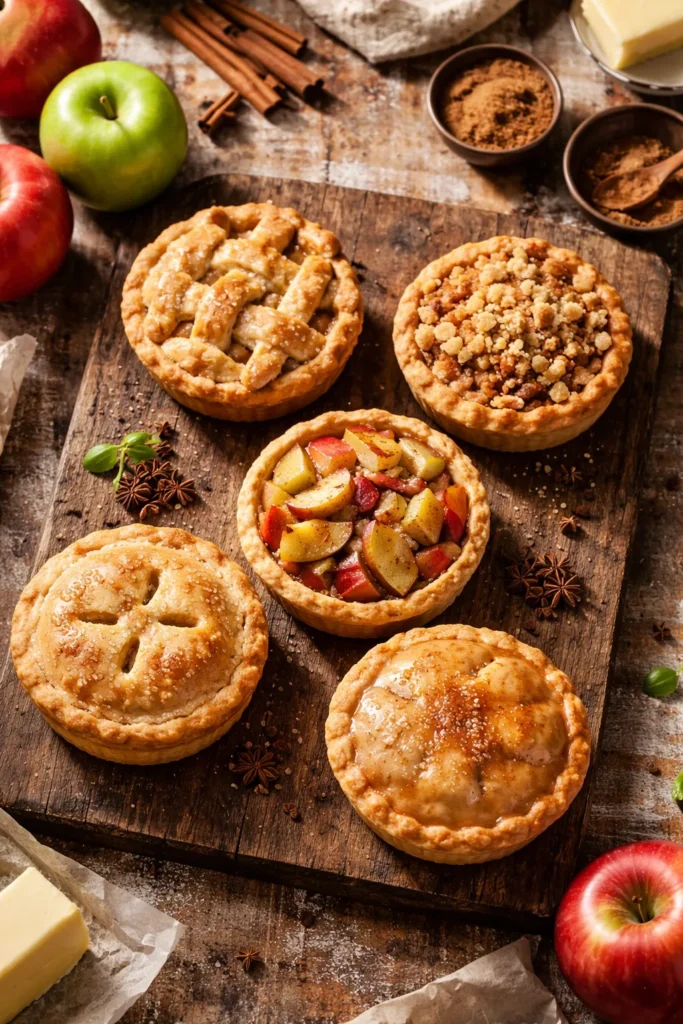
Crumb Topping Variation: Instead of a double crust, use one crust on the bottom and a crumb topping on the filling. Mix 1 cup all-purpose flour, ¾ cup brown sugar, ½ cup cold butter (cut into small pieces), and ½ teaspoon cinnamon. Combine until it resembles breadcrumbs, then scatter evenly over the filling. Bake as directed (the crumb topping won’t need foil protection as a traditional crust does, but watch it to ensure it doesn’t burn; cover with foil if necessary).
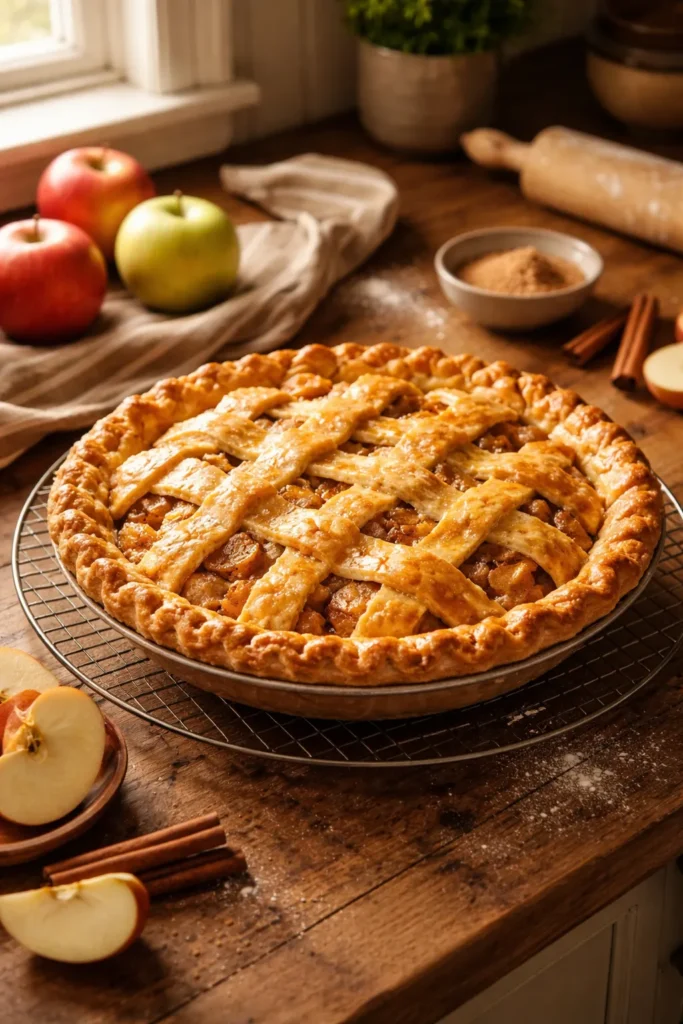
Lattice-Top Pie: After placing the filling in the bottom crust, cut the top crust into ½-inch-wide strips. Arrange them in a diagonal lattice pattern over the filling, weaving them over and under each other. This is more decorative than a solid top crust and slightly easier than it sounds with a bit of practice.
Dietary Adaptations:
For gluten-free pie, use a gluten-free flour blend for the crust and a cornstarch slurry for the filling. (Mix 1 tablespoon cornstarch with 2 tablespoons cold water, then stir into the filling just before baking.) Gluten-free crusts can be more delicate, so handle them gently.
For vegan pie, use a vegan butter (such as Earth Balance) for the crust, prepared exactly the same way as with dairy butter. Skip the egg wash or use a plant-based alternative (a mixture of aquafaba, the liquid from canned chickpeas, beaten with a fork creates a similar glossy effect).
For lower-sugar pie, reduce the total sugar to ½ cup and use a sugar substitute for half of that. Keep in mind that sugar contributes to both sweetness and the thickening of the filling, so excessive reduction may make the pie runnier than usual.
Final Thoughts
Baking apple pie from scratch is one of those kitchen projects that feels more impressive than it actually is. Once you understand the fundamentals—why certain apples work better than others, how to build and protect your crust, and the importance of proper cooling—you’ll find yourself returning to this recipe repeatedly. Each pie you bake teaches you something about your oven, your preferences, and your skill level.
The beauty of apple pie is that it’s simultaneously comforting and flexible. The basic formula works reliably, yet there’s room to experiment with apple varieties, spice levels, and serving styles. You can make it ahead, freeze it, reheat it, and serve it in countless ways. It’s appropriate for holidays and casual weeknight desserts alike.
Trust the process. Follow the temperatures and timing carefully the first time you bake—this builds your foundation. Once you’ve successfully made a pie, you’ll feel confident adapting techniques and ingredients to match your preferences. That first slice you cut, the way the warm filling flows gently onto the plate, the taste of those tender apples and warm spices with a crispy crust—that’s the moment when you’ll understand why people have been baking apple pie for generations. You’ve joined a long tradition of home bakers, and you’ve created something genuinely special with your own hands.