Are you looking to grow monk fruit, which is both sweet and good for you? Growing monk fruit is a fun project, but it’s not the simplest. Don’t worry though! I have put together a very detailed guide with steps to help you.
Monk fruit is a special fruit from Asia that used to grow mainly in mountain areas close to tropical forests. Monk fruit is known for its sweetness and is also packed with antioxidants. It has become quite well-known as a sugar substitute because it’s so sweet without any calories. Growing monk fruit yourself is a great way to get this healthy sweetness into your life.
This small green melon comes from Southeast Asia and is a lot sweeter than sugar—about 150-200 times sweeter! People like using monk fruit instead of sugar because it has no calories and won’t affect your blood sugar levels. It’s a top choice for people who want to eat less sugar or fewer calories.
Table of Contents
- Starting Your Monk Fruit Garden
- Step 1 – Find Good Monk Fruit Seeds
- Step 2 – Get Soil and Trays or Pots Ready
- Step 3 – Plant the Seeds
- Step 4 – Water Well
- Step 5 – Cover with Plastic for Humidity
- Step 6 – Find the Perfect Spot
- Step 7 – Watch for Sprouts
- Step 8 – Take Off the Plastic Wrap
- Step 9 – Care for the Growing Plants
- Step 10 – Move to Bigger Homes
- Step 11 – Support Your Plants
- Step 12 – Maintain Ideal Soil Conditions
- Step 13 – FertilizeFertilize often and prune when needed to help the plant grow well
- Watch out for bugs and sickness, and take care of them fast
- Pick the fruit when it’s ripe and as big as you want it
- Keep the fruit in a cool, dry place, or get it ready to use
- Helpful Tips for Growing Monk Fruit
- Getting and Storing Your Fruit
- Frequently Asked Questions
- What climate does monk fruit grow in?
- Can you grow monk fruit in a greenhouse?
- Where does monk fruit grow naturally?
- Is monk fruit hard to grow?
- What are the negatives of monk fruit?
- Can you eat fresh monk fruit?
- What zone does monk fruit grow in?
- Is monk fruit a tropical fruit?
Starting Your Monk Fruit Garden
Step 1 – Find Good Monk Fruit Seeds
The first thing you need to do is get some monk fruit seeds that can grow. It might be hard to find them at your local store since monk fruit is new to many places. But you can look online and buy from trusted shops. Try to get seeds that are organic or not genetically modified (non-GMO) and that are known to sprout well.
Make sure you choose seeds that will grow well where you live because different kinds of monk fruit can grow differently and produce different amounts of fruit. Starting with the right seeds can make your growing journey much more successful.
Step 2 – Get Soil and Trays or Pots Ready
Now that you have your seeds, you need to get your growing area ready. You can use seed trays or pots, but make sure the soil drains well. Monk fruit likes moisture but doesn’t do well if it’s too wet, because the roots might rot.
Use a soil mix that doesn’t have soil in it, like peat moss or perlite. These help the soil stay moist but not too wet. Fill your trays or pots with this mix, then water it well.
Step 3 – Plant the Seeds
With the soil ready to go, it’s time to plan out your garden. You don’t need to plant deep. Just press the seeds into the top of the soil and lightly cover them up. If you’re using a tray or pot for more than one seed, spread them out so they have room to grow.
Step 4 – Water Well
After putting the seeds in the soil, give them a good watering. This will help the soil settle and make sure your seeds are in good contact with the soil. Keep the soil moist (not drenched, though, because too much water can cause problems). Check on the soil often and water it whenever it needs to stay moist enough for the seeds to spruff.
Step 5 – Cover with Plastic for Humidity
To help the seeds start growing, cover your trays or pots with plastic wrap. This keeps the humidity up and stops the soil from drying out. Put everything in a warm place that gets plenty of light, like a sunny windowsill or under some grow lights.
Step 6 – Find the Perfect Spot
The seeds need warmth and lots of light to sprout. They like it when the temperature is between 70-85°F (21-29°C), and they need around 8 hours of direct sunlight every day. If they don’t get enough light, they may not grow strong.
Step 7 – Watch for Sprouts
After you plant the seeds, keep an eye on them to see when they start to grow, which should be in about 2-3 weeks. When you see the little plants, take off the plastic wrap for good air flow.
Keep watering just enough to keep the soil damp for the baby plants, but avoid over-watering.
Step 8 – Take Off the Plastic Wrap
When you can see the plants, remove the plastic. This is really important to stop mold from growing. Continue to water just the right amount and add more light if the plants seem to be reaching for it.
Step 9 – Care for the Growing Plants
As the plants get bigger, make sure they have all they need. Growing indoors? Keep them under lights or by a window with plenty of sun, and water as needed to keep the soil from getting dry. You can also give them some fertilizer every few weeks to help them grow strongly.
Step 10 – Move to Bigger Homes
When the plants are big enough—between 6 and 12 inches tall—you can put them in a bigger pot or even in your garden.
Choose a big enough place to let the plants grow to their full size. Before making the big move, start getting them used to being outside by setting them outside in the shade for a little while each day, slowly increasing the time they’re out.
Step 11 – Support Your Plants
As your monk fruit plants grow taller, they might need something to help them stand up like stakes or a trellis. This is super important if the plants start to produce lots of heavy fruit.
Step 12 – Maintain Ideal Soil Conditions
For your monk fruit plants to thrive, it’s crucial to keep the soil just right: moist but not soggy. Over-watering can cause the roots to rot and kill the plants. Make sure water doesn’t sit around the roots by having soil that drains well.
Step 13 – FertilizeFertilize often and prune when needed to help the plant grow well
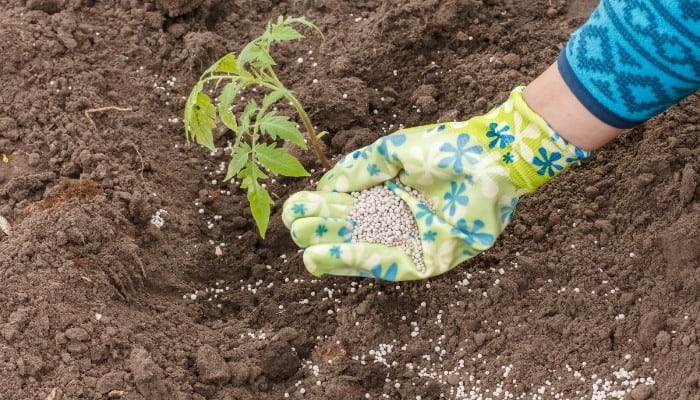
To help your monk fruit plant grow strong and healthy, it needs regular food through fertilization. Use a balanced fertilizer every couple of weeks during its growing time. Pruning is good for the plant too. It helps get rid of any dead or sick parts, makes sure air can flow around the plant well, and helps new parts of the plant to start growing.
Watch out for bugs and sickness, and take care of them fast
Keep an eye on your monk fruit plant for any bugs or diseases. If you find any, you should take action right away. Bugs like aphids, whiteflies, and scale insects might show up. Diseases like powdery mildew, root rot, and verticillium wilt are also things to look out for. Catching and treating these problems early is the key.
Pick the fruit when it’s ripe and as big as you want it
When the monk fruit is ripe and the right size, it’s time to pick it. The fruit should be full, smell nice, and have a skin that’s a yellow-green color. For the best taste and sweetness, you should pick the fruits in the cool of the morning. You can eat monk fruit fresh or use it in cooking or to make things last longer, like jams.
Keep the fruit in a cool, dry place, or get it ready to use
After picking the ripe monk fruit, you can store it where it’s cool and dry for a few weeks. You can also make it into a natural sugar substitute. To make monk fruit powder, you need to dry the fruits and grind them until they’re really fine. This powder can take the place of sugar in things you make or add to your drinks, like tea or smoothies. Monk fruit is a fantastic choice instead of processed sugar because it gives you sweetness without any calories.
Helpful Tips for Growing Monk Fruit
If you want to grow your own monk fruit from seeds, here are some tips to make sure you do it right:
- Pick a sunny spot – Find a place that gets lots of sunshine or a bit of shade and check that water doesn’t stay in the soil.
- Start seeds inside your home – This gives your plant a strong and healthy start.
- Water just right – Keep the soil damp but don’t let it get too wet.
- Feed your plant – Give it the nutrients it needs to grow by feeding it at the right times.
- Prune when necessary – Cutting off dead or sick parts helps the plant and makes it grow better.
- Keep an eye out for trouble – Regular checks can spot bugs or diseases before they spread.
- Pick the fruit when it’s ready – When the fruit is ripe and big enough, that’s the best time to harvest.
- Give it light and something to climb – Use stakes or trellises and make sure it gets enough sunshine.
- Think about the weather – Monk fruit likes warm, moist places, but you can still try growing it in other conditions. Just be careful.
- Be patient – Growing monk fruit takes time. Remember to enjoy watching your plant grow.
Getting and Storing Your Fruit
Collecting Monk Fruit:
- It’s pick-time when the monk fruit is all ripe and the size you want.
- Search for fruits that are big and have a yellow-green skin.
- Go fruit picking in the morning, it’s cooler then, and the fruits are sweeter.
Saving Monk Fruit:
- You can keep the whole fruits somewhere cool and dry, and they’ll be good for a few weeks.
- Drying and grinding the fruits right after they’re picked keeps their sweet taste.
- You can also turn monk fruit into a sugar substitute. A lot of times, people dry it and make a powder that they use in baking or to sweeten up their drinks.
Picking the right time to harvest monk fruit is about waiting until it’s perfectly ripe. Harvest it when the fruits are big, full, and yellow-green, with the best time being in the cool mornings when the sugar is most concentrated. Store the fruits in a cool, dry place, and they’ll stay good for weeks. Grind or make an extract from the monk fruit while it’s still fresh for the best taste. The monk fruit extract or powder can be a natural way to sweeten your food and drinks without adding extra calories.
Frequently Asked Questions
What climate does monk fruit grow in?
Monk fruit thrives in areas that are warm and humid, with soil that allows water to pass through it easily. While it can adapt to various environments if cared for well, monk fruit does its best when it gets a lot of sunshine or at least some light shade.
Can you grow monk fruit in a greenhouse?
Certainly, growing monk fruit in a greenhouse is achievable. Doing so requires creating an environment that closely resembles the warm and humid conditions monk fruit loves to grow in. By controlling the climate inside a greenhouse, you can successfully grow this fruit.
Where does monk fruit grow naturally?
The monk fruit plant is originally from the warmer regions of Southern China and Northern Thailand. It is commonly cultivated in these areas, typically in small family-owned gardens rather than large-scale farms.
Is monk fruit hard to grow?
Yes, it can be quite difficult to grow monk fruit. This is because it needs specific conditions to thrive: a warm and moist atmosphere, along with soil that doesn’t hold water for too long. Additionally, monk fruit plants grow at a slow pace, so it can take a while to see the fruits of your labor, requiring commitment and attentive care.
What are the negatives of monk fruit?
One downside to monk fruit is that it’s not as common in shops as some other sweeteners, which can make it more expensive. There is also the possibility that eating too much monk fruit sweetener might cause stomach upset for some people.
Can you eat fresh monk fruit?
Fresh monk fruit is edible, although it doesn’t taste as sweet as when it’s dried and processed into a sweetener. The fresh fruit has a different taste that some might find not as enjoyable compared to its sweetened form.
What zone does monk fruit grow in?
For those in the United States, monk fruit is best grown in USDA hardiness zones 10 and 11. These zones have mild climates where the temperatures usually stay above 30°F, which suits the monk fruit plant just fine.
Is monk fruit a tropical fruit?
Indeed, monk fruit is a tropical fruit. Its origins lie in the warm and moist regions of Southern China and Northern Thailand, which provide the ideal conditions it needs to flourish.
![How Long Does An Apple Tree Take To Bear Fruit? [ANSWERED]](https://fruitonix.com/wp-content/uploads/2023/06/Screenshot-2023-06-02-12.52.12-AM.png)