There’s a particular kind of disappointment that comes with biting into a pound cake and finding it dry, dense in all the wrong ways, and disappointing—especially after all the work you put into making it from scratch. The irony is that pound cake, by its very nature, should be moist and tender, almost melting on your tongue. The problem isn’t the concept; it’s usually one or two small mistakes that transform what could be a stunning dessert into something you’d rather hide.
The truth is, buttermilk is the single most important ingredient for keeping a pound cake moist, and most home bakers don’t understand why or how to use it properly. When you crack the code on moisture retention, you’ll never make a dry pound cake again. I’ve tested this recipe dozens of times, made every mistake in the book, and landed on something that comes out perfectly moist every single time—a cake that stays tender for days, slices cleanly, and actually improves slightly as it sits.
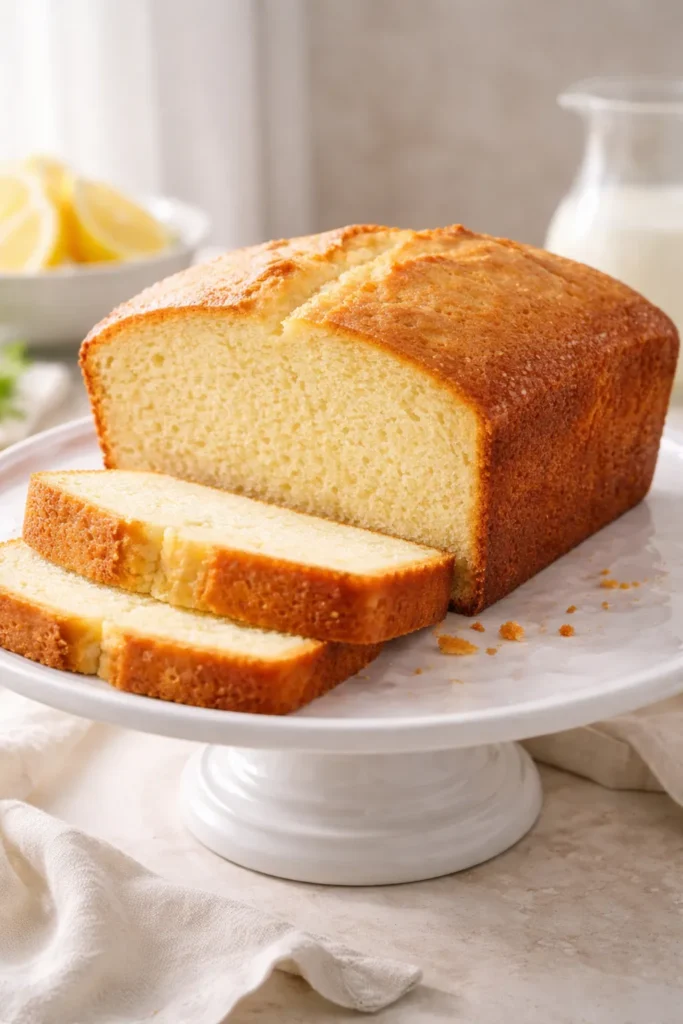
This isn’t a pound cake that needs frosting to mask dryness, or one that requires eating immediately before it hardens. This is a cake you can make ahead, store wrapped, slice a few days later, and have it taste just as good—maybe better—than it did fresh from the oven. Let me show you exactly how to make it happen.
Table of Contents
- Why Buttermilk Creates Such Moist, Tender Cake
- The Science Behind a Dense, Tender Crumb
- Essential Ingredients for Maximum Moisture
- Room Temperature: The Secret Nobody Talks About
- Perfect Creaming Technique
- The Right Pan and Preparation Method
- Measuring Flour Correctly to Prevent Dryness
- Baking Temperature and Baking Time
- Buttermilk Pound Cake Recipe
- Ingredients
- Instructions
- Expert Tips for Never-Fail Results
- Flavor Variations and Adaptations
- Storage and Make-Ahead Guide
- Serving Suggestions and Pairings
- Troubleshooting Dry Pound Cake
- Final Thoughts
Why Buttermilk Creates Such Moist, Tender Cake
Buttermilk seems like just another liquid in a recipe, but it’s actually doing something chemically important that regular milk simply cannot do. The acidity in buttermilk reacts with baking soda to create lift and structure, but more importantly for moisture, it tenderizes the gluten strands in the flour. This creates a finer, more delicate crumb structure that naturally traps and holds moisture more effectively than a cake made with water or regular milk.
When gluten strands are overdeveloped or too tight, they create channels for moisture to escape during baking and cooling. Buttermilk’s acidic nature prevents this by keeping gluten relaxed and pliable. The result is a cake that feels tender and soft rather than tough or crumbly, and this tender structure genuinely holds onto moisture better as it sits.
Additionally, buttermilk adds a subtle tang that balances the sweetness and makes the overall flavor more complex and satisfying. You don’t taste “buttermilk” in the finished cake—instead, you taste a richer, more developed butter flavor that just tastes right. This is why pound cakes made with buttermilk have been a Southern tradition for generations. Grandmothers knew, before the science was formalized, that buttermilk made the best, most reliable pound cakes.
The Science Behind a Dense, Tender Crumb
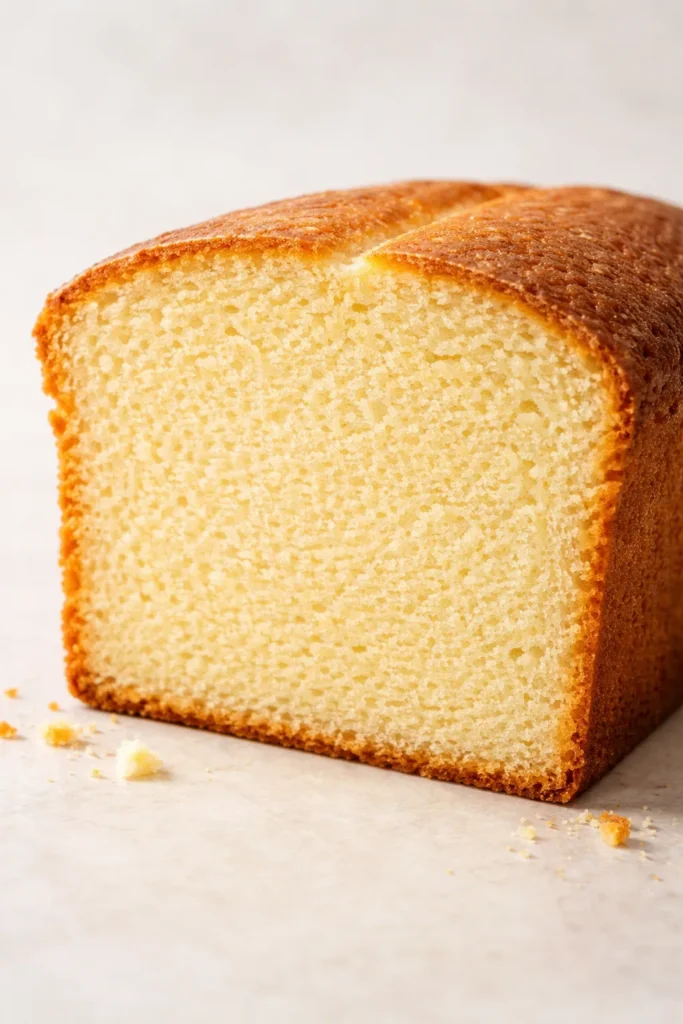
Dense doesn’t mean dry—that’s the critical distinction most bakers miss. A proper pound cake is supposed to be dense; it’s a butter cake with a rich, tight crumb, not a fluffy layer cake. The difference between dense-and-moist and dense-and-dry comes down to how you treat three things: the fat content, the batter structure, and the baking temperature.
Butter is the primary fat in pound cake, and fat carries flavor and creates a feeling of moisture in the mouth even if the literal water content is identical to a drier cake. A pound cake made with proper proportions of butter will taste and feel moist because it’s literally more fatty. This is also why pound cake is so satisfying; a small slice is often enough because of the richness.
The batter structure matters enormously. When you cream butter and sugar together properly—and this really does take a full 5 minutes, not 2—you’re incorporating tiny air bubbles throughout. These bubbles expand in the oven and create the tender crumb. If you rush creaming, you get fewer bubbles and a denser, tighter crumb that doesn’t absorb moisture as well. Conversely, if you overmix the batter after adding flour, you develop gluten and create a tough, dry cake despite having plenty of fat.
Essential Ingredients for Maximum Moisture
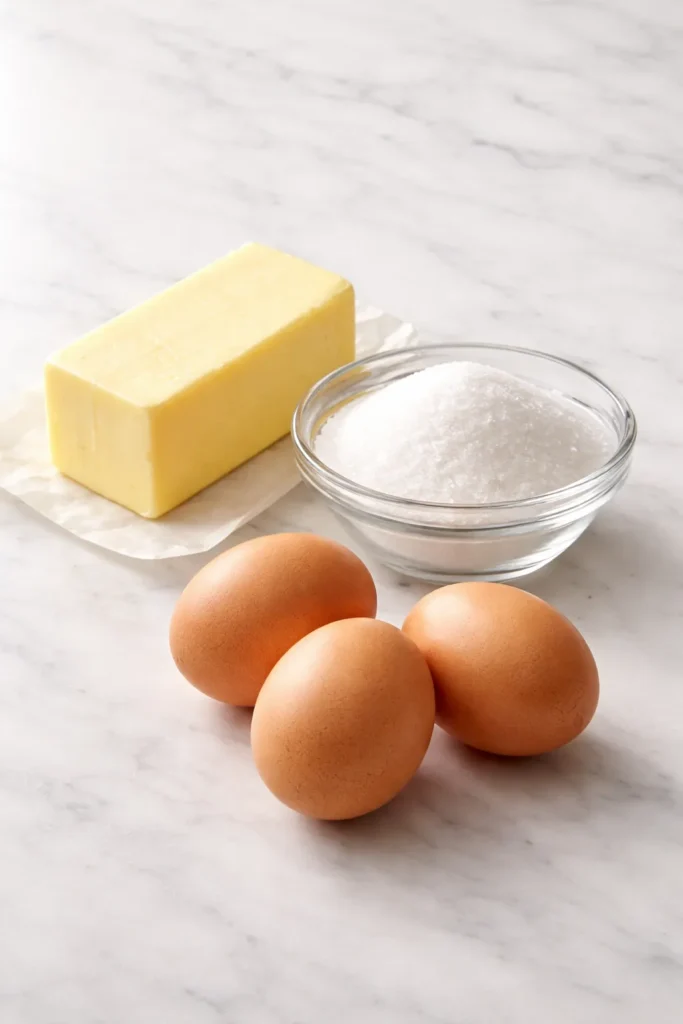
Unsalted Butter (Room Temperature)
This is non-negotiable. Unsalted butter allows you to control the salt in your recipe precisely, and room-temperature butter creams with sugar far more effectively than cold butter. If your butter is too cold, it won’t incorporate air; if it’s too warm, it won’t hold air and the cake becomes greasy. Let butter sit on the counter for 1-2 hours, or cut it into tablespoon-sized pieces and let it soften on the wrapper. It’s ready when you can leave a slight fingerprint indentation in it.
Granulated Sugar
White granulated sugar is best here because it dissolves into a uniform sweetness and creates the proper texture. Don’t substitute brown sugar unless you’re making a variation; brown sugar adds molasses, which changes both flavor and moisture retention in ways that require different proportions.
Large Eggs at Room Temperature
Cold eggs will cause the softened butter to seize up, creating a broken, curdled batter that bakes into a dense, dry cake. Room-temperature eggs blend seamlessly with the butter-sugar mixture, creating a smooth, emulsified batter. To warm eggs quickly, place them in a bowl of warm (not hot) tap water for 5 minutes, then dry them before cracking.
All-Purpose Flour, Measured Correctly
More pounds of pound cake fail because of flour measurement than any other single reason. Never scoop flour directly from the bag into a measuring cup; this compacts the flour and adds 20-30% more than the recipe calls for. Instead, spoon flour into the measuring cup and level it with the back of a knife. Too much flour dries out a cake noticeably, making it crumbly and tough.
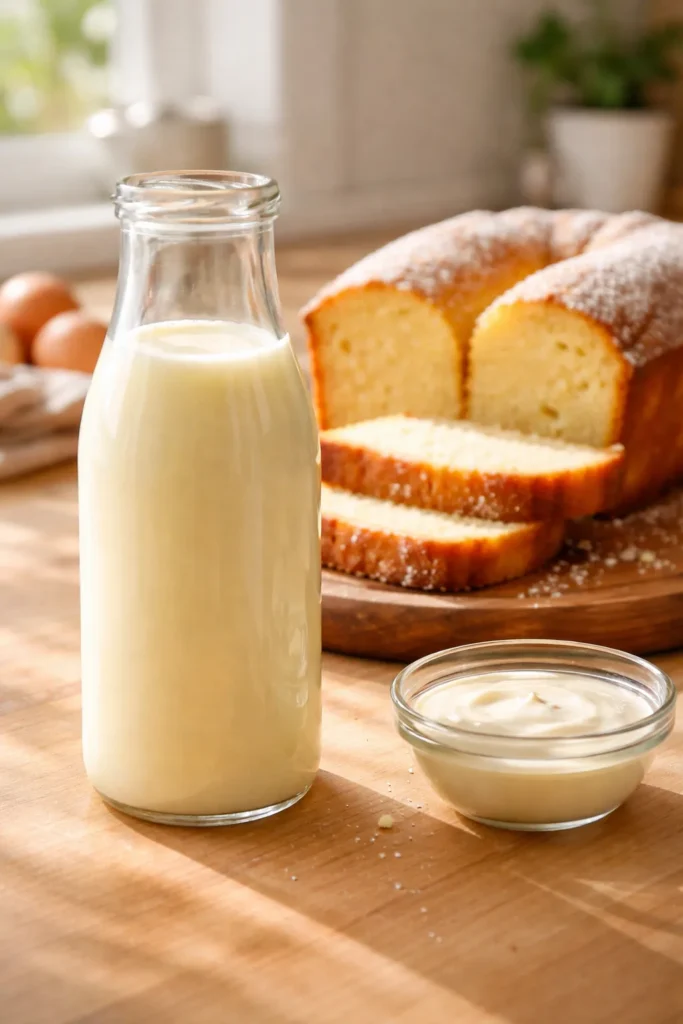
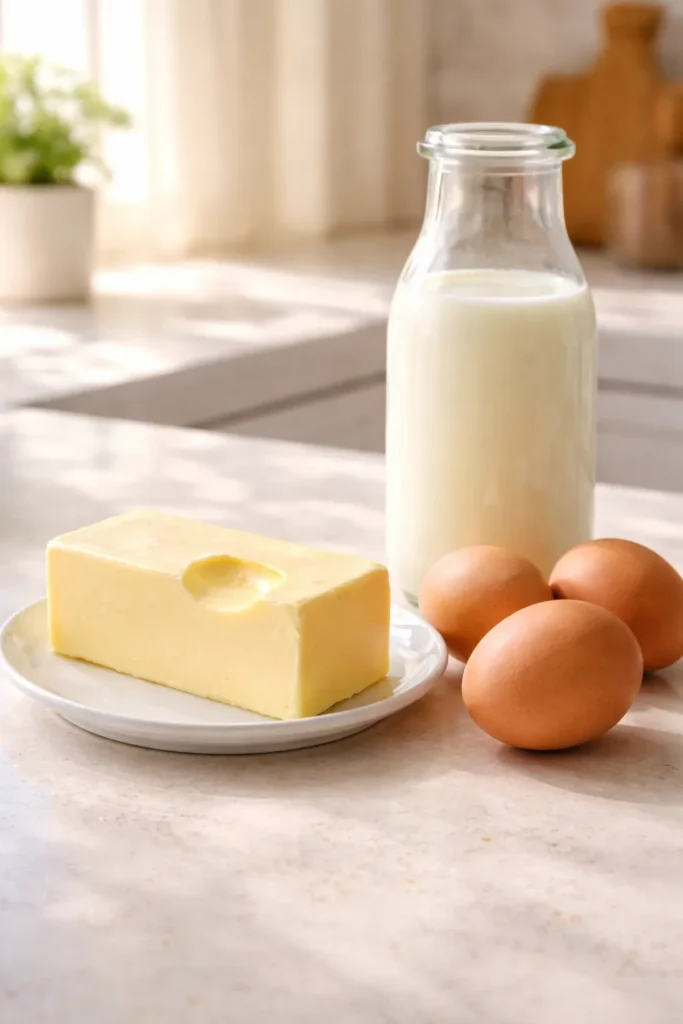
Real Buttermilk
There’s truly no good substitute for actual buttermilk. It’s cultured, it’s been fermented slightly, and this creates the flavor and chemical properties that work in pound cake. If you absolutely cannot find buttermilk, you can make a substitute by mixing 1 tablespoon of fresh lemon juice or white vinegar with 1 cup of whole milk and letting it sit for 5 minutes. But understand that this substitute works mechanically (the acidity reacts with baking soda) but doesn’t replicate the flavor or the full tenderizing effect of real buttermilk. Use whole-fat buttermilk if you can find it; low-fat versions work but produce slightly less moist results.
Baking Soda (Only Baking Soda)
This recipe uses only baking soda, not baking powder, because the acidity in buttermilk activates baking soda perfectly. Using both creates too much rise and can cause the cake to overflow, crack, or have a bitter taste. Measure it carefully—too much baking soda makes the cake taste metallic and changes the texture.
Salt
Salt isn’t optional and isn’t just about savory flavoring. Salt enhances and balances the overall flavor of the cake, making the sweetness taste less cloying and the butter flavor more pronounced. Omitting salt or reducing it makes the finished cake taste flat and one-dimensional.
Vanilla and Almond Extracts
These add flavor depth without adding moisture issues. Vanilla extract is the base, and almond extract adds a subtle floral note that makes butter flavor sing. You can adjust either one to taste, or skip the almond if you prefer a pure vanilla pound cake.
Room Temperature: The Secret Nobody Talks About
This deserves its own section because getting all your ingredients to room temperature is genuinely the most important technical step, and almost nobody does it properly. The reason is simple: when you combine cold ingredients with warm, emulsified butter and sugar, you destabilize the mixture. The cold liquid cools the butter, making it seize and separate, creating a broken, curdled-looking batter.
A broken batter doesn’t incorporate air properly, doesn’t mix smoothly with flour, and bakes into a cake that’s both dense and dry—exactly what you’re trying to avoid. You need every ingredient—butter, eggs, and buttermilk—at roughly the same temperature so they can emulsify together and create a smooth, uniform batter.
Plan ahead. Take your butter out of the fridge 1-2 hours before you start, depending on how warm your kitchen is. Take your eggs and buttermilk out of the fridge at the same time. If you forget, place eggs in a bowl of warm tap water for 5 minutes, and let buttermilk sit on the counter for 10-15 minutes. There’s no cheating this step with a microwave; microwaving butter causes uneven softening and burning in spots.
Perfect Creaming Technique
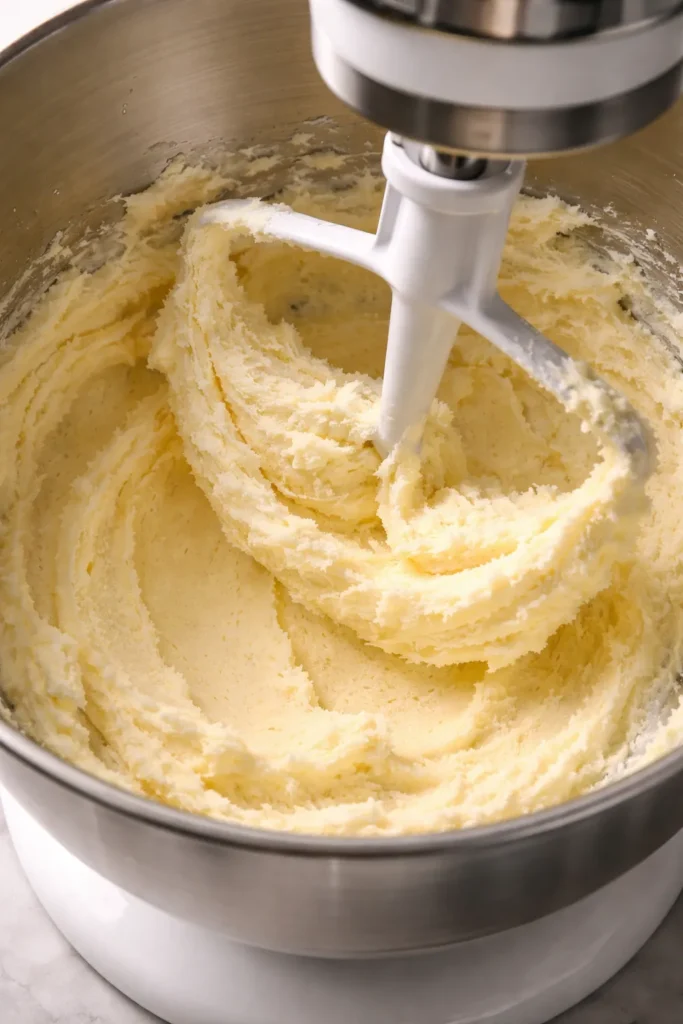
Creaming butter and sugar isn’t just mixing them until they look combined; it’s a precise technique that determines your cake’s texture. When you cream properly, you’re incorporating hundreds of tiny air bubbles into the butter. These bubbles expand in the oven’s heat and create that tender, airy crumb structure.
Start with room-temperature butter and granulated sugar in a large mixer bowl. Mix on medium speed for a full 5-7 minutes. Yes, five whole minutes. Set a timer. After 3 minutes, the mixture will look pale and slightly fluffy; after 5 minutes, it should look almost like frosting in color and texture—light, airy, and spreadable. If you stop at 2-3 minutes, your cake will be denser and less tender, and it won’t trap moisture as well.
Add the eggs one at a time, beating for about 20-30 seconds after each addition and scraping down the bowl sides after every other egg. The batter may look slightly curdled or broken-looking after adding the eggs—this is totally normal and will come together once you add the flour. Don’t panic and don’t try to fix it by overmixing at this stage.
The Right Pan and Preparation Method
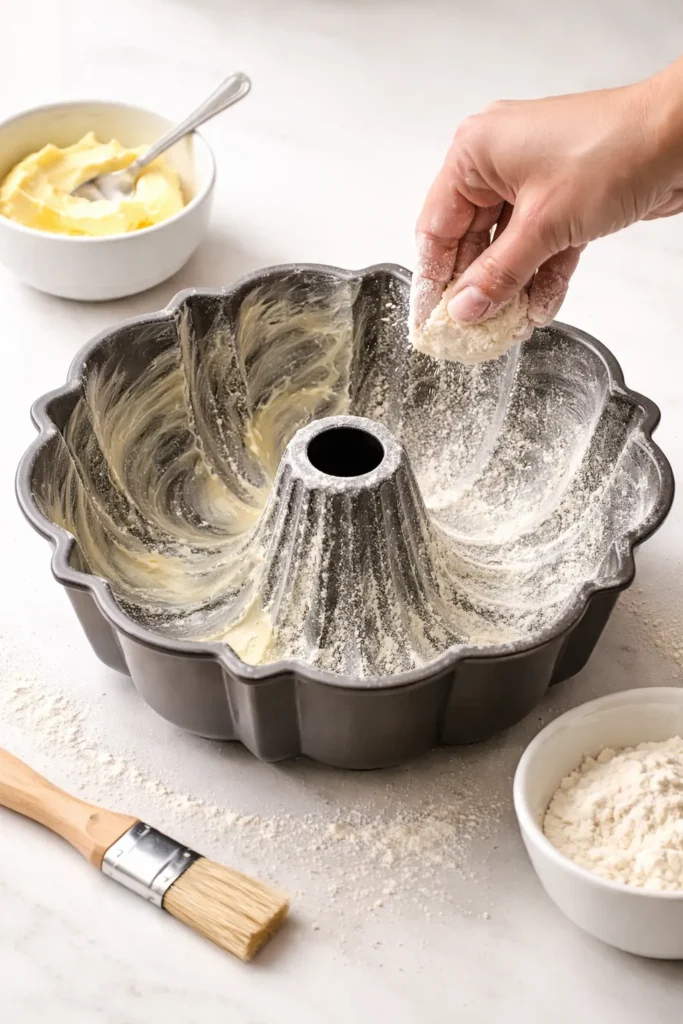
Use a Bundt pan or tube pan, preferably 10-12 cups. The fluted surface of a Bundt pan conducts heat efficiently and creates that beautiful, classic presentation. However, a loaf pan or even two smaller Bundt pans work fine; just adjust the baking time downward slightly.
Prepare your pan meticulously—this is where cakes stick and break. Grease the pan thoroughly with softened butter or non-stick baking spray, making sure to get into every ridge and corner. Then dust it lightly with all-purpose flour, tapping out the excess. Some bakers make a homemade cake release by mixing 2 tablespoons flour + 1 tablespoon vegetable oil into a smooth paste, then brushing it into the pan with a pastry brush. This genuinely does work better than grease alone.
Newer, light-colored Bundt pans work better than dark pans for even browning and consistent baking. Dark pans conduct heat more aggressively and can create overly dark, hard edges while the inside is still underbaked. If you only have a dark pan, reduce the oven temperature to 320°F.
Measuring Flour Correctly to Prevent Dryness
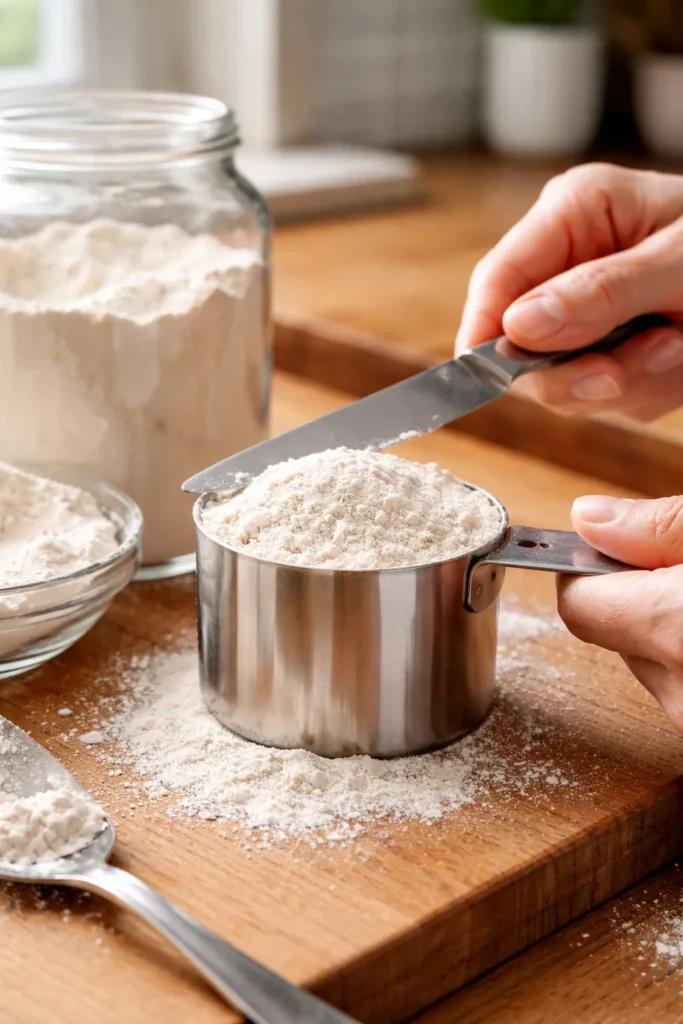
I’m going to repeat this because it’s that important: Spoon flour into a dry measuring cup and level it with the back of a knife. Never scoop the measuring cup directly into the flour bag.
Scooping compacts the flour and you end up with 30% more flour than the recipe calls for. This creates a dry, tough, crumbly cake regardless of how much buttermilk you use. If you’re a baker who weighs ingredients, that’s ideal—3 cups of all-purpose flour weighs approximately 360-370 grams depending on how densely it was packed in the bag.
Some recipes call for sifting flour, but this recipe doesn’t need it if you measure correctly. Sifting adds extra air and can make the cake too light; we want a proper pound cake density.
Baking Temperature and Baking Time
Pound cakes bake at 325°F (163°C), which is lower than most cakes. This lower temperature allows the cake to bake more slowly and evenly, which prevents the edges from overcooking and drying out while the center is still underbaked. At higher temperatures, the exterior browns and hardens before the interior is fully baked.
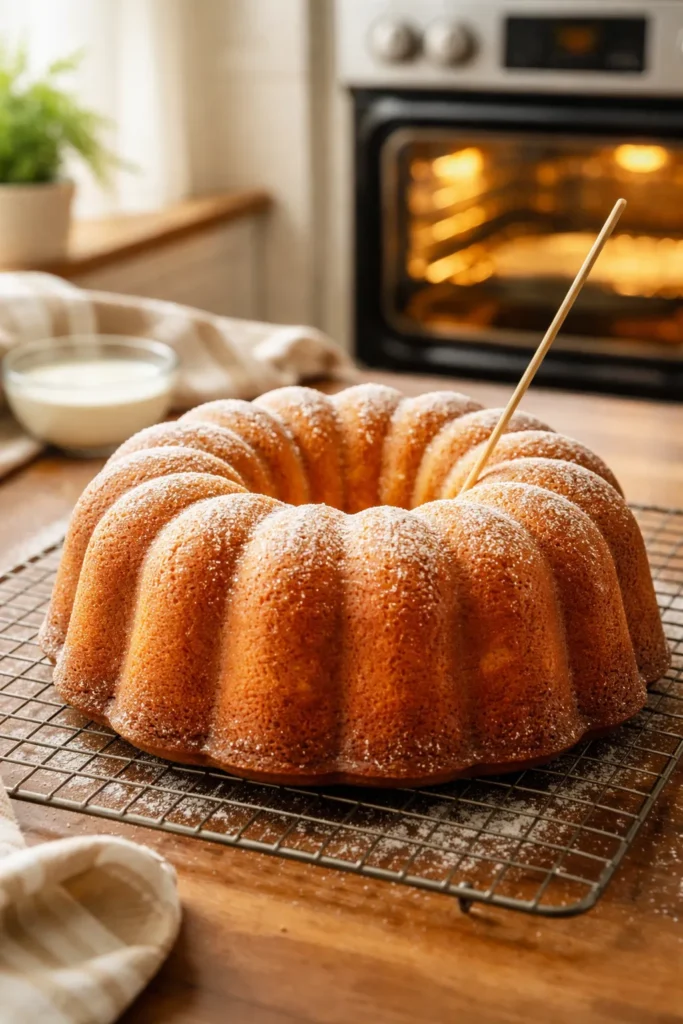
Baking time is typically 1 hour 10 minutes to 1 hour 25 minutes for a standard 10-12 cup Bundt pan, depending on your oven. Start checking at the 60-minute mark. The cake is done when a toothpick inserted in the very center comes out clean or with just a few moist crumbs—not sticky batter, but not bone-dry either. A few moist crumbs are actually ideal; waiting for a completely clean toothpick can mean overbaking.
If you have an instant-read thermometer, the internal temperature should register 208-210°F (98-99°C). This is the sweet spot where the cake is fully set but not overdone.
Don’t open the oven door during the first 55-60 minutes. Opening the door releases heat and steam, which can cause the cake to fall or bake unevenly. Wait until the final 10-15 minutes to check on it.
Buttermilk Pound Cake Recipe
Yield: Serves 12-14 | Makes one 10-12 cup Bundt cake
Prep Time: 20 minutes
Cook Time: 1 hour 15 minutes
Total Time: 1 hour 35 minutes (plus cooling)
Difficulty: Beginner — This recipe is straightforward even for first-time bakers, requiring only basic mixing and standard baking equipment. The most important part is patience with room-temperature ingredients and proper measuring.
Ingredients
For the Cake:
- 1½ cups (3 sticks) unsalted butter, softened to room temperature
- 2½ cups granulated sugar
- 4 large eggs, room temperature
- 3½ cups all-purpose flour (measured by spooning into the cup and leveling off)
- ½ teaspoon fine sea salt
- ½ teaspoon baking soda (this is the only leavening agent; do not add baking powder)
- 1 cup whole-fat buttermilk, room temperature
- 2 teaspoons pure vanilla extract
- 1 teaspoon almond extract
Instructions
Prepare Your Pan and Preheat:
-
Preheat the oven to 325°F (163°C) and position the rack in the center of the oven.
-
Grease a 10-12 cup Bundt pan thoroughly with softened butter or non-stick baking spray, making sure to coat every ridge and corner. Dust the entire pan lightly with all-purpose flour, then tap out the excess. The pan should look mostly glossy butter with a thin flour coating, not heavily floured.
Cream the Butter and Sugar:
-
In a large mixing bowl, combine the softened butter and granulated sugar.
-
Using a stand mixer fitted with the paddle attachment (or a hand mixer), beat on medium speed for a full 5-7 minutes. Set a timer—this is not a step to rush. The mixture should transform from grainy and yellow to pale, noticeably fluffy, and almost frosting-like in texture and color. The volume should visibly increase.
Add the Eggs:
-
Add the eggs one at a time, beating for about 20-30 seconds after each addition. Scrape down the sides of the mixing bowl after every other egg, ensuring no hidden pockets of unmixed batter remain.
-
The batter may look slightly curdled or broken-looking after adding all the eggs—this is completely normal and will come together in the next steps. Do not try to fix it by overmixing.
-
Beat in the vanilla extract and almond extract until just combined.
Combine Dry Ingredients:
- In a separate medium bowl, whisk together the flour, salt, and baking soda until evenly distributed. Set aside.
Alternate Flour and Buttermilk:
-
Starting and ending with the dry flour mixture, add the dry ingredients and buttermilk in alternating batches to the butter mixture. The pattern is: ⅓ flour → ½ buttermilk → ⅓ flour → ½ buttermilk → final ⅓ flour.
-
Mix on low speed after each addition, just until the ingredients are combined—stop as soon as you don’t see streaks of flour. Do not overmix. Overmixing develops gluten and creates a tough, dense, dry cake. This mixing should take maybe 30-40 seconds total across all additions.
-
After the final flour addition is mixed in, use a rubber spatula to scrape down the sides and bottom of the bowl, then fold the batter gently 2-3 times to ensure everything is evenly combined.
Bake the Cake:
-
Pour the batter into the prepared Bundt pan, spreading it gently into an even layer with an offset spatula or the back of a spoon. Do not tap the pan on the counter. Gently tapping forces air bubbles to the top and can create a fragile crust that cracks as the cake rises.
-
Place the pan in the preheated 325°F oven and bake for 1 hour 10 minutes to 1 hour 25 minutes. Do not open the oven door before 55 minutes have passed. After 55 minutes, you may check for doneness.
-
The cake is done when a toothpick inserted into the very center comes out clean or with just a few moist crumbs clinging to it (not wet batter, but a few crumbs are fine). The top should be deep golden brown, and the cake should just be beginning to pull away from the sides of the pan.
-
If you’re using an instant-read thermometer, aim for an internal temperature of 208-210°F (98-99°C).
Cool the Cake:
-
Remove the cake from the oven and set the pan on a wire cooling rack. Let the cake cool in the pan for 10 minutes. This resting time allows the structure to set and makes removal from the Bundt pan far less likely to break the cake.
-
After 10 minutes, place a wire cooling rack or serving plate over the top of the pan and carefully invert the cake onto the rack. The cake should slide out smoothly. If it’s sticking, gently run a thin knife around the inside edges of the pan and try again.
-
Allow the cake to cool completely on the wire rack—at least 1-2 hours at room temperature. Never frost, glaze, or wrap a warm cake; the heat will cause condensation that makes the exterior soggy. A completely cooled cake has a much better texture.
Expert Tips for Never-Fail Results
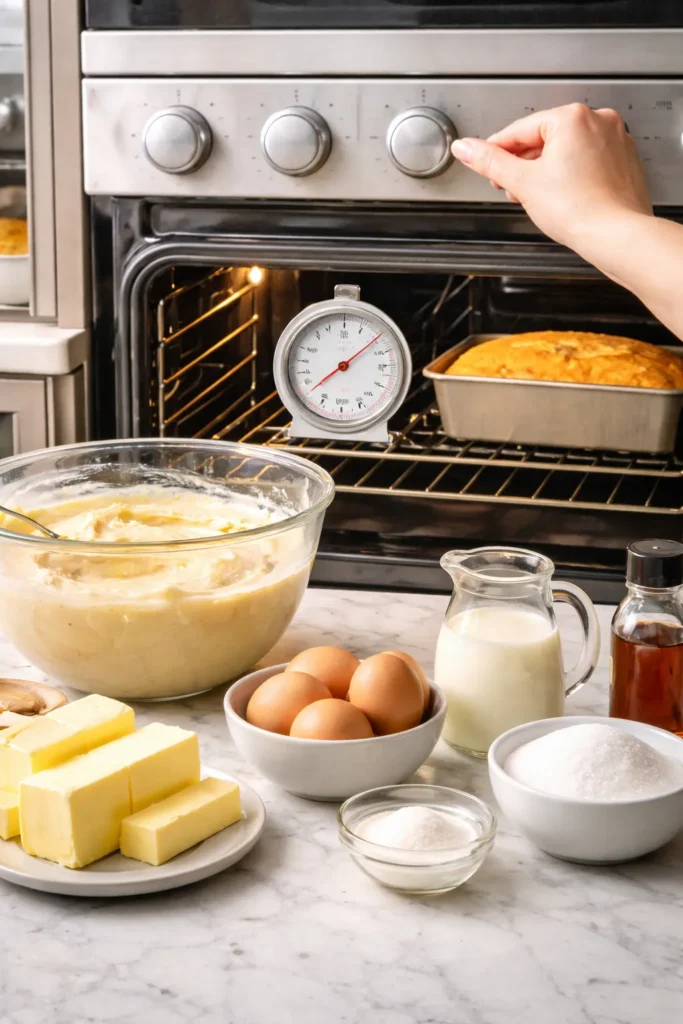
Invest in a quality oven thermometer. Home ovens are often off by 25-50 degrees Fahrenheit, which dramatically affects baking time and moisture retention. A cheap oven thermometer ($10-15) tells you the real temperature and lets you adjust accordingly. Place it in the center of the oven for 10 minutes before you start baking to get an accurate reading.
Use whole-fat buttermilk if you can find it. Low-fat and fat-free buttermilk will work, but whole-fat produces a noticeably more moist, richer cake. The fat content matters.
Don’t skip the almond extract. It seems optional, but 1 teaspoon of almond extract in a pound cake is genuinely magical. It adds a subtle floral note that makes the butter flavor come alive without tasting like almonds. You can use pure almond extract or almond flavoring—both work.
Beat eggs in slowly, not all at once. Adding all four eggs at once can shock the emulsified butter mixture and cause it to break. Adding them one at a time, with a brief beat between each, ensures they incorporate smoothly and create a uniform batter.
Scrape the bowl frequently. Especially after adding eggs, there are often pockets of unmixed batter clinging to the sides and bottom of the bowl. Scraping and mixing for 5 extra seconds ensures everything is evenly combined, which results in more uniform texture throughout the cake.
Don’t rely on appearance to judge doneness—use a toothpick or thermometer. A pound cake can look completely done on the outside while still being slightly underbaked in the center. A toothpick test is reliable and simple. With a thermometer, you remove the guesswork entirely.
Let the cake cool completely before storing. A still-warm cake releases steam that condenses inside a storage container, creating a soggy exterior. Cooling completely ensures any moisture that was lost during baking stays inside the crumb rather than on the outside.
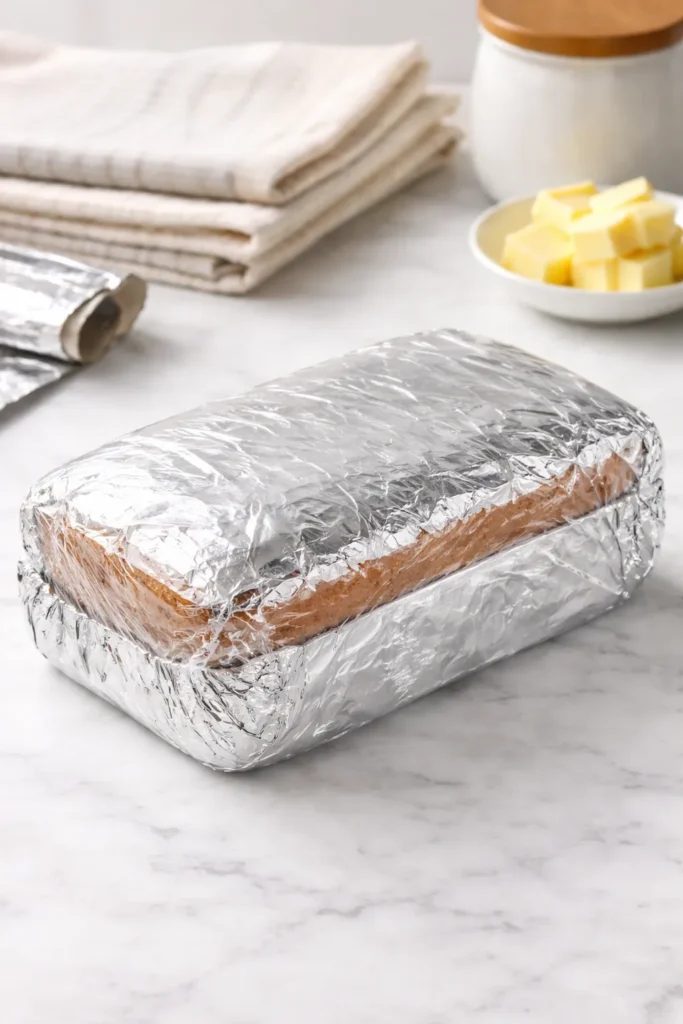
Wrap cooled cake in plastic wrap, then foil. This double layer seals in moisture and prevents the cake from absorbing odors from the fridge or freezer. Press the plastic wrap directly against the cake surface to minimize air contact.
Flavor Variations and Adaptations
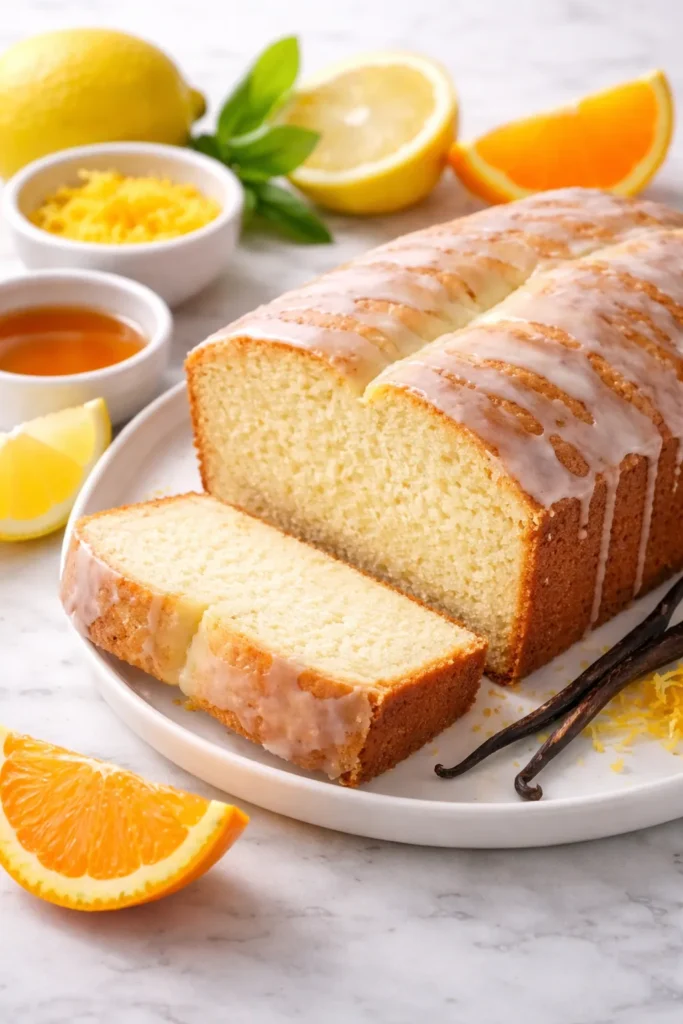
Lemon Pound Cake
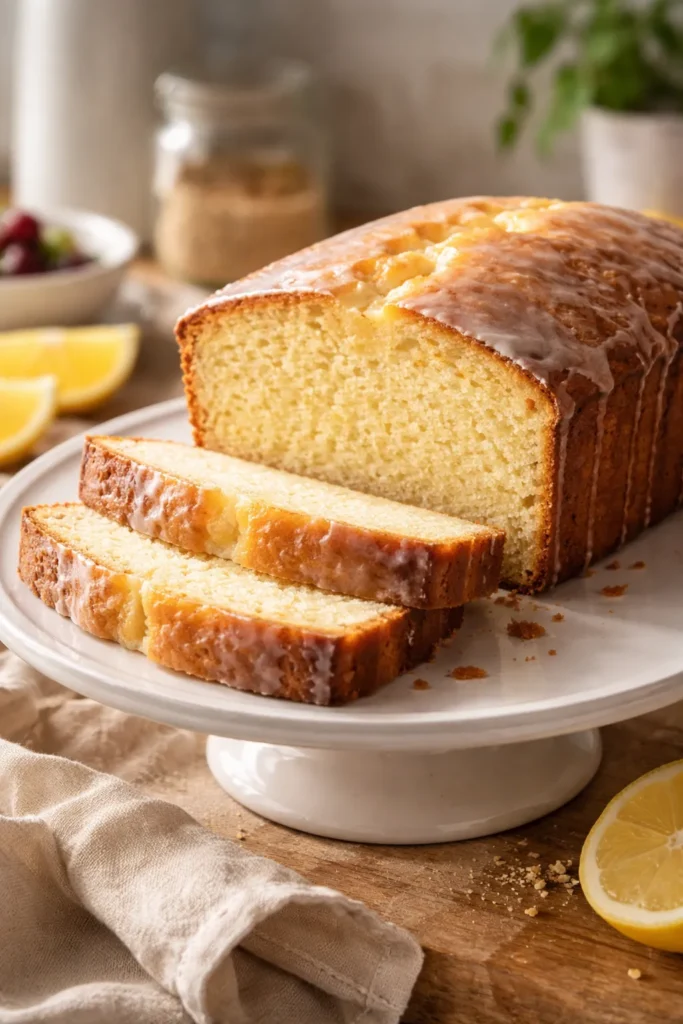
Replace the almond extract with ½ teaspoon lemon extract, and add the zest of 2 lemons to the butter-sugar mixture before beating. The lemon zest adds bright flavor without adding extra liquid. You can also drizzle the cooled cake with a simple lemon glaze made from powdered sugar, lemon juice, and a touch of butter.
Orange Pound Cake
Use the zest of 2 navel oranges instead of lemon, and replace the almond extract with ½ teaspoon orange extract (or just omit the almond extract entirely and use vanilla). This creates a warm, subtle citrus flavor that pairs beautifully with the buttermilk tang.
Vanilla Bean Pound Cake
Instead of using vanilla extract, scrape the seeds from 1 vanilla bean and add them to the buttermilk before mixing. You’ll see the black vanilla specks throughout the cake, and the flavor is noticeably more complex and aromatic than extract alone. Vanilla bean paste also works and is easier to find than fresh vanilla beans.
Brown Sugar Glaze Variation
While the cake is cooling, you can make a simple glaze: Melt 3 tablespoons butter with ¼ cup packed light brown sugar in a saucepan over medium heat. Remove from heat and stir in 1 teaspoon vanilla, ¼ cup buttermilk, and 1½ cups powdered sugar until smooth. Let the glaze cool for 15 minutes (if it’s too warm, it slides right off the cake), then drizzle it over the completely cooled cake. The brown sugar glaze adds richness and a subtle caramel note.
Spiced Pound Cake (Cinnamon, Nutmeg, Cloves)
Add ½ teaspoon ground cinnamon, ¼ teaspoon freshly grated nutmeg, and a pinch of ground cloves to the dry flour mixture. Keep the vanilla and omit the almond extract, or use almond extract as written. This creates a warm, almost cake-spice flavor that’s perfect with apple cider or coffee.
Make It Dairy-Free (Vegan Adaptation)
Replace the butter with coconut oil or vegan butter, the eggs with a flax egg (1 tablespoon ground flaxseed mixed with 3 tablespoons water per egg, let sit 5 minutes), and the buttermilk with non-dairy buttermilk or soy milk mixed with lemon juice or vinegar (1 tablespoon vinegar per 1 cup milk, let sit 5 minutes). The texture may be slightly less tender, but the cake will still be moist and delicious. Use plant-based extracts to ensure everything is vegan.
Storage and Make-Ahead Guide
Storing at Room Temperature
Wrap the completely cooled cake tightly in plastic wrap, then wrap again in aluminum foil. Stored this way on a cool kitchen counter, the cake will stay fresh and moist for 4-5 days. The plastic wrap against the cake prevents it from absorbing kitchen odors, and the foil protects it from light and air exposure.
Storing in the Refrigerator
If your kitchen is particularly warm or if you want to extend the storage time, wrap the cake in plastic wrap and foil and refrigerate it. It will stay fresh for 7 days in an airtight container or wrapped tightly. Cold cakes firm up slightly, so let it come to room temperature for 20-30 minutes before serving, or microwave individual slices for 10-15 seconds to restore softness.
Freezing for Long-Term Storage
Wrap the completely cooled cake first in plastic wrap, then in aluminum foil, then place it in a freezer-safe container or freezer bag. Frozen pound cake will keep for up to 3 months without quality loss. Thaw it overnight in the refrigerator, then let it come to room temperature before serving. You can also thaw individual slices at room temperature for 1-2 hours or microwave them for 15-20 seconds.
Do not freeze a glazed or frosted cake unless the topping is specifically freeze-safe (like buttercream). Glazes and frostings can crack or separate during freezing.
Make-Ahead Options
You can prepare the batter up to 2 hours before baking. Once the batter is mixed, cover the bowl and let it sit at room temperature (no longer than 2 hours). This actually allows the flour to fully hydrate, which can create a slightly more tender crumb. Don’t refrigerate the batter; cold batter bakes unevenly.
You can also bake the cake the day before you need it, which sometimes improves the flavor and moisture distribution as it sits overnight. Wrap it as soon as it’s completely cooled.
Serving Suggestions and Pairings
Serve Plain and Simple
A properly made buttermilk pound cake needs nothing but itself. Slice it thick, serve it at room temperature or slightly warm, and let the butter flavor and tender crumb speak for itself. A slice with a cup of coffee or tea is a complete, satisfying dessert.
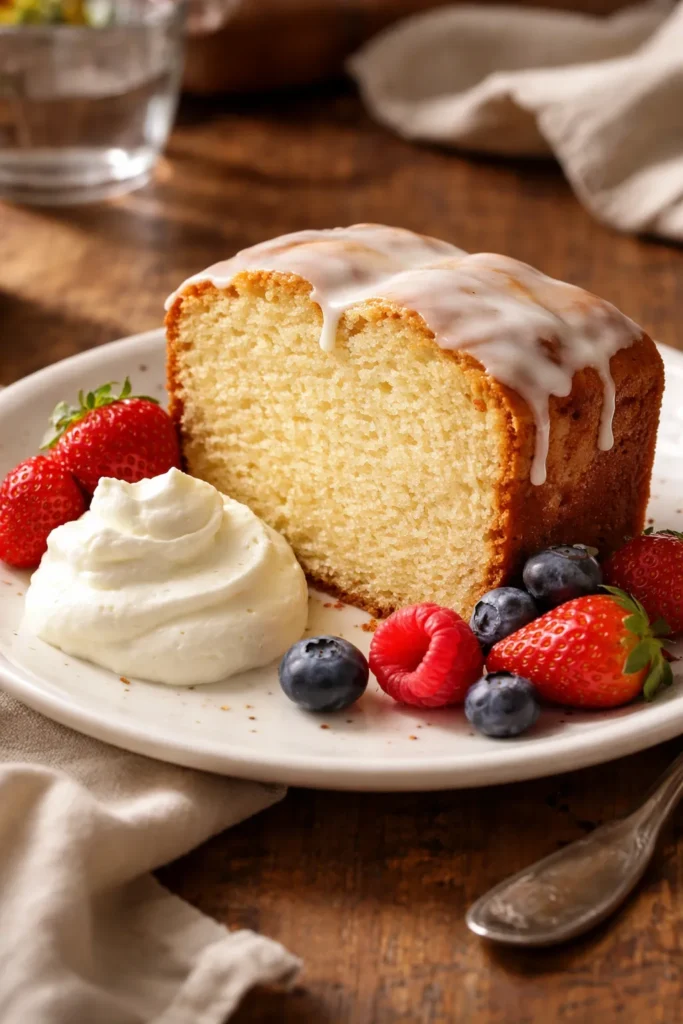
With Fresh Berries and Whipped Cream
Pair thick slices with fresh strawberries, raspberries, or blueberries macerated in a touch of sugar, plus a dollop of softly whipped cream. The tartness of berries contrasts beautifully with the rich, buttery cake.
With Glazes and Frostings
A simple vanilla glaze (powdered sugar, butter, milk, vanilla) keeps the focus on the cake. A cream cheese frosting adds richness. A chocolate glaze or caramel drizzle transforms it into something more decadent. Brown sugar glaze (as mentioned in the variations section) is particularly delicious.
With Ice Cream
Serve a warm slice of pound cake with vanilla, butter pecan, or salted caramel ice cream. The ice cream melts into the warm cake, creating an indulgent dessert.
For Special Occasions
Use slices as the base for strawberry shortcake, layering with whipped cream and fresh berries. Toast slices lightly and serve with champagne and berries for a brunch dessert. Cube leftover cake for a trifle layered with custard, whipped cream, and fruit.
Breakfast or Snack
Pound cake is legitimate for breakfast or an afternoon snack in a way that feels less indulgent than a traditional cake. A slice with coffee feels refined and European.
Troubleshooting Dry Pound Cake
If your cake turned out dry despite following this recipe, here’s what likely happened:
Too much flour. This is the most common culprit by far. You either scooped the measuring cup directly into the flour (compacting it) or packed the flour into the cup by tapping it. Measure flour correctly by spooning it in and leveling it off. If you’re serious about baking, weigh your ingredients.
Oven temperature too high. If your oven runs hot and the cake baked at 350°F instead of 325°F, the exterior would brown too quickly while the interior stayed underbaked, and then as it cooled, it would dry out. Use an oven thermometer to verify your actual temperature.
Baked too long. A cake baked for 1 hour 40 minutes instead of 1 hour 15 minutes will definitely be dry. Start checking at 60 minutes with a toothpick. The toothpick should come out with a few moist crumbs, not completely clean.
Buttermilk wasn’t used, or was replaced with regular milk. Regular milk doesn’t have the acidity to tenderize the gluten, so the crumb becomes tight and dry. Always use real buttermilk if possible.
Batter was overmixed after adding flour. Overmixing develops gluten, which creates a tough, dry cake. Mix only until flour is barely combined after you add it. This should be quick—maybe 10-15 seconds of mixing, not 60 seconds.
Ingredients weren’t at room temperature. Cold buttermilk or eggs can prevent proper emulsification, creating a broken batter that bakes unevenly and dry.
The cake sat uncovered after baking. If the completely cooled cake wasn’t wrapped immediately, it lost moisture to the air. Always wrap cooled cake in plastic wrap and foil.
Final Thoughts
A truly moist, tender buttermilk pound cake isn’t luck or a secret ingredient—it’s the result of understanding why each step matters and executing those steps consistently. Room-temperature ingredients, proper creaming, correct flour measurement, buttermilk’s acidity, and not overmixing are the five pillars that prevent dryness and create the texture you’re aiming for.
The beautiful part about this cake is that once you nail the basic technique, you can flavor it however you want—lemon, orange, spiced, vanilla bean—and it will consistently come out moist and tender. You can make it ahead, store it for days, and have it taste better than most bakery pound cakes. You can freeze it for unexpected guests. You can slice it for breakfast, dessert, or a fancy trifle.
Stop settling for pound cake that needs frosting to hide its dryness. This recipe makes a cake that’s genuinely delicious completely on its own, one that people will ask you to make again, and one that proves that sometimes the simplest ingredients and techniques, executed correctly, create something truly special.