There’s something undeniably comforting about a golden, flaky chicken pie fresh from the oven, with steam rising from its buttery crust and the aroma of herbs filling your kitchen. When it comes to mastering this beloved comfort food, few recipes rival the approach championed by New Zealand’s culinary treasure, Chelsea Winter. Her chicken pie has captured hearts and taste buds across the globe, transforming a simple home-cooked meal into an extraordinary culinary experience that brings families together around the dinner table. Whether you’re battling the winter chill or simply craving soul-satisfying comfort food, this ultimate guide will walk you through every aspect of creating a chicken pie that rivals anything you’d find at a gourmet bakery.
The beauty of a well-executed chicken pie lies in its perfect balance—tender chicken pieces swimming in a creamy, herb-infused sauce, encased in pastry that shatters at the first bite yet remains sturdy enough to hold its precious filling. This isn’t just about following a recipe; it’s about understanding the techniques, selecting quality ingredients, and embracing the cooking process that transforms ordinary components into something truly spectacular. From seasoned home cooks to kitchen novices, anyone can master this recipe with the right guidance and attention to detail.
Table of Contents
- What Makes Chelsea Winter’s Chicken Pie Special
- Essential Ingredients for the Perfect Chicken Pie
- The Filling Components
- The Pastry Selection
- Step-by-Step Preparation Guide
- Preparing the Chicken Filling
- Creating the Perfect Sauce
- Assembling Your Pie
- Pro Tips for Achieving Restaurant-Quality Results
- Common Mistakes to Avoid
- Variations and Customization Ideas
- Vegetable Additions
- Dietary Modifications
- Serving Suggestions and Side Dishes
- Storage and Reheating Instructions
- Final Words
What Makes Chelsea Winter’s Chicken Pie Special
Chelsea Winter’s approach to chicken pie stands out in the crowded landscape of comfort food recipes for several compelling reasons that elevate it from ordinary to extraordinary.
The foundation of this recipe’s success lies in its commitment to building layers of flavor rather than relying on shortcuts. Unlike many quick chicken pie recipes that use condensed soups or pre-made sauces, this method starts from scratch, creating a rich, velvety sauce that’s perfectly seasoned and beautifully balanced. The technique involves properly browning the chicken to develop depth, sautéing aromatics until fragrant, and creating a roux-based sauce that’s neither too thick nor too thin—achieving that elusive “just right” consistency that coats each ingredient without becoming gluey or watery.
Another distinguishing feature is the attention paid to texture throughout the dish. The chicken is cut into substantial, bite-sized pieces that remain tender and juicy rather than dry and stringy. Vegetables are added at strategic points in the cooking process to ensure they maintain some structure while contributing their flavors to the overall dish. The pastry selection—whether you opt for puff, shortcrust, or a combination—is treated with respect, handled minimally to maintain flakiness, and baked at the right temperature to achieve that coveted golden-brown finish.
The recipe also demonstrates remarkable versatility without compromising its core identity. It welcomes seasonal vegetable additions, accommodates different dietary preferences, and scales beautifully whether you’re cooking for two or feeding a crowd. This adaptability, combined with reliable results, has made it a go-to recipe for busy weeknight dinners, special family gatherings, and everything in between. The pie delivers both visual appeal and incredible taste, making it equally suitable for casual meals and occasions when you want to impress guests with your culinary prowess.
Essential Ingredients for the Perfect Chicken Pie
Success in creating an exceptional chicken pie begins long before you turn on the oven—it starts with selecting the right ingredients that will form the foundation of your dish.
The Filling Components
The protein component requires careful consideration to ensure your finished pie delivers on tenderness and flavor. Boneless, skinless chicken thighs are the superior choice for chicken pie, offering more flavor and remaining moist throughout the cooking and baking process. While chicken breast can certainly be used, thighs provide insurance against dryness, especially if the pie needs reheating. Plan for approximately 600-800 grams of chicken for a standard family-sized pie, which typically serves four to six people generously.

The aromatic base of your filling creates the flavor foundation that elevates the entire dish. You’ll need quality butter for sautéing—don’t skimp here, as it contributes significantly to the overall richness. Fresh onions, preferably brown or yellow varieties, should be diced finely to distribute their sweetness throughout the sauce. Garlic adds aromatic complexity; use fresh cloves rather than pre-minced versions for the best flavor. Consider including celery for its subtle flavor and pleasant textural contrast, finely diced so it integrates seamlessly into the filling.
Vegetables add nutrition, color, and textural variety to your pie. Frozen peas are convenient and work beautifully, maintaining their bright color and sweet flavor. Carrots should be diced small enough to cook through but large enough to provide satisfying bites. Corn kernels add pops of sweetness that complement the savory elements. Mushrooms, while optional, contribute earthy depth and meaty texture—choose button or Swiss brown varieties, sliced to maintain their presence in the filling.
The sauce components transform your collection of ingredients into a cohesive, luscious filling. Plain flour creates the roux that thickens your sauce—approximately 1/3 cup is typically sufficient. Chicken stock forms the liquid base; use homemade if possible, or select a quality store-bought option with low sodium so you can control the seasoning. Cream or milk adds richness and creates that signature velvety texture; heavy cream delivers the most luxurious result, while milk creates a lighter version. Dijon mustard, though used sparingly, adds complexity without making the filling taste distinctly mustardy. Fresh or dried herbs—thyme, parsley, and bay leaves—infuse the filling with aromatic depth.
The Pastry Selection
Your pastry choice dramatically impacts the final character of your chicken pie, and understanding the options helps you make the best decision for your preferences and skill level.
Puff pastry represents the easiest path to impressive results, particularly when using quality store-bought versions. This laminated dough creates those dramatic, flaky layers that shatter delicately when you break through the crust. It rises beautifully in the oven, creating an impressive domed top that looks bakery-professional with minimal effort. The butter-rich layers complement the creamy filling perfectly, though puff pastry does require careful handling to prevent it from becoming soggy. For best results, keep it cold until the moment you’re ready to use it, and consider using it only as a top crust, with the filling placed in a ceramic or enamel pie dish without a bottom crust.
Shortcrust pastry offers a more substantial, cookie-like texture that holds up exceptionally well to generous amounts of filling. This option works beautifully when you want both a bottom and top crust, creating a completely enclosed pie. Homemade shortcrust pastry requires more skill but delivers superior flavor and texture. The key is keeping everything cold—your butter should be chilled and cut into small cubes, your water should be ice-cold, and you should work quickly to prevent the butter from melting into the flour. The resulting pastry should be tender yet sturdy, providing structural integrity while remaining pleasantly crumbly rather than tough.
Many accomplished home cooks opt for a combination approach, using shortcrust pastry for the base to provide a sturdy, leak-proof foundation, and topping the pie with puff pastry to create visual drama and textural contrast. This method offers the best of both worlds—the structural integrity and satisfying crumb of shortcrust combined with the impressive appearance and delicate flakiness of puff pastry. Whichever option you choose, ensure you have enough pastry to adequately cover your pie dish with some overhang for crimping and decoration.
Step-by-Step Preparation Guide
Creating the ultimate chicken pie is an achievable goal when you break the process into manageable steps, each building upon the previous one to create your masterpiece.
Preparing the Chicken Filling
Begin by preparing your chicken, cutting the meat into roughly 2-3 centimeter chunks that will provide satisfying bites without being unwieldy. Season the pieces generously with salt and pepper before cooking—this initial seasoning is crucial for building flavor from the ground up. Heat a large, heavy-based pot or deep frying pan over medium-high heat, add a tablespoon of butter along with a splash of oil to prevent burning, and brown the chicken in batches. This step is absolutely critical and shouldn’t be rushed; proper browning develops complex flavors through the Maillard reaction, creating depth that permeates the entire dish.
Resist the urge to overcrowd the pan, which would cause the chicken to steam rather than brown. Each batch should have space between pieces, and you should hear a satisfying sizzle when the chicken hits the pan. Cook each batch for approximately 3-4 minutes, turning occasionally until the pieces develop golden-brown patches, then transfer them to a plate. The chicken doesn’t need to cook through at this stage—it will finish cooking later—so focus on color development rather than internal temperature. The browned bits (fond) stuck to the bottom of your pan are flavor gold, so don’t wash the pan; these will be incorporated into your sauce.
Once all the chicken is browned and set aside, reduce the heat to medium and add another tablespoon of butter to the pan. Add your diced onions and celery, scraping up those precious browned bits as the vegetables release moisture. Cook the aromatics for approximately 5-6 minutes, stirring occasionally, until the onions turn translucent and begin to soften. They should develop a slight golden color at the edges but shouldn’t brown significantly. Add the minced garlic and cook for another minute until fragrant, being careful not to let it burn, which would introduce bitterness. If using mushrooms, add them now and cook until they release their moisture and it evaporates, concentrating their flavor and preventing the filling from becoming watery.
Creating the Perfect Sauce
The sauce transforms your collection of ingredients into a cohesive, luxurious filling that defines your chicken pie’s success. After your aromatics are perfectly cooked, sprinkle the flour over the vegetables and stir constantly for about 2 minutes, creating a roux that will thicken your sauce. This cooking time is essential—it eliminates the raw flour taste that would otherwise compromise your finished dish. The mixture should become slightly golden and emit a toasted, nutty aroma, indicating that the flour has cooked sufficiently.
Begin adding your chicken stock gradually, starting with about a cup and stirring constantly to prevent lumps from forming. The mixture will initially seem impossibly thick, but continue stirring and it will smooth out into a thick paste, then gradually thin as you incorporate more liquid. Add the remaining stock in two or three additions, stirring well between each and ensuring the sauce remains smooth. The constant stirring during this stage prevents lumps and ensures your sauce has a silky, professional texture rather than a lumpy, amateur appearance.
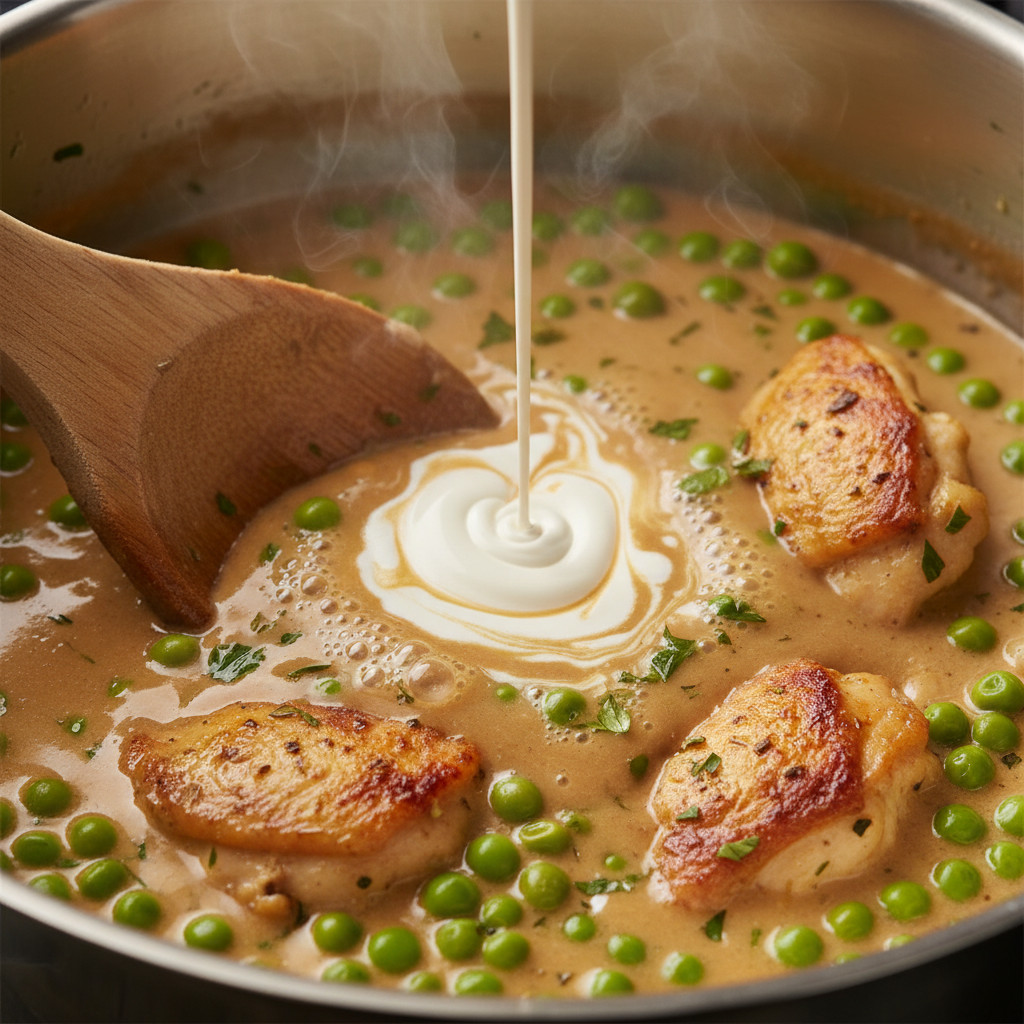
Once all the stock is incorporated, bring the mixture to a gentle simmer and add your cream or milk, stirring to combine thoroughly. Add your bay leaves, thyme, and a teaspoon of Dijon mustard at this stage, along with salt and pepper to taste. Remember that flavors will concentrate slightly during baking, so season with a slightly lighter hand than you might for a dish you’re serving immediately. Return the browned chicken to the pot along with any accumulated juices, then add your carrots. Simmer gently for approximately 8-10 minutes, allowing the sauce to thicken to a consistency that generously coats the back of a spoon while the chicken finishes cooking and the carrots begin to soften.
Add your frozen peas and corn during the final 2-3 minutes of cooking, just long enough for them to thaw and heat through without becoming mushy. Taste the filling carefully and adjust the seasoning as needed—this is your last opportunity to perfect the flavor before the pie goes into the oven. The filling should taste well-seasoned and delicious on its own, with a balanced richness that’s savory without being heavy. Remove the bay leaves and transfer the filling to a shallow dish to cool for at least 20-30 minutes before assembling your pie. This cooling step is crucial; filling that’s too hot will melt your pastry, causing it to become soggy and lose its flaky texture.
Assembling Your Pie
Preheat your oven to 200°C (400°F) or 180°C (350°F) for fan-forced ovens while your filling cools. If using a bottom crust, roll your shortcrust pastry to about 3-4mm thickness on a lightly floured surface, making it large enough to line your pie dish with some overhang. Carefully transfer it to your dish, pressing it gently into the corners without stretching, which would cause shrinkage during baking. Trim the excess, leaving about 2cm overhang around the edges, then prick the base several times with a fork to prevent bubbling.
For a sturdier base that won’t become soggy, consider blind-baking your bottom crust for 10-12 minutes. Line the pastry with parchment paper, fill it with pie weights, dried beans, or rice, and bake until the edges are just beginning to color. Remove the weights and parchment, then return to the oven for another 3-4 minutes to dry out the base completely. This extra step creates a barrier that prevents moisture from the filling from saturating the pastry, ensuring every bite has the proper texture.
Once your filling has cooled adequately, spoon it into your prepared dish, mounding it slightly in the center. The filling should come close to the rim but not overflow—you need space for the pastry to nestle down slightly as it bakes. Roll out your top crust, whether puff or shortcrust, to about 3-4mm thickness, making it large enough to cover the pie with a 2-3cm overhang. If you’ve used a bottom crust, lightly brush the edges with beaten egg, which acts as glue to seal the layers together. Carefully drape the top pastry over the filling, pressing the edges together firmly to seal, then trim any excess and crimp decoratively with a fork or your fingers.
Cut several small slits or create a decorative pattern in the top crust to allow steam to escape during baking—this prevents the pastry from becoming soggy and the filling from bubbling over. Brush the entire top surface with beaten egg wash, which creates that gorgeous golden-brown, glossy finish that makes bakery pies so appealing. For an extra-professional touch, you can create decorative shapes from pastry scraps—leaves, braids, or geometric patterns—and attach them to the top with a little egg wash before applying the final coat. Place your assembled pie on a baking tray to catch any drips, then transfer it to your preheated oven.
Bake for 35-45 minutes, checking after 30 minutes, until the pastry is deeply golden and you can see the filling bubbling gently through the steam vents. If the pastry is browning too quickly, particularly around the edges, loosely tent it with aluminum foil for the remaining cooking time. The pie is ready when the pastry has achieved a rich, even color and sounds slightly hollow when tapped. Remove it from the oven and allow it to rest for at least 10-15 minutes before serving—this resting period allows the filling to set slightly, making it easier to slice and serve cleanly without the sauce running everywhere.

Pro Tips for Achieving Restaurant-Quality Results
Elevating your chicken pie from good to extraordinary requires attention to details that professional chefs consider essential but home cooks often overlook.
Temperature control throughout the process proves critical for success at every stage. Your pastry ingredients should be cold—butter straight from the refrigerator, ice-cold water for mixing—and the finished pastry should be chilled for at least 30 minutes before rolling. This keeps the butter in distinct pieces rather than melting into the flour, creating the layers and flakiness that define excellent pastry. Conversely, ensure your filling has cooled to at least room temperature before assembling; hot filling melts the butter in your pastry, resulting in a soggy, greasy crust rather than a crisp, flaky one.
Building layers of flavor separates exceptional pies from mediocre ones. Season your chicken before browning, taste and adjust your sauce before filling the pie, and don’t forget that little bit of Dijon mustard that adds complexity without being identifiable. Consider adding a splash of white wine when you’re cooking your aromatics, allowing it to reduce completely before adding flour—this adds acidity and depth. A small amount of fresh lemon zest stirred into the cooled filling brightens all the other flavors, making them sing without tasting citrusy.
Proper sauce consistency makes the difference between a pie that’s a pleasure to eat and one that’s either dry or soupy. Your finished filling should be thick enough to coat the back of a spoon but should still flow when stirred—think thick gravy rather than paste or thin soup. Remember that the sauce will thicken slightly during baking and as it cools, so err on the side of slightly thinner rather than thicker. If your sauce seems too thin, simmer it uncovered for a few extra minutes; if it’s too thick, add a splash more stock or cream.
Strategic vegetable preparation ensures every component maintains its integrity throughout cooking. Cut dense vegetables like carrots into smaller pieces than softer vegetables so everything finishes cooking simultaneously. Add delicate vegetables like peas and corn at the very end to prevent them from becoming mushy. If using greens like spinach, wilt them separately, squeeze out excess moisture, and fold them in at the end to prevent watery filling.
Invest in quality pastry if making your own feels intimidating—premium store-bought pastry delivers excellent results and saves significant time and stress. Look for all-butter varieties rather than those made with vegetable oils or margarine; the superior flavor and texture justify the slight additional cost. Allow frozen pastry to thaw in the refrigerator overnight rather than at room temperature, which keeps it cold and prevents the butter from separating.
Common Mistakes to Avoid
Understanding potential pitfalls helps you navigate around them, ensuring success even if this is your first attempt at creating a chicken pie.
Undercooking the flour in your roux results in a sauce that tastes starchy and raw rather than rich and velvety. After adding flour to your butter and vegetables, commit to stirring constantly for at least 2 minutes, allowing it to cook until it smells toasted and nutty. This eliminates the raw flour taste and develops the nutty undertones that add complexity to your sauce. Don’t rush this step, even though it might feel tedious—it’s essential for creating professional-quality results.
Overfilling your pie might seem generous, but it creates problems during baking. Excessive filling can bubble over, creating a mess in your oven and on your pie dish, while also preventing the top and bottom crusts from sealing properly. The filling expands slightly as it heats, so leave adequate headroom—about 1-2cm between the filling and the rim of your dish. If you have leftover filling, it makes an excellent topping for toast, rice, or pasta rather than forcing it all into the pie.
Skipping the resting period for both your pastry and your finished pie compromises texture and appearance. Unbaked pastry needs to rest in the refrigerator after rolling to relax the gluten that developed during handling—this prevents excessive shrinkage during baking. The finished pie needs 10-15 minutes of resting after baking to allow the filling to set slightly, ensuring clean slices rather than a saucy mess that runs across the plate. Exercise patience during these waiting periods, even though the aroma makes it incredibly tempting to dig in immediately.
Neglecting to create steam vents in your top crust traps moisture inside the pie, preventing the pastry from achieving maximum crispness and potentially causing the filling to bubble over through the weakest point in the seal. Cut several slits, create a decorative pattern, or cut out small shapes to allow steam to escape throughout baking. These vents are functional as well as decorative, contributing to both the appearance and texture of your finished pie.
Using chicken breast exclusively often results in dry, stringy protein rather than the tender, juicy bites that characterize excellent chicken pie. If you prefer breast meat for dietary reasons, consider using at least a portion of thigh meat, or take extra care not to overcook the chicken during browning. Another option involves cutting the breast meat into larger pieces that won’t dry out as quickly, or marinating it briefly in buttermilk to enhance tenderness and juiciness.
Variations and Customization Ideas
One of this recipe’s greatest strengths is its adaptability, welcoming creative variations while maintaining its fundamental appeal.
Vegetable Additions
Beyond the classic pea-carrot-corn combination, numerous vegetables can enhance your chicken pie’s nutritional profile and flavor complexity. Leeks bring mild sweetness and elegant flavor—slice them thinly and cook them along with your onions until tender. Broccoli adds color and nutrition; cut it into very small florets and blanch briefly before adding to the filling to ensure it cooks through without becoming mushy. Sweet potato cubes introduce appealing sweetness and color contrast; dice them small and add them when you add carrots so they have adequate cooking time.
Green beans contribute satisfying crunch and visual appeal—trim and cut them into 2cm pieces, then blanch briefly before incorporating into your filling. Asparagus works beautifully in a spring version of this pie; cut it into 2cm pieces and add it during the final few minutes of cooking to maintain its vibrant color and slight crunch. Bell peppers, whether red, yellow, or orange, add sweetness and color—dice them finely and cook them with your aromatics. Zucchini can work if you take precautions against its high moisture content; dice it small, salt it and let it drain for 15 minutes, then squeeze out excess moisture before adding to the filling.
Dietary Modifications
The recipe adapts beautifully to accommodate various dietary requirements without sacrificing flavor or satisfaction. For a dairy-free version, replace butter with dairy-free margarine or olive oil, and substitute the cream with full-fat coconut milk, which provides similar richness. Ensure your pastry is dairy-free, or make your own using coconut oil or vegetable shortening instead of butter—the texture differs slightly but remains pleasantly flaky.
Creating a gluten-free chicken pie requires substituting gluten-free flour for the roux—use a 1:1 gluten-free baking blend or cornstarch (reduce the amount by about one-third if using cornstarch, as it has stronger thickening power). Gluten-free pastry can be purchased ready-made from specialty stores, or you can make your own using gluten-free flour blends specifically designed for pastry. Handle it gently, as gluten-free pastry tends to be more delicate and may require parchment paper for transferring to prevent tearing.
For reduced-fat versions, use chicken breast exclusively, reduce butter to minimal amounts, and replace cream with milk or a milk-cream combination. While the result won’t be quite as rich, it significantly reduces calories and fat while maintaining the fundamental comfort food appeal. Consider boosting flavor with additional herbs, a splash of white wine, or a touch more Dijon mustard to compensate for the reduced richness.
A completely vegetarian version transforms this recipe beautifully—replace chicken with chickpeas, cubed firm tofu, or extra vegetables, and use vegetable stock instead of chicken stock. Add nutritional yeast for umami depth, and consider including cooked grains like barley or farro for satisfying texture. This variation proves that the recipe’s appeal extends beyond meat-eaters, delivering comfort and satisfaction to everyone around your table.
Serving Suggestions and Side Dishes
While chicken pie is satisfying enough to serve as a complete meal, thoughtful accompaniments enhance the dining experience and provide textural and flavor contrast.
Fresh green salads provide refreshing contrast to the pie’s richness and heaviness. Opt for crisp lettuces like romaine or butter lettuce, and keep the dressing light and acidic—a simple vinaigrette with lemon juice or white wine vinegar cuts through the cream and pastry beautifully. Include vegetables with crunch factor, such as cucumber, radishes, or bell peppers, and consider adding fresh herbs like parsley, dill, or mint for brightness. The cool, crisp salad alongside warm, rich pie creates a balanced plate that prevents palate fatigue.
Steamed or roasted vegetables complement the pie without competing with it. Green beans, asparagus, broccolini, or Brussels sprouts work particularly well, especially when simply prepared with butter, lemon, and salt. The slight bitterness of greens provides pleasant contrast to the creamy filling, while their bright color makes the plate visually appealing. Roasted root vegetables like carrots, parsnips, and beets add earthiness and natural sweetness, though be mindful not to duplicate vegetables already in your pie filling.
Mashed potatoes or roasted potatoes turn the meal into a truly hearty feast suitable for the coldest winter evenings. Choose baby potatoes roasted with rosemary and garlic for textural contrast, or opt for creamy mashed potatoes if you’re feeding people who appreciate abundant comfort food. While potatoes alongside pastry creates a carbohydrate-heavy meal, sometimes that’s exactly what the occasion calls for, particularly when feeding hungry teenagers or workers who’ve been outdoors in cold weather.
Simple bread and butter offers a humble but satisfying accompaniment, particularly crusty sourdough or whole grain varieties. The bread can be used to soak up any sauce that escapes from the pie, ensuring none of that delicious filling goes to waste. This option works particularly well for casual family meals where the focus is on comfort and satisfaction rather than elaborate presentation.
Beverages should complement rather than compete with your pie. Crisp white wines like Sauvignon Blanc or Chardonnay work beautifully, their acidity cutting through the richness. For beer lovers, pale ales or wheat beers provide refreshment without overwhelming the subtle flavors. Non-alcoholic options might include sparkling water with lemon, iced tea, or even traditional lemonade, all of which provide palate-cleansing refreshment between bites.
Storage and Reheating Instructions
Proper storage and reheating techniques ensure your chicken pie remains delicious beyond its initial serving, making it practical for meal preparation and reducing food waste.
Storing unbaked assembled pies offers maximum flexibility for busy schedules. Once assembled, cover the pie tightly with plastic wrap, ensuring it doesn’t touch the pastry surface, or place it in a large food storage bag. Refrigerate for up to 24 hours before baking, or freeze for up to 3 months. When ready to bake a frozen pie, you can bake it directly from frozen, adding 15-20 minutes to the cooking time, or thaw it overnight in the refrigerator before baking as usual. This make-ahead approach allows you to enjoy homemade pie on busy weeknights without spending hours in the kitchen.
Refrigerating cooked pie works well for leftovers that will be consumed within 3-4 days. Allow the pie to cool completely at room temperature—this typically takes about an hour—then cover it tightly with plastic wrap or aluminum foil, or transfer individual portions to airtight containers. The pastry will soften somewhat in the refrigerator as it absorbs moisture from the filling, but proper reheating can restore much of its original texture. Label your containers with the date to track freshness, and always check that the pie smells fresh before reheating and consuming.
Freezing cooked pie extends its life for up to 2-3 months, providing convenience for meal planning. Cool the pie completely, then wrap it tightly in plastic wrap, followed by a layer of aluminum foil to prevent freezer burn. Alternatively, slice the pie and freeze individual portions wrapped separately, which allows you to defrost only what you need. For best results, thaw frozen pie in the refrigerator overnight before reheating, though you can reheat from frozen if necessary by extending the reheating time and covering the pastry with foil to prevent excessive browning.
Reheating techniques significantly impact the quality of your leftover pie. The oven delivers the best results, helping to restore crispness to the pastry while heating the filling evenly. Preheat your oven to 180°C (350°F), place the pie on a baking sheet, cover it loosely with foil if the pastry is already deeply golden, and heat for 20-30 minutes for refrigerated pie or 40-50 minutes for frozen pie. The pie is ready when the filling is bubbling around the edges and a skewer inserted into the center comes out hot to the touch.
The microwave offers speed but compromises texture—the pastry will inevitably become soggy rather than crisp. If you must use a microwave, place your portion on a microwave-safe plate and heat in 1-minute increments at medium-high power, checking frequently to prevent hot spots. A microwave crisper pan can improve results somewhat, helping to maintain some textural integrity. For best results, microwave just until heated through, then transfer to a hot skillet for a minute or two to crisp the bottom crust slightly.
Individual portions can be refreshed beautifully in an air fryer, which combines the speed of microwave heating with the crisping power of an oven. Preheat your air fryer to 160°C (320°F), place your portion inside, and heat for 8-12 minutes, checking at the halfway point. This method works particularly well for single servings, delivering crispy pastry and hot filling in less time than conventional oven reheating. The air fryer’s circulating hot air refreshes the pastry texture remarkably effectively, making leftovers nearly as appealing as the freshly baked pie.
Final Words
The ultimate Chelsea Winter chicken pie represents more than just a recipe—it’s an invitation to slow down, embrace the cooking process, and create something truly special for the people you care about. While the ingredient list might seem lengthy and the steps numerous, each component and technique contributes to the final result in meaningful ways that justify the time investment. The beauty of this recipe lies not just in its delicious outcome but in its accessibility to cooks of varying skill levels who are willing to follow the process thoughtfully and patiently.
As you embark on creating your own chicken pie masterpiece, remember that perfection comes with practice. Your first attempt might not achieve bakery-level visual appeal, but it will almost certainly deliver on flavor and satisfaction. Each time you make this pie, you’ll develop a deeper understanding of the techniques, learning to recognize when your sauce has reached the perfect consistency, when your pastry is properly chilled, and when your pie is perfectly baked. These intuitive skills, developed through repetition, transform cooking from mere recipe-following into genuine culinary competence.
The versatility of this recipe ensures it will remain relevant regardless of changing seasons, dietary preferences, or available ingredients. Adapt it to showcase seasonal vegetables, accommodate dietary restrictions, or simply work with what’s available in your pantry. The fundamental technique remains constant, providing a reliable framework that welcomes creativity and personalization. This adaptability means you’ll return to this recipe again and again, each time perhaps with slight modifications that make it increasingly your own signature dish.
Beyond its practical appeal, this chicken pie carries emotional weight that transcends its individual ingredients. It’s the kind of dish that creates memories—the aroma that greets family members when they walk through the door, the anticipation as you cut into the golden crust, the satisfaction of watching people enjoy something you’ve created with care. In our fast-paced world of convenience foods and quick meals, taking the time to prepare a dish like this represents an act of love and commitment that doesn’t go unnoticed or unappreciated.
So gather your ingredients, clear your afternoon, and embrace the process of creating something truly wonderful. Your kitchen will fill with incredible aromas, your table will host a dish worthy of celebration, and you’ll have mastered a recipe that will serve you well for years to come. Whether you’re cooking for family, friends, or yourself, the ultimate Chelsea Winter chicken pie delivers comfort, satisfaction, and joy in equal measure—and really, what more could we ask from our food?