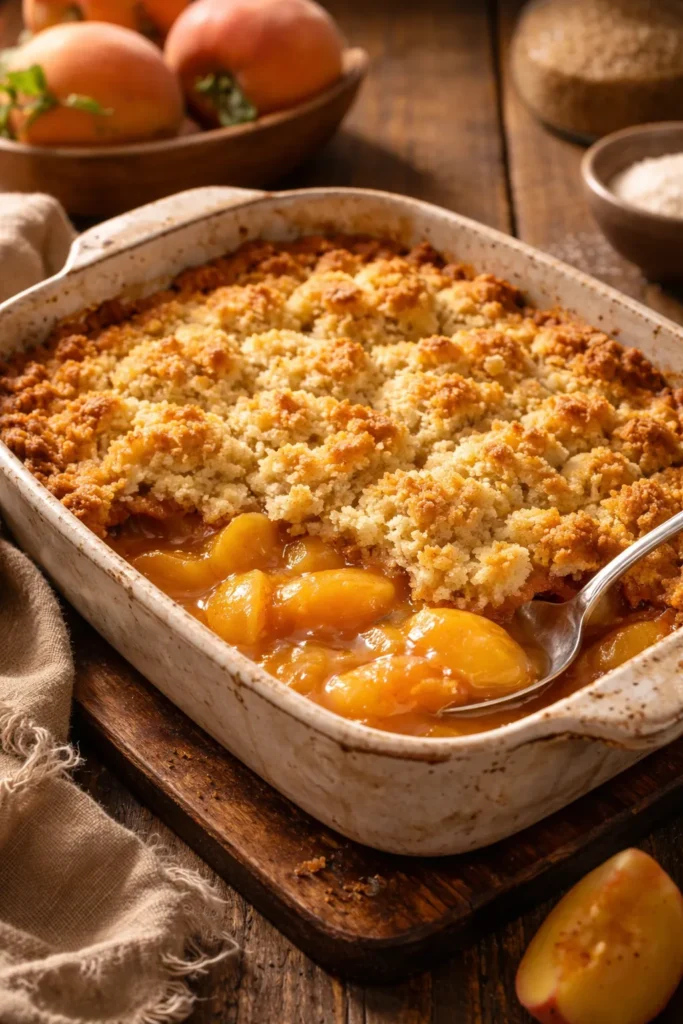
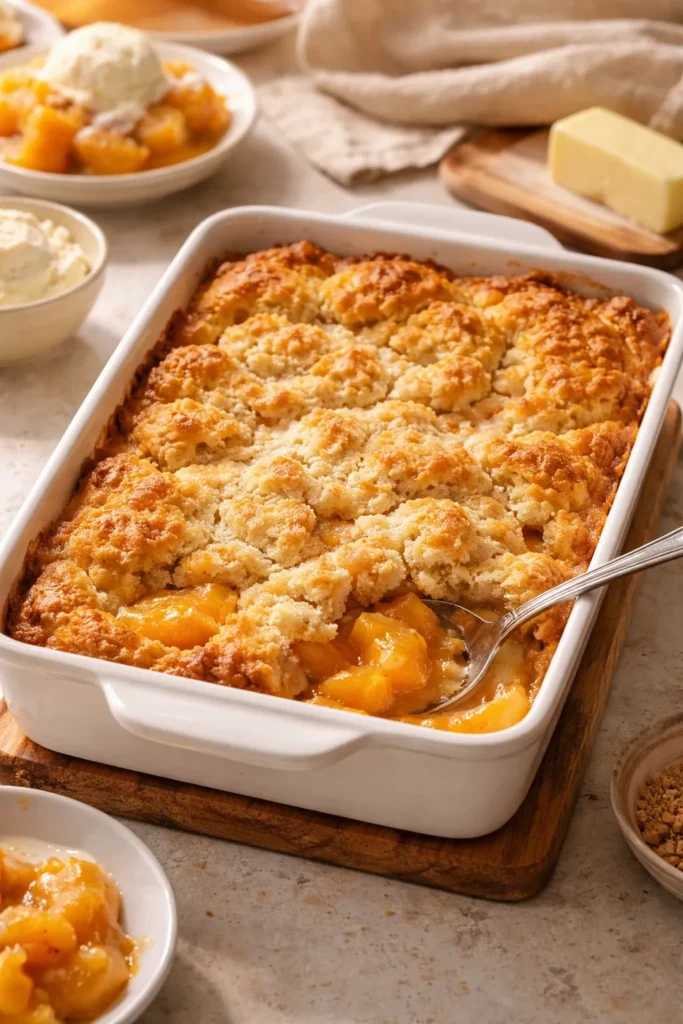
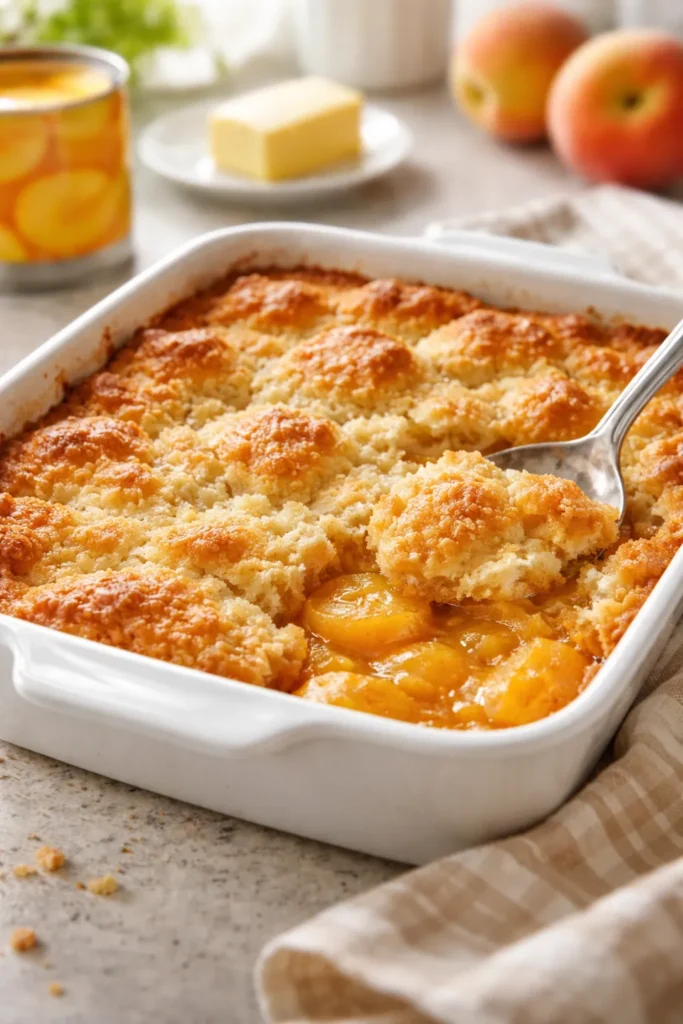
Imagine having a warm, homemade fruit cobbler on the table in just five minutes. That’s not an exaggeration—it’s the reality with this ridiculously simple Bisquick cobbler recipe that uses canned peaches and minimal ingredients. No rolling out dough, no complicated layering, no fussy techniques. Just a handful of pantry staples mixed right in the baking dish, topped with sweet peaches, and baked until the biscuit topping turns golden and crispy.
The beauty of this recipe isn’t just the speed—it’s how genuinely delicious the result tastes. The biscuit topping emerges from the oven soft on the inside with slightly crispy edges, and the peaches bubble up through the batter creating pockets of juicy fruit throughout. Serve it warm with vanilla ice cream or a dollop of whipped cream, and you’ve got a dessert that tastes like you spent far longer in the kitchen than you actually did.
This is the kind of recipe that feels almost too easy to be true until you make it and taste it for yourself. Whether you’re craving something sweet after dinner, need to bring a dessert to a gathering, or want to impress someone with minimal effort, this five-minute cobbler delivers every single time.
Table of Contents
- The History and Appeal of Bisquick Cobblers
- Why This 5-Minute Version Works
- Why Canned Peaches Are Actually Superior Here
- Ingredient Quality and Where to Splurge
- Preparing Your Ingredients: The Mise En Place Approach
- Yield, Timing, and Difficulty
- Complete Ingredient List
- Detailed Step-by-Step Instructions
- Pro Tips for Perfect Results Every Time
- Common Mistakes and How to Avoid Them
- Variations and Adaptations You Can Try
- Storage and Make-Ahead Instructions
- Serving Suggestions and Perfect Pairings
- Frequently Asked Questions About Five-Minute Bisquick Cobbler
- Can I Use Fresh Peaches Instead of Canned?
- What If I Don’t Have Nutmeg?
- Can I Make This in a Cast Iron Skillet?
- Why Isn’t My Topping Golden Brown?
- How Do I Know When It’s Done Baking?
- Can I Double This Recipe?
- Why Is My Filling Watery?
- Can I Use Pancake Mix Instead of Bisquick?
- How Far Ahead Can I Assemble This?
- Final Thoughts
The History and Appeal of Bisquick Cobblers
Cobblers have a long and comforting place in American dessert tradition, dating back centuries. The name itself comes from the cobblestone appearance of the rustic topping—not rolled-out and precise like a pie crust, but rather dropped and scattered in a charming, uneven pattern. This casual presentation is part of what makes a cobbler so appealing: it’s forgiving, unpretentious, and delicious.
When Bisquick entered the scene in the early twentieth century, it revolutionized home baking. Suddenly, home cooks could skip the entire step of making biscuit dough from scratch. Mix a few dry ingredients, add liquid, and you had biscuit dough ready to go. This innovation made cobblers even more accessible, turning what could be a time-intensive dessert into something achievable on a weeknight.
The combination of canned peaches with Bisquick represents the ultimate in convenience without sacrificing quality or taste. Canned peaches are actually picked at peak ripeness and processed quickly, locking in flavor and nutrition. They’re also available year-round, which means you can make this cobbler whenever the craving strikes—not just during peach season. The result is a dessert that’s both nostalgic and completely modern in its practicality.
Why This 5-Minute Version Works
The secret to making a cobbler this quickly comes down to understanding what actually takes time in traditional recipes. Most of the time spent making a fruit cobbler isn’t in the flavor-building—it’s in preparation. Peeling and slicing fresh peaches, making biscuit dough from scratch, measuring out multiple dry ingredients, and carefully assembling the dish. Remove those steps, and what you’re left with is something that comes together almost instantly.
The mathematics of speed here matter. Canned peaches eliminate the peeling and slicing step entirely. Bisquick provides all the dry ingredients you’d normally measure separately—flour, baking powder, salt, and more—already combined and balanced. The mixing process requires just a bowl and a spoon. The assembly involves literally stirring everything in the baking dish where it will eventually bake. There’s no transferring between bowls, no cooling steps, no resting periods.
The five minutes refers specifically to active preparation time—the time your hands are actually busy doing something. It doesn’t include the baking time, which is approximately forty-five to fifty minutes. But from the moment you pick up a can opener to the moment you put the cobbler in the oven, you’re genuinely looking at around five minutes of actual work. That’s the magic of this recipe.
Why Canned Peaches Are Actually Superior Here
There’s a persistent myth that canned fruit is somehow inferior to fresh fruit. In the case of cobbler, that simply isn’t true. Canned peaches for this recipe offer distinct advantages that make them arguably the better choice than fresh peaches, even during peak season.
Quality and consistency matter most. Canned peaches are picked at peak ripeness when their flavor and texture are at their absolute best. They’re processed within hours of harvesting, which preserves that flavor. Fresh peaches you buy at the store might have been picked weeks ago, shipped across the country, and ripened artificially. They might be mealy, bland, or unevenly ripe. With canned peaches, you get predictable, reliably delicious results every single time.
There’s also the practical element. Fresh peaches require peeling and slicing, which adds significant time to your cobbler preparation. If you have to pit and peel six to eight peaches by hand, you’re already past that five-minute prep window. Canned peaches come ready to use—just drain and stir. That efficiency is a huge part of why this recipe works so well.
The liquid content is worth addressing too. Canned peaches in their own juice or light syrup provide some additional moisture that actually improves the cobbler’s texture. However, you do want to drain them well to avoid an overly soggy biscuit topping. That’s the only real consideration when using canned peaches: drain them properly and your cobbler will be perfect.
Ingredient Quality and Where to Splurge
Even though this recipe uses just six ingredients, the quality of those ingredients matters. You don’t need to buy expensive versions of everything, but hitting the sweet spot between cost and quality makes a real difference in the final result.
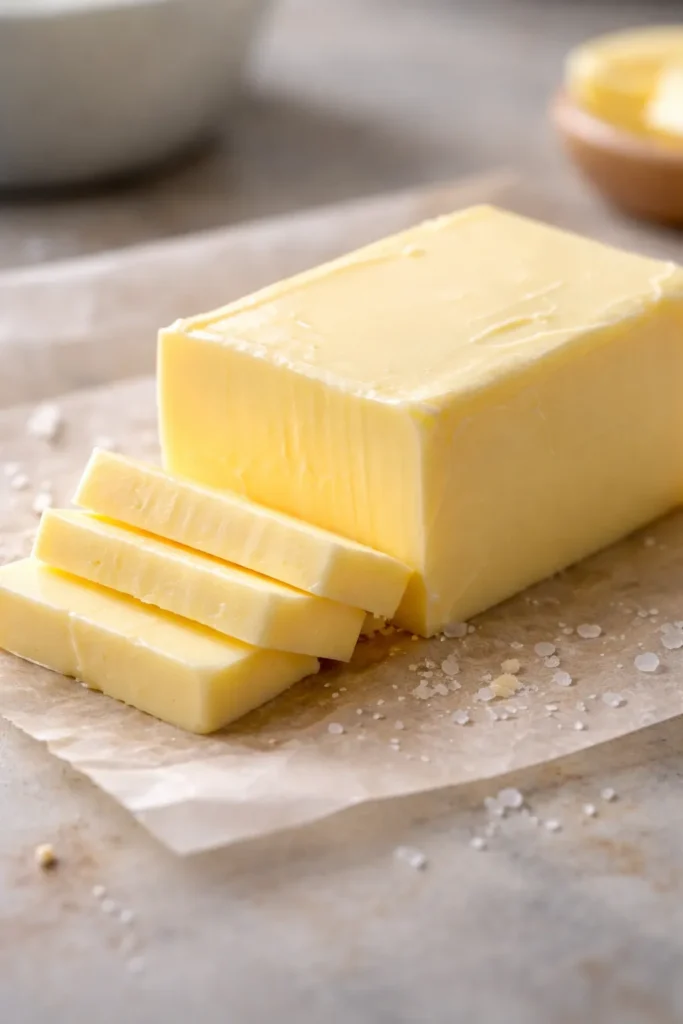
Butter is non-negotiable here. This recipe relies on butter for flavor and texture, so use real butter, not margarine or butter-flavored oil. The difference is noticeable in both taste and how the topping bakes. Unsalted butter gives you control over the salt level, though salted butter works fine if that’s what you have. You’ll need it melted but not hot—let it cool for a minute or two before adding to the batter.
Milk can actually be flexible. Whole milk creates the richest, most luxurious topping. Two-percent milk produces nearly identical results and works beautifully. Even nondairy milk alternatives like almond, oat, or coconut milk work surprisingly well, though they may produce a slightly lighter topping. What matters is that you use whatever milk you already have on hand or prefer to drink.
Nutmeg elevates everything. Buy whole nutmegs and grate them fresh if you can—the flavor difference is dramatic. Pre-ground nutmeg works, but it loses potency quickly once the container is opened. If your ground nutmeg has been in the spice cabinet for longer than a year, it’s probably time to replace it. This spice does the heavy lifting in terms of flavor in this recipe, so it deserves to be fresh.
Sugar is straightforward. Granulated white sugar is perfect here. Don’t overthink it. The peaches themselves provide additional sweetness, so you’re not trying to make this a candy—just sweet enough to balance the fruit’s natural tartness.
Preparing Your Ingredients: The Mise En Place Approach
Even though this is a five-minute recipe, spending thirty seconds organizing your ingredients before you start makes the process smoother and less stressful.
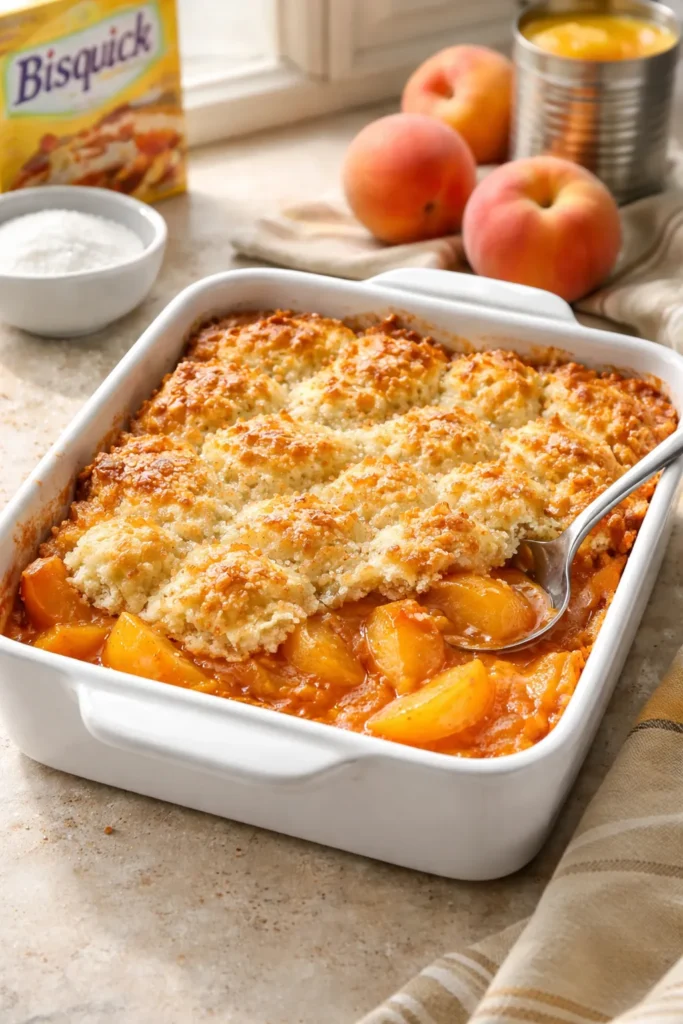
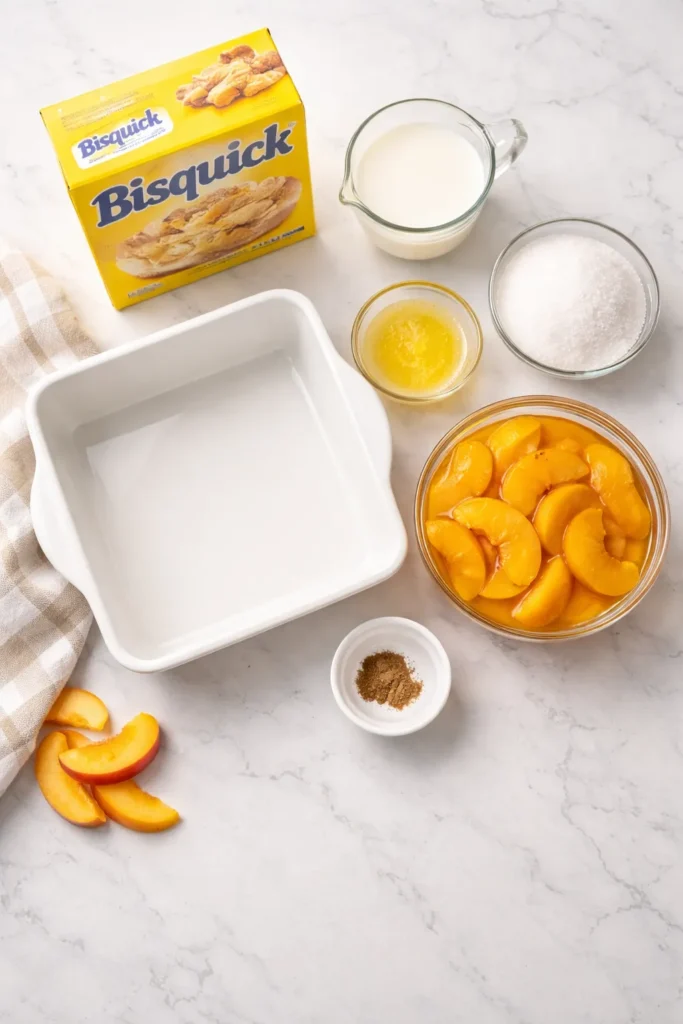
Gather the Bisquick, milk, nutmeg, melted butter, sugar, and drained canned peaches on your counter near your 8-inch square baking dish. The baking dish is where you’ll do most of the work, so position it so you can easily reach it. This way, nothing gets forgotten and you’re not hunting through cabinets while trying to remember where you put the milk.
Drain your canned peaches in a colander or fine-mesh strainer, pressing gently to remove excess liquid. You want them drained but not completely dry—a bit of moisture clinging to them is fine. If you use peaches in heavy syrup rather than juice, drain them especially well. Set them aside in a small bowl so they’re ready to go.
Measure out your milk and have it nearby. It doesn’t need to be cold—room temperature milk works perfectly. Melt your butter either in the microwave (about thirty seconds) or on the stovetop, and let it cool slightly while you’re getting everything else organized. This prevents it from cooking the eggs if you add any, though this particular recipe doesn’t use eggs in the traditional sense.
The entire process of gathering and prepping these few ingredients takes maybe two minutes, leaving you three minutes for actual mixing and assembling.
Yield, Timing, and Difficulty
Yield: Serves 6 to 8 | Makes one 8-inch square cobbler (approximately 9 to 12 servings depending on generosity)
Prep Time: 5 minutes
Cook Time: 45 to 50 minutes
Total Time: 50 to 55 minutes active time (includes both prep and baking)
Chill/Rest Time: 30 minutes cooling before serving (optional but recommended)
Best Served: Warm from the oven or reheated, ideally within a few hours of baking for the best topping texture
Difficulty: Beginner — This recipe requires absolutely no baking experience or special skills. There’s no mixing technique to master, no temperature precision beyond preheating the oven, and no way to really mess it up. If you can open a can, drain peaches, and mix ingredients, you can make this cobbler successfully.
Complete Ingredient List
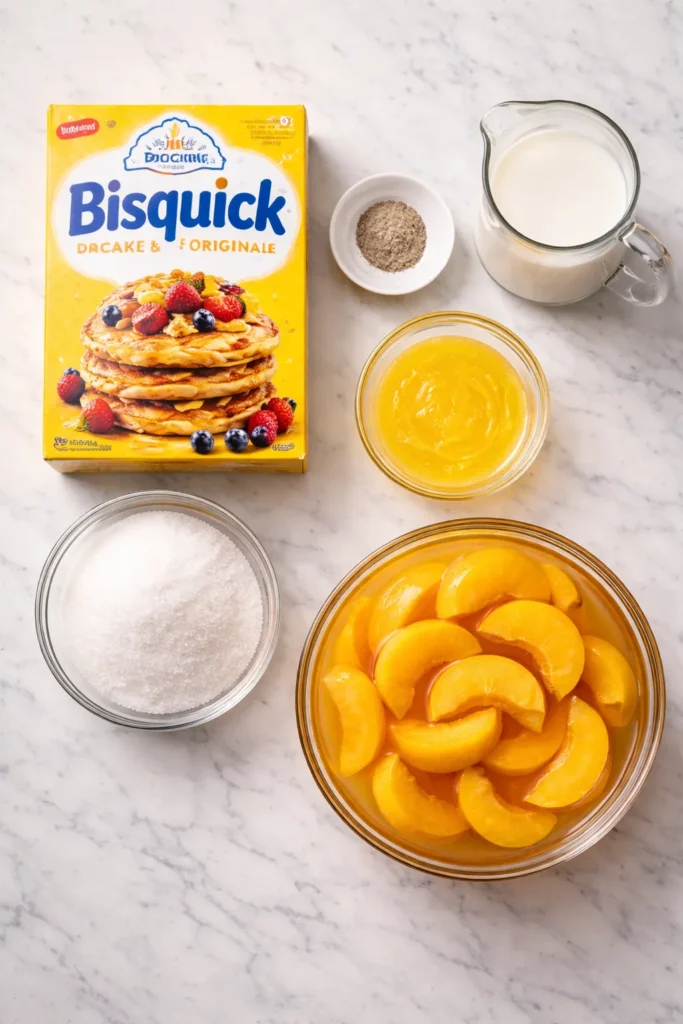
For the Biscuit Topping and Base:
- 1 cup Bisquick Original Pancake & Baking Mix
- 1 cup whole milk (2% milk or plant-based alternatives work fine)
- ½ teaspoon ground nutmeg
- ½ cup unsalted butter, melted and cooled slightly
- ¾ cup granulated sugar
For the Peach Filling:
- 1 can (29 ounces) sliced peaches in juice or light syrup, well drained
Optional Toppings:
- Coarse sugar for sprinkling on top before baking (creates extra crunch)
- Vanilla ice cream for serving
- Fresh whipped cream for serving
- A sprinkle of additional nutmeg for garnish
Detailed Step-by-Step Instructions
Prepare Your Oven and Pan:
-
Preheat your oven to 375°F (190°C) and position the rack in the center of the oven.
-
You do not need to grease your 8-inch square glass baking dish. The moisture from the batter and peach filling will prevent sticking, and greasing actually makes it harder to serve clean slices later. Dry baking dish is the way to go.
Make the Biscuit Batter:
-
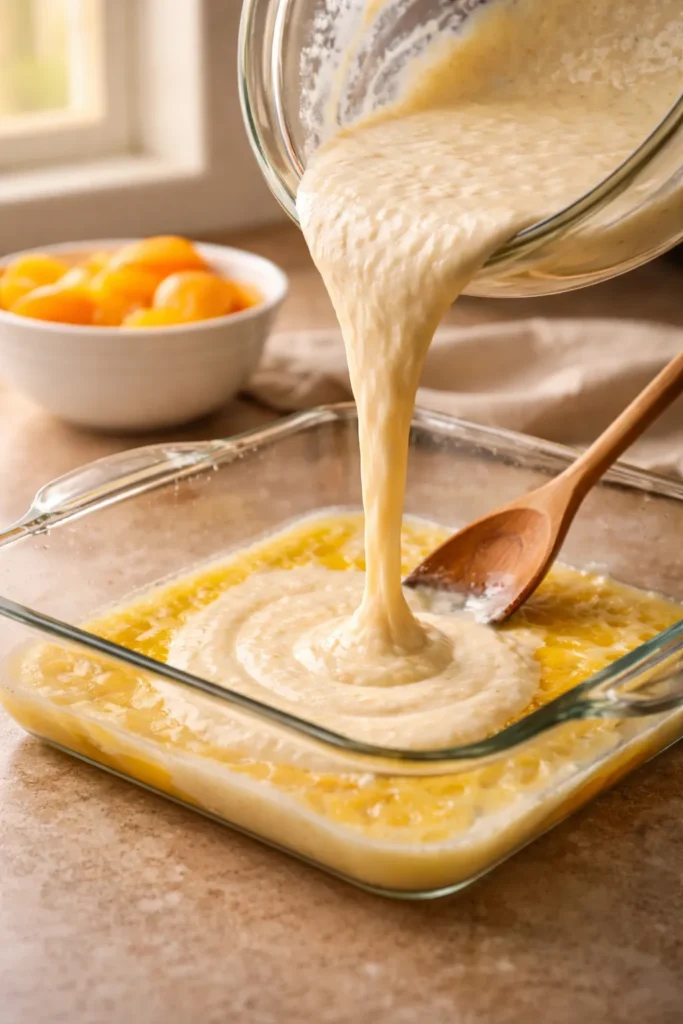
Pour the 1 cup of Bisquick into your ungreased baking dish—not into a separate bowl, but directly into the dish where it will bake. This eliminates one step and one dish to wash.
-
Add the 1 cup of milk and the ½ teaspoon of ground nutmeg to the Bisquick. Stir gently with a fork or spoon until just combined. You’re looking for a wet, slightly lumpy batter at this point—do not overmix. Lumps are completely fine and even desirable. Overmixing activates gluten and can make the topping tough.
-
Pour the ½ cup of melted butter into the batter and stir until it’s fully incorporated. The batter will look loose and sloppy—this is exactly right. You should have something resembling thick pancake batter, not stiff dough.
Add the Peaches and Sugar:
-
In a small separate bowl, combine the ¾ cup of sugar with the well-drained peaches. Stir gently until the sugar is evenly distributed and the peaches are coated. This distributes the sweetness throughout the filling rather than concentrating it in pockets.
-
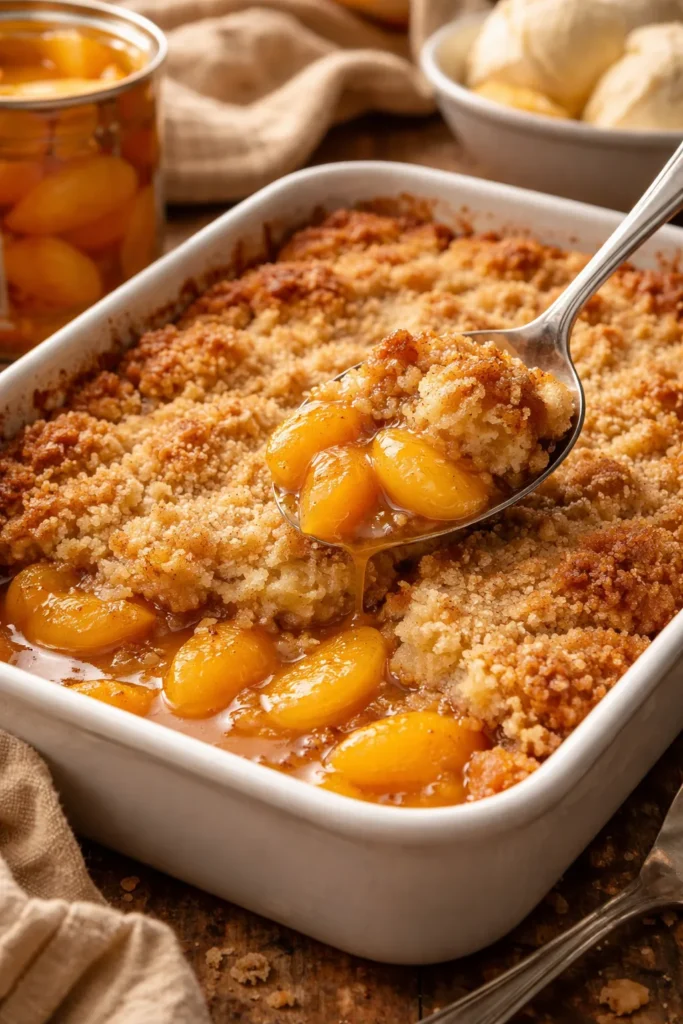
Spoon the peach-sugar mixture directly over the batter in the baking dish. You can try to spread it somewhat evenly, but it doesn’t need to be perfect. The batter will come up around the peaches as it bakes, creating natural pockets of fruit throughout.
-
If you want extra crunch and visual appeal, sprinkle about 1 teaspoon of coarse sugar over the top of the peaches now. This step is entirely optional but creates a pleasant texture contrast.
Bake to Golden Perfection:
-
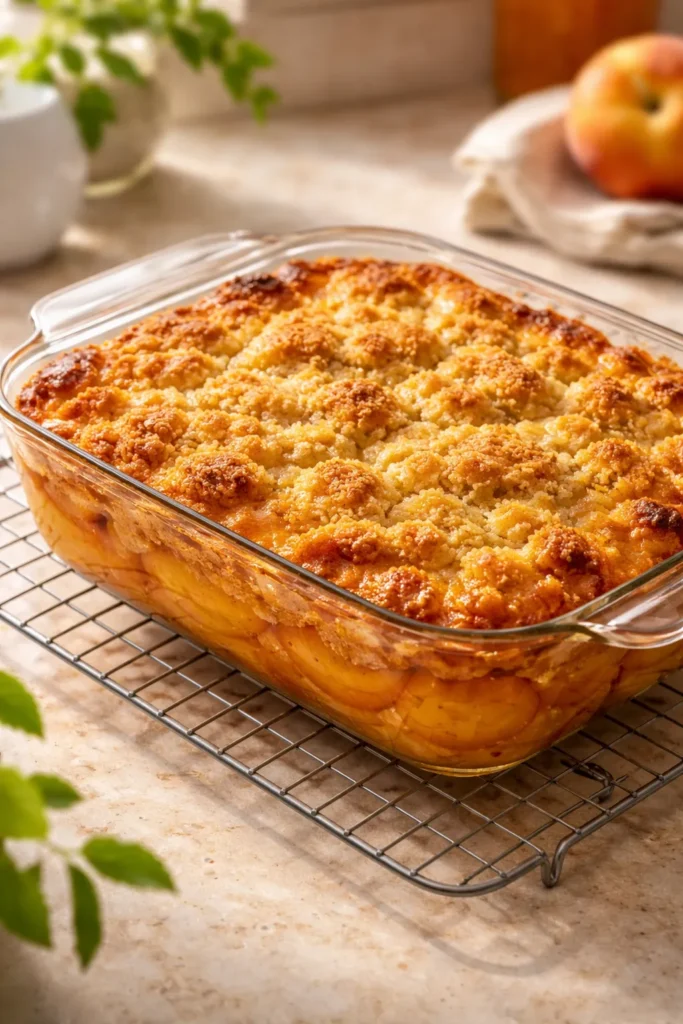
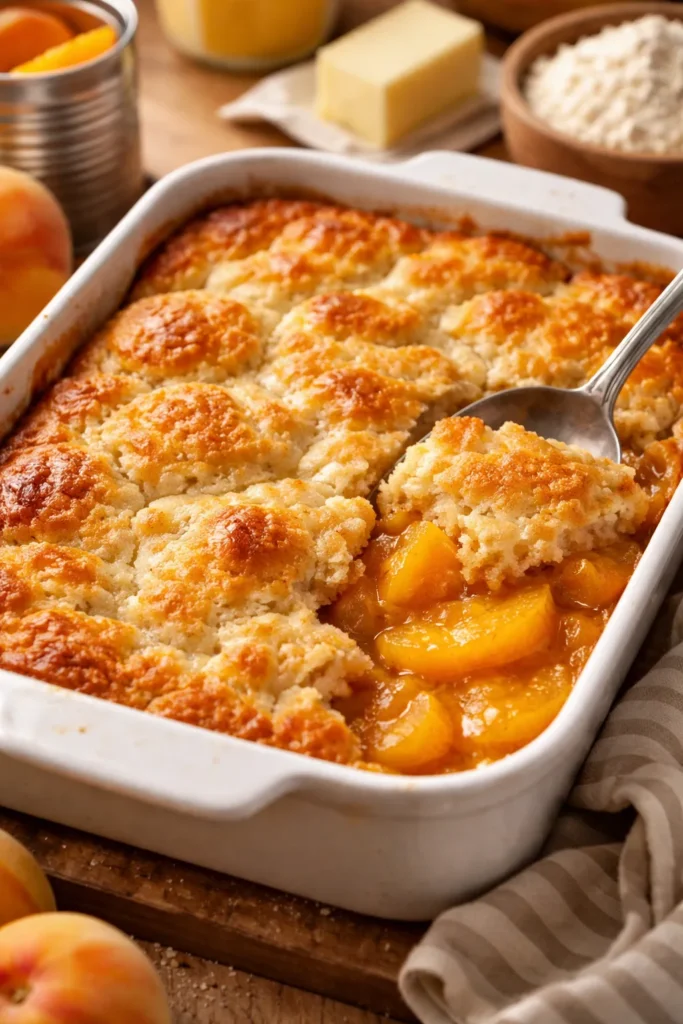
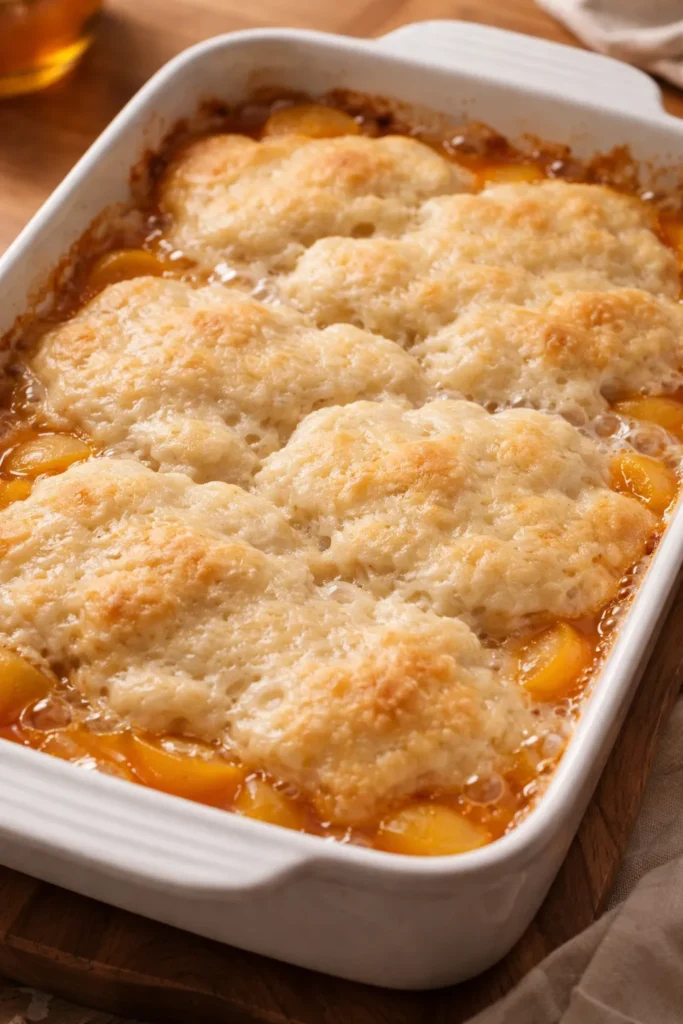
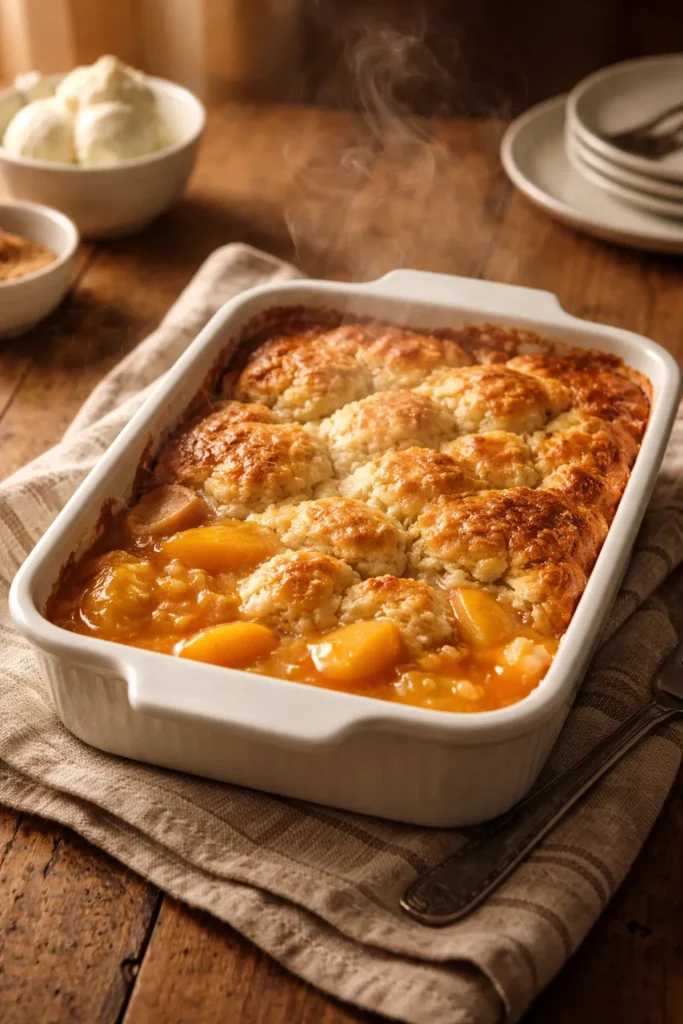
Place the baking dish into your preheated 375°F oven and bake for 45 to 50 minutes. The cobbler is done when the biscuit topping is deep golden brown (not pale or light) and the peach mixture is bubbling around the edges. You should see some fruit juices bubbling up between the biscuit pieces.
-
Check at the forty-five-minute mark by looking at the color of the top. If it’s still quite pale, give it another five minutes. Every oven is slightly different, so the exact timing may vary by a few minutes.
-
Once the top is golden brown and you see bubbling, remove the cobbler from the oven and place it on a wire cooling rack or trivet. Do not cover it with foil or plastic wrap—that traps steam and softens the topping.
Cool Before Serving:
- Allow the cobbler to cool for at least 30 minutes before serving. This resting time allows the filling to set slightly so it doesn’t run all over your plate when you scoop it out. The cobbler will still be quite warm at the thirty-minute mark, which is perfect for serving with ice cream.
Pro Tips for Perfect Results Every Time
The milk-to-batter ratio determines texture. If your cobbler topping comes out a bit soggy, use slightly less milk next time—maybe ¾ cup plus 2 tablespoons instead of a full cup. If it comes out too dense or dry, use slightly more milk. You’re not changing the recipe dramatically, just fine-tuning it to your oven and preferences. This is the only real adjustment most people ever need to make.
Don’t skip the cooling time, even though it’s tempting. Hot cobbler is delicious, but the biscuit topping will be more tender and the filling will slice more cleanly if you wait that thirty minutes. If you absolutely cannot wait, scoop it into bowls and eat it warm—the results will be fine, just a bit messier.
Watch the color, not the clock. Oven temperatures vary, and the exact baking time matters less than the visual cue of golden-brown topping with visible bubbling around the edges. If your oven runs cool, your cobbler might take fifty-five minutes. If it runs hot, it might be done in forty minutes. Go by appearance rather than rigidly following the time.
The peaches will sink slightly as the batter rises. This is completely normal and exactly what should happen. The batter comes up around and between the peaches, creating those delicious fruit pockets throughout. You’re not trying to keep the peaches sitting on top of the batter—you want them distributed throughout.
Nutmeg is the secret flavor builder here. Don’t skip it, and don’t reduce it thinking it’s too much. The ½ teaspoon amount is calibrated perfectly for the other ingredients. It adds warmth and depth without making the cobbler taste spiced or overwhelming.
Butter flavor matters. Real butter doesn’t just contribute to texture—it contributes to taste. This recipe relies on the butter to provide the primary flavor in the topping, so quality here is worth the investment.
Common Mistakes and How to Avoid Them
Soggy topping is the most common complaint, and it’s usually caused by one of three things. First, you might not be draining the peaches thoroughly enough. Drain them in a colander and even press them gently between paper towels. Second, your oven might not be hot enough or the cobbler might not be baking long enough. Look for that golden-brown color and visible bubbling, not just a set-looking top. Third, you might be covering the cobbler while it cools, which traps steam. Let it cool uncovered.
Dense topping usually means overmixing the batter. Remember that lumps are fine and even desirable. You’re not making cake batter where you want everything perfectly smooth. Stir just until combined and stop. Overmixing develops gluten in the flour and makes the topping tough and dense instead of light and tender.
Too much sugar in pockets happens when you don’t stir the sugar into the peaches properly. Take ten seconds to make sure the sugar is distributed evenly throughout the fruit. This prevents biting into crystallized sugar pockets and ensures even sweetness throughout.
Undercooked batter underneath is rare but can happen if you didn’t preheat the oven properly or if your oven runs particularly cool. Make sure your oven is actually at 375°F using an oven thermometer if you’re not confident. The batter needs to bake fully to transform from raw to set and tender.
Peach liquid at the bottom of the pan instead of distributed throughout means the peaches released too much moisture. This usually happens if you used peaches in heavy syrup instead of juice, or if you didn’t drain them well. Next time, drain them more thoroughly and consider using peaches in juice specifically labeled as “in juice” rather than syrup.
Variations and Adaptations You Can Try
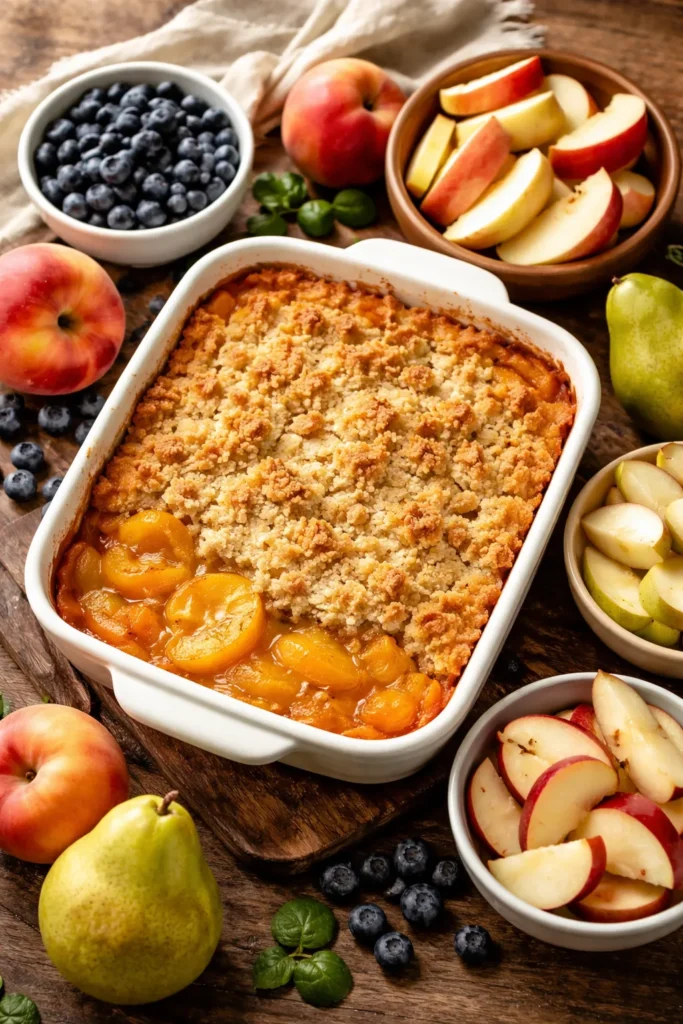
Berry Cobbler: Substitute one 12-ounce bag of frozen blueberries, blackberries, or mixed berries for the canned peaches. No need to thaw them—just add them straight from the freezer to the batter. Add the zest of one lemon to brighten the berry flavor. Frozen berries work beautifully because they release their juices during baking, creating a naturally juicy filling.
Mixed Fruit Version: Combine half a can of peaches with half a can of pears or cherries. The different fruits create a more complex flavor profile. Use the same total amount of drained fruit, just mix two types. Add ¼ teaspoon of almond extract along with the nutmeg for extra depth.
Apple Cobbler: Replace the peaches with two cans (15 ounces each) of sliced apples, well drained. Add ½ teaspoon of ground cinnamon to the batter instead of using it all in the fruit. The combination of cinnamon and nutmeg together is particularly lovely with apples.
Cherry Cobbler: Use one 21-ounce can of cherry pie filling instead of plain canned cherries and sugar. This is a one-for-one substitution that simplifies the recipe even further since the filling comes pre-sweetened. Just drain it if there’s excess liquid.
Peach Cobbler with Ginger: Add ¼ teaspoon of ground ginger to the batter along with the nutmeg. Ginger and peaches are a classic pairing, and the warm spice note adds unexpected complexity.
Single-Serve Ramekin Version: Divide the batter equally among four to six individual ramekins or oven-safe bowls. Top each with peaches and bake for twenty to twenty-five minutes until the tops are golden. Individual cobblers are perfect for portion control and look impressive plated on their own.
Gluten-Free Version: Replace the Bisquick with 1 cup of gluten-free all-purpose flour that contains xanthan gum. Add ½ teaspoon of baking powder to compensate for the gluten-free flour’s different structure. The result is slightly different in texture but still delicious.
Storage and Make-Ahead Instructions
Storing at Room Temperature:
If you’re planning to enjoy your cobbler within a few hours of baking, you can leave it at room temperature covered loosely with foil or plastic wrap. Don’t seal it tightly—a loose cover allows steam to escape and keeps the topping from getting soggy. The cobbler will stay perfectly good for four to six hours this way, though the topping begins to soften after about two hours.
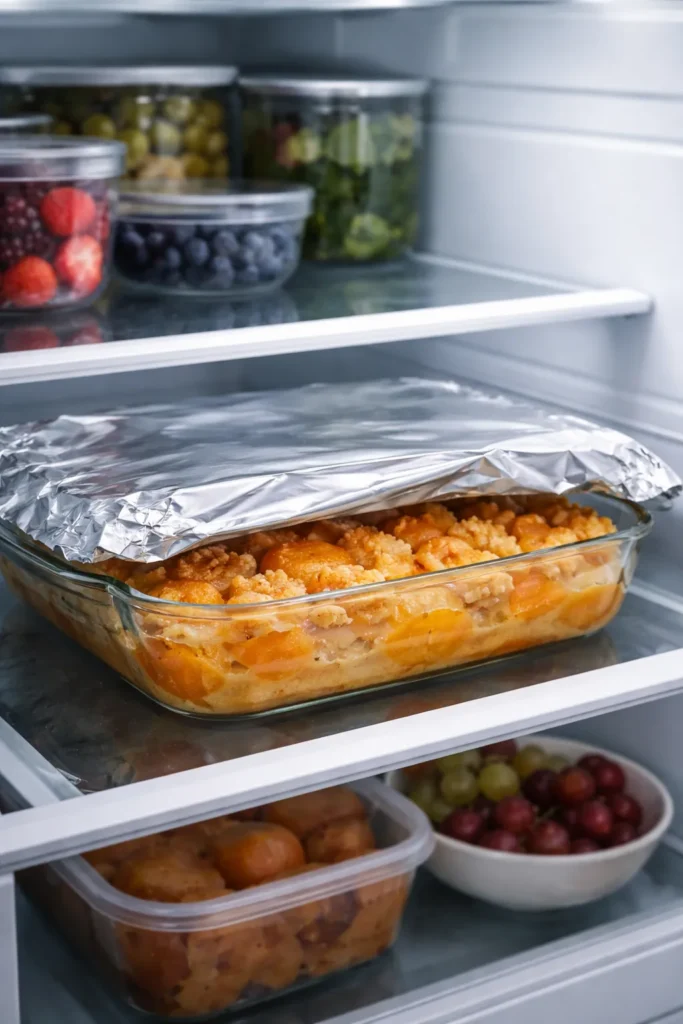
Refrigerating for Longer Storage:
For storage beyond a few hours, cover the cooled cobbler tightly and refrigerate it. It will keep in the refrigerator for three to four days in an airtight container or covered baking dish. The topping will soften somewhat during refrigeration, but the flavors actually improve as they meld together overnight.
Reheating Refrigerated Cobbler:
Scoop the portions you want to eat into an oven-safe bowl or back into the baking dish. Cover loosely with foil and reheat in a 350°F oven for about ten to fifteen minutes, until it’s warm throughout. The gentle oven reheating prevents the fruit from overheating while the biscuit topping crisps back up slightly. Microwave reheating works too—about sixty seconds per serving will warm it through, though the topping will be softer.
Freezing (Not Recommended, But Possible):
Freezing this particular cobbler isn’t ideal because the high moisture content in the peach filling can make the biscuit topping quite soggy when thawed and reheated. That said, if you must freeze it, let it cool completely, wrap it tightly in plastic wrap and then foil, and freeze for up to two months. Thaw it overnight in the refrigerator before reheating. The topping won’t be quite as good as the original, but it will still be edible and reasonably pleasant.
Making Ahead:
You can actually assemble this cobbler completely in advance without baking it. Prepare the batter and peach topping in the baking dish, cover it tightly, and refrigerate for up to eight hours. When you’re ready to bake, add about five to ten minutes to the baking time since the batter and fruit will be cold coming out of the refrigerator. This makes the cobbler perfect for weeknight entertaining—do the prep work whenever you have time, then pop it in the oven right before dinner.
Serving Suggestions and Perfect Pairings
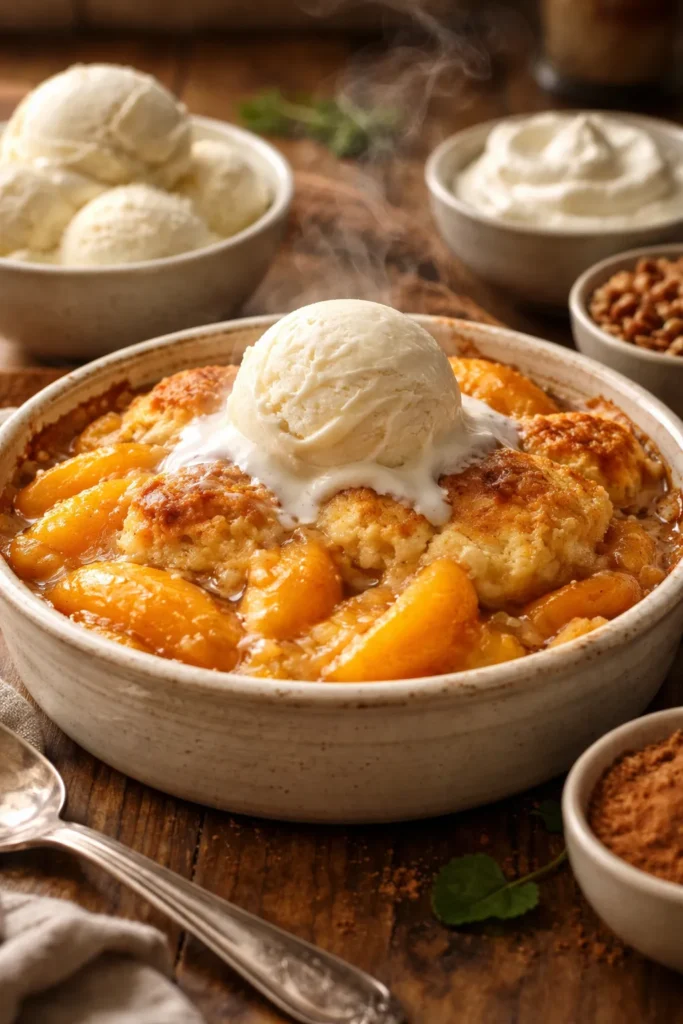
Vanilla ice cream is the classic choice, and for good reason. The cold, creamy sweetness of vanilla complements the warm, juicy fruit and soft biscuit topping perfectly. A generous scoop melting into warm cobbler is one of life’s great simple pleasures.
Whipped cream offers a lighter alternative. Use freshly whipped cream with a touch of vanilla and sugar rather than store-bought whipped topping. The homemade version has so much more flavor and texture.
Brown butter ice cream takes things to another level. If you want to get fancy, make or buy brown butter vanilla ice cream, which adds a nutty richness that plays beautifully with the peach and nutmeg flavors.
Crème fraîche or sour cream provides a tangy contrast that’s refreshing. A dollop of either one alongside warm cobbler balances the sweetness and adds complexity.
Custard sauce drizzled over individual servings creates an elegant presentation. It’s essentially a thin, pourable vanilla custard that adds richness without being overwhelming.
Serve it for breakfast. Leftover cobbler is absolutely delicious served cold or reheated for breakfast alongside yogurt or cottage cheese. The fruit and biscuit topping work surprisingly well in the morning.
Pair with hot beverages. Warm cobbler alongside strong coffee, hot tea, or hot cider makes for a cozy dessert experience. The warm fruit and biscuit pair beautifully with morning or evening hot beverages.
Take it to gatherings. Cobbler transports well and actually improves slightly after a few hours as the flavors meld. Bring it to potlucks, picnics, or casual gatherings. People always love it.
Frequently Asked Questions About Five-Minute Bisquick Cobbler
Can I Use Fresh Peaches Instead of Canned?
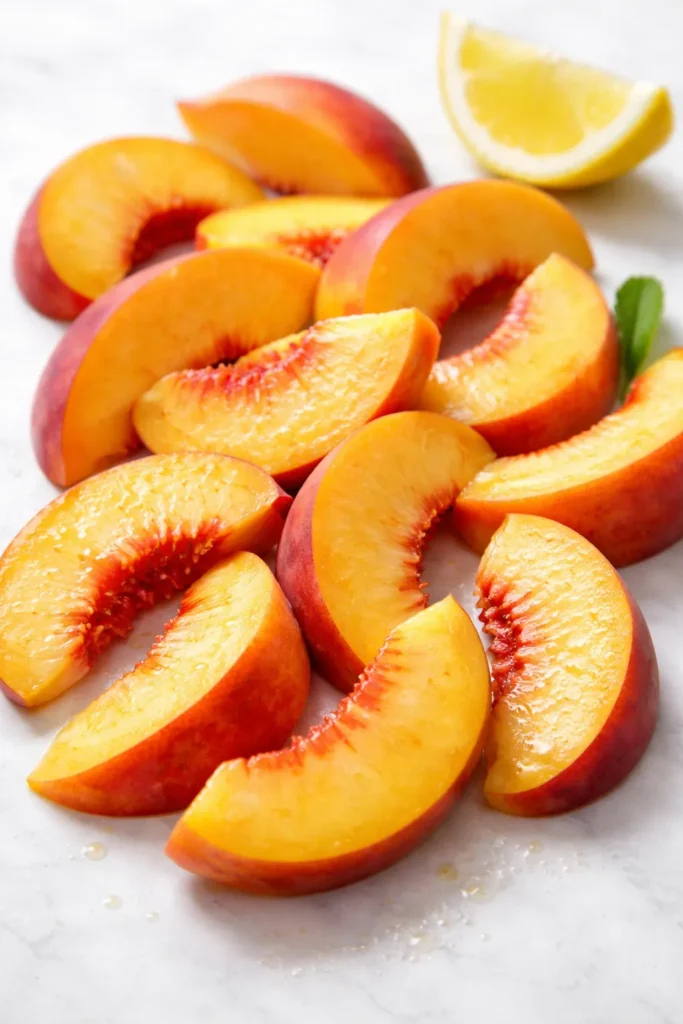
Absolutely, though you’ll lose the time advantage of this recipe. You’ll need to peel, pit, and slice five to six medium fresh peaches, which adds about ten to fifteen minutes to your prep time. Lightly toss them with a tablespoon of lemon juice to prevent browning and to brighten their flavor. Use them the same way you’d use the canned peaches. The result will be delicious, just not quite as quick.
What If I Don’t Have Nutmeg?
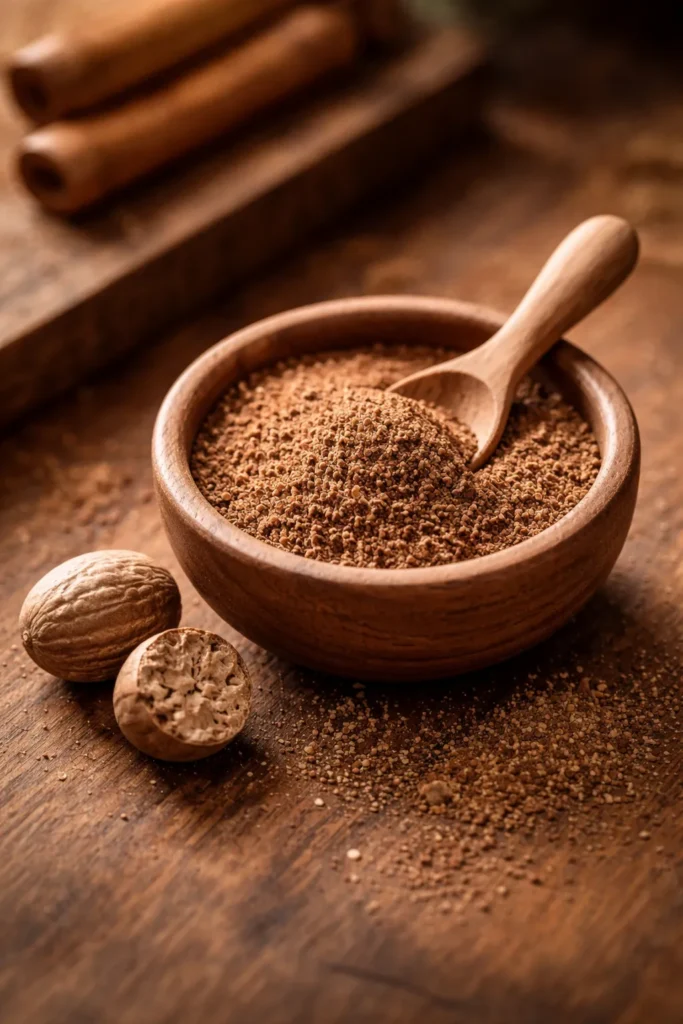
Nutmeg is really the flavor backbone here, so it’s worth keeping on hand. That said, if you absolutely don’t have it, you can substitute ½ teaspoon of ground cinnamon, though the flavor will be different. You could also use ¼ teaspoon each of cinnamon and allspice for a spiced cobbler. Or omit the spice entirely and just rely on the peach flavor—it will still be good, just less complex.
Can I Make This in a Cast Iron Skillet?
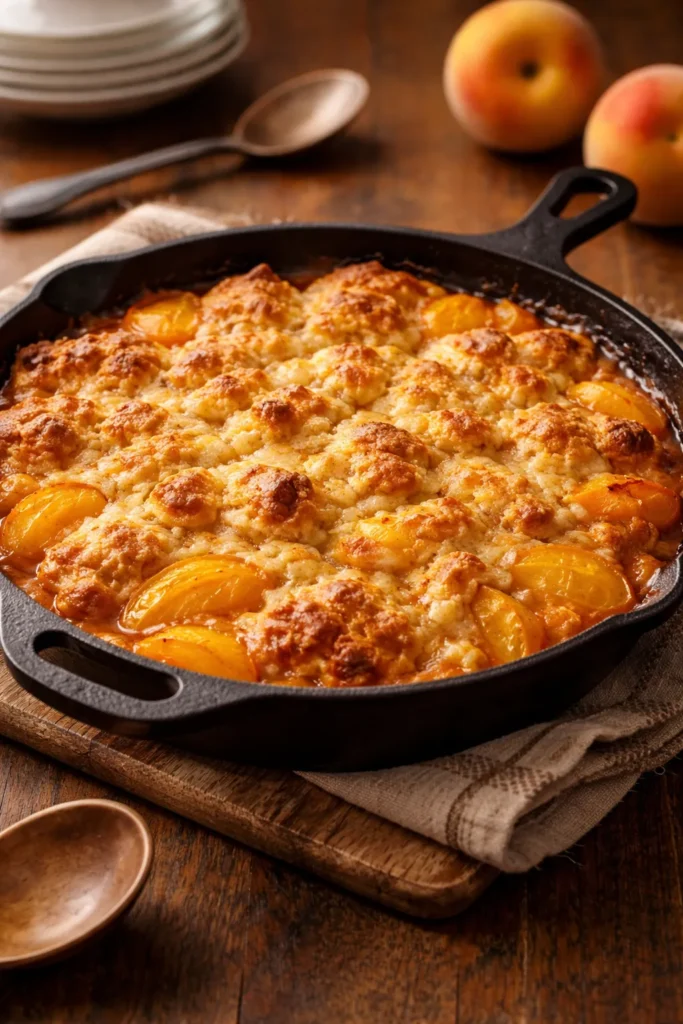
Yes, a cast iron skillet works wonderfully. Use a ten-inch skillet and follow the same instructions. You may need to add a minute or two to the baking time since cast iron conducts heat differently. The cobbler will brown beautifully in cast iron, and the skillet can even go directly to the table for serving.
Why Isn’t My Topping Golden Brown?
Your oven might run cool. Use an oven thermometer to verify that 375°F is actually 375°F in your specific oven. If your oven is indeed cooler, increase the temperature by twenty-five degrees. Alternatively, your cobbler might just need more time—keep it in for a few more minutes and watch for that golden-brown color and bubbling around the edges.
How Do I Know When It’s Done Baking?
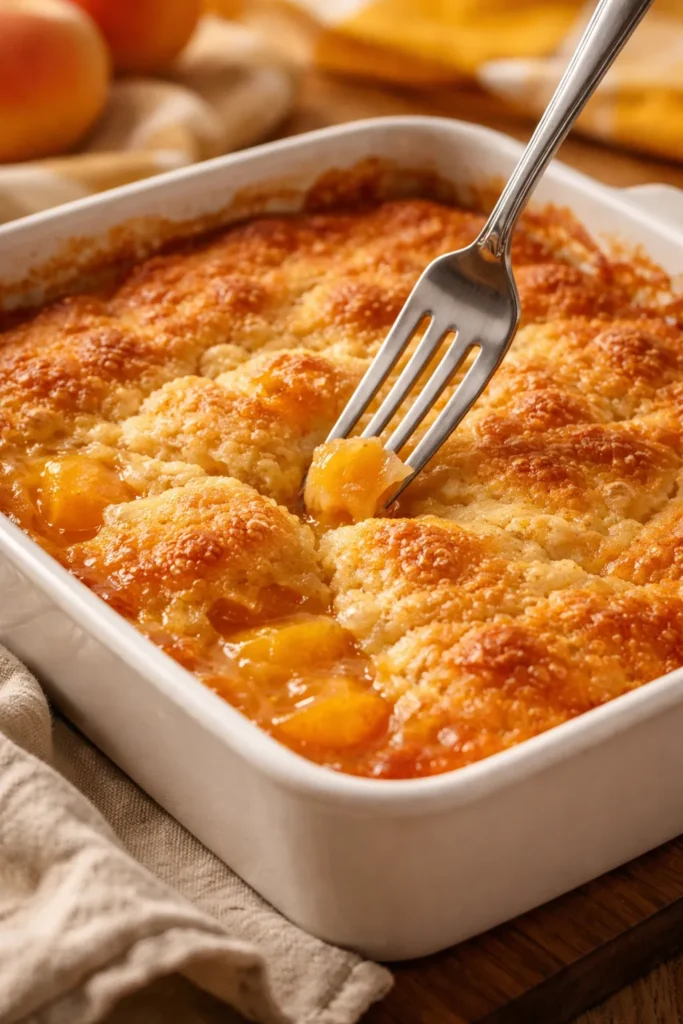
Look for three things simultaneously: the biscuit topping is deep golden brown (not pale), you can see peach filling bubbling around the edges of the biscuit pieces, and a fork inserted into the center of the biscuit comes out with no wet batter clinging to it. If all three things are true, it’s done.
Can I Double This Recipe?

Yes, easily. Double all ingredients and use a nine-by-thirteen-inch baking dish instead of the eight-inch square. The baking time will increase to about fifty-five to sixty minutes since the cobbler will be slightly deeper. Everything else remains the same.
Why Is My Filling Watery?

You likely didn’t drain the canned peaches thoroughly enough before using them. Next time, drain them in a colander and even press them gently between paper towels. If you used peaches in heavy syrup rather than juice, they’ll release more liquid. Stick with peaches in juice, which are lower in added sugar anyway.
Can I Use Pancake Mix Instead of Bisquick?
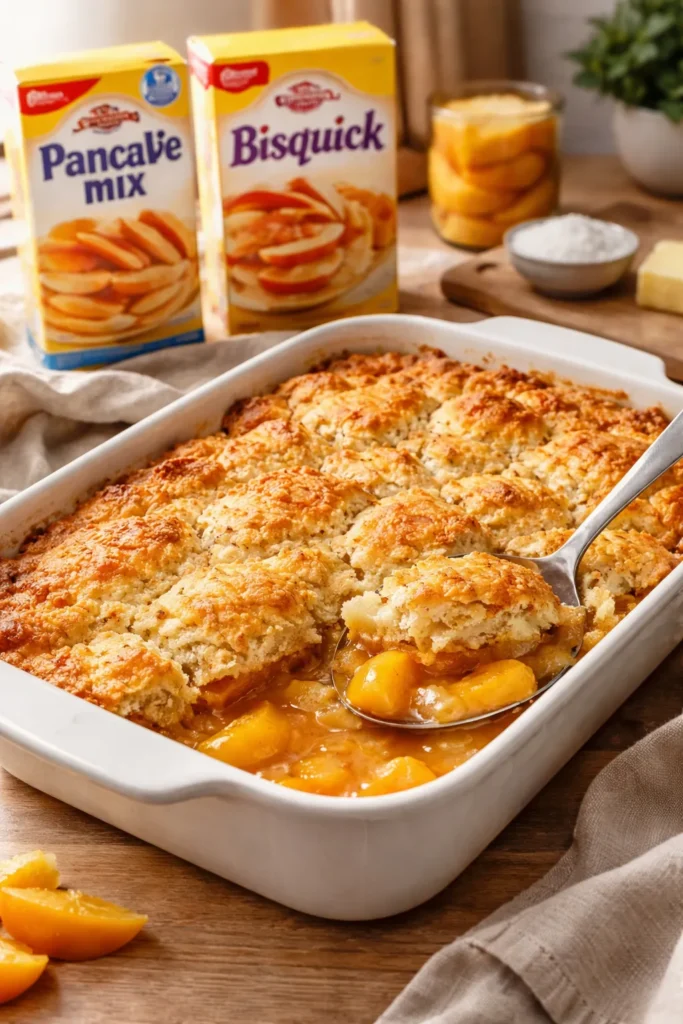
Yes, they’re essentially the same product. Bisquick and pancake mix are both self-rising mixes designed for quick baking. You can substitute one for the other without any real difference in the final result.
How Far Ahead Can I Assemble This?
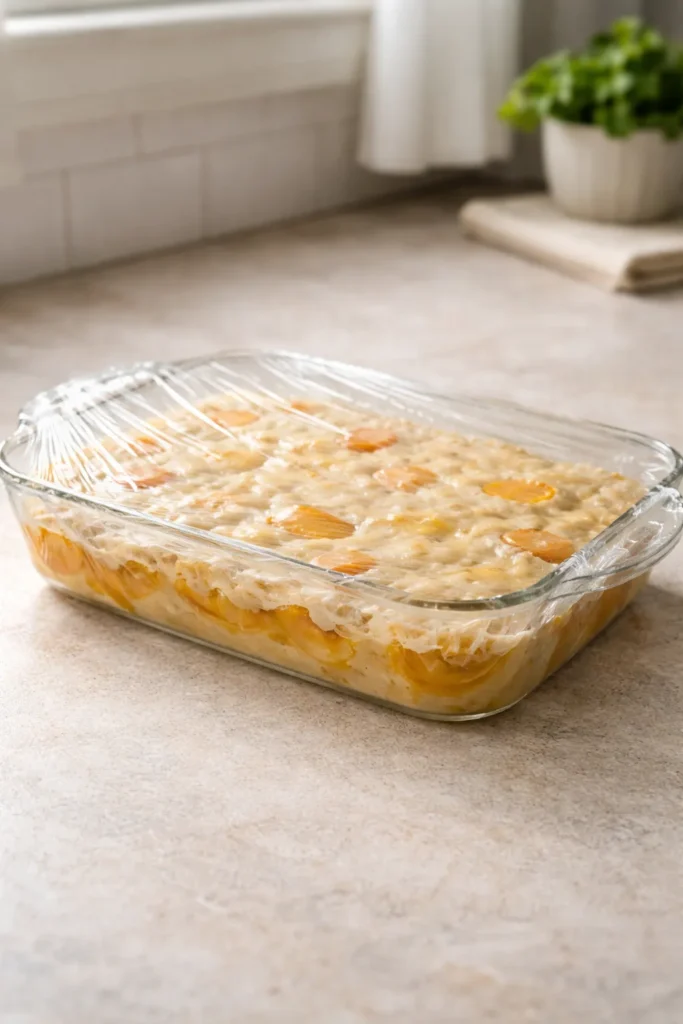
You can assemble the full cobbler (batter and peach topping together) up to eight hours in advance. Cover it tightly and refrigerate. When you’re ready to bake, add about five minutes to the baking time since everything starts cold. This makes it perfect for entertaining—prep it in the morning and bake it in the evening.
Final Thoughts
This five-minute Bisquick cobbler represents everything that’s wonderful about accessible home cooking. It proves that you don’t need complex techniques, fancy ingredients, or hours of time to create something genuinely delicious and deeply satisfying. It’s the kind of dessert that makes people feel cared for because you took the time to make something warm and homemade, even though you actually spent less time cooking than many people spend waiting in line for coffee.
The genius of this recipe is its flexibility. You can make it exactly as written and be thrilled with the results. You can adapt it with different fruits or spices to match your mood. You can make it ahead for company or throw it together on a weeknight when you want something sweet. It works in every scenario.
Whether you’re a beginner baker looking for confidence-building success, a busy parent needing a quick dessert, or an experienced cook who just wants something effortless, this cobbler delivers. It’s proof that the best recipes aren’t always the most complicated ones—sometimes they’re simply the ones that taste amazing and get dinner on the table without stress.
Keep this recipe on hand. Make it whenever you need a morale boost or a crowd-pleaser. Serve it warm, serve it cold, serve it for breakfast, serve it for dessert. It will be delicious every single time.