There’s a particular kind of satisfaction that comes with making a great sandwich at home — one that actually competes with what you’d get at a proper deli or a good neighborhood lunch spot. The difference between a forgettable sandwich and one you’ll think about for days usually comes down to a few deliberate choices: the right bread, a bold spread, and a filling with enough flavor to carry the whole thing.
The problem most people run into isn’t a lack of good ingredients. It’s defaulting to the same rotation — the same turkey-and-mustard, the same cold cuts on white bread — simply because sandwiches feel like too casual a category to put real thought into. But sandwiches have earned serious culinary respect across every food culture in the world, from the pressed Cubano of Havana to the banh mi of Vietnamese street corners to the corned beef Reuben that anchors a New York deli menu.
These eight homemade sandwich recipes are designed to cover the full range — hearty weeknight dinners, satisfying lunches, crowd-pleasing party options, and meatless builds that hold their own against any protein-stuffed stack. Some take 15 minutes. Others reward patience with slow-cooked depth. All of them are genuinely worth making.
Table of Contents
- What Makes a Homemade Sandwich Worth Making from Scratch
- The Layering Order That Protects Your Bread
- 1. Classic Reuben Sandwich
- Making Thousand Island at Home in 2 Minutes
- Key Ingredients for One Reuben
- 2. Chicken Parmesan Hoagie
- Building the Sandwich
- 3. Cuban Sandwich (Cubano)
- Pressing Without a Panini Press
- Cuban Sandwich Essentials
- 4. Slow-Cooked Chipotle Pulled Pork Sandwich
- The Coleslaw Factor
- Building the Sandwich
- 5. Slow-Cooker Meatball Sub
- The Bun Choice
- 6. Basil-Tomato Grilled Cheese on Sourdough
- Getting the Crust Right
- 7. Smashed Chickpea Salad Sandwich
- Building the Sandwich
- 8. Philly Cheesesteak
- The Cheese Decision
- Choosing the Right Bread for Every Sandwich Style
- When to Toast, When to Leave It Fresh
- Building a Sandwich That Doesn’t Fall Apart or Go Soggy
- Sides That Pair Well with Homemade Sandwiches
- Final Thoughts
What Makes a Homemade Sandwich Worth Making from Scratch
The case for making sandwiches at home goes beyond convenience or cost. When you control every element — the bread, the spread, the protein, the produce — you can tune the flavors exactly to your preference. That freedom is something no grab-and-go counter can match.
Spreads are the most underestimated element of any sandwich. A plain swipe of mayonnaise is a missed opportunity. Blending mayo with smoked paprika, garlic, chipotle, or grated cheese transforms the same base into something that ties the whole sandwich together. Pesto, horseradish cream, and tahini-lemon dressing all work the same way — they coat the bread and act as a flavor bridge between the other components.
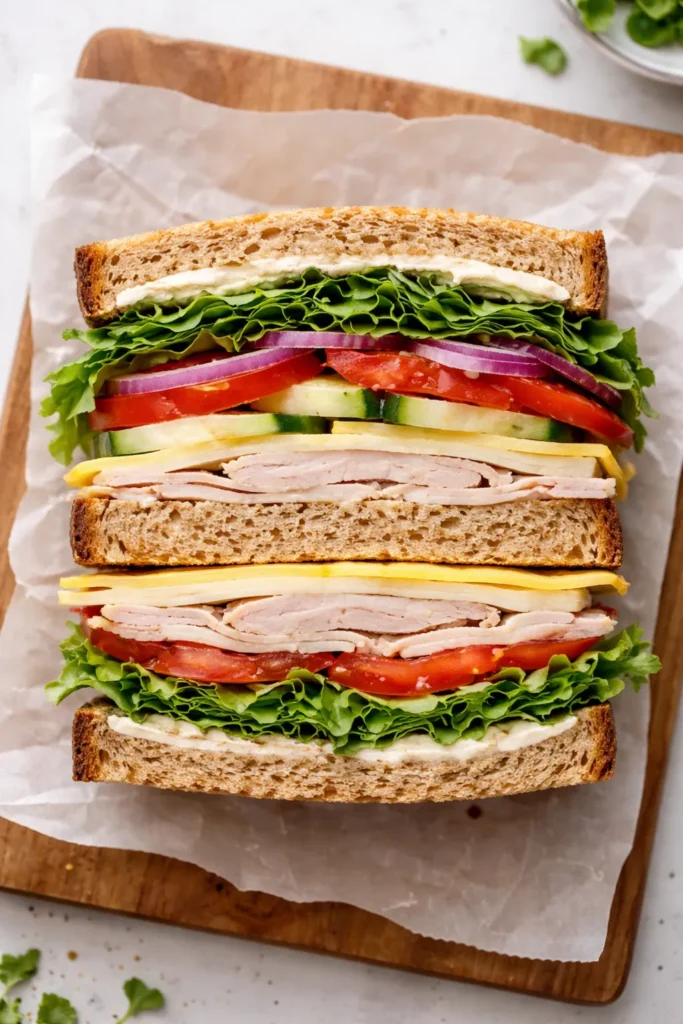
Texture contrast matters just as much as flavor. The best sandwiches pair something soft with something crisp: creamy cheese against shredded lettuce, tender braised meat against a toasted crust, smooth avocado against crunchy pickles. When every component has the same texture, even good flavors feel flat.
Temperature plays a role too. Warm proteins against cool, crisp vegetables create a contrast that makes hot sandwiches feel far more dynamic than room-temperature ones. That’s why letting grilled chicken or sautéed steak rest for 2-3 minutes before loading it into a bun — rather than piling it in straight off the heat — gives everything time to settle without steaming the bread into mush.
The Layering Order That Protects Your Bread
Soggy bread is the enemy of a good sandwich, and the order you layer ingredients directly affects how long the bread stays structurally sound. Always place a fat-based spread — mayo, butter, pesto, aioli — directly on the bread first. This creates a barrier that prevents wet ingredients from soaking straight into the crumb.
Place cheese or deli meat against the spread, then stack wetter ingredients like tomato slices or dressed greens toward the center of the sandwich, away from direct bread contact. If you’re packing a sandwich to eat later, keep wet toppings in a small separate container and add them at the table. This single habit is the difference between a sandwich that holds together after two hours and one that falls apart on the way to the park.
1. Classic Reuben Sandwich
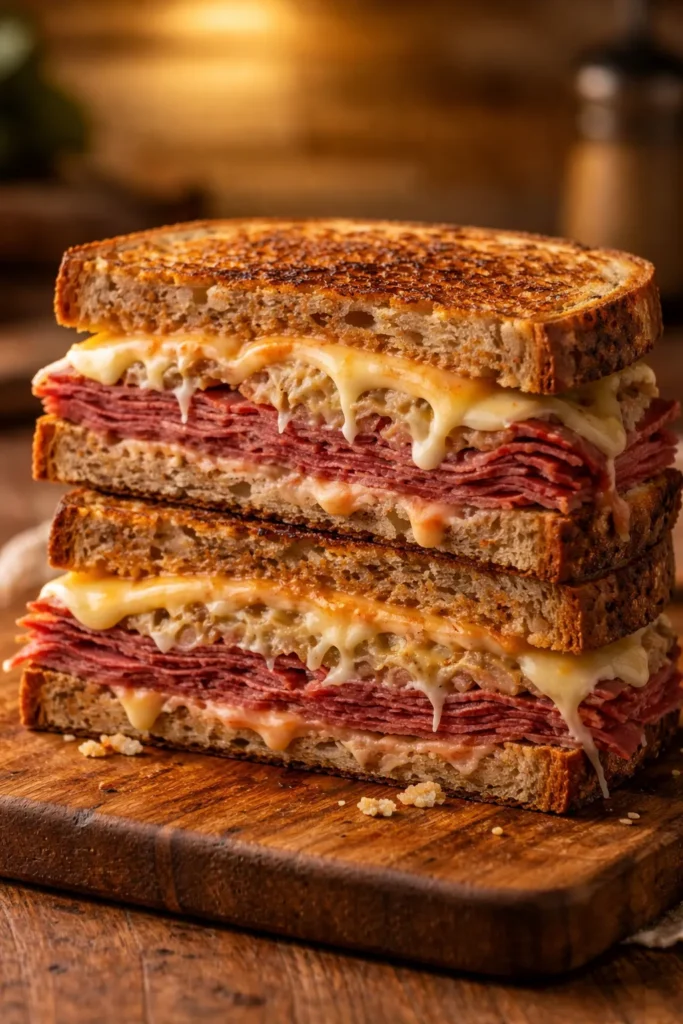
The Reuben might be the greatest deli sandwich ever assembled, and it’s far easier to make at home than most people assume. Thinly sliced corned beef, tangy sauerkraut, Swiss cheese, and a generous smear of Thousand Island dressing are griddled between two slices of buttered rye bread until the cheese melts and the crust turns a deep, burnished gold.
The non-negotiable here is the bread. Seeded rye — the kind with a firm, slightly sour crumb — holds up to both the moisture from the sauerkraut and the butter used to grill it. Soft white bread will turn soggy before you’ve finished building the thing. Look for a dense, sliced deli rye at the bakery section of a well-stocked grocery store.
Drain your sauerkraut before adding it. This is a step most first-timers skip, and it’s the main reason home Reubens end up wet and sad. Press the sauerkraut between paper towels until most of the liquid is gone — you’ll keep all the flavor and acidity without turning the inside of your sandwich into a pool.
Making Thousand Island at Home in 2 Minutes
Store-bought Thousand Island works, but a quick homemade version is noticeably better. Combine 3 tablespoons of mayonnaise, 1 tablespoon of ketchup, 1 teaspoon of sweet pickle relish, a tiny squeeze of lemon juice, and a pinch of garlic powder. Stir and taste. It takes two minutes and the flavor is brighter and more balanced than anything in a bottle.
Key Ingredients for One Reuben
- 2 slices seeded rye bread, buttered on the outside
- 3 oz thinly sliced corned beef
- 2 slices Swiss cheese
- 3 tablespoons sauerkraut, well drained and pressed dry
- 1 tablespoon Thousand Island dressing
Grill over medium heat for 3-4 minutes per side, pressing gently with a spatula, until the cheese is fully melted and the bread is deeply golden.
2. Chicken Parmesan Hoagie
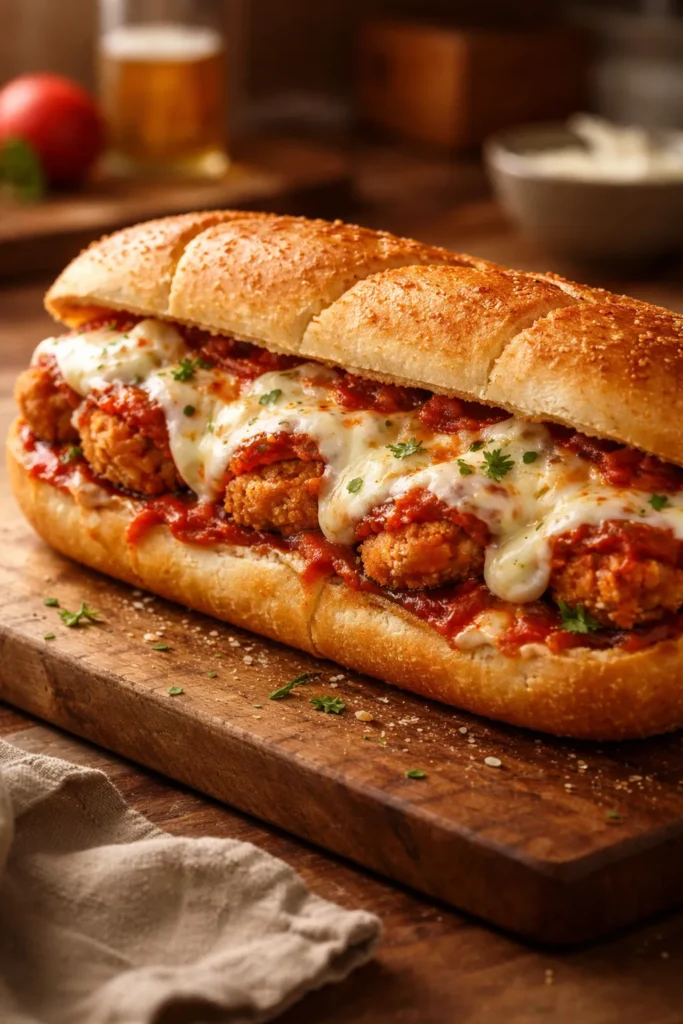
Taking the flavors of chicken Parmigiana and putting them inside a hoagie roll is the kind of idea that sounds obvious in retrospect. Crispy breaded chicken, a spoonful of good marinara, a blanket of melted mozzarella — it works as a main dish pasta, and it works just as well as a handheld.
The key to keeping the chicken crispy inside the roll is to toast the hoagie before loading it. A dry, lightly toasted roll forms a sturdier barrier against the marinara than a soft, untoasted one. Slice the hoagie lengthwise, spread a thin layer of garlic butter on both cut sides, and toast it cut-side down in a dry skillet for about 90 seconds. The garlic butter caramelizes slightly, and the surface firms up enough to resist the sauce.
For the chicken, pound boneless chicken breasts to an even ½-inch thickness before breading. Uneven thickness means the thinner parts overcook while the thicker parts stay underdone. After dredging in seasoned breadcrumbs, pan-fry in a neutral oil over medium-high heat for about 3-4 minutes per side until deeply golden, then transfer to a wire rack — not a paper towel — to drain. A rack allows air to circulate underneath and keeps the crust from steaming itself soft.
Building the Sandwich
Spoon 2-3 tablespoons of marinara onto the bottom of the toasted hoagie. Place the breaded chicken cutlet directly on top, add another small spoonful of sauce over the chicken, then layer on 2 slices of fresh mozzarella or a handful of shredded low-moisture mozzarella. Slide the open-face sandwich under a broiler for 60-90 seconds until the cheese bubbles and the edges turn golden. Close the roll, press gently, and slice in half before serving. A few torn fresh basil leaves between the cheese and the roll make a notable difference.
3. Cuban Sandwich (Cubano)
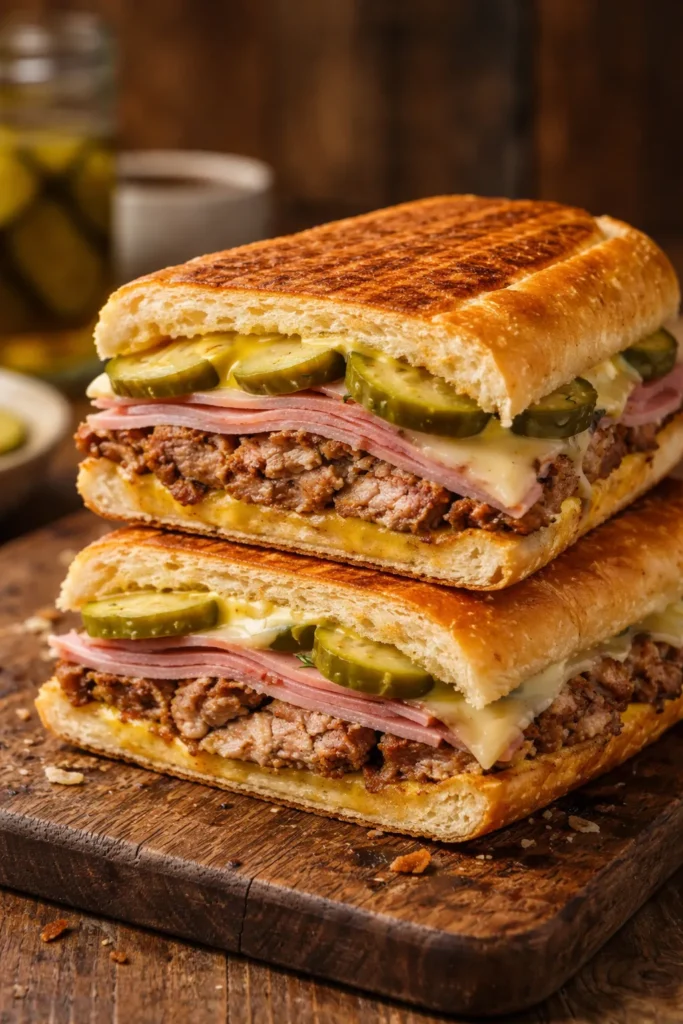
Few sandwiches in the world achieve the kind of harmony a well-made Cuban does. Roast pork, sliced ham, Swiss cheese, yellow mustard, and dill pickle slices — pressed together in a long roll until everything melts and compresses into one unified, extraordinary bite.
The bread is as essential as the filling. A proper Cuban roll has a thin, papery crust and a light, slightly sweet interior — similar to a French baguette but less chewy. Soft sub rolls work in a pinch, but the pressed crust of a Cuban roll is part of what makes the sandwich what it is. If you can find them at a Latin bakery, they’re worth seeking out.
The roast pork is where most of the flavor lives. A mojo-marinated pork shoulder — seasoned with garlic, citrus juice, cumin, and oregano — roasted low and slow until it’s tender enough to slice thinly is ideal. If you’re working with leftovers or a time constraint, a Cuban sandwich made with store-bought pernil from a Latin market is legitimately excellent and shaves hours off the process.
Pressing Without a Panini Press
You don’t need a panini press to get that signature flattened, toasted crust. Butter both sides of the assembled sandwich, then place it in a heavy skillet — cast iron is ideal — over medium heat. Set another heavy skillet or a foil-wrapped brick directly on top of the sandwich. Press down firmly and hold for 30 seconds, then let the weight sit for another 2-3 minutes per side. The result is indistinguishable from a press-made Cubano: golden, crusty exterior, melted cheese, and warm, fragrant filling throughout.
Cuban Sandwich Essentials
- 1 Cuban or soft French roll
- 3 oz slow-roasted or mojo pork, thinly sliced
- 2 oz sliced deli ham
- 2 slices Swiss cheese
- 6-8 thin dill pickle slices
- 1 tablespoon yellow mustard
- Softened butter for grilling
4. Slow-Cooked Chipotle Pulled Pork Sandwich
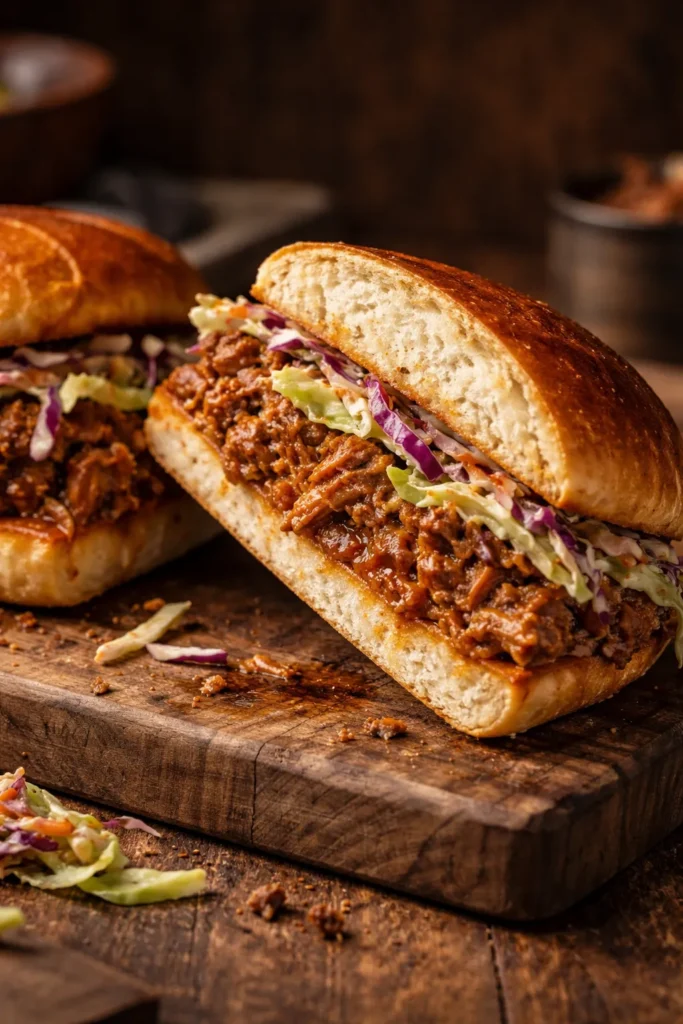
Pulled pork is the rare sandwich filling that genuinely improves with time — the longer the pork shoulder braises, the deeper and more complex the flavor becomes. Making it at home means you control the sauce, the smoke level, and the heat, none of which you can do with a pre-made option.
A standard pork shoulder (also labeled pork butt) works best for this. The fat content is high enough that the meat stays moist through a long cook — 6-8 hours in a slow cooker on low, or 3-4 hours in a Dutch oven at 300°F. Season the pork generously with a dry rub of smoked paprika, brown sugar, garlic powder, cumin, and black pepper the night before, wrap it in plastic, and refrigerate overnight. The seasoning penetrates the meat far more deeply than a same-day rub.
Chipotle peppers in adobo sauce are the flavor anchor. Add 2-3 chipotles, roughly chopped, plus 2 tablespoons of the adobo sauce to whatever braising liquid you’re using — beer, chicken stock, apple cider, or a combination. The chipotles deliver a smoky, earthy heat that’s distinct from chili powder and far more layered than hot sauce alone.
The Coleslaw Factor
Pulled pork sandwiches need coleslaw. This isn’t negotiable. The cool, lightly tangy crunch of slaw cuts through the richness of braised pork in a way that no other topping does. A simple slaw of shredded green cabbage, a little shredded carrot, apple cider vinegar, a small amount of sugar, and just enough mayo to bind it comes together in 5 minutes. Make it while the pork rests.
Building the Sandwich
Pile the pulled pork onto a toasted brioche bun or a sturdy potato roll. Add a generous spoonful of coleslaw directly on top of the pork — not on the side — so every bite gets the contrast. A few pickled jalapeño slices or bread-and-butter pickles add a final bright note. Press the top bun down gently and serve immediately.
5. Slow-Cooker Meatball Sub

A meatball sub done right — with properly seasoned, tender meatballs, a fragrant tomato sauce, and cheese that stretches with every bite — is one of the most satisfying sandwiches on this list. The slow cooker does most of the heavy lifting, making this a build-in-the-morning, eat-at-dinner situation with almost no evening effort.
Broiling the meatballs before adding them to the slow cooker is the step that matters most. A quick 10-minute broil on a sheet pan browns the exterior and creates a crust that helps them hold together during the long, slow braise. Without this step, the meatballs become waterlogged and start to fall apart by dinnertime. After broiling, transfer them directly into the slow cooker, cover with your tomato sauce of choice, and cook on low for 4-6 hours.
For the meatballs themselves, a mixture of ground beef and ground pork — roughly 70/30 — gives a better flavor and texture than all-beef. Add one egg per pound of meat, a generous handful of grated Pecorino Romano, minced garlic, dried oregano, and breadcrumbs soaked in a tablespoon of milk. The milk-soaked breadcrumbs act as a binder that keeps the interior soft rather than dense and dry.
The Bun Choice
A soft, wide hoagie roll that’s been split and toasted is the right vessel. The exterior should be firm enough to hold the sauce without disintegrating immediately, while the interior should stay soft enough to compress slightly when you bite down. Split the roll, brush the inside with garlic butter, and toast it cut-side down in a skillet or under the broiler for about 2 minutes.
Load 3-4 meatballs into each roll, spoon extra sauce over the top, then blanket with shredded mozzarella and provolone. Run under the broiler for 90 seconds until the cheese is bubbling and beginning to brown at the edges. Serve with napkins — these are not tidy sandwiches.
6. Basil-Tomato Grilled Cheese on Sourdough
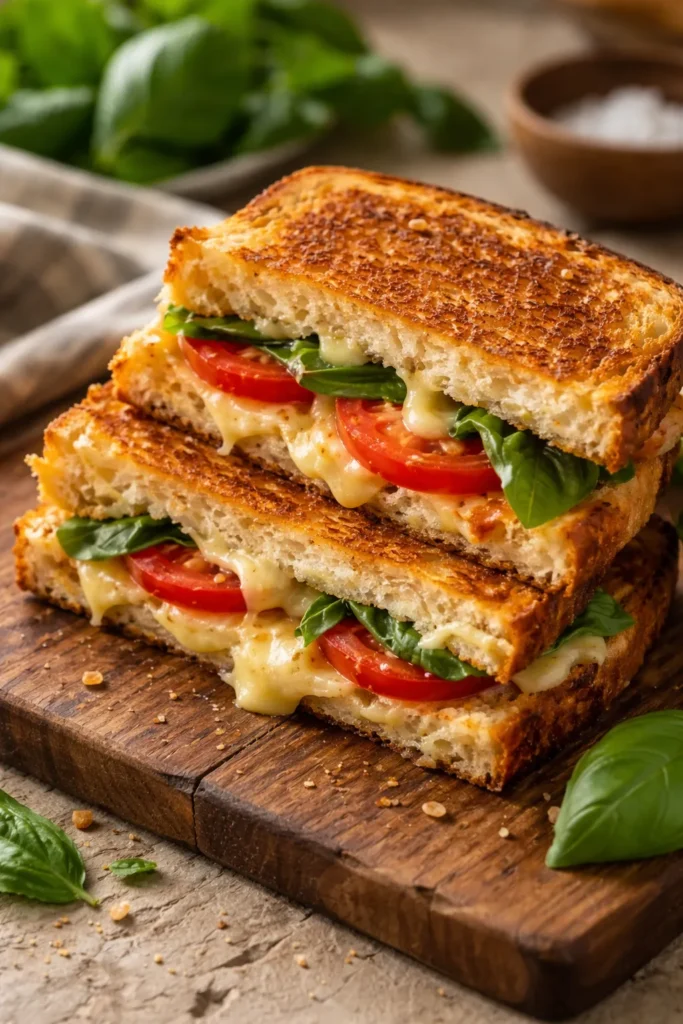
Grilled cheese has a reputation as the most basic sandwich in the canon, which makes it the perfect candidate for a few smart upgrades that cost almost no additional effort. This version uses tangy sourdough instead of white sandwich bread, layered with fontina and sharp white cheddar, fresh basil leaves, and ripe tomato slices that have been salted and blotted dry.
Salting the tomatoes is the step that separates a soggy grilled cheese from a great one. Slice the tomatoes, lay them on a paper towel, sprinkle lightly with salt, and let them sit for 10 minutes. The salt draws out the excess liquid, concentrating the tomato flavor and dramatically reducing the moisture that would otherwise steam into the bread during grilling.
The two-cheese approach — fontina for its exceptional melting qualities and sharp cheddar for its depth of flavor — works better than using a single cheese. Fontina melts beautifully into a smooth, creamy layer, while cheddar adds a sharpness that keeps the sandwich from tasting flat. Freshly grated cheese melts more evenly than pre-shredded, which has an anti-caking coating that interferes with the melt.
Getting the Crust Right
Butter both exterior sides of the bread with softened (not melted) butter. Softened butter coats the bread more evenly and browns more uniformly than melted butter, which can pool and create hot spots. Cook over medium-low heat — not medium-high — for 3-4 minutes per side. Patience here pays off: lower heat gives the cheese time to melt completely before the bread over-browns. If the outside looks done before the cheese has melted, tent the sandwich loosely with a lid for 60 seconds to trap enough heat to finish the job.
Add the basil leaves to the inside of the sandwich after the cheese has melted and before pressing the sandwich closed. The residual heat wilts the basil gently without making it bitter, which happens when you cook basil at direct high heat for any length of time.
7. Smashed Chickpea Salad Sandwich
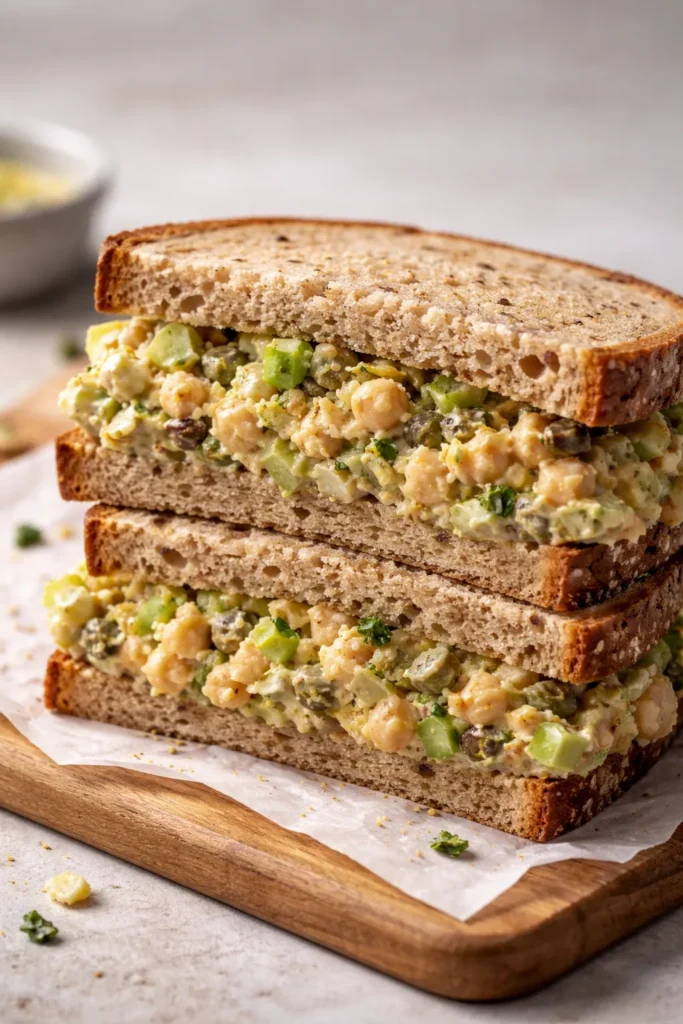
This is the sandwich that converts people who assume vegetarian fillings are inherently less satisfying than meat-based ones. Smashed chickpeas — partially mashed, so the mixture has both creamy and chunky textures — mixed with lemon juice, grainy mustard, capers, celery, and a modest amount of mayonnaise create a filling that’s genuinely hearty and packed with flavor.
The partial mash is the technique that makes this work. Drain and rinse a can of chickpeas, then spread them on a cutting board and press firmly with the flat side of a large knife or the back of a fork. You want roughly half of them to break open and release their interior while the other half stay mostly whole. This creates a texture that’s creamy enough to hold together as a spread but chunky enough to feel substantial.
Season aggressively. Chickpeas are mild by nature, which means they need more seasoning than you’d expect — a full teaspoon of lemon zest, 2 tablespoons of lemon juice, a generous pinch of salt, black pepper, and a teaspoon of capers (roughly chopped) add brightness and salinity. Finely diced celery adds crunch, and a small handful of fresh parsley keeps the whole mixture feeling fresh rather than heavy.
Building the Sandwich
Whole grain bread, sturdy sourdough, or a seeded rye all work well as the base. Spread the chickpea mixture generously on the bottom slice — about ½ inch thick. Layer on sliced avocado, a small handful of baby arugula, thin slices of cucumber, and a few shavings of red onion. Close with the top slice and press gently. The avocado adds the kind of rich creaminess that keeps this sandwich completely satisfying without any meat.
This is also a genuinely excellent make-ahead option. The chickpea salad keeps well in the fridge for up to 3 days; store it separately and assemble the sandwiches fresh to keep the bread from getting soggy.
8. Philly Cheesesteak
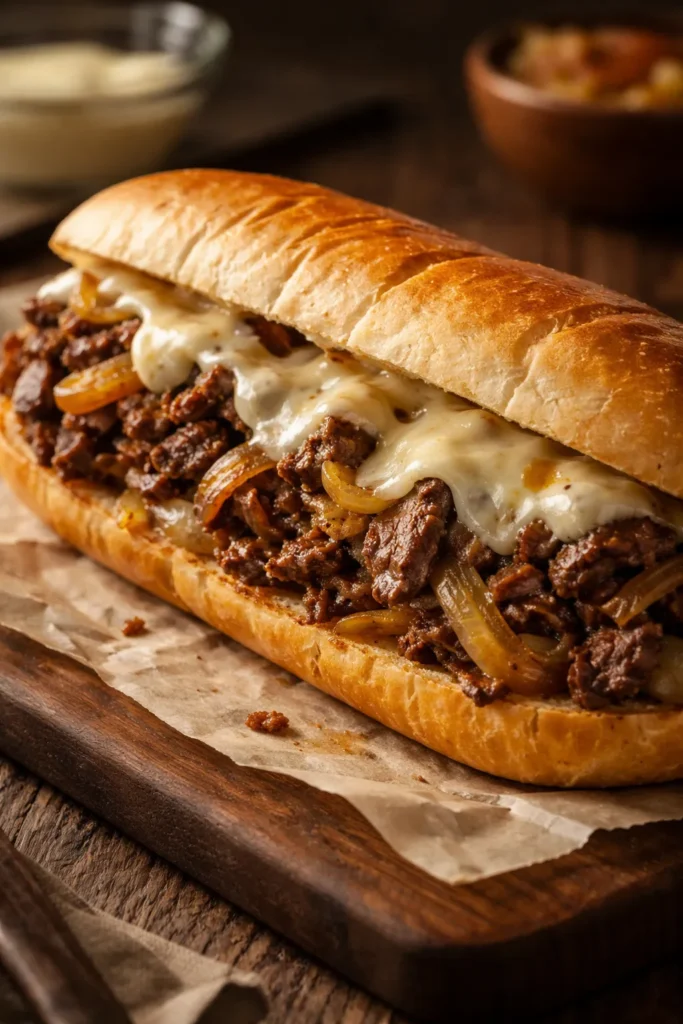
A proper Philly cheesesteak is one of the most argued-over sandwiches in existence, and anyone from Philadelphia will have strong opinions about what belongs in one and what doesn’t. What’s not up for debate is this: thinly sliced ribeye, sautéed onions, and melted cheese in a hoagie roll is one of the great sandwiches of any cuisine.
Ribeye is the correct cut, and it’s worth insisting on. The fat marbling throughout a ribeye is what keeps the meat tender and juicy after the brief, high-heat cook. Leaner cuts like sirloin or round work in a budget pinch but tend to turn chewy and dry when cooked over the high heat that a cheesesteak needs. Ask your butcher to shave the ribeye as thin as possible — about ⅛ inch — or freeze the steak for 20-30 minutes at home before slicing it yourself with a sharp knife. Semi-frozen meat is far easier to slice thinly than fresh.
The onions — thinly sliced and cooked slowly in butter over medium-low heat for 20-25 minutes until they turn sweet and caramelized — are as important as the beef. Don’t rush them. The Maillard reaction that turns raw, sharp onion into sweet, almost jammy caramelized onion takes time and can’t be shortcut with high heat, which just scorches the exterior while leaving the interior raw.
The Cheese Decision
Provolone, American cheese, or Cheez Whiz — all three have their advocates among Philly natives. For a homemade version, provolone or a blend of provolone and American cheese melts beautifully and provides the right balance of flavor and gooey texture. Lay the cheese slices directly over the meat in the skillet for the last 60-90 seconds of cooking, cover the pan with a lid, and let the steam melt the cheese into the beef. Then scoop the entire mixture — cheese and all — directly into a lightly toasted hoagie roll using a wide spatula.
Choosing the Right Bread for Every Sandwich Style
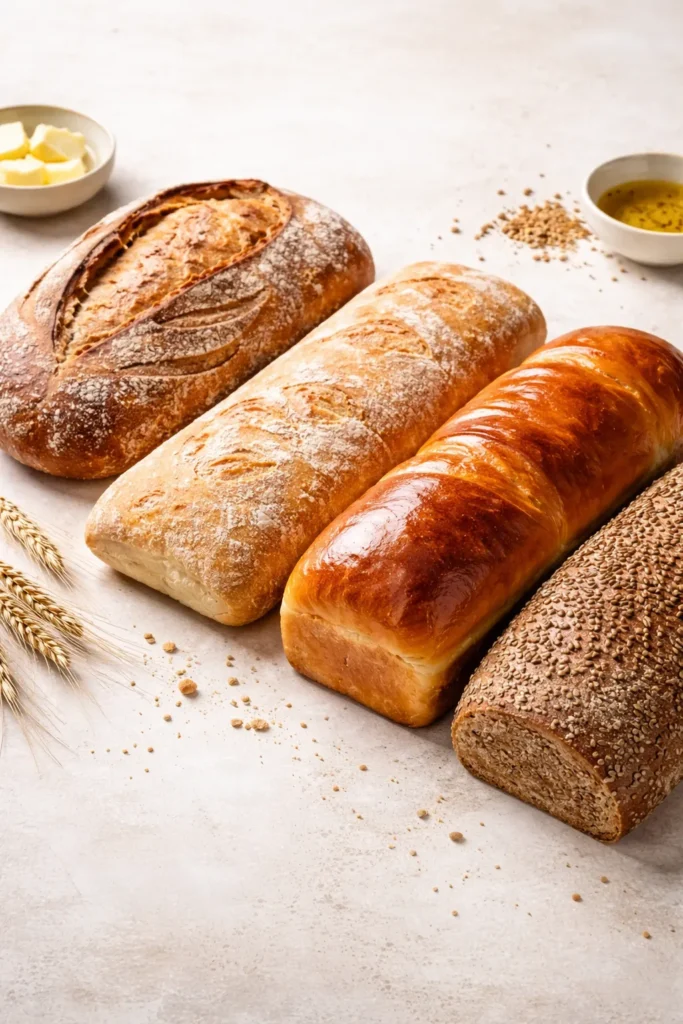
Bread isn’t just structural — it’s a flavor component, and the wrong bread can undercut an otherwise excellent filling. A few reliable pairings worth keeping in mind:
Sourdough brings tang and chew that pairs well with rich, fatty fillings — grilled cheese, avocado-based sandwiches, smoked salmon. Its density holds up to wet ingredients better than most soft breads.
Ciabatta has an open, airy crumb that soaks up dressings and sauces without turning immediately soggy. Excellent for pressed sandwiches, caprese-style builds, and anything with pesto or aioli.
Brioche and potato rolls are soft and slightly sweet, which makes them the right choice for pulled pork, sloppy joes, and BBQ-sauced fillings. The sweetness plays against smoky, tangy sauces in a way that plain white rolls can’t match.
Hoagie rolls are the workhorses of the sandwich world — sturdy enough for meatball subs and cheesesteaks, with enough interior crumb to absorb sauce without falling apart. Toast them, always.
Rye bread is the natural match for Reubens, corned beef, and any sandwich that leans on cured or pickled flavors. The slight bitterness of the rye plays beautifully against the acidity of sauerkraut and the richness of pastrami.
When to Toast, When to Leave It Fresh
The default position should be: toast the bread. Toasting creates a sturdier surface, adds texture contrast, and extends the window before bread goes soggy from contact with wet fillings. The exception is a delicate sandwich where softness is part of the appeal — a fresh caprese on focaccia, a Japanese fruit sando on milk bread, or a simple egg salad on a perfectly fresh pullman loaf. When the bread itself is exceptional, leave it alone.
Building a Sandwich That Doesn’t Fall Apart or Go Soggy
The enemy of a great packed lunch is a sandwich that goes soggy in transit. A few strategies that reliably prevent this:
Pat proteins dry before adding them to the bread. Rotisserie chicken, canned tuna, and fresh tomato slices all carry excess moisture that migrates into the bread over time.
Separate wet from bread with a fat layer. Cheese placed directly against the bread surface acts as a moisture barrier. A generous spread of mayonnaise, hummus, or avocado does the same thing.
Pack components separately when possible. For lunch-box sandwiches, carry the bread separately from the filling and assemble at your desk or table. A two-minute assembly at lunchtime is a small inconvenience that preserves hours of texture quality.
Wrap assembled sandwiches tightly in parchment paper rather than plastic wrap. Parchment allows slight airflow without letting the sandwich dry out, whereas plastic wrap traps steam that softens the bread from the outside in.
For sandwiches you want to store assembled overnight — a pressed muffuletta, a layered sub meant to marinate in its own dressing — choose heartier breads like ciabatta or crusty Italian rolls. These benefit from resting under weight, which compresses the fillings and allows the bread to absorb a small amount of oil from the olive spread or dressing in a way that improves rather than ruins the texture.
Sides That Pair Well with Homemade Sandwiches
Sandwiches work for any meal, and the right side makes them feel genuinely complete rather than like a quick snack. A few combinations worth considering:
- Pulled pork or chipotle sandwiches pair well with tangy coleslaw, corn on the cob with chili butter, or a simple black bean salad
- Meatball subs and chicken Parm hoagies are great alongside a crisp green salad dressed simply with lemon and olive oil, which cuts through the richness of the marinara and cheese
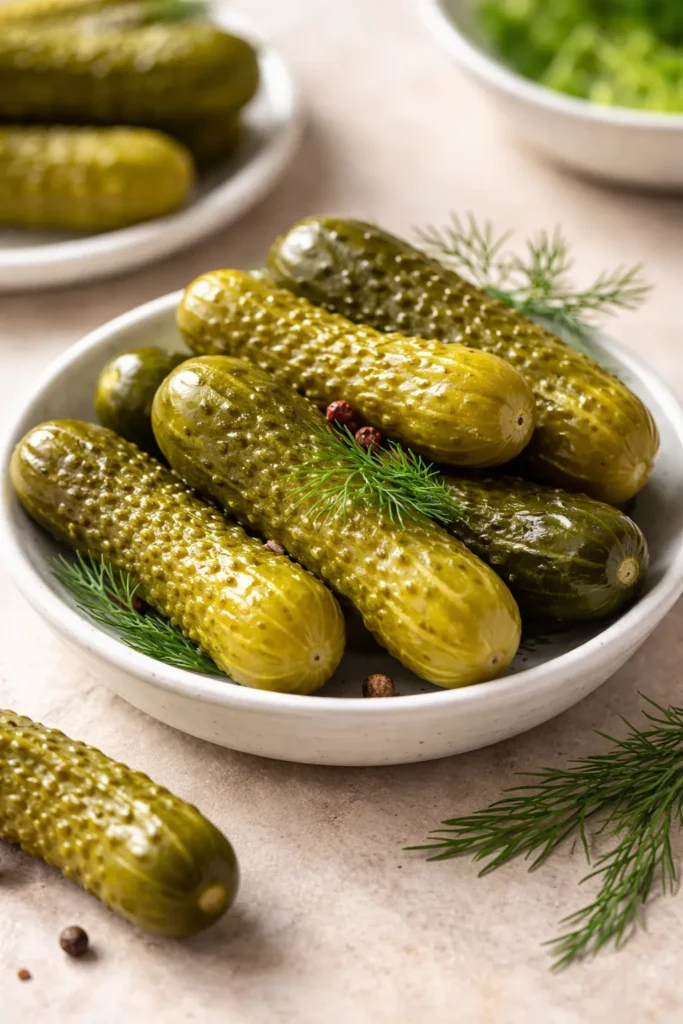
- Reubens and Cuban sandwiches go naturally with dill pickles, kettle chips, or a bowl of tomato soup
- Chickpea salad and grilled cheese sandwiches pair well with a light fruit salad or a small bowl of lentil soup
- Cheesesteak and pulled beef sandwiches are designed to go with something crunchy and salty — thin-cut fries, pickled pepper rings, or a simple coleslaw
A small side does more than round out the meal. It gives you a contrast — something cool against something hot, something crisp against something soft — that makes the entire plate more satisfying than the sandwich alone.
Final Thoughts
Sandwiches earn their place at any meal when you treat them with the same intentionality you’d bring to any other dish. The difference between a sandwich that feels like an afterthought and one that makes a lasting impression almost always comes down to a few specific decisions: the quality of the bread, the boldness of the spread, and whether the flavors and textures in the filling actually work together.
Of the eight recipes here, the Reuben and the Cubano represent the kind of sandwiches worth making time for on a weekend — not because they’re complicated, but because the process of assembling them carefully, pressing them properly, and eating them while they’re still warm is its own reward. The chickpea salad sandwich and the slow-cooker meatball sub are the workhorses — reliable, deeply satisfying, and flexible enough to make on a weeknight without stress.
Don’t overlook the spreads, the bread choices, and the drying and layering steps outlined throughout. Those details aren’t fussy perfectionism — they’re the difference between a good sandwich and one that earns a regular spot in your weekly rotation.
Make one of these this week. Start with whatever ingredients you already have on hand, and don’t overthink it. The best homemade sandwich is always the one you actually make.