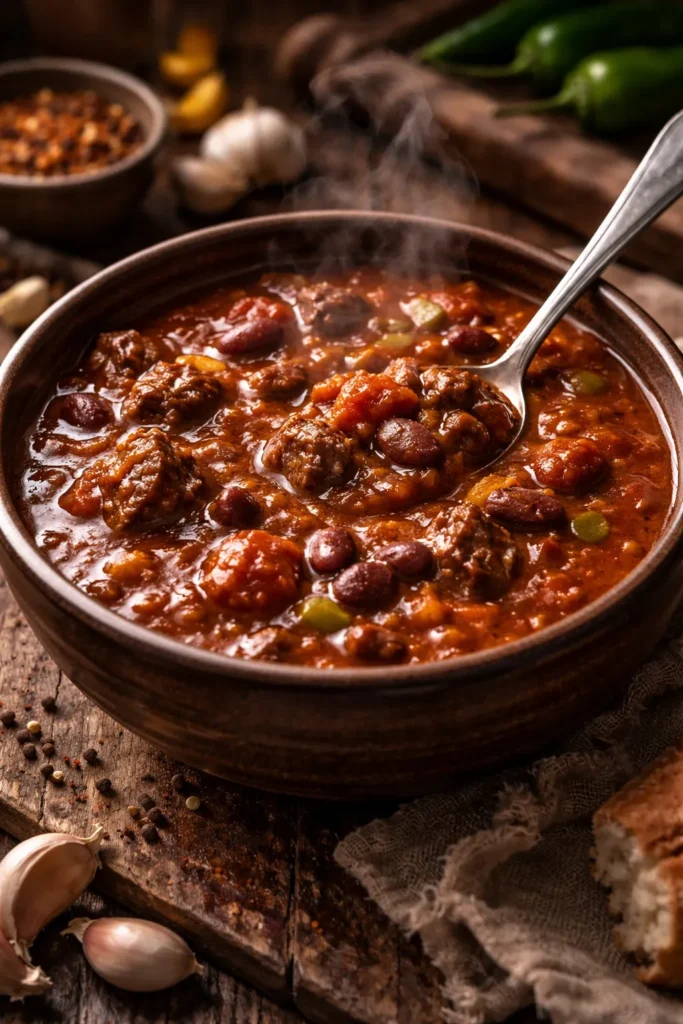
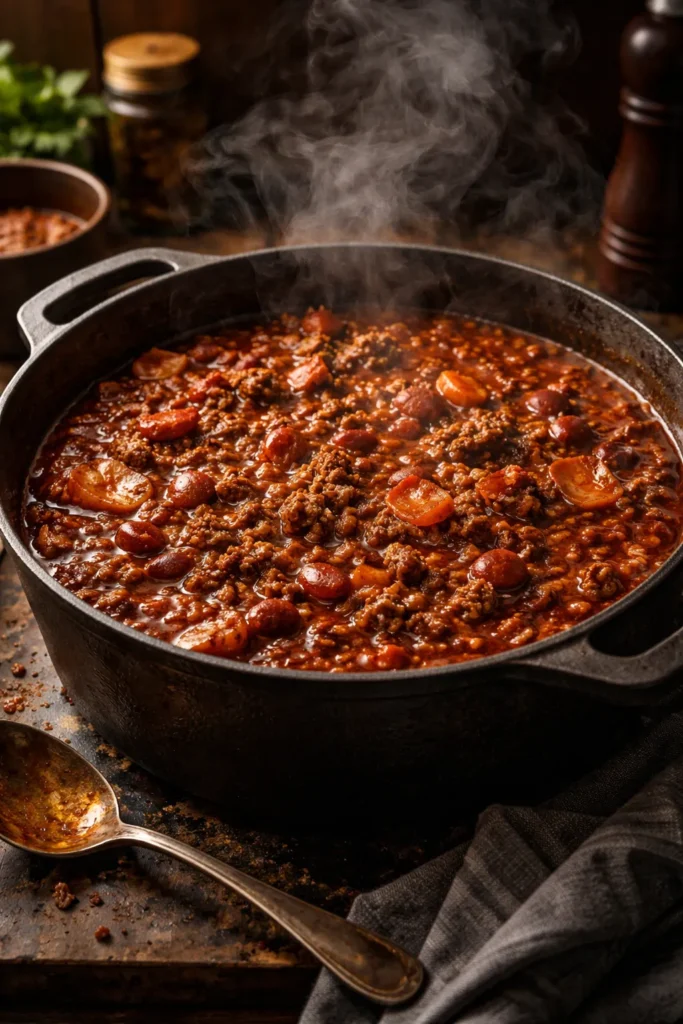
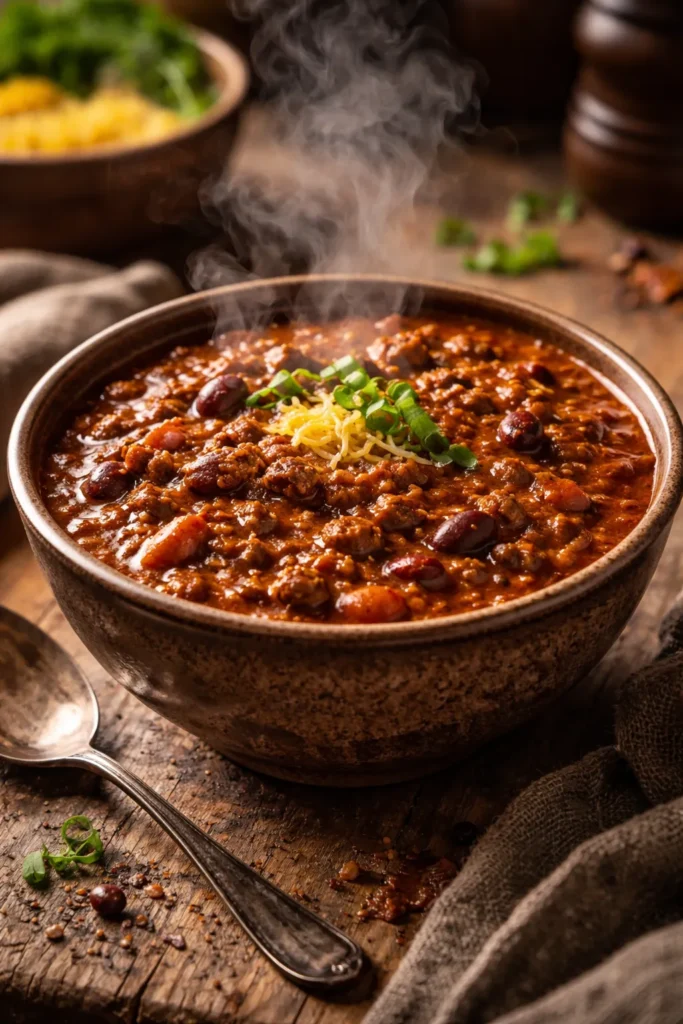
There’s a specific kind of satisfaction that comes from a bowl of chili that’s been bubbling on the stove for hours — the kind where the steam hits your face before the spoon even reaches your mouth. It’s thick, it’s spiced, it’s deeply savory in a way that few dishes can match. And when the temperature drops and the wind picks up, nothing else really comes close.
Chili has been a contested subject for centuries — beans or no beans, tomatoes or not, ground beef or chunks — and honestly, that debate is part of what makes it so endlessly interesting. Every version tells a different story. Texas chili is unapologetically bold and beefforward. White chicken chili is velvet-soft and surprising. Cowboy chili smells like campfire smoke in the best possible way. The beauty is that there’s no single “right” answer, just a pot full of options to match your mood, your pantry, and the coldness of the night.
What all great chili has in common, though, is this: depth of flavor built from layered technique. It’s not just about dumping ingredients into a pot. It’s about browning the meat properly, blooming the spices in fat, and giving the whole thing enough time to develop into something that tastes like it’s been cooking all day — whether it has or not.
The eight chili styles covered here span the full range, from a bacon-forward ground beef chili that’s won actual cook-offs, to a sweet-and-smoky pumpkin version that surprises even dedicated chili skeptics. Each one is fully approachable whether you’re cooking for a weeknight family dinner or feeding a crowd on game day.
Table of Contents
- What Separates a Great Chili from a Forgettable One
- The Case for Longer Simmer Times
- Why Chili Always Tastes Better the Next Day
- Building Your Chili Topping Bar
- Toppings That Add Texture and Freshness
- 1. Classic Ground Beef and Bacon Chili
- Key Ingredients That Make This Version Stand Out
- What to Expect in the Bowl
- 2. Authentic Texas Chili With No Beans
- The Dried Chile Foundation
- Choosing the Right Cut of Beef
- 3. Creamy White Chicken Chili
- The Shredded Chicken Approach
- Flavor Boosters That Elevate the Bowl
- 4. Slow Cooker Cowboy Chili
- Building Cowboy Chili for the Slow Cooker
- Cook Times and Finishing Touches
- 5. Cozy Pumpkin Chili
- Why Pumpkin and Chili Spices Work Together
- Best Ingredients for Pumpkin Chili
- 6. Vegetarian Three-Bean Chili
- Adding Umami Without Meat
- Vegetables Worth Adding
- 7. Turkey and Sweet Potato Chili
- Getting the Most Flavor Out of Ground Turkey
- Spice Profile and Sweet Potato Timing
- 8. Cincinnati-Style Chili Over Spaghetti
- The Spice Profile That Sets Cincinnati Apart
- The “Way” System
- How to Store, Freeze, and Reheat Chili
- Reheating Without Destroying Texture
- The Best Sides to Serve Alongside Chili
- Final Thoughts
What Separates a Great Chili from a Forgettable One
Most disappointing chili suffers from the same core problem: the flavors never really come together. Everything tastes separate — the beef is just beef, the beans are just beans, the tomatoes are just tomatoes. Great chili, by contrast, tastes like a single unified thing with complexity underneath.
Building that unified flavor starts with fat. Whether you’re cooking bacon first and using its rendered fat to sauté your aromatics, or browning beef hard until you get real caramelization, fat is how flavor develops. Don’t drain everything and start fresh — keep a tablespoon or two of that rendered fat working in the pot.
Toasting spices is another step most home cooks skip. Adding chili powder, cumin, smoked paprika, and coriander directly to the dry or barely-wet pot for 30 to 60 seconds before adding liquid coaxes out oils in those dried spices that would otherwise dissolve into the background. You’ll notice the smell shift dramatically — it goes from dusty and flat to warm and aromatic almost instantly.
The Case for Longer Simmer Times
A 30-minute chili is entirely possible on a weeknight, and it’ll taste good. But a chili that simmers uncovered for 90 minutes to 2 hours undergoes a genuinely different transformation. The liquid reduces and concentrates, the beef fibers relax and absorb the spiced broth around them, and the whole pot begins to taste more layered and complex.
If you have a free afternoon, give it time. If you don’t, a slow cooker accomplishes the same thing with far less babysitting.
Why Chili Always Tastes Better the Next Day
The reason leftover chili tastes so much more developed is simple: overnight resting allows the fat to redistribute, the spices to hydrate and settle into the broth, and the proteins to continue a slow process of tenderization. Making chili the day before serving it is not laziness — it’s genuinely one of the best techniques you have available. It takes a good chili and makes it noticeably better.
One more thing: always taste and adjust before serving. A squeeze of fresh lime juice, an extra pinch of salt, or a half-teaspoon more of cumin can shift the balance of an entire pot. Don’t skip that final seasoning check.
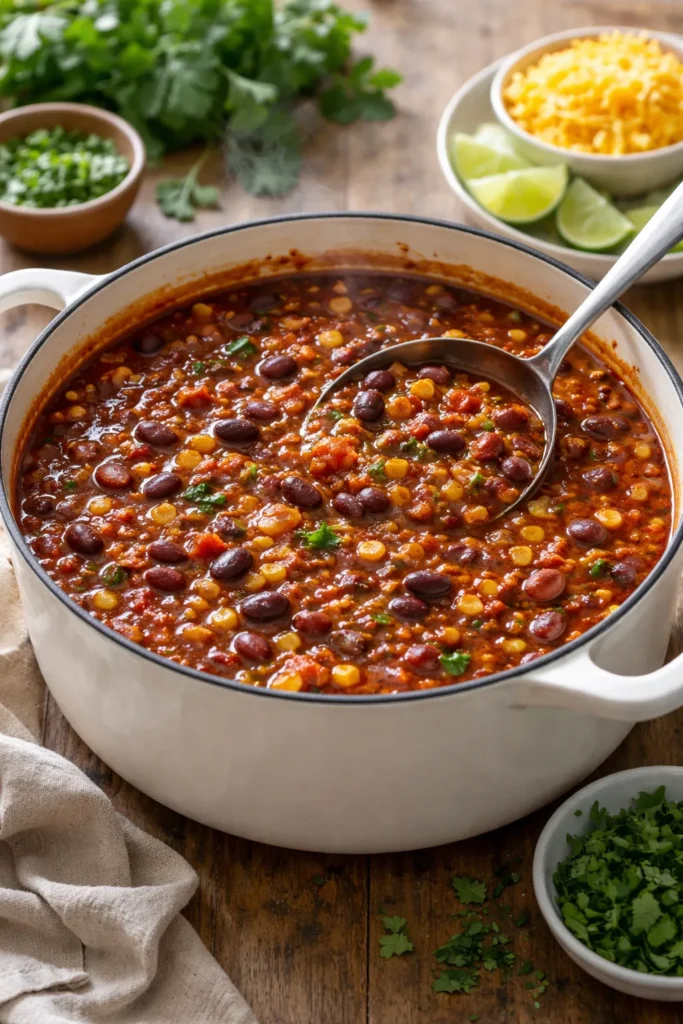
Building Your Chili Topping Bar
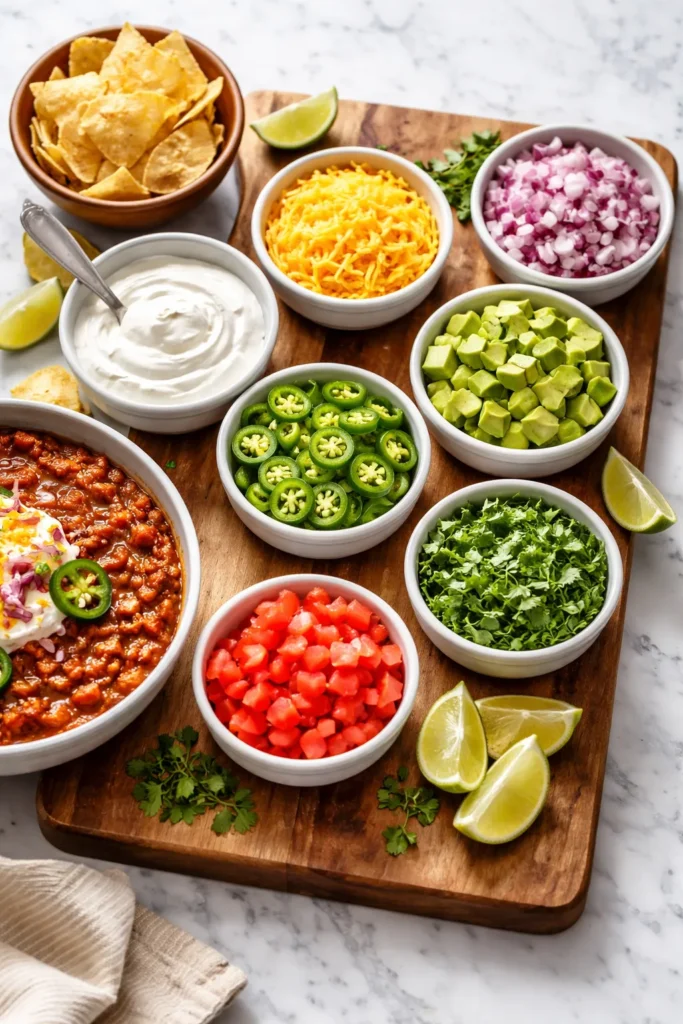
Part of what makes chili such a crowd-pleasing dish is how customizable it becomes once it hits the bowl. The toppings aren’t just garnish — they’re actively part of the eating experience, adding texture, temperature contrast, and flavor dimensions that the chili itself can’t provide alone.
Sour cream or plain Greek yogurt is non-negotiable for most people. A cool, tangy dollop dropped into a hot, spicy bowl provides immediate relief and richness. Greek yogurt delivers a slightly sharper tang with more protein, which works well if the chili already has a lot of fat from beef.
Shredded cheese is the second anchor. Sharp cheddar is the classic choice, but Monterey Jack melts more smoothly, pepper jack adds heat, and crumbled cotija or queso fresco brings a salty, crumbly contrast that works particularly well on white chicken chili or lighter variations.
Toppings That Add Texture and Freshness
- Crushed Fritos or tortilla chips for salty crunch that softens slowly as you eat
- Sliced fresh jalapeños or pickled jalapeños for heat and acidity
- Diced white or green onions for sharp, clean contrast
- Diced avocado or guacamole for creamy fat that balances spice
- Fresh cilantro for a bright, herbal lift
- A wedge of lime to squeeze over the whole bowl — acid is one of chili’s best friends
- Crispy bacon crumbles, especially over beef chili, for smokiness and bite
Setting all of this out in small bowls and letting everyone build their own bowl makes chili feel like an event rather than just a weeknight dinner. It also means picky eaters can keep it simple while the heat-seekers pile on the jalapeños and hot sauce.
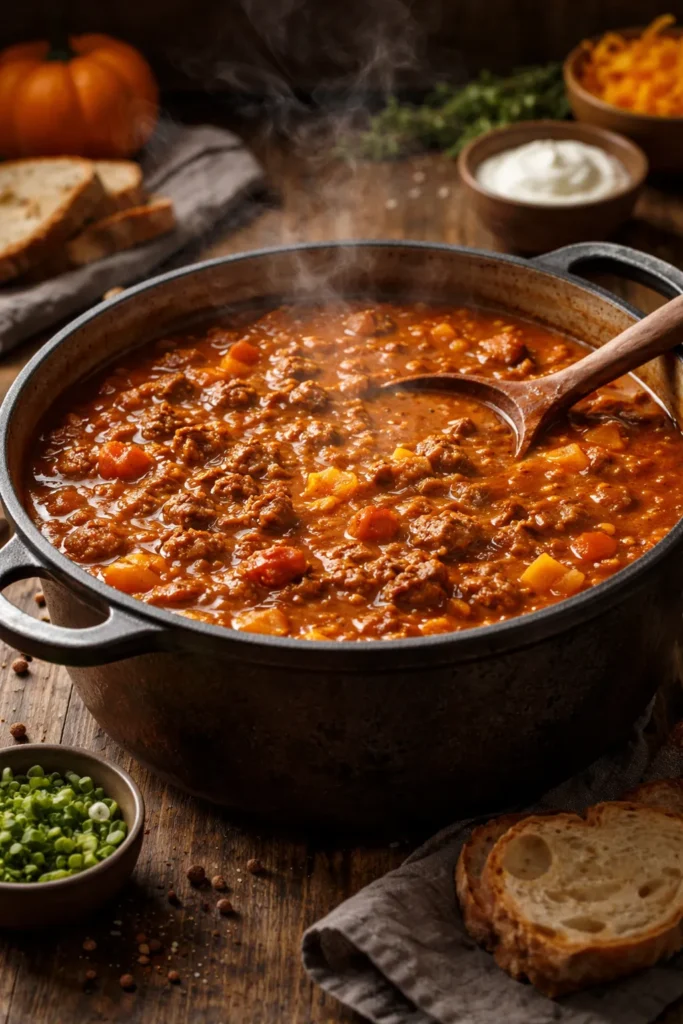
1. Classic Ground Beef and Bacon Chili
If you’re going to have one master chili in your rotation — the one that wins cook-offs and gets requested every cold weekend — this is the version to commit to. It starts with bacon, which immediately signals that this pot means business. Cooking the bacon first and using the rendered fat as the base for sautéing onions and peppers builds a smoky, savory foundation that no amount of additional seasoning can replicate after the fact.
The ground beef goes in next, but not all at once and not at full cook. Adding the spices when the beef is about halfway browned — still slightly pink — allows the spices to toast against the partially cooked meat and fat before the liquids go in. This is the step most recipes skip, and it’s where the deep, almost layered heat in great chili comes from.
Key Ingredients That Make This Version Stand Out
This chili uses a dual-powder approach: both regular chili powder and ancho chili powder. Regular chili powder brings familiar, accessible heat. Ancho powder (made from dried poblano peppers) contributes a fruity, almost chocolatey undertone that adds real complexity without making the chili taste obviously different. Fire-roasted tomatoes are another non-negotiable — they add smokiness that plain diced tomatoes simply don’t have. Worcestershire sauce and a tablespoon of brown sugar round out the umami-sweetness balance.
What to Expect in the Bowl
- A thick, deeply colored chili that holds its shape on a spoon
- Tender beef that’s fully seasoned throughout, not just on the surface
- A heat level that builds gradually — medium by default, easily adjustable with cayenne
- Simmer time of 30 minutes minimum, 60 minutes for maximum depth
Pro tip: Don’t skip the brown sugar. It doesn’t make the chili sweet — it rounds out the acidity from the tomatoes and creates a more balanced, harmonious flavor profile.
2. Authentic Texas Chili With No Beans
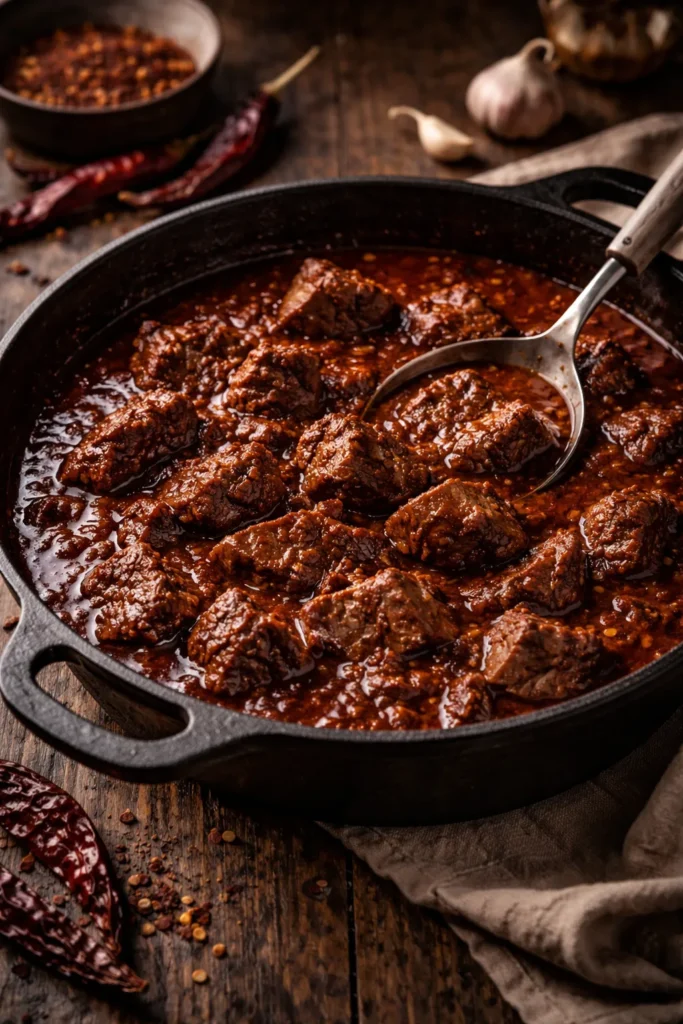
Texas chili — technically chili con carne — is as pure and stripped-down as the dish gets. No beans. No tomatoes. Nothing that might dilute or distract from the main event: tender chunks of beef submerged in a sauce built entirely from rehydrated dried chiles and slow-cooked aromatics.
The philosophy behind Texas chili is that beans and tomatoes are additions, not essentials, and that a truly great chili can stand completely on the quality of its meat and the complexity of its chile peppers. This isn’t a dismissal of other styles — it’s a commitment to a specific kind of depth that beans and tomatoes actually do obscure when they’re present.
The Dried Chile Foundation
The difference between Texas chili and everything else starts with the chiles themselves. A proper Texas chili uses at least two varieties of dried whole chiles — typically ancho, guajillo, or pasilla — toasted briefly in a dry pan, soaked in hot water until soft, and blended into a thick paste. This paste forms the sauce base and carries far more flavor than any bottled chili powder blend. The result is a sauce that tastes earthy, fruity, mildly sweet, and deeply savory all at once.
Choosing the Right Cut of Beef
Coarsely ground beef or rough-cut chuck is the standard here. Chuck has enough fat content to stay moist during the long braise, and the irregular texture absorbs the chile sauce differently than uniformly ground meat. If you cut your own chuck into rough ½-inch pieces, you’ll get a more rustic, cowboy-style chili with noticeable chunks.
- Cook time: 2 to 3 hours, low and slow
- Best served with: cornbread, pickled onions, or simply over plain white rice
- Adjust heat: Cascabel or chipotle chiles increase the fire level significantly
If you’ve only ever had chili with beans and tomatoes, Texas-style will genuinely surprise you with how complex and satisfying it is without them.
3. Creamy White Chicken Chili
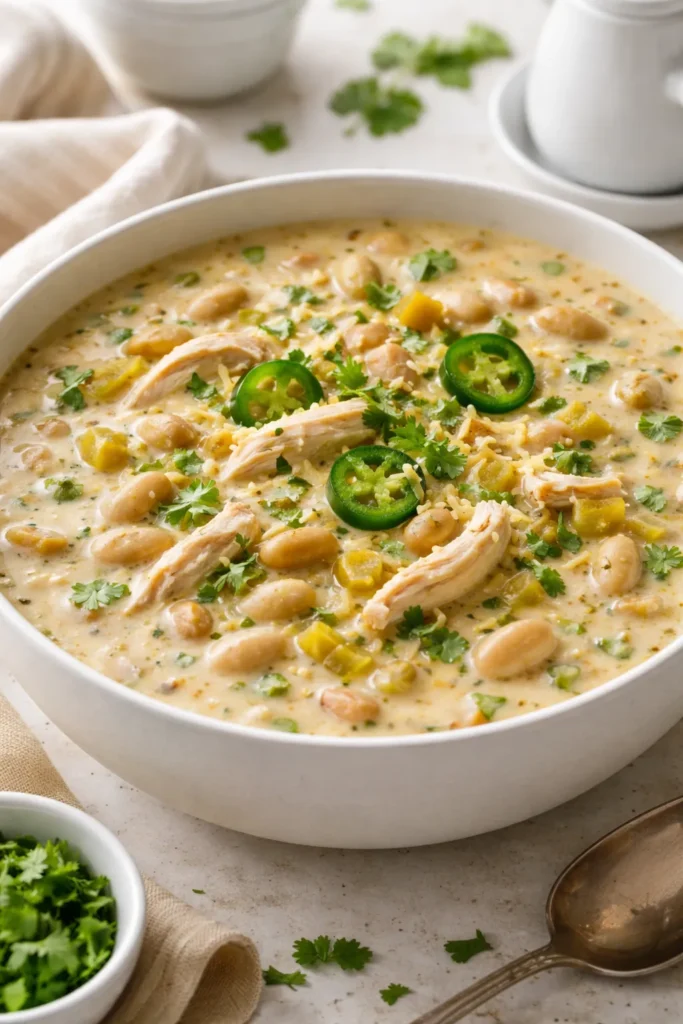
White chicken chili tends to catch people off guard the first time they have it. It doesn’t look like chili — no red broth, no dark kidney beans, no ground beef. But that first spoonful of velvety, gently spiced, slightly tangy soup with shredded chicken and white beans is enough to convert almost anyone.
The base here is chicken broth rather than beef, combined with cream cheese or heavy cream to create a rich, luscious texture. Green chiles (usually from a small can of fire-roasted Hatch chiles) add a mild heat and a gentle roasted character that works beautifully against the creamy broth. White beans — navy, cannellini, or Great Northern — provide that hearty, filling quality without the heavy earthiness of kidney beans.
The Shredded Chicken Approach
Boneless, skinless chicken breasts or thighs both work here. You can poach them directly in the broth until just cooked through (about 15 to 20 minutes), then shred with two forks. Thighs stay more moist and have slightly more flavor, but breasts work perfectly if you don’t overcook them. An Instant Pot or slow cooker can do this step completely hands-off.
Flavor Boosters That Elevate the Bowl
- Cumin and garlic are the dominant spices — don’t skimp on either
- A squeeze of fresh lime juice right before serving brightens the whole pot
- Sour cream stirred in at the very end adds richness without breaking into graininess
- Diced jalapeños, either fresh or pickled, add heat without changing the color
Pro tip: Top with shredded pepper jack, sliced avocado, and a scatter of cilantro. The combination of heat, fat, and freshness makes each bite genuinely layered.
4. Slow Cooker Cowboy Chili
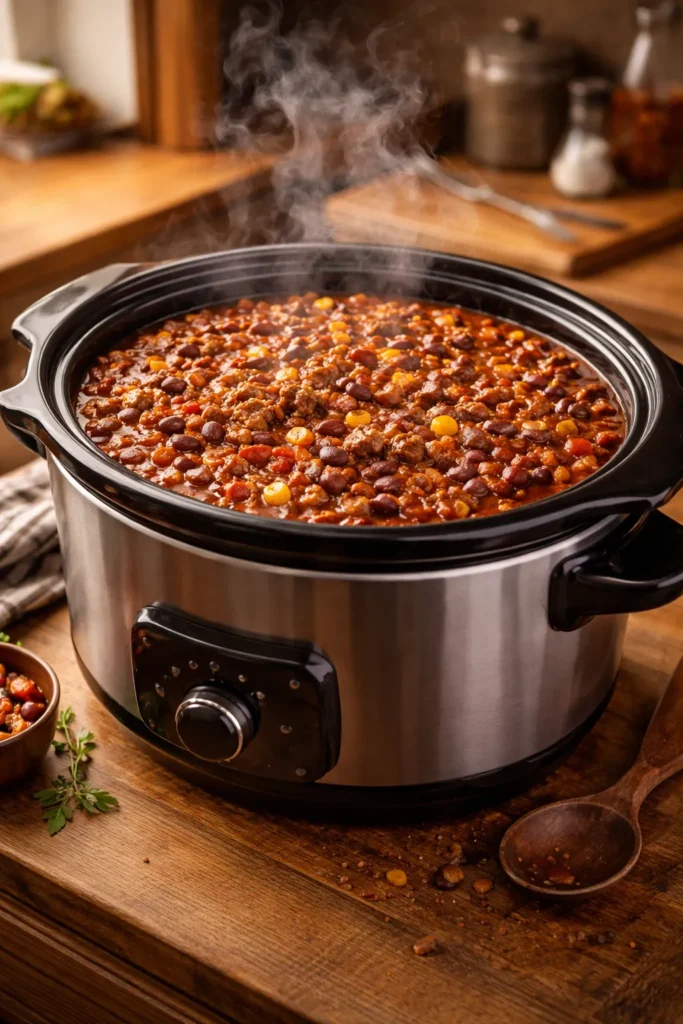
Cowboy chili occupies a comfortable middle ground between the bean-free austerity of Texas chili and the fully loaded style of classic American ground beef chili. It welcomes both beans and a variety of meats, it often includes corn, and it gets a distinctive smoky-sweet character from bacon and a touch of brown sugar. Most importantly, it’s built for long, slow cooking — the kind a slow cooker handles perfectly.
The origin story is practical: ranch cooks needed to feed large groups of hungry people with whatever protein was on hand, cooked in a single cast-iron pot over a fire for most of the day. That low-and-slow mentality is still exactly right for this style of chili, and a slow cooker replicates it with zero supervision.
Building Cowboy Chili for the Slow Cooker
Brown your ground beef or diced chuck in a skillet first — don’t skip this step for the slow cooker version. The browning creates flavor compounds that the slow cooker’s moist environment can’t produce on its own. Transfer the browned meat, any rendered fat, and your sautéed aromatics directly into the slow cooker along with all remaining ingredients.
- Beans: pinto and kidney work well together in this style
- Add-ins: corn kernels, diced green chiles, and a tablespoon of brown sugar
- Liquid: 1 to 1½ cups beef broth — the slow cooker doesn’t evaporate liquid the way a stovetop does, so go lighter than you think
Cook Times and Finishing Touches
Cook on low for 6 to 8 hours or high for 3 to 4 hours. The longer low-and-slow version produces noticeably more tender meat and a richer, more unified flavor. Remove the lid for the final 30 minutes to help the chili thicken.
Serve this one in deep bowls with crumbled cornbread stirred in at the table, and don’t hold back on the sharp cheddar.
5. Cozy Pumpkin Chili
Pumpkin chili sounds like a gimmick until you actually make it and realize what pumpkin does to the texture of a pot of chili: it makes it rounder, creamier, and slightly sweet in a way that pairs uncannily well with the savory spices. A can of plain pumpkin purée (not pumpkin pie filling — that distinction matters) essentially dissolves into the chili as it cooks, thickening the broth and adding a warm, earthy sweetness that makes everything taste more complex.
This version typically uses ground beef or turkey as the base, but the pumpkin is the ingredient that drives the conversation. It’s a legitimately different chili experience — not a gimmick, not a compromise, but a genuinely distinct style that earns its place in a serious chili rotation.
Why Pumpkin and Chili Spices Work Together
Pumpkin’s natural sweetness provides a counterpoint to the heat of chili powder and cayenne, which is exactly why a small amount of brown sugar or molasses works in conventional chili too. The difference is that pumpkin also adds body and that characteristic squash earthiness, which connects beautifully to cumin and smoked paprika.
Canned pumpkin purée works flawlessly here — there’s no need to roast and purée your own, though you certainly can. One 15-ounce can stirred into a standard chili recipe during the last 45 minutes of cooking is all it takes.
Best Ingredients for Pumpkin Chili
- 1 lb ground beef or turkey
- 1 can (15 oz) plain pumpkin purée
- 1 can fire-roasted diced tomatoes
- 1 can each of black beans and kidney beans
- Chicken or beef broth
- Chili powder, cumin, smoked paprika, cinnamon, and a pinch of nutmeg
- Apple cider vinegar (1 tablespoon at the end) for brightness
Finish with a dollop of sour cream and a sprinkle of pepitas (roasted pumpkin seeds) for a topping that’s thematically on-point and genuinely delicious.
6. Vegetarian Three-Bean Chili
The secret to vegetarian chili that satisfies even devoted meat-eaters is concentration. Without beef fat and rendered pork, you need to work harder to build savory depth — and the way you do that is by not being shy with the aromatics, using a combination of beans that each contribute different textures and flavors, and letting everything simmer long enough to meld into something genuinely rich.
Three-bean chili typically combines kidney beans, black beans, and pinto beans (or sometimes chickpeas as a third option). Each behaves slightly differently in the pot: kidney beans hold their shape firmly, black beans turn slightly creamy, and pintos start to break down at the edges and naturally thicken the broth. That combination of textures is part of what makes this style satisfying in a way that a single-bean chili isn’t.
Adding Umami Without Meat
This is where most vegetarian chili falls flat. Without ground beef or bacon, you’re missing the Maillard reaction compounds, the gelatin, and the fat that carry flavor. You can compensate with:
- Tomato paste — cook it in the pot with the aromatics for 2 minutes before adding liquid, which caramelizes it and adds concentrated savory depth
- Chipotle peppers in adobo sauce — one or two peppers, minced, add both smokiness and that low, controlled heat
- Worcestershire sauce — just one tablespoon, though check the label if you need it to be strictly vegetarian (many brands contain anchovies; Henderson’s or Annie’s are vegan-friendly alternatives)
- A small square of dark chocolate or a teaspoon of unsweetened cocoa powder — this sounds strange but it works, adding a round, bitter depth that makes the chili taste more complex
Vegetables Worth Adding
Bell peppers (red and green), zucchini, corn, and sweet potato all work well here. The sweet potato is particularly valuable — it adds natural sweetness, holds its shape nicely after 45 minutes of simmering, and increases the fiber content noticeably.
7. Turkey and Sweet Potato Chili

Ground turkey chili has a reputation problem it doesn’t entirely deserve. Yes, turkey is leaner than beef — 93% lean ground turkey contains almost no intramuscular fat — which means it genuinely needs more help in the flavor department. But with the right technique, it produces a chili that’s lighter and brighter than beef while still feeling deeply satisfying.
The sweet potato partnership is what makes this version particularly interesting. Sweet potato chunks add natural sweetness, a contrasting softness among the firmer beans, and a color that makes the whole pot look more vibrant. They’re also filling in a way that adds real substance without heaviness.
Getting the Most Flavor Out of Ground Turkey
Ground turkey browns differently than beef — it can look done well before it’s developed any meaningful color. Don’t rush this step. Leave the turkey sitting undisturbed in the hot pan for a full 2 to 3 minutes before breaking it up, allowing the bottom to genuinely brown rather than just steam. Use a pan hot enough to hear a sizzle when the meat hits it.
Season the turkey directly with a generous amount of salt before cooking it — about ½ teaspoon per pound. This draws moisture to the surface and helps with browning.
Spice Profile and Sweet Potato Timing
- Use chipotle chili powder rather than (or in addition to) regular chili powder — the smokiness compensates for what you lose by not using bacon or beef fat
- Cumin, smoked paprika, and a little cinnamon work particularly well with the sweet potato’s natural flavor
- Add sweet potato cubes 30 to 40 minutes before the end of cooking — they need time to become tender but shouldn’t turn to mush, which happens if they go in at the beginning of a long simmer
- A squeeze of lime juice and fresh cilantro stirred in at the end brings the whole pot to life
Pro tip: A tablespoon of almond butter or natural peanut butter stirred into turkey chili during the last 10 minutes adds fat and depth in a way that you won’t identify but absolutely will taste.
8. Cincinnati-Style Chili Over Spaghetti

Cincinnati chili is one of the more polarizing dishes in American regional cooking, and that’s exactly what makes it worth understanding. It doesn’t look like chili. It doesn’t smell entirely like chili. It arrives at the table over a plate of spaghetti, topped with finely shredded mild cheddar piled so high it forms a yellow dome over the bowl. And it contains cinnamon. And sometimes chocolate.
If you approach it as a chili, you’ll be confused and possibly annoyed. If you approach it as a spiced Mediterranean-influenced meat sauce (which is actually closer to its origin story — the recipe was developed by Macedonian immigrants in Ohio in the 1920s, drawing on the spice traditions they brought with them), it makes complete and beautiful sense.
The Spice Profile That Sets Cincinnati Apart
Where classic chili is built around chili powder, cumin, and smoked paprika, Cincinnati-style leans into a different pantry entirely:
- Cinnamon — the most distinctive addition, used more generously than in any other chili style (½ to 1 teaspoon for a full pot)
- Allspice and cloves in small amounts — they add warmth and a slightly sweet-spicy complexity
- Unsweetened cocoa powder or a square of dark chocolate — 1 tablespoon of cocoa deepens the color and adds a bitter undertone that balances the sweet spices
- Worcestershire sauce and apple cider vinegar for savory tang
The meat is finely ground beef, cooked in water or broth rather than sautéed — this produces a finer, more uniform texture that clings to spaghetti properly.
The “Way” System
Cincinnati chili has its own ordering vocabulary. A “two-way” is chili over spaghetti. Add shredded cheddar and it becomes a “three-way.” Add diced onion and it’s a “four-way.” Add beans and you have a “five-way.” The beans here are kidney beans, kidney is actually optional in the traditional preparation, and the cheese is always mild, finely shredded cheddar — never sharp, never sliced.
Serve on warm plates, not in bowls, and top with enough cheese that the chili is barely visible underneath. That’s the proper Cincinnati way.
How to Store, Freeze, and Reheat Chili
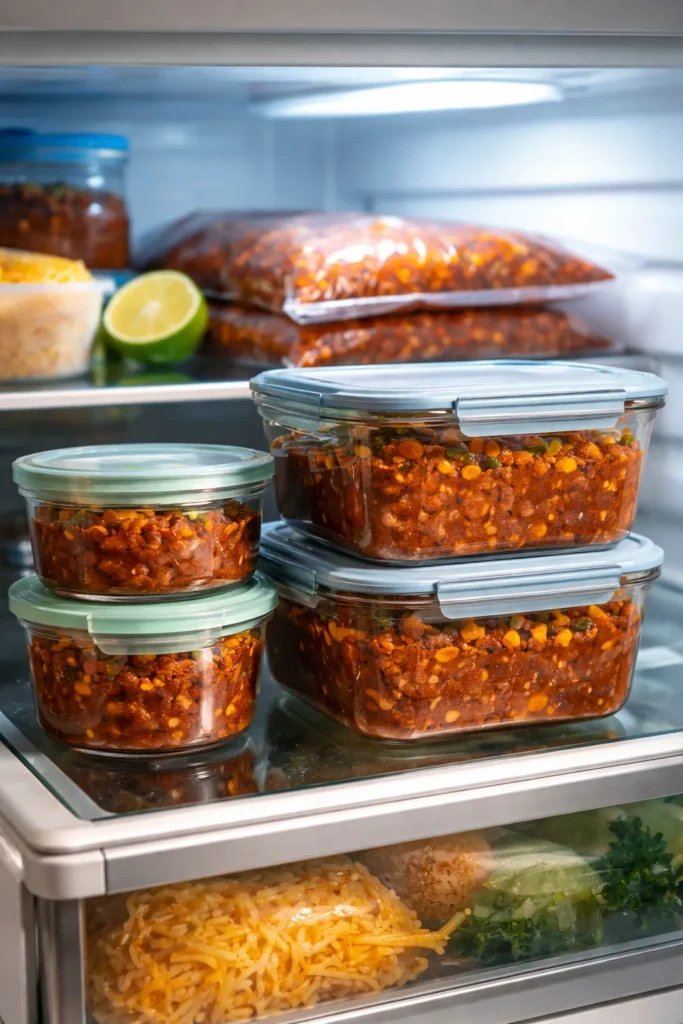
Chili is one of the most freezer-friendly dishes you can make, and it actually improves with a day or two in the refrigerator before you eat it. Understanding how to store and reheat it properly means every batch you make can become multiple easy meals.
In the refrigerator, any chili will keep well for 3 to 4 days in an airtight container. The fat will solidify at the surface when cold — don’t discard this when you reheat, as it contains a significant portion of the flavor.
For freezing, let the chili cool completely at room temperature for no more than 2 hours before transferring to containers. Portion into individual servings (approximately 1½ to 2 cup portions) rather than freezing the whole batch in one container — this allows you to thaw exactly what you need without defrosting a 6-serving pot for a solo lunch. Chili keeps in the freezer for 3 to 4 months with minimal quality loss.
Reheating Without Destroying Texture
- Stovetop reheating over medium-low heat is the best method — add a splash of beef broth if the chili has thickened too much overnight
- Microwave reheating works, but stir every 60 to 90 seconds to prevent uneven heating and rubbery meat
- Never boil chili when reheating — a hard boil will toughen the meat proteins and make beans fall apart entirely
- Add any fresh toppings only after reheating, never before
For frozen chili, the safest thaw method is overnight in the refrigerator. If you’re short on time, a sealed freezer bag submerged in cold water for 45 to 60 minutes works nearly as well.
The Best Sides to Serve Alongside Chili
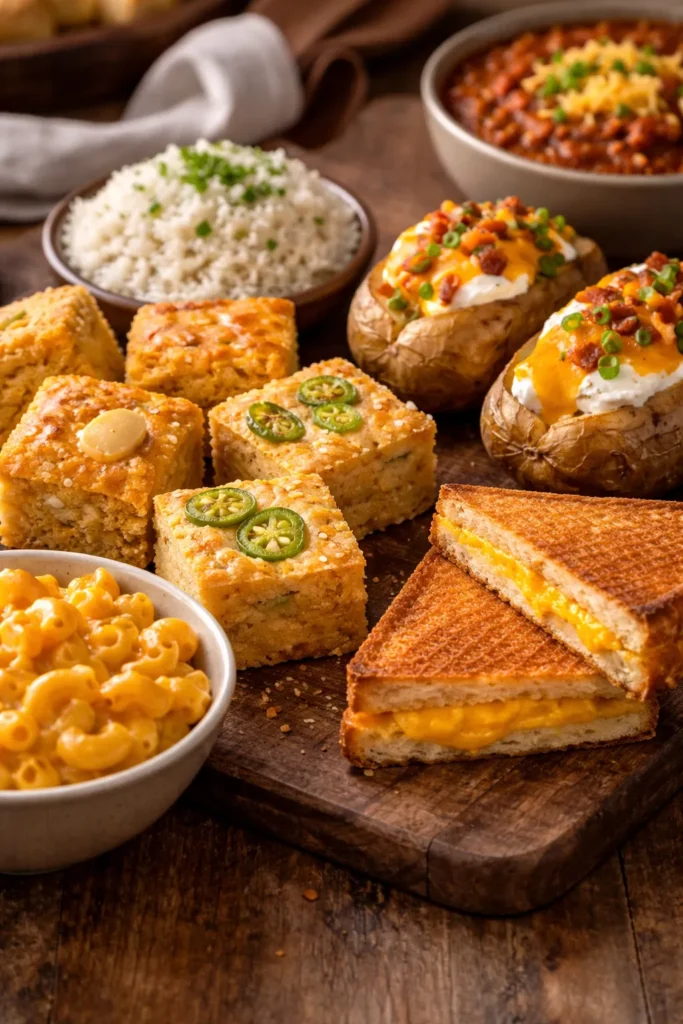
Cornbread is the canonical answer, and it deserves that status. A good skillet cornbread — slightly crispy on the bottom, just sweet enough, dense enough to hold up to dunking — is one of the best food pairings in American cooking. The sweet crumb against spicy, savory chili is essentially a perfect contrast. Jalapeño cornbread, with diced chiles and shredded cheddar baked in, takes the combination up another level.
Beyond cornbread, a few other sides pair with chili in ways that are genuinely worth trying:
- Baked potatoes: Spoon chili directly over a split baked potato and top with sour cream and cheese. This is a full meal and an excellent way to stretch a pot of chili for a larger group
- Rice: White rice served under a ladleful of chili absorbs the sauce and adds a mild, starchy contrast that many people find deeply comforting — this is how a lot of Southern families eat chili
- Elbow macaroni: Mix leftover chili with cooked pasta and a handful of shredded cheese for an instant chili mac that kids and adults both love
- Grilled cheese sandwich: A buttery, crispy grilled cheese on the side of a bowl of chili is a combination that doesn’t get enough credit — the bread and melted cheese echo the cornbread pairing in a slightly richer register
- Crackers: Simple saltine crackers crumbled directly into a bowl of chili are an underrated classic, adding a neutral crunch that lets the chili flavor speak for itself
Final Thoughts
What ties all eight of these chili styles together isn’t the ingredient list — it’s the approach. Start with heat, build flavor from fat and aromatics, layer in your spices before the liquid goes in, and give the whole thing enough time to become something greater than the sum of its parts. That process works whether you’re making a stripped-down Texas chili with just beef and dried chiles, or a pumpkin and turkey version that surprises everyone at the table.
The other thing worth holding onto: chili rewards patience and punishes shortcuts. The difference between 30 minutes on the stove and 2 hours on the stove is the difference between a good dinner and a dish that people ask about for weeks. If you have a free Sunday afternoon, put a pot on in the morning and leave it alone.
Pick one recipe from this list that doesn’t quite match your usual style — the Cincinnati version if you’ve only ever made classic beef chili, or the Texas no-bean style if you’ve always leaned on beans for body. Expanding your chili vocabulary is one of the more rewarding things you can do in a home kitchen, and a cold night is the perfect excuse to start.