There’s something quietly brilliant about pulling a hot, home-cooked meal out of the freezer on a Tuesday night when you have zero energy to cook. No takeout guilt, no sad cereal-for-dinner compromise — just real food you made yourself, ready in minutes. That’s the whole magic of the cook-once, eat-twice approach, and once you start doing it consistently, you’ll wonder how you ever lived without it.
The concept is beautifully simple: whenever you’re already standing at the stove, you double the batch. You eat half tonight and freeze the rest in portioned containers for a future meal. The cleanup happens once. The prep happens once. But you get paid twice in the form of effortless dinners on your busiest nights. For couples, small households, or anyone cooking for one or two people, this method is especially powerful — it transforms a single cooking session into a week’s worth of backup meals without the dread of eating the exact same thing three nights in a row.
What separates a genuinely useful freezer meal from a disappointing frozen brick is knowing which dishes actually hold up to the freeze-thaw cycle. Not everything does. Creamy pasta with delicate seafood? Doesn’t freeze well. Hearty braises, robust tomato-based sauces, chili-style dishes, and casseroles layered with sturdy proteins? They freeze beautifully — often tasting better after a day or two because the flavors have had time to deepen and settle.
The eight meals below were chosen with that in mind: every single one holds up in the freezer for up to three months, portions down easily for one or two people, and reheats without losing its texture or soul. Each recipe includes specific notes on how to freeze, portion, and reheat it correctly so you’re not just cooking — you’re building a genuine backup system for the weeks ahead.
Table of Contents
- Why the Cook Once, Eat Twice Method Actually Works
- The Flavor Science Behind It
- What Freezes Well vs. What Doesn’t
- How to Portion and Freeze for Two
- 1. Classic Beef Lasagna
- How to Build It for the Freezer
- Freezing and Reheating
- 2. Chicken Tikka Masala
- Building a Sauce That Freezes Beautifully
- Portioning and Reheating
- Making the Most of Your Batch
- 3. Slow Cooker Pulled Pork
- The Rub and Liquid That Makes It
- Freezing Strategies for Two
- 4. Turkey and Black Bean Chili
- Building Flavors That Deepen After Freezing
- Portioning for Maximum Versatility
- The Repurposing Play
- 5. Classic Shepherd’s Pie
- The Filling That Matters Most
- Freezing Instructions
- 6. Cheesy Chicken and Broccoli Rice Casserole
- The One Rule That Prevents Mushy Rice
- Building the Sauce
- Reheating From Frozen
- 7. Slow-Simmered Spaghetti Meat Sauce
- What Makes This Sauce Worth the Effort
- Freezing and Serving
- 8. Chicken Tortilla Soup
- The Base That Comes Together Fast
- The Toppings You Freeze Separately
- Reheating and Serving
- Storing and Reheating Your Frozen Meals the Right Way
- Final Thoughts
Why the Cook Once, Eat Twice Method Actually Works
Most people who try batch cooking once and give up make the same mistake: they think of it as a separate task instead of folding it into what they’re already doing. You don’t need a dedicated meal-prep Sunday to pull this off. The most effective version of this strategy is dead simple — whenever you make one of these eight dishes, you make two portions of it. One goes on the table tonight. One goes straight into the freezer.
The reason this works so well is compounding efficiency. When you’re already chopping onions, dicing garlic, browning meat, and pulling out every pot and cutting board in the kitchen, doing 50% more of that same work barely registers. But the payoff on the back end is enormous: a fully cooked meal waiting in your freezer that requires nothing but reheating.
The Flavor Science Behind It
Many slow-cooked and braised dishes genuinely improve after freezing. The freeze-thaw cycle breaks down cell walls slightly, which allows spices, aromatics, and fats to redistribute more evenly through the dish. A chili or curry that tastes good on the day you make it often tastes noticeably richer when you pull it out two weeks later. This isn’t a myth — it’s why stews, braises, and tomato sauces are the undisputed stars of freezer cooking.
What Freezes Well vs. What Doesn’t
The key rule: avoid high-water-content vegetables, delicate proteins, and cream-heavy sauces when you’re planning a freeze. Potatoes can get grainy, cooked pasta can turn mushy, and dairy-based sauces sometimes separate when reheated. The dishes on this list sidestep those pitfalls through smart ingredient choices and specific freezing instructions — such as cooking pasta slightly underdone before it goes in, or freezing the cream component separately.
How to Portion and Freeze for Two
Before getting into the recipes, it’s worth spending a moment on containers and portioning, because the container you use makes a bigger difference than most people expect.
For soups, chilis, and sauces: Freeze in 1-cup or 2-cup portions using freezer-safe containers or silicone freezer trays. A two-person serving of soup is typically 2 to 2.5 cups per person, so aim for 4 to 5 cups per “meal” pack.
For casseroles: Rather than freezing an entire 9×13 dish — which is way too much for two people and takes forever to reheat — divide your casserole into two loaf pans (roughly 8.5×4.5 inches) before baking. Freeze one unbaked in the loaf pan, wrapped tightly in plastic wrap and then foil. Baking time will be shorter for the smaller size, so check it 10-15 minutes earlier than the original recipe suggests.
For individual proteins like meatballs or chicken pieces: Flash freeze them first. Spread them on a parchment-lined sheet pan and freeze until solid (about 2 hours), then transfer to a zip freezer bag. This prevents them from clumping together, so you can pull out exactly as many as you need.
Labeling is non-negotiable. Write the dish name, date frozen, and reheating instructions directly on the bag or container. Frozen meals have a way of becoming mysterious, anonymous blobs within three weeks. A piece of freezer tape and a marker takes 10 seconds and saves enormous frustration later.
For optimal quality, plan to use your frozen meals within 3 months. Most will stay safe beyond that, but flavor and texture start to decline around the 3-month mark.
1. Classic Beef Lasagna
Lasagna is probably the single most freezer-friendly dish in the entire universe of home cooking, and it has earned that reputation for good reason. The layered structure — pasta, meat sauce, ricotta, mozzarella — holds together perfectly through freezing and reheating, and a rich tomato-based meat sauce actually deepens in flavor over time. Making two smaller lasagnas in loaf pans instead of one massive 9×13 gives you a perfectly portioned meal for two, both now and later.
How to Build It for the Freezer
Use a robust meat sauce made from ground beef (80/20 fat ratio gives the best flavor) browned with onion, garlic, crushed fennel seeds, and a full can of crushed tomatoes simmered down for at least 20 minutes. Don’t skip the fennel seeds — they add that subtle Italian sausage warmth without adding sausage. Layer with whole-milk ricotta mixed with an egg, fresh parsley, and a generous pinch of nutmeg.
Cook your pasta sheets slightly underdone — about 2 minutes less than the package direction. This is the single most important lasagna freezer tip. The pasta will continue to absorb moisture during reheating, so starting it al dente ensures it reaches the perfect tender texture when it comes out of the oven rather than getting soft and mushy.
Freezing and Reheating
Assemble both loaf-pan lasagnas fully but freeze one unbaked. Wrap it tightly in plastic wrap, then a layer of foil, and it will keep for up to 3 months. To bake from frozen, remove the plastic wrap, recover with foil, and bake at 375°F (190°C) for about 75 minutes covered, then another 20 minutes uncovered until bubbly and the cheese is golden. Thawing overnight in the refrigerator first cuts the bake time down to about 45-50 minutes total.
Pro tip: Add a thin layer of plain tomato sauce at the very bottom of the pan before you start layering. This prevents the bottom pasta sheet from drying out or sticking during reheating.
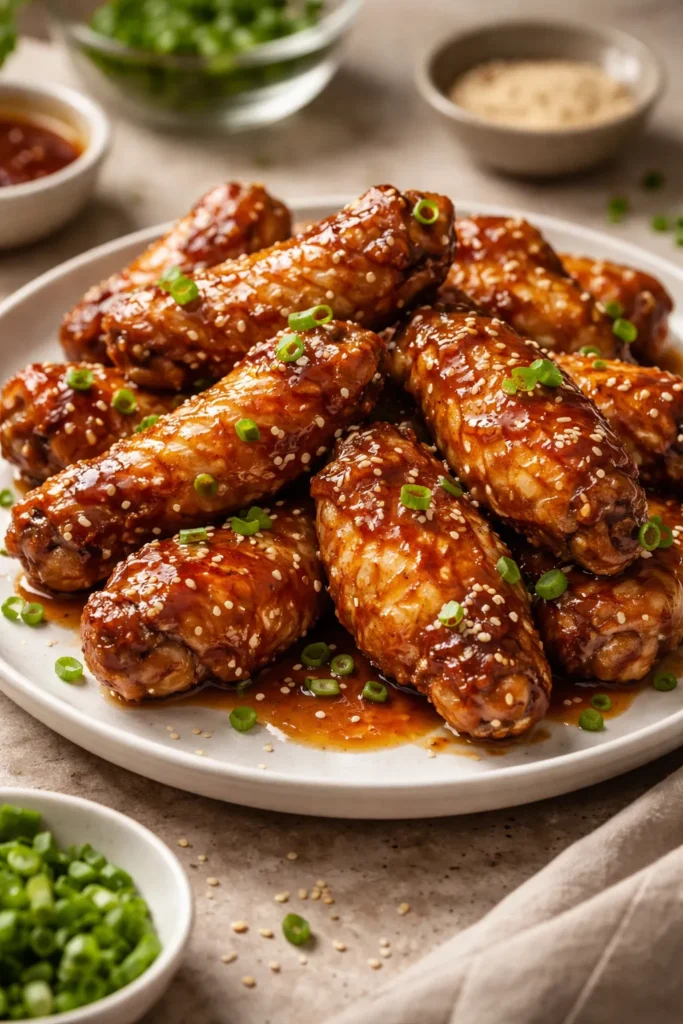
2. Chicken Tikka Masala
Few dishes reward the freezer cook as generously as chicken tikka masala. The deeply spiced tomato-cream sauce clings to the chicken in a way that only gets more cohesive over time, and it reheats beautifully in a saucepan with a splash of water to loosen it up. It’s the kind of dish that genuinely tastes like you ordered from a restaurant — which is exactly why it earns a permanent spot in any serious freezer rotation.
Building a Sauce That Freezes Beautifully
The secret to a freezer-stable tikka masala sauce is blooming your spices in oil before adding the tomatoes. Heat a tablespoon of neutral oil in a heavy-bottomed pan, add finely diced onion and cook until deeply golden (at least 12 minutes — don’t rush this), then add grated fresh ginger, minced garlic, garam masala, ground cumin, smoked paprika, and ground coriander. Let them sizzle in the oil for 60 seconds before adding a can of crushed tomatoes and a cup of chicken broth.
Simmer the sauce for 20 minutes until it’s thickened and fragrant, then stir in the heavy cream or coconut cream. Add bite-sized chicken pieces (boneless thighs work better than breast meat here — they stay moist through freezing and reheating), and cook through.
Portioning and Reheating
Freeze in 2-cup portions per person — roughly 4 cups for a two-person meal. The sauce does separate slightly when frozen, but a gentle stir while reheating over medium-low heat brings it back together within a few minutes. A tiny splash of water or broth helps the process. Serve over freshly cooked basmati rice; don’t freeze the rice with the sauce, as rice becomes waterlogged and loses its texture entirely.
Making the Most of Your Batch
When you’re already making this, make double the sauce and freeze half of it without the chicken. This gives you a versatile base that works beautifully with chickpeas, shrimp (added fresh at reheating time), or paneer for a completely different meal later in the month.
3. Slow Cooker Pulled Pork
Pulled pork might be the most versatile freezer protein you can make. A single pork shoulder yields enough meat to power 4 to 6 completely different meals — pulled pork sandwiches, tacos, rice bowls, quesadillas, pasta — making it one of the highest-return investments in the entire freezer cooking arsenal. The slow cooker does all the heavy lifting over 8 hours while you get on with your life.
The Rub and Liquid That Makes It
A solid dry rub makes the difference between generic pulled pork and something you’d genuinely crave. Mix together brown sugar, smoked paprika, garlic powder, onion powder, ground cumin, black pepper, and a healthy amount of salt. Pat a 3 to 4 pound bone-in pork shoulder dry with paper towels, then press the rub into every surface. Sear it in a hot cast-iron skillet with a little oil for 3 minutes per side until deeply browned before it goes in the slow cooker — this step takes 10 minutes but pays off significantly in depth of flavor.
Add a cup of apple cider vinegar, half a cup of chicken broth, and two tablespoons of Worcestershire sauce to the slow cooker base. Cook on low for 8 hours or high for 4 to 5 hours. The pork should fall apart the moment you touch it with a fork.
Freezing Strategies for Two
Shred the pork and freeze it in the cooking juices — never dry. The juices are loaded with fat and gelatin that keep the meat moist during reheating. Portion into 1.5 to 2 cup servings (enough for two generous sandwiches or two taco portions) in zip freezer bags, pressing out all the air before sealing.
Reheat directly in a saucepan over medium heat with the juices, stirring occasionally. Add your barbecue sauce after reheating, not before freezing — it gives you more flexibility to use the same pulled pork in different ways across multiple meals.
Worth knowing: Freeze the cooking liquid separately in ice cube trays for a quick flavor boost you can drop into soups, rice, or braised vegetables later.
4. Turkey and Black Bean Chili
Chili is the textbook freezer meal, and this turkey-and-black-bean version earns its place at the top of the rotation through sheer practicality. It’s lighter than traditional beef chili without sacrificing any of the satisfaction, it’s genuinely nutritious, it takes about 45 minutes start-to-finish, and a double batch fills your freezer with enough meals to cover at least four weeknight dinners for two. Served with cornbread, over baked potatoes, or simply with a handful of shredded cheddar and a dollop of sour cream, it covers every base.
Building Flavors That Deepen After Freezing
Brown a pound of ground turkey with diced onion and two finely diced poblano peppers until the turkey is fully cooked and the vegetables are soft. Add five cloves of minced garlic, two tablespoons of chili powder, one teaspoon each of ground cumin and smoked paprika, half a teaspoon of dried oregano, and a pinch of cayenne. Stir and cook for 90 seconds before adding two cans of black beans (one drained, one with its liquid — the extra liquid adds body), a can of fire-roasted diced tomatoes, and a cup of chicken broth.
Simmer uncovered for 25 minutes, stirring occasionally, until the chili has thickened noticeably and the flavors have melded. Taste and adjust salt before cooling.
Portioning for Maximum Versatility
Cool the chili completely at room temperature for no more than an hour, then refrigerate until cold before freezing — never freeze hot food directly, as it raises the temperature of everything around it in the freezer and can affect food safety. Portion into 2-cup containers for individual servings. This chili freezes for up to 3 months and reheats perfectly on the stovetop in 10 minutes or in the microwave in 3 to 4 minutes with a splash of broth to loosen it.
The Repurposing Play
Here’s where this chili really shines: a single frozen portion can become three different meals. Eat it as soup tonight. Spoon it over scrambled eggs tomorrow morning for a hearty breakfast. Stuff it into a warm tortilla with shredded cheese on the third day. One freeze, three meals — that’s the cook-once-eat-twice philosophy pushed to its absolute best.
5. Classic Shepherd’s Pie
Shepherd’s pie is comfort food in its most reliable, no-nonsense form — savory ground lamb (or beef, in which case it’s technically cottage pie, but the cooking method is identical) with vegetables in a rich gravy, topped with a thick layer of buttery mashed potatoes and baked until the top is golden. It freezes beautifully when prepared correctly, and for two people, baking it in two smaller loaf pans is the move.
The Filling That Matters Most
Brown ground lamb or beef with diced onion, carrots, and celery until the meat is fully cooked and any excess moisture has evaporated — this is important because waterlogged filling turns the mashed potato topping soggy from the inside out. Add tomato paste, Worcestershire sauce, fresh thyme, and beef broth, then simmer until the sauce is thick enough to coat the back of a spoon cleanly. Stir in frozen peas at the very end (they go in off the heat so they stay vibrant green).
The potatoes: Make them with more butter and less milk than you think you need. A slightly stiffer mashed potato holds its structure better during freezing and reheating. Yukon Golds give you the richest flavor and creamiest texture with the least effort.
Freezing Instructions
Fill your two loaf pans with the meat filling, spread the mashed potato on top, and run a fork across the surface to create ridges — they crisp up beautifully in the oven. Freeze one pan before baking, wrapped in plastic and foil. Bake from frozen at 400°F (200°C) for 40-45 minutes covered, then another 15-20 minutes uncovered until the top is properly golden and the filling is bubbling around the edges.
The potato topping can get slightly grainy after freezing, which is worth knowing. To counteract this, dot the frozen surface with a few small pieces of butter before it goes into the oven — it melts in and restores the creaminess as it heats.
6. Cheesy Chicken and Broccoli Rice Casserole
This casserole is the workhorse of weeknight cooking — straightforward, filling, crowd-pleasing, and completely freezer-friendly when you handle the rice correctly. The combination of tender chicken, bright broccoli, and a sharp cheddar sauce baked over rice creates something that’s genuinely greater than the sum of its parts, and it reheats without the typical casserole problem of drying out.
The One Rule That Prevents Mushy Rice
Undercook your rice by 5 minutes before it goes into the casserole. Rice continues to absorb liquid during baking and again during reheating, so if it starts fully cooked, it ends up waterlogged and unpleasant. Starting with par-cooked rice means it finishes at the perfect texture when the casserole comes out of the oven.
Building the Sauce
Make a quick cheese sauce by whisking together butter, flour, chicken broth, and whole milk in a saucepan over medium heat until thick and smooth, then remove from heat and stir in sharp cheddar by the handful, adding each addition until fully melted before adding the next. Season generously with garlic powder, onion powder, dry mustard, and black pepper. The dry mustard is a small thing that makes a noticeable difference — it sharpens the cheese flavor without tasting mustardy.
Toss the sauce with par-cooked rice, bite-sized pieces of raw chicken breast, and small broccoli florets, then divide between two loaf pans.
Reheating From Frozen
Cover tightly with foil and bake at 375°F (190°C) from frozen for 60-70 minutes. Remove the foil for the last 15 minutes to allow the top to develop a slightly crispy, golden crust. Add a handful of extra shredded cheddar in those final 15 minutes if you want a proper cheesy crust. A splash of chicken broth poured around the edges before reheating helps prevent the edges from drying out.
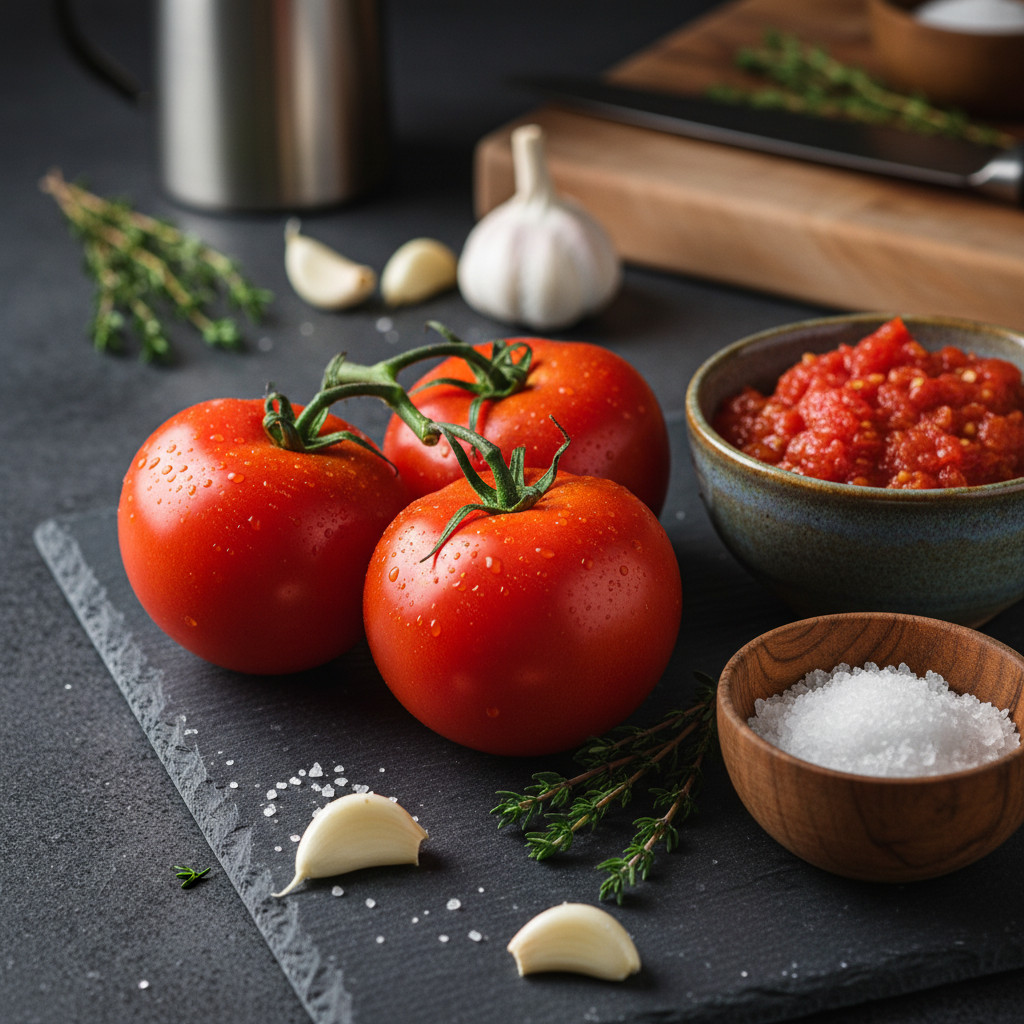
7. Slow-Simmered Spaghetti Meat Sauce
A great meat sauce is one of the most practical things you can have in your freezer. It adapts to almost any situation — toss it with spaghetti tonight, spoon it into a lasagna next week, use it as pizza sauce after that. Making a proper long-simmered bolognese-style meat sauce takes time, but the time is almost entirely passive, and doubling the recipe adds maybe 10 extra minutes of active work for twice the output.
What Makes This Sauce Worth the Effort
Use a blend of ground beef and ground pork in equal parts — the pork adds fat and sweetness that ground beef alone can’t replicate. Brown the meat in batches in a wide, heavy pan over high heat, making sure each portion gets genuinely seared with golden crust rather than steaming in its own moisture. This is the step most home cooks skip, and it’s the step that creates most of the sauce’s deep, savory flavor.
Build on that base with finely diced onion, carrot, and celery (the classic soffritto), garlic, tomato paste (cooked in the pan for 2 minutes before the liquid goes in), crushed San Marzano tomatoes, a splash of dry red wine, and beef broth. Simmer, partially covered, on the lowest possible heat for at least 90 minutes — ideally 2 hours. The sauce should be thick, glossy, and deeply brick-red.
Freezing and Serving
Cool the sauce completely, then portion into 2-cup servings (enough for two generous pasta portions). This sauce keeps 3 months in the freezer without any quality loss. Reheat gently in a saucepan, adding a splash of pasta water if it seems too thick.
One thing most people miss: Always finish the sauce with a tablespoon of cold butter stirred in at the very end of reheating. This trick — called mantecatura in Italian cooking — gives the sauce a silky, restaurant-quality richness that transforms it from home-cooked to genuinely impressive.
8. Chicken Tortilla Soup
Chicken tortilla soup is the freezer meal that punches far above its weight. It’s quick to make, takes maybe 35 minutes from start to finish, freezes exceptionally well, and reheats into something that feels like a full, satisfying restaurant bowl when you pile on the right toppings. For two people, it’s the perfect weeknight meal — warm, filling, and endlessly customizable based on what you have on hand.
The Base That Comes Together Fast
Sauté diced onion, jalapeño, and red bell pepper in a wide pot over medium heat until softened, about 6 minutes. Add minced garlic, ground cumin, chili powder, smoked paprika, and dried oregano, and cook for another 60 seconds. Add fire-roasted diced tomatoes, chicken broth, one can of black beans (drained), one can of corn (drained), and two large chicken breasts submerged directly in the liquid.
Simmer on medium-low for 20-25 minutes until the chicken is cooked through and easily shredded. Remove the chicken, shred it with two forks (it should come apart with almost no effort), and return it to the pot. Taste and adjust seasoning — this soup wants to be bold, so don’t be shy with the salt.
The Toppings You Freeze Separately
Do not freeze the toppings with the soup. Avocado, sour cream, shredded cheese, tortilla strips, and fresh cilantro all belong on top of the hot, reheated soup — never inside the frozen portion. Keep these toppings fresh and add them at serving time. The soup itself freezes in 2-cup or 3-cup portions per person for a filling bowl.
Reheating and Serving
Reheat directly from frozen in a saucepan over medium heat, stirring every couple of minutes, or thaw overnight in the refrigerator for a faster reheat. Top each bowl with crushed tortilla chips, a spoonful of sour cream, shredded sharp cheddar or Monterey Jack, sliced avocado, fresh lime juice, and cilantro. The toppings are what make this soup feel like a complete meal rather than just a bowl of something warm.
This is also a soup that rewards slight variations on reheating night — stir in a spoonful of chipotle in adobo if you want more smoke, or add a handful of baby spinach in the last minute for a nutritional boost without changing the flavor profile meaningfully.
Storing and Reheating Your Frozen Meals the Right Way
Knowing how to freeze food correctly is half the battle — and the most common mistakes happen right here.
Cool completely before freezing. Hot food placed directly into the freezer creates condensation inside the container, which leads to ice crystals, freezer burn, and degraded texture. Let dishes cool to room temperature (no more than 2 hours) and then refrigerate until cold before transferring to the freezer.
Remove as much air as possible. Freezer burn is caused by air exposure, not temperature. For zip bags, press out every bit of air before sealing and lay them flat to freeze. For rigid containers, fill them as close to the top as you can — leave about half an inch of headspace for expansion, but not more.
Thaw safely. The refrigerator is the safest and best method for thawing frozen meals — transfer your container from freezer to fridge the evening before you plan to eat it, and it’ll be thawed and ready by dinner time. For soups, chilis, and sauces, you can reheat directly from frozen in a covered saucepan over medium-low heat, stirring occasionally. Never thaw on the countertop at room temperature — this puts food in the temperature danger zone (40-140°F) for too long.
Reheat to 165°F internally. Use a kitchen thermometer to check the center of casseroles and larger dishes. If it’s not hot all the way through, cover and continue reheating in 5-minute increments until it is.
Most of these meals will keep at peak quality for up to 3 months. They’ll remain safe beyond that, but the flavor starts to dull and the texture can change noticeably after the 3-month mark. A simple labeling system with the dish name and freeze date eliminates all guesswork.
Final Thoughts
The cook-once, eat-twice approach isn’t about spending an entire weekend in the kitchen — it’s about being thoughtful enough to make a little extra while you’re already doing the work. Any one of these eight dishes becomes exponentially more valuable when you double it, and the difference between making one batch and making two is rarely more than 15 minutes of extra effort.
Start with whichever dish sounds most appealing right now and just make two of it. That’s the whole strategy. Over time, a few weeks of consistent doubling builds a freezer stocked with real, home-cooked meals that cover your busiest nights without any of the stress. The payoff compounds quickly.
The best freezer meal is always the one you actually eat — so choose flavors you genuinely love, portion them in amounts that make sense for your household, and label everything. Future-you, standing in front of the freezer on a Wednesday night with 20 minutes until dinner, will be nothing but grateful.