Table of Contents
- 10 Secrets to Successful Garden Fruit Cage
- Understanding Garden Fruit Cages and Their Importance
- What Exactly Is a Fruit Cage?
- The Compelling Benefits of Fruit Cage Installation
- Secret #1: Strategic Location Selection
- Secret #2: Selecting the Optimal Size and Design
- Calculating the Right Dimensions
- Popular Design Configurations
- Secret #3: Investing in Quality Materials
- Secret #4: Mastering Proper Installation Techniques
- Secret #5: Choosing the Right Netting Mesh Size
- Secret #6: Creating Optimal Growing Conditions Inside
- Irrigation and Watering Systems
- Soil Preparation and Ongoing Nutrition
- Secret #7: Implementing Effective Pest Management
- Secret #8: Seasonal Maintenance and Care
- Secret #9: Maximizing Space and Productivity
- Secret #10: Avoiding Common Mistakes
- Additional Expert Tips for Outstanding Results
- Final Thoughts: Your Path to Fruit Cage Success
10 Secrets to Successful Garden Fruit Cage
Picture this: you’ve spent months nurturing your berry bushes and fruit trees, watching them blossom and develop promising fruit, only to wake up one morning and find that birds, squirrels, and other wildlife have beaten you to the harvest. This frustrating scenario plays out in countless gardens every growing season, leaving gardeners wondering if there’s a better way to protect their precious produce. The answer lies in one of the most effective yet often underutilized gardening solutions—the garden fruit cage.
A well-designed fruit cage can transform your gardening experience, ensuring that the fruits of your labor actually end up on your table rather than feeding the local wildlife population. However, simply purchasing and installing a fruit cage isn’t enough to guarantee success. There are specific strategies, techniques, and insider knowledge that separate thriving, productive fruit cages from those that underperform or fail entirely. Whether you’re a seasoned gardener looking to optimize your existing setup or a newcomer considering your first fruit cage investment, understanding these crucial secrets will make the difference between abundant harvests and disappointing results.
Understanding Garden Fruit Cages and Their Importance
Before diving into the secrets of success, it’s essential to understand exactly what a garden fruit cage is and why it has become an indispensable tool for serious fruit gardeners around the world.
What Exactly Is a Fruit Cage?
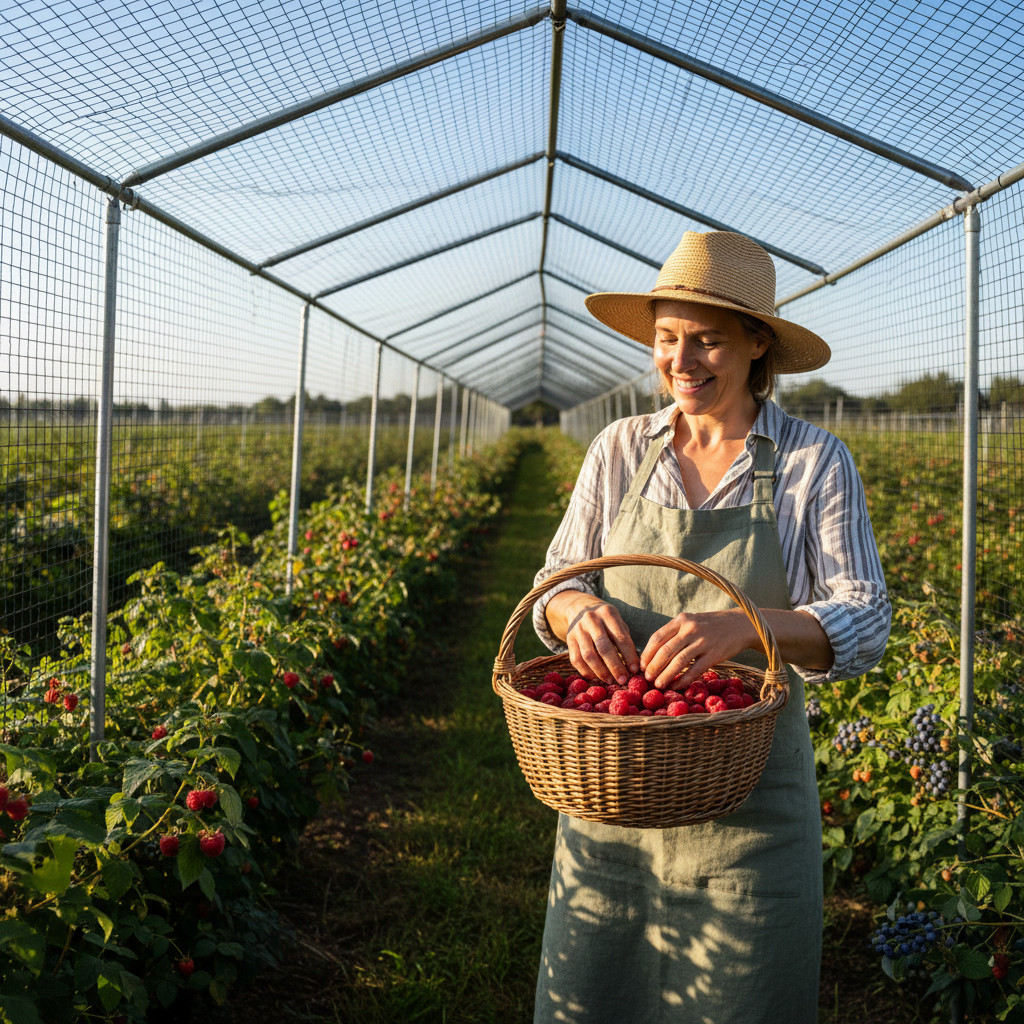
A garden fruit cage is a permanent or semi-permanent structure designed to enclose fruit-bearing plants within a protective framework covered with netting. These structures typically consist of a sturdy frame made from materials like galvanized steel, aluminum, or treated wood, topped and sided with fine mesh netting that allows sunlight, rain, and air to penetrate while keeping birds and other pests out.
Unlike temporary netting solutions that simply drape over plants, fruit cages provide a walk-in environment where gardeners can tend to their crops comfortably. This accessibility makes tasks like pruning, harvesting, and general plant care significantly easier and more efficient. The enclosed space creates a dedicated growing environment that can be customized to meet the specific needs of various fruit varieties.
The Compelling Benefits of Fruit Cage Installation
The advantages of installing a fruit cage extend far beyond simple pest protection. Here are the primary benefits that make fruit cages an excellent investment:
- Complete bird protection prevents crop losses that can exceed 80% in unprotected gardens
- Physical barrier against squirrels, rabbits, deer, and other mammals seeking easy meals
- Microclimate creation that can extend growing seasons and improve fruit quality
- Reduced pesticide dependence through natural protection methods
- Organized growing space that maximizes productivity per square foot
- Long-term cost savings compared to replacing damaged crops year after year
Secret #1: Strategic Location Selection
The foundation of a successful fruit cage begins long before construction starts—it begins with choosing the perfect location in your garden.
Selecting the right spot for your fruit cage is arguably the most critical decision you’ll make in this entire process. Many gardeners make the mistake of placing their fruit cage wherever there’s available space, without considering the specific environmental requirements of the fruits they plan to grow. This oversight can lead to poor yields, disease problems, and general disappointment despite having quality materials and proper construction.
Sunlight is the primary consideration when choosing your fruit cage location. Most fruiting plants require a minimum of six to eight hours of direct sunlight daily to produce abundant, flavorful harvests. Position your cage in an area that receives morning sun, which helps dry dew quickly and reduces fungal disease problems. Avoid locations shaded by buildings, large trees, or other structures, especially during the critical growing months.
Soil quality and drainage play equally important roles in location selection. Conduct a simple drainage test by digging a hole approximately 12 inches deep and filling it with water. If the water drains within a few hours, you have suitable drainage. Standing water leads to root rot and other problems that no amount of careful cage management can overcome. Additionally, test your soil pH and nutrient levels to ensure they match your chosen fruits’ requirements.
Accessibility and convenience should not be overlooked. Place your fruit cage within reasonable distance of water sources for irrigation, and ensure you have clear pathways for transporting harvested fruit. Consider proximity to your home as well—a fruit cage you can see from your kitchen window will receive more attention and care than one hidden in a distant corner of your property.
Secret #2: Selecting the Optimal Size and Design
Getting the dimensions right ensures your fruit cage serves your needs for years to come without limiting your growing potential.
One of the most common regrets among fruit cage owners is not building large enough initially. While budget constraints are real, planning for adequate size from the beginning prevents costly modifications and expansion projects later. Your fruit cage should accommodate not only your current planting plans but also allow room for growth and experimentation.
Calculating the Right Dimensions
When determining the size of your fruit cage, consider these essential factors:
-
Plant spacing requirements vary significantly between fruit types. Blueberry bushes need approximately 4-6 feet between plants, while raspberry canes can be planted more densely at 2-3 feet apart. Research the mature size of your chosen varieties and calculate accordingly, adding extra space for walking paths between rows.
-
Working height matters tremendously for comfort and practicality. A minimum ceiling height of 6 feet allows most adults to work comfortably without stooping. However, if you plan to grow taller fruit varieties or train plants vertically, consider heights of 7-8 feet to accommodate future growth and make harvesting easier.
-
Future expansion possibilities should influence your initial design. Even if you start small, choosing a modular design that allows for additions means you won’t need to start from scratch when you inevitably want to grow more fruit. Many experienced gardeners recommend building at least 25% larger than your initial plans suggest.
Popular Design Configurations
Different fruit cage designs serve various purposes and garden layouts:
- Rectangular walk-in cages represent the most popular option, offering maximum interior space and easy access
- Lean-to designs work excellently against walls or fences, utilizing vertical space efficiently
- Tunnel-style cages suit narrow garden spaces and provide excellent coverage for row plantings
- Modular systems allow for customization and future expansion without complete reconstruction
Secret #3: Investing in Quality Materials
The durability and effectiveness of your fruit cage depend entirely on the quality of materials used in its construction.
Cutting corners on materials is a false economy that leads to frequent repairs, premature replacement, and ultimately higher costs over time. A well-constructed fruit cage using quality materials can last 15-25 years with proper maintenance, making the initial investment worthwhile when spread across decades of productive use.
Frame material selection significantly impacts both longevity and maintenance requirements. Galvanized steel offers excellent strength and durability, resisting rust for many years even in wet climates. Aluminum frames are lighter, completely rust-proof, and easier to assemble, though typically more expensive. Pressure-treated wood provides a natural aesthetic and adequate durability but requires more ongoing maintenance and eventual replacement of components.
Netting quality varies dramatically between products, and this is not an area where bargain hunting pays off. High-quality polyethylene netting with UV stabilization maintains its strength and flexibility for 10-15 years, while cheap alternatives may deteriorate within 2-3 seasons. Look for netting with reinforced edges and consider black netting, which is less visible and generally more durable than green alternatives.
Connection hardware and fittings deserve attention equal to main structural components. Stainless steel or galvanized connectors resist corrosion and maintain structural integrity through years of exposure to weather. Plastic connectors may seem adequate initially but often become brittle and fail after a few seasons of UV exposure and temperature fluctuations.
Secret #4: Mastering Proper Installation Techniques
Even the best materials fail when installation is rushed or improperly executed—taking time to install correctly ensures years of trouble-free protection.
Proper installation begins with thorough ground preparation and continues through careful assembly of every component. Rushing this phase or skipping important steps invariably leads to problems that are difficult and expensive to correct later. Dedicate adequate time to installation, and don’t hesitate to recruit helpers for larger structures.
Foundation and anchoring requirements depend on your local climate and soil conditions. In areas with high winds, deep ground anchors or concrete footings are essential to prevent structural damage or complete cage failure during storms. Even in calmer climates, proper anchoring prevents gradual shifting and maintains the tension necessary for netting to remain effective.
Assembly best practices include these critical steps:
-
Level the ground thoroughly before beginning construction. Use a spirit level and string lines to ensure your cage sits perfectly square, which prevents stress on joints and ensures doors close properly.
-
Pre-assemble frame sections on the ground where possible before raising them into position. This approach is safer and allows for easier adjustment of connections before weight is applied.
-
Install netting with adequate tension but avoid over-stretching, which leads to premature wear and tearing. Netting should be taut enough to prevent sagging that creates entry points for pests while maintaining enough flexibility to absorb wind loads without damage.
-
Secure all edges completely using purpose-designed clips, rails, or burial techniques. Even small gaps at ground level provide access for determined pests and compromise the entire structure’s effectiveness.
Secret #5: Choosing the Right Netting Mesh Size
The mesh size of your netting determines which pests are excluded and directly impacts airflow, light penetration, and overall growing conditions inside your cage.
Selecting appropriate mesh size requires balancing protection against various pests with the need for adequate air circulation and pollinator access. Different mesh sizes serve different purposes, and understanding these distinctions helps you make informed decisions based on your specific pest pressures and fruit varieties.
Standard mesh sizes and their applications:
-
19mm (¾ inch) mesh provides excellent protection against birds while allowing butterflies and bees to enter for pollination. This size is ideal for most soft fruits where bird damage is the primary concern.
-
16mm (⅝ inch) mesh offers increased protection against smaller birds like sparrows while still permitting pollinator access. This represents a good compromise for gardens with diverse pest pressures.
-
7mm (¼ inch) mesh excludes virtually all birds and most flying insects, including wasps and some butterflies. While providing maximum protection, this mesh size may require hand pollination or temporary removal during flowering periods.
Airflow considerations become increasingly important as mesh size decreases. Finer mesh restricts air movement more significantly, which can increase humidity levels inside the cage and potentially promote fungal diseases. If using fine mesh for enhanced pest protection, ensure your cage design includes adequate ventilation and consider spacing plants slightly further apart to improve air circulation.
Seasonal mesh management involves using different netting at different times. Some successful gardeners install coarser mesh during flowering to ensure pollination, then switch to finer mesh as fruit develops and becomes attractive to pests. While this approach requires more effort, it optimizes both pollination success and crop protection.
Secret #6: Creating Optimal Growing Conditions Inside
Your fruit cage creates a unique microclimate that can be optimized through careful management of water, soil, and environmental factors.
The enclosed environment of a fruit cage offers opportunities for environmental control that open gardens cannot match. Understanding and leveraging these opportunities allows you to create ideal growing conditions that maximize both fruit quality and quantity.
Irrigation and Watering Systems
Consistent, appropriate watering is essential for fruit production, and installing efficient irrigation systems inside your fruit cage simplifies this critical task:
Drip irrigation systems deliver water directly to plant root zones, minimizing waste through evaporation and reducing leaf wetness that promotes disease. Install drip lines before planting, running them along rows with emitters positioned at each plant location. This approach saves water, reduces labor, and produces healthier plants with better fruit quality.
Soaker hoses offer a simpler alternative for smaller cages, providing even moisture distribution along their length. While less precise than drip systems, soaker hoses are inexpensive, easy to install, and effective for many fruit cage applications.
Watering frequency and volume requirements vary by fruit type, growth stage, and weather conditions. Generally, most soft fruits prefer consistent moisture—approximately 1-2 inches per week during the growing season. Install a simple rain gauge inside your cage to monitor natural precipitation and adjust supplemental watering accordingly.
Soil Preparation and Ongoing Nutrition
Healthy soil produces healthy plants, and the controlled environment of a fruit cage allows for precise soil management:
-
Test soil annually and adjust pH and nutrient levels based on results. Most berries prefer slightly acidic conditions (pH 5.5-6.5), while other fruits may have different requirements.
-
Add generous organic matter in the form of compost, well-rotted manure, or leaf mold. This improves soil structure, water retention, and nutrient availability.
-
Apply appropriate mulch around plants to conserve moisture, suppress weeds, and gradually add organic matter as it decomposes. Wood chips, straw, or shredded leaves all work well.
-
Feed plants according to their needs using organic or synthetic fertilizers appropriate for fruit production. Avoid excessive nitrogen, which promotes leafy growth at the expense of fruit development.
Secret #7: Implementing Effective Pest Management
While your fruit cage excludes many pests, vigilant management inside the protected space prevents problems and ensures healthy harvests.
A fruit cage eliminates bird damage but doesn’t automatically solve all pest problems. Insects, diseases, and even small mammals can still affect crops if not properly managed. Implementing integrated pest management strategies creates a healthy growing environment where problems are prevented rather than simply treated.
Regular monitoring forms the foundation of effective pest management. Inspect plants at least weekly during the growing season, checking both upper and lower leaf surfaces, stems, and developing fruit. Early detection of problems allows for intervention before significant damage occurs. Keep a garden journal noting any issues you observe and the treatments applied.
Beneficial insect encouragement reduces pest populations naturally. Plant flowering herbs and companion plants inside or immediately outside your cage to attract ladybugs, lacewings, hoverflies, and other predatory insects that consume aphids, mites, and other soft-bodied pests. Avoid broad-spectrum pesticides that harm these beneficial allies.
Cultural practices prevent many problems before they start:
- Remove fallen fruit promptly to eliminate breeding sites for fruit flies and other pests
- Prune properly to improve air circulation and reduce conditions favorable to fungal diseases
- Rotate crops where possible, avoiding planting the same fruit family in the same location year after year
- Maintain clean growing areas by removing weeds and plant debris that harbor pests and diseases
Targeted treatments when necessary should follow the principles of integrated pest management—using the least toxic effective option and applying only when damage thresholds justify intervention. Organic options like neem oil, insecticidal soaps, and biological controls provide effective pest management while maintaining a healthy growing environment.
Secret #8: Seasonal Maintenance and Care
Consistent seasonal maintenance extends your fruit cage’s lifespan and ensures optimal performance year after year.
A fruit cage is a significant investment that rewards diligent care with decades of service. Establishing regular maintenance routines prevents small problems from becoming major issues and keeps your cage functioning effectively through changing seasons.
Spring preparation sets the stage for successful growing:
-
Inspect the entire structure for winter damage, checking frames for rust, rot, or structural weakness. Repair or replace damaged components before they fail under the stress of summer growth and weather.
-
Examine netting carefully for holes, tears, or areas of deterioration. Even small openings compromise protection, so repair damage with patches or replace sections as needed. Check that netting remains securely fastened at all edges and connections.
-
Clean the interior space by removing accumulated debris, fallen leaves, and any overwintered pest populations. Rake away old mulch to expose soil briefly to sun and air before applying fresh material.
-
Test and prepare irrigation systems by flushing lines, checking for leaks, and ensuring emitters are functioning correctly. Replace clogged or damaged components and adjust positioning as needed for new plantings.
Summer vigilance involves ongoing attention:
- Check netting tension regularly, especially after storms
- Monitor plants for pest and disease issues
- Maintain adequate water and nutrition
- Harvest fruit promptly to prevent attracting pests
Autumn and winter preparation protects your investment:
- Remove or secure netting in areas with heavy snowfall to prevent damage
- Clean and store removable components properly
- Apply protective treatments to wooden frame elements
- Plan improvements and modifications for the coming season
Secret #9: Maximizing Space and Productivity
Smart space utilization transforms your fruit cage from a simple protective structure into a highly productive growing system.
Every square foot inside your fruit cage represents valuable growing space that should be utilized efficiently. Implementing space-maximizing strategies increases your harvests without requiring additional land or construction.
Vertical growing techniques dramatically increase productivity:
Training fruit plants upward on trellises, wires, or stakes makes excellent use of vertical space inside your cage. Raspberry and blackberry canes can be trained to grow vertically rather than sprawling, reducing ground coverage while maintaining or increasing yields. Grape vines and kiwi fruit naturally climb and benefit from overhead training systems that utilize the full height of your cage structure.
Succession planting strategies extend harvest periods and maximize annual production. Rather than planting all of one variety, choose early, mid-season, and late varieties of each fruit type. This approach spreads your harvest over many weeks rather than overwhelming you with simultaneous ripening. Additionally, interplanting with quick-maturing crops during establishment years makes use of space before permanent plantings reach full size.
Companion planting within the cage adds productivity and pest management benefits:
- Plant low-growing herbs like thyme, oregano, and chives beneath taller fruit plants
- Include flowering plants that attract pollinators and beneficial insects
- Grow strawberries as groundcover beneath cane fruits
- Interplant nitrogen-fixing plants to improve soil fertility
Efficient pathway design minimizes non-productive space while maintaining necessary access. Use stepping stones rather than wide permanent paths, or consider raised beds that allow walking on edges rather than dedicating separate pathway areas.

Secret #10: Avoiding Common Mistakes
Learning from others’ errors saves time, money, and frustration while accelerating your path to fruit cage success.
Even experienced gardeners make mistakes when establishing and managing fruit cages. Understanding these common pitfalls helps you avoid them and achieve better results from the start.
Installation errors that undermine success:
-
Inadequate ground anchoring leads to structural failure during storms or gradual shifting that creates gaps in protection. Always anchor more securely than you think necessary.
-
Failing to level the structure creates stress on joints and prevents doors from closing properly. Take time during installation to ensure everything is perfectly square and level.
-
Leaving gaps at ground level allows rodents and ground-dwelling pests to enter. Bury netting edges, use ground-level rails, or install hardware cloth barriers to prevent access.
-
Over-tensioning netting causes premature failure and makes repairs more difficult. Netting should be taut but not stretched to its limit.
Management oversights that reduce productivity:
-
Neglecting pollination requirements results in poor fruit set despite healthy plants. Research your chosen varieties’ pollination needs and ensure appropriate partners are available, either inside the cage or accessible through adequately sized mesh.
-
Overcrowding plants reduces air circulation, increases disease pressure, and decreases fruit quality. Follow recommended spacing guidelines even when space seems generous.
-
Forgetting about access for maintenance makes essential tasks difficult or impossible. Ensure doors are large enough for comfortable entry and that interior layout allows access to all plants.
-
Ignoring soil health leads to declining productivity over time. Replenish nutrients annually and maintain organic matter levels through regular additions.
Additional Expert Tips for Outstanding Results
These bonus insights from experienced fruit cage gardeners help you achieve exceptional harvests.
Door placement and design significantly impacts daily usability. Install doors on the side providing easiest access from your garden’s main pathway. Consider double doors or wider openings if you’ll be transporting equipment or harvest containers regularly. Self-closing hinges and secure latches prevent accidental pest entry through forgotten open doors.
Climate modification possibilities within your cage include adding shade cloth during extreme heat, installing frost protection for shoulder-season protection, and using thermal mass (water containers, stone paths) to moderate temperature fluctuations. These modifications extend your productive season and improve fruit quality during challenging weather.
Record keeping practices improve results year after year. Document planting dates, varieties, yields, pest problems, and management interventions. Review these records annually to identify patterns, successful strategies, and areas needing improvement. This information becomes invaluable for optimizing your cage’s productivity over time.
Final Thoughts: Your Path to Fruit Cage Success
Creating a successful garden fruit cage involves far more than simply enclosing plants within netting. It requires thoughtful planning, quality materials, proper installation, and ongoing attention to the unique growing environment you’ve created. The ten secrets revealed in this guide provide a comprehensive framework for achieving exceptional results, whether you’re establishing your first fruit cage or optimizing an existing one.
Remember that success comes from the combination of all these elements working together. Choosing the right location provides the foundation, quality materials ensure longevity, proper installation creates effective protection, and diligent ongoing management maximizes productivity year after year. Each secret builds upon the others, creating a synergistic system that produces abundant, high-quality fruit while minimizing the frustrations that plague unprotected gardens.
The investment you make in your fruit cage—both financially and in terms of time and effort—rewards you with years of bountiful harvests. Fresh berries, currants, and other soft fruits picked at peak ripeness from your own garden offer flavor and nutrition that store-bought alternatives simply cannot match. The satisfaction of successfully protecting your crops from birds and pests, combined with the joy of harvesting basket after basket of perfect fruit, makes every bit of effort worthwhile.
Take action today by assessing your current situation, identifying which secrets you’ve already implemented and which need attention. Whether you’re planning a new installation or improving an existing cage, applying these proven strategies will transform your fruit-growing experience and ensure that the fruits of your labor end up where they belong—on your table, not in the beaks of birds.


![How To Grow A Pear Tree From Seed [Step-By-Step Guide]](https://fruitonix.com/wp-content/uploads/2023/06/Screenshot-2023-06-07-1.36.07-AM.png)