There’s nothing quite as frustrating as watching your carefully cultivated berries and soft fruits disappear overnight, devoured by hungry birds and persistent pests before you’ve had a chance to enjoy them. If you’ve ever experienced the heartbreak of finding your strawberry patch stripped bare or your raspberry bushes picked clean by feathered visitors, you’re certainly not alone. Every year, home gardeners across the world lose significant portions of their harvest to wildlife, but there’s a remarkably effective solution that seasoned growers have relied upon for generations—the humble fruit cage.
A well-designed fruit cage transforms your garden into a protected sanctuary where your precious fruits can ripen to perfection without interference. Whether you’re growing succulent blueberries, sweet strawberries, or tangy currants, mastering the art of fruit cage installation and maintenance can dramatically increase your yield while reducing the stress and disappointment that comes with crop loss. In this comprehensive guide, you’ll discover everything you need to know about selecting, building, and maintaining a fruit cage that will serve your home garden for years to come.
Table of Contents
- Understanding Fruit Cages: The Foundation of Successful Soft Fruit Growing
- Types of Fruit Cages: Choosing the Right Style for Your Garden
- Walk-In Fruit Cages
- Low-Profile and Tunnel Fruit Cages
- DIY Versus Pre-Made Fruit Cage Kits
- Planning Your Fruit Cage Installation: Setting the Stage for Success
- Selecting the Optimal Location
- Measuring and Sizing Considerations
- Step-by-Step Guide to Building Your Fruit Cage
- Step 1: Preparing the Ground
- Step 2: Assembling and Installing the Frame
- Step 3: Attaching the Netting
- Selecting the Best Netting for Your Fruit Cage
- Understanding Mesh Sizes
- Material Options and Durability
- Ideal Fruits for Fruit Cage Cultivation
- Soft Fruits and Berries
- Climbing and Trained Fruits
- Year-Round Fruit Cage Maintenance
- Seasonal Maintenance Schedule
- Repair and Replacement Best Practices
- Common Mistakes and How to Avoid Them
- Installation Errors
- Ongoing Management Oversights
- Advanced Strategies for Maximizing Your Fruit Cage
- Companion Planting Within Fruit Cages
- Integrating Irrigation and Growing Systems
- Final Thoughts: Your Path to Fruit Growing Success
Understanding Fruit Cages: The Foundation of Successful Soft Fruit Growing
Before diving into installation techniques, it’s essential to understand what fruit cages are and why they’ve become indispensable tools for serious home gardeners.
A fruit cage is essentially a protective structure consisting of a framework—typically made from metal, wood, or plastic—covered with fine netting designed to keep birds, insects, and other pests away from your crops while still allowing essential elements like sunlight, rain, and beneficial pollinators to reach your plants. These structures range from simple, low-profile covers for individual plants to elaborate walk-in enclosures that can house entire fruit gardens.
The primary purpose of a fruit cage extends beyond mere pest protection. These structures create a microclimate that can benefit your plants in multiple ways. The netting provides partial shade during scorching summer days, reduces wind damage to delicate fruits, and even offers a degree of frost protection during unexpected cold snaps. Additionally, the enclosed environment makes it easier to manage organic pest control methods and monitor plant health without external interference.
Why every home gardener should consider a fruit cage:
Crop Protection: Studies suggest that unprotected soft fruit crops can lose anywhere from 50% to 100% of their harvest to birds alone. A properly installed fruit cage eliminates this threat almost entirely.
Extended Harvest Window: Without birds constantly pecking at ripening fruits, berries can reach optimal ripeness on the vine, resulting in sweeter, more flavorful harvests.
Reduced Chemical Use: The physical barrier reduces the need for chemical deterrents and pesticides, making your garden more organic and environmentally friendly.
Peace of Mind: Once installed, you can enjoy your garden knowing that your hard work won’t be undone by opportunistic wildlife.
Year-Round Structure: Unlike temporary coverings, permanent fruit cages provide ongoing protection season after season.
Types of Fruit Cages: Choosing the Right Style for Your Garden
Selecting the appropriate fruit cage type depends on your garden size, budget, and the specific fruits you plan to grow.
The market offers numerous fruit cage configurations, each designed to address different gardening needs and spatial constraints. Understanding these options will help you make an informed decision that aligns with your specific requirements and long-term gardening goals.
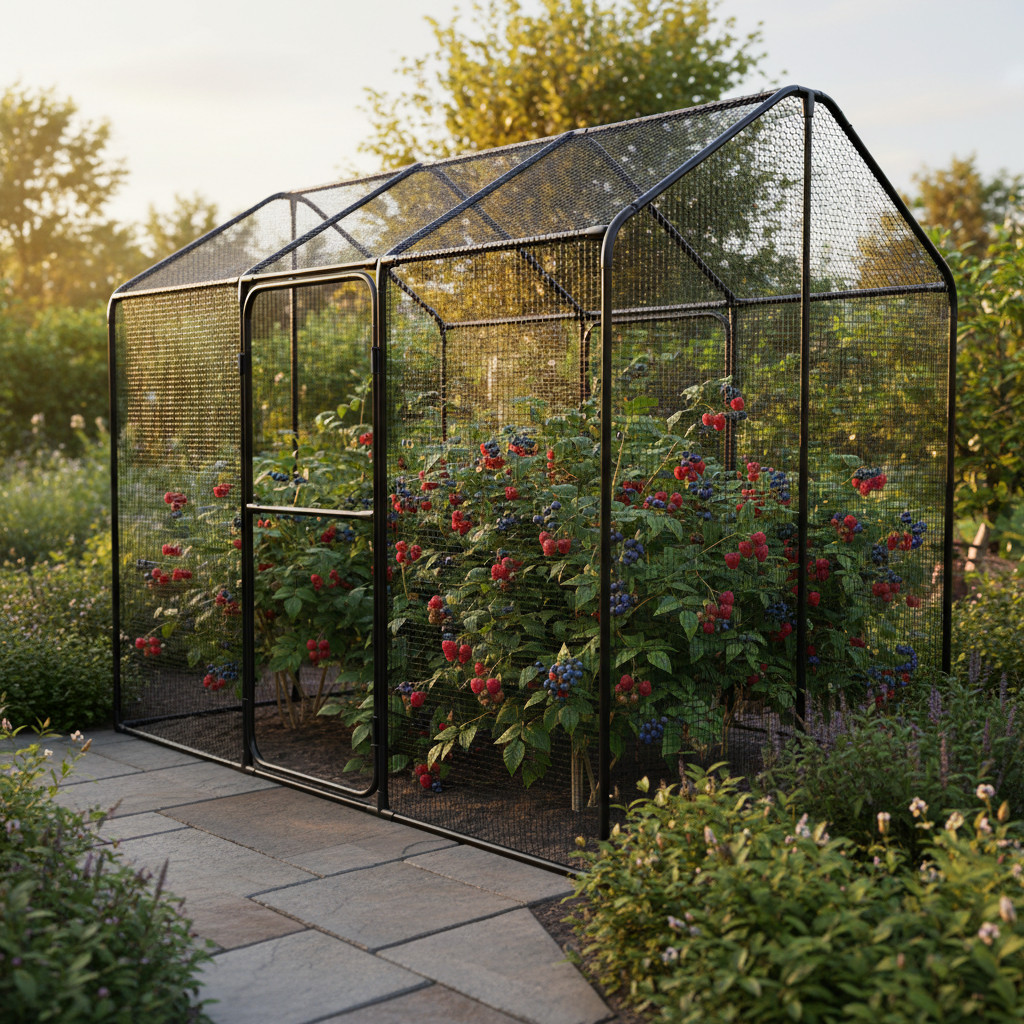
Walk-In Fruit Cages
Walk-in fruit cages represent the gold standard for serious soft fruit cultivation. These substantial structures typically stand between 1.8 and 2.1 meters tall, allowing gardeners to walk freely inside while tending to their crops. The spacious interior accommodates taller fruit bushes, trained fruit trees, and even climbing varieties like grapes or kiwis.
The advantages of walk-in cages are substantial. You’ll enjoy unrestricted access for pruning, harvesting, and general maintenance without needing to remove netting or crouch uncomfortably. These structures typically feature sturdy frames made from galvanized steel or aluminum, ensuring longevity and resistance to rust and corrosion. Many models include doors or zippered entries for convenient access while maintaining pest exclusion.
Walk-in fruit cages do require a larger initial investment and more garden space, but for dedicated fruit growers, the convenience and capacity justify the expense. They’re particularly well-suited for gardens that house multiple fruit varieties or larger quantities of a single crop.
Low-Profile and Tunnel Fruit Cages
For gardeners with limited space or those focusing on ground-level crops like strawberries and alpine berries, low-profile fruit cages offer an excellent alternative. These structures typically stand between 45 and 90 centimeters high, creating a protective canopy over your plants without the height and footprint of walk-in varieties.
Tunnel-style cages work exceptionally well for raised beds and row plantings. Their arched or peaked design encourages water runoff and prevents snow accumulation during winter months. Installation is generally simpler and faster than larger structures, and many gardeners appreciate the ability to easily relocate these cages as crop rotation dictates.
The primary limitation of low-profile cages is access—you’ll need to lift or roll back the netting for harvesting and maintenance, which can become tedious during peak season. However, for smaller gardens or single-crop protection, they represent an economical and effective solution.
DIY Versus Pre-Made Fruit Cage Kits
Pre-made kits offer convenience and professional engineering. These packages include all necessary components—frame pieces, netting, connectors, ground anchors, and detailed instructions. Quality kits from reputable manufacturers ensure proper fit and structural integrity, reducing the risk of installation errors that could compromise protection.
DIY fruit cages provide flexibility and potential cost savings. By sourcing materials independently—such as PVC piping, wooden posts, or metal conduit combined with purchased netting—creative gardeners can customize dimensions, adapt to irregular garden shapes, and potentially reduce overall expenses. However, DIY projects require more planning, tool proficiency, and problem-solving capability.
Planning Your Fruit Cage Installation: Setting the Stage for Success
Proper planning prevents poor performance—nowhere is this more true than in fruit cage installation.
Before purchasing materials or breaking ground, invest time in thorough planning. The decisions you make during this phase will determine your fruit cage’s effectiveness, durability, and ease of use for years to come.
Selecting the Optimal Location
Location selection requires balancing multiple factors. Your fruit cage should occupy a spot that receives at least six to eight hours of direct sunlight daily, as most soft fruits require abundant light for optimal production. Simultaneously, consider wind exposure—while some air circulation benefits plant health, excessive wind can damage netting and stress plants.
Soil quality and drainage deserve equal attention. Avoid low-lying areas where water pools after rain, as waterlogged roots lead to disease and poor yields. If your preferred location has drainage issues, consider installing raised beds within the fruit cage footprint or improving soil structure before installation.
Proximity to your home matters for practical reasons. A fruit cage located conveniently close encourages regular monitoring and makes daily harvesting more likely. Additionally, consider access for wheelbarrows, hoses, and other gardening equipment when positioning your structure.
Measuring and Sizing Considerations
Accurate measurements prevent costly mistakes and wasted materials. Begin by determining your current and future planting needs. Remember that fruit bushes grow substantially over time—a young blueberry bush occupying one square meter may eventually require three or four times that space. Plan for mature plant sizes rather than current dimensions.
Consider these sizing guidelines:
-
Height Requirements: Allow at least 60 centimeters of clearance above your tallest plants’ mature height. This space accommodates growth, simplifies harvesting, and prevents netting from rubbing against and damaging fruit.
-
Width and Length: Include adequate pathways between rows—a minimum of 60 centimeters allows comfortable access for harvesting and maintenance. Wider paths of 90 centimeters or more significantly improve working comfort.
-
Door Placement: Plan door locations for logical workflow. Position entries near paths leading to your home, water sources, and composting areas.
-
Expansion Potential: If space permits, size your fruit cage slightly larger than immediate needs. This foresight accommodates future additions without requiring complete reconstruction.
Step-by-Step Guide to Building Your Fruit Cage
Follow these detailed instructions to construct a professional-quality fruit cage that will protect your harvest for seasons to come.
Building a fruit cage represents a weekend project for most handy gardeners. With proper preparation and attention to detail, you’ll create a structure that rivals commercial installations at a fraction of the cost.
Step 1: Preparing the Ground
Begin by clearing your chosen area completely. Remove all weeds, grass, rocks, and debris from the footprint plus an additional 30 centimeters around the perimeter. This cleared buffer prevents vegetation from growing into the netting and provides clean access around the structure’s exterior.
Mark your cage’s corners and door locations using stakes and string. Ensure your layout is perfectly square by measuring diagonals—equal diagonal measurements confirm square corners. For larger cages, also mark intermediate post positions, typically spaced every 1.8 to 2.4 meters along the perimeter.
If you’re installing ground sleeves or anchor points for your frame posts, this is the time to dig and set them. For permanent installations, consider setting posts in concrete for maximum stability. Temporary or relocatable cages may use ground spikes or stake-style anchors instead.
Step 2: Assembling and Installing the Frame
Frame assembly varies depending on your chosen materials and design. For metal kit cages, follow manufacturer instructions precisely, ensuring all connectors are fully seated and tightened. For DIY structures, construct corner assemblies first, then connect them with horizontal rails.
Critical installation tips:
-
Use a level frequently to ensure vertical posts are plumb and horizontal rails are even. A crooked frame creates tension points that stress netting and reduce structure lifespan.
-
Install cross-bracing on larger structures to prevent frame flex during high winds. Diagonal braces at corners significantly improve rigidity.
-
Check all connections after assembly and before adding netting. Tighten any loose joints and verify overall structure stability.
Step 3: Attaching the Netting
Netting installation requires patience and ideally a helper. Work on a calm day—wind transforms netting into an unmanageable sail that tangles and tears easily.
Start with the roof section, draping netting across the top of your frame with even overhang on all sides. Secure the center first using clips, zip ties, or the attachment system included with your kit. Work outward from the center, maintaining even tension throughout.
Next, attach side panels, either as separate pieces or by extending the roof netting down the walls. Ensure netting reaches the ground and overlaps sufficiently to prevent gaps where birds could enter. For the best protection, bury netting edges 10 to 15 centimeters underground or secure them beneath ground-level boards.

Pay special attention to door installation. Whether using zippered entries, hinged doors, or overlapping flap systems, ensure closures seal completely when shut. Even small gaps invite determined birds to squeeze through.
Selecting the Best Netting for Your Fruit Cage
The netting you choose directly impacts protection effectiveness, durability, and long-term value.
Not all garden netting performs equally. Understanding the options helps you select materials that will serve your specific needs while providing years of reliable service.
Understanding Mesh Sizes
Mesh size—the dimension of individual openings in the netting—determines what pests you’ll exclude. Larger mesh (19-25mm) effectively blocks birds but allows smaller insects through. Medium mesh (12-16mm) stops most birds including smaller species like sparrows and finches. Fine mesh (6-8mm) provides comprehensive protection against birds, butterflies, moths, and many larger insects.
Consider your primary threats when selecting mesh size. If birds represent your main concern, medium mesh offers an excellent balance of protection and airflow. For gardeners battling both birds and cabbage white butterflies or codling moths, fine mesh justifies its higher cost and slightly reduced ventilation.
Material Options and Durability
Polyethylene netting represents the most common and economical choice. Quality UV-stabilized polyethylene resists sun degradation and typically lasts five to ten years with proper care. Look for products specifically marketed as UV-protected for garden use.
Polypropylene netting offers superior durability and softer handling characteristics. Though more expensive, it’s gentler on plants when contact occurs and tends to maintain flexibility longer than polyethylene alternatives.
Woven versus knitted construction affects both durability and behavior when damaged. Knitted netting resists runs—if one strand breaks, the damage remains localized. Woven netting may unravel from damage points but often provides tighter, more uniform pest exclusion.
Ideal Fruits for Fruit Cage Cultivation
Maximize your fruit cage’s value by growing varieties that benefit most from protected conditions.
While fruit cages can protect virtually any crop, certain fruits particularly benefit from the enclosed environment. Focus on these high-value, bird-attractive varieties for the best return on your investment.
Soft Fruits and Berries
Strawberries top the list of fruit cage candidates. These ground-level fruits attract birds, slugs, and numerous insects. Protected strawberries develop fuller flavor profiles as they ripen completely without bird damage.
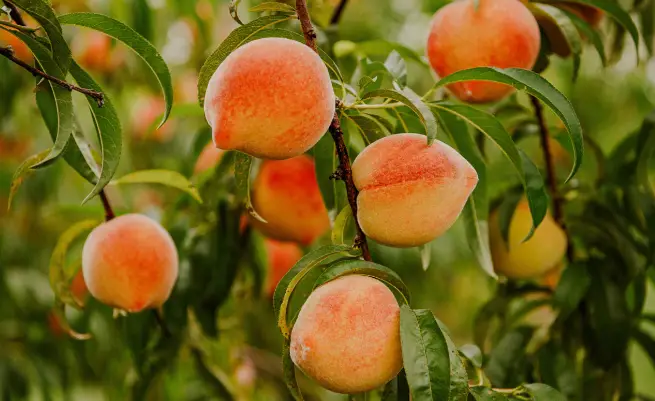
Blueberries represent perhaps the most bird-targeted crop in home gardens. The bright colors and irresistible sweetness make unprotected blueberry bushes virtual bird feeders. Inside a fruit cage, you’ll finally harvest the abundant crops these productive plants promise.
Other excellent soft fruit choices include:
-
Raspberries and Blackberries: Their brambling habit suits cage cultivation, and the extended ripening period means extended bird vulnerability without protection.
-
Currants (red, black, and white): These traditional cottage garden fruits produce heavily when protected from birds that target their small, bright berries.
-
Gooseberries: Though somewhat less bird-attractive than other berries, gooseberries benefit from the pest exclusion and microclimate benefits fruit cages provide.
Climbing and Trained Fruits
Walk-in fruit cages accommodate vertical growing opportunities. Train grape vines along internal support structures for abundant harvests protected from birds and wasps. Fan-trained stone fruits like cherries and plums succeed beautifully within taller cage structures, though ensure adequate pollinator access during bloom periods.
Year-Round Fruit Cage Maintenance
Consistent maintenance ensures your fruit cage continues performing optimally season after season.
A fruit cage is an investment worth protecting. Regular maintenance prevents minor issues from becoming major problems and extends your structure’s useful life significantly.
Seasonal Maintenance Schedule
Spring tasks focus on preparation for the growing season. Inspect all netting for winter damage—look for tears, holes, and areas where netting has sagged or stretched. Check frame connections and tighten any that have loosened. Clear any debris that accumulated over winter and ensure door mechanisms operate smoothly.
Summer responsibilities center on monitoring and responding to issues. Regularly check that netting remains properly secured, particularly after storms. Ensure plants aren’t growing into or through the netting, which causes damage to both plants and covering. Monitor for any pest intrusions and address gaps immediately.
Autumn maintenance prepares your cage for winter stress. Remove any accumulated plant debris from the netting surface. For areas with heavy snowfall, consider removing roof netting to prevent snow load damage, replacing it with coarser mesh that sheds snow while still providing basic protection.
Winter attention includes periodic checks during thaws to assess any storm damage. After significant weather events, verify the frame remains stable and netting intact.
Repair and Replacement Best Practices
Address small netting tears immediately before they expand. Repair kits and netting patches provide quick fixes for minor damage. For larger tears or general netting deterioration, full panel replacement proves more effective than extensive patching.
Frame component replacement should address any rust, rot, or structural weakness before failure occurs. Most kit manufacturers offer replacement parts, and DIY builders can source comparable materials from hardware suppliers.
Common Mistakes and How to Avoid Them
Learn from others’ errors to ensure your fruit cage succeeds from the start.
Even experienced gardeners sometimes make avoidable mistakes during fruit cage installation and maintenance. Awareness of these common pitfalls helps you sidestep frustration and wasted resources.
Installation Errors
Insufficient anchoring leads to structural failure during storms. Ensure your cage is properly secured to the ground using appropriate anchors for your soil type and local wind conditions. Sandy soils may require longer, screw-type anchors, while clay soils often hold traditional posts well.
Neglecting proper tensioning results in saggy netting that birds can push aside or become entangled in. Maintain firm, even tension throughout all netting panels, checking and adjusting periodically as materials naturally relax over time.
Forgetting pollinator access during blooming periods defeats the fruit cage’s purpose—no pollination means no fruit. Plan for temporary netting removal or install bee-friendly access points that allow beneficial insects to reach flowers.
Ongoing Management Oversights
Ignoring plant spacing requirements within the cage leads to overcrowding, reduced airflow, and increased disease pressure. Follow recommended spacing even though the cage feels spacious initially—mature plants need room.
Failing to rotate or maintain soil health treats the fruit cage as a closed system immune to typical garden requirements. Continue regular fertilization, composting, and soil amendment practices within your protected area.
Advanced Strategies for Maximizing Your Fruit Cage
Elevate your fruit cage from simple protection to a high-performance growing environment.
Once you’ve mastered basic fruit cage operation, advanced techniques can further enhance productivity and gardening satisfaction.
Companion Planting Within Fruit Cages
Strategic companion planting improves pest management and plant health even within protected environments. Incorporate pollinator-attracting flowers like borage, calendula, or phacelia to encourage beneficial insects when netting is temporarily opened or features bee-access panels.
Aromatic herbs such as mint, thyme, and lavender planted around the cage perimeter or in corner spaces can deter some crawling insects while adding culinary value to your garden. These companions also attract beneficial predatory insects that control aphids and other pests.
Integrating Irrigation and Growing Systems
Drip irrigation installation within your fruit cage ensures consistent moisture delivery while minimizing disease risk from overhead watering. Plan irrigation lines during initial construction for easiest installation, running supply lines under the netting edge.
Mulching systems work particularly well within fruit cages, as the protected environment allows undisturbed mulch layers to build and benefit soil health over time. Consider permanent living mulches like clover or chamomile that provide ongoing ground cover between fruit plants.
Final Thoughts: Your Path to Fruit Growing Success
Mastering fruit cage gardening transforms your relationship with soft fruit cultivation. No longer will you watch helplessly as birds claim the harvest you’ve worked months to produce. Instead, you’ll enjoy the deeply satisfying experience of picking sun-ripened berries at their peak perfection, knowing that your investment in protection has paid dividends many times over.

The key principles to remember:
-
Plan thoroughly before purchasing materials or beginning construction. Proper planning prevents costly mistakes and ensures your fruit cage meets both current and future needs.
-
Invest in quality materials that will withstand years of weather exposure and use. Economy materials often prove expensive when premature replacement becomes necessary.
-
Maintain consistently with seasonal attention that prevents minor issues from becoming major problems. A well-maintained fruit cage serves reliably for decades.
-
Grow strategically by focusing on high-value fruits that benefit most from protection while utilizing advanced techniques to maximize your enclosed environment’s potential.
Your fruit cage represents more than a physical structure—it’s a commitment to successful, sustainable home fruit production. Whether you choose a modest low-profile cover for your strawberry patch or invest in an expansive walk-in cage housing an entire soft fruit garden, the principles outlined in this guide will serve you well.
Begin your fruit cage journey today, and next harvest season, you’ll wonder how you ever gardened without one. The sweet taste of success—and perfectly protected berries—awaits.