Table of Contents
- How Are Onions Grown? Your Complete Guide to Cultivating This Garden Essential
- Understanding Onion Varieties and Day-Length Requirements
- Choosing Between Seeds, Sets, and Transplants
- Seeds: Maximum Variety, Minimum Cost
- Sets: Easy, Fast, and Beginner-Friendly
- Transplants: The Middle Ground
- Preparing Your Soil for Optimal Onion Growth
- Planting Your Onions: Timing and Techniques
- Caring for Growing Onions Throughout the Season
- Watering: Consistency Is Key
- Fertilizing: Feeding for Bulb Development
- Weeding: Keep Competition at Bay
- Dealing with Bolting
- Harvesting Your Onion Crop
- Curing and Storing Your Harvest
- Curing: The Critical Step Most Gardeners Skip
- Preparing Onions for Storage
- Storage Conditions and Methods
- Common Problems and How to Solve Them
- Companion Planting and Crop Rotation
- Final Thoughts: Growing Your Best Onion Crop
How Are Onions Grown? Your Complete Guide to Cultivating This Garden Essential
If you’ve ever wondered how those perfectly round, paper-skinned onions make their way from tiny seeds to your dinner table, you’re about to discover one of gardening’s most rewarding and accessible adventures. Growing onions is surprisingly simple, making them an ideal crop for both novice gardeners taking their first steps into vegetable cultivation and experienced growers looking for a reliable, high-yield addition to their gardens. Whether you’re dreaming of sweet Vidalias for your summer salads, pungent storage onions to last through winter, or vibrant red onions for grilling, understanding the fundamentals of onion cultivation will transform your gardening success and fill your kitchen with fresh, flavorful bulbs for months to come.
Onions have been cultivated for at least 7,000 years, with their origins spanning from Iran to Central Asia, and today they remain one of the most widely grown vegetables worldwide. What makes onions particularly special for home gardeners is their versatility—they can be harvested at nearly any size, they store exceptionally well when properly cured, and they require relatively little space compared to the abundant harvest they provide. Beyond their culinary importance, onions are remarkably adaptable, thriving in various climates and growing conditions when you match the right variety to your location. This comprehensive guide will walk you through every step of the onion-growing journey, from selecting the perfect variety for your region to harvesting and storing your bounty for year-round enjoyment.
Understanding Onion Varieties and Day-Length Requirements
Before you plant a single onion, understanding the critical concept of day-length sensitivity will determine your success or failure in the garden. This section covers approximately 200-300 words of essential information about choosing the right onion type for your specific location.
Onions are photoperiodic plants, meaning they form bulbs in response to the number of daylight hours they receive. This biological clock is programmed into their genetics, making variety selection one of the most crucial decisions you’ll make as an onion grower. The three main categories—short-day, long-day, and intermediate (day-neutral) onions—each require different amounts of daylight to trigger bulb formation, and planting the wrong type in your region will result in disappointing, undersized bulbs no matter how perfectly you care for them.
Short-day onions are specifically bred for southern gardeners living between latitudes 25° and 35° north, which includes most of the southern United States. These varieties begin forming bulbs when days reach just 10-12 hours of sunlight, typically in late winter or early spring in southern climates. Popular short-day varieties include the famous ‘Texas 1015Y Supersweet’ (the number refers to the ideal planting date of October 15th), ‘Red Creole’ with its pungent flavor and excellent storage qualities, and ‘Southern Belle’ with its beautiful ruby-red color throughout. In the South, short-day onions are commonly planted in fall and allowed to overwinter, growing slowly through the cooler months and maturing for harvest in spring. This extended growing period, combined with mild temperatures, produces the characteristically sweet, mild-flavored onions that southern regions are famous for, such as Vidalia onions from Georgia.
Long-day onions thrive in northern latitudes between 37° and 47° north, requiring 14-16 hours of daylight to initiate bulb formation. These varieties are perfect for gardeners in northern states and Canada, where summer days stretch long into the evening. If you plant short-day onions in these northern regions, they’ll never receive the signal to form bulbs properly, resulting in plants that remain small and never develop the large, storage-worthy bulbs you’re hoping for. Excellent long-day varieties include ‘Copra’, known for exceptional storage life lasting well into spring, ‘Walla Walla’, producing huge, sweet bulbs perfect for fresh eating, ‘Red Wethersfield’, a reliable heirloom with flattened red bulbs, and ‘Yellow Sweet Spanish’, offering large, mild bulbs excellent for a wide range of culinary uses. These varieties are typically planted in early spring and harvested in late summer to early fall.
Intermediate or day-neutral onions offer flexibility for gardeners in the middle tier of the United States, roughly between latitudes 32° and 42° north. These versatile varieties begin bulbing when days reach 12-14 hours, making them suitable for transitional zones where neither strictly short-day nor long-day varieties perform optimally. Varieties like ‘Candy’, producing sweet golden bulbs that store well, ‘Super Star’ with large white bulbs, and ‘Red Stockton’ are excellent choices for these regions. Some gardeners in these intermediate zones successfully grow both long-day and short-day varieties by carefully timing their plantings, though day-neutral varieties typically provide the most consistent results with the least risk of bolting or poor bulb formation.
Choosing Between Seeds, Sets, and Transplants

This brief section of 30-50 words introduces the three main starting methods available to onion growers and their respective advantages.
The method you choose for starting your onions significantly impacts your timeline, budget, variety selection, and ultimate success. Understanding the pros and cons of each approach helps you make the best decision for your gardening situation.
Seeds: Maximum Variety, Minimum Cost
Growing onions from seed offers the most economical approach and provides access to the widest variety selection available. While seed catalogs may list dozens or even hundreds of onion varieties in every color, size, and flavor profile imaginable, your local garden center will stock only a handful of the most popular set varieties. Starting from seed costs just a few dollars for enough plants to fill a substantial garden bed, whereas purchasing the equivalent number of sets or transplants would cost considerably more. However, growing from seed requires more time, attention, and planning than other methods, making it better suited to gardeners comfortable with seed-starting techniques.
For successful seed starting, begin indoors 8-10 weeks before your last expected spring frost date, which typically means sowing in late winter (January through March for most regions). Use modular trays filled with quality seed-starting mix, sowing seeds about 1/4 inch deep. Some growers sow one seed per cell for individual transplants, while others practice “multi-sowing” by planting 3-4 seeds per cell, which are later transplanted as a cluster that produces several smaller onions rather than one large bulb. Seeds germinate best with consistent moisture and temperatures around 70°F (21°C), typically sprouting within 7-14 days with fresh seed. Place seedlings under grow lights or in a very bright, sunny window, keeping them at moderate room temperatures.
Onion seedlings grow slowly and require patient care over their indoor period. Keep the soil consistently moist but never waterlogged, and feed with diluted liquid fertilizer every two weeks once seedlings have developed their second set of leaves. Many growers trim onion seedlings to about 4-5 inches tall while they’re growing indoors, which may seem counterintuitive but actually encourages stronger root development and makes the plants easier to manage under lights. Before transplanting outdoors, seedlings must be properly hardened off over 7-10 days, gradually exposing them to outdoor conditions to prevent transplant shock. Direct seeding outdoors is also possible in early spring once soil is workable, sowing seeds 1/4 to 1/2 inch deep in rows, then thinning to proper spacing, though this method is less common as germination can be slow and patchy in cool soil.
Sets: Easy, Fast, and Beginner-Friendly
Onion sets—small, dormant bulbs typically about 1/2 to 3/4 inch in diameter—represent the most popular method for home gardeners, and for good reason. Sets are essentially onions that were grown from seed the previous season, harvested when immature, then dried and held dormant over winter for replanting. They provide an instant head start over seeds, establishing quickly and reliably with minimal care or expertise required. If you can poke a hole in the ground, you can successfully grow onions from sets. They’re widely available at garden centers, hardware stores, and farm supply stores every spring, usually packaged in mesh bags of 50-100 sets, making them convenient and accessible for most gardeners.
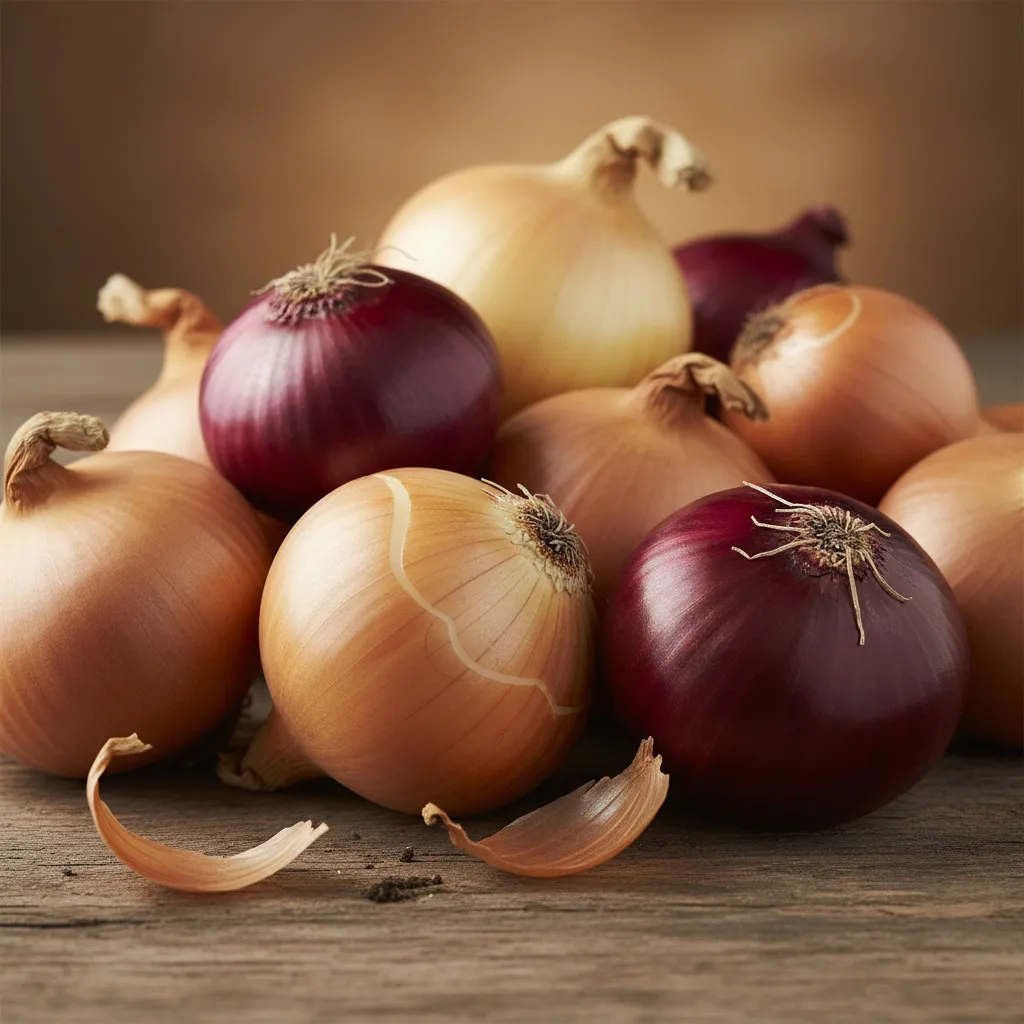
However, sets do have some limitations compared to seeds. First, variety selection is severely restricted—you’ll typically find only basic yellow, white, and red varieties, often with no specific cultivar name listed. Second, sets are more prone to bolting (premature flowering) than seed-grown plants, especially larger sets or those exposed to temperature fluctuations. When onions bolt, they send up a flower stalk and stop developing their bulbs, making them unusable for storage though still edible if harvested immediately. To minimize bolting risk, look for heat-treated sets, which have been exposed to specific temperature cycles that reduce the likelihood of flowering, and choose sets no larger than a dime or about 3/4 inch in diameter—larger sets are more likely to bolt. Despite these drawbacks, sets remain the best choice for beginning gardeners or anyone wanting a simple, reliable onion crop without the fuss of indoor seed starting.
Transplants: The Middle Ground
Onion transplants or “plants” represent a middle ground between seeds and sets, offering some advantages of each. These are onions grown from seed earlier in the current season, then sold as young plants with green tops and established root systems, typically bundled in groups of 50-75 plants. Unlike sets, which are dormant bulbs from the previous year, transplants are actively growing plants from the current season’s seed crop. They establish quickly like sets but are less prone to bolting than sets, while offering better variety selection than sets though not as extensive as seeds. Transplants are commonly sold through mail-order suppliers and some garden centers in spring.
Many experienced growers prefer transplants over sets specifically because they produce more consistently sized, higher-quality bulbs with lower bolting rates. Companies like Dixondale Farms in Texas specialize in growing and shipping onion plants nationwide, timed for planting in your specific region. When transplants arrive, they may look somewhat wilted or stressed from shipping, but they typically recover quickly once planted and watered. Before planting, trim the roots to about 2 inches and the tops to about 4 inches to reduce transplant shock and make handling easier. Plant them at the same depth and spacing as sets, and water them in thoroughly. Within days, they’ll perk up and begin establishing themselves in your garden.
Preparing Your Soil for Optimal Onion Growth
This 30-50 word introduction explains why soil preparation is foundational to onion success and sets up the detailed information to follow.
Onions are somewhat demanding crops when it comes to soil conditions, and proper preparation before planting dramatically impacts your final harvest size and quality. Taking time to create ideal growing conditions pays dividends throughout the season.
The foundation of successful onion growing begins with selecting the right location and thoroughly preparing your soil. Onions absolutely must have full sun—at least 6-8 hours of direct sunlight daily, though more is better. The more solar energy your onion plants can capture through photosynthesis, the larger their bulbs will grow, so avoid planting them where they’ll be shaded by taller crops like tomatoes, corn, or trellised beans. Choose a spot with excellent drainage, as onions will not tolerate waterlogged conditions, which quickly lead to rot. Raised beds are ideal for onion cultivation, as they provide superior drainage and warm up earlier in spring, giving your crop a head start. If you’re gardening in-ground, consider creating raised rows by mounding soil 4-6 inches high, which improves drainage in heavier soils.
Soil texture and fertility matter enormously for onions. These vegetables perform best in loose, well-draining soil—sandy loam to silt loam is ideal—rather than heavy clay, which compacts easily and restricts both drainage and root development. Because onions have relatively shallow, inefficient root systems that don’t travel far in search of nutrients or water, they need resources readily available in the immediate root zone. Several weeks before planting, work 2-3 inches of high-quality compost, well-aged manure, or other organic matter into the top 6-8 inches of soil. This amendment serves multiple purposes: it adds essential nutrients, improves soil structure and drainage in clay soils, increases water-holding capacity in sandy soils, and encourages beneficial microbial activity. Never use fresh manure, as it may contain harmful pathogens, increase weed problems, and can burn plant roots.
Test your soil pH, aiming for a range between 6.0 and 6.8—onions strongly prefer slightly acidic to neutral soil and perform poorly in highly acidic conditions. If your pH is too low (too acidic), incorporate lime according to soil test recommendations several months before planting, as lime takes time to alter pH. If your soil is too alkaline (above 7.0), sulfur can gradually lower pH, though this is less commonly needed. Onions require significant amounts of phosphorus for root development and potassium for bulb formation, though many soils already contain adequate phosphorus. Apply phosphorus and potassium according to soil test recommendations, or work in a balanced organic fertilizer like 5-5-5 at planting time. Because onions are heavy nitrogen feeders, plan to provide additional nitrogen throughout the growing season, but avoid over-application, which can result in lush foliage at the expense of bulb development, plus soft bulbs that don’t store well and thick necks that are difficult to cure.
Planting Your Onions: Timing and Techniques
Proper planting timing and technique set the stage for your entire onion-growing season, making these details crucial to master for the best results.
Timing your onion planting correctly is essential because these crops need adequate time to develop strong foliage before day-length triggers bulb formation. For spring-planted onions (most common in northern regions), plant sets or transplant seedlings in early spring, typically 2-4 weeks before your last expected frost date, once soil temperature reaches at least 50°F (10°C) and the ground is workable. In many northern zones, this means planting in late March through April, though you can plant as late as early May if necessary. Because onions are remarkably cold-hardy, tolerating temperatures down to 28°F (-2°C) once established, early planting is not only safe but beneficial, giving plants maximum time to grow. Autumn planting is also possible in many regions using specific overwintering or Japanese varieties, planted in October or November in areas with mild winters. These autumn-planted onions establish roots before winter, remain semi-dormant during cold months, then resume vigorous growth in early spring for harvest in June or early July—several weeks earlier than spring-planted crops.
When planting onion sets, create shallow furrows or individual holes about 2 inches deep using a dibber, hoe, or even your finger. Place sets with the pointed end facing up (this is where the shoots will emerge) and the root end down, spacing them 4-6 inches apart within rows, with rows spaced 12-18 inches apart. Closer spacing of 4 inches produces more onions but smaller individual bulbs, while wider spacing of 6 inches yields fewer but larger bulbs—choose based on your preference. Some gardeners plant some sets more densely at 2-3 inch spacing specifically for harvesting as scallions or small green onions, which naturally thins the row and provides space for remaining onions to bulk up. Push sets gently into loose soil or place them in furrows, then cover with soil so just the tip is barely visible at the surface—planting too deep can inhibit bulb development. Firm the soil gently around each set and water thoroughly to settle them in.
For transplants (whether seed-grown or purchased plants), trim roots to about 2 inches and tops to about 4 inches before planting to reduce stress and make handling easier. Dig a shallow trench or individual holes about 2-3 inches deep, place transplants at the same spacing as sets, then backfill with soil, covering the white portion of the stem but not burying the point where green leaves emerge. The crown (where leaves meet the roots) should be about 1 inch below the soil surface. Don’t worry if transplants initially lean or flop over—they’ll straighten themselves within a few days. Water transplants thoroughly after planting and provide consistent moisture for the first week to encourage rapid establishment. If you’re growing onions in containers, choose pots at least 10 inches deep and as wide as possible, fill with quality potting mix enriched with compost, and plant sets or transplants at the same spacing described above. A 5-gallon bucket can accommodate 4-6 onions, while larger containers hold many more.
Protect newly planted sets from birds, which inexplicably love pulling them out of the ground. Cover the planting area with lightweight horticultural fleece, netting, or floating row cover until sets have rooted firmly, usually about 7-10 days. Remove any sets that get pulled up and gently replant them immediately—they’ll usually recover fine if replanted promptly. This simple protection step can prevent frustrating losses in the critical early establishment period.
Caring for Growing Onions Throughout the Season
This section’s brief 30-50 word introduction emphasizes that while onions are relatively low-maintenance, consistent attention to a few key care practices ensures the best harvest.
Once established, onions don’t require intensive daily care, but they do need consistent attention in several areas to develop those large, beautiful bulbs you’re hoping for.
Watering: Consistency Is Key
Onions have shallow, rather inefficient root systems that don’t extend deep into the soil or spread widely in search of moisture. This biological limitation means they rely entirely on consistent moisture in the top 6-8 inches of soil and can’t recover well from drought stress, even though they may survive and resume growth once watered. For optimal bulb development, onions need approximately 1 inch of water per week from combined rainfall and irrigation. In sandy soils that drain quickly, you may need to water more frequently—perhaps twice weekly—while clay soils retain moisture longer. Use a rain gauge to track natural rainfall and supplement with irrigation when weekly totals fall short.
The best watering method directs moisture to the soil rather than wetting foliage, as wet leaves encourage fungal diseases like downy mildew and rust. Drip irrigation or soaker hoses work beautifully for onions, delivering consistent moisture directly to root zones while keeping foliage dry. If you’re hand-watering, direct the stream at the soil level between plants. Water deeply enough to wet the soil to 6-8 inches deep—shallow, frequent watering encourages shallow roots and weaker plants. Check moisture levels by pushing your finger into the soil; if it’s dry an inch below the surface, it’s time to water. Applying 2-3 inches of organic mulch like straw, grass clippings (from lawns not treated with herbicides), or shredded leaves between rows helps retain soil moisture, suppress weeds, and moderate soil temperatures, though keep mulch pulled back from the bulbs themselves once they begin swelling above the soil surface, as the tops benefit from exposure to sun and air.
Timing matters when it comes to watering onions. Consistent moisture is critical during the early and middle parts of the growing season when plants are developing foliage and beginning to form bulbs. However, once bulbs have reached full size and foliage begins to yellow and tip over—signs that the crop is approaching maturity—stop watering entirely. This dry-down period allows the neck (the stem above the bulb) to naturally shrink and seal, which is essential for proper curing and long-term storage. Continuing to water mature onions can result in soft necks that don’t cure properly and bulbs that rot quickly in storage.
Fertilizing: Feeding for Bulb Development
Because onions are heavy feeders with limited root systems, they benefit from supplemental fertilization throughout the growing season, particularly nitrogen in the early stages. If you’ve properly prepared your soil with compost or aged manure before planting, your onions will have a good nutrient foundation. However, many growers find that additional feeding boosts yields significantly. For autumn-planted onions, apply a nitrogen-rich organic fertilizer in late winter or very early spring to jumpstart growth as plants emerge from dormancy. This early feeding is particularly important and can also help reduce premature bolting by promoting vigorous vegetative growth.
Through the growing season, you can side-dress onions with additional fertilizer once or twice, typically about 4-6 weeks after planting and again 4-6 weeks later. Side-dressing means applying fertilizer alongside plant rows rather than directly on top of roots. Use a nitrogen-rich fertilizer like blood meal, feather meal, or a balanced organic vegetable fertilizer at rates recommended on the package. Create a shallow trench about 6 inches from the onion row, sprinkle the fertilizer into the trench, cover it with soil, and water thoroughly to begin dissolving nutrients for root uptake. Alternatively, use liquid fertilizers like fish emulsion or compost tea, diluted according to package directions and applied as a soil drench every 2-3 weeks during active growth. Be cautious not to over-fertilize with nitrogen, especially in the latter part of the growing season, as excessive nitrogen produces lush green growth at the expense of bulb development, results in thick necks that resist curing, and creates soft bulbs with poor storage qualities.
Cease all fertilization about 4 weeks before your expected harvest date, typically in mid-to-late summer. This allows plants to naturally redirect energy from foliage growth into bulb maturation and begin the process of sealing the neck, both of which are crucial for proper curing and storage. Think of fertilization as supporting a race car through most of the race, then backing off as it approaches the finish line to coast across in the best position.
Weeding: Keep Competition at Bay
Meticulous weed control is absolutely essential for successful onion growing, perhaps more so than for many other vegetables. Because onion foliage is thin and upright, casting minimal shade, and because onion roots are shallow and localized, weeds easily outcompete onions for light, water, and nutrients. Even moderate weed pressure can reduce your harvest by 50% or more, as onion bulbs simply won’t size up properly when competing with aggressive weeds. Begin controlling weeds before planting by clearing the bed thoroughly, and maintain vigilant weed management throughout the entire season for best results.
Hand-pulling weeds is the safest method near onion bulbs, as cultivation tools can easily damage the shallow roots or nick the developing bulbs—any injury creates entry points for disease organisms and reduces storage quality. If you use a hoe for weeding, work very carefully and stay several inches away from the onion plants themselves, making shallow cuts just below the soil surface in the row middles. Never hoe deeply near onions, as you’ll damage their limited root systems. The 2-3 inch mulch layer mentioned earlier does double-duty by suppressing weed germination and growth, significantly reducing your weeding workload. Maintain a weed-free zone around each plant extending at least 3-4 inches in all directions.
Stay on top of weeding by walking through your onion patch at least weekly, removing any small weeds before they become established. This regular attention takes just minutes and prevents the hours-long weeding sessions that result when you let weeds get ahead of you. Small weeds are also much easier to remove, as they haven’t yet developed extensive root systems that compete with your onions. Think of frequent, quick weeding sessions as preventive maintenance that protects your investment of time and garden space.
Dealing with Bolting
Occasionally, some onion plants will send up a thick, hollow flower stalk topped with a rounded flower bud—this is called bolting, and it’s one of the most common frustrations onion growers face. Bolting occurs when plants are exposed to certain environmental triggers (typically cold temperatures followed by warmth, or stress) that convince them they’ve completed a full growing cycle and should now flower and set seed. Once an onion bolts, the bulb stops enlarging and develops a hard, woody core as the plant redirects all its energy into flower and seed production. Bolted onions won’t store well and should be harvested and used immediately, though they’re still perfectly edible if you cut away the tough central core.
As soon as you notice flower stalks forming (they’ll emerge from the center of the foliage and quickly shoot upward), snap or cut them off at the base. Removing the flower stalk immediately sometimes allows the plant to redirect at least some energy back into the bulb, and it prevents seed formation that further drains resources. Heat-treated onion sets bolt far less frequently than untreated sets, which is why they’re worth seeking out. Onions grown from seed or transplants generally bolt less often than sets. Consistent watering and fertilization help reduce stress-induced bolting. Despite your best efforts, some bolting is inevitable in most growing seasons—chalk it up to the unpredictability of gardening, harvest those bulbs early, and focus your attention on the majority that are developing properly.
Harvesting Your Onion Crop
This 30-50 word introduction emphasizes the satisfaction of harvest and the importance of proper timing for both immediate use and storage success.
After months of careful tending, harvest time brings the rewarding moment when you finally see the results of your efforts. Knowing when and how to harvest ensures the best quality and storage potential.
One of the delightful aspects of growing onions is that they can be harvested and enjoyed at virtually any stage of development. You can pull young onions just a few weeks after planting to use as scallions or green onions—these immature plants offer mild flavor and tender texture perfect for salads, garnishes, or grilling. As the season progresses and bulbs begin swelling, you can harvest “summer” onions at any size for immediate fresh use, perhaps selecting a few whenever you need onions for a particular recipe. This gradual harvesting approach extends your fresh onion season over many weeks and naturally thins your planting, giving remaining onions more space and resources to continue expanding. However, if your goal is to grow onions for storage—and this is the primary reason most gardeners grow them—you must wait until they’ve reached full maturity and properly signal their readiness.
The clear sign that storage onions are ready to harvest comes from the foliage: when approximately half to two-thirds of the plants have tops that yellow and naturally bend over at the neck (the stem just above the bulb), your crop has reached maturity. This toppling happens because the neck tissue softens and can no longer support the weight of the foliage, and it’s a crucial part of the bulb’s natural ripening process. The bent neck begins to shrink and seal, which eventually protects the bulb from moisture entry and rot organisms—essential for successful storage. Timing your harvest properly means watching for this toppling to begin but harvesting before foliage completely dies back and turns brown. In most regions, this occurs in mid-to-late summer for spring-planted onions (typically August or September) or early-to-mid summer for autumn-planted varieties (June or July).
Once you’ve determined that your crop is ready, choose a dry, sunny day for harvesting if at all possible—wet conditions at harvest can introduce moisture and disease organisms that compromise storage. Stop watering the onion bed a week or two before harvest to allow the soil to dry somewhat, making harvest easier and encouraging the necks to finish sealing. To harvest, gently loosen the soil around bulbs using a digging fork (also called a garden fork or spading fork), inserting it several inches away from the plants and carefully lifting to break roots without stabbing or bruising the bulbs. Handle onions very carefully throughout harvest, as any cut, bruise, scrape, or damage creates an entry point for rot and drastically reduces storage life—damaged onions should be set aside for immediate use rather than storage.
Once loosened, gently pull bulbs from the soil, shake off excess dirt (don’t wash them, as moisture interferes with curing), and lay them in a single layer on the soil surface if weather permits. This initial field curing in full sun for several days helps dry the outer skins and start the curing process. If rain threatens or conditions are very humid, move the onions immediately to a covered, well-ventilated area like a garage, porch, greenhouse, or shed. Leave the foliage attached at this stage—do not cut it off yet, as nutrients and moisture continue moving from the leaves into the bulb during early curing.
Curing and Storing Your Harvest
This brief 30-50 word introduction explains that proper post-harvest handling determines whether your onions last weeks or months, making these steps as important as everything that came before.
The difference between onions that rot within weeks and those that last through winter comes down to proper curing and storage—processes that are simple but non-negotiable for success.
Curing: The Critical Step Most Gardeners Skip
Curing is the process of drying onions thoroughly after harvest, allowing the outer skins to become papery, the necks to shrink and seal completely, and excess moisture to evaporate from the bulb. This step is absolutely essential for storage onions but is often misunderstood or inadequately done, leading to premature rot and disappointing losses. Properly cured onions can last 4-8 months in storage, while poorly cured onions may rot within 4-8 weeks, so taking time to cure correctly is one of the best investments you can make.
For optimal curing, spread your harvested onions in a single layer (bulbs should not touch each other) in a location with excellent air circulation, protection from rain and dew, warm temperatures (ideally 75-85°F/24-29°C), and low humidity. Slatted wooden racks, wire cooling racks, old window screens propped up on blocks, or even the rungs of an old ladder work well, as they allow air to circulate beneath and around the bulbs. A covered porch, open garage with doors raised for airflow, greenhouse with vents open, well-ventilated shed, or a shaded area outdoors under a roof overhang are all suitable curing locations. If curing outdoors, the onions must be protected from rain and heavy dew—even brief exposure to moisture can restart rot processes you’re trying to prevent.
Allow onions to cure for 2-4 weeks, depending on the size of the bulbs, weather conditions, and how dry they were at harvest. Check them periodically, looking for signs that curing is complete: the outer skins should be completely dry, crisp, and papery (like tissue paper), making a distinctive crackling or rustling sound when touched; the necks should be thoroughly dry, tight, and shriveled; and the roots should be dry, wiry, and crispy. The neck is the last part to dry and the most critical—a thick, soft, or “green” neck indicates incomplete curing and means the onion won’t store well. You can test readiness by gently pulling on the foliage; if properly cured, the tops will pull away cleanly.
Preparing Onions for Storage
Once curing is complete, prepare your onions for long-term storage by removing excess soil (brush gently; don’t wash), trimming the roots close to the bulb base with clean pruning shears or scissors, and cutting the dried tops to leave 1-2 inches of stem above the bulb. Some growers prefer to leave tops longer (4-6 inches) for braiding onions together, which is both decorative and functional. Remove any loose, flaky outer skin layers if they’re falling off, but leave the papery skins intact—these protect the onion in storage. Sort through your cured onions and separate any with soft spots, damage, thick necks that didn’t dry properly, or any signs of sprouting or rot. These imperfect specimens should be used immediately rather than stored, as they’ll quickly spoil and potentially spread rot to neighboring bulbs.
Storage Conditions and Methods
Store cured onions in a cool (35-50°F/2-10°C is ideal), dark or dimly lit, dry (humidity below 65% if possible), and well-ventilated location. Basements, root cellars, unheated spare rooms, attached garages, or even closets can work if they meet these conditions. Avoid storing in refrigerators (too humid), sealed containers (inadequate air circulation), or warm rooms (promotes sprouting). Good air circulation around each bulb prevents moisture buildup and condensation that encourage rot.
Effective storage methods include placing onions in mesh bags or net bags hung from hooks or ceiling, arranging them in shallow boxes or wooden crates in a single layer or two shallow layers at most, spreading them on slatted shelves, or braiding the stems together and hanging the braids. Never pile onions deeply or store them in solid containers without ventilation. Check stored onions every week or two, removing any that show signs of softening, sprouting, or rot immediately to prevent spread to healthy bulbs.
Sweet onions and those varieties bred for fresh eating rather than storage have higher water content and don’t store as long as traditional pungent storage varieties—plan to use these within 1-3 months. Traditional storage onions like ‘Copra’ or ‘Stuttgarter’ can easily last 6-8 months or even longer when ideally stored. Shallots often store even better than onions, sometimes lasting 8-10 months. Under good conditions, you can enjoy your homegrown onions well into the following spring, when the cycle begins again with a new planting.
Common Problems and How to Solve Them
This 30-50 word introduction acknowledges that while onions are relatively trouble-free compared to many vegetables, knowing how to prevent and address potential issues ensures success.
Onions face fewer pest and disease challenges than many crops, but several issues can arise that home gardeners should recognize and manage appropriately.
Onion thrips are tiny (almost microscopic) insects that suck sap from onion foliage, causing silvery streaks, distorted growth, and weakened plants. To check for thrips, hold a dark piece of paper under onion leaves and shake the foliage—if thrips are present, you’ll see tiny tan-colored, rice-shaped insects on the paper. Control thrips with insecticidal soap applied twice, three days apart, covering all leaf surfaces thoroughly. Floating row covers installed at planting time exclude thrips and other pests entirely.
Onion maggots are the larvae of a fly that lays eggs at the base of onion plants. The white maggots tunnel into roots and bulbs, causing wilting and plant death. Prevention is easier than cure: cover young plants with floating row covers to exclude adult flies, avoid planting onions where alliums grew the previous year, and keep mulch away from plant bases (maggots favor decaying organic matter). Remove and destroy any infested plants immediately.
White rot is a serious fungal disease causing yellowed, wilting foliage and white fungal growth on bulb bases, eventually producing small black structures (sclerotia) that persist in soil for many years. No cure exists—remove and destroy affected plants (do not compost), and avoid growing onions or related crops in that location for at least 8-10 years. This disease emphasizes the importance of crop rotation.
Neck rot (Botrytis) affects onions in storage, causing gray mold and rot starting at the neck. Prevention includes proper curing, gentle handling to avoid damage, and good air circulation in storage. Discard affected bulbs immediately.
Downy mildew causes pale patches on leaves that develop fuzzy purple-gray fungal growth in humid conditions. Improve air circulation, avoid wetting foliage, and remove severely affected plants. Plant resistant varieties when available.
Bolting (premature flowering) can be minimized by using heat-treated sets, planting at the correct time, maintaining consistent soil moisture, and selecting bolt-resistant varieties.
Companion Planting and Crop Rotation
This brief 30-50 word introduction explains how strategic plant placement can improve onion health and protect other vegetables while emphasizing the importance of rotation.
Smart garden planning through companion planting and crop rotation helps onions thrive while naturally managing pests and maintaining soil health season after season.
Onions make excellent companion plants for many vegetables because their strong odor deters numerous pests. Plant onions near brassicas (broccoli, cabbage, kale, cauliflower) to discourage cabbage worms and cabbage root maggots; near lettuce and greens to repel aphids; among carrots to deter carrot flies; alongside tomatoes, peppers, and strawberries to help ward off aphids and other pests; and near beets and other root crops. Many gardeners interplant marigolds or chamomile with onions for additional pest deterrence. Herbs like dill and chamomile planted nearby can enhance onion growth and flavor. Parsley planted among onions may help repel onion flies.
However, avoid planting onions near beans (both bush and pole types), peas, asparagus, and sage, as these combinations can stunt growth or negatively affect flavor. Don’t plant different allium family members (onions, garlic, leeks, shallots) together, as they share diseases and pests that can easily spread throughout the planting.
Practice crop rotation by avoiding planting onions (or any allium family members) in the same location more than once every 3-4 years. This simple practice prevents the buildup of soil-borne diseases and pests specific to onions, maintains soil fertility by varying nutrient demands, and disrupts pest life cycles that depend on finding host plants in the same location year after year.
Final Thoughts: Growing Your Best Onion Crop
Growing onions successfully is ultimately about understanding their specific needs and providing consistent care through the long growing season. These remarkable plants tie the seasons together, from early spring planting through summer growth and fall harvest, and into winter storage when your cured onions continue providing fresh flavor long after the garden sleeps under snow. Whether you’re growing sweet red onions for summer salads, pungent yellow storage onions to last through winter, or specialized varieties for specific culinary purposes, the principles remain the same: choose the right variety for your day-length and climate, prepare soil thoroughly, plant at the correct time and depth, provide consistent moisture and nutrition, keep weeds at bay, harvest at proper maturity, and cure completely before storage.
The beauty of onion growing lies in its simplicity and reliability—these are crops that reward attention without demanding perfection. Even beginning gardeners can achieve satisfying harvests with basic care, while experienced growers can push yields higher through fine-tuning of techniques. Each season brings opportunities to try new varieties, experiment with planting times, or improve your curing and storage methods. The cycle repeats year after year, and with each repetition, your confidence and skill grow along with your bulbs.
Start small if you’re new to onion growing—perhaps just 50 sets or one packet of seeds—and expand as you learn what works in your specific conditions. Pay attention to what succeeds and what struggles, and adjust accordingly in future seasons. Before long, you’ll find yourself anticipating onion planting season as enthusiastically as tomato time, appreciating these humble vegetables for the foundational ingredient they are in countless dishes. There’s profound satisfaction in walking to your basement or pantry in February, selecting a perfectly cured onion from your own harvest, and knowing that your summer’s work continues feeding you through winter’s deepest cold. That connection to the full cycle of growth, harvest, and nourishment is what makes growing onions—and all gardening—so deeply rewarding. Now get out there and grow some onions!


![What Is the National Fruit of Afghanistan and Why? [ANSWERED]](https://fruitonix.com/wp-content/uploads/2023/04/pomegranate.webp)