Table of Contents
- How Do You Cross Pollinate? A Complete Guide to Mastering This Essential Gardening Technique
- Understanding Cross-Pollination Fundamentals
- The Natural Mechanisms Behind Cross-Pollination
- Essential Tools and Materials for Hand Pollination
- Step-by-Step Guide to Cross-Pollinating Different Plant Types
- Cross-Pollinating Fruit Trees
- Hand-Pollinating Vegetables With Separate Male and Female Flowers
- Cross-Pollinating Self-Pollinating Plants
- Timing and Environmental Considerations for Successful Cross-Pollination
- Preventing Unwanted Cross-Pollination in the Garden
- Recognizing Successful Pollination and What Comes Next
- Common Challenges in Cross-Pollination and Solutions
- Advanced Cross-Pollination Techniques for Plant Breeding
- Key Takeaways: Mastering Cross-Pollination in Your Garden
How Do You Cross Pollinate? A Complete Guide to Mastering This Essential Gardening Technique
Have you ever wondered how professional plant breeders create those stunning new flower varieties or develop fruit trees that produce larger, sweeter harvests? The answer lies in a fascinating natural process that gardeners can easily replicate at home: cross-pollination. Whether you’re looking to increase your fruit tree yields, save seeds with specific characteristics, or experiment with creating entirely new plant varieties, understanding how to cross-pollinate opens up a world of possibilities in your garden.
Cross-pollination is far more than just a botanical term—it’s a powerful technique that allows you to take control of your garden’s genetic diversity. While nature typically handles pollination through wind, bees, and other insects, there are many situations where manual intervention can produce superior results. Indoor plants lack natural pollinators, certain fruit trees require specific pollen partners to bear fruit, and ambitious gardeners may want to deliberately combine traits from two parent plants to create something entirely new. This comprehensive guide will walk you through everything you need to know about cross-pollination, from understanding the basic mechanics to mastering advanced hand-pollination techniques that can transform your gardening success.
Understanding Cross-Pollination Fundamentals
Before diving into the practical techniques of cross-pollination, it’s essential to grasp what this process actually entails and why it matters for your garden. Cross-pollination is the transfer of pollen from the flower of one plant to the flower of another plant, typically within the same species but of a different variety. This botanical process forms the foundation for genetic diversity in the plant kingdom and has been utilized by farmers and gardeners for thousands of years to improve crops.
The process occurs when pollen grains, which contain the male genetic material, are moved from the stamen (the male reproductive organ) of one plant to the stigma (the female reproductive organ) of another plant. When this pollen successfully travels down through the pistil to reach the ovule, fertilization occurs, and seeds begin to develop. These seeds carry genetic information from both parent plants, which means the offspring will exhibit characteristics from both sources. This genetic mixing is what makes cross-pollination such a valuable tool for plant improvement and adaptation.
What makes cross-pollination particularly interesting is that it differs significantly from self-pollination, where a plant fertilizes itself with its own pollen. Self-pollinating plants like tomatoes, beans, and peas have evolved to complete their reproductive cycle independently, which ensures reliable seed production but limits genetic variation. Cross-pollination, on the other hand, promotes genetic diversity, which evolutionary biologists recognize as crucial for species survival. Plants resulting from cross-pollination tend to be more robust, better adapted to changing environmental conditions, and often produce higher yields than their self-pollinated counterparts.
It’s important to understand that cross-pollination can only occur between compatible plants. Contrary to popular garden myths, a cucumber cannot cross-pollinate with a squash despite belonging to the same family, just as a dog and cat cannot produce offspring together despite both being mammals. However, different varieties within the same species—such as a Gala apple and a Golden Delicious apple—can successfully cross-pollinate because they share the same species classification. This distinction is crucial for gardeners who want to either encourage or prevent cross-pollination in their gardens.
The Natural Mechanisms Behind Cross-Pollination
Understanding how cross-pollination occurs naturally helps gardeners replicate and optimize the process manually. In nature, several key agents facilitate the movement of pollen between plants, each with distinct characteristics and effectiveness levels.
Wind Pollination Systems
Wind pollination represents one of the oldest and most widespread pollination mechanisms in the plant kingdom. Plants that rely on wind pollination have evolved specific adaptations to maximize success with this seemingly random method. These plants typically produce enormous quantities of lightweight, smooth pollen grains designed to travel long distances through the air. Corn, beetroot, Swiss chard, spinach, and many grass species depend primarily on wind for pollination.
Wind-pollinated flowers generally lack the showy petals, bright colors, and fragrant scents that characterize insect-pollinated species. Instead, they feature exposed stamens that release pollen into the breeze and large, feathery stigmas positioned to capture airborne pollen efficiently. The stigmas often extend beyond the flower structure, maximizing their exposure to pollen-carrying air currents. This explains why corn is traditionally planted in blocks rather than single rows—the dense planting arrangement increases the likelihood that pollen released by one plant will land on the silks (stigmas) of neighboring plants.
The effectiveness of wind pollination depends heavily on environmental conditions. Calm, humid days result in minimal pollen dispersal, while dry, breezy conditions can carry pollen hundreds of feet from the source plant. For gardeners attempting to control cross-pollination in wind-pollinated crops, this presents a particular challenge, as maintaining sufficient isolation distances often proves impractical in typical home garden settings. Research suggests that effective isolation for wind-pollinated crops like corn requires distances of at least 150 feet between different varieties, and even greater distances provide more reliable results.
Insect-Mediated Pollination
Insect pollination represents a more targeted and efficient system than wind pollination, involving intricate relationships between plants and their pollinating partners. Bees, particularly honeybees and native bee species, serve as the primary pollinators for most garden vegetables and fruit trees. These industrious insects visit flowers to collect nectar and protein-rich pollen for their colonies, inadvertently transferring pollen between plants as they forage.
The relationship between flowering plants and insect pollinators demonstrates remarkable co-evolution. Flowers have developed specific features to attract their preferred pollinators: bright colors that insects can see (particularly blues, purples, yellows, and whites), sweet or pungent fragrances, nectar rewards, and flower structures that accommodate insect body sizes and feeding behaviors. When a bee lands inside a flower to access nectar, pollen adheres to the bee’s fuzzy body. Upon visiting the next flower, some of this pollen rubs off onto the stigma, achieving pollination.
Common insect-pollinated crops in home gardens include members of the Brassica family (broccoli, cabbage, kale, and cauliflower), cucurbits (squash, pumpkins, cucumbers, and melons), fruit trees (apples, pears, cherries, and plums), and most flowering ornamental plants. Understanding which crops rely on insect pollination helps gardeners create pollinator-friendly environments and recognize when hand pollination might be necessary. For instance, greenhouse-grown cucumbers and tomatoes often require manual pollination because protective structures exclude natural pollinating insects.
Encouraging beneficial insect pollinators involves more than just planting flowers. Gardeners should avoid using pesticides during flowering periods, as these chemicals can harm or kill pollinators. If pesticide application becomes necessary, applying treatments in the evening after bees have returned to their hives minimizes impact. Additionally, providing shallow water sources with landing platforms (such as stones in a birdbath) gives pollinators the hydration they need without risking drowning. Planting a diverse array of flowering plants that bloom throughout the growing season ensures pollinators have continuous food sources, which keeps them active in your garden.
Essential Tools and Materials for Hand Pollination
Successfully cross-pollinating plants by hand requires surprisingly few tools, most of which you probably already have around the house or can acquire inexpensively. Having the right equipment prepared before you begin makes the process smoother and increases your success rate.
Primary Pollination Tools
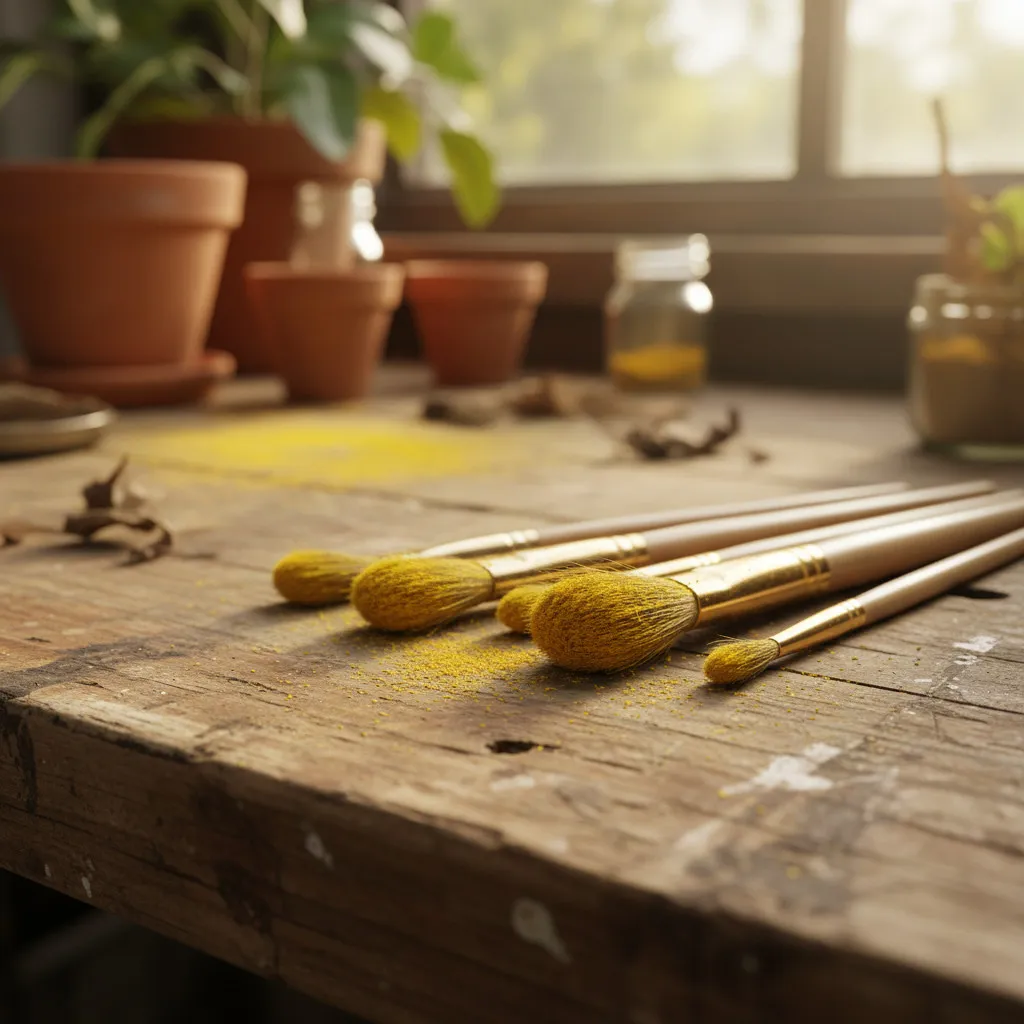
The most essential tool for hand pollination is something to transfer pollen from one flower to another. Small, soft-bristled paintbrushes work excellently for this purpose—artist’s brushes in sizes ranging from 0 to 4 provide appropriate control and gentle contact with delicate flower structures. Natural bristle brushes are preferable to synthetic ones because they more effectively capture and hold pollen grains. Keep several brushes on hand if you’re working with multiple plant varieties, as this prevents accidental cross-contamination between varieties you wish to keep separate.
Cotton swabs represent another effective pollen transfer tool, particularly for beginners or when working with larger flowers. The soft, absorbent cotton picks up pollen readily and allows precise application to stigmas. Some gardeners prefer cotton swabs for their disposability—you can use a fresh swab for each cross to eliminate any risk of mixing pollen from different varieties. For very small flowers with intricate structures, a single natural feather can serve as an ultra-gentle pollination tool that mimics natural contact from visiting insects.
When working with plants that have separate male and female flowers (like squash, cucumbers, and pumpkins), you can use the male flower itself as a pollination tool. Simply pluck a freshly opened male flower, carefully remove the petals to expose the pollen-covered stamen, and gently rub this directly against the stigma of the female flower. This method ensures maximum pollen transfer and feels very intuitive for beginners learning the cross-pollination process.
Protection and Isolation Materials
If you’re cross-pollinating with the intent to save seeds that will breed true to type, you’ll need materials to protect pollinated flowers from receiving additional, unwanted pollen from insects or wind. Small paper bags work perfectly for covering flowers after you’ve completed the intended pollination. Brown paper lunch bags are ideal for medium to large flowers, while smaller paper coin envelopes suit smaller blooms. Never use plastic bags, as these trap moisture and heat that can damage developing seeds and cause the flower to rot.
Twist ties, soft string, or rubber bands help secure protective coverings without damaging stems or flower structures. Choose materials that won’t cut into plant tissue as the stem grows and swells. Some gardeners use strips of soft cloth or pantyhose for tying, as these materials are gentle and slightly stretchy. For plants with very delicate flowers, fine mesh organza bags provide protection while allowing some air circulation, though they cost more than simple paper bags.
Gelatin capsules—the clear, two-piece capsules used for herbal supplements—provide an excellent solution for storing collected pollen when you need to transport it between plants located far apart or when timing issues mean you can’t immediately use freshly collected pollen. These capsules protect pollen from moisture and contamination. You can find them at health food stores or order them online inexpensively. For longer pollen storage (up to several days), keep filled capsules in the refrigerator inside a sealed container with a desiccant packet to control humidity.
Documentation and Labeling Supplies
Successful cross-pollination projects require careful record-keeping, especially when you’re creating deliberate crosses to develop new varieties or save seeds from specific parentage. Waterproof plant labels or tags allow you to mark which flowers you’ve pollinated, note the date, and record the parent plants involved. Write with permanent marker or pencil, as regular ink often fades in sun and rain. Attach these labels near the pollinated flower, positioning them so you can easily identify the specific fruit or seed pod that results from your intended cross.
A dedicated garden journal or notebook becomes invaluable for tracking your cross-pollination experiments. Record the date of each pollination, the parent plants used, weather conditions, how many flowers you pollinated, success rates, and observations about the resulting seeds or plants. This information helps you refine your technique, repeat successful crosses, and understand which varieties work well together. Digital options include smartphone apps designed for garden record-keeping, which allow you to add photos alongside your notes—extremely helpful for comparing results across seasons or years.
Step-by-Step Guide to Cross-Pollinating Different Plant Types
Cross-pollination techniques vary somewhat depending on the type of plant you’re working with. Understanding these variations ensures you use the most effective approach for your specific crops.
Cross-Pollinating Fruit Trees
1. Understanding Fruit Tree Pollination Requirements
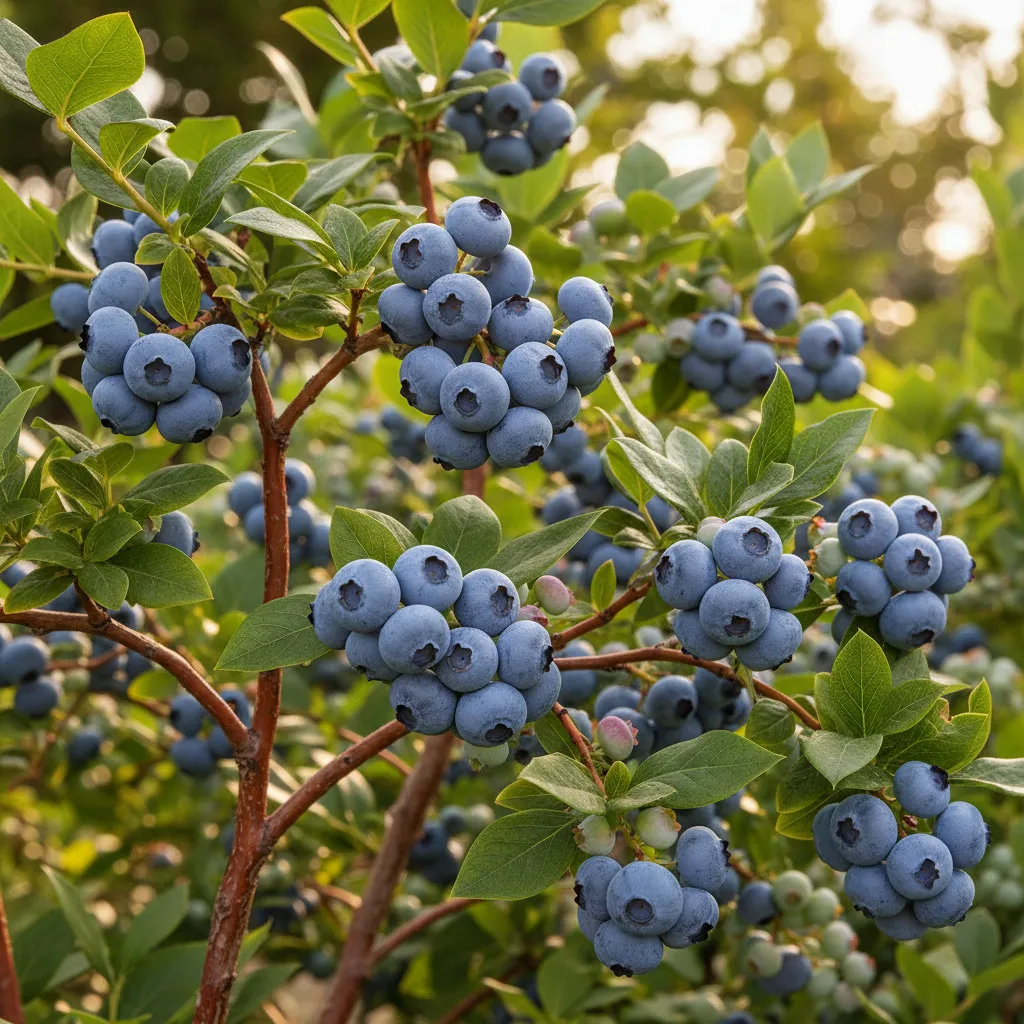
Many fruit tree varieties require cross-pollination to produce fruit, making this technique essential rather than optional for successful harvests. Apples, pears, sweet cherries, plums, and blueberries generally need pollen from a different variety to set fruit effectively. Some varieties are entirely self-sterile and will produce no fruit at all without a pollination partner, while others are technically self-fertile but produce significantly larger and more numerous fruits when cross-pollinated.
Before attempting to cross-pollinate fruit trees, research the specific requirements of your varieties. Some trees have particular compatibility issues—for instance, certain apple varieties like Jonagold are triploid, meaning they produce sterile pollen and cannot pollinate other trees. These varieties require two other compatible apple varieties nearby: one to pollinate the triploid tree and another to pollinate the pollinator. Additionally, timing matters enormously; cross-pollination only succeeds when both trees bloom simultaneously. Early-blooming varieties cannot effectively pollinate late-blooming varieties because their flowering periods don’t overlap.
Most fruit trees benefit from having a pollination partner planted within 50 to 100 feet, as this distance allows bees to efficiently travel between trees while foraging. Commercial orchards often plant compatible varieties in alternating rows to maximize cross-pollination. Home gardeners with limited space can plant two compatible varieties in the same planting hole, angled slightly apart, or choose grafted trees that feature multiple compatible varieties on a single rootstock. Understanding these requirements before planting prevents the common disappointment of fruitless trees.
2. Timing Your Fruit Tree Pollination
Successful fruit tree cross-pollination depends entirely on performing the procedure when flowers are at the optimal stage of receptivity. Fruit tree flowers typically open over a period of one to three weeks, creating a window of opportunity for pollination. The stigma is most receptive when the flower first opens fully and remains viable for several days, though receptivity decreases over time. Pollen from the stamens becomes available slightly before or simultaneously with stigma receptivity, depending on the species.
The ideal time for hand-pollinating fruit trees is mid-morning on a dry, relatively calm day. By this time, morning dew has evaporated (moisture can cause pollen to clump and lose viability), but afternoon heat hasn’t yet made pollen overly sticky or reduced its fertility. Examine flowers carefully before beginning—look for those that have fully opened within the past day or two, with fresh-looking stigmas that may appear slightly sticky or moist. Avoid flowers that look brown or dried, as these are past their receptive period.
Weather conditions significantly impact pollination success. Cool temperatures (below 55°F) reduce pollen viability and bee activity, while extremely hot conditions (above 85°F) can damage pollen and reduce stigma receptivity. Plan your hand-pollination sessions for periods with moderate temperatures and minimal wind. If rain is forecast, try to complete pollination before the rain arrives, as heavy rainfall can wash pollen away and reduce your success rate substantially.
3. Collecting and Transferring Fruit Tree Pollen
Begin by identifying flowers on your pollen donor tree that have freshly opened and display abundant yellow or cream-colored pollen on their anthers. Using a small, soft paintbrush, gently swirl the bristles inside the flower, making contact with all the anthers to collect as much pollen as possible. You should see a visible coating of fine powder on your brush. If you’re pollinating many flowers, collect pollen from several donor flowers to ensure you have sufficient quantity and to increase genetic diversity.
Move to the tree you wish to pollinate (the mother tree that will bear fruit) and locate freshly opened flowers. Gently insert your pollen-coated brush into the flower and carefully touch the stigma—the central structure that often appears slightly sticky or fuzzy. Use a light brushing or dabbing motion rather than scrubbing, as excessive force can damage the delicate stigma and prevent successful fertilization. Repeat this process with multiple flowers across the tree to increase your overall fruit set. Most gardeners pollinate far more flowers than needed because not every pollination attempt will result in successful fruit development.
For trees located far apart or when you need to store pollen, scrape collected pollen from your brush into a small gelatin capsule or clean, dry vial. Store this immediately in a cool, dry location. Refrigerated pollen remains viable for several days, though fresh pollen always produces better results. When ready to use stored pollen, pour a small amount onto a clean plate or paper, dip your brush into it, and proceed with pollination as described above. Always label stored pollen with the variety name and collection date to prevent confusion.
Hand-Pollinating Vegetables With Separate Male and Female Flowers
1. Identifying Male and Female Flowers
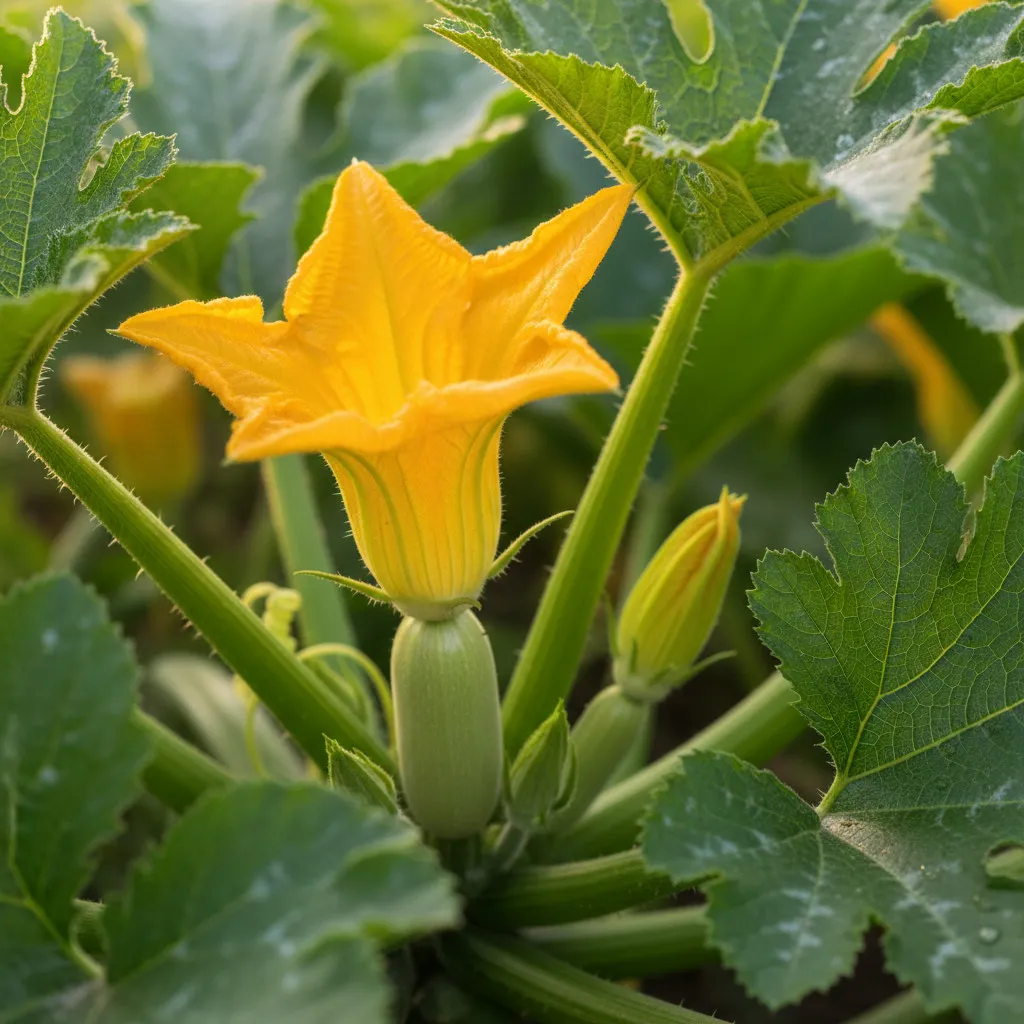
Many popular garden vegetables produce separate male and female flowers on the same plant, a characteristic called “monoecious.” This group includes squash, zucchini, pumpkins, cucumbers, melons, and gourds—all members of the cucurbit family. Distinguishing between these flower types is essential for successful cross-pollination and represents a skill every vegetable gardener should master.
Female flowers are easily identified by the small, immature fruit (ovary) located directly behind the flower petals. This miniature fruit looks like a tiny version of the mature vegetable you’ll eventually harvest—a tiny cucumber behind cucumber flowers, a small zucchini behind zucchini blossoms, and so forth. The female flower also has a stigma inside the bloom that appears divided into multiple lobes and has a sticky or moist surface designed to capture pollen. Female flowers typically appear later in the growing season than male flowers, and plants usually produce fewer females than males.
Male flowers lack any swelling behind the bloom and instead attach to the plant via a thin, straight stem. Inside the male flower, you’ll see the stamen—a central column or multiple stamens covered with powdery yellow or orange pollen. Male flowers tend to open earlier in the plant’s life cycle and are produced in greater numbers than female flowers. Many beginning gardeners worry when their squash plants produce only male flowers initially, but this is completely normal. The plant must reach a certain maturity level before producing female flowers capable of developing fruit.
2. Performing Cross-Pollination on Cucurbit Vegetables
The optimal time for pollinating cucurbit vegetables is early morning, shortly after flowers open for the day. These flowers typically open at dawn and may close by mid-afternoon, especially during hot weather. Fresh male flowers will have abundant, powdery pollen that comes off easily when touched, while receptive female flowers display fresh, moist-looking stigmas. Flowers that have been open for multiple days or that show browning are past their prime and unlikely to result in successful pollination.
Select a freshly opened male flower from your chosen pollen donor plant and carefully pluck it from the vine. Gently peel away the petals to expose the pollen-covered stamen in the center—this becomes your natural pollination tool. Locate a receptive female flower on the plant you wish to pollinate (this can be a different variety of the same species or the same variety, depending on your goals). Carefully touch the exposed stamen to the stigma inside the female flower, making contact with all the stigma lobes and ensuring generous pollen transfer. Use a gentle twisting or dabbing motion to coat the stigma thoroughly.
If you prefer not to remove male flowers, you can achieve the same result using a small, soft paintbrush or cotton swab. Swirl your tool inside the male flower to collect pollen, then immediately transfer it to the female flower’s stigma. This method works particularly well when you have limited male flowers or want to use one male flower to pollinate multiple female flowers. A single male flower typically produces enough pollen to successfully fertilize three to five female flowers, though pollination rates improve when you use fresh pollen from multiple male sources.
3. Protecting Against Unwanted Cross-Pollination
If you’re cross-pollinating to create specific hybrids or to save seeds that will breed true to a particular variety, you must prevent insects from introducing unwanted pollen before, during, or after your intended pollination. This requires isolating both male and female flowers before they open. Identify flower buds that will open the following morning—they’ll be larger, showing color, and beginning to separate at the tips. Late in the afternoon, before these buds open, gently secure them closed using small clips, twist ties, or by carefully taping the petals together with painter’s tape.
The next morning, perform your intended cross-pollination on these protected flowers, then immediately cover the pollinated female flower with a small paper bag secured with string or a twist tie. This barrier prevents bees from introducing additional pollen from other varieties. Label the protected flower with information about the cross, including the date and parent varieties. Leave the bag in place for at least three to five days, until the flower naturally withers and falls away, ensuring the fruit develops from your intended pollination alone.
Some gardeners construct more elaborate protection systems using fine mesh bags or tulle fabric fashioned into small sacks that slip over flowers. These breathable covers protect against insect pollination while allowing air circulation and are reusable across multiple seasons. While this approach requires more initial investment and effort, it produces excellent results for serious seed savers working with multiple varieties of the same species. The mesh must have openings small enough to exclude even tiny insects—bridal tulle or bags specifically designed for plant breeding work best for this purpose.
Cross-Pollinating Self-Pollinating Plants
1. Why Hand-Pollinate Self-Pollinating Plants
Self-pollinating plants, which include tomatoes, peppers, eggplants, beans, peas, and lettuce, have evolved flower structures that facilitate pollination within individual flowers or between flowers on the same plant. These species don’t strictly require cross-pollination to produce fruit and seeds, which makes them particularly reliable crops for home gardeners. However, there are several compelling reasons why you might choose to hand-pollinate these plants deliberately.
Plant breeders and ambitious gardeners cross-pollinate self-pollinating species to create new varieties with desired characteristics. By manually transferring pollen from one variety to another, you can combine traits such as disease resistance, fruit size, color, flavor profiles, and growth habits. This is how most of the tomato, pepper, and bean varieties available today were developed—through careful, intentional cross-pollination followed by several generations of selection. Home gardeners can engage in this same process, potentially developing varieties uniquely suited to their local growing conditions and personal preferences.
Additionally, self-pollinating plants grown in protected environments like greenhouses, high tunnels, or indoor growing spaces may benefit from hand-pollination assistance even when you’re not attempting to create crosses. Without wind movement or insect visitors, pollen transfer becomes less reliable, potentially resulting in reduced fruit set or misshapen fruits. Gently vibrating tomato plants or using a small brush to distribute pollen within flowers encourages more complete pollination, leading to better-formed fruits. Many greenhouse tomato growers regularly “tickle” their plants during flowering to improve fruit development, essentially facilitating self-pollination through manual intervention.
2. Technique for Crossing Self-Pollinating Species
Cross-pollinating self-pollinating plants requires slightly more care than working with species that naturally cross-pollinate because you must overcome the flower’s structural tendency toward self-fertilization. The process involves removing the stamens (male parts) from one flower before it releases pollen, then introducing pollen from your chosen donor plant. This technique, called emasculation, prevents the flower from self-pollinating and ensures the resulting seeds represent a true cross between your selected parents.
Begin by identifying an unopened flower bud on your mother plant (the plant that will produce the crossed seeds). The bud should be within a day or two of opening—large enough that you can work with it but not yet open enough to have released pollen. Using fine tweezers or small scissors, carefully open the flower petals just enough to access the stamens. Gently remove all stamens from the flower without damaging the central pistil and stigma. This emasculated flower can no longer self-pollinate but remains receptive to introduced pollen.
Next, collect pollen from your donor plant by removing a freshly opened flower and shaking it gently over a small piece of clean paper or into a petri dish. You should see fine pollen dust collect on your surface. Use a small brush or cotton swab to collect this pollen, then carefully apply it to the stigma of your emasculated flower. For tomatoes and peppers, the stigma is the central structure in the flower, sometimes slightly protruding. Coat it generously with donor pollen, then cover the entire flower with a small paper bag secured with twist tie to prevent insects from introducing other pollen. Label your cross carefully, as the fruits from self-pollinating plants all look alike, and you’ll need to know which fruits contain your crossed seeds.
Timing and Environmental Considerations for Successful Cross-Pollination
The success of cross-pollination attempts depends heavily on timing and environmental conditions. Understanding these factors helps you plan pollination sessions when success rates are highest.
Flower Maturity and Receptivity Windows
Every flower has a specific period during which its stigma is receptive to pollen and fertilization can occur. This receptivity window varies by species but generally begins when the flower first opens fully and lasts anywhere from a few hours to several days. During peak receptivity, the stigma often appears moist, slightly sticky, or displays a subtle sheen—visual cues that the tissue is ready to receive pollen. As the flower ages, the stigma dries, changes color (often browning), and loses receptivity.
Coordinating pollination with peak receptivity dramatically improves success rates. For most species, the first day a flower opens completely represents the optimal pollination time. Some plants exhibit specific timing patterns worth noting: corn silks remain receptive for approximately 10 days after emergence, though the first few days show highest fertility; squash and cucumber flowers open for just one day, requiring precise timing; apple and pear blossoms remain receptive for about three to five days, with the first two days showing best results. Observing your plants carefully and noting these patterns helps you identify the sweet spot for pollination attempts.
Additionally, some species display a phenomenon called dichogamy, where male and female organs mature at different times within the same flower or plant. Protandrous species release pollen before their own stigmas become receptive, while protogynous species have receptive stigmas before their pollen matures. These mechanisms evolved to prevent self-fertilization and encourage cross-pollination. Understanding whether your target species displays dichogamy helps you time your intervention appropriately. For example, salvias are strongly protandrous, so you must collect pollen from older flowers and apply it to younger flowers on different plants for successful crosses.
Weather and Time of Day Effects
Environmental conditions at the moment of pollination significantly influence whether fertilization succeeds. Temperature ranks among the most critical factors—most pollination occurs optimally between 60°F and 80°F. Temperatures below 55°F can cause pollen to become inactive or reduce stigma receptivity, while temperatures above 85°F may damage pollen viability and reduce the flower’s ability to complete fertilization. Extended periods of temperature stress can cause flowers to abort entirely, dropping from the plant before any pollination occurs.
Humidity and moisture conditions also play important roles. Light humidity helps pollen grains hydrate properly and germinate once they reach the stigma. However, excessive moisture from rain, heavy dew, or very high humidity can cause pollen to clump, become too heavy to transfer effectively, or lose viability. This is why hand-pollination attempts should occur after morning dew has dried but before the day becomes excessively hot—typically between 8:00 AM and 11:00 AM for most regions and seasons. In very hot climates, early morning pollination (around dawn) may be preferable to avoid heat stress.
Wind conditions merit consideration as well, particularly when working with fruit trees or tall plants. Moderate breezes can actually assist pollination by helping distribute pollen within the garden, but strong winds make hand-pollination difficult and can physically damage delicate flower structures. Strong winds also increase the risk of unwanted cross-pollination from distant pollen sources if you’re trying to maintain variety purity. Schedule your pollination work for relatively calm periods, checking weather forecasts to avoid days with predicted high winds or storms.
Preventing Unwanted Cross-Pollination in the Garden
While cross-pollination offers many benefits, there are situations where you specifically want to prevent it, particularly when saving seeds to preserve specific varieties.
Understanding which crops can cross and which cannot helps you design your garden to minimize unwanted crosses. Remember that cross-pollination occurs only between varieties of the same species, not between different species. Cucumbers will never cross with squash, tomatoes won’t cross with peppers, and carrots can’t cross with parsnips, despite what garden folklore might suggest. However, different tomato varieties can potentially cross with each other, various squash types within the same species can cross, and different colored bell peppers will cross because they’re all the same species.
For self-pollinating crops like tomatoes, beans, peas, and lettuce, preventing crosses is relatively simple. These crops rarely cross naturally, so maintaining just 10 feet of separation between varieties provides adequate protection for seed-saving purposes. The greater risk with these crops comes from accidentally mixing harvested seeds from different varieties rather than actual cross-pollination. For insect-pollinated crops like cucurbits, brassicas, and most flowers, maintaining purity requires significantly greater separation—typically 100 yards or more depending on pollinator activity levels in your area.
When garden space limitations make adequate separation impossible, several alternative strategies can maintain variety purity. The most straightforward approach is growing only one variety of each species per year, rotating different varieties through subsequent seasons. This guarantees purity but sacrifices diversity. Alternatively, practice isolation by blooming time—plant varieties with different maturity dates so their flowering periods don’t overlap. Early-season and late-season varieties of the same species may never cross because they bloom weeks apart. Physical barriers also work: fine mesh netting or row covers placed over plants before flowering begins exclude insect pollinators, allowing you to hand-pollinate selected flowers while maintaining variety purity. This technique requires significant effort but enables growing multiple varieties in limited space.
Recognizing Successful Pollination and What Comes Next
After completing cross-pollination, several indicators reveal whether your efforts succeeded.
Successful pollination typically shows itself within days to weeks, depending on the plant species. The most obvious sign is fruit development—the ovary behind the flower begins swelling and growing into mature fruit. On plants with separate male and female flowers like squash and cucumbers, unpollinated female flowers typically yellow and drop off within a day or two, while successfully pollinated flowers wither but the fruit behind them continues enlarging. Fruit trees show similar patterns: pollinated flowers produce fruits that begin swelling, while unpollinated flowers drop during the natural “June drop” when trees shed excess blossoms and immature fruits.
For cross-pollinations intended to produce seeds for breeding projects, patience becomes essential. You must allow fruits to fully mature on the plant before harvesting seeds. This maturity point varies dramatically by species: tomato seeds are ready when fruits are fully ripe and even slightly overripe; squash and cucumber seeds need fruits to mature well beyond eating stage until rinds harden; bean and pea seeds require pods to dry completely on the plant. Harvesting seeds prematurely results in low germination rates and weak seedlings, essentially wasting your careful pollination work.
Once you’ve harvested seeds from successful crosses, proper storage protects your genetic investment. Clean seeds thoroughly, removing all fruit flesh or pod material, as residual organic matter can harbor disease organisms and reduce storage life. Dry seeds completely—inadequately dried seeds may mold in storage or lose viability quickly. Store dried seeds in paper envelopes or breathable containers in a cool, dry, dark location. Label everything meticulously with the parent varieties used, cross date, and any observations about the parent plants. This information becomes invaluable when evaluating the resulting plants next season and deciding whether to continue developing a particular cross.
Common Challenges in Cross-Pollination and Solutions
Even experienced gardeners encounter obstacles when cross-pollinating plants. Recognizing common issues and knowing how to address them improves your success rate.
Poor Fruit Set Despite Pollination Efforts
Sometimes hand-pollinated flowers fail to develop fruit despite seemingly perfect technique. Multiple factors may contribute to this frustration. Extreme temperatures represent the most common culprit—many plants cannot complete fertilization during heat waves or cold snaps, even when adequate pollen is present. Inadequate nutrition also prevents fruit development; plants suffering from nutrient deficiencies may drop flowers or young fruits to conserve resources. Additionally, plants experiencing water stress through either drought or overwatering often abort reproductive efforts in favor of survival.
Address these issues by timing your pollination efforts for periods with moderate temperatures and ensuring plants receive consistent moisture and appropriate fertilization. Some species show particular sensitivity: peppers often drop flowers when nighttime temperatures exceed 75°F; tomatoes struggle with fruit set when daytime temperatures surpass 90°F; apples require specific chill hours during winter to set fruit the following spring. Research your specific species’ requirements and work within these parameters for best results. If environmental conditions are genuinely unfavorable, sometimes the wisest course is waiting for better conditions rather than persisting with pollination attempts that have low success probability.
Misshapen or Poorly Developed Fruit
When fruits develop but appear misshapen, oddly colored, or undersized, incomplete pollination is often responsible. Many fruits require thorough, even pollination across all ovules to develop symmetrically. Strawberries provide a clear example: each tiny seed on the strawberry surface represents a fertilized ovule, and areas where fertilization failed develop poorly, creating lopsided, misshapen berries. Similarly, apples and pears may grow lopsided when pollination occurs on only one side of the flower. Corn kernels fail to develop in spots where silks weren’t adequately pollinated, producing cobs with missing kernels.
Prevent this problem by ensuring generous pollen application during hand-pollination. Don’t be timid—thoroughly coat the stigma with pollen from multiple brushfuls or multiple donor flowers. For corn, ensure every silk receives pollen contact. Multiple pollination sessions can help: return to the same flowers and reapply pollen 24 hours after the initial application, giving a second opportunity for any ovules that didn’t receive adequate pollen initially. This technique is particularly valuable for crops that benefit from heavy pollination, including corn, strawberries, and bramble fruits like raspberries and blackberries.
Difficulty Determining Which Plants Are Compatible
Confusion about which varieties can successfully cross-pollinate together creates significant frustration, especially with fruit trees where purchasing mistakes mean years of waiting for non-existent fruit. Many factors influence compatibility beyond simple species matching. Some varieties are self-sterile (they cannot use their own pollen or pollen from the same variety) yet also produce sterile pollen that can’t fertilize any other variety—these require two different compatible varieties nearby to fruit. Bloom timing must align between varieties, or they cannot pollinate each other despite being theoretically compatible. Additionally, some plant families have complex compatibility systems where certain variety combinations work while others fail unpredictably.
Solve this challenge through research before purchasing or planting. Consult reliable, research-based resources like university extension publications, which typically provide compatibility charts for common fruit trees and vegetables. Many reputable nurseries supply compatibility information with their fruit trees, listing which varieties serve as good pollination partners. Online communities of seed savers and plant breeders can offer practical experience with specific crosses. When in doubt, select varieties described as “good pollinizers” or “universal pollinators”—these varieties reliably pollinate a wide range of other varieties and typically have extended bloom periods that overlap with many others. For fruit trees, varieties like Granny Smith apple, Bartlett pear, or Stella cherry (for sweet cherries) reliably pollinate many other varieties and make excellent additions to home orchards.
Advanced Cross-Pollination Techniques for Plant Breeding
Once you’ve mastered basic cross-pollination, you might want to explore more sophisticated applications that allow you to develop your own plant varieties.
Creating stable, new plant varieties through cross-pollination requires multi-year commitment and understanding of genetic principles. When you cross two varieties, the first-generation offspring (called F1 or “first filial” generation) typically shows hybrid vigor—enhanced growth, yield, or other desirable characteristics. However, these F1 plants carry genetic material from both parents in unstable combinations. Seeds saved from F1 plants produce wildly variable F2 (second filial generation) offspring, with some resembling one parent, others resembling the other parent, and many showing intermediate or unexpected characteristics.
Developing a stable new variety requires growing out multiple generations while selecting and saving seeds only from plants that display your desired characteristics. By F5 or F6 generations, traits typically stabilize, and plants “breed true” from seed. This process, called selection, requires space to grow substantial populations (at least 25-50 plants per generation), careful record-keeping, and ruthless culling of plants that don’t meet your standards. The reward is a unique variety adapted to your specific conditions and preferences, bearing your personal stamp as a plant breeder.
Key Takeaways: Mastering Cross-Pollination in Your Garden
Cross-pollination represents one of the most empowering skills a gardener can develop, opening doors to improved harvests, new plant varieties, and deeper understanding of the plants you grow. Whether you’re hand-pollinating a greenhouse tomato to ensure fruit set, crossing two pepper varieties to develop your dream cultivar, or simply ensuring your fruit trees receive adequate pollen for bountiful harvests, the principles remain consistent: understand your plant’s reproductive biology, provide or transfer pollen when flowers are most receptive, and protect against unwanted crosses when seed purity matters.
Success with cross-pollination comes through practice and observation. Start with forgiving crops like squash or self-pollinating vegetables before progressing to more demanding fruit trees or breeding projects. Keep detailed records of your attempts, noting what works and what doesn’t in your specific conditions. Pay attention to timing, weather, and your plants’ visual cues about readiness for pollination. Don’t be discouraged by initial failures—even experienced gardeners encounter setbacks from weather extremes, mistimed pollination attempts, or simple bad luck.
Remember that cross-pollination affects only the seeds produced by the pollinated flower, not the current year’s fruit itself (with corn being the notable exception). This means you can safely grow multiple varieties side by side without worrying about this year’s harvest quality, only exercising control when you intend to save seeds for future planting. Whether you’re seeking to boost your harvest, protect heirloom varieties, or embark on the rewarding journey of plant breeding, understanding how to cross-pollinate puts you in the driver’s seat, transforming you from passive observer to active participant in your garden’s genetic legacy. The techniques you’ve learned here represent centuries of accumulated gardening wisdom, now available to enhance your own gardening success and enjoyment.