Few trees can capture the imagination and transform a landscape quite like the Japanese maple (Acer palmatum). With their graceful, layered branches, delicately lobed leaves, and breathtaking autumn colors ranging from fiery crimson to golden yellow, these ornamental trees have been prized by gardeners for centuries. Originally cultivated in Japan since the early 1600s, Japanese maples have become a beloved staple in gardens worldwide, from traditional Japanese tea gardens to contemporary suburban landscapes. Whether you’re growing a towering ‘Bloodgood’ specimen or a petite container-bound dwarf variety, understanding the fundamentals of Japanese maple care is essential for ensuring your tree thrives for decades to come. This comprehensive guide will walk you through everything you need to know about watering, pruning, soil requirements, and sunlight needs to help your Japanese maple reach its full potential.

Table of Contents
- Understanding Japanese Maple Trees: A Brief Overview
- Ideal Sunlight Requirements for Japanese Maples
- Finding the Right Light Balance
- Signs Your Tree Needs Light Adjustment
- Soil Requirements for Thriving Japanese Maples
- Understanding pH and Drainage Essentials
- Preparing Your Soil for Planting
- Watering Your Japanese Maple: Best Practices
- Watering Newly Planted Trees
- Watering Established Trees
- How to Plant a Japanese Maple: Step-by-Step Guide
- Choosing the Perfect Location
- The Planting Process
- Pruning Japanese Maples: Techniques and Timing
- When to Prune Your Japanese Maple
- Pruning Techniques and Best Practices
- Fertilizing Your Japanese Maple for Optimal Growth
- Choosing the Right Fertilizer
- Fertilizing Schedule and Application
- Protecting Japanese Maples from Pests and Diseases
- Common Pests and Management
- Disease Prevention and Treatment
- Seasonal Care Tips for Year-Round Health
- Summer Care Essentials
- Winter Protection Strategies
- Growing Japanese Maples Successfully in Containers
- Container Selection and Setup
- Container Care Best Practices
- Final Thoughts: Cultivating Japanese Maple Success
Understanding Japanese Maple Trees: A Brief Overview

Japanese maples offer incredible diversity, with over 1,000 cultivated varieties ranging from 2 to 30 feet tall, each with unique characteristics that make them suitable for different garden settings and climates.
Japanese maples belong to the species Acer palmatum and are native to Japan, Korea, China, and Taiwan. These ornamental trees have been refined through centuries of cultivation, resulting in an extraordinary range of sizes, shapes, leaf forms, and colors. The botanical name “palmatum” derives from the Latin word “palma,” referring to the hand-shaped leaves that typically feature five to nine pointed lobes. This distinctive foliage is one of the tree’s most recognizable features, though the specific appearance varies dramatically between cultivars.
The two primary categories of Japanese maples are upright varieties and dissected (laceleaf) varieties. Upright maples grow with a more traditional tree form and feature classic lobed leaves, while dissected maples display incredibly lacy, finely divided foliage that creates a delicate, feathery appearance. Growth habits range from tall, vase-shaped specimens reaching 25 feet to compact, mounding dwarf cultivars perfect for containers or small spaces.
Popular cultivars include:
- ‘Bloodgood’: Deep burgundy-red foliage that holds color well throughout summer
- ‘Crimson Queen’: A weeping laceleaf variety with persistent crimson foliage
- ‘Sango Kaku’ (Coral Bark Maple): Known for striking coral-red bark that intensifies in winter
- ‘Emperor I’: Excellent heat tolerance with dark purple-red leaves
- ‘Tamukeyama’: One of the best laceleaf varieties for hot climates
Understanding your specific variety’s characteristics will help you provide optimal care tailored to its unique needs.
Ideal Sunlight Requirements for Japanese Maples
Japanese maples thrive in conditions that mimic their native forest habitat—areas offering shelter from harsh winds and protection from intense afternoon sun, with most varieties performing best in dappled shade or morning sun with afternoon protection.
Finding the Right Light Balance
Light requirements for Japanese maples depend significantly on the variety, your climate zone, and the specific microclimate of your garden. As a general rule, Japanese maples prefer partial shade, particularly protection from the hot afternoon sun that can scorch their delicate leaves. However, the relationship between light and leaf color is nuanced. Red and purple-leafed varieties often need more sun exposure to maintain their vibrant coloration, while green-leafed and variegated cultivars typically prefer more shade to prevent leaf damage.
In mild, temperate climates, many Japanese maples can tolerate full sun without issue. However, in hotter regions—particularly those with intense summer heat and dry conditions—afternoon shade becomes essential to prevent leaf scorch. The further south you garden, the more critical shade protection becomes. Morning sun with afternoon shade represents the ideal scenario for most Japanese maples, providing enough light for healthy growth and color development while protecting leaves during the hottest part of the day.
Signs Your Tree Needs Light Adjustment
Watch for these indicators that your Japanese maple may need more or less light:
- Leaf scorch (brown, crispy edges): Often indicates too much direct sun, especially afternoon exposure
- Faded or greenish-red foliage: Red varieties may be receiving insufficient light to maintain color
- Leggy, sparse growth: The tree may need more light to develop proper branching
- Poor fall color: Sometimes results from too much shade during the growing season
When selecting a planting location, observe the area throughout the day to understand its light patterns. Eastern exposures that receive morning sun and afternoon shade work exceptionally well. If you’re planting near structures, position your maple on the east or north side of buildings to ensure adequate protection from western sun exposure.
Soil Requirements for Thriving Japanese Maples
Japanese maples thrive in well-drained, consistently moist soil that is rich in organic matter and has a slightly acidic to neutral pH, making soil preparation one of the most critical factors in establishing a healthy tree.
Understanding pH and Drainage Essentials
The foundation of successful Japanese maple cultivation lies in proper soil conditions. These trees prefer slightly acidic to neutral soil with a pH between 6.0 and 7.0. Highly alkaline soils can cause chlorosis (yellowing leaves) because they prevent roots from absorbing essential nutrients like iron and zinc. If your soil tests alkaline, you may need to amend it with sulfur or use specialized fertilizers designed for acid-loving plants.
Drainage is equally critical—Japanese maples cannot tolerate waterlogged conditions. Consistently wet soil leads to root rot, one of the most common causes of Japanese maple decline and death. Before planting, assess your site’s drainage by digging a test hole, filling it with water, and observing how quickly it drains. If water remains after several hours, you’ll need to improve drainage through soil amendment or consider raised planting.
Preparing Your Soil for Planting
Proper soil preparation dramatically increases your Japanese maple’s chances of long-term success. The ideal soil mix combines good drainage with moisture retention and nutrient availability. Japanese maples are heavy feeders, especially when young, and benefit from soil rich in organic matter.
Key soil preparation steps:
- Amend with compost: Work generous amounts of well-rotted compost into the planting area to improve both drainage and moisture retention
- Add organic matter: Incorporate materials like leaf mold, aged bark, or peat moss to create loose, friable soil
- Test and adjust pH: Apply sulfur to lower pH in alkaline soils, following package instructions carefully
- Avoid heavy clay: If your soil is predominantly clay, amend heavily or create a raised bed
For container-grown Japanese maples, use a high-quality potting mix that retains moisture while draining well. A mixture of half acidic planting mix (like azalea mix) and half quality potting soil works excellently. Never use garden soil in containers—it compacts too heavily and impedes drainage.
Watering Your Japanese Maple: Best Practices
Proper watering represents one of the most critical aspects of Japanese maple care, as these trees require consistent moisture without waterlogging, and their shallow root systems make them particularly sensitive to both drought and overwatering.
Watering Newly Planted Trees
Establishing a proper watering routine during the first few years is essential for root development and long-term tree health. Newly planted Japanese maples have not yet developed the extensive root systems that allow mature trees to withstand drought, making regular watering crucial during the establishment period.
For newly planted Japanese maples, follow this watering schedule:
-
First week after planting: Water daily, ensuring the entire root ball receives thorough moisture. Use a hose rather than relying on sprinklers to ensure adequate saturation. Each watering should deliver approximately 5 to 10 gallons of water, allowing it to soak deeply into the soil rather than running off the surface. This initial intensive watering helps eliminate air pockets around the roots and ensures the tree doesn’t experience transplant shock from dehydration.
-
Weeks two through four: Water every 2 to 3 days, monitoring soil moisture between waterings. At this stage, you want to encourage roots to begin spreading outward while still maintaining consistent moisture. Check soil moisture by inserting your finger 1 to 2 inches below the surface—if it feels dry at this depth, it’s time to water. Avoid watering on a rigid schedule; instead, water based on observation of actual soil conditions.
-
First growing season: Gradually reduce watering frequency to once per week during normal weather conditions, increasing to 2 to 3 times weekly during hot, dry periods. Deep watering encourages roots to grow downward, creating a more drought-resistant root system. Apply water slowly and thoroughly, ensuring moisture penetrates the top 12 inches of soil where most feeder roots reside.
Watering Established Trees
Once established (typically after 2 to 3 years), Japanese maples require less frequent watering but still benefit from consistent moisture during dry periods. Mature trees in many climates receive adequate water from natural rainfall, but supplemental irrigation becomes necessary during drought or extended heat waves.
Best practices for established tree watering:
- Water deeply once per week during normal summer conditions
- Increase frequency during extreme heat or drought
- Water immediately after applying fertilizer to help nutrients reach the root zone
- Reduce watering in late summer and early fall to encourage vibrant autumn color development
- Never allow soil to remain waterlogged—Japanese maples despise “wet feet”
Warning signs of watering problems:
| Problem | Symptoms | Solution |
|---|---|---|
| Underwatering | Brown, crispy leaf edges; wilting; premature leaf drop | Increase watering frequency and depth |
| Overwatering | Yellowing leaves; wilting despite moist soil; root rot | Improve drainage; reduce watering; check for root disease |
How to Plant a Japanese Maple: Step-by-Step Guide
Proper planting technique sets the foundation for your Japanese maple’s entire life, with the most critical factors being hole preparation, planting depth, and initial care during the establishment period.
Choosing the Perfect Location
Before breaking ground, carefully evaluate potential planting sites. Consider not only current conditions but also how the area will develop as surrounding plants mature and structures cast changing shadows. Your Japanese maple may live for 100 years or more, making location selection one of your most consequential decisions.
Site selection considerations:
- Mature size: Ensure adequate space for the tree’s ultimate height and spread without interference from power lines, buildings, or other trees
- Wind protection: Avoid exposed, windy locations that dry out leaves and cause branch damage
- Root space: Keep adequate distance from foundations, sidewalks, and driveways
- Aesthetic placement: Position where the tree’s form and seasonal color changes can be appreciated
The Planting Process
Follow these detailed steps for successful Japanese maple planting:
-
Dig the planting hole: Create a hole three times as wide as the root ball but only as deep as the root ball’s height. This wide, shallow approach encourages lateral root growth and prevents settling that could bury the tree too deeply. The hole should resemble a saucer rather than a cylinder. Loosen the soil at the edges and bottom to allow roots to penetrate easily, but avoid digging deeper than necessary to prevent the tree from settling after planting.
-
Prepare the tree: Carefully remove the tree from its container, handling it by the root ball rather than the trunk to prevent damage. Examine the roots for circling or girdling roots that could eventually strangle the tree. If roots are tightly wound, gently loosen them or make shallow cuts (about half an inch deep) at four equidistant points around the root ball to encourage outward growth. Also score the bottom of the root ball in an X pattern to promote downward root development.
-
Position the tree correctly: Place the tree in the hole so the top of the root ball sits slightly above the surrounding soil level—approximately 1 to 2 inches higher is ideal. This elevated position accounts for settling and prevents the critical root flare from becoming buried. The root flare (where the trunk widens at the base) should always remain visible above the soil surface. Planting too deeply is one of the most common causes of Japanese maple decline.
-
Backfill and water: Mix slow-release fertilizer into the backfill soil according to package directions. Fill around the root ball gradually, tamping gently to eliminate air pockets without compacting the soil. When the hole is half full, water thoroughly to settle the soil, then continue filling to grade. Water deeply again after completing the backfill.
-
Apply mulch: Spread a 2 to 3 inch layer of organic mulch (shredded bark works excellently) around the tree, extending to the drip line. Keep mulch 2 to 3 inches away from the trunk to prevent moisture accumulation against the bark, which can cause rot and attract pests. The mulch helps retain soil moisture, regulate temperature, and suppress competitive weeds.
Pruning Japanese Maples: Techniques and Timing
Japanese maples require minimal pruning compared to many other trees, but thoughtful, strategic pruning enhances their natural beauty, improves air circulation, and maintains the graceful form that makes these trees so distinctive.
When to Prune Your Japanese Maple
Timing significantly impacts pruning success. Japanese maples can be pruned at various times throughout the year, but certain periods offer distinct advantages:
Late winter (dormant season): Ideal for major structural pruning because the tree’s architecture is fully visible without foliage, making it easier to identify problem branches and envision the final result. However, be aware that Japanese maples “bleed” sap when pruned in late winter, which is messy but doesn’t harm the tree.
Late spring to early summer: Excellent for fine pruning and aesthetic adjustments once leaves have fully emerged. At this time, you can see exactly how branches fill out and identify areas that are too dense or detracting from the desired form.
Avoid pruning during: Rainy periods (increases disease risk), late summer through fall (can stimulate tender new growth vulnerable to frost), and periods of active new growth in early spring.
Pruning Techniques and Best Practices
Follow these guidelines for successful Japanese maple pruning:
- Remove dead, damaged, or diseased branches first: These can be pruned at any time of year and should be addressed promptly
- Eliminate crossing or rubbing branches: Where branches contact each other, friction creates wounds that invite disease
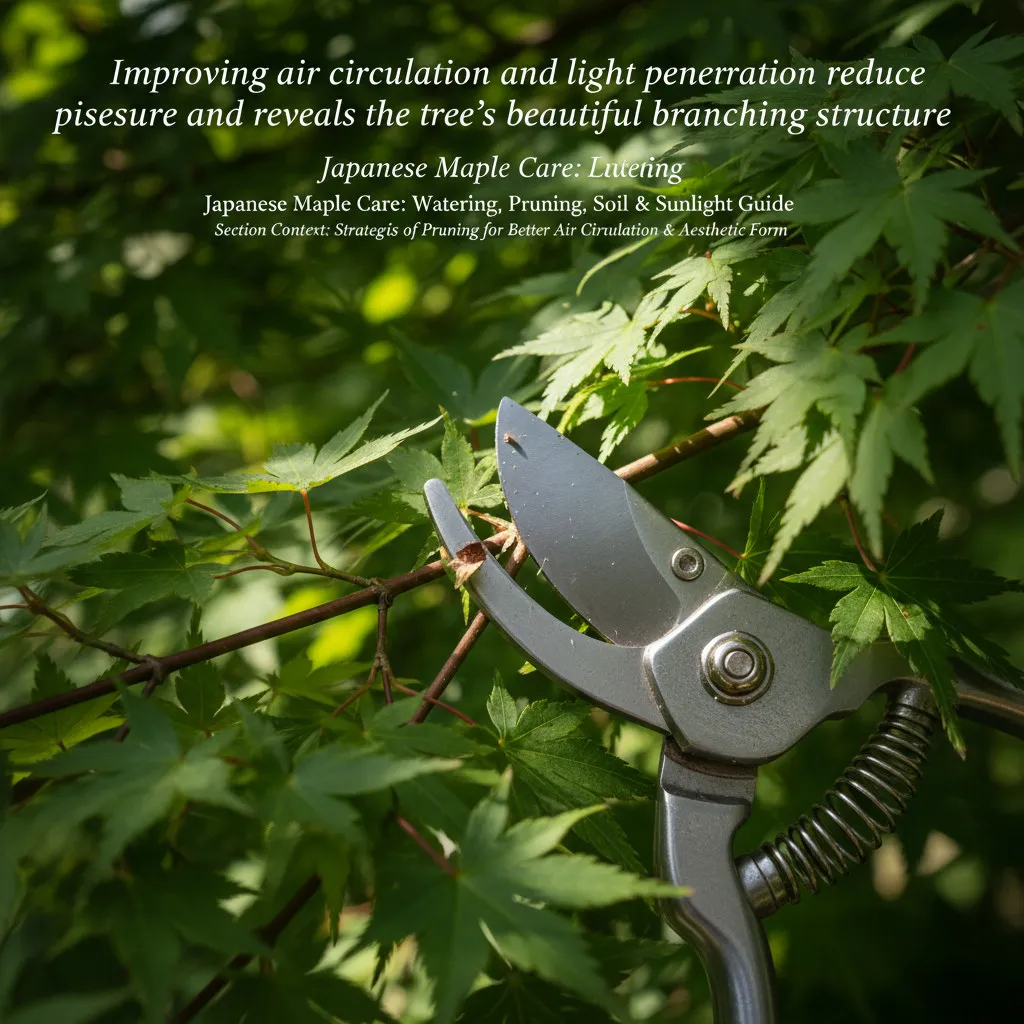
- Thin dense interior growth: Improving air circulation and light penetration reduces disease pressure and reveals the tree’s beautiful branching structure
- Cut back to lateral branches or buds: Never leave stubs that die back and create entry points for pathogens
- Use clean, sharp tools: Disinfect pruning equipment between cuts, especially after removing diseased material
Important pruning principles:
Less is more with Japanese maples. Work slowly, step back frequently to assess your progress, and resist the urge to dramatically reshape the tree in a single session. Heavy pruning can stress the tree and stimulate excessive, unattractive growth.
For weeping varieties, remove branches growing straight up that disrupt the cascading form. For upright varieties, remove inward-growing branches and selectively thin to create the characteristic layered appearance.
Fertilizing Your Japanese Maple for Optimal Growth
Japanese maples are moderate feeders that benefit from annual fertilization but can be damaged by excessive nutrients, particularly high-nitrogen fertilizers that promote weak, leggy growth and increase susceptibility to pests and diseases.
Choosing the Right Fertilizer
Select a balanced, slow-release fertilizer formulated for acid-loving plants or trees. Products designed for rhododendrons, azaleas, and camellias work excellently for Japanese maples because they address similar nutritional needs and maintain appropriate soil pH.
Fertilizer selection guidelines:
- Slow-release formulations: Provide consistent nutrition throughout the growing season without risking nutrient burn
- Balanced nutrients: Avoid high-nitrogen formulas that stimulate excessive vegetative growth
- Organic options: Products containing mycorrhizae and beneficial bacteria support healthy root development
- Avoid: Heavy manures, water-soluble quick-release fertilizers, and high-nitrogen lawn fertilizers
Fertilizing Schedule and Application
Timing recommendations:
-
Do not fertilize newly planted trees: Wait until the second growing season to allow roots to establish without the stress of concentrated nutrients
-
Apply in early spring: Fertilize once annually, just before new growth begins, when trees can immediately utilize the nutrients for spring flush
-
Optional mid-summer application: If growth appears sluggish on young trees, a second light application in early July can be beneficial—but never fertilize after mid-summer
Application tips:
- Apply fertilizer around the drip line, not against the trunk
- Water thoroughly after application to move nutrients into the root zone
- Follow package instructions carefully—more is not better
- If soil is rich in organic matter, annual fertilization may be unnecessary for mature trees
Protecting Japanese Maples from Pests and Diseases
While Japanese maples are generally healthy, low-maintenance trees, they can occasionally face challenges from pests like aphids and spider mites, as well as fungal diseases such as verticillium wilt and powdery mildew.
Common Pests and Management
Aphids: These small, soft-bodied insects cluster on new growth, sucking sap and excreting sticky honeydew. Heavy infestations cause distorted leaves and attract ants. Management: Spray with a strong stream of water to dislodge, apply insecticidal soap or neem oil, or introduce beneficial insects like ladybugs.
Spider mites: Tiny pests that thrive in hot, dry conditions, causing stippled, bronzed foliage and fine webbing. Management: Maintain adequate watering to reduce plant stress, spray foliage with water to increase humidity, and apply miticides for severe infestations.
Scale insects: Appear as small bumps on branches and leaves, weakening trees by feeding on sap. Management: Scrub off with a soft brush, apply horticultural oil during dormancy, or use systemic insecticides for heavy infestations.
Disease Prevention and Treatment
Verticillium wilt: A serious soil-borne fungal disease causing sudden branch dieback, often on one side of the tree first. Look for green or black streaking in the wood of affected branches. Prevention: Plant in well-drained soil, avoid overwatering, maintain tree health through proper care. Treatment: No cure exists—remove affected branches, disinfect tools between cuts, and hope the tree can compartmentalize the infection.
Leaf scorch: While technically a stress response rather than a disease, leaf scorch (brown, crispy leaf margins) commonly affects Japanese maples during hot, dry, or windy weather. Prevention: Provide afternoon shade, maintain consistent moisture, and protect from wind.
Seasonal Care Tips for Year-Round Health
Japanese maples require different care approaches throughout the year, with summer heat protection and winter hardiness being primary seasonal concerns in most climates.
Summer Care Essentials
Summer presents the greatest challenges for Japanese maples, particularly in hot climates. Prioritize these summer care practices:
- Maintain consistent moisture: Water deeply and regularly, especially during heat waves
- Provide afternoon shade: Use shade cloth temporarily during extreme heat if necessary
- Apply mulch: Refresh mulch layer to keep roots cool and conserve moisture
- Monitor for pests: Spider mites thrive in hot, dry conditions—check regularly
- Avoid fertilizing: No fertilization after early summer to prevent tender late-season growth
Winter Protection Strategies
Most Japanese maples are hardy to Zone 5 or 6, but winter protection may be necessary in colder areas or for trees planted in exposed locations:
- Mulch heavily: Apply 3 to 4 inches of mulch before ground freezes to insulate roots
- Wrap trunks: Protect thin bark from freeze-thaw damage and rodent nibbling
- Brush off heavy snow: Prevent branch breakage by gently removing snow accumulation (leave ice in place)
- Water during dry winters: Roots can desiccate during prolonged dry periods
- Protect container maples: Move to sheltered locations where soil temperature stays above 14°F
Growing Japanese Maples Successfully in Containers
Container cultivation allows gardeners to enjoy Japanese maples on patios, decks, and in small spaces, though potted trees require more attentive care than those planted in the ground, particularly regarding watering and winter protection.
Container Selection and Setup
Choosing the right container significantly impacts your success with potted Japanese maples. Select a container that balances aesthetics with functionality:
Size: Choose a pot 2 to 3 times the diameter of the root ball, allowing room for growth. Repot every 2 to 3 years as the tree matures.
Material considerations:
- Ceramic and terracotta: Heavy, stable, and breathable, but may dry out quickly and can crack in freezing temperatures
- Plastic: Lightweight, retains moisture well, but may lack breathability
- Wood: Natural appearance, good insulation, but requires treatment to prevent decay
- Fiberglass: Lightweight, durable, and available in attractive finishes
Essential features: Adequate drainage holes are non-negotiable—Japanese maples cannot tolerate waterlogged roots.
Container Care Best Practices
- Water more frequently than in-ground trees—possibly daily during summer heat
- Use quality potting mix (never garden soil)
- Fertilize lightly but regularly during the growing season
- Protect roots from temperature extremes (both heat and cold)
- Repot when roots become circling or water no longer penetrates the root ball
Final Thoughts: Cultivating Japanese Maple Success
Japanese maples reward patient, attentive gardeners with decades of breathtaking beauty. These remarkable trees transform with each season—from the delicate unfurling of spring leaves to the spectacular autumn display of crimson, orange, and gold. By providing proper sunlight exposure, well-drained acidic soil, consistent moisture without waterlogging, and thoughtful pruning, you create the conditions for your Japanese maple to thrive.
Remember that location selection represents your most important decision, as changing a tree’s position later proves difficult and stressful. Take time to observe potential sites throughout the day and across seasons before committing. Once planted, resist the temptation to over-manage—Japanese maples evolved to succeed with minimal intervention when their basic needs are met.
Key takeaways for Japanese maple success:
- Light: Partial shade or morning sun with afternoon protection works best for most varieties
- Soil: Well-drained, slightly acidic, rich in organic matter
- Water: Consistent moisture without waterlogging; adjust based on observation, not schedule
- Pruning: Less is more—focus on removing dead wood and improving air circulation
- Fertilizing: Annual spring application of slow-release, balanced fertilizer
- Protection: Shield from extreme heat, harsh winds, and severe winter cold
Whether you’re cultivating a stately specimen in your front yard, a cascading laceleaf beside your patio, or a diminutive bonsai on your windowsill, Japanese maples offer endless opportunities for garden artistry. Embrace the journey of learning your specific tree’s preferences, and you’ll be rewarded with a living masterpiece that grows more beautiful with each passing year.
![What Is the National Fruit of Korea And Why? [ANSWERED]](https://fruitonix.com/wp-content/uploads/2023/04/What-Is-the-National-Fruit-of-Korea-And-Why-1024x683.jpg)

![What Is The National Fruit Of Japan And Why? [ANSWERED]](https://fruitonix.com/wp-content/uploads/2023/04/japanese-persimmon-1024x576.jpg)