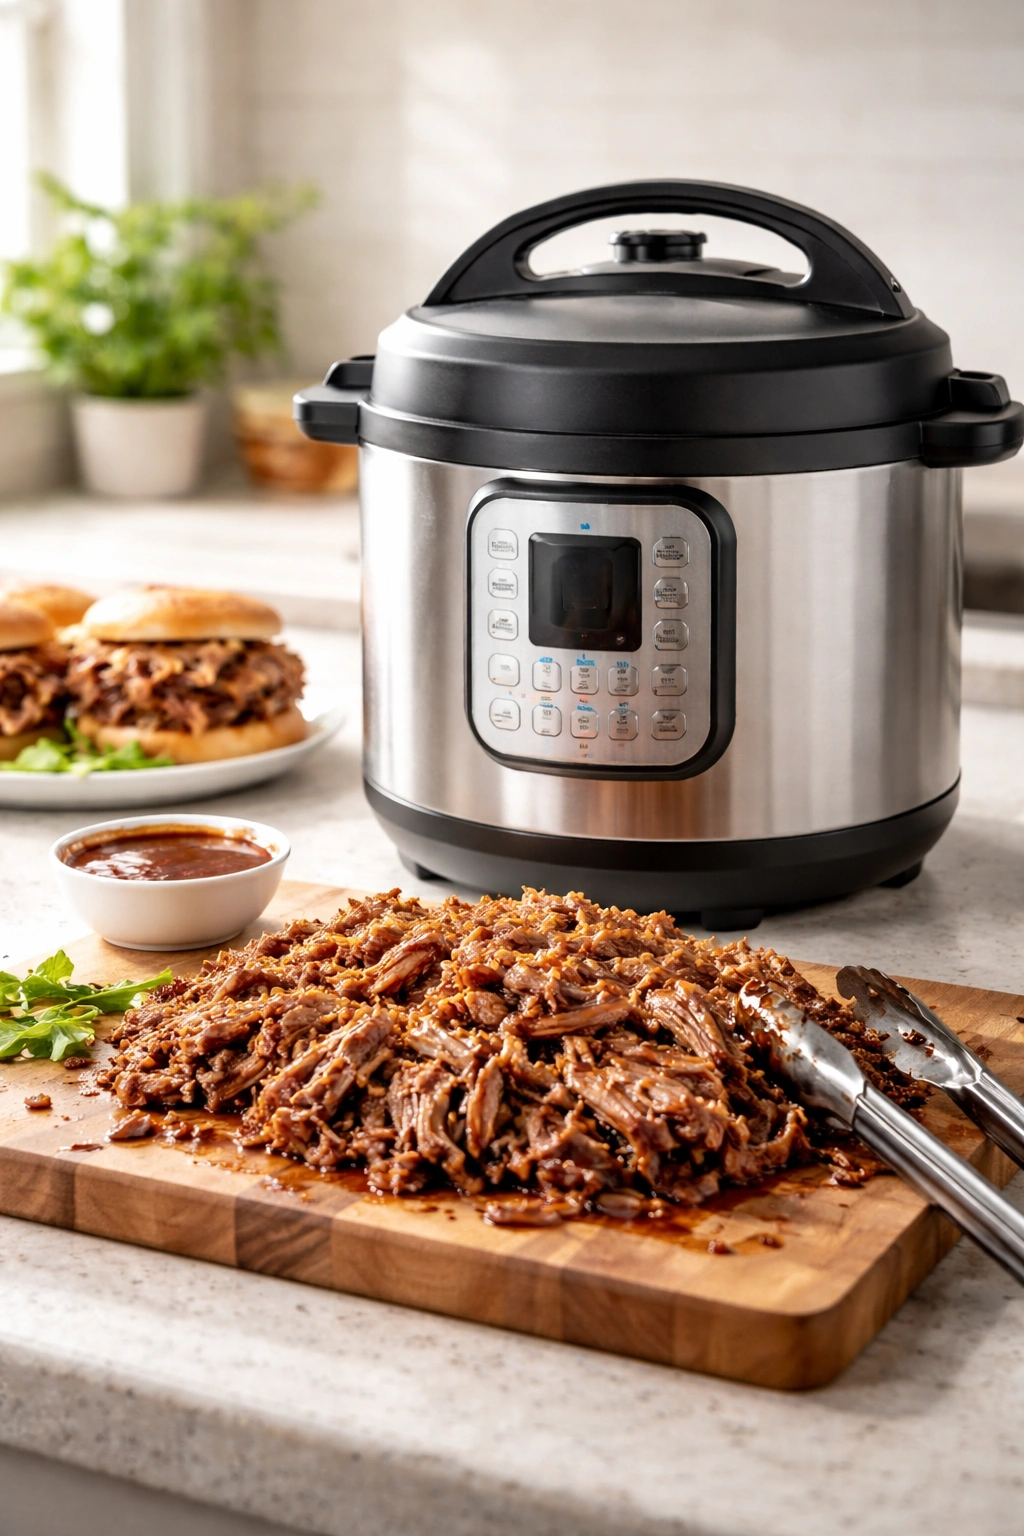
Instant Pot Pulled Pork That Shreds Perfectly
There’s something magical about pulling apart a piece of pork so tender it falls to shreds with barely any effort. For years, achieving that texture meant spending entire afternoons tending a smoker or slow cooker, watching the clock, and hoping the timing would work out. The Instant Pot changed that equation completely. What once required eight hours of passive cooking or three hours in the oven now happens in just one hour of active pressure cooking—plus a natural release.
The secret isn’t luck or some mysterious technique. It’s understanding how pressure and time work together to break down connective tissues and transform a tough, marbled cut of pork into something so moist and tender it practically dissolves on your tongue. More importantly, you’ll learn exactly why certain methods produce better results than others, and what separates good pulled pork from the kind that makes people ask for your recipe.
This isn’t just another pulled pork recipe. This is a deep dive into why the Instant Pot delivers such consistently perfect results, backed by practical knowledge from making this dish countless times. By the end, you’ll understand the science, master the technique, and know how to troubleshoot if anything goes sideways.
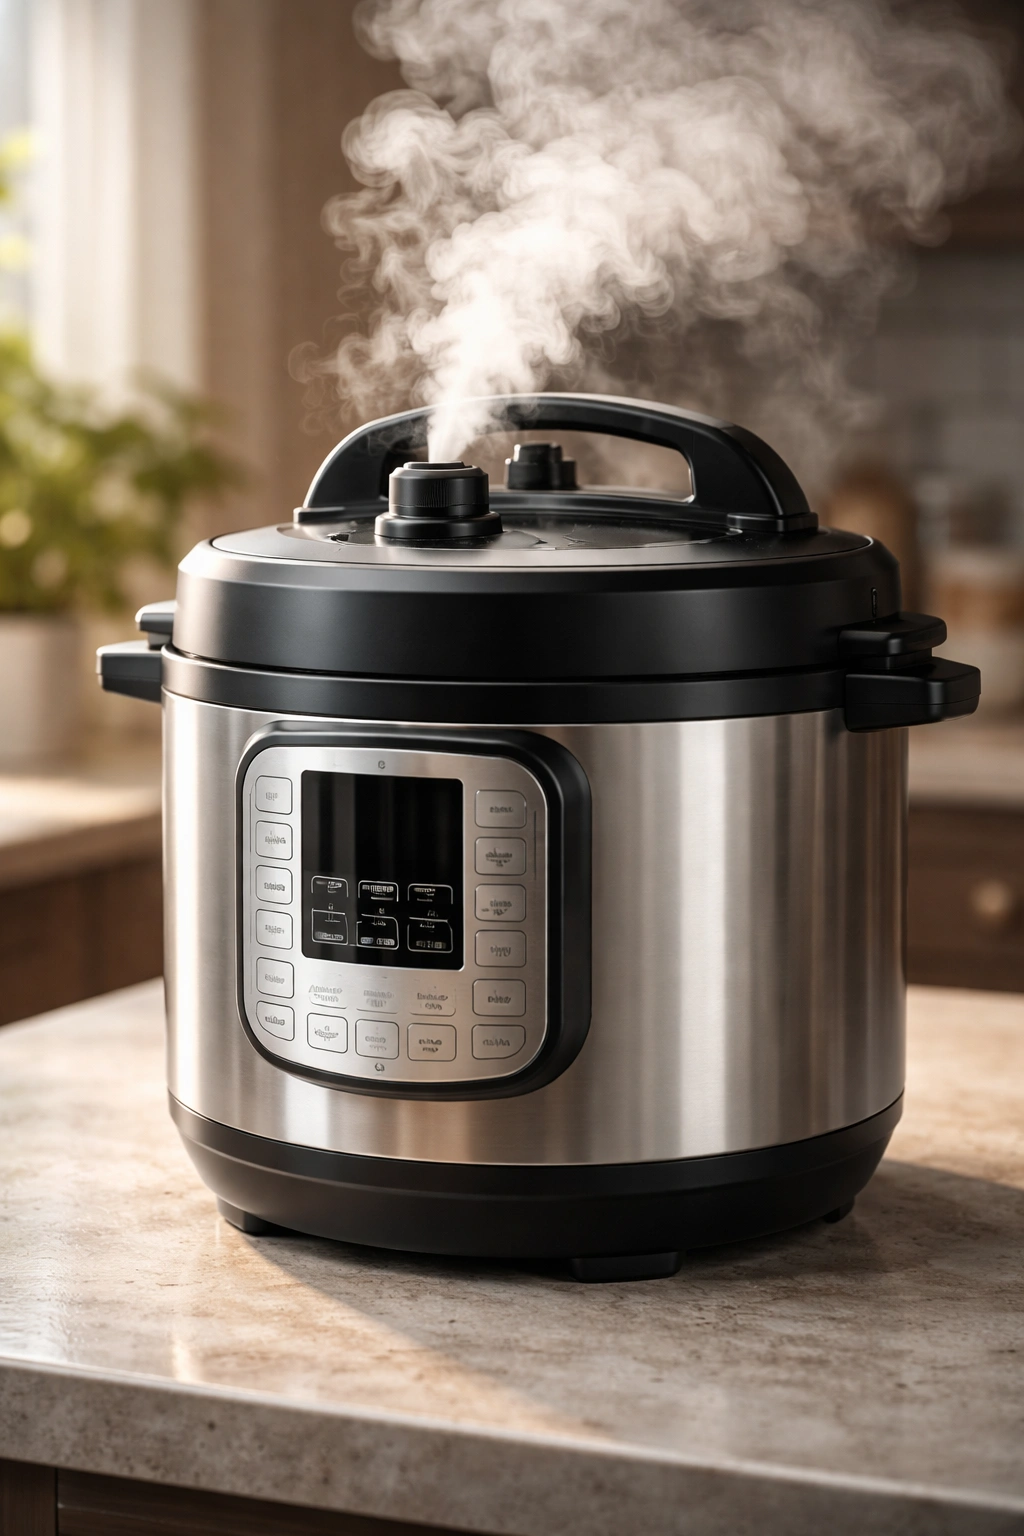
Why the Instant Pot Is Perfect for Pulled Pork
The Instant Pot succeeds where other methods sometimes struggle because of how pressure cooking works at a fundamental level. When you seal the lid and pressurize the pot, the temperature inside rises above the normal boiling point of water. This higher heat penetrates the meat much faster, breaking down collagen into gelatin—the substance responsible for that luxurious, melt-in-your-mouth texture you’re after.
Traditional slow cooking accomplishes the same transformation, but it does it slowly over eight or more hours. The Instant Pot achieves similar—sometimes superior—results in about one hour of actual cooking time, plus pressure buildup and release. You’re not sacrificing quality for speed; you’re gaining both.
The sealed environment of the pressure cooker also traps steam and aromatic compounds. Every spice you add, every bit of seasoning, stays in the pot rather than evaporating into your kitchen. This means deeper, more concentrated flavors in less time. The pork absorbs these flavors directly rather than having them slowly simmer away over hours.
Another advantage is control. With a slow cooker, if you forget about it or get held up, you’ve got a window where the meat might overcook and become mushy. With the Instant Pot, your cooking time is precise. Once you hit that sixty-minute mark and allow the natural pressure release, the cooking essentially stops. You get consistency every single time.
Choosing Your Cut of Pork
Not all pork cuts will produce equally tender, juicy pulled pork. The wrong choice sets you up for disappointment before you even begin cooking. You want a cut with enough fat and connective tissue that these elements transform into something amazing under pressure, rather than becoming tough or stringy.
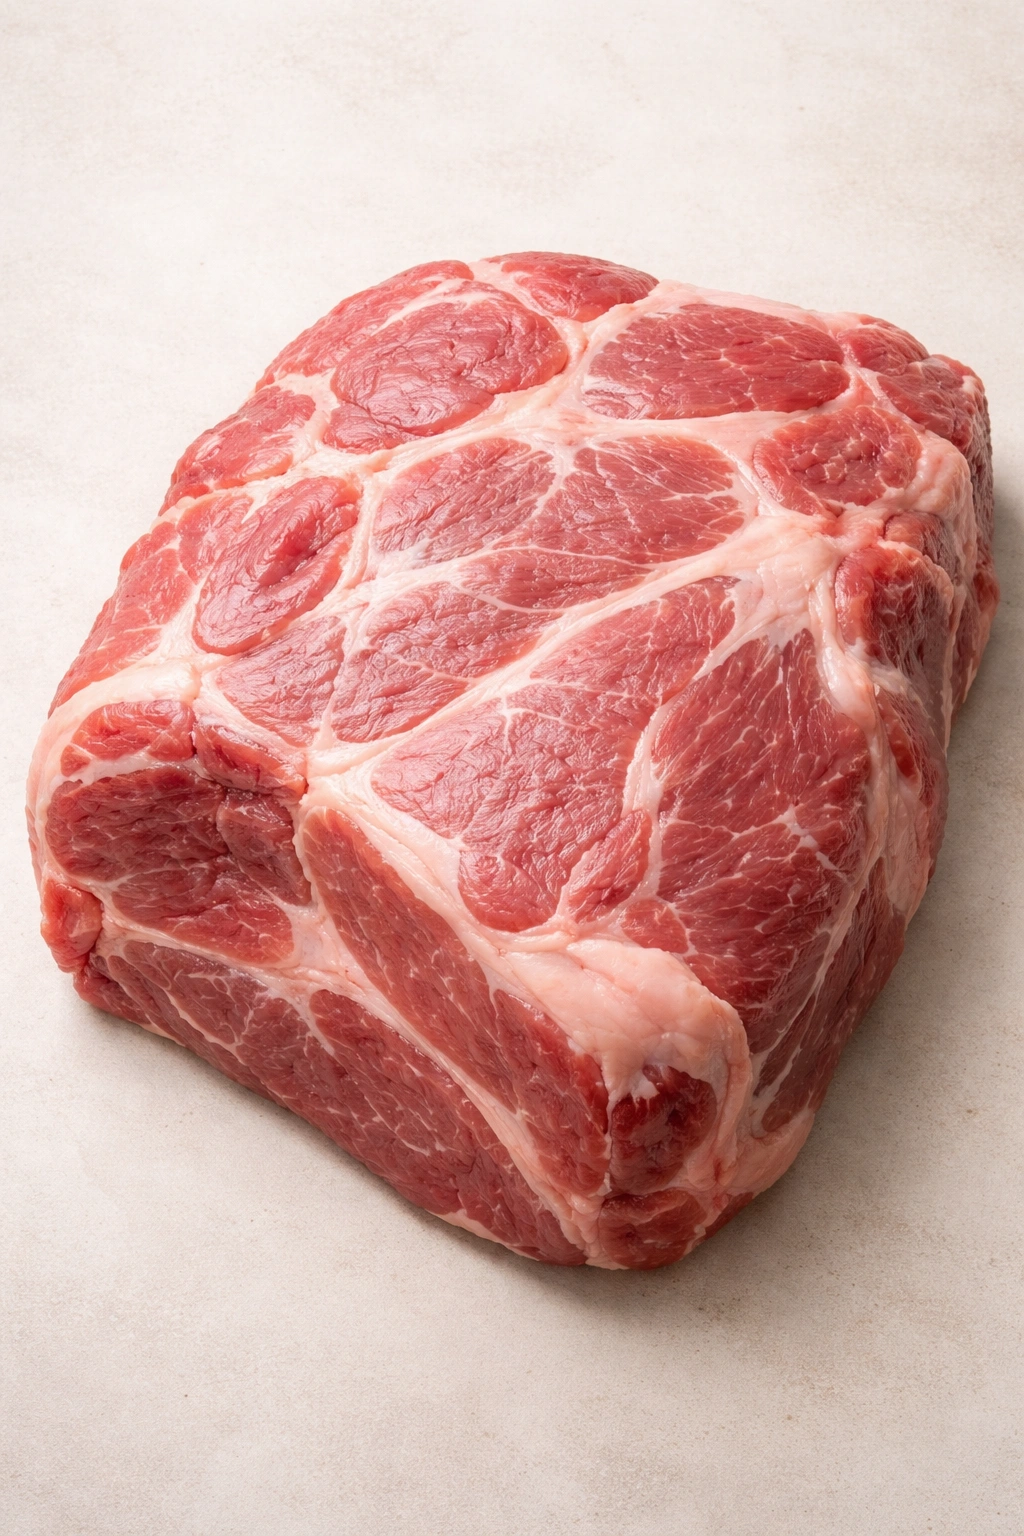
Pork shoulder—also called Boston butt, pork butt, or picnic shoulder—is the gold standard for pulled pork. Despite the confusing name, Boston butt doesn’t come from the rear of the pig; it comes from the upper front leg, where the animal’s muscles work harder, creating a marbled, well-integrated fat throughout the meat. This fat is crucial. It keeps the pork moist, renders during cooking to create that rich flavor, and contributes to the tender texture that defines excellent pulled pork.
Pork shoulder typically ranges from three to five pounds, which is the ideal size for an Instant Pot. A smaller piece might not have enough liquid surrounding it to come to proper pressure, while a larger cut might not cook evenly or may exceed your pot’s fill line. Look for shoulders with visible white marbling throughout the meat—that’s the fat doing its job.
You can choose between bone-in and boneless. Bone-in shoulders are often slightly cheaper and some swear the bone adds flavor, though the difference is minimal with the Instant Pot method. Boneless is more convenient for cutting into chunks and shredding afterward. Either works perfectly.
Pork loin is sometimes suggested as a leaner alternative, but it’s not ideal. It has less fat, which means less flavor and potentially drier results. If you prefer leaner meat or have dietary restrictions, pork loin will work, but you’ll need to be extra vigilant about not overcooking it and keeping it moist with additional liquid.
When selecting your pork, look for meat that’s a pale pink color with white marbling visible throughout. Avoid anything that looks gray or has excessive surface moisture. If the shoulder is vacuum-sealed and the label indicates a salt solution or brine, that’s a bonus—the pork has already been treated to retain moisture during cooking.
The Flavor Foundation: Creating the Perfect Rub
The dry rub is your first and most direct method of flavoring the pork. A good rub doesn’t just sit on the surface; the salt and spices begin penetrating the meat immediately, seasoning it from the outside in. When you apply the rub several hours or even the night before cooking, you get even deeper flavor penetration through a process called osmosis.
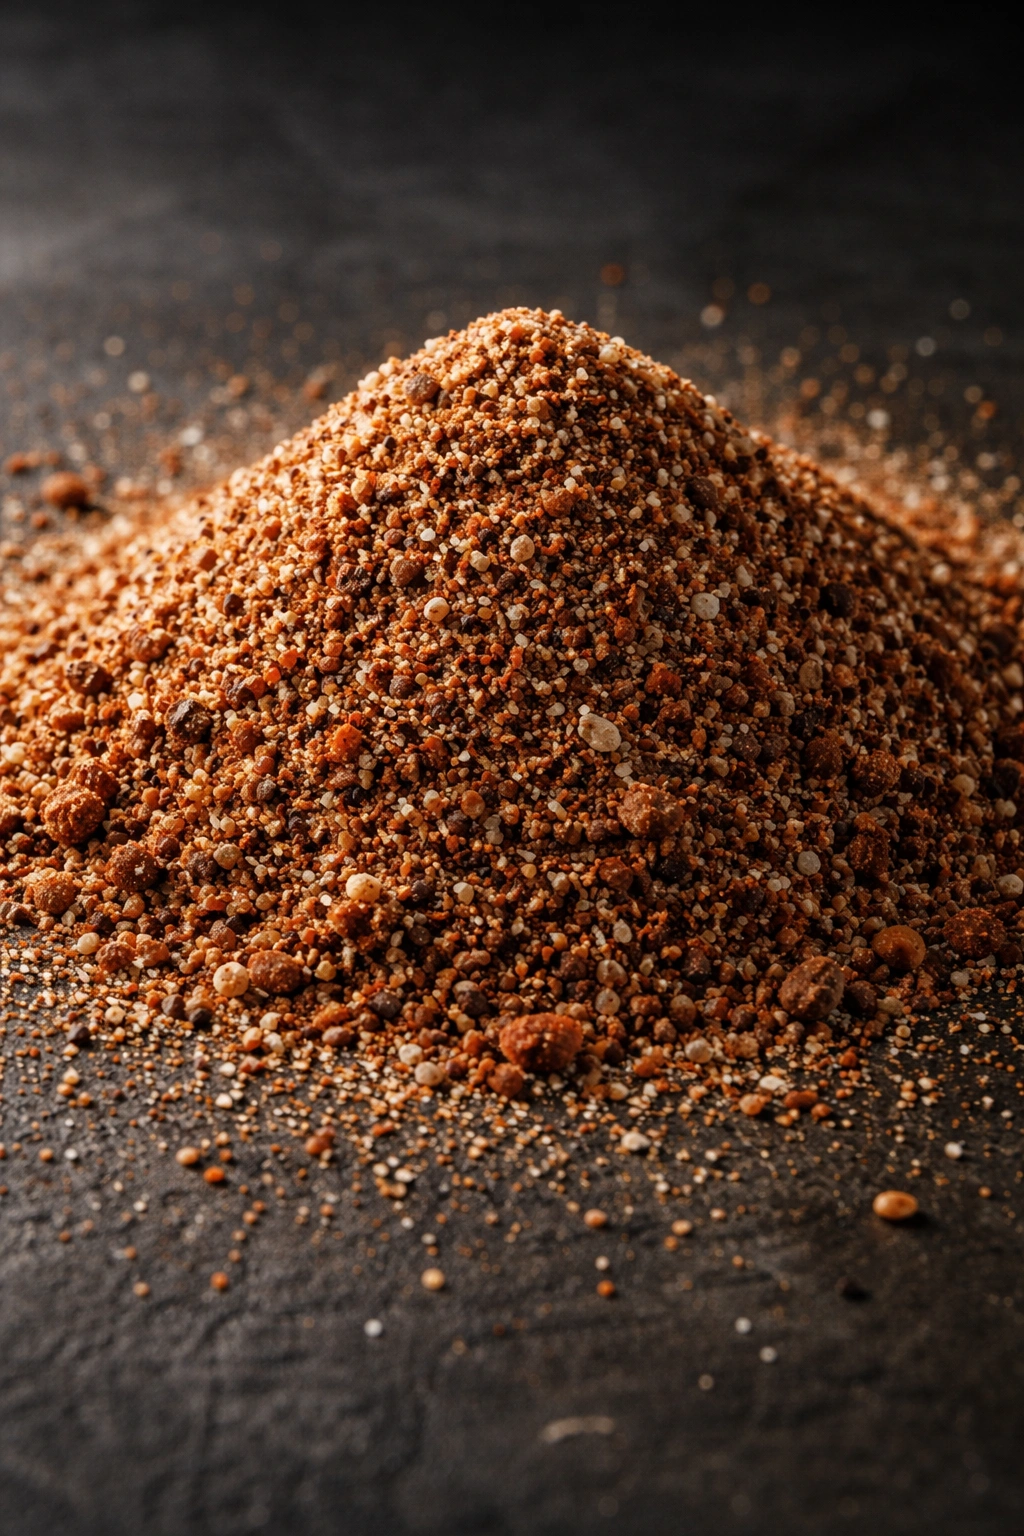
A classic pulled pork rub balances sweetness, savory depth, and just enough heat to keep things interesting. Brown sugar provides sweetness and caramelization. Paprika adds color, mild sweetness, and a subtle smokiness that echoes traditional barbecue. Garlic powder and onion powder contribute savory depth without requiring fresh aromatics that might scorch during searing.
Kosher salt is essential—it doesn’t just add saltiness but actually helps the meat retain moisture through a process called brining. Black pepper rounds out the flavor with subtle heat. Cumin adds an earthy warmth, and optional cayenne brings genuine heat without overpowering the other flavors.
The typical formula is about one tablespoon of brown sugar, two teaspoons of paprika, two teaspoons of garlic powder, two teaspoons of onion powder, one teaspoon of salt, one teaspoon of black pepper, half a teaspoon of cumin, and a quarter teaspoon of cayenne pepper. This makes enough to coat a four to five-pound shoulder generously.
Mix your spices together in a small bowl first, then add them to the pork pieces one at a time, rubbing each piece thoroughly. Get every surface—top, bottom, and sides. If you have time, seal the rubbed pork in a zip-top bag and refrigerate for a few hours or overnight. This isn’t absolutely necessary, but it does improve flavor depth significantly.
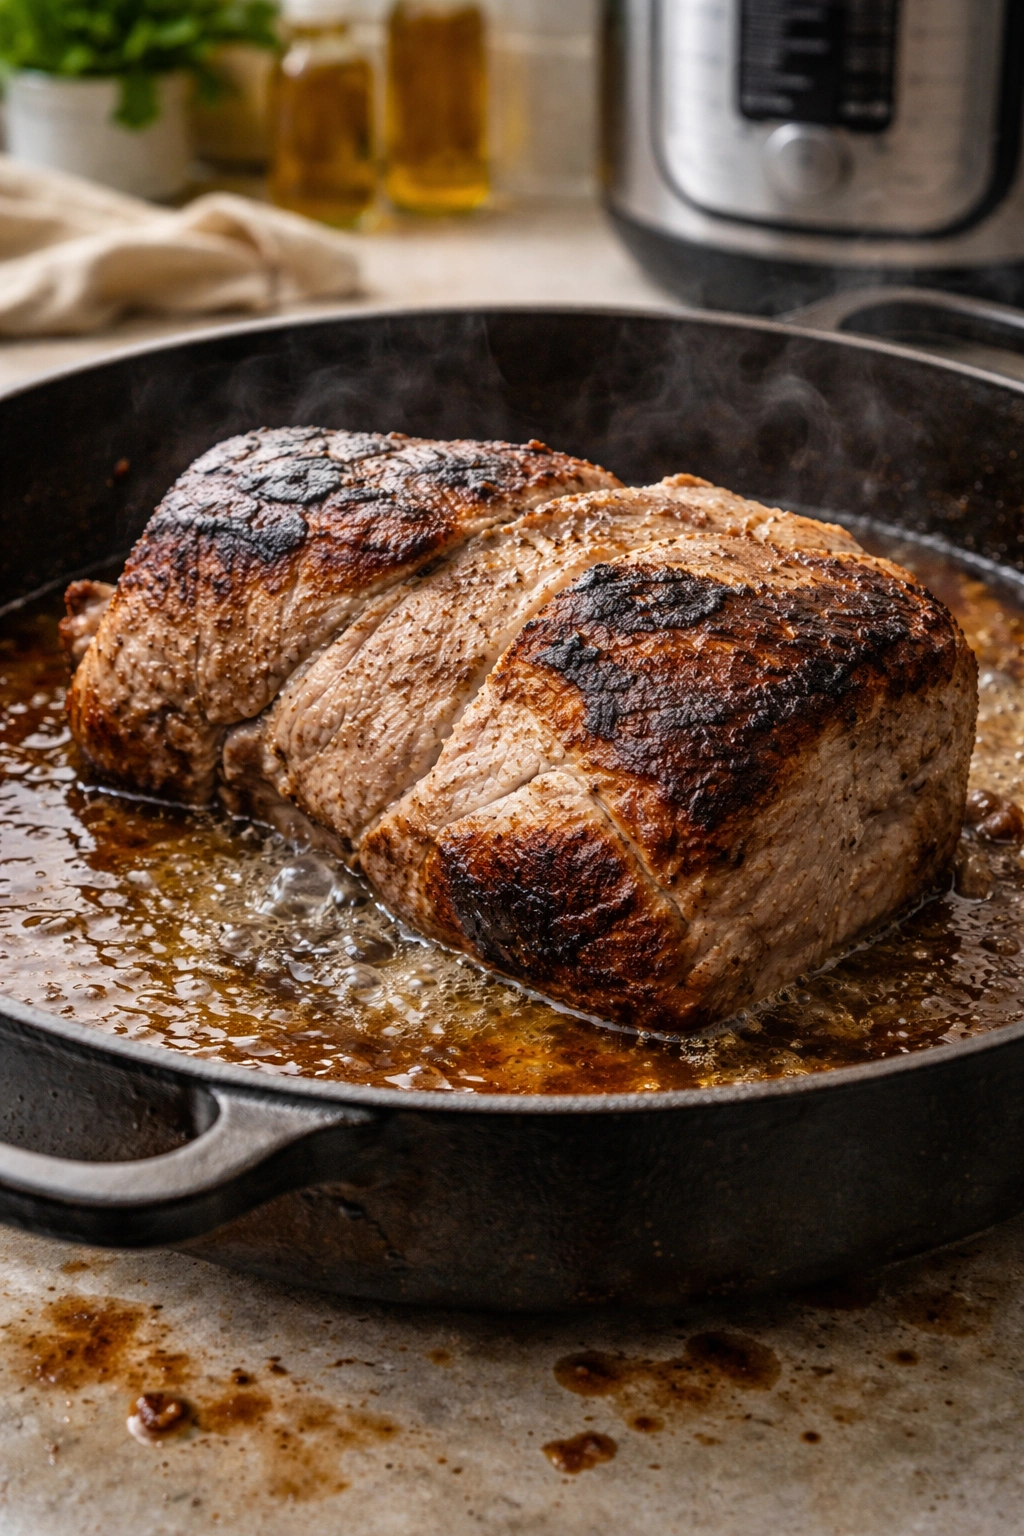
Searing Your Pork for Deep Flavor
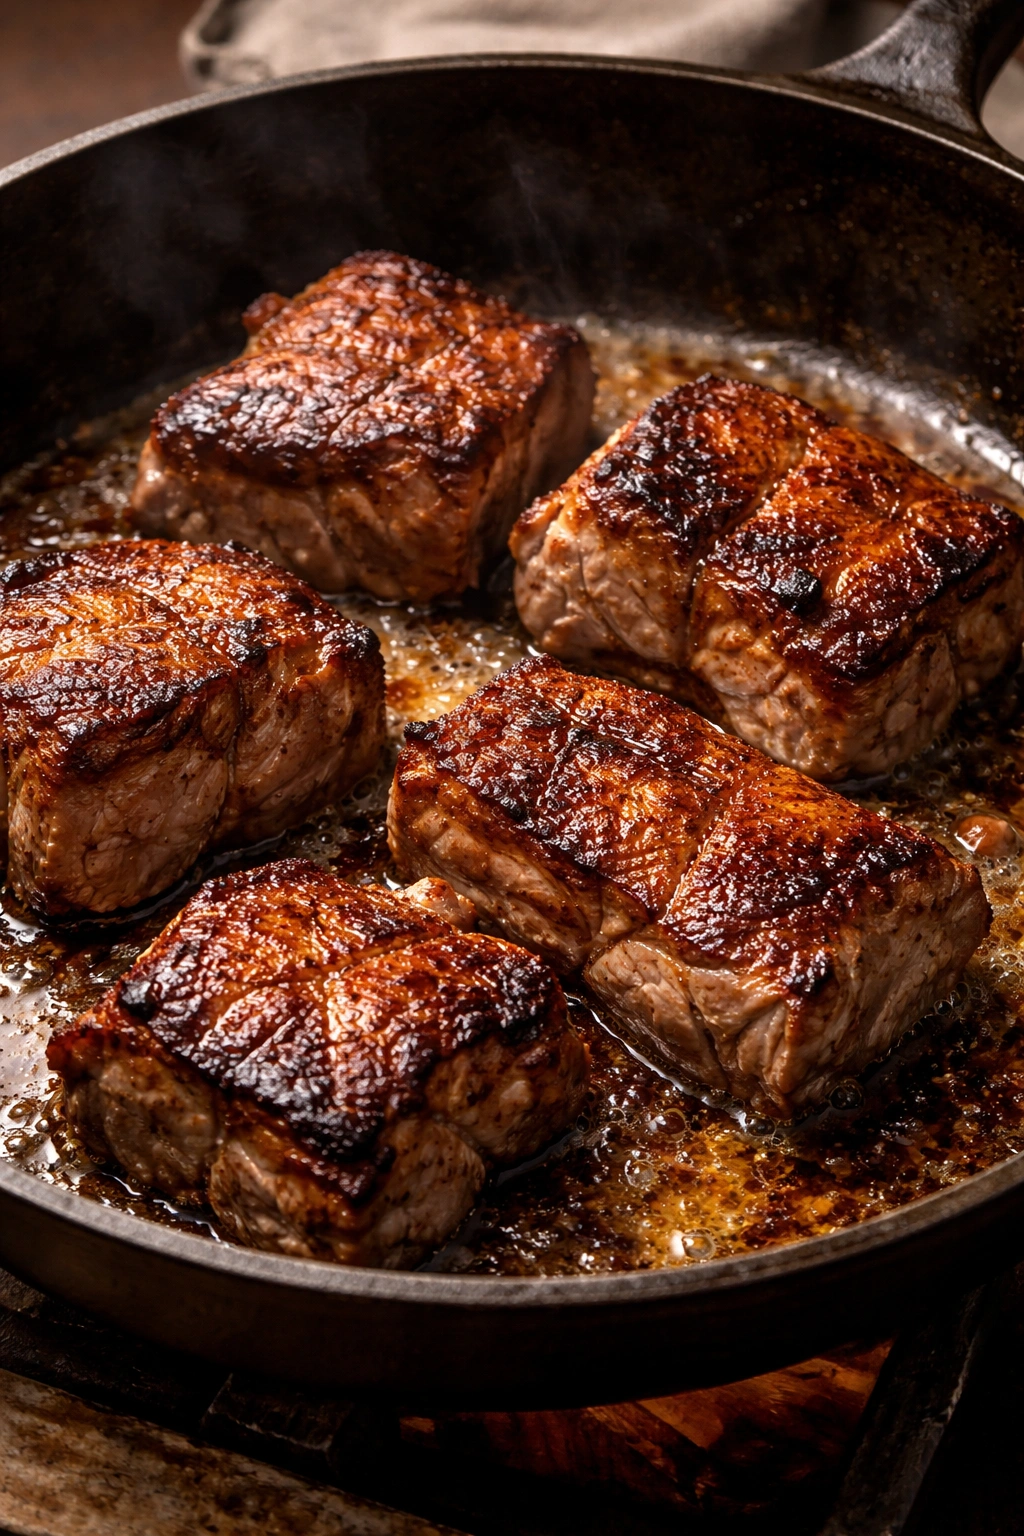
Searing the pork before pressure cooking might seem like an extra step, but it creates complexity that you simply cannot achieve without it. When you sear meat at high heat, the proteins and sugars on the surface undergo the Maillard reaction, creating hundreds of new flavor compounds that aren’t present in the raw meat.
These browned, caramelized bits aren’t just flavor—they’re visible evidence that your pork is developing depth. When you use the Instant Pot’s sauté function to brown the meat thoroughly, you’re creating a foundation of umami and richness that will carry through the entire finished dish.
Set your Instant Pot to sauté mode and let it preheat for a minute or two. Add two tablespoons of olive oil or another high-heat oil like avocado oil. Once the oil is shimmering—you’ll see it move easily across the bottom of the pot—carefully add your pork pieces. Don’t crowd the pot; you want each piece to have contact with the hot surface. If your shoulder is cut into four chunks, you might need to sear in two batches.
Let each piece sit undisturbed for about two to three minutes before moving it. You’re looking for a deep golden brown color on that first side—not black or burned, but genuinely browned. Flip and repeat on the second side. If you can, try to sear the edges and any irregular surfaces as well.
The entire searing process takes about ten to fifteen minutes if you’re doing it in batches. It’s not wasted time. You’re building the foundation of your finished dish right there in the pot.
Deglazing and Building Complexity
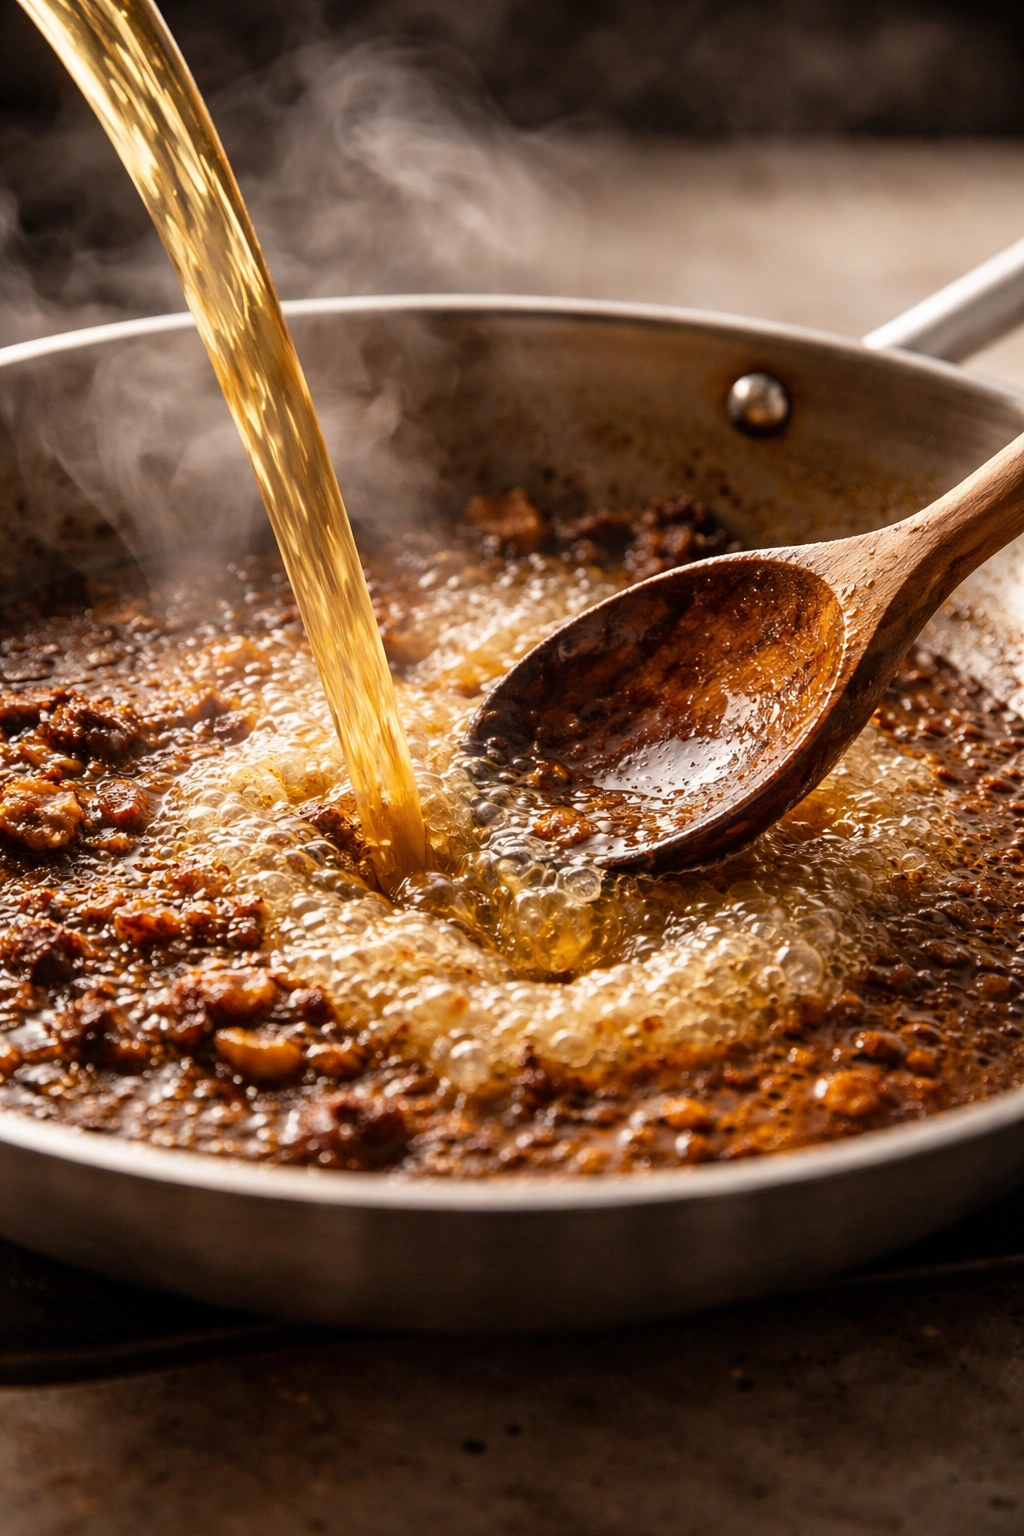
After you’ve removed the seared pork and set it aside on a plate, the bottom of the Instant Pot will be covered with browned bits and rendered fat. This is called fond, and it’s liquid gold in terms of flavor. Deglazing—the process of dissolving these stuck-on bits and incorporating them into the cooking liquid—is what transforms a simple broth into something complex and deeply savory.
Press cancel to turn off the sauté function, then add about half a cup of chicken or beef broth to the pot. Use a wooden spoon to scrape the bottom and sides, working at those browned bits until they dissolve into the liquid. It takes about a minute of scraping, and you’ll see the liquid turn darker as the fond incorporates. Don’t rush this step; make sure you’re getting everything.
Once the fond is dissolved, add the remaining broth—typically another one and a half cups—along with any additional liquid you’re using. Many excellent pulled pork recipes include apple cider vinegar for brightness and acid, which helps tenderize the meat and adds complexity. Worcestershire sauce brings umami depth. Some recipes use barbecue sauce directly in the cooking liquid, which works perfectly and saves a step at the end.
The total liquid should be enough to partially submerge the pork pieces without filling the pot past the two-thirds fill line. The Instant Pot needs some headspace to build pressure properly. Too little liquid and you risk a burn error; too much and you’ll have excess cooking liquid that will need reducing afterward.
Pressure Cooking for Tender Results
This is where the Instant Pot does its magic. Once your pork is back in the pot, submerged in the liquid, you’ll secure the lid, ensure the valve is set to sealing (not venting), and set the pressure cooker to high pressure for sixty minutes.
The pot will take about ten to twenty minutes to come to pressure—you’ll hear it hissing as pressure builds, and eventually a little pin inside the lid will rise, indicating that proper pressure has been reached. Once that pin goes up, your sixty-minute timer has officially started.
Don’t open the lid or check on the pork. This is the “set it and forget it” part. The pressure is doing the work, penetrating the meat and breaking down the collagen into gelatin. The meat is cooking completely submerged in flavorful liquid, staying incredibly moist throughout.
After sixty minutes of cooking, turn off the heat and allow the pressure to release naturally. This is crucial—don’t quick-release immediately. Natural release takes about twenty minutes, during which the pressure inside the pot gradually decreases. This gradual cooling allows the meat fibers to relax and retain their moisture. Quick release, by contrast, causes sudden temperature and pressure drops that can make the meat tougher and drier.
You’ll know the natural release is complete when the pin in the lid drops back down. Only then should you open the lid. Be careful when you do—there’s still steam inside, and the liquid is still very hot. Lift the lid away from you to avoid the initial burst of steam.
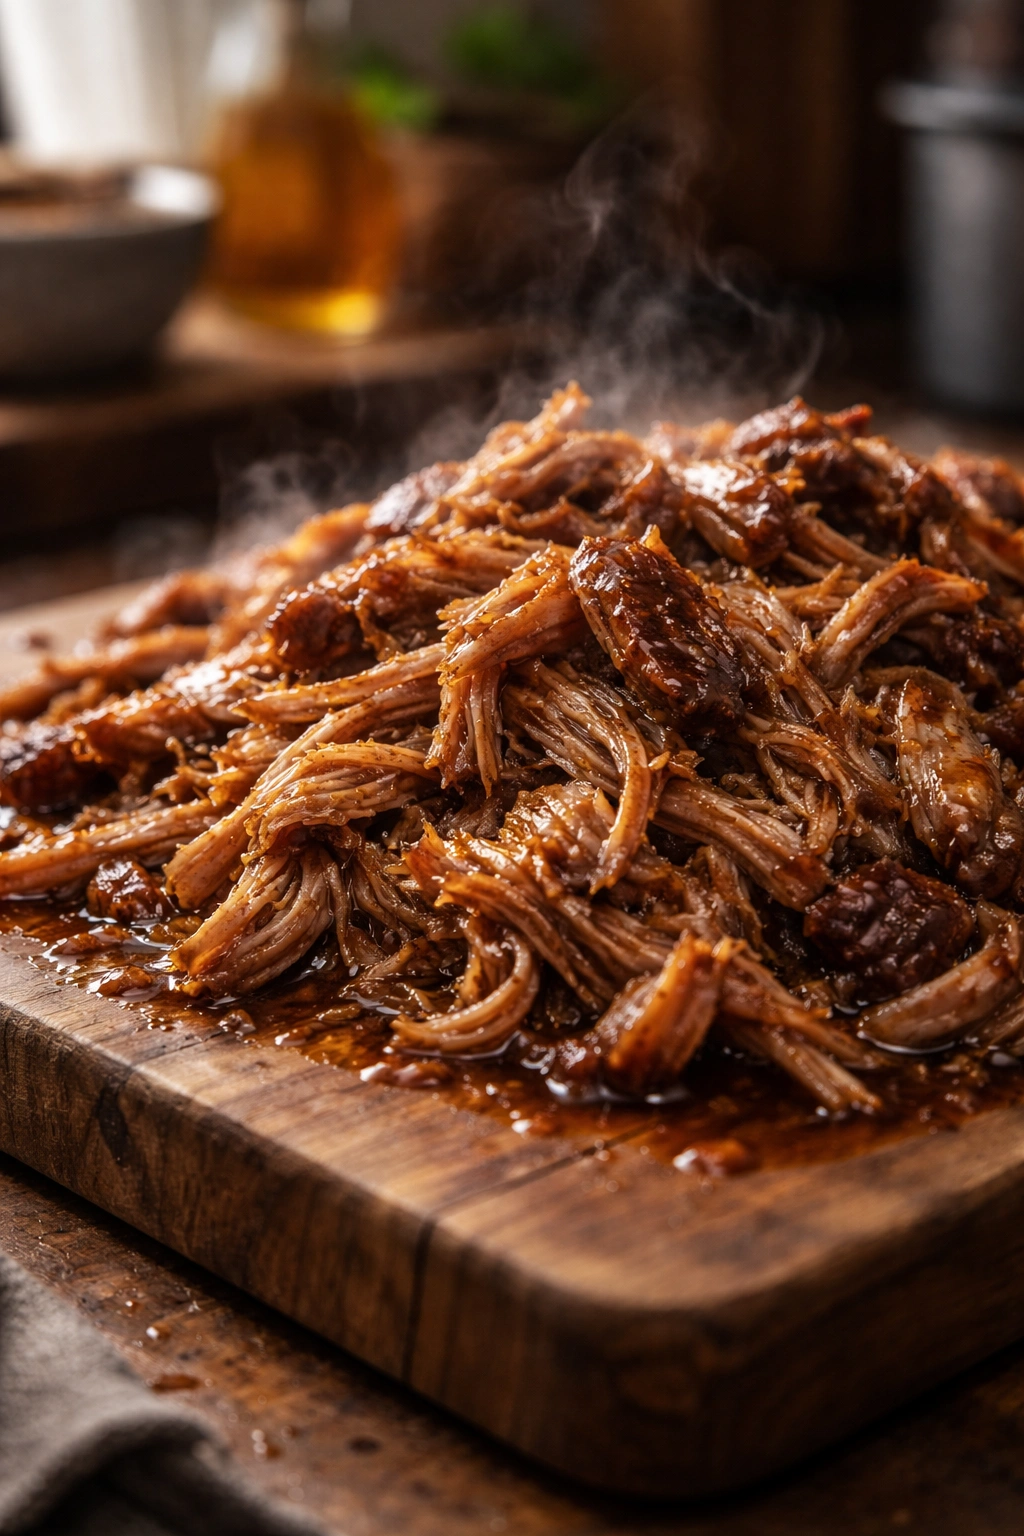
Shredding Techniques That Work Best
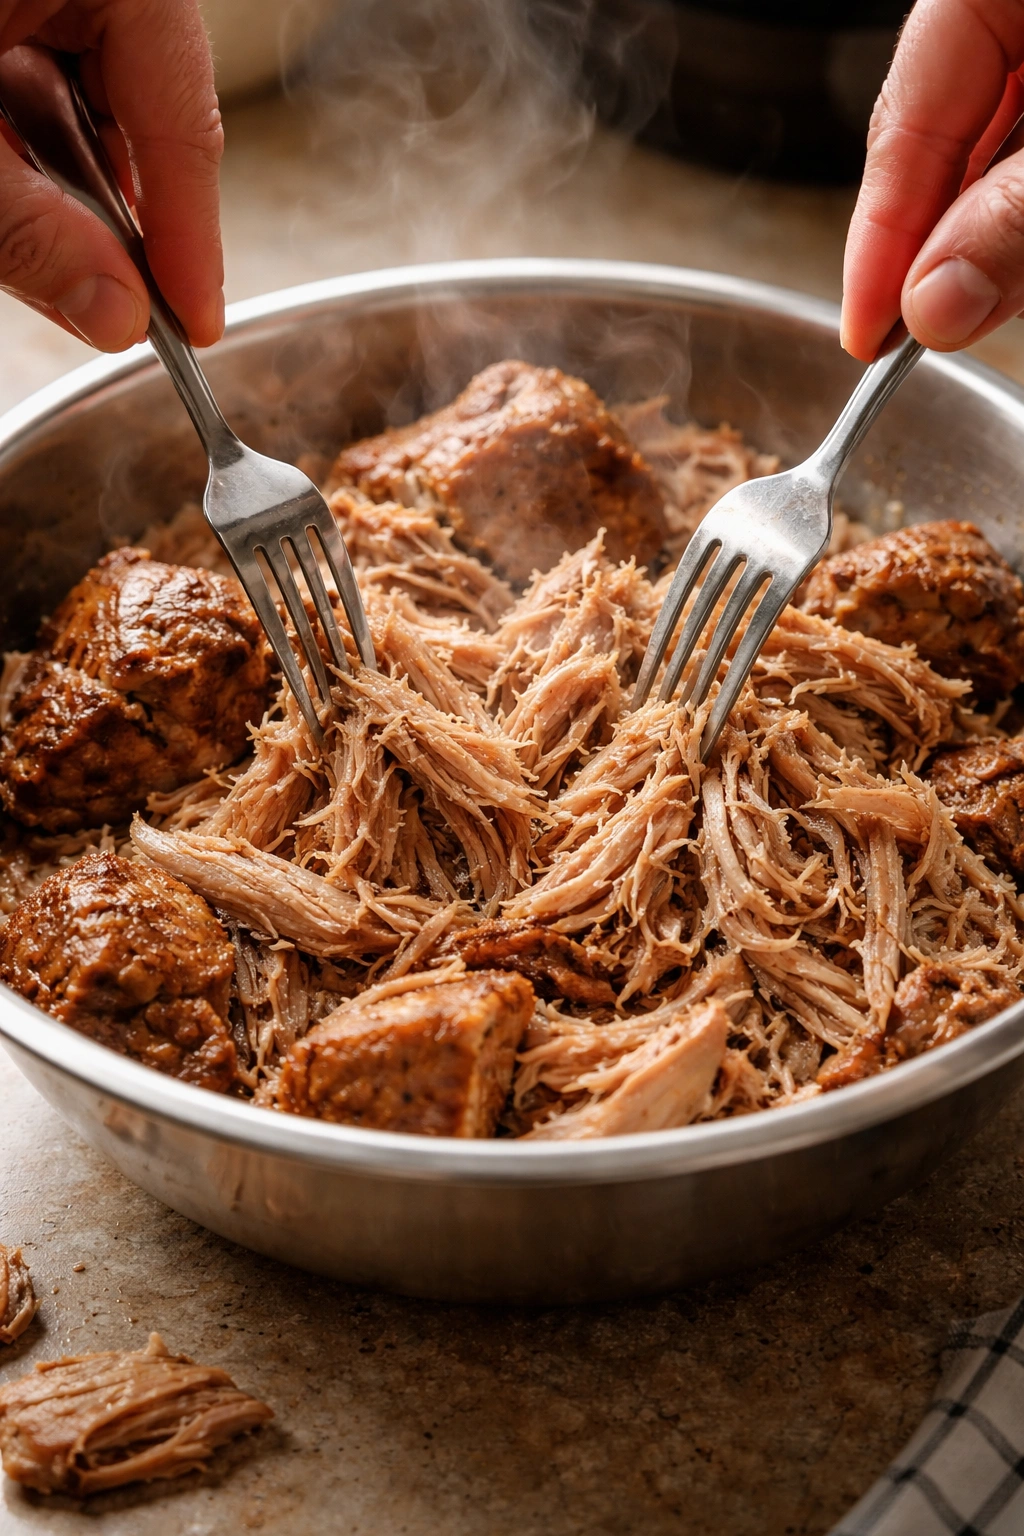
Once the pot is open and the steam has dissipated a bit, carefully remove the pork pieces and place them in a large bowl. They should fall apart at the slightest pressure—that’s how you know the cooking was perfect. If a piece feels solid or tough, it likely needs a few more minutes of cooking time.
The easiest and most practical way to shred the pork is with two forks. Hold one fork with the tines facing down into the meat, pressing to hold the piece steady. Use the other fork to pull the meat apart, working across the grain. The meat should separate into shreds almost effortlessly. Work your way through all the pieces until you’ve shredded everything.
As you shred, discard any large pieces of hard fat, though don’t obsess over getting every trace—some fat is what makes pulled pork delicious. Just remove the big, unpalatable chunks.
Some people use a stand mixer with a paddle attachment to shred larger batches of pork more quickly. If you go this route, make sure the meat is cool enough to handle and has been drained of excess liquid. This method works wonderfully for bulk meal prep.
You can also use two sturdy spoons, working one spoon against the other to separate the meat. It’s slower than forks or a mixer, but it works perfectly fine if that’s what you have available.
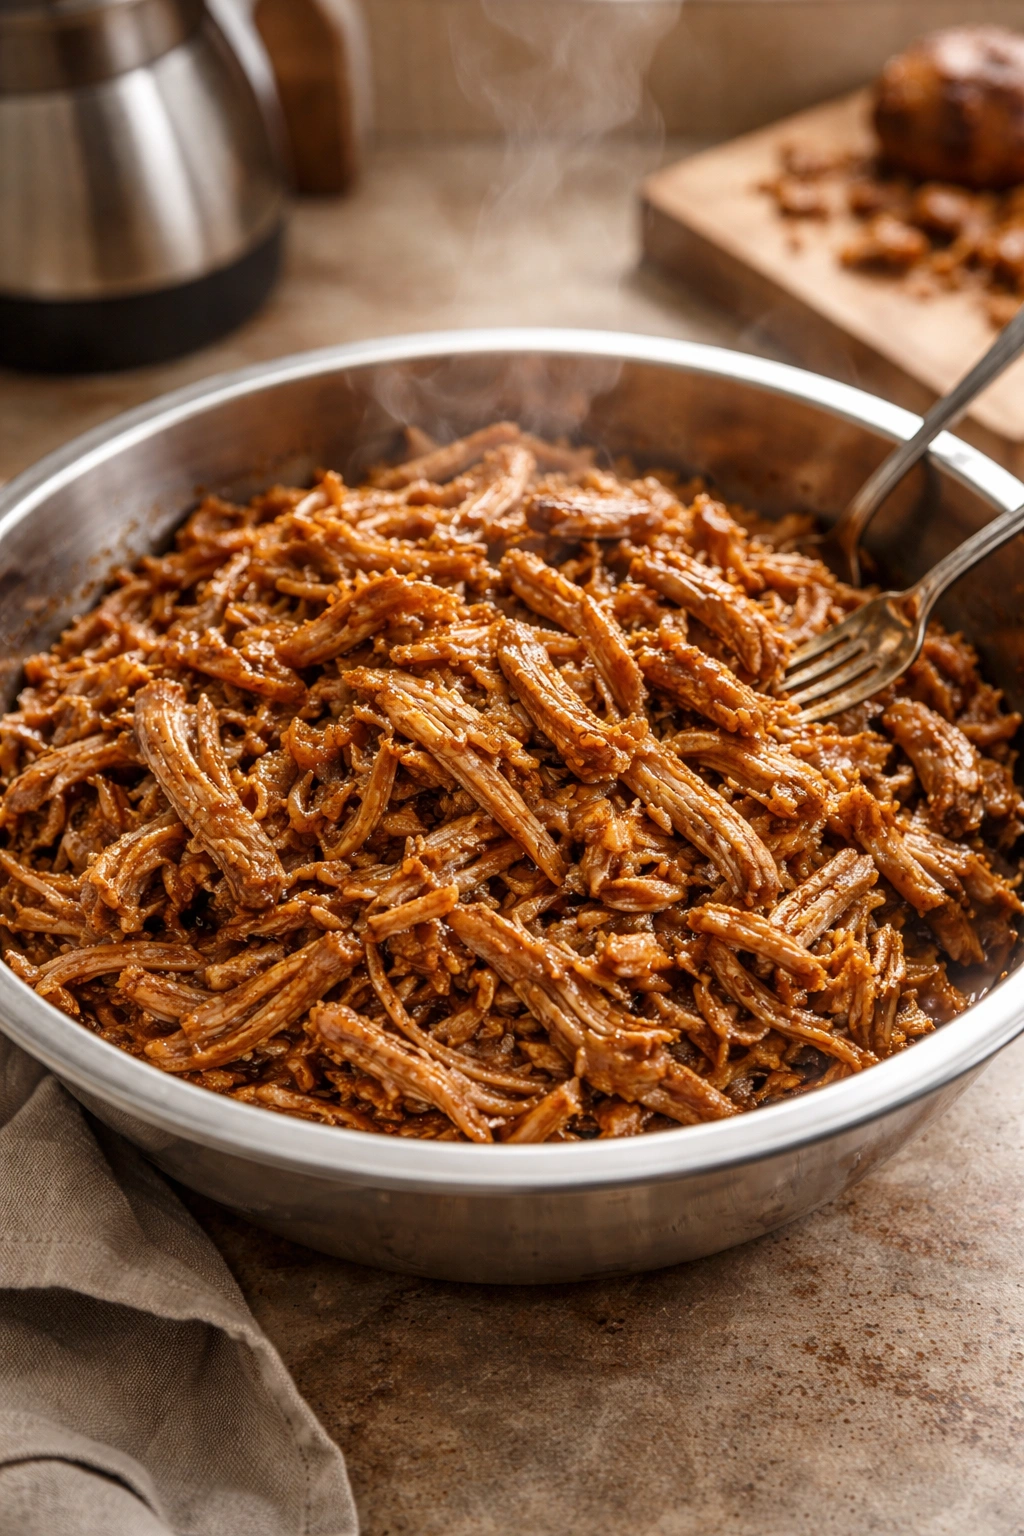
Once all the pork is shredded, add it back to the pot with the cooking liquid. Stir well so every piece is coated and absorbs the flavorful juices. At this point, you can serve immediately, or if the liquid seems excessive, you can use the sauté function to reduce it by about half. This concentrates the flavor and creates a saucier, more cohesive finished dish.
The Complete Instant Pot Pulled Pork Recipe
Yield: Serves 8 to 10 | Makes approximately 3 to 4 pounds cooked pulled pork
Prep Time: 15 minutes
Cook Time: 60 minutes at pressure
Pressurizing Time: 15 to 20 minutes
Natural Release: 20 minutes
Total Time: 1 hour 45 minutes to 2 hours
Difficulty: Beginner to Intermediate — The steps are straightforward even for first-time pressure cooker users, but understanding natural pressure release and proper meat searing helps achieve the best results.
For the Dry Rub:
- 1 tablespoon packed brown sugar
- 2 teaspoons smoked paprika
- 2 teaspoons garlic powder
- 2 teaspoons onion powder
- 1 teaspoon kosher salt
- 1 teaspoon black pepper
- ½ teaspoon ground cumin
- ¼ teaspoon cayenne pepper (optional, for mild heat)
For the Pork and Cooking Liquid:
- 4 to 5 pounds boneless pork shoulder (also called pork butt or Boston butt), trimmed of excess surface fat and cut into 4 equal chunks
- 2 tablespoons olive oil or avocado oil
- ½ cup chicken or beef broth (for deglazing)
- 1½ cups additional chicken or beef broth
- ⅓ cup apple cider vinegar
- 1 tablespoon Worcestershire sauce
- 1 teaspoon liquid smoke (optional but recommended)
- Your favorite barbecue sauce for serving (½ to 1 cup, depending on preference)
Prepare the Rub and Season the Pork:
-
In a small bowl, whisk together the brown sugar, smoked paprika, garlic powder, onion powder, salt, black pepper, cumin, and cayenne until well combined.
-
Place the pork chunks on a cutting board or in a large bowl. Using your hands, rub the spice mixture generously all over each piece, making sure to coat all surfaces thoroughly. Press the spices into the meat so they stick. If you have time, place the seasoned pork in a zip-top bag and refrigerate for 1 to 4 hours, or even overnight, for deeper flavor development. This step isn’t mandatory, but it genuinely improves the finished result.
Advertisements
Sear the Pork:
-
Set your Instant Pot to sauté mode and allow it to preheat for 1 to 2 minutes until the display shows “hot.”
-
Add the olive oil to the pot. Once the oil is shimmering and moves easily across the bottom, carefully place half of the seasoned pork chunks into the pot. Do not crowd the pot—each piece needs to make contact with the hot surface to brown properly.
-
Allow the pork to sit undisturbed for 2 to 3 minutes, until the bottom is deep golden brown. Using tongs, flip each piece and brown the second side for another 2 to 3 minutes. Try to sear the edges as well if they’re exposed. Once browned on multiple sides, remove the pork to a clean plate. Repeat this searing process with the remaining pork chunks, adding an extra half tablespoon of oil if the pot looks dry.
Deglaze the Pot:
-
Press cancel to turn off sauté mode. Add the ½ cup of broth to the pot. Using a wooden spoon, scrape the bottom and sides of the pot vigorously, working at all the browned bits (called fond) until they dissolve into the liquid. This takes about 1 minute. Don’t skip this step—those browned bits are pure flavor.
-
Pour in the additional 1½ cups of broth, the apple cider vinegar, and the Worcestershire sauce. Stir to combine. If using liquid smoke, add it now.
Return Pork and Pressure Cook:
-
Carefully place all the seared pork chunks directly back into the flavorful liquid in the pot. Arrange them as evenly as possible, submerged in the liquid but not stacked on top of each other. Some overlap is fine, but you want the liquid to circulate around the meat.
-
Place the lid securely on the Instant Pot and ensure the valve is set to sealing (not venting). Press the pressure cook or manual button and set the time to 60 minutes at high pressure.
Advertisements -
The pot will now begin to pressurize. You’ll hear hissing sounds as pressure builds. This pressurization phase takes approximately 15 to 20 minutes. Once the pin inside the lid rises fully, your 60-minute pressure cooking time officially begins. Do not open the lid or check on the pork during this time.
Natural Pressure Release:
-
When the 60-minute timer sounds, turn off the Instant Pot immediately. Allowing the pressure to release naturally is crucial—this typically takes about 20 minutes. During this time, the pressure inside the pot gradually decreases, and the pork continues to cook gently in the residual heat. Do not quick-release the pressure, as this can make the meat tougher and cause it to lose moisture.
-
You’ll know the natural release is complete when the pin in the center of the lid drops all the way down. At this point, carefully lift the lid away from you to avoid the initial blast of hot steam. The interior of the pot and all the pork is still extremely hot.
Shred the Pork:
-
Using tongs, carefully remove the pork pieces from the pot and place them in a large bowl. The meat should be so tender that it begins to fall apart as you handle it. Using two forks, one in each hand, begin shredding the pork. Hold one fork down into the meat to anchor it, and use the other fork to pull the meat apart. Work across the grain for the easiest shredding. The meat should separate into tender shreds with minimal effort—if it’s still tough or resisting, it may need 5 to 10 more minutes of cooking time.
-
As you shred, discard any large, hard pieces of fat, but don’t obsess over removing every trace of fat—the fat that renders and stays integrated into the shredded meat is what keeps it moist and flavorful.
-
Once all the pork is shredded, add it back to the pot with the cooking liquid. Stir well to distribute the meat throughout the liquid and ensure every shred is coated and absorbs the flavorful broth.
Optional: Reduce the Cooking Liquid:
-
If the cooking liquid seems excessive or overly thin, you can reduce it for a more concentrated sauce. Set the Instant Pot to sauté mode and allow the liquid to simmer gently for 10 to 15 minutes, stirring occasionally. The liquid should reduce by about half, becoming noticeably thicker and more flavorful. This step is optional but creates a richer, more cohesive finished dish.
Advertisements -
Stir in your favorite barbecue sauce, starting with ½ cup and adding more to taste. Barbecue sauce should complement the pork, not overwhelm it—you’re looking for a balance where the pork’s own flavor remains the star.
Serve:
- Serve the pulled pork immediately on toasted buns, slider buns, or soft rolls, topped with coleslaw, pickles, extra barbecue sauce, or whatever accompaniments you prefer. Alternatively, serve over rice, in tacos, or on salads for different flavor profiles.
Expert Tips for Perfect Results Every Time

Don’t skip the searing step. Yes, it takes time, but the Maillard reaction that occurs when searing creates flavor compounds that pressure cooking alone cannot produce. The difference between seared and non-seared pulled pork is noticeable and worth the extra ten minutes.
Use a meat thermometer to verify doneness. The pork should reach an internal temperature of at least 190°F to 205°F in the thickest part. At this temperature, the collagen has fully converted to gelatin, resulting in maximum tenderness. If your pork seems tough after cooking, it likely didn’t reach this temperature, and a few additional minutes of pressure cooking will solve the problem.
Never skip the natural pressure release. Quick-releasing pressure causes sudden temperature drops that can make the meat tougher. Natural release allows the fibers to gradually relax and retain moisture. It takes only twenty minutes and dramatically improves texture.
Deglaze thoroughly. Those browned bits on the bottom of the pot contain intense flavor. Taking a full minute to scrape and dissolve them into your liquid is one of the highest-impact steps you can take. This is what separates good pulled pork from mediocre pulled pork.
Cut your pork into relatively uniform pieces. If one chunk is significantly larger than the others, it will cook slower, potentially resulting in uneven doneness. Four chunks of roughly equal size from a four to five-pound shoulder is ideal. If you’re working with a larger roast, adjust your cooking time accordingly—roughly 15 minutes per pound of meat.
Don’t fill the pot past the two-thirds fill line. The Instant Pot needs headspace to pressurize properly. If you’re concerned about having enough liquid, remember that you can always add more barbecue sauce or broth at the end without compromising the recipe.
Save the cooking liquid. Even if you’re not reducing it, this liquid is liquid gold. It’s full of rendered pork fat, spice flavors, and collagen that has converted to gelatin. Stir it back into the shredded pork, and if you have extra, freeze it to use in soups, beans, or as a base for future gravies.
Common Mistakes and How to Avoid Them
Overcooking the pork by leaving it at pressure for longer than sixty minutes. More cooking time doesn’t equal better results once the pork has already reached the optimal tenderness around the sixty-minute mark. Overcooking can actually make the meat stringy or mushy, especially the exterior pieces that are in direct contact with the liquid.
Quick-releasing pressure to speed up the process. This saves maybe fifteen minutes but sacrifices texture and moisture. The natural release is passive—you’re not actively waiting; it’s just happening. Use that time to toast your buns, prepare side dishes, or set the table.
Using too much liquid. While you need enough liquid for the pot to come to pressure, excessive liquid can dilute flavors and result in watery finished pork. The standard ratio is about one cup of liquid per pound of meat, plus a bit extra for deglazing.
Not searing the pork properly, or using too low heat. Low-heat searing takes forever and results in steaming rather than browning. Your oil should shimmer, and when the pork hits the pot, you should hear a distinct sizzle. That sound tells you the temperature is high enough for proper browning.
Shredding the pork while it’s still in the pot. It’s tempting, but removing it to a separate bowl makes the shredding process much easier. You’ll have better leverage, the meat stays warmer (which actually makes it easier to shred), and you won’t splash hot liquid all over yourself.
Adding barbecue sauce during cooking instead of at the end. Barbecue sauce contains sugar that can caramelize and potentially stick to the bottom of the pot, triggering a burn error. Add it after cooking, when you can control the amount and ensure it coats the meat evenly.
Using a pork cut that’s too lean. Pork loin, pork tenderloin, or other lean cuts can work, but they’re less forgiving. They have less fat to keep the meat moist, and they require careful attention to avoid overcooking. Pork shoulder is the right choice because its fat content ensures juicy results even if timing isn’t perfect.
Variations and Flavor Adaptations
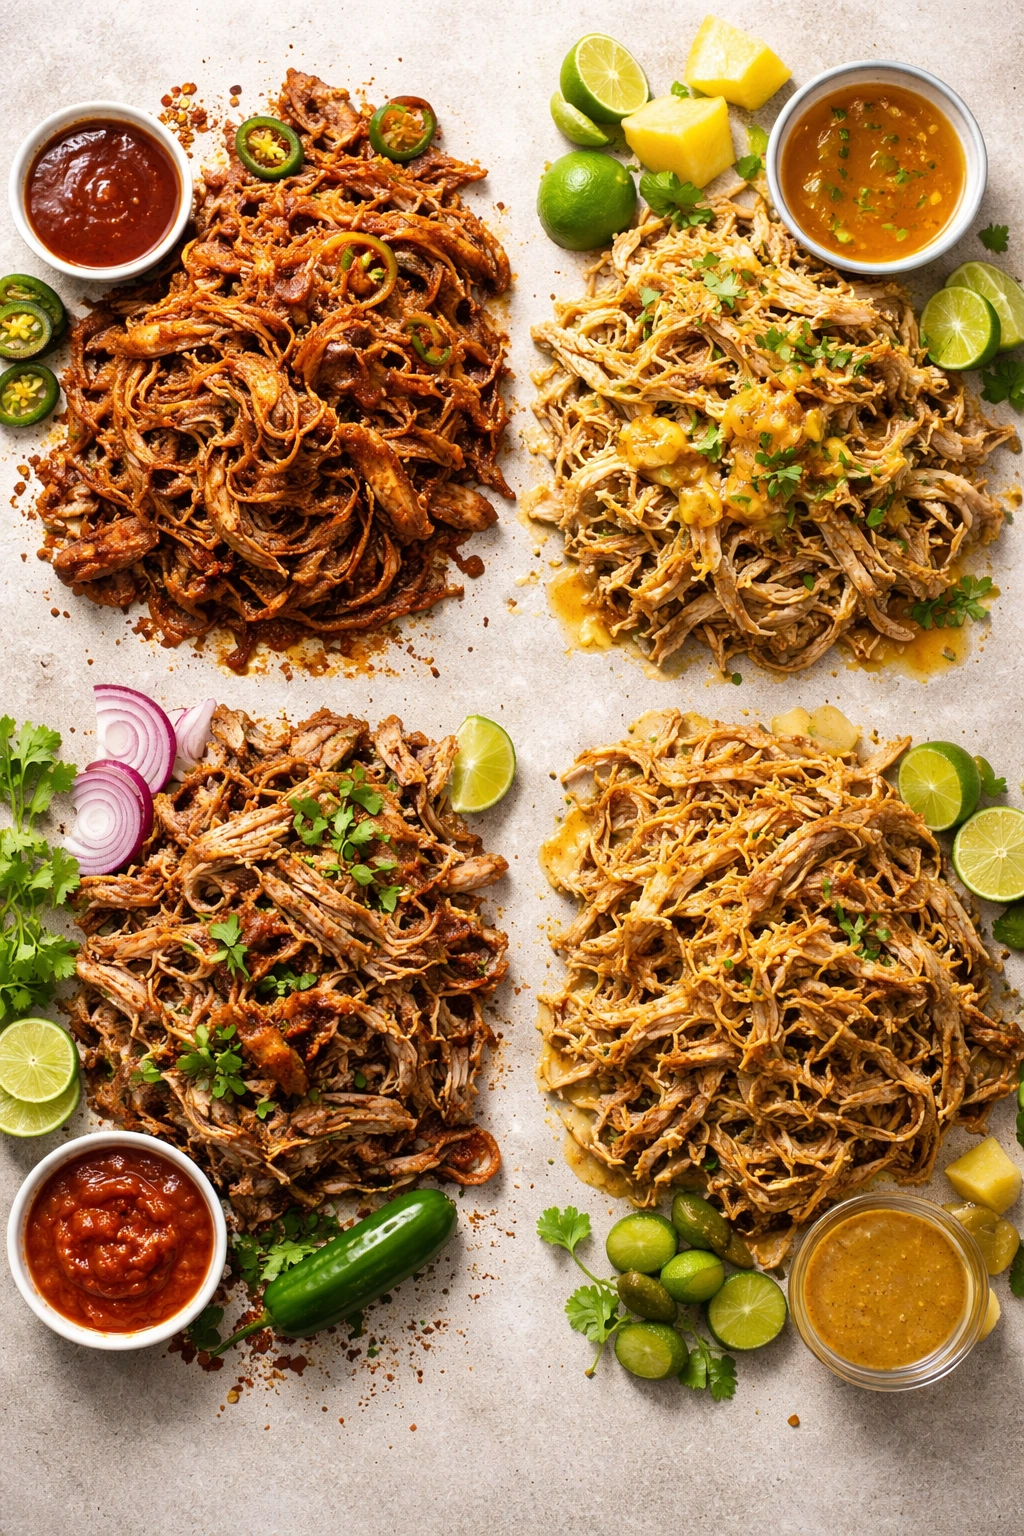
Spicy BBQ Pulled Pork: Add one teaspoon of cayenne pepper to your dry rub, and when finishing the pork, stir in a spicy barbecue sauce or hot sauce. Top with jalapeños and serve on brioche buns with spicy slaw for a serious kick.
Carolina-Style Pulled Pork: Skip the barbecue sauce altogether. Instead, mix the reserved cooking liquid with additional apple cider vinegar (about ½ cup), a tablespoon of mustard, and a teaspoon of hot sauce. The result is tangy, vinegary, and distinctly different from sweet BBQ sauce styles. Serve on plain white bread with pickles on the side.
Mexican Carnitas-Style Pork: Add two teaspoons of cumin and one teaspoon of chili powder to your dry rub. Cook as directed, then shred and crisp the pork briefly in a hot skillet with a little oil until the edges are crispy. Serve in warm corn tortillas with lime, cilantro, diced onion, and avocado.
Hawaiian Pulled Pork: Add ½ cup of pineapple juice to your cooking liquid instead of some of the broth. Top the finished pork with a teriyaki glaze and serve on Hawaiian rolls. A little diced pineapple mixed into the pork adds authentic sweetness.
Citrus-Glazed Pulled Pork: Replace some of the broth with orange juice and add a tablespoon of lime juice to the cooking liquid. The result is bright, citrusy, and works beautifully with cilantro and fresh herbs as toppings.
Coffee-Rubbed Pulled Pork: Add two teaspoons of finely ground coffee and one teaspoon of cocoa powder to your dry rub. The coffee adds depth and bitterness that balances the sweetness beautifully. Many BBQ competitions use this technique for its complexity.
Storage, Freezing, and Reheating
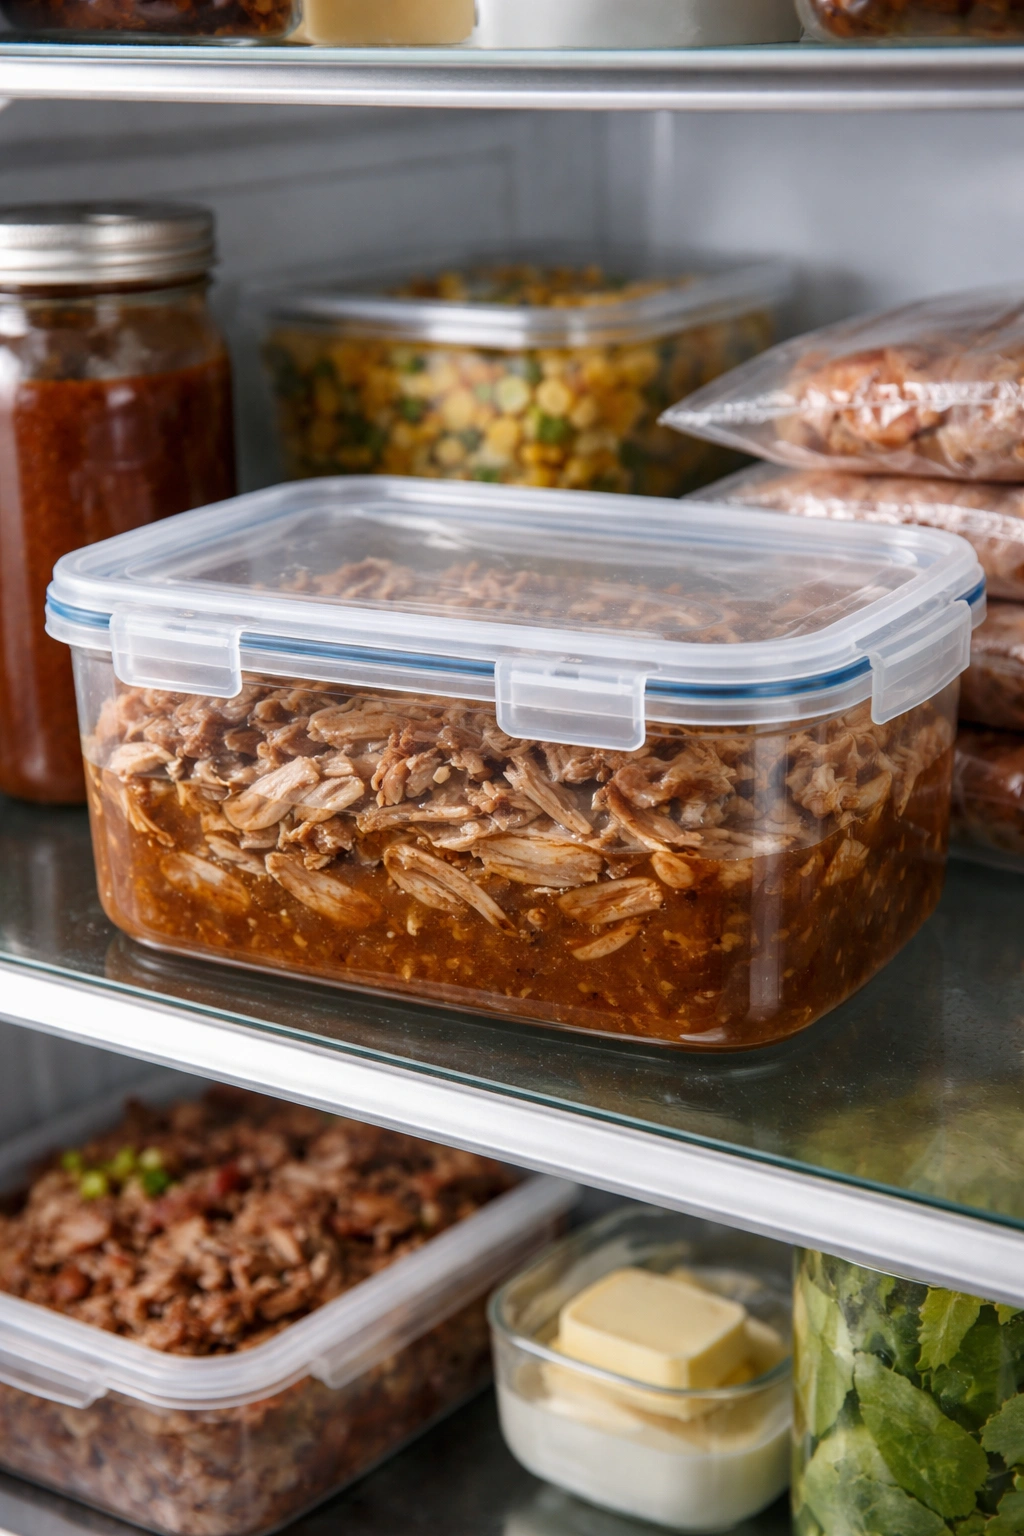
Pulled pork is remarkably practical for meal prep and leftovers. The fact that it freezes beautifully and reheats without significant quality loss makes it one of the most convenient proteins to prepare in bulk.
Refrigerator Storage: Store leftover pulled pork in an airtight container with all the cooking liquid or braising liquid. The liquid keeps the meat moist and prevents it from drying out. Properly stored, pulled pork will last 3 to 5 days in the refrigerator. Don’t store it without liquid—the meat will dry out significantly and become difficult to reheat to a pleasant texture.
Freezer Storage: Pulled pork freezes exceptionally well for up to 3 to 6 months. Store it in airtight freezer-safe containers or heavy-duty zip-top freezer bags. Leave a little space at the top of containers since the liquid will expand slightly as it freezes. Label with the date so you know how long it’s been frozen. You can portion it into meal-sized amounts before freezing, which makes reheating exactly what you need much more convenient.
Thawing: Thaw frozen pulled pork overnight in the refrigerator. Don’t thaw at room temperature, as this increases the risk of bacterial growth. Once thawed, use it within 1 to 2 days.
Microwave Reheating: Place the pulled pork and its liquid in a microwave-safe bowl. Cover loosely with a microwave-safe lid or damp paper towel. Heat at 50% power for 3 to 5 minutes, stirring halfway through. Full power can cause the edges to heat too quickly while the center remains cold. The low power approach ensures even, gentle heating that preserves moisture.
Stovetop Reheating: Transfer the pulled pork and liquid to a skillet or saucepan. Heat over medium heat, stirring occasionally, until heated through to 165°F (about 10 to 15 minutes). If the liquid has evaporated during storage, add a splash of broth or water to prevent sticking.
Oven Reheating: Preheat your oven to 250°F. Place the pulled pork and liquid in an oven-safe baking dish, cover with foil, and bake for 20 to 30 minutes until heated through. This method is ideal for larger quantities and heats gently without drying the meat.
Pro tip: If your reheated pork seems dry, add a splash of broth, barbecue sauce, or even apple cider vinegar to reintroduce moisture. The meat will absorb this liquid as it heats, restoring its original juiciness.
Serving Ideas and Pairings

Pulled pork is endlessly versatile, which is part of why it’s such a kitchen staple. The same batch can be served three different ways throughout the week without feeling repetitive.
Classic BBQ Sandwiches: Heap pulled pork onto a toasted brioche, pretzel, or potato bun. Top with creamy coleslaw and pickles, then drizzle with extra barbecue sauce. The coleslaw adds crucial textural contrast and a cool, crisp element that balances the rich, tender pork.
Tacos: Warm soft corn or flour tortillas and fill with pulled pork, diced red onion, fresh cilantro, sliced avocado, and a squeeze of lime. The acidic lime brightens everything and cuts through the richness of the pork.
Nachos: Layer tortilla chips with pulled pork, melted cheese, jalapeños, sour cream, guacamole, and salsa. The contrast of crispy chips, creamy toppings, and tender pork creates multiple textures in every bite.
Pulled Pork Sliders: Using dinner rolls or slider buns, create bite-sized sandwiches perfect for parties or casual dinners. Pair with simple toppings like coleslaw and barbecue sauce to keep them manageable.
Over Rice or Grains: Serve pulled pork over rice, quinoa, or another grain as a composed bowl with vegetables. Drizzle the cooking liquid over everything for moisture and flavor. Add roasted vegetables like sweet potato or Brussels sprouts for complete nutrition.
Pulled Pork Salad: Toss shredded pulled pork with fresh greens, cherry tomatoes, crispy onions, and a light vinaigrette. This lighter application works for lunches and cuts the richness of the pork with fresh vegetables.
In Soups and Stews: Leftover pulled pork adds instant protein and flavor to chili, bean soups, or vegetable stews. The meat’s tender texture integrates seamlessly into these dishes.
Breakfast Applications: Shred pulled pork into fried rice, breakfast hash, or scrambled eggs for a savory, protein-rich breakfast or brunch option. The rendered fat adds richness and flavor that lifts simple egg dishes into something special.
Side Dish Pairings: Pulled pork pairs beautifully with classic BBQ sides like creamy coleslaw, baked beans, corn on the cob, sweet potato salad, potato salad, mac and cheese, collard greens, or cornbread. Choose sides that either echo the pork’s richness or provide contrasting freshness.
Final Thoughts
Perfect pulled pork in the Instant Pot isn’t luck or magic—it’s understanding the mechanics of pressure cooking and executing a few straightforward techniques with intention. The searing creates depth. The deglazing dissolves concentrated flavor. The proper pressure and time transform tough muscle into something tender. The natural release preserves moisture.
Each step serves a purpose, and skipping any of them compromises the final result in a noticeable way. The beauty of this recipe, though, is that it’s forgiving enough for beginners yet interesting enough that you can refine and experiment as you become more comfortable. Your first batch might be good. Your tenth batch will be exceptional because you’ll understand the variables and how to adjust them.
The practical advantage—tender, juicy pulled pork in under two hours, freezable for months, endlessly versatile—means you can make this in a single cooking session and have protein ready for multiple meals throughout the week. That’s not just convenience; that’s meal prep done right.
Make this recipe once with full attention to the technique, and you’ll understand why people rave about Instant Pot pulled pork. Make it a few times, and you’ll stop consulting the recipe altogether because it becomes instinctive. That’s when you’ll start experimenting with different braises, adding your own twists, and maybe eventually sharing this technique with someone asking you how you make pulled pork so good.